

LSx into '67-'69 Camaro, the basics


 06-05-2006, 03:21 PM
#43
Teching In

Join Date: Jun 2006
Posts: 6
Likes: 0
Received 0 Likes
on
0 Posts
Putting an 02 LS1 in my 69 camaro - got all my parts(headers, mounts, oil pan etc) from S&P, I'm using the stock belts and pulleys with the alternator on the driver side (high side) and just ran into a wall. The powers steering pulley does not clear the A-Arm. Any suggestions? Is the P/S pulley from the LS truck blocks smaller?
06-06-2006, 02:51 PM
#45
Teching In
Join Date: Jun 2006
Posts: 6
Likes: 0
Received 0 Likes
on
0 Posts
the hooker headers will fit with the stock steering - be sure to get the adaptor plate - its sold separately. I'd call jegs to make sure they got it. The S&P mounts are tricky! Forget about running solid mounts with the S&Ps, small block and big block don't fit. Use the standard 1969 small block mounts - those will fit. Also on the mounts, don't bother getting the polished you can't see it anyway- I'd use the natural finish -save yourself about $20.
06-09-2006, 04:36 PM
#47
Staging Lane

Join Date: Oct 2004
Posts: 77
Likes: 0
Received 0 Likes
on
0 Posts
Originally Posted by umedevelopment
the hooker headers will fit with the stock steering - be sure to get the adaptor plate - its sold separately. I'd call jegs to make sure they got it. The S&P mounts are tricky! Forget about running solid mounts with the S&Ps, small block and big block don't fit. Use the standard 1969 small block mounts - those will fit. Also on the mounts, don't bother getting the polished you can't see it anyway- I'd use the natural finish -save yourself about $20.
I know the hooker headers will fit with the hooker mounts...what I'm wanting to know is if they'll fit with S&P's motor mounts? I've already installed the motor, ran my fuel lines, installed an ATS transmission mount, etc., and don't want to have to tear it all up to make these headers fit.
Does anyone know for sure?

 07-18-2006, 07:37 PM
#53
TECH Resident
iTrader: (2)
Join Date: Jun 2006
Location: Roswell, GA
Posts: 802
Likes: 0
Received 0 Likes
on
0 Posts
If anyone is wondering what the Hooker mount pates look like, a picture is attached below. They're pretty rough... looks like they were hand cut with a bandsaw, then wiped down with a shop rag without any grinding or deburring, and then they painted over the lint ripped off the shop rag.
07-18-2006, 10:19 PM
#54
SCHWING!
Just the other day, I was looking at my cluster of 4 gauges in my console, trying to ignore the sad water temp gauge that sat motionless on the low setting, and mentally putting off the definate cranial strain it would take to make it come to life. Well, today I decided to knock it out for good. I have to admit, this looked like it'd be a big pain in the a$$, but it turned out to be a piece of cake. I coulda researched and bought a little adapter, but I'd rather do it for free without having to worry about shipping, the delay, and all the good stuff that comes with buying parts from other people. Here's how I did it, plain and simple.
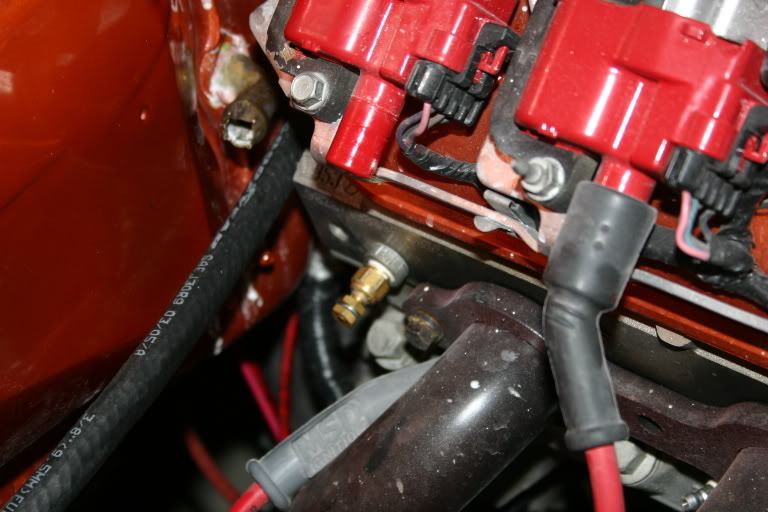
1. Pull the plug.
Get your favorite set of allen keys, and pop out that little plug behind the last header bolt on the passenger side of the car. (pic at end) Admire it's corroded goodness, and marvel at the fact that you were able to get that bad boy out without stripping it or busting your knuckles on something. (if you busted your knuckles or stripped it, sucks for you, ignore the last sentence, bust out the channel locks and the tequila, take one shot for every time they slip off and travel to the depths of your engine compartment.) When you get it out, throw it in disgust somewhere you'll find it later, and go park it in front of the tube.
2. Scalpel, Nurse.
WHOA! you mustered up the courage to get back at it, huh? good for you. Now grab the following items.
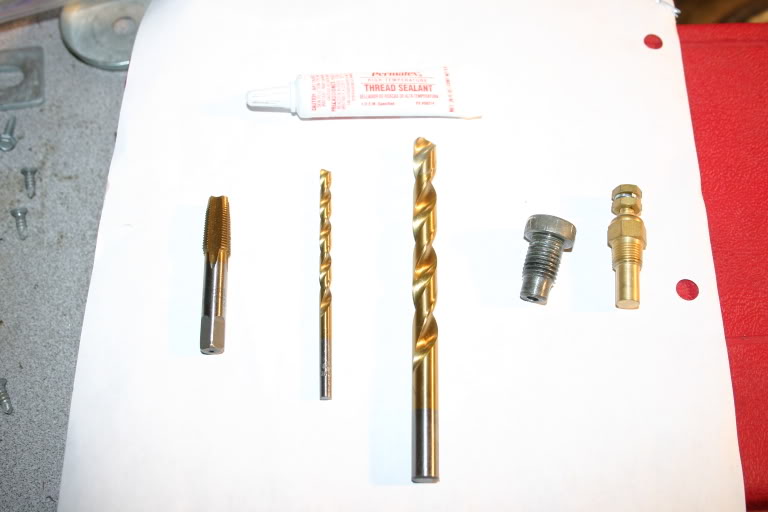
*the plug itself
* some teflon thread sealant. (don't grab that teflon tape I know you're thinking of)
* a size "R" drill bit. If you dont know what size in metric or Imperial that relates to, I dont either, so go look it up.
*a smaller drill bit.. try one about half the size, not real important.
*1/8 in PIPE tap (this isn't your regular ole tap, ladies and gentlemen.)
*a couple beers and a box of pizza
*your favorite drill..
*a small chamfer tool or a bigger drill bit.
*some brake cleaner or a wire wheel.
check it out, I was cool enough to take some pics. bitchin, huh?
3. Tunneling is in progress, sir.
Managed to retreive all of the above components from the dark recesses of the toolbox, under the car, behind the workbench, on top of the shelves, and your local Harbor Freight? Good! you're ready to begin. Hold your sensor in one hand, and your plug in the other. Take note of how deep your hole needs to go, and stand up your "R" drill bit right next to it. Wrap some tape around the drill bit to make sure you dont' go too deep. Clamp that sucka into the nearest vise (I have plastic jaws on mine, so I dont' destroy the threads) and start drilling straight down. Now back it out, and switch your bitchin' milwaukee or deWalt hammer drill to "drill only," and proceed until you hit the stop.
Now, get your smaller bit, and drill it straight through, in the center of your plug (So the water hits the sender right away, not having to pass through any air or metal in the plug)
sweet, huh?
4. Dayum. I'd tap dat, yo.
Look down into your plug, if you see little lines where the allen head marks were, chamfer the entrance to the hole a little using a bigger drill bit or a chamfer mill bit. Now you're talking. Grab a can of WD-40 or light oil, and carefully tap the hole. Be sure to test fit the sensor often, tapping a pipe tap too deep will make it loose, and you'll have to mill some material off the top of the bung. Once you've got it like you like it, stand back, admire your work, and head for the 3 beers left in the 12 pack you carried out with you.
(damn, it refocused itself on the can.. so much for the attempt at creative photography, huh? Oh well, you get the point.)
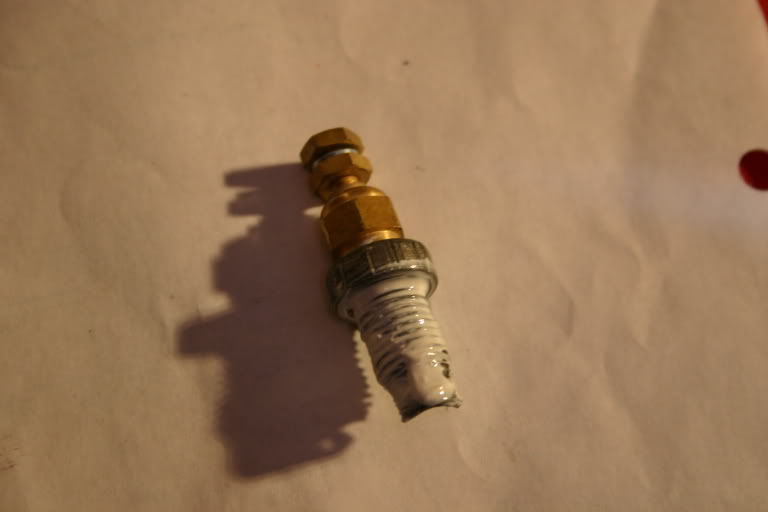
5. Repent! The end is near!
If you can still read this, i'm not footing your tab at any bar we're at. Take your assembly apart, and blast both parts with some brake cleaner (to take off the old thread sealant on the bung) or use a wire wheel. Blow them off pretty good, slather the sensor with teflon thread sealant, and torque it till it stops. (i found some vise grips help to hold the plug pretty well, use good sense (no such thing as common sense anymore) and don't gorilla torque it. There it is, your bitchin cheap new sensor adapter. Slop some more teflon sealant on the metric threads, and pop it back in your block, turn it till it wont' turn no mo, connect your sender, and you're done!
hope this has helped some people, I know it'd really help me out if I was lost.
olly
Just the other day, I was looking at my cluster of 4 gauges in my console, trying to ignore the sad water temp gauge that sat motionless on the low setting, and mentally putting off the definate cranial strain it would take to make it come to life. Well, today I decided to knock it out for good. I have to admit, this looked like it'd be a big pain in the a$$, but it turned out to be a piece of cake. I coulda researched and bought a little adapter, but I'd rather do it for free without having to worry about shipping, the delay, and all the good stuff that comes with buying parts from other people. Here's how I did it, plain and simple.
1. Pull the plug.
Get your favorite set of allen keys, and pop out that little plug behind the last header bolt on the passenger side of the car. (pic at end) Admire it's corroded goodness, and marvel at the fact that you were able to get that bad boy out without stripping it or busting your knuckles on something. (if you busted your knuckles or stripped it, sucks for you, ignore the last sentence, bust out the channel locks and the tequila, take one shot for every time they slip off and travel to the depths of your engine compartment.) When you get it out, throw it in disgust somewhere you'll find it later, and go park it in front of the tube.
2. Scalpel, Nurse.
WHOA! you mustered up the courage to get back at it, huh? good for you. Now grab the following items.
*the plug itself
* some teflon thread sealant. (don't grab that teflon tape I know you're thinking of)
* a size "R" drill bit. If you dont know what size in metric or Imperial that relates to, I dont either, so go look it up.
*a smaller drill bit.. try one about half the size, not real important.
*1/8 in PIPE tap (this isn't your regular ole tap, ladies and gentlemen.)
*a couple beers and a box of pizza
*your favorite drill..
*a small chamfer tool or a bigger drill bit.
*some brake cleaner or a wire wheel.
check it out, I was cool enough to take some pics. bitchin, huh?
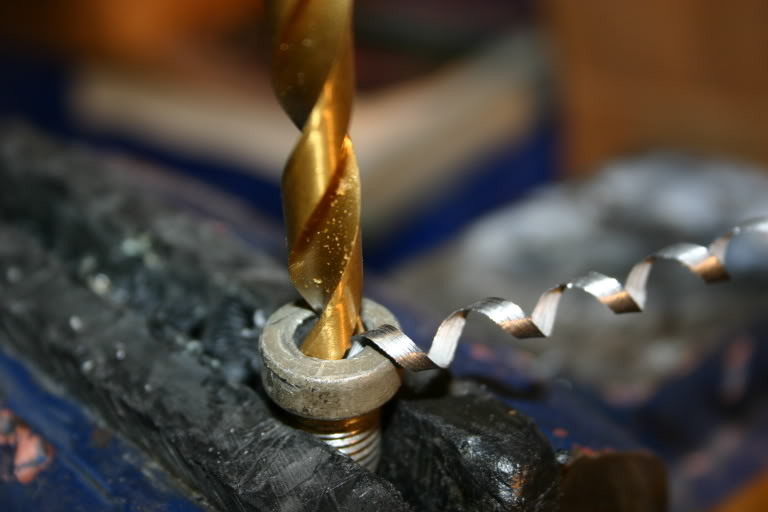
3. Tunneling is in progress, sir.
Managed to retreive all of the above components from the dark recesses of the toolbox, under the car, behind the workbench, on top of the shelves, and your local Harbor Freight? Good! you're ready to begin. Hold your sensor in one hand, and your plug in the other. Take note of how deep your hole needs to go, and stand up your "R" drill bit right next to it. Wrap some tape around the drill bit to make sure you dont' go too deep. Clamp that sucka into the nearest vise (I have plastic jaws on mine, so I dont' destroy the threads) and start drilling straight down. Now back it out, and switch your bitchin' milwaukee or deWalt hammer drill to "drill only," and proceed until you hit the stop.
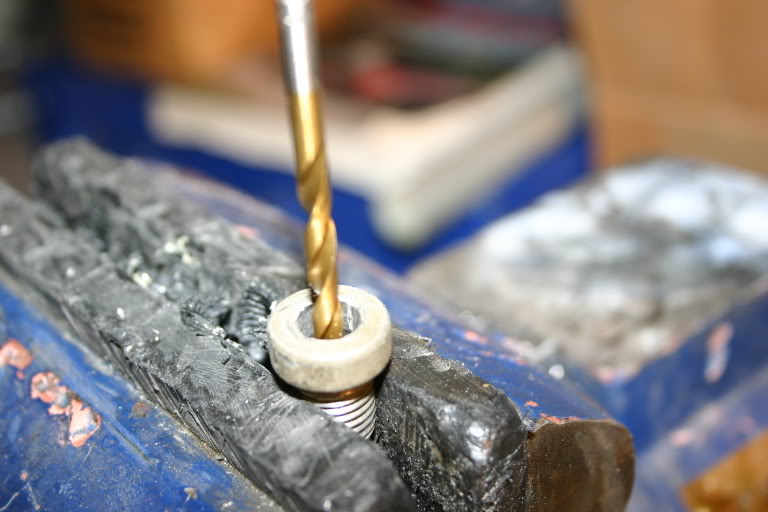
Now, get your smaller bit, and drill it straight through, in the center of your plug (So the water hits the sender right away, not having to pass through any air or metal in the plug)
sweet, huh?
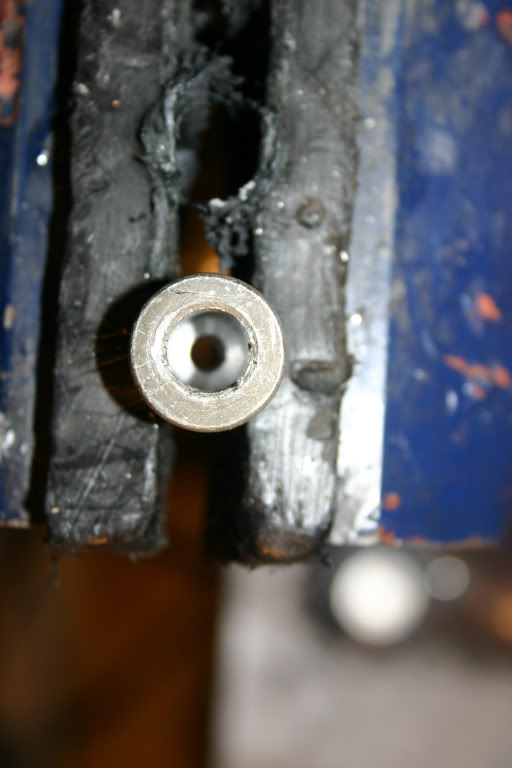
4. Dayum. I'd tap dat, yo.
Look down into your plug, if you see little lines where the allen head marks were, chamfer the entrance to the hole a little using a bigger drill bit or a chamfer mill bit. Now you're talking. Grab a can of WD-40 or light oil, and carefully tap the hole. Be sure to test fit the sensor often, tapping a pipe tap too deep will make it loose, and you'll have to mill some material off the top of the bung. Once you've got it like you like it, stand back, admire your work, and head for the 3 beers left in the 12 pack you carried out with you.
(damn, it refocused itself on the can.. so much for the attempt at creative photography, huh? Oh well, you get the point.)
5. Repent! The end is near!
If you can still read this, i'm not footing your tab at any bar we're at. Take your assembly apart, and blast both parts with some brake cleaner (to take off the old thread sealant on the bung) or use a wire wheel. Blow them off pretty good, slather the sensor with teflon thread sealant, and torque it till it stops. (i found some vise grips help to hold the plug pretty well, use good sense (no such thing as common sense anymore) and don't gorilla torque it. There it is, your bitchin cheap new sensor adapter. Slop some more teflon sealant on the metric threads, and pop it back in your block, turn it till it wont' turn no mo, connect your sender, and you're done!
hope this has helped some people, I know it'd really help me out if I was lost.
olly
Last edited by 67RSCamaroVette; 07-19-2006 at 12:11 AM.
07-19-2006, 10:25 AM
#55
Great tip and entertaining thread olly! 

For the less talented or ambitious, you can trip on down to your local import car parts store, and pick up the dreaded A-dap-ter kit from EQUUS, part number is #6848. Cost me less than 8 bucks. You might find it at a regular parts store too since even the US car makers are going metric these days. Not only will it have a metric to 1/8 Pipe adapter for your water temp, it will have one that will work with the factory oil fitting hole at the top, back of the block as well. And you will have a couple pieces left over that you can string on a chain to make a necklace for your sweety. The kit has all these in it: 1/8 x27 NPT sender to M10 x 1, M12 x 1.5, M14 x 1.5 and M16 x 1.5 and 1/8" x 28 BSP.
So now both the store bought and the do-it-your-selfers have a solution.
Pat
08-05-2006, 01:40 PM
#56
The 2006 400 HP LS2's oil pan is front sump and will not fit the first gen frame. If you (like me  ) have one of this engines or will get one you will need to chage the oil pan to rear sump GM part # 12581810 $271.16, Corvette - 6.0L 2005.
) have one of this engines or will get one you will need to chage the oil pan to rear sump GM part # 12581810 $271.16, Corvette - 6.0L 2005. 

