




Opinions on custom dash arrangement...

Thread Starter
TECH Fanatic
iTrader: (17)
Joined: Mar 2006
Posts: 1,746
Likes: 2
From: West Chester, PA

Seems weird doesnt it?? Thats how it was in a thirdgen from the factory though. My reasoning behind keeping it this way, is that with my right hand doing the shifting, and my left hand on the wheel, my left forearm blocks the left gauge. So I figured Ide better make the more important gauge visible. I can always swap it around. Thats what I love about the way I did the dash. Im using the entire stock dash cluster, gutted, so that I can re-arrange things at will. But Im pretty happy with it so far. Gotta get the column back in and see how it looks that way.
Justin
Justin
Thread Starter
TECH Fanatic
iTrader: (17)
Joined: Mar 2006
Posts: 1,746
Likes: 2
From: West Chester, PA
UPDATE... New gauges, new warning light idea... Hey everyone. Bringing this thread back instead of starting another one. Ive started some modifications to my custom dash. I wanted to install a programmable fuel level gauge, I wanted to mount my aeroforce gauge from the console up to the cluster, and finally I wanted to ditch those ugly LED warning lights and try something new. So..thats what I did. First a pic of my original design.

I had an aeroforce scan gauge mounted next to the cig lighter in the 4th gen console. Well..thats too far down and away to be of any use. So I wanted it higher...up in the cluster. I also hated my warning lights. So they had to go.
On this new cluster, I have the aeroforce gauge mounted. I also have the new programmable fuel level gauge installed...because Im tired of having NO idea how much gas I have. Then...for the "NEW" part. Im playing with this new idea for the warning lights. Ill let the pics speak for themselves, and get into more in depth when I do the final install. Tonight was just playing around to see if I was going to like it. The final design will be much cleaner, and much more stealth...
Pics...
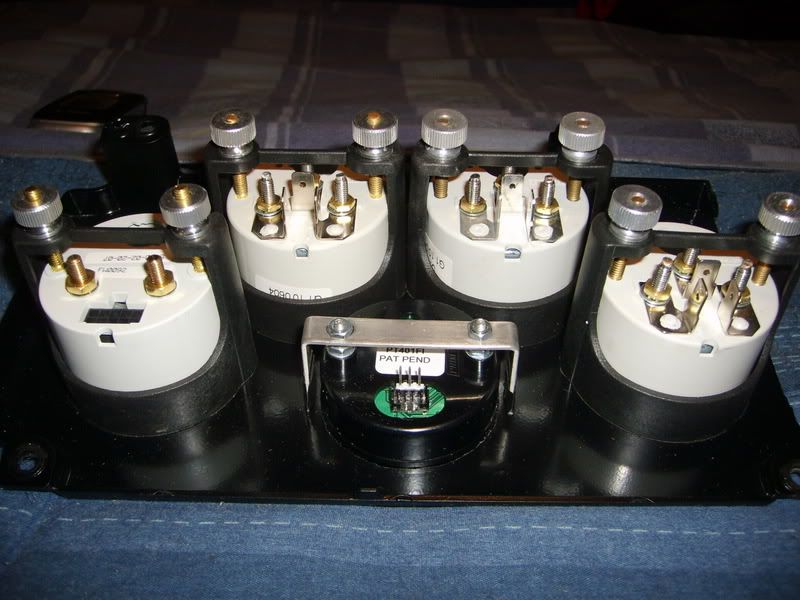
Backside...
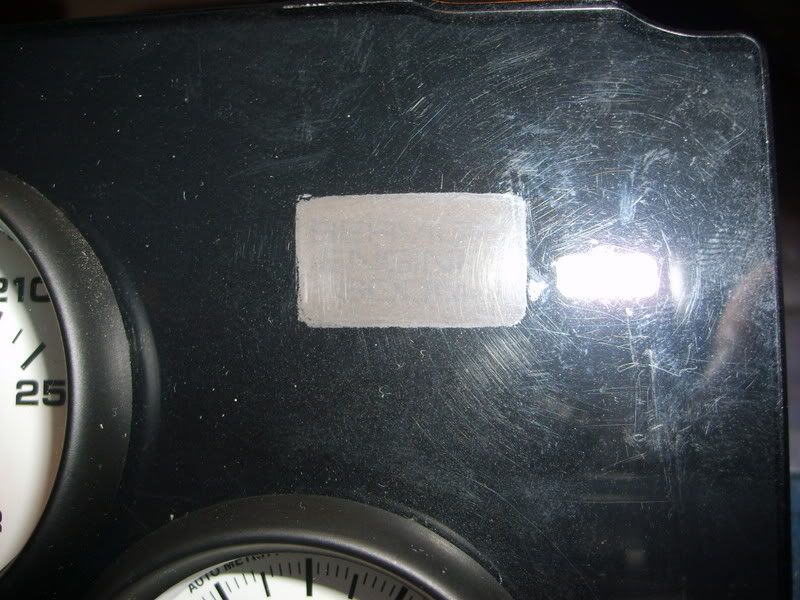
Front face. Upper right...little rectange is the "service engine soon" light...

Now...this is with just a maglight behind the cluster...to show how the light works...so the illumination is really inconsistant.

Close up. This little "window" will be much cleaner when Im done with it. I just roughed it in to see how it would work...

Close up with it off. I have a way of making this not as obvious that Im going to try out.
Any comments are welcome. Let me know what you think! Im pretty excited. and like I said, its just in the "prototyping" phase. Hopefully Ill have something more substantial in a few days.
Justin
I had an aeroforce scan gauge mounted next to the cig lighter in the 4th gen console. Well..thats too far down and away to be of any use. So I wanted it higher...up in the cluster. I also hated my warning lights. So they had to go.
On this new cluster, I have the aeroforce gauge mounted. I also have the new programmable fuel level gauge installed...because Im tired of having NO idea how much gas I have. Then...for the "NEW" part. Im playing with this new idea for the warning lights. Ill let the pics speak for themselves, and get into more in depth when I do the final install. Tonight was just playing around to see if I was going to like it. The final design will be much cleaner, and much more stealth...
Pics...
Backside...
Front face. Upper right...little rectange is the "service engine soon" light...
Now...this is with just a maglight behind the cluster...to show how the light works...so the illumination is really inconsistant.
Close up. This little "window" will be much cleaner when Im done with it. I just roughed it in to see how it would work...
Close up with it off. I have a way of making this not as obvious that Im going to try out.
Any comments are welcome. Let me know what you think! Im pretty excited. and like I said, its just in the "prototyping" phase. Hopefully Ill have something more substantial in a few days.
Justin
Brains is doing something similar. He used window tint to "conceal" the area. I don't know if he has had a chance to test it yet to see how it would work, but with a LED light, or group of lights, behind it, there should be no problem viewing it through the tint.
Thread Starter
TECH Fanatic
iTrader: (17)
Joined: Mar 2006
Posts: 1,746
Likes: 2
From: West Chester, PA
haha crap. so much for being "new" then. I wanted to use that nightshades spray tint... but non of the stores carry that around me anymore. So I too am going to use window tint. I have to wait on some stuff I ordered to finish it up...but I should be able to finish it soon.
J.
J.
Thread Starter
TECH Fanatic
iTrader: (17)
Joined: Mar 2006
Posts: 1,746
Likes: 2
From: West Chester, PA
Ok guys/gals... I spent some time on the dash panel, and I think I have it where I want it. I have lots of pictures, so Im going to let them do most of the talking. Just a few things first... The camera flash brings out some spots that look like imperfections. Such as the tint line around the warning light openings. You cant see it in person...and you definetly wont see it once its in the dash with the bezel around it.
Also, the pics with the lights lit up, is just two flashlights ghetto rigged to shine through. Once the flash light reflectors are in place, they will be plenty bright and more uniform in illumination. Went with new LEDs for the low oil and low coolant lights as well. These are smaller and look cleaner.
On to the pics. Any questions...just ask!
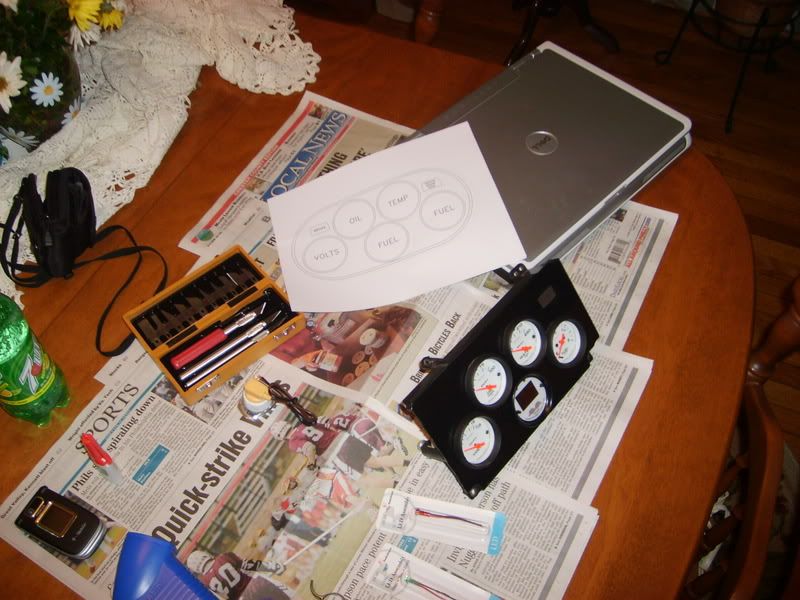


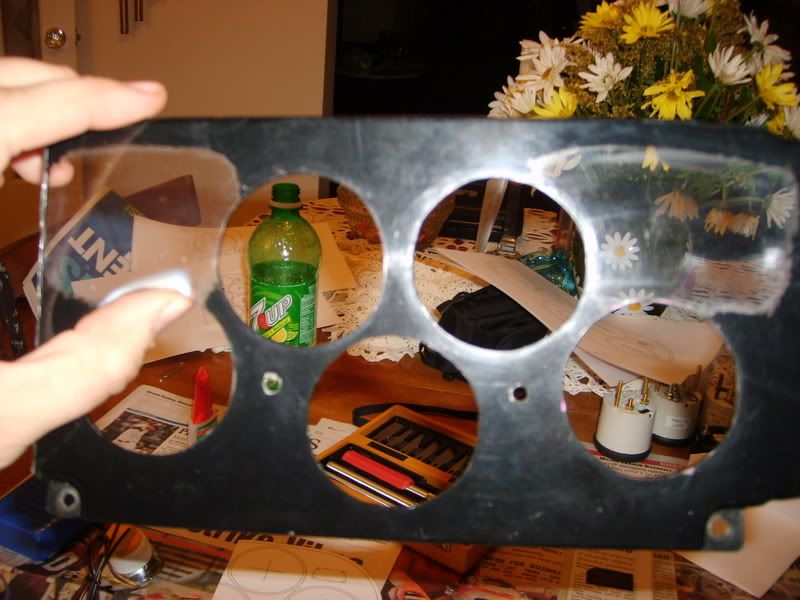
Those were sort of the "pre assembly pics".
Also, the pics with the lights lit up, is just two flashlights ghetto rigged to shine through. Once the flash light reflectors are in place, they will be plenty bright and more uniform in illumination. Went with new LEDs for the low oil and low coolant lights as well. These are smaller and look cleaner.
On to the pics. Any questions...just ask!
Those were sort of the "pre assembly pics".
Thread Starter
TECH Fanatic
iTrader: (17)
Joined: Mar 2006
Posts: 1,746
Likes: 2
From: West Chester, PA
Now for the construction....
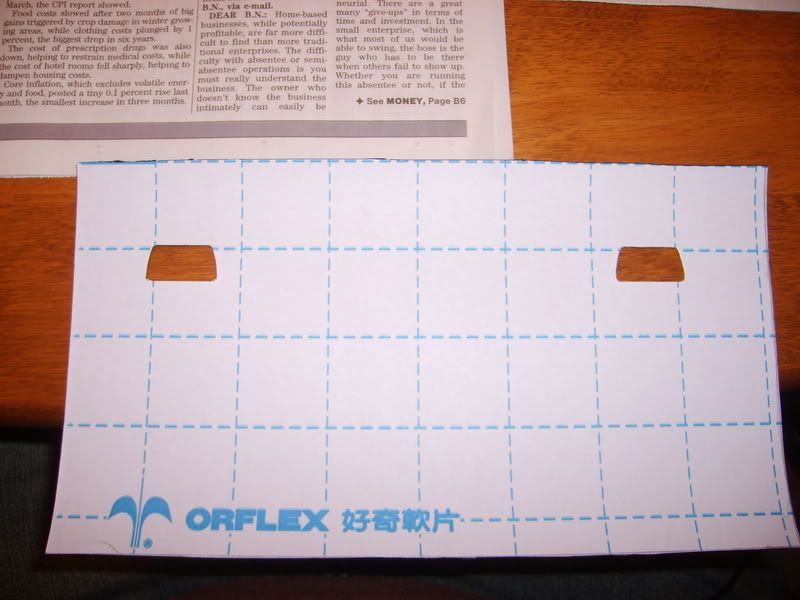


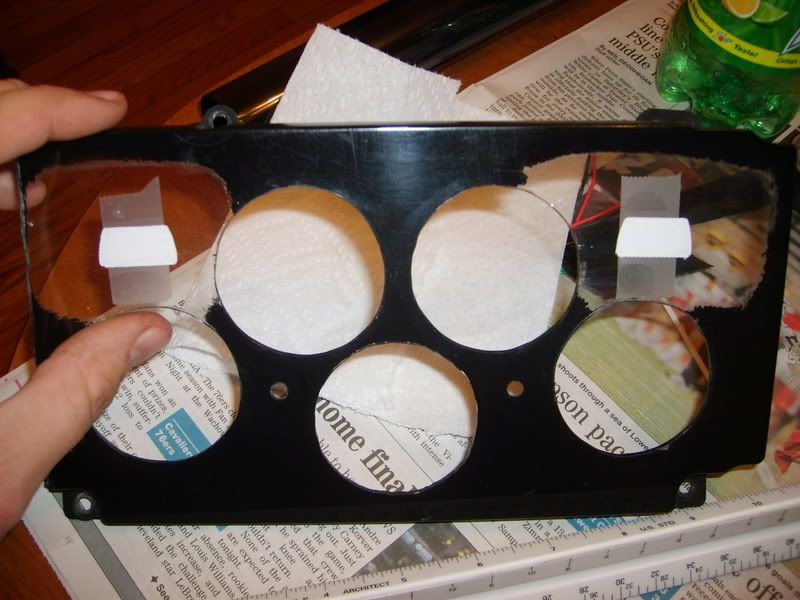

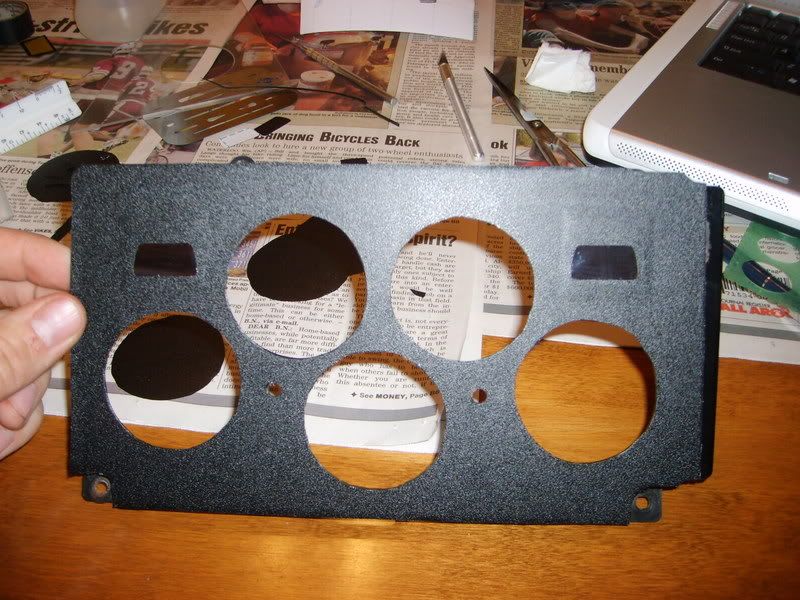

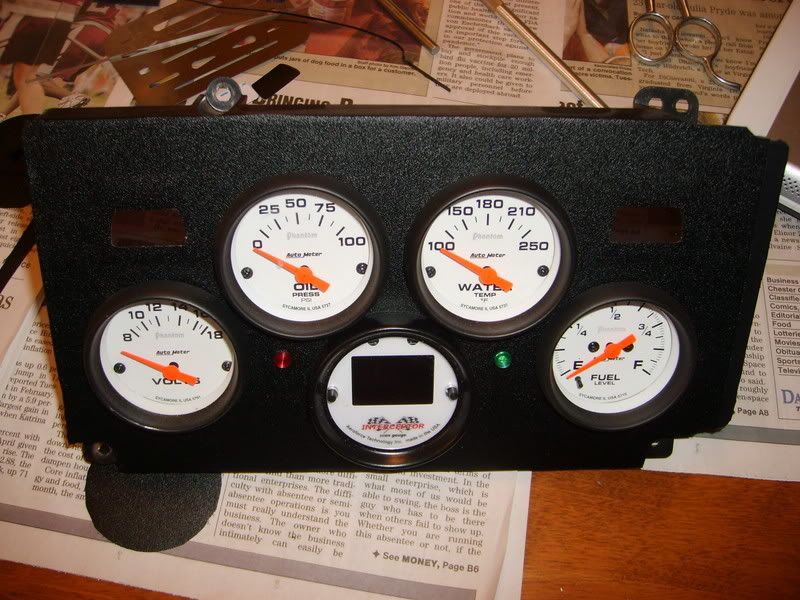

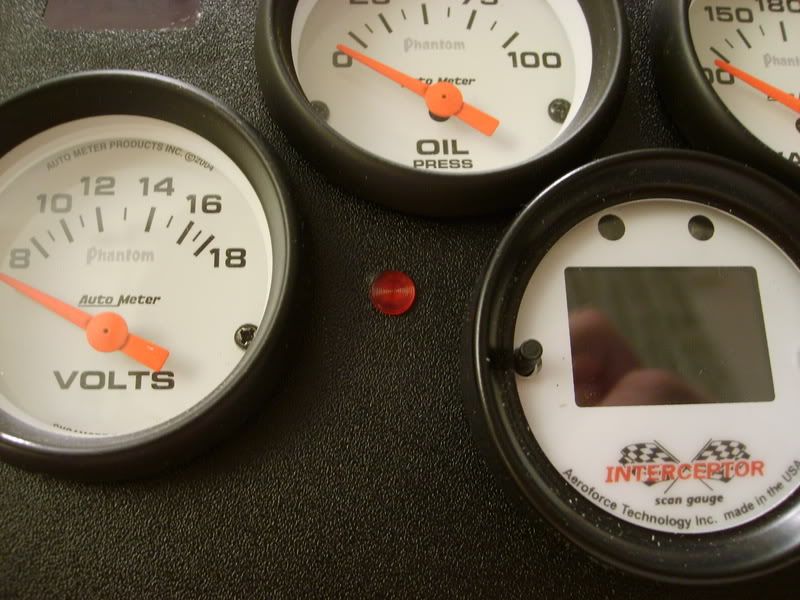
Comments? Opinions? If its not raining tomorrow, I might work on installing it back into the car. I need to run the harness for the new fuel gauge, and tinker with the warning light wiring.
Thanks for looking!
Justin
Comments? Opinions? If its not raining tomorrow, I might work on installing it back into the car. I need to run the harness for the new fuel gauge, and tinker with the warning light wiring.
Thanks for looking!
Justin
Thread Starter
TECH Fanatic
iTrader: (17)
Joined: Mar 2006
Posts: 1,746
Likes: 2
From: West Chester, PA
Man the boards were doing something weird last night...none of this showed up, so I came back today to try posting it again and it was already here... strange.
Justin
Justin
Looks cool. You ever think about doing a littel silkscreening? It isn't as expensive as you would think. You can create the overlay using autocad, corel, or just about any drawing package, and send it in for Silk. Once the silk is made, you can either paste in yourself, or pay the guy that made the silk. We do this at work all the time. We just send the plates/housings over to the guy with a file on a CD, and a few days later, the work is done.
LS1 Tech Stories
The Best V8 Stories One Small Block at Time

Gas Monkey Built a 6-Wheel Ferrari Testarossa With a Corvette LT4 Engine
Verdad Gallardo
7 Most Reliable High-Performance Engines GM Has Ever Built
Verdad Gallardo
Amazing '71 Camaro Restomod Is Modern Muscle Car Under the Skin
Verdad Gallardo
6 Common C5 Corvette Failures and What's Involved In Repairing Them
Pouria Savadkouei
Retro Modern Bandit Pontiac Trans AM Comes With Burt Reynolds' Autograph
Verdad Gallardo
Top 10 Greatest Cadillac V Series Performance Models Ever, Ranked
Pouria Savadkouei
Top 10 Most Powerful Chevy Trucks Ever Made!

Hennessey's New Supercharged Silverado ZR2 Has 700 HP
Verdad Gallardo
Coachbuilt N2A Anteros Is an LS2-Powered C6 Corvette In Italian Clothes
Verdad Gallardo Thread Starter
TECH Fanatic
iTrader: (17)
Joined: Mar 2006
Posts: 1,746
Likes: 2
From: West Chester, PA
You have to pardon my ignorance on this... But isnt silk screening when you put things on fabric?? Like, how would silk screening accomplish what I was goin for on the panel? That wasnt to sound like an ***...I really dont know anything about silk screening  You've sparked my curiousity...
That laminate was $10 for a 2'x18' roll. The tint I already had. The little warning light labels were from a stock dash. So I made it fairly cheap. And I only worked on it last night for a couple hours. Most of that was making sure the holes were cut just right, then actually cutting them out. Those little holes have 1/8" radius corners, which were a chore to cut with the exacto.
I really like the way it looks now. That shiny plexi was ok at first, but it looked cheap and didnt fit. This laminate matches the texture of the rest of the dash and the dash pad. And there are no surface issues like the face of the plexi. If the weather holds, Ill have installed pics tonight I hope.
J.
You've sparked my curiousity...That laminate was $10 for a 2'x18' roll. The tint I already had. The little warning light labels were from a stock dash. So I made it fairly cheap. And I only worked on it last night for a couple hours. Most of that was making sure the holes were cut just right, then actually cutting them out. Those little holes have 1/8" radius corners, which were a chore to cut with the exacto.
I really like the way it looks now. That shiny plexi was ok at first, but it looked cheap and didnt fit. This laminate matches the texture of the rest of the dash and the dash pad. And there are no surface issues like the face of the plexi. If the weather holds, Ill have installed pics tonight I hope.
J.

I need to get the updated pics of my dash cluster posted, but I have all the indicators I need mounted and working. I only did turn signals, high beam indicator, and service engine soon. I'm not bothering with idiot lights for the other stuff since I have gauges (volts, oil press, water temp).  I cut up a stock Camaro overlay to get the symbols and lettering, and glued them to the back of the cluster. Then I shaved down some LED's and glued them into some little plexiglass "light pipes" I built to even out the illumination for each area, and glued those to the cluster. Once that was all dry and solid, I spray painted the back side over everything so there is no light leakage. With the indicators off, you can't see anything - it looks like a solid black cluster. With them lit up, it looks... well.. like it's supposed to.
I cut up a stock Camaro overlay to get the symbols and lettering, and glued them to the back of the cluster. Then I shaved down some LED's and glued them into some little plexiglass "light pipes" I built to even out the illumination for each area, and glued those to the cluster. Once that was all dry and solid, I spray painted the back side over everything so there is no light leakage. With the indicators off, you can't see anything - it looks like a solid black cluster. With them lit up, it looks... well.. like it's supposed to. Thread Starter
TECH Fanatic
iTrader: (17)
Joined: Mar 2006
Posts: 1,746
Likes: 2
From: West Chester, PA
Brains someone mentioned you were doing something similar. Ide like to see what you got goin... My high beams and turn signals are still the stock firebird layout. They were blacked out and hidden from the factory so I left them alone. I didnt like the line of LEDs I had, but I kept two LEDs for low oil and low coolant... reason... because I had sensors for them. haha. Figured with all them money and time I have into the car, why not know if something happened and Im leaking oil before the motor burns up. Oil pressure can stay good even if you are running out of oil... and with that solid pan, and the low car, Im always nervous about hitting something and cracking it open.
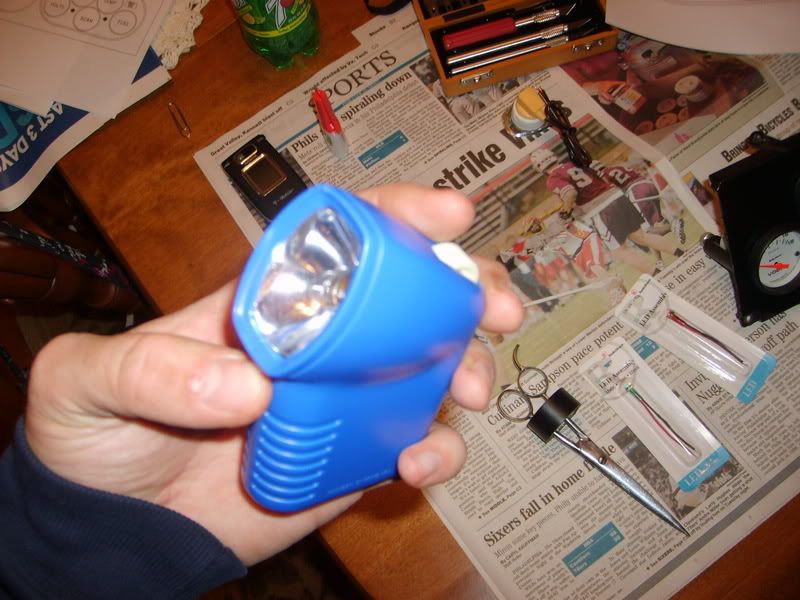
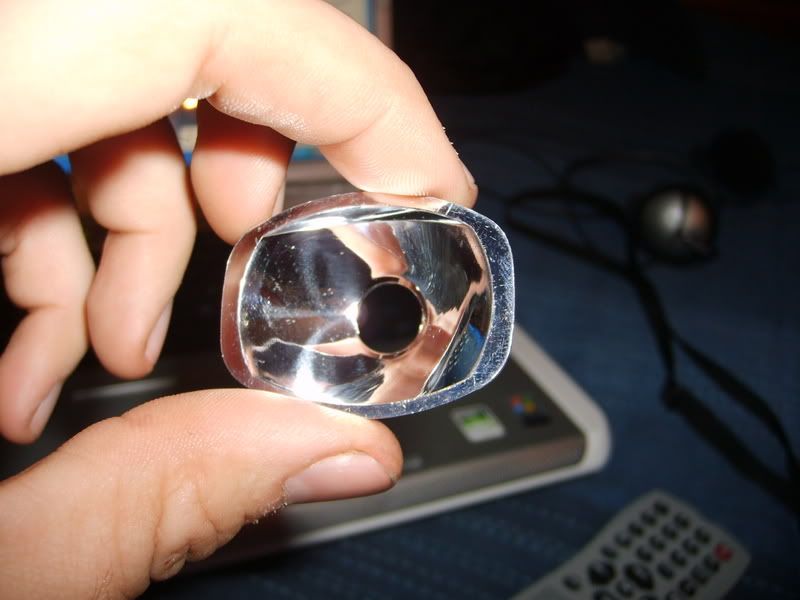
For my "light tubes" behind the warning lights, I got alittle creative. I was going to make my own out of plexi, but was too lazy. So I got a flash light reflector and a 194 bulb socket. To fit the two, I used a soda bottle cap. Glued that to the reflector, made a hole in the top, and I will glue everything to the rear of the panel. I also will be sealing seams with black RTV and spraying it all with black to keep the light seepage away. Here are a few pics of my light set up...
Reflector...
Glued together...
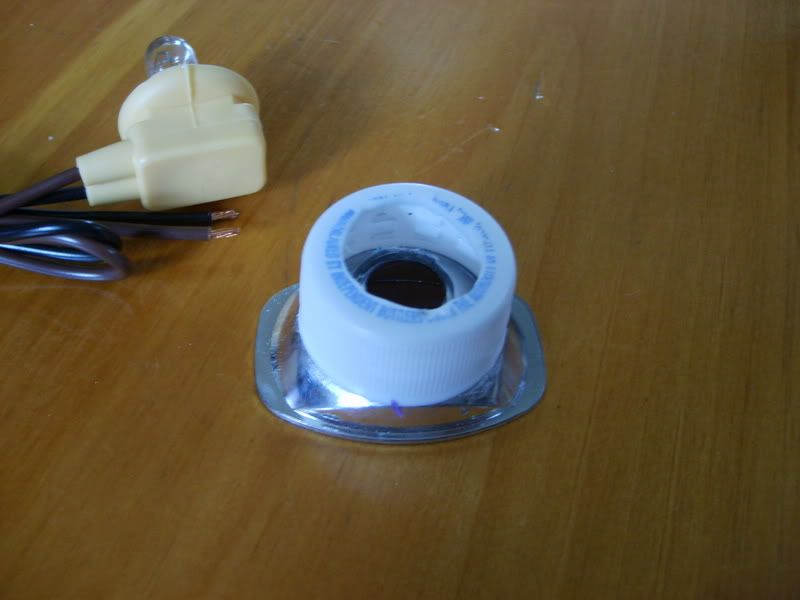
Assembled...
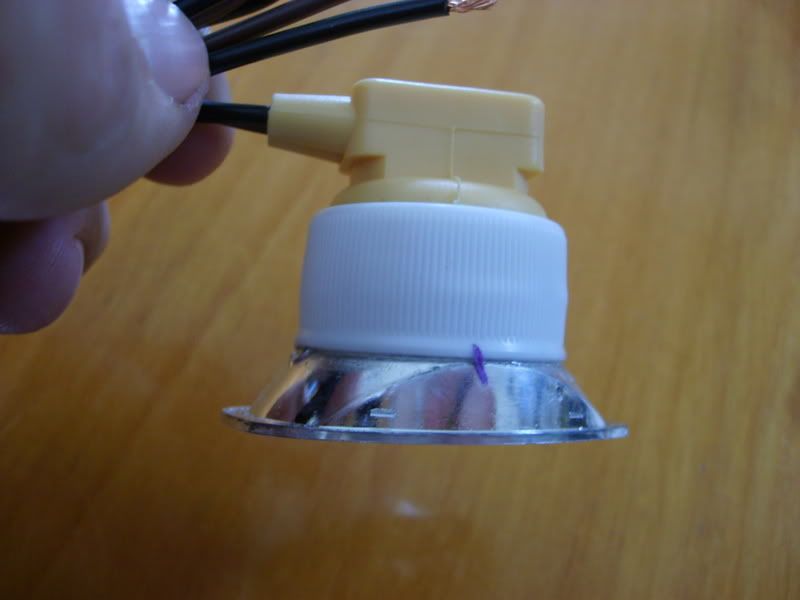
J.
For my "light tubes" behind the warning lights, I got alittle creative. I was going to make my own out of plexi, but was too lazy. So I got a flash light reflector and a 194 bulb socket. To fit the two, I used a soda bottle cap. Glued that to the reflector, made a hole in the top, and I will glue everything to the rear of the panel. I also will be sealing seams with black RTV and spraying it all with black to keep the light seepage away. Here are a few pics of my light set up...
Reflector...
Glued together...
Assembled...
J.
Thread Starter
TECH Fanatic
iTrader: (17)
Joined: Mar 2006
Posts: 1,746
Likes: 2
From: West Chester, PA
P.S.... Brains did you use window tint over the plexi? If so, are you worried about it becoming milky or bubbling? I was going to tint over it, then stick my laminate down, but I read that since plexi gasses naturally, that it will eventually bubble and turn the plexi to a milky color. Now...I thought ide seen plexi with window film before, but I could be mistaken. I ended up not doing it, just to be on the safe side...but I was just curious as to your take on that...
I checked your pictures out on your site, and the dash you have goin there looks good so far. I love the gauge lighting...
J.
I checked your pictures out on your site, and the dash you have goin there looks good so far. I love the gauge lighting...
J.

Originally Posted by ghettocruiser
You have to pardon my ignorance on this... But isnt silk screening when you put things on fabric?? Like, how would silk screening accomplish what I was goin for on the panel? That wasnt to sound like an ***...I really dont know anything about silk screening You've sparked my curiousity...
J.
You've sparked my curiousity...J.
To build a panel like yours with the aftermarket gauges (which have their own backlighting), you can use a different method. In the area for your brake light and SES light, on your base panel, build up the light isolators (looks like you are putting bulb reflectors in the back). Cut out the window in the base plate for each (you already did that). Instead of the textured adhesive backed material you used, get a piece of smoked color transparent overlay material (plexiglass or lexan may work fine in your application, but they are a bit thick.) On the reverse side of the transparensy, sillscreen the Brake and SES words or pics as you want them to be (mirrored of course). On the face side, silscreen the black over everything you want opaque. You can silkscreen aditional words, logos, pictures on the face in various colors at this point, but they will not be backlit, only the areas that are smoked are backlit at this point. This would give you the same thing you have already done, with a slighlty different look and feel. Not bashing on the job you did, I think you came up with a creative, inexpensive solution. Just wanted to present a different approach. The original comment was about silkscreening a couple words under your indicator lamps to let you know what they mean....
Last edited by 67rsss; Apr 19, 2007 at 10:55 AM.
I'm a little curious as to bubbling, I read the same thing about outgassing you mentioned. Time will tell, and if it looks like poop in time I'll just come up with something else then. I realistically should have just bought smoked plexi to begin with, rather than using window film, but this worked out well. Also, I tinted the BACK of the cluster, so flaws are easier to hide. I actually had a couple small bubbles I missed when applying the film, that I just poked with a needle. Visually the flaw disappeared completely.
Thread Starter
TECH Fanatic
iTrader: (17)
Joined: Mar 2006
Posts: 1,746
Likes: 2
From: West Chester, PA
67rsss: Thanks for the explaination. Seems a bit involved to accomplish what I did. Maybe if I had more labeled warning lights to install. I didnt watn to see any text during daylight or night. Only when lit. But that process seems like it woudl have its benefits for sure.
Brains: Sounds good. I hope it keeps looking good for you. I ended up just leaving the protective film on it, and using the adhesive from teh laminate to hold it into place. Seems to have worked for now. If you have time, post up some newer pictures of your dash. Im curious to see the light tubes that you made, because those reflectors, while effective, arent what I had in mind at first.
J.
Brains: Sounds good. I hope it keeps looking good for you. I ended up just leaving the protective film on it, and using the adhesive from teh laminate to hold it into place. Seems to have worked for now. If you have time, post up some newer pictures of your dash. Im curious to see the light tubes that you made, because those reflectors, while effective, arent what I had in mind at first.
J.
I'm curious as to what it would cost to silk screen a 12" x 8" piece of plexiglass like 67rsss described? Also, what type of shop would do this work? A print shop, a T-shirt shop, etc.?
Also, ghettocrusier, where did you get that laminate that you put on the front of your piece? Did they have different styles?
Also, ghettocrusier, where did you get that laminate that you put on the front of your piece? Did they have different styles?
Thread Starter
TECH Fanatic
iTrader: (17)
Joined: Mar 2006
Posts: 1,746
Likes: 2
From: West Chester, PA
doublenickel: I got it from Amazon.com... Search for "textured laminate" and it should come up. They had different colors I think. And maybe diff. textures as well. Its "designed" for covering speaker boxes. Thats what they advertise it for. If you dont find it let me know...
I really like the way the stuff looks. Im happy with it. It sticks well also...
J.
I really like the way the stuff looks. Im happy with it. It sticks well also...
J.
Doing a single screen print would be somewhat pricey. You still have to generate the negative, image it on the screen, cure the goo, and then print it. Not to mention, the inks for this type of stuff are a bit more than t-shirt inks I think.
Guess it depends on the relationship you have with your screener. We do about $300K with them every year, and we generate our own laser plots. Price will definately reflect your local market. You can buy kits for silkscreen as well, but I have never used one. Your local print shop can either do it, or recomend a place. A lot of places that do powder coating can also run silk.