


 nice project man keep it up and the SLR garage is going to the top with these projects
the mother of all lsx mustangs :D
Thread Starter
8 Second Club
iTrader: (1)
Joined: Nov 2001
Posts: 3,697
Likes: 1
From: the not so stock tribe
here's the startup video:
http://s299.photobucket.com/albums/m...t=100_0663.flv
after the start up we found a small leak from the rear main seal, we'll be replaceing that tomorow
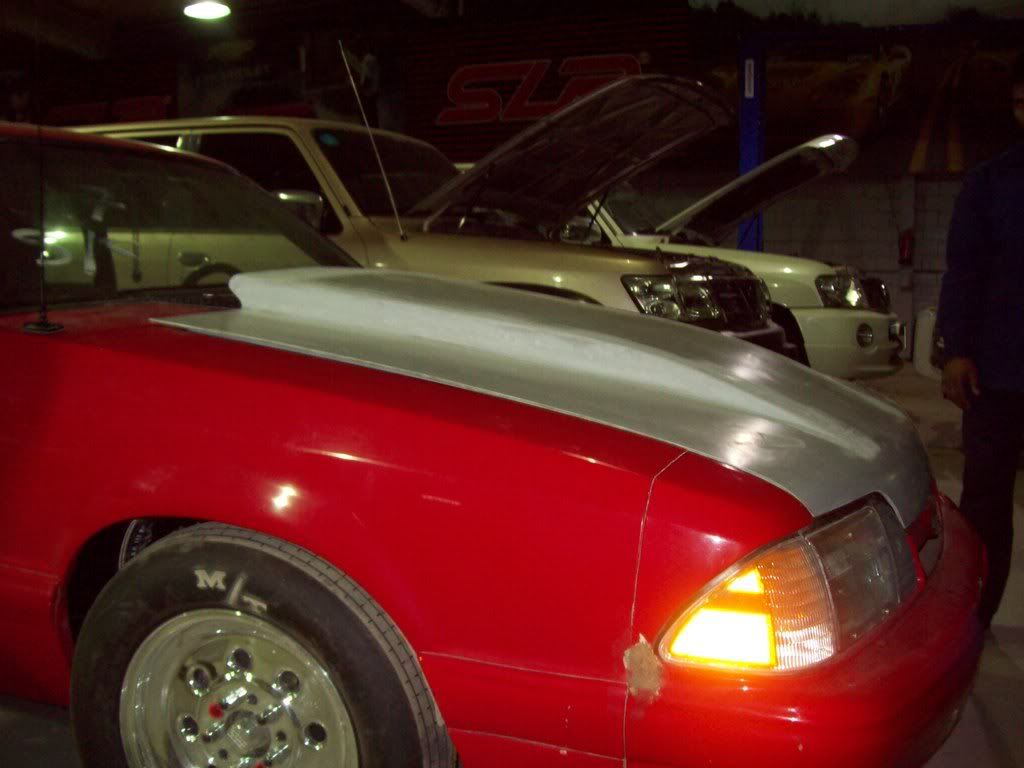
here's how the new fiberglass cowl hood fits:
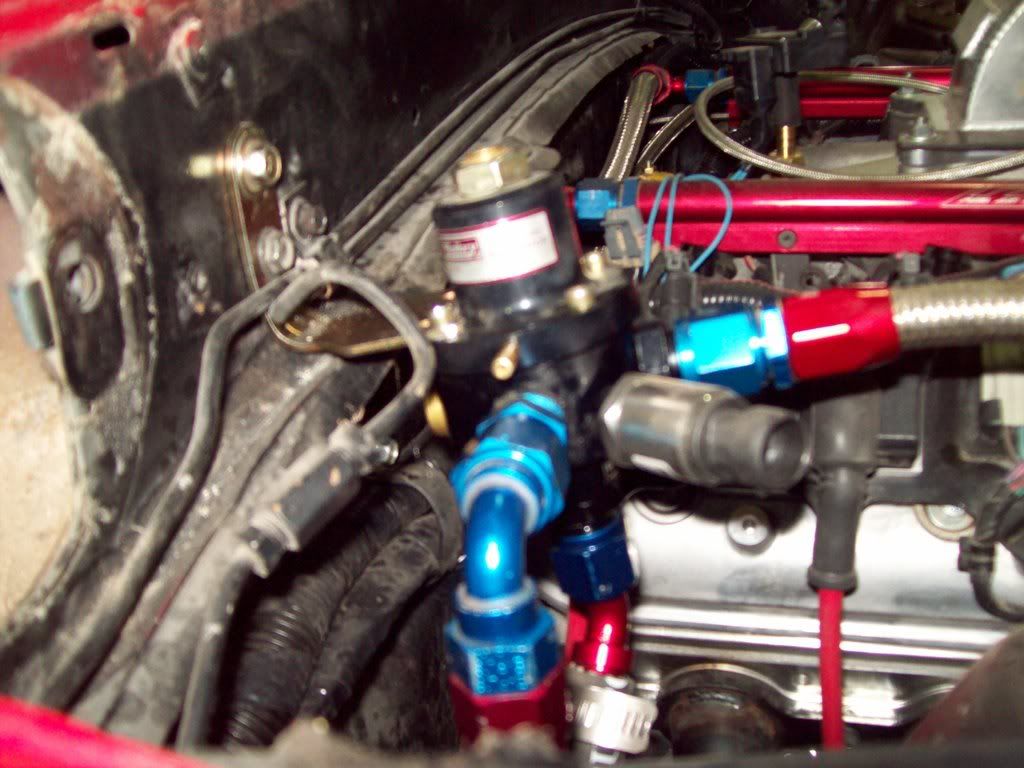
we had to relocate the regulator a bit lower to clear the hood's bracing:
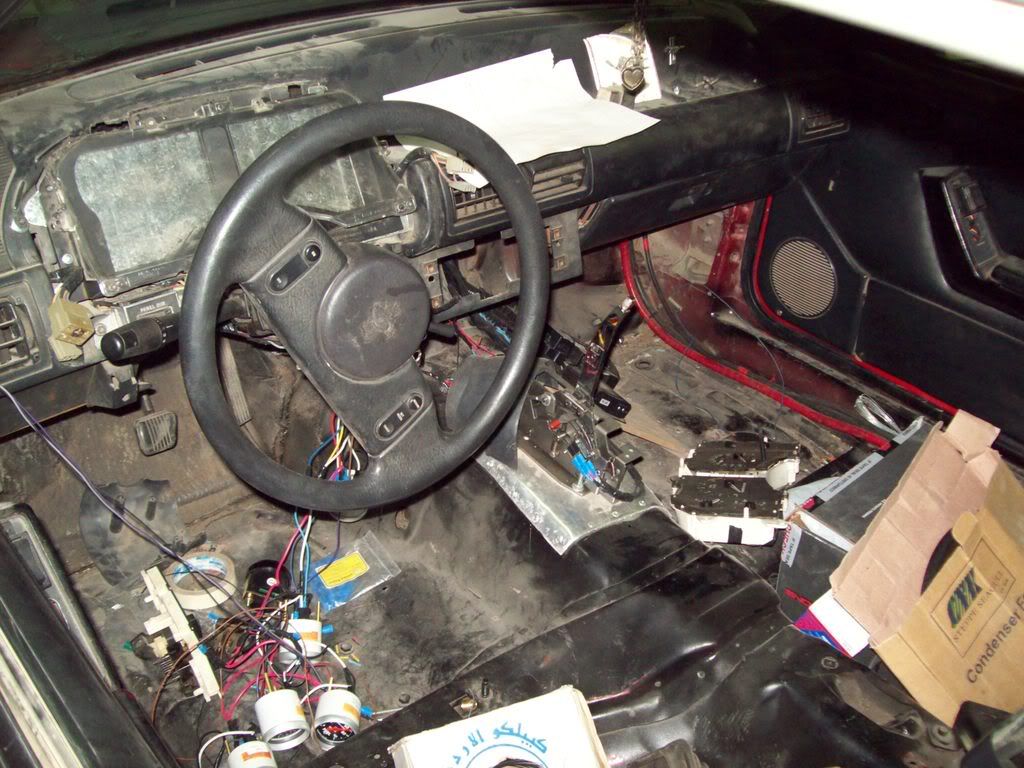
if you ever wondered how it looks from the inside :
:
next step :
- get driveshaft from shop
- get a connector for the alternator ( harness plug)
- replace rear main seal
- route vaccum lines and BOV
- get a hole saw to make holes for the guages
- put a milk crate inside and do burnouts!
http://s299.photobucket.com/albums/m...t=100_0663.flv
after the start up we found a small leak from the rear main seal, we'll be replaceing that tomorow
here's how the new fiberglass cowl hood fits:
we had to relocate the regulator a bit lower to clear the hood's bracing:
if you ever wondered how it looks from the inside
: next step :
- get driveshaft from shop
- get a connector for the alternator ( harness plug)
- replace rear main seal
- route vaccum lines and BOV
- get a hole saw to make holes for the guages
- put a milk crate inside and do burnouts!
Thread Starter
8 Second Club
iTrader: (1)
Joined: Nov 2001
Posts: 3,697
Likes: 1
From: the not so stock tribe
driveshaft is in , but somehow it cam out a bit short, so it was off again to get lengthened by 1 inch.
alternator connector is here ( we're using a lexus alternator) , we plugged it in , only to find that the alternator had some issue with it (its actualy 1/2 of one alternator and 1/2 of another ) this should be fixed by today.
vaccume lines are 90% done , and so is the rear main. can't figure out why the one on there leaked. its supposed to be a brand new one that came with the engine.
the hole saw should be here today (heard that countless times before ).
plans for tomorow include:
- finish routing the vaccume lines to the inside of the car for the water injection and the boost guage.
- check that the alternator is charging.
- first oil and filter change.
- start drilling the dash and mounting the guages
- slap the driveshaft back in
- check and set pinion angle
- and in preperation for the burnouts: fill diff with lube and break in , and then bleed the brakes
might even take the pipes off the car to paint them .
alternator connector is here ( we're using a lexus alternator) , we plugged it in , only to find that the alternator had some issue with it (its actualy 1/2 of one alternator and 1/2 of another
) this should be fixed by today.vaccume lines are 90% done , and so is the rear main. can't figure out why the one on there leaked. its supposed to be a brand new one that came with the engine.
the hole saw should be here today
(heard that countless times before ).plans for tomorow include:
- finish routing the vaccume lines to the inside of the car for the water injection and the boost guage.
- check that the alternator is charging.
- first oil and filter change.
- start drilling the dash and mounting the guages
- slap the driveshaft back in
- check and set pinion angle
- and in preperation for the burnouts: fill diff with lube and break in , and then bleed the brakes
might even take the pipes off the car to paint them .
LS1 Tech Stories
The Best V8 Stories One Small Block at Time

Gas Monkey Built a 6-Wheel Ferrari Testarossa With a Corvette LT4 Engine
Verdad Gallardo
7 Most Reliable High-Performance Engines GM Has Ever Built
Verdad Gallardo
Amazing '71 Camaro Restomod Is Modern Muscle Car Under the Skin
Verdad Gallardo
6 Common C5 Corvette Failures and What's Involved In Repairing Them
Pouria Savadkouei
Retro Modern Bandit Pontiac Trans AM Comes With Burt Reynolds' Autograph
Verdad Gallardo
Top 10 Greatest Cadillac V Series Performance Models Ever, Ranked
Pouria Savadkouei
Top 10 Most Powerful Chevy Trucks Ever Made!

Hennessey's New Supercharged Silverado ZR2 Has 700 HP
Verdad Gallardo
Coachbuilt N2A Anteros Is an LS2-Powered C6 Corvette In Italian Clothes
Verdad Gallardo
Thread Starter
8 Second Club
iTrader: (1)
Joined: Nov 2001
Posts: 3,697
Likes: 1
From: the not so stock tribe
you need to drill out the hole in the block where the dipstick needs to go (  ) unless the machine shop already did that for you . you might need to notch the windage tray too .
) unless the machine shop already did that for you . you might need to notch the windage tray too . Guess I got lucky. 
Teching In
Joined: Jul 2008
Posts: 6
Likes: 0
Thread Starter
8 Second Club
iTrader: (1)
Joined: Nov 2001
Posts: 3,697
Likes: 1
From: the not so stock tribe
loool,, thanks.
well the dash is almost done, we got the guages inplace and wired up . after installation we noticed that we needed to move the boost guage to the other side next to the AFR . this is to make it easier to read both at the same time, all wile making it easier for the inboard camera to view them.
the turn signals, high beam indicator , alt light, and the check engine light are all incorporated in the new dash; they're the little LED's in the bottom. i have to get some different colors to make them look nicer currently they're all red.
(note: the dash pod thingy is still not tightened down)
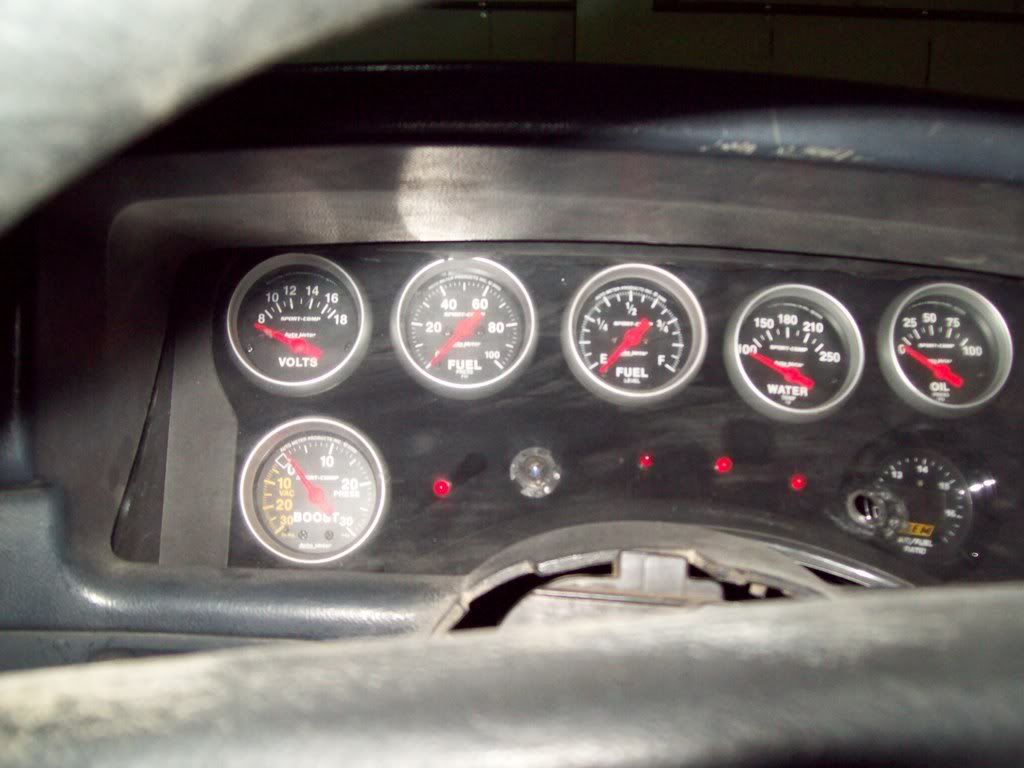
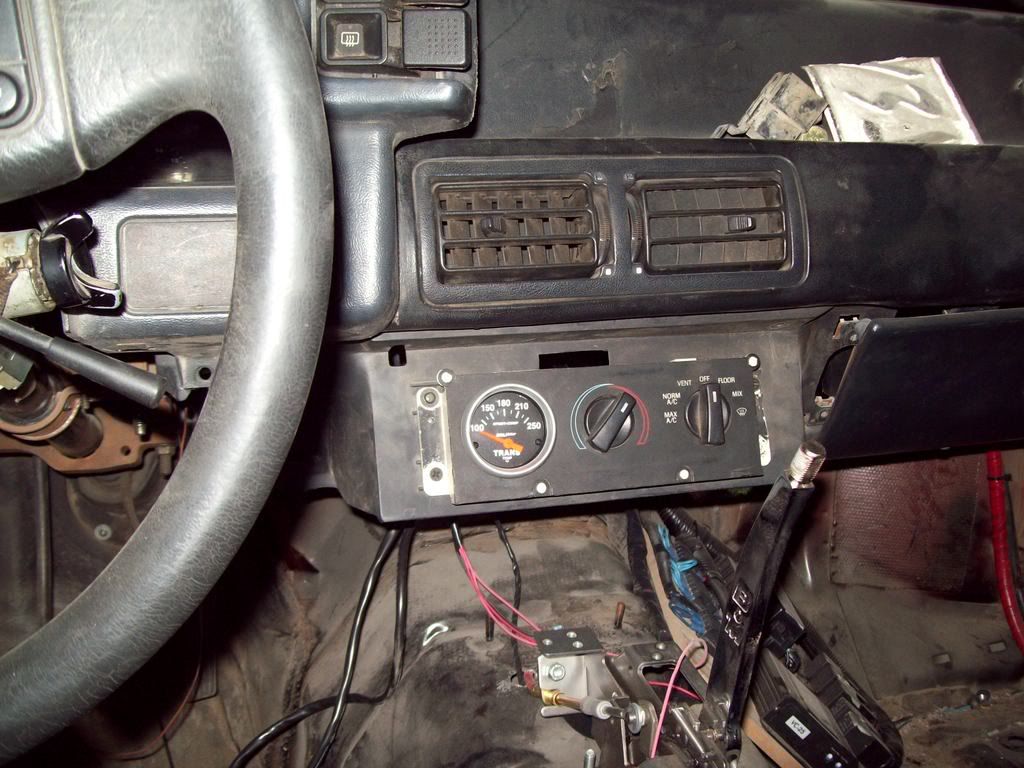
the trans temp guage had to go to the side cause we ran out of room
next up is going to be the drive shaft ( which some one forgot to get from the driveshaft place ) and installing a stock seat inside, that way we can atleast drive the thing around and maybe start tuning it on the dyno. (read: i wanna do burnouts! )
well the dash is almost done, we got the guages inplace and wired up . after installation we noticed that we needed to move the boost guage to the other side next to the AFR . this is to make it easier to read both at the same time, all wile making it easier for the inboard camera to view them.
the turn signals, high beam indicator , alt light, and the check engine light are all incorporated in the new dash; they're the little LED's in the bottom. i have to get some different colors to make them look nicer
currently they're all red.(note: the dash pod thingy is still not tightened down)
the trans temp guage had to go to the side cause we ran out of room
next up is going to be the drive shaft ( which some one forgot to get from the driveshaft place
) and installing a stock seat inside, that way we can atleast drive the thing around and maybe start tuning it on the dyno. (read: i wanna do burnouts! ) 


