
Write Up: Back Window Replacement

Thread Starter


Joined: Jun 2014
Posts: 1,242
Likes: 47
From: Noblesville, IN
H'okay, sorry this took so long. Hopefully this won't be too long winded but we'll see.
Firstly, let me start by saying that when I did this, I have had no prior experience working in automotive upholstery. Everything I learned, I learned from a DVD that gave a detailed how-to on replacing the whole top. If you wanna know where to get it, PM me.
Tools needed:
10mm deep socket
Air ratchet/electric impact driver (a regular hand ratchet will do, but it gets rather tiring)
Phillips screw driver
Pneumatic Staple gun (I used a Porter Cable TS056 from Home Depot. Was around $50)
Stainless steel staples (I used arrow T50 3/8" staples)
Air Compressor (Mine was set to around 100psi)
Furniture pads/thick blankets
1/8" drill bit
1/8" rivet
rivet popper
A 6-10" block of wood
About 4-6 hours of time
Parts:
1 replacement window back piece. I got mine from topsonline for about 290. It's a Robbins top and comes with a lifetime warranty on the back window seal (Wish we woulda had that from the factory...)
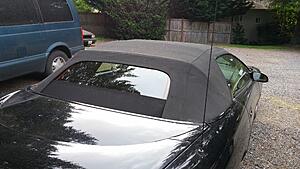
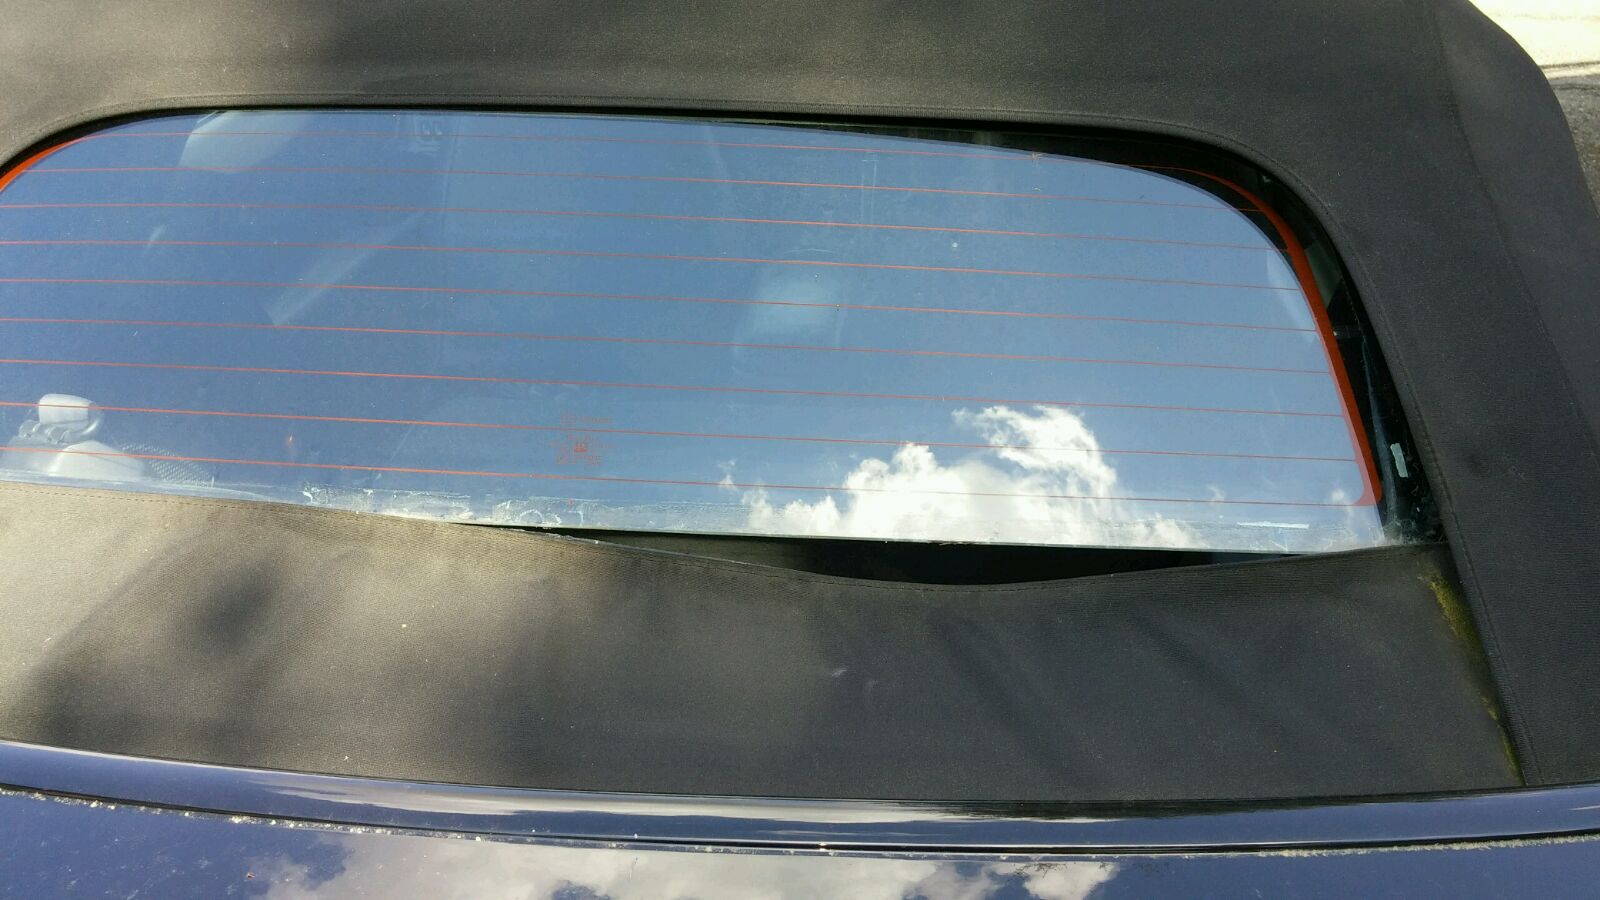
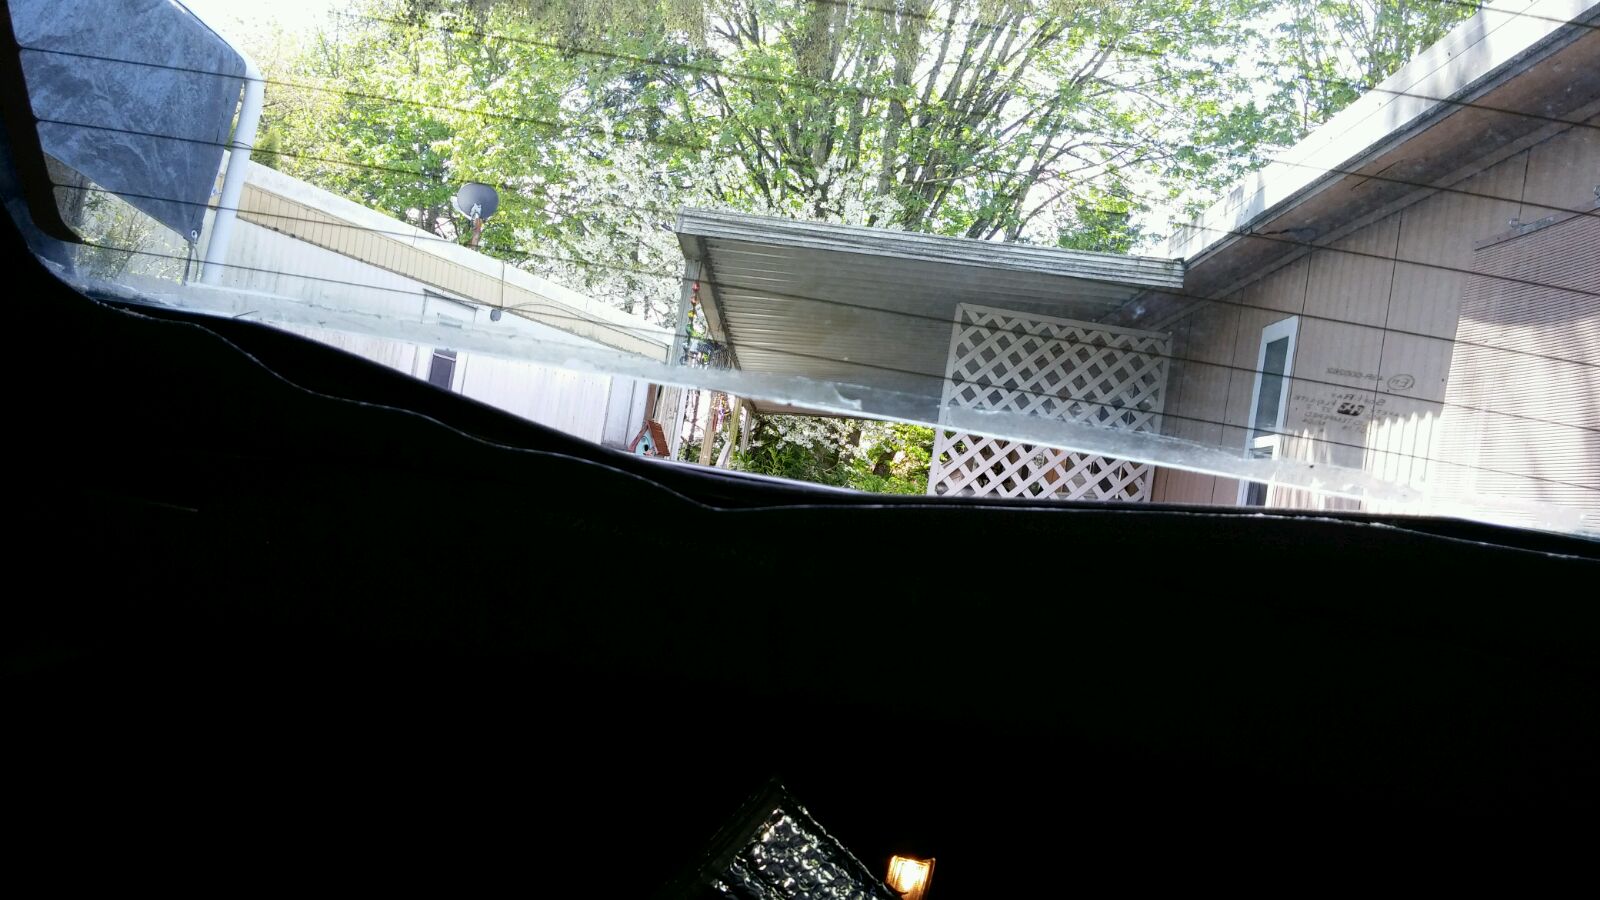
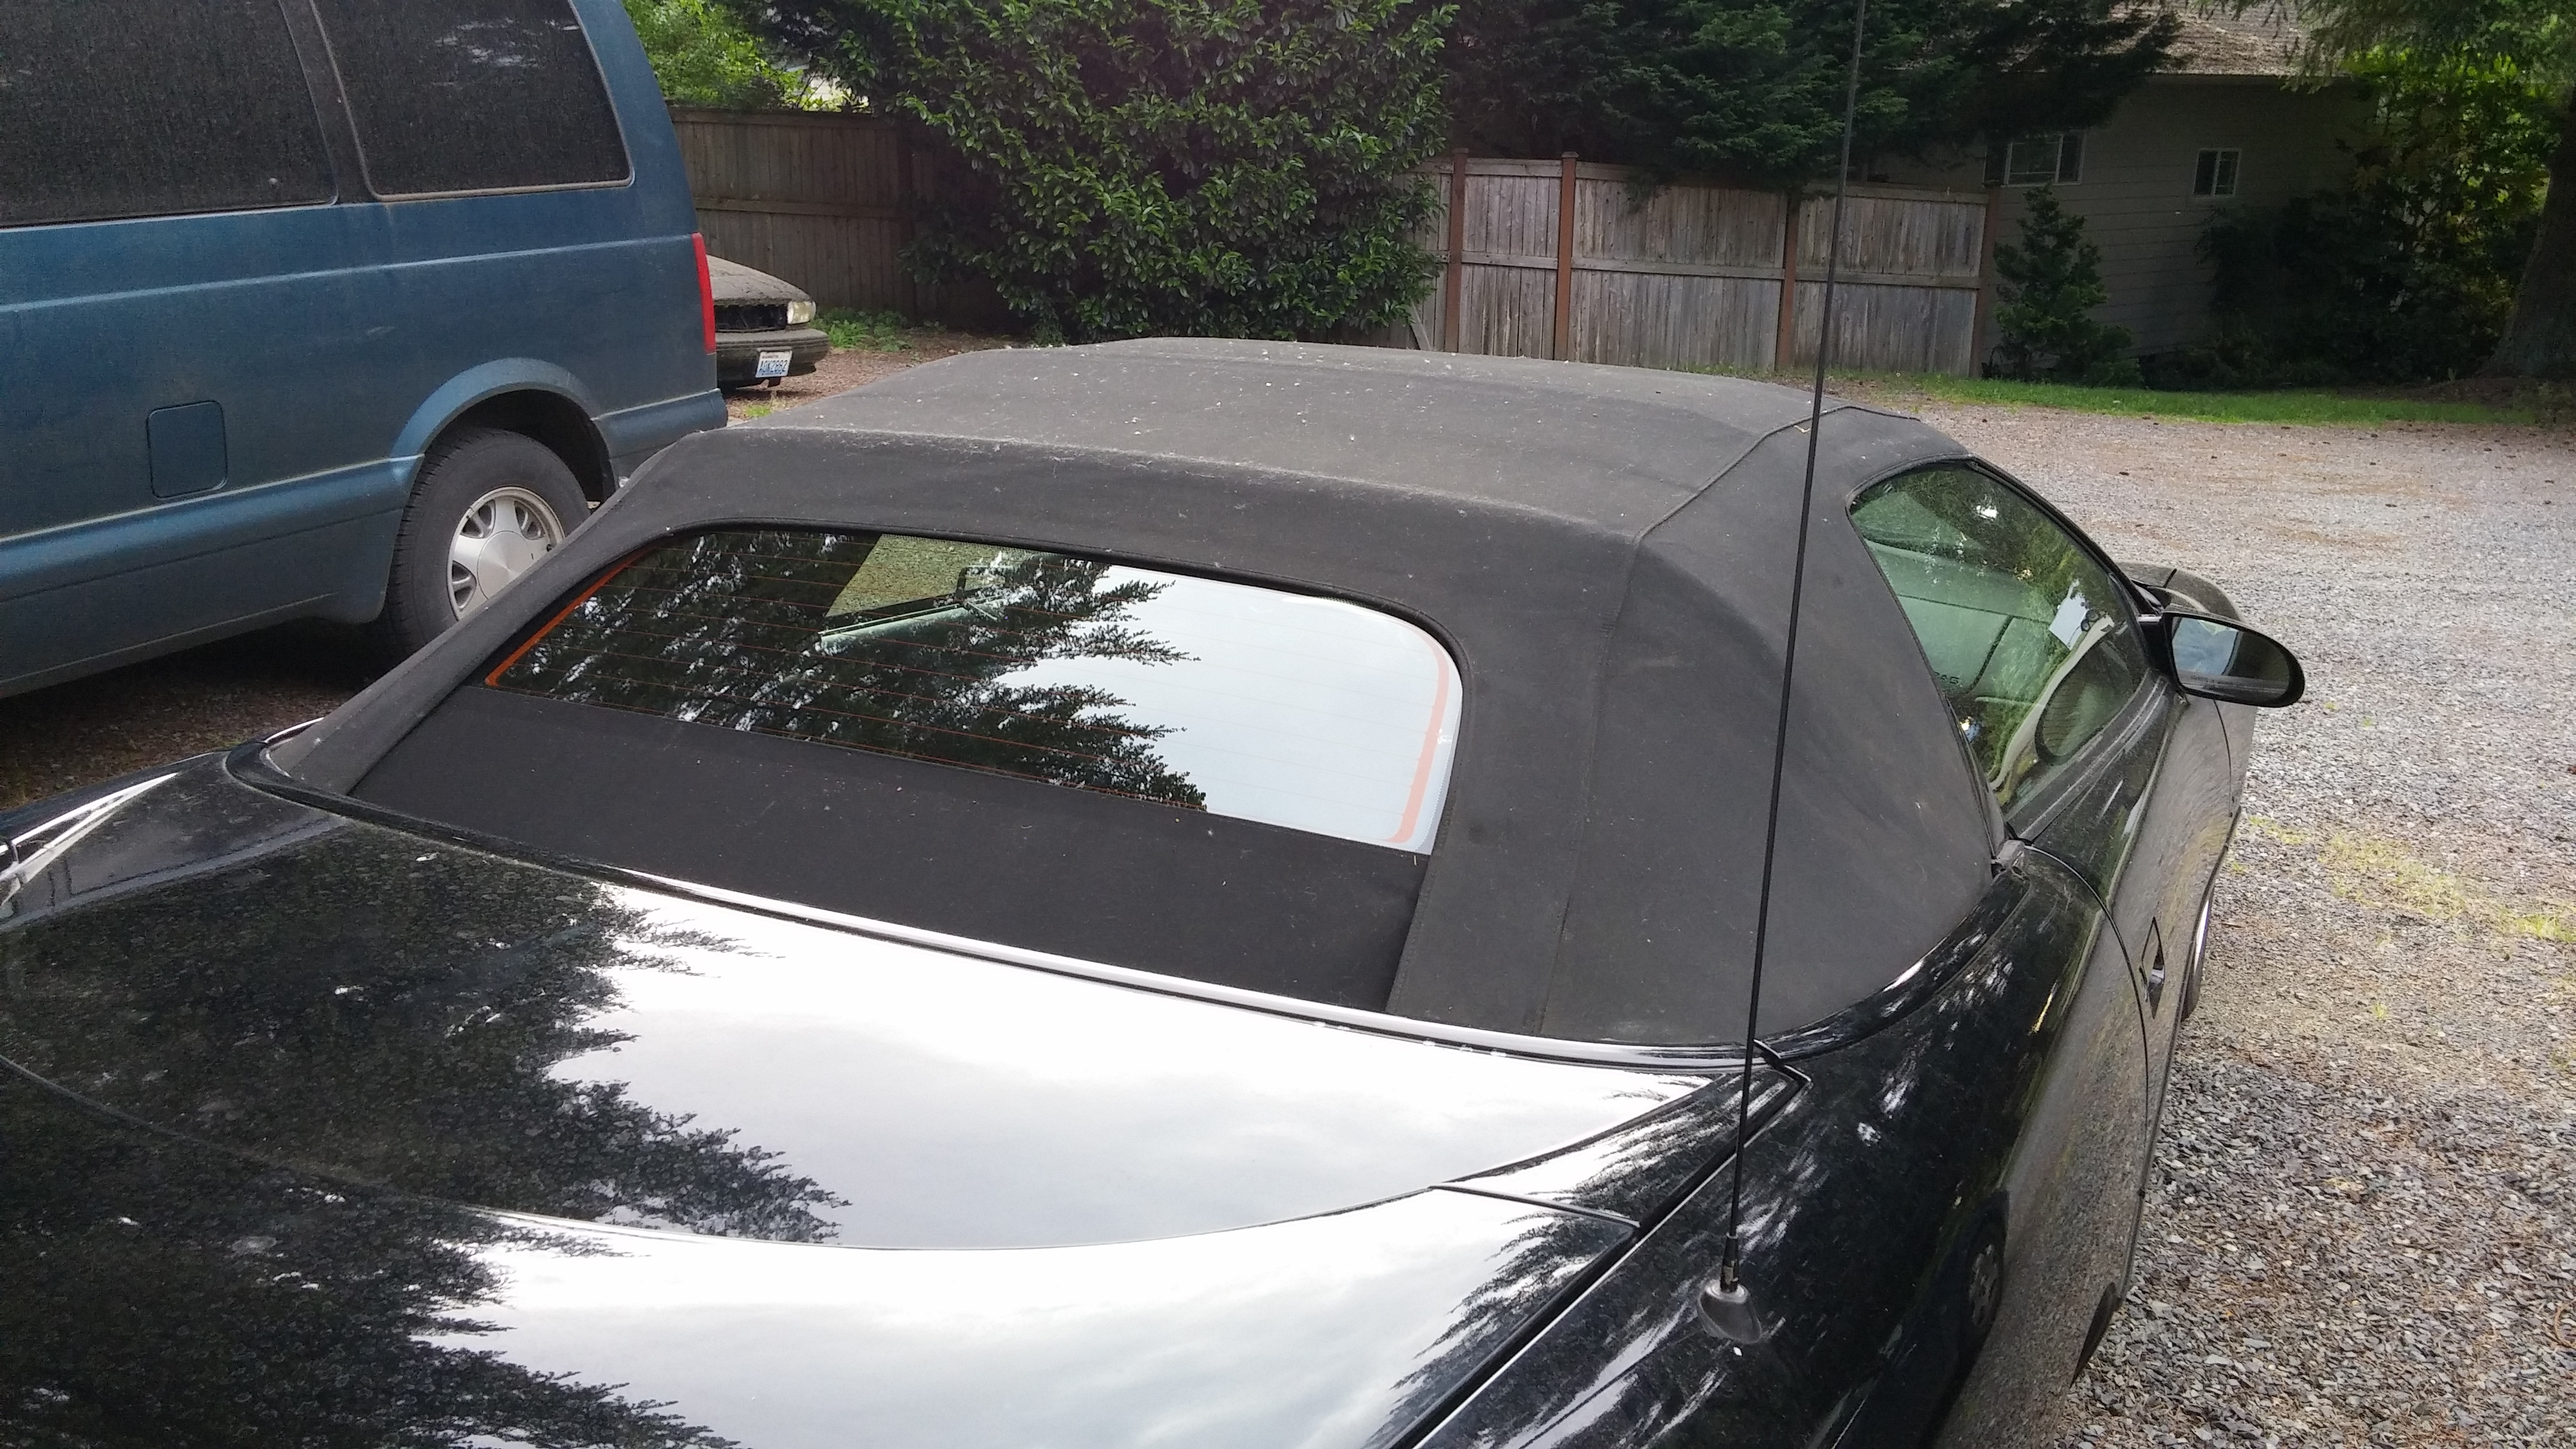
So when I started, this is what my back window looked like:
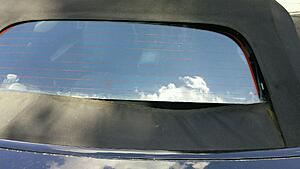
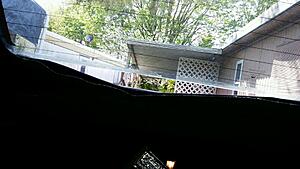
Pretty awful, right? Hooray for years of neglect from the previous owner....
Anyway, this is how to fix that!
Step 1:
First, fold down your rear seat and pop the trunk. There are two plastic pieces on either side of the trunk/deck area, attached to the bar that the back of the top attaches to. Remove these plastic pieces and the carpeted piece in the middle by popping the little plastic pins out. At the same time, on the left hand side of the trunk, go ahead and turn the little valve on the top pump, so you can move it manually. Unlatch the top, but don't raise it yet
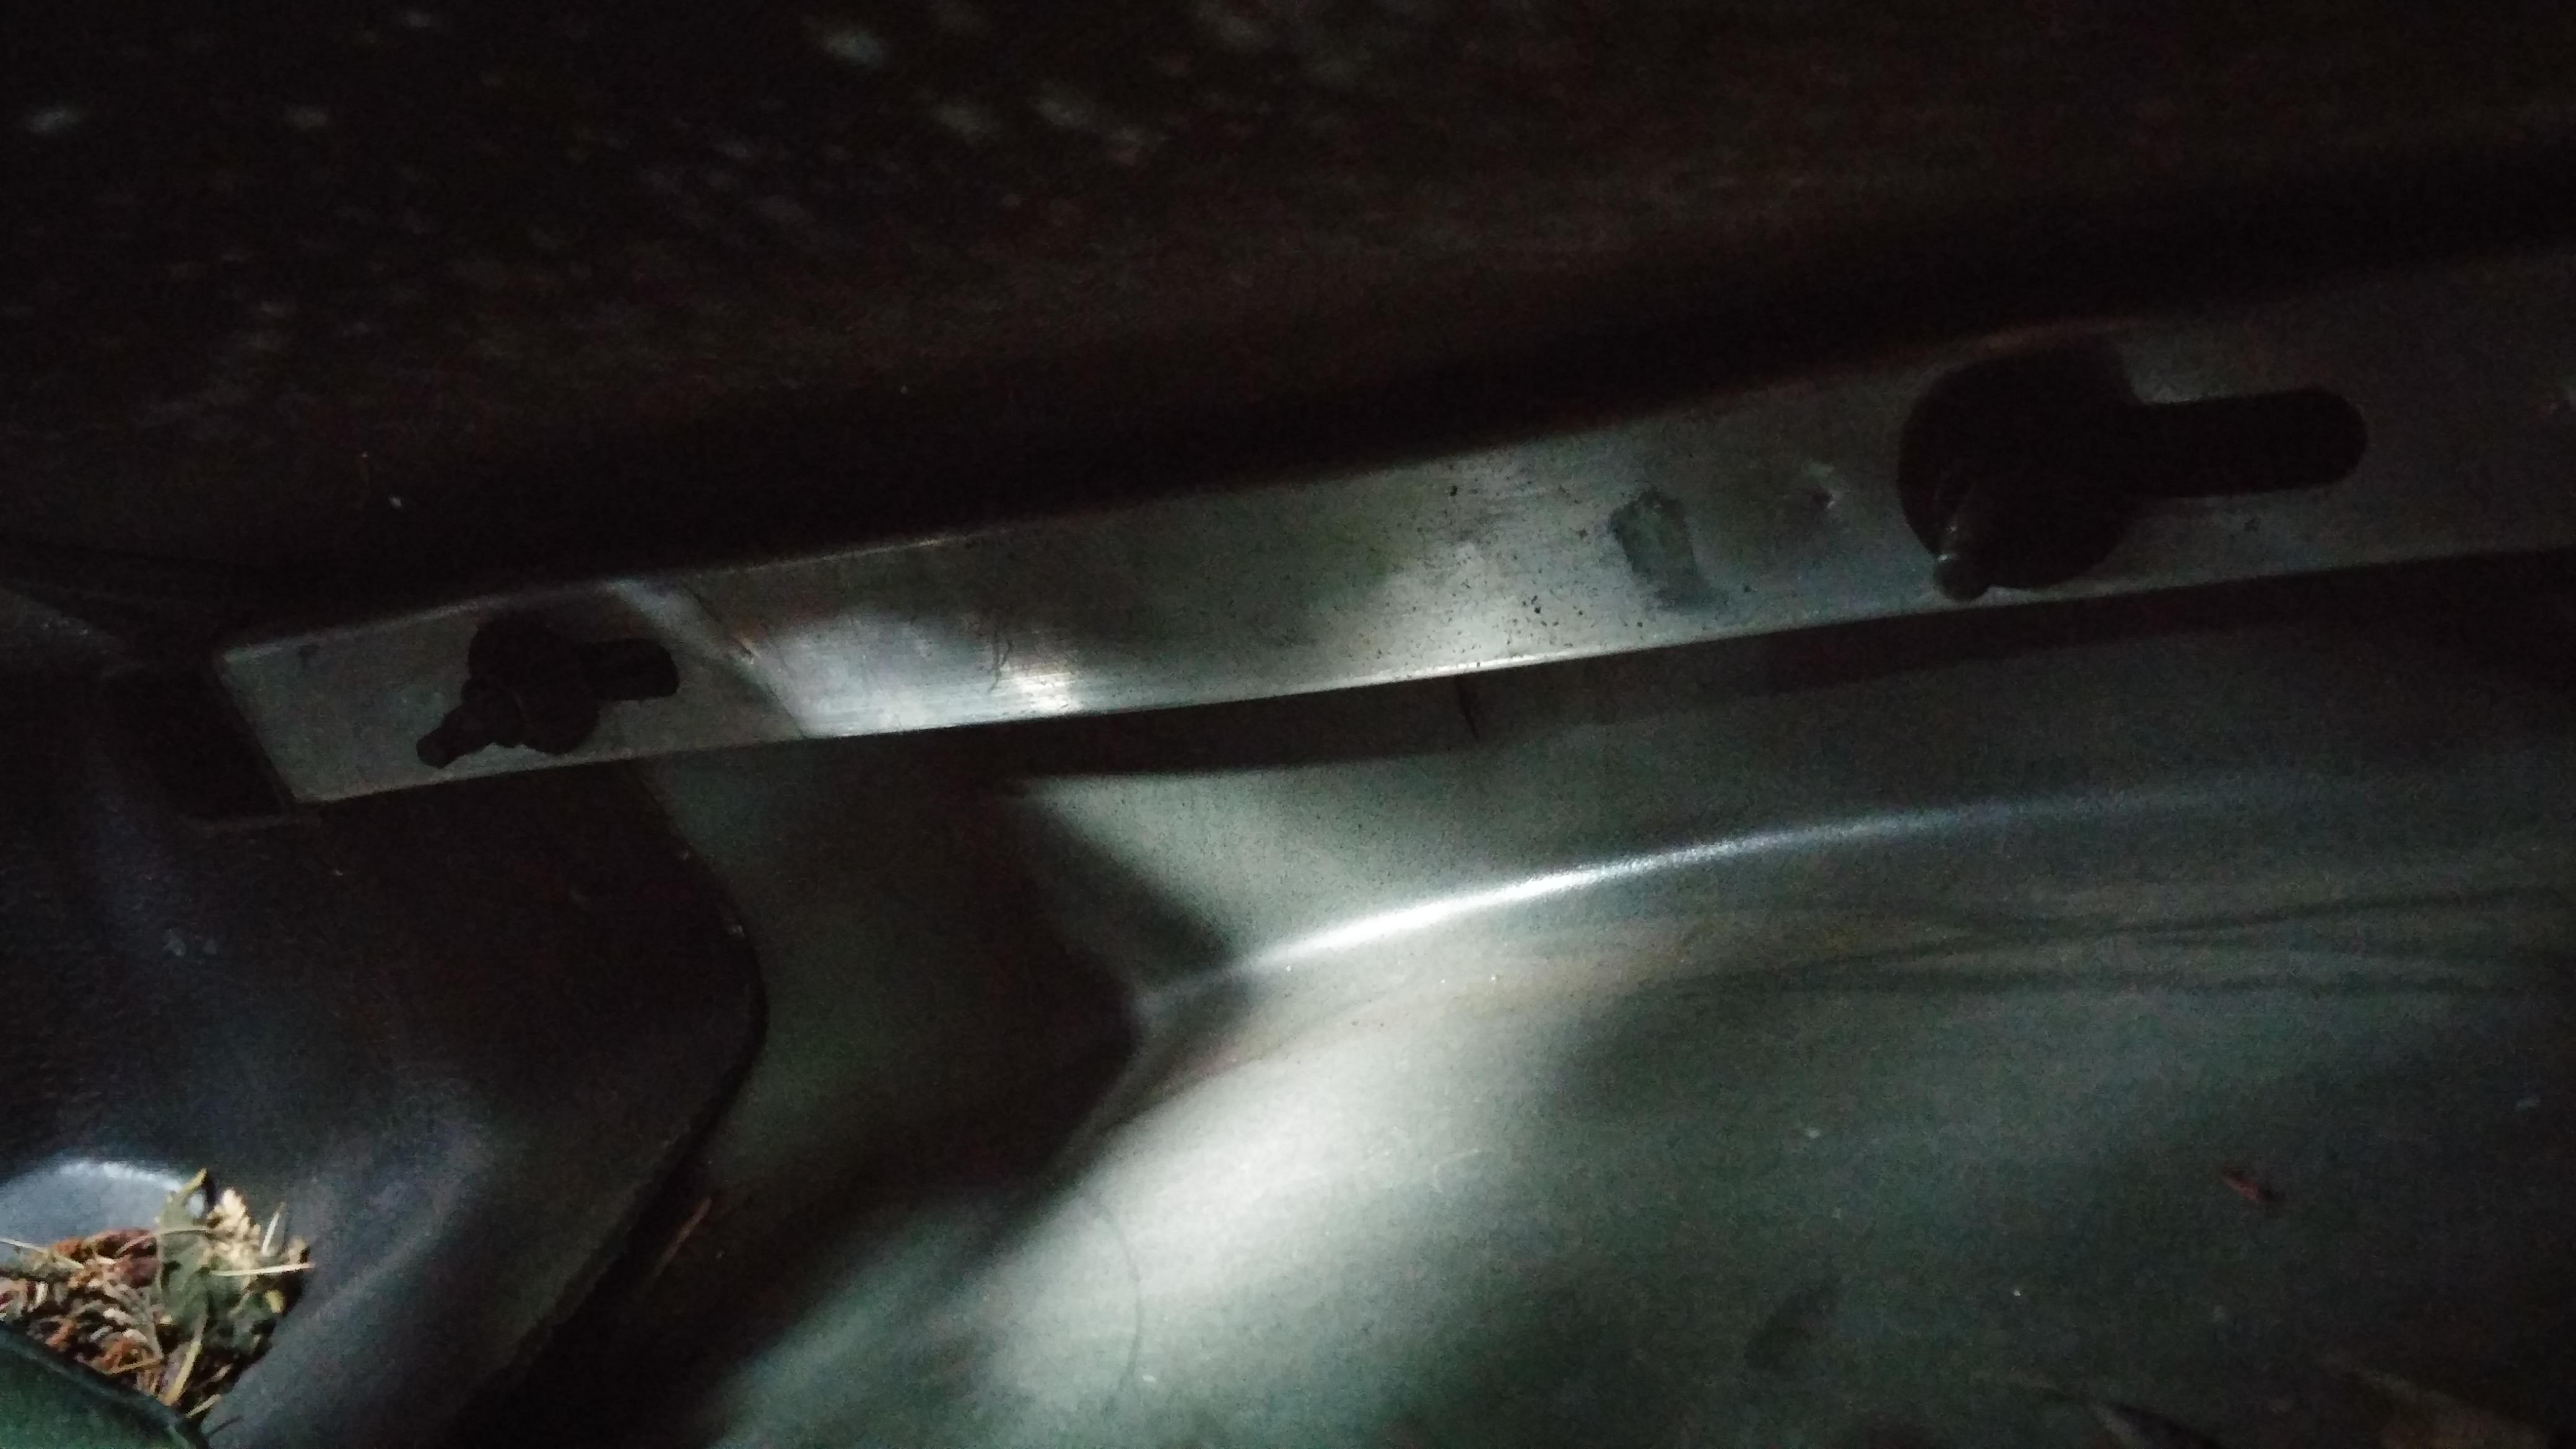
Step 2: Climb into the back seat, you should see a u-shaped bar (hereafter referred to as a Tack Bar) with [number] of 10mm nuts holding it in place. On the both inside corners of the headliner you should see an elastic strap, held to the bar by a phillips screw. Remove these (don't lose the screws). The corner of the headliner should hang loose now, and give you access to the sides of the tack bar that runs along the quarter panel.
Note the slotted holes in the tack bar on each side. You'll want to set these in the same position as before. I took a picture for my reference, but if you want to scratch something in the tack bar that's fine.
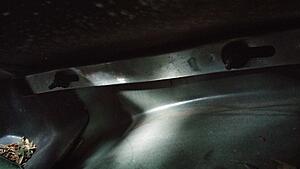
Also note the pile of crap at the end of the 1/4 panel. I live in the Pacific Northwest so pine needles and s*** like that gets all over my car. Vacuum that out while you do this.
Step 3: Remove all of the 10mm nuts holding the bar in place. After that is done, now raise the top and place the wooden block between the edge of the top and the top of the windshield (take care not to damage the rubber weatherstripping)
Step 4: Close the trunk, and lay furniture pads along the top of the trunk and the 1/4 panels. We're about to deal with studs and staples and that stuff will gouge the s*** out of your paint. Carefully pop the tack bar off of the studs, and maneuver it out of the car and onto the furniture pads. This is a lot easier said than done, as the rest of the top is still attached and wants to fight you. Just take your time and be careful.
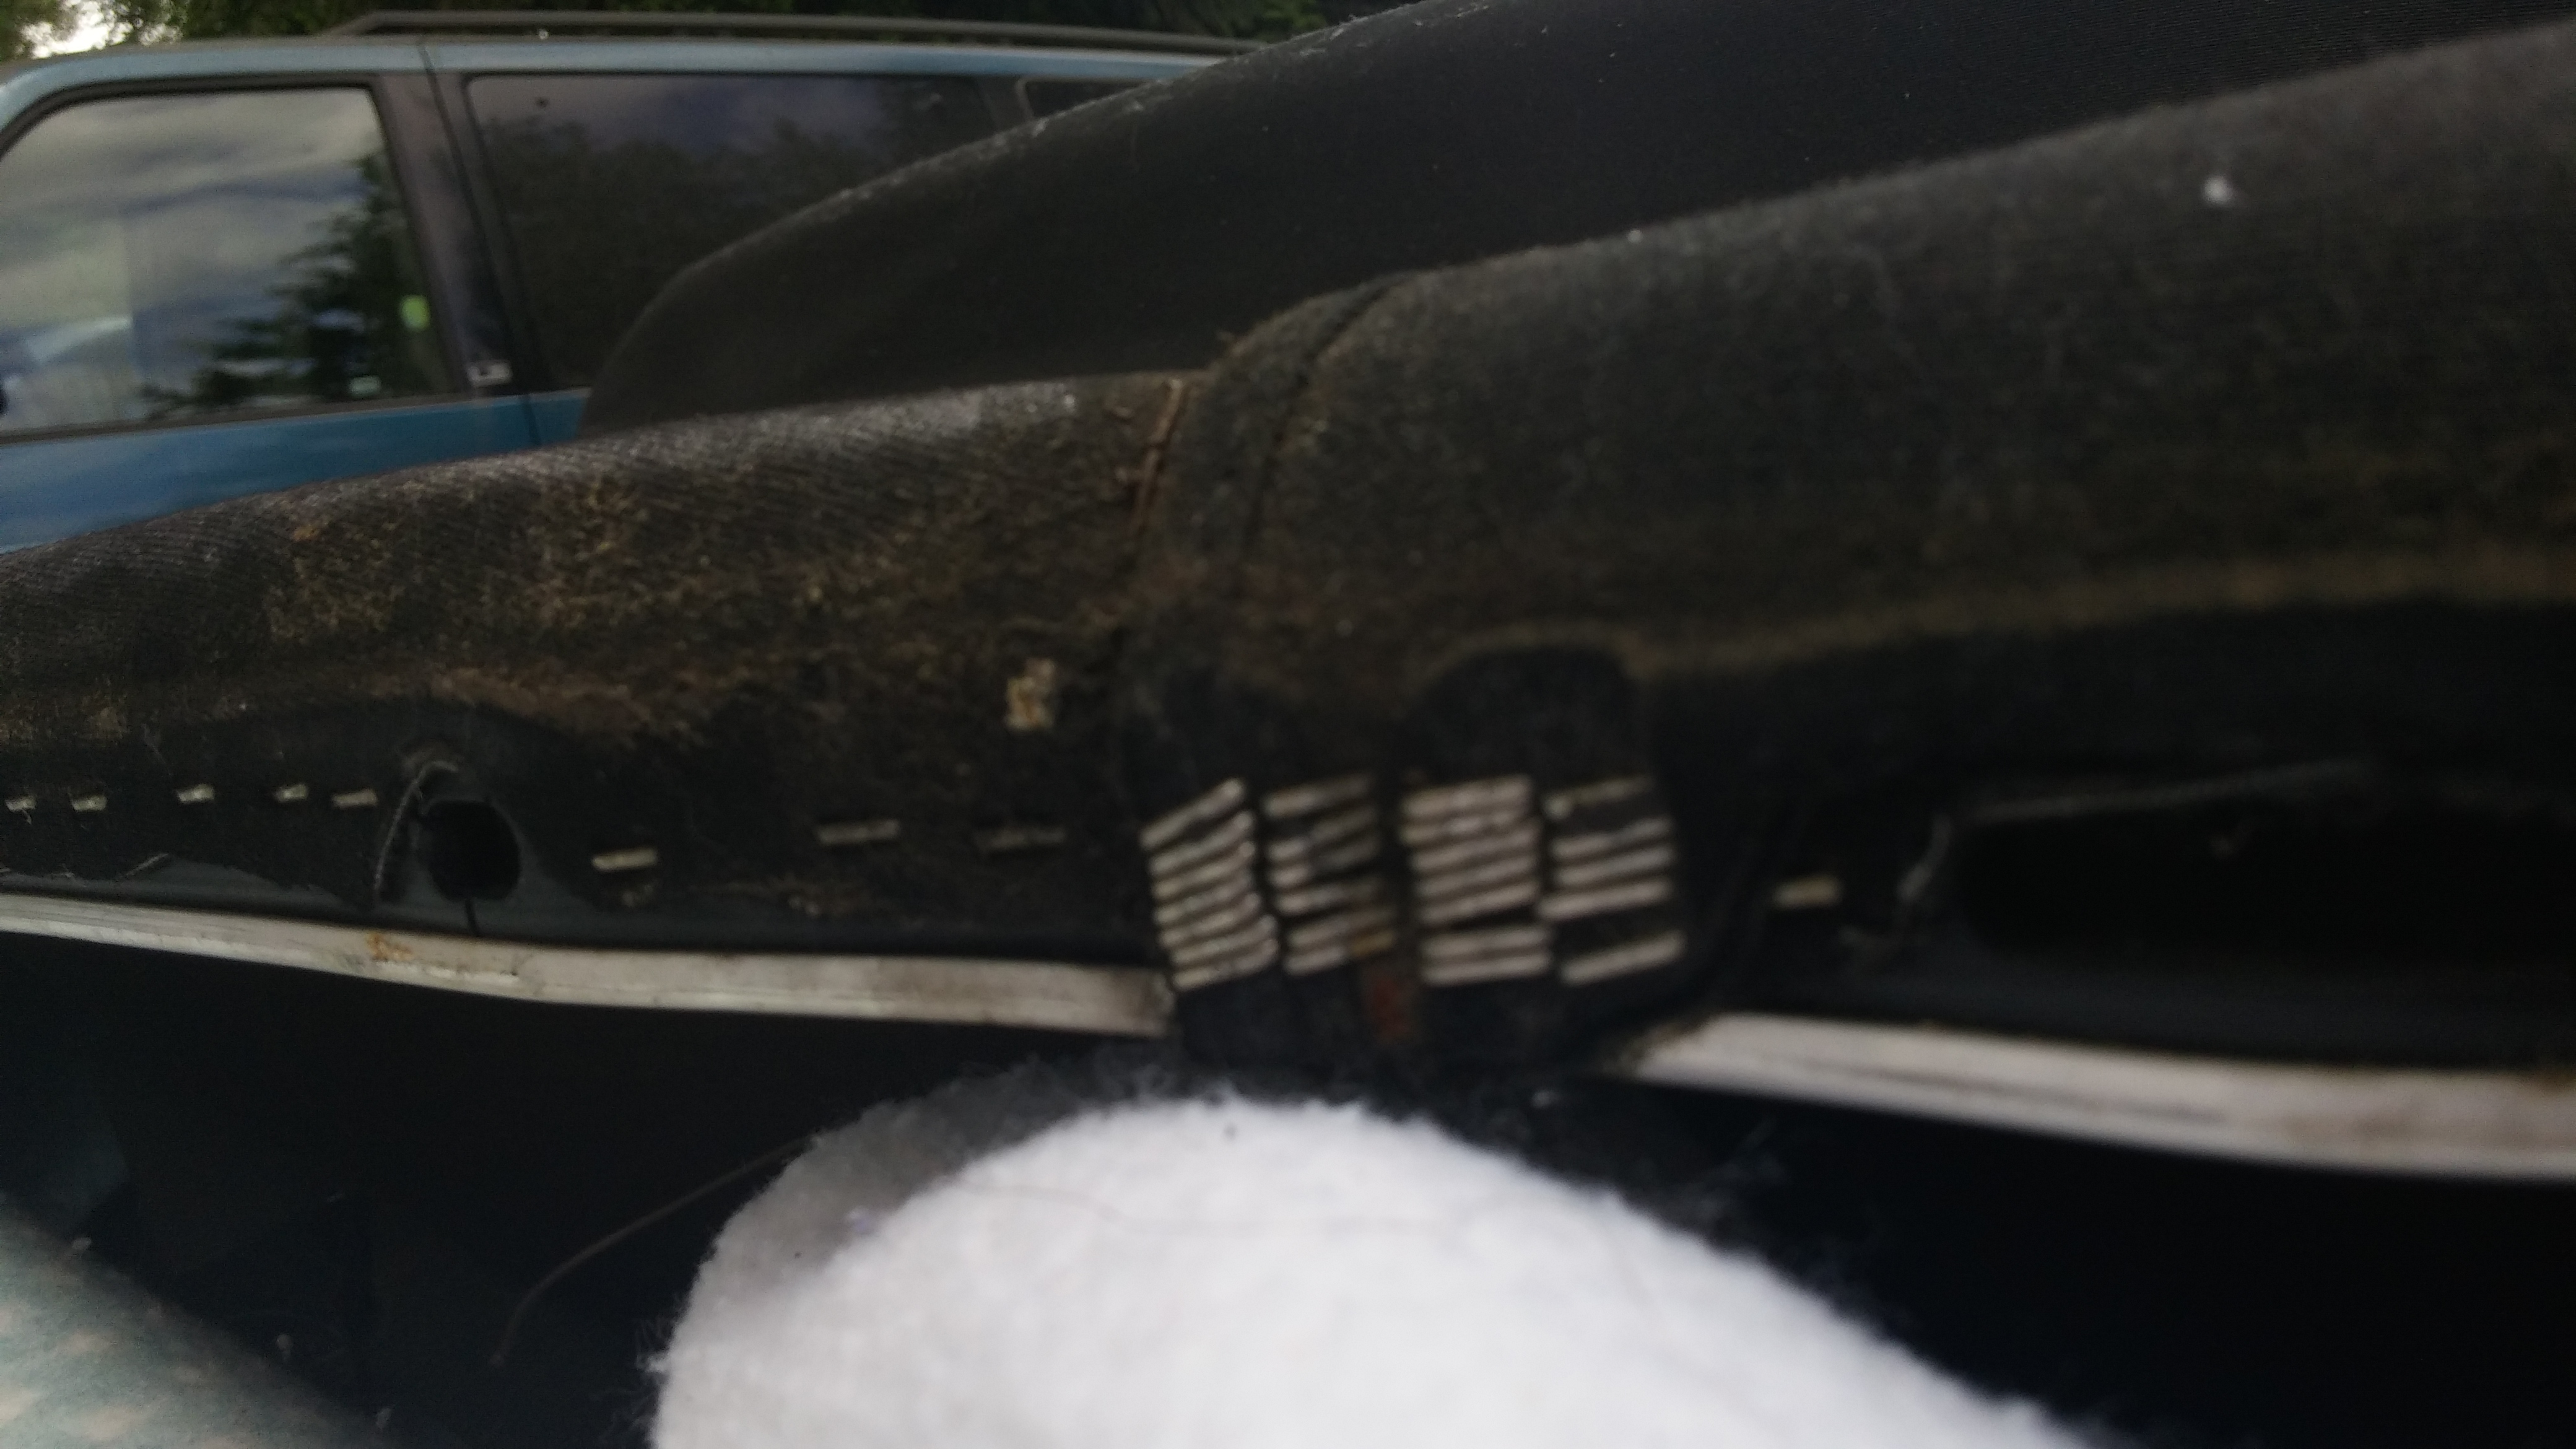
Step 5: Take a moment to document the placement of everything. Staples, locations, etc. Mark the edges of the top and the window piece with a sharpie on the tack bar. Also marvel at how filthy your top is.
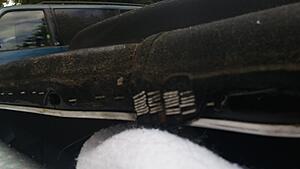
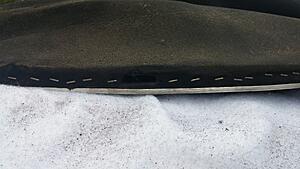
Also note how many staples were used at the edge of the top and the edge of the window piece.
Step 6: The point of no return
Start pulling staples out. I used a crappy flathead screwdriver that I had rounded the edges on on a grinder. As you pull the top off you'll notice a nylon strap running from the rear-most bow to the tack bar. Take note of it's positioning as well.
Take a picture, post it on facebook, and title it 'AAAAAAAAAAHHHHH'
Now that all of the staples are out, you can pull the tack bar free from the car. Set it aside in a place it will not get stepped on.
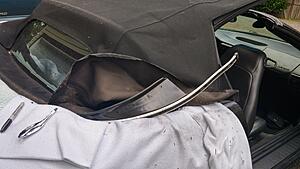
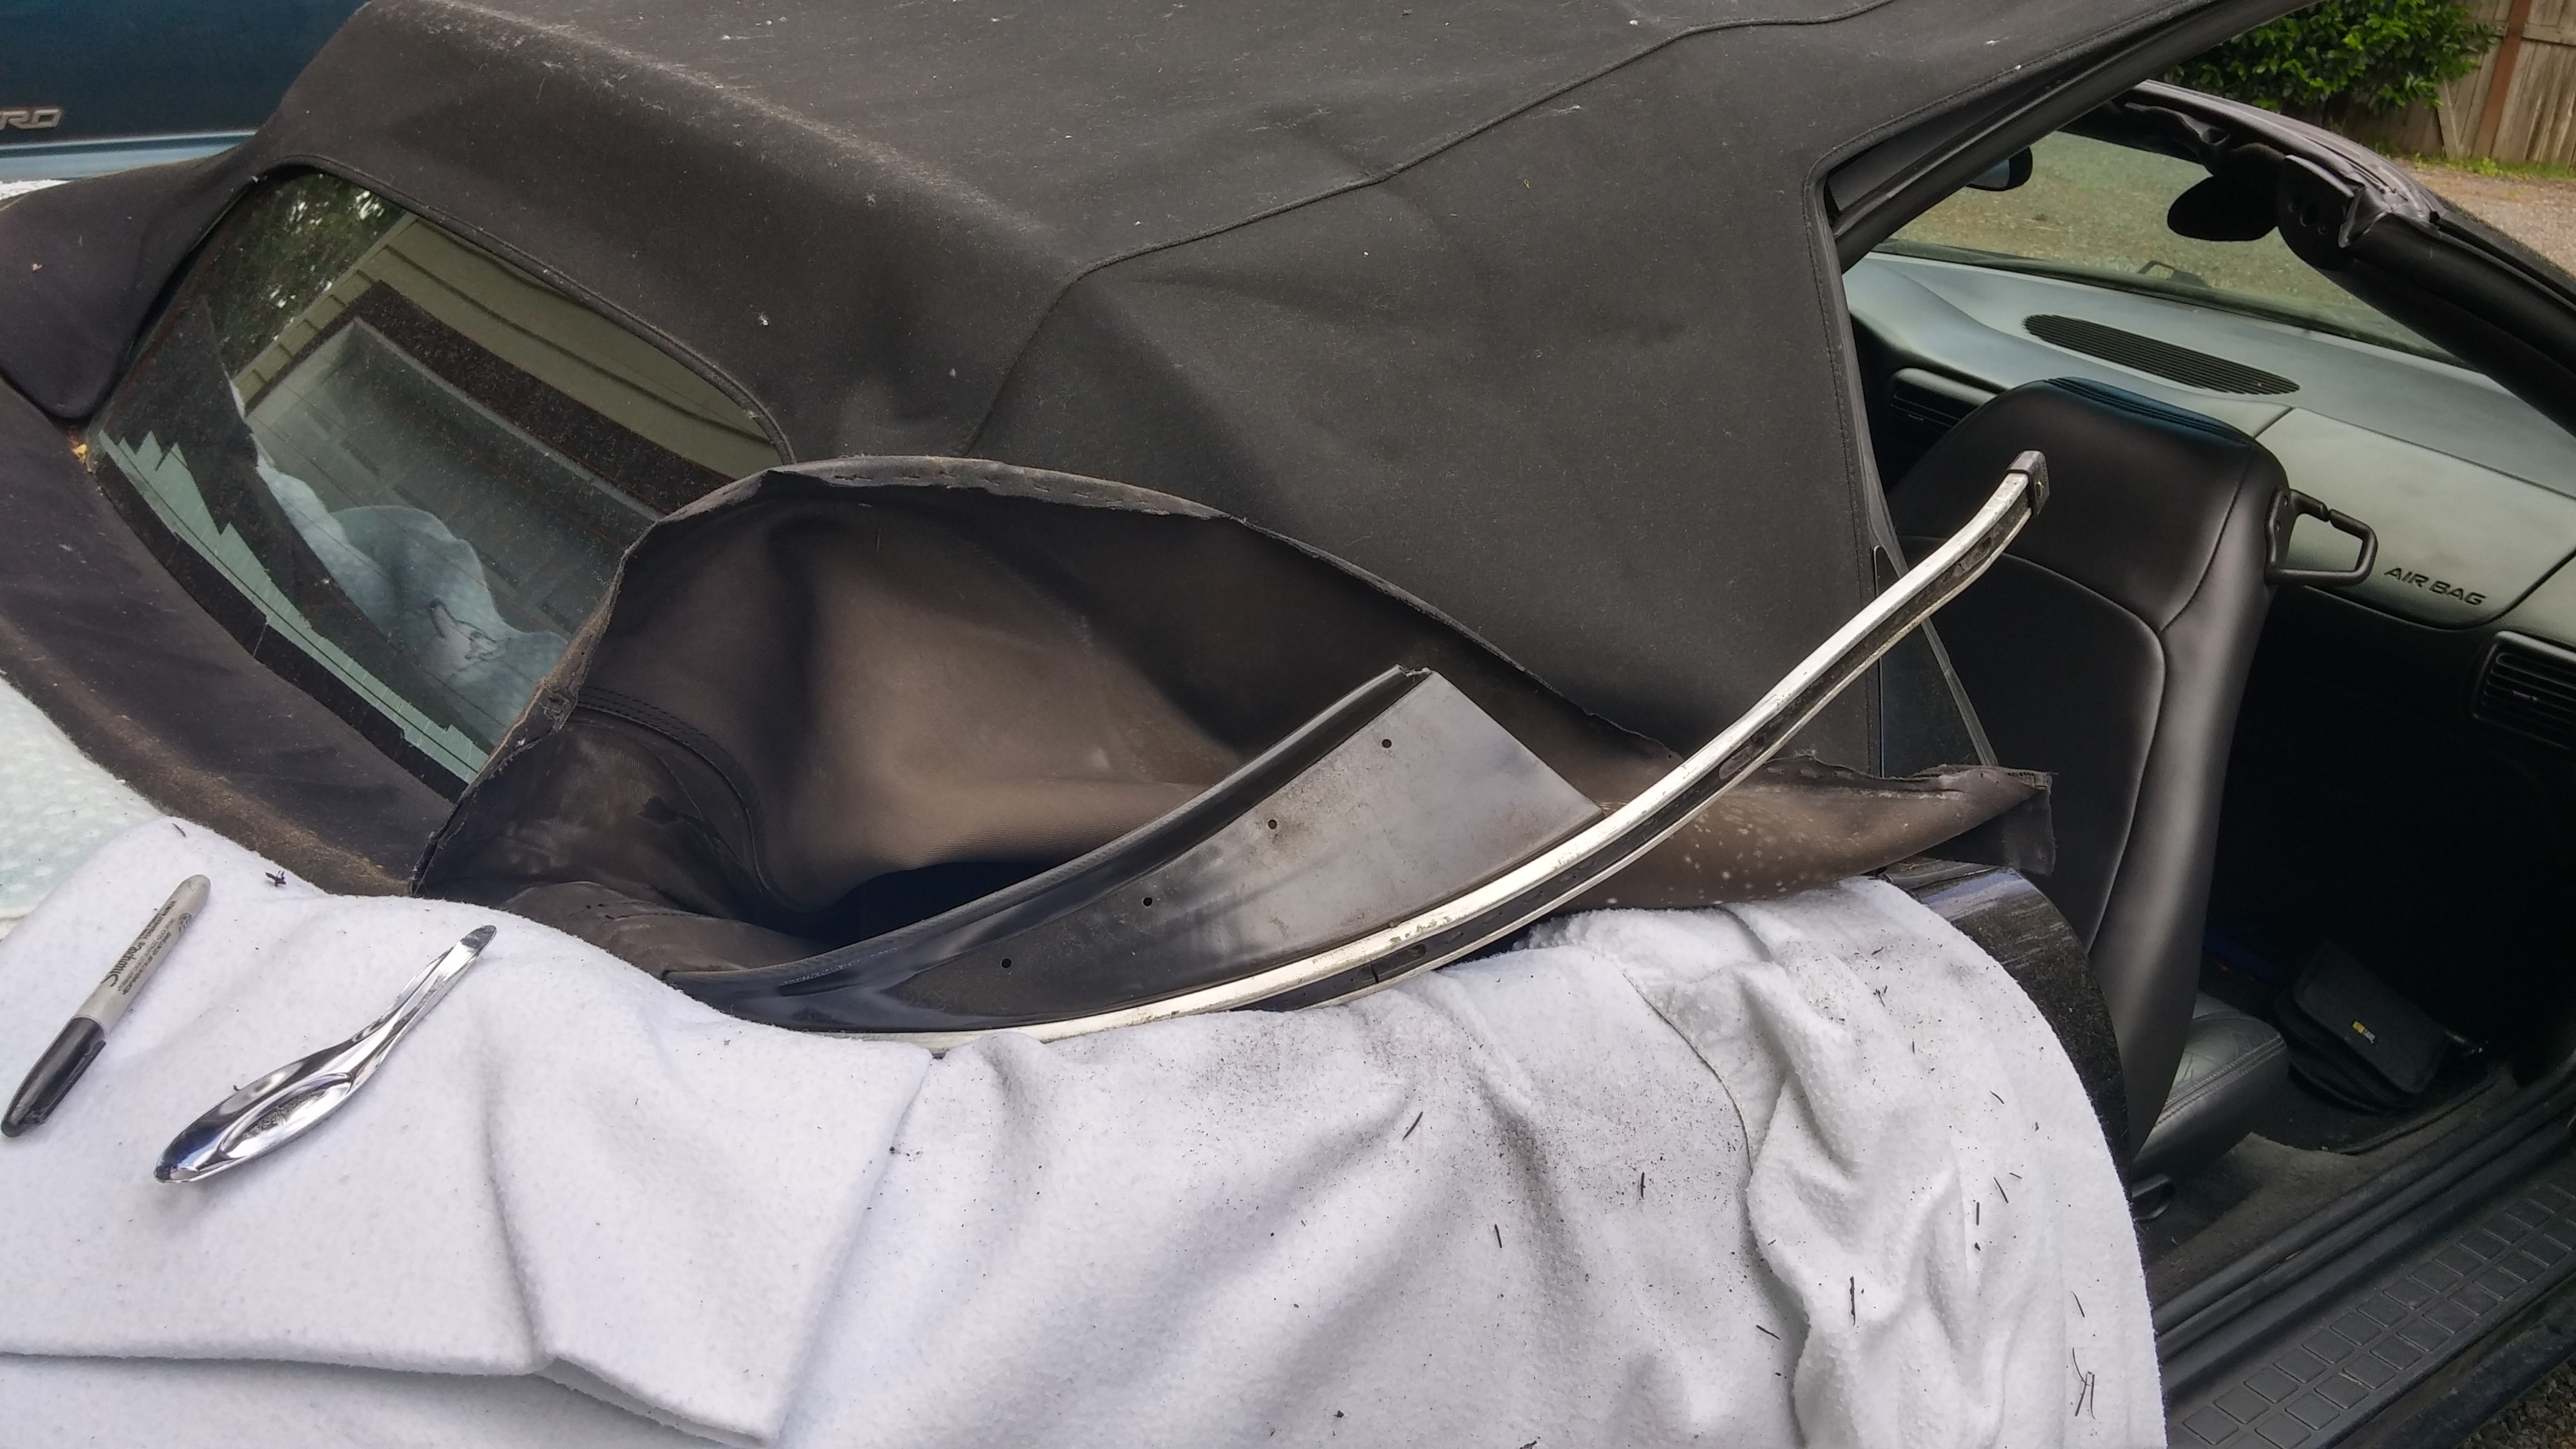
Step 7: Fold the top back gently. At the top of the window piece you should see an aluminum channel with a rivet in it. Carefully drill out this rivet. (For me, it was a royal pain in the ***. As I was drilling the channel got all sorts of f***ed with bent aluminum and I had to carve that out with a tiny screwdriver to pull the window piece). After the rivet is cleared you should be able to (gently) pull the window piece out. If the window doesn't budge, DO NOT YANK ON IT. You will bend the channel, and you will be up a creek at that point, because I don't think they make replacements for that anymore. Ensure the rivet hole is clear and the window should slide out.
Step 8: Lay your old window on top of the new window. with a piece of chalk mark out any holes, and the bottom of the window piece.
Step 9: Carefully slide the new window into the channel. Mine came with a marking that marked the center of the window. Line that up with your rivet hole.
Step 10: Grab your stapler, load it up and hook it up to your compressor. Place the tack bar back onto the furniture pads. My piece also had a small hole cut on the bottom that marked the center of the piece, as well as (roughly) where to center it on the tack bar. Take your stapler and sink a staple on either side of the center hole.
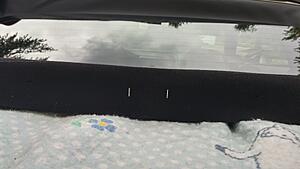
(The little holes denoted holes in the tack bar and roughly where I wanted to center the piece on the tack bar. Wasn't perfect but helped immensely with the side-to-side alignment)
Step 11: Carefully stretch the window piece across the tack bar, line up the edge with the edge you market on the tack bar, and sink a staple on the inside of the folded piece. Do this for both sides.
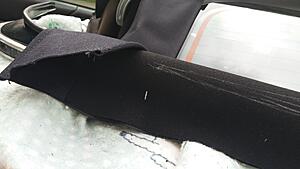
(The folded piece has to tuck up into the top)
Step 12: Sink a few more staples per side into the window piece, taking care not to fire one into the holes in the tack bar. (Or fire one into your hand, that hurts like a mother). Cut the holes out where the holes in the tack bar are. Carefully maneuver the tack bar back into the car, and place it on the studs (again, this is a PITA). Check the alignment. Make sure the window isn't to the left or right. If all is well, go ahead and pop that rivet onto the window channel.
Step 13: Tighten down a handful of the nuts back onto the studs, when I did it I did every other one. No need to go bananas on it, just tighten them down so the bar won't move. Carefully remove the wooden block, and slowly lower the top down. Watch the tension on the window piece. If it's too tight and you latch the top you risk tearing it. If all seems well latch the top and check the window piece for fitment.

You can see on mine the center is nice and tight, but on either side there is a slight dimple, this means that the top is too loose in those sections. If this occurs (anywhere on the top) pull the tack bar up, loosen the staples about 2 inches in either direction, and pull the top further down. To minimize the risk of tearing, only pull it down 1/4-3/8" at a time.
Step 14: Once fitment is correct, pull the tack bar up and prepare to re-staple the top. Fortunately if you aren't replacing the top, you have a perfect marker as to where everything needs to be to retain proper alignment. Staple it back together in reverse order of how you un-stapled it.
Step 15: Replace the tack bar and tighten half of the nuts, check again for fitment and proper tension. If all is well, tighten the rest of the nuts. Replace the elastic straps for the headliner, then the center carpet piece and lastly, the plastic.
Step 16: Take a step back, take a deep breath, and marvel at how you were able to do what upholstery shops charge 6-900 to do.
Take another photo, post it on facebook and title it "Look Mah, fixed the cah!"
Firstly, let me start by saying that when I did this, I have had no prior experience working in automotive upholstery. Everything I learned, I learned from a DVD that gave a detailed how-to on replacing the whole top. If you wanna know where to get it, PM me.
Tools needed:
10mm deep socket
Air ratchet/electric impact driver (a regular hand ratchet will do, but it gets rather tiring)
Phillips screw driver
Pneumatic Staple gun (I used a Porter Cable TS056 from Home Depot. Was around $50)
Stainless steel staples (I used arrow T50 3/8" staples)
Air Compressor (Mine was set to around 100psi)
Furniture pads/thick blankets
1/8" drill bit
1/8" rivet
rivet popper
A 6-10" block of wood
About 4-6 hours of time
Parts:
1 replacement window back piece. I got mine from topsonline for about 290. It's a Robbins top and comes with a lifetime warranty on the back window seal (Wish we woulda had that from the factory...)
So when I started, this is what my back window looked like:
Pretty awful, right? Hooray for years of neglect from the previous owner....
Anyway, this is how to fix that!
Step 1:
First, fold down your rear seat and pop the trunk. There are two plastic pieces on either side of the trunk/deck area, attached to the bar that the back of the top attaches to. Remove these plastic pieces and the carpeted piece in the middle by popping the little plastic pins out. At the same time, on the left hand side of the trunk, go ahead and turn the little valve on the top pump, so you can move it manually. Unlatch the top, but don't raise it yet
Step 2: Climb into the back seat, you should see a u-shaped bar (hereafter referred to as a Tack Bar) with [number] of 10mm nuts holding it in place. On the both inside corners of the headliner you should see an elastic strap, held to the bar by a phillips screw. Remove these (don't lose the screws). The corner of the headliner should hang loose now, and give you access to the sides of the tack bar that runs along the quarter panel.
Note the slotted holes in the tack bar on each side. You'll want to set these in the same position as before. I took a picture for my reference, but if you want to scratch something in the tack bar that's fine.
Also note the pile of crap at the end of the 1/4 panel. I live in the Pacific Northwest so pine needles and s*** like that gets all over my car. Vacuum that out while you do this.
Step 3: Remove all of the 10mm nuts holding the bar in place. After that is done, now raise the top and place the wooden block between the edge of the top and the top of the windshield (take care not to damage the rubber weatherstripping)
Step 4: Close the trunk, and lay furniture pads along the top of the trunk and the 1/4 panels. We're about to deal with studs and staples and that stuff will gouge the s*** out of your paint. Carefully pop the tack bar off of the studs, and maneuver it out of the car and onto the furniture pads. This is a lot easier said than done, as the rest of the top is still attached and wants to fight you. Just take your time and be careful.
Step 5: Take a moment to document the placement of everything. Staples, locations, etc. Mark the edges of the top and the window piece with a sharpie on the tack bar. Also marvel at how filthy your top is.

Also note how many staples were used at the edge of the top and the edge of the window piece.
Step 6: The point of no return
Start pulling staples out. I used a crappy flathead screwdriver that I had rounded the edges on on a grinder. As you pull the top off you'll notice a nylon strap running from the rear-most bow to the tack bar. Take note of it's positioning as well.
Take a picture, post it on facebook, and title it 'AAAAAAAAAAHHHHH'
Now that all of the staples are out, you can pull the tack bar free from the car. Set it aside in a place it will not get stepped on.
Step 7: Fold the top back gently. At the top of the window piece you should see an aluminum channel with a rivet in it. Carefully drill out this rivet. (For me, it was a royal pain in the ***. As I was drilling the channel got all sorts of f***ed with bent aluminum and I had to carve that out with a tiny screwdriver to pull the window piece). After the rivet is cleared you should be able to (gently) pull the window piece out. If the window doesn't budge, DO NOT YANK ON IT. You will bend the channel, and you will be up a creek at that point, because I don't think they make replacements for that anymore. Ensure the rivet hole is clear and the window should slide out.
Step 8: Lay your old window on top of the new window. with a piece of chalk mark out any holes, and the bottom of the window piece.
Step 9: Carefully slide the new window into the channel. Mine came with a marking that marked the center of the window. Line that up with your rivet hole.
Step 10: Grab your stapler, load it up and hook it up to your compressor. Place the tack bar back onto the furniture pads. My piece also had a small hole cut on the bottom that marked the center of the piece, as well as (roughly) where to center it on the tack bar. Take your stapler and sink a staple on either side of the center hole.

(The little holes denoted holes in the tack bar and roughly where I wanted to center the piece on the tack bar. Wasn't perfect but helped immensely with the side-to-side alignment)
Step 11: Carefully stretch the window piece across the tack bar, line up the edge with the edge you market on the tack bar, and sink a staple on the inside of the folded piece. Do this for both sides.

(The folded piece has to tuck up into the top)
Step 12: Sink a few more staples per side into the window piece, taking care not to fire one into the holes in the tack bar. (Or fire one into your hand, that hurts like a mother). Cut the holes out where the holes in the tack bar are. Carefully maneuver the tack bar back into the car, and place it on the studs (again, this is a PITA). Check the alignment. Make sure the window isn't to the left or right. If all is well, go ahead and pop that rivet onto the window channel.
Step 13: Tighten down a handful of the nuts back onto the studs, when I did it I did every other one. No need to go bananas on it, just tighten them down so the bar won't move. Carefully remove the wooden block, and slowly lower the top down. Watch the tension on the window piece. If it's too tight and you latch the top you risk tearing it. If all seems well latch the top and check the window piece for fitment.

You can see on mine the center is nice and tight, but on either side there is a slight dimple, this means that the top is too loose in those sections. If this occurs (anywhere on the top) pull the tack bar up, loosen the staples about 2 inches in either direction, and pull the top further down. To minimize the risk of tearing, only pull it down 1/4-3/8" at a time.
Step 14: Once fitment is correct, pull the tack bar up and prepare to re-staple the top. Fortunately if you aren't replacing the top, you have a perfect marker as to where everything needs to be to retain proper alignment. Staple it back together in reverse order of how you un-stapled it.
Step 15: Replace the tack bar and tighten half of the nuts, check again for fitment and proper tension. If all is well, tighten the rest of the nuts. Replace the elastic straps for the headliner, then the center carpet piece and lastly, the plastic.
Step 16: Take a step back, take a deep breath, and marvel at how you were able to do what upholstery shops charge 6-900 to do.
Take another photo, post it on facebook and title it "Look Mah, fixed the cah!"

I did mine years ago - you've nicely written up and documented the process. Using a pneumatic staple gun is a real time saver - I used a manual one and it's a real PIA! I was fortunate in that I was aware of that central rivet and was able to drill it out easily. One thing i remember was that in my camaro, there was some sort of sticky/greasy/gluey substance all along the inside of the tack bar that made it difficult to work with, but got it done. Again, nice job!


