
Quest for Better ET's & 60's ... Latest Mod ... Front Strange DA STR-S5071's
 08-19-2012, 05:56 PM
#1
TECH Resident
Thread Starter
Join Date: Sep 2010
Location: Cartersville, Georgia
Posts: 866
Likes: 0
Received 0 Likes
on
0 Posts
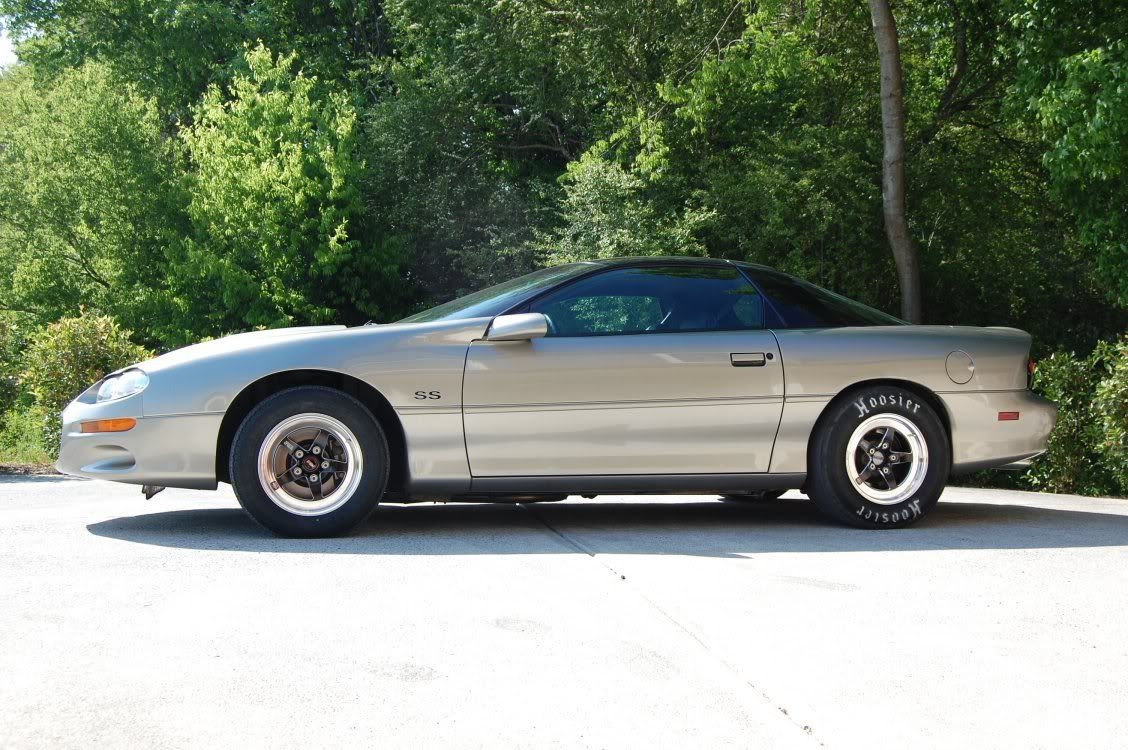
Hear is the starting point ... stock DeCarbons with a front ride height of 27.5" on 26x7.5-15 M/T Sportsman's. The rears are 27x11.5-15 Hoosier QTP's on Strange DA coil overs with a ride height of 27".
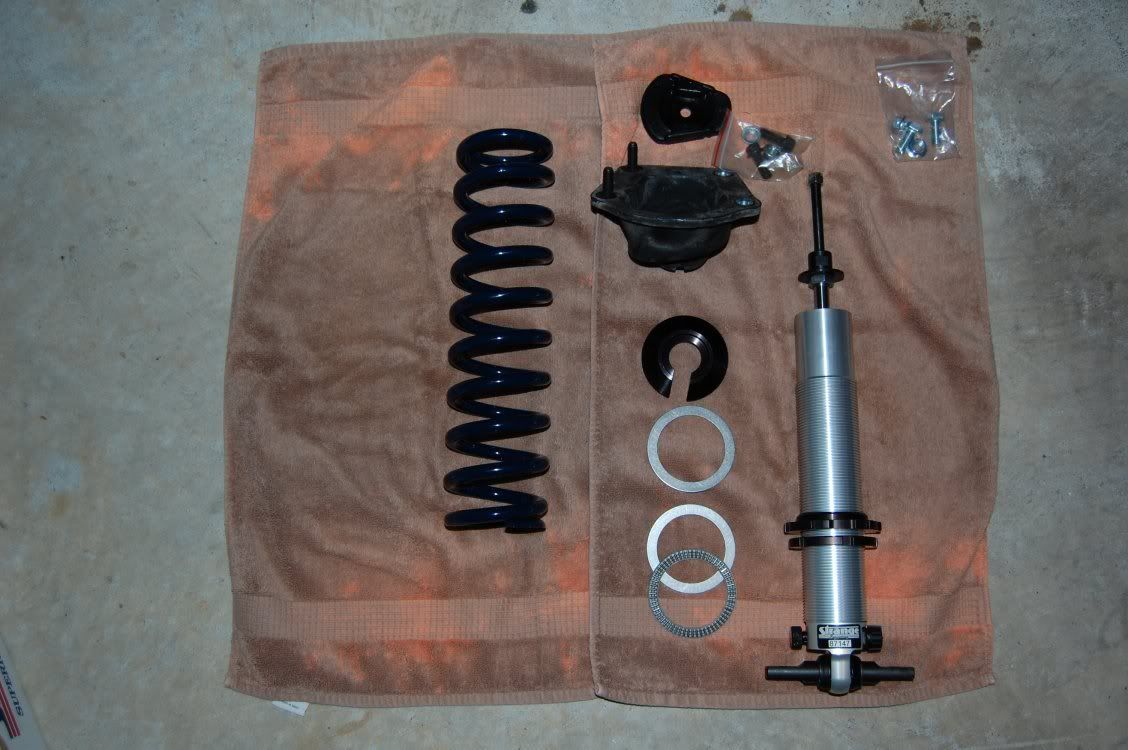
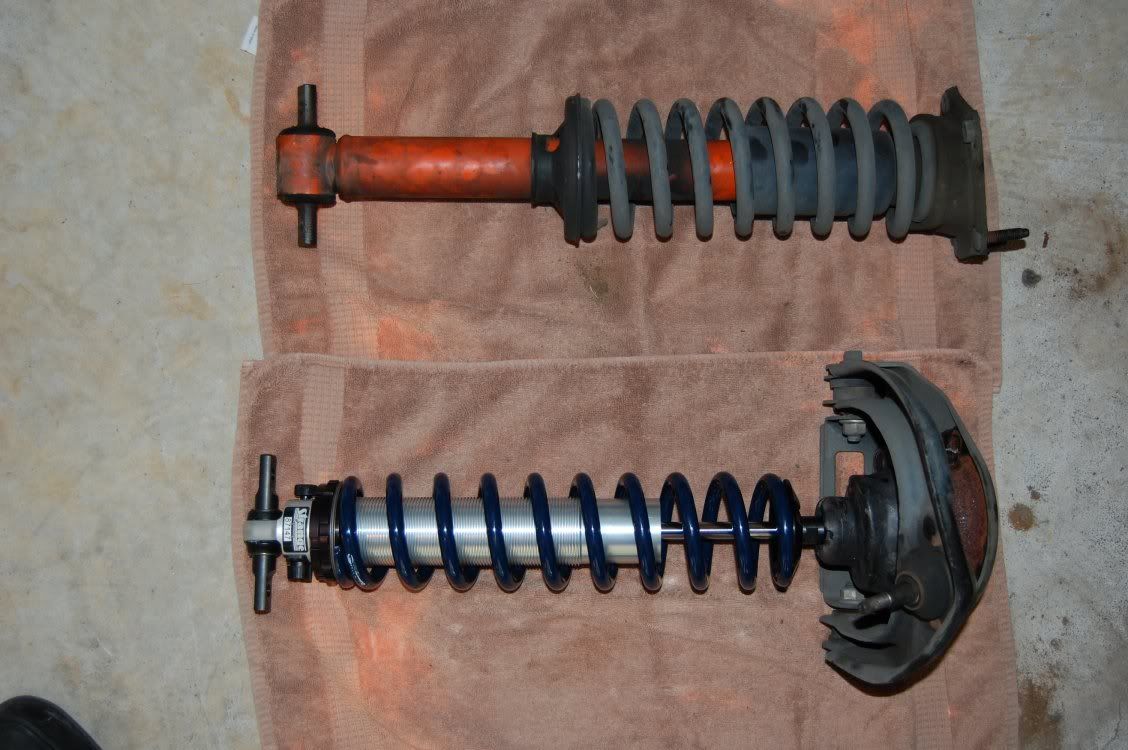
Thanks to Carl at Central Racing Parts (LS1Tech sponser) .... Strange DA STR-S5071 front coil over, 300# Strange Hypercoil spring and set of Torrington bearings. The intention of my install was to pull the stock DeCarbons as a whole and store for a de-mod later, so, also in the photo is a new strut mount and hardware (Ebay) (more about these later) and shock mount bushing (O'Reilly's).
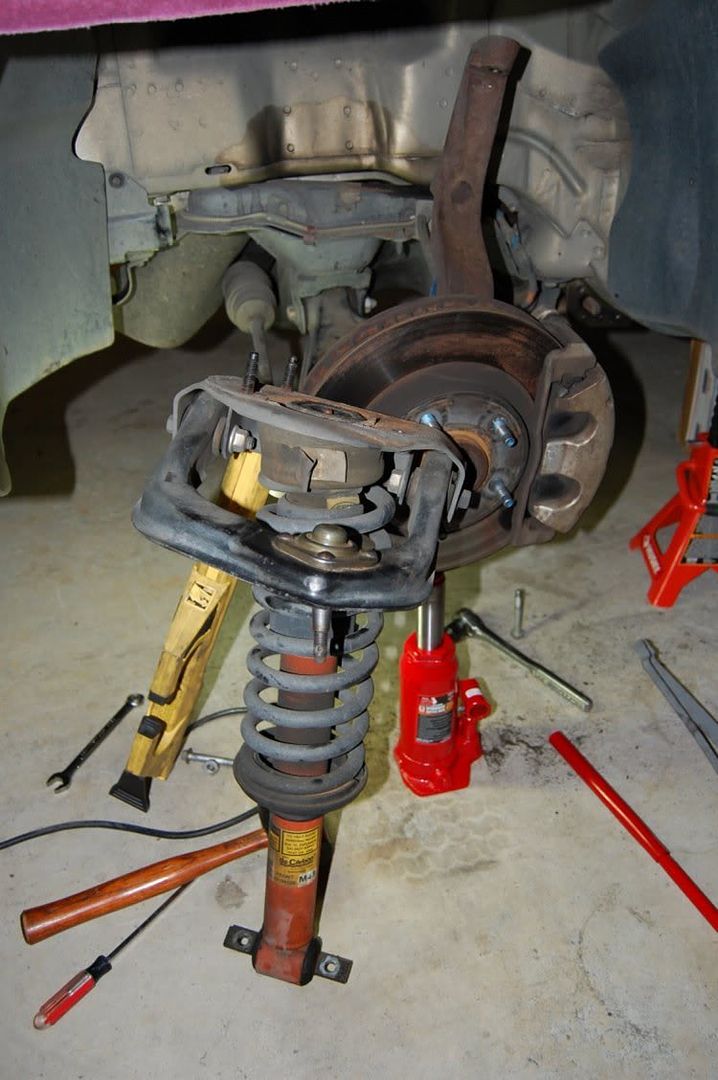
Removing the the stock Decarbon's, I started with the driver's side first since it would be the most difficult. Before removing the steering knuckle bolt, be sure to support the assembly so the brake line does not stretch. I used a simple bungie cord and later a bottle jack.

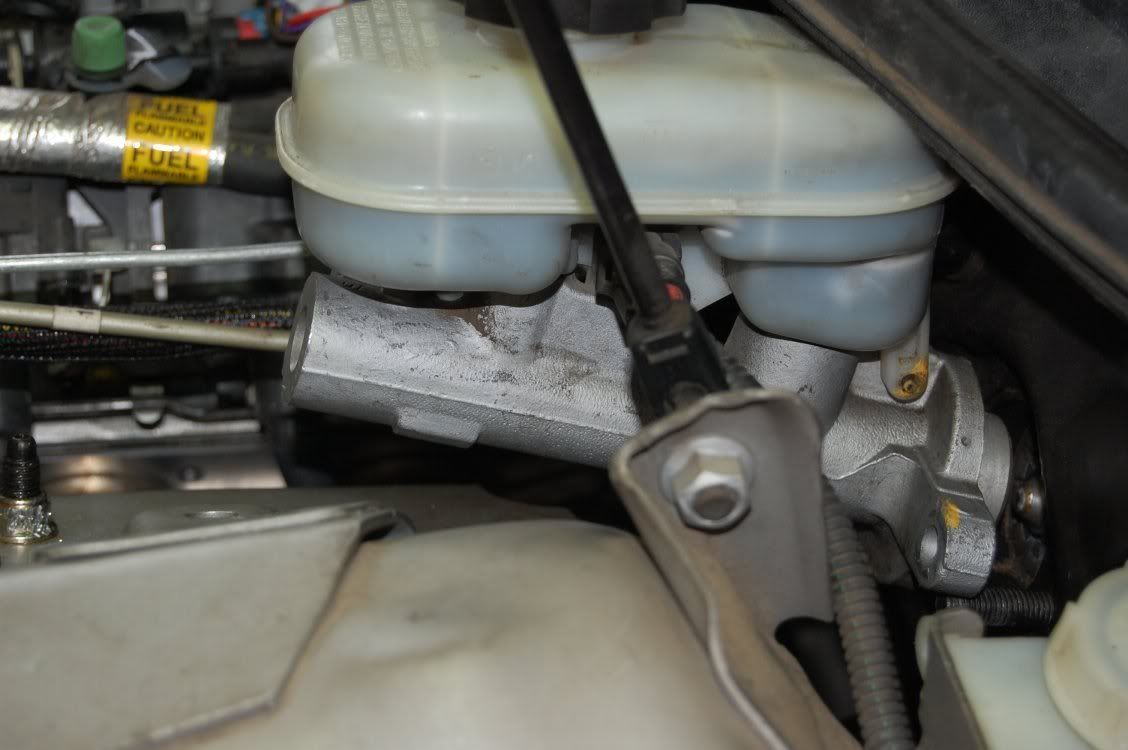
Before the body mounted Torx bolts can be removed, the brake master cylinder reservoir must be removed. Remove two bolts and it can be moved to the side enough to get a Torx "socket" next to it.
The whole assembly is then removed. Notice that I had already removed the sway bar so the shocks could do their job independently and a bit of front end weight savings at the track. This probably made the install easier.
The new coil over with new strut mount and shock mount bushing.
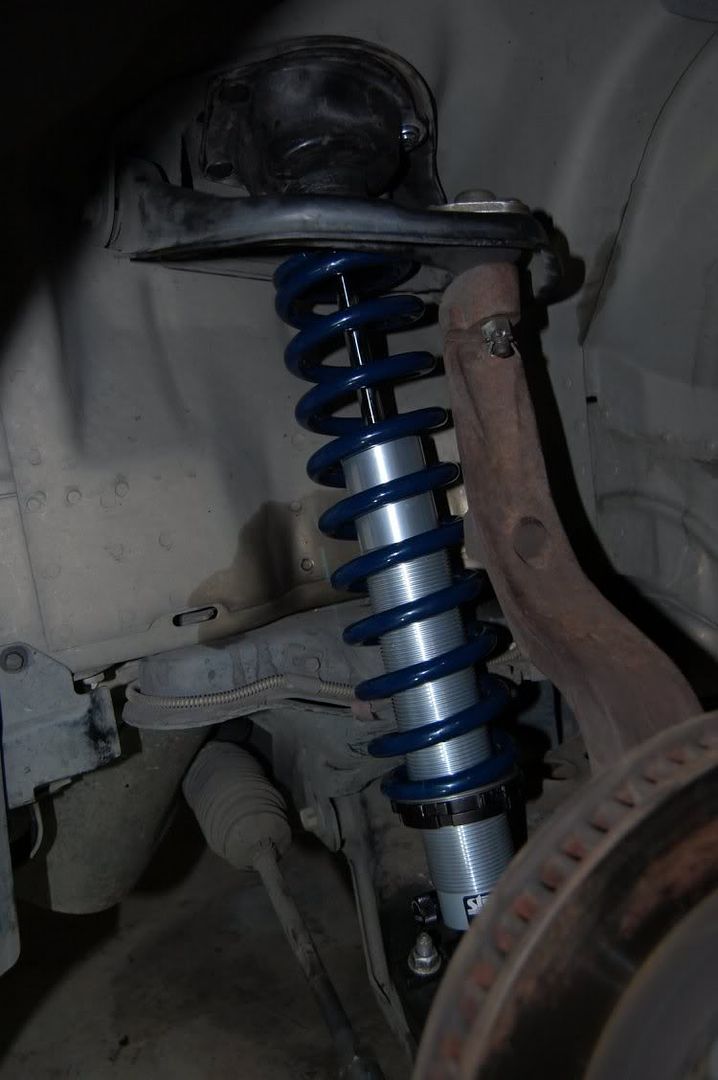
The new coil over assembly installed.
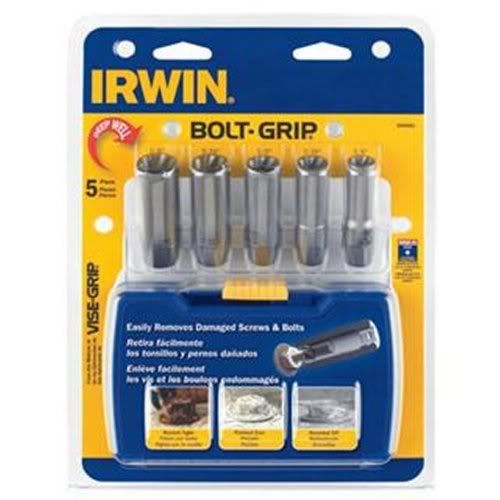
Now came the issues .... after installing the strut mount "hat", I noticed the bolt holes in the new strut mount did not exactly line up with the bolt holes in the strut mount "hat". A little hole opening with a drill and all was good, so I thought! While torquing the bolts, the bolt inserts began turning in the strut mount. You might notice from the photos that the pressed-in bolt inserts are smooth. That won't be easy to remove. So I went to work on the passenger side. Once again .... the same exact issue .... damn Ebay products ... these were made in Australia! Here is a quick tip on removing the bolts if this issue happens to you or if you need to remove a stripped nut or bolt .... it happens to the best of us. This was a life saver ... BOLT-GRIP Deep Well Set!
So I guess my $60 strut mounts were junk so off to the parts store. A new set of Master Pro for $150, but they looked exactly the same as the Ebay brand pressed-in inserts and all. Oh well, they have a life time warranty and what do you know, the same issue! BOLT-GRIP to the rescue again and a full refund from the parts store. After looking at the stock strut mounts, they actually have pressed-in bolts, not smooth inserts, so it was off to my local service center and I had the stock struts broken down for $30. The stock strut mounts went in like butter with perfect bolt hole alignment (obviously) and both sides finished.
Now for the finished product .... 26" front ride height. For those doing this installation, it took 4" of thread showing below the lock "nut" for my target ride height and please do not forget the Torrington bearings. Adjustment would be a bear with them.
Thanks to Carl at Central Racing Parts (LS1Tech sponser) .... Strange DA STR-S5071 front coil over, 300# Strange Hypercoil spring and set of Torrington bearings. The intention of my install was to pull the stock DeCarbons as a whole and store for a de-mod later, so, also in the photo is a new strut mount and hardware (Ebay) (more about these later) and shock mount bushing (O'Reilly's).
Removing the the stock Decarbon's, I started with the driver's side first since it would be the most difficult. Before removing the steering knuckle bolt, be sure to support the assembly so the brake line does not stretch. I used a simple bungie cord and later a bottle jack.
Before the body mounted Torx bolts can be removed, the brake master cylinder reservoir must be removed. Remove two bolts and it can be moved to the side enough to get a Torx "socket" next to it.
The whole assembly is then removed. Notice that I had already removed the sway bar so the shocks could do their job independently and a bit of front end weight savings at the track. This probably made the install easier.
The new coil over with new strut mount and shock mount bushing.
The new coil over assembly installed.
Now came the issues .... after installing the strut mount "hat", I noticed the bolt holes in the new strut mount did not exactly line up with the bolt holes in the strut mount "hat". A little hole opening with a drill and all was good, so I thought! While torquing the bolts, the bolt inserts began turning in the strut mount. You might notice from the photos that the pressed-in bolt inserts are smooth. That won't be easy to remove. So I went to work on the passenger side. Once again .... the same exact issue .... damn Ebay products ... these were made in Australia! Here is a quick tip on removing the bolts if this issue happens to you or if you need to remove a stripped nut or bolt .... it happens to the best of us. This was a life saver ... BOLT-GRIP Deep Well Set!
So I guess my $60 strut mounts were junk so off to the parts store. A new set of Master Pro for $150, but they looked exactly the same as the Ebay brand pressed-in inserts and all. Oh well, they have a life time warranty and what do you know, the same issue! BOLT-GRIP to the rescue again and a full refund from the parts store. After looking at the stock strut mounts, they actually have pressed-in bolts, not smooth inserts, so it was off to my local service center and I had the stock struts broken down for $30. The stock strut mounts went in like butter with perfect bolt hole alignment (obviously) and both sides finished.
Now for the finished product .... 26" front ride height. For those doing this installation, it took 4" of thread showing below the lock "nut" for my target ride height and please do not forget the Torrington bearings. Adjustment would be a bear with them.

 08-19-2012, 06:39 PM
#3
TECH Resident
Thread Starter
Join Date: Sep 2010
Location: Cartersville, Georgia
Posts: 866
Likes: 0
Received 0 Likes
on
0 Posts
I would have loved to go with the AFCO's, but they were just too pricey for me and, yes, I hope to hit a local 1/8-mile track this Friday night and would like to run Alabama International (Steele) for one of their Sunday TnT's by the end of the month.
08-19-2012, 07:32 PM
#5
TECH Resident
Thread Starter
Join Date: Sep 2010
Location: Cartersville, Georgia
Posts: 866
Likes: 0
Received 0 Likes
on
0 Posts


Trending Topics
 08-21-2012, 09:37 PM
#9
TECH Resident
Thread Starter
Join Date: Sep 2010
Location: Cartersville, Georgia
Posts: 866
Likes: 0
Received 0 Likes
on
0 Posts
08-21-2012, 09:45 PM
#10
TECH Resident
Thread Starter
Join Date: Sep 2010
Location: Cartersville, Georgia
Posts: 866
Likes: 0
Received 0 Likes
on
0 Posts
.... 1.77x's with the stock DeCarbons and spinning well past the tree. Out back, I am running Strange DA coil overs set at 5-extension and 6-compression, but I will go near full loose on the extension to get the tires to dig into the starting line and close to full hard on the compression since I have my fronts on now. Hopefully, it will stop unloading the rear after launching and stop the tire spin for much better 60's. I am also running 27x11.5-15 QTP's on 15x10 RTS's. Did that answer your question about the back? I wasn't sure what you were asking about specifically.
10-02-2012, 02:44 PM
#13
.... 1.77x's with the stock DeCarbons and spinning well past the tree. Out back, I am running Strange DA coil overs set at 5-extension and 6-compression, but I will go near full loose on the extension to get the tires to dig into the starting line and close to full hard on the compression since I have my fronts on now. Hopefully, it will stop unloading the rear after launching and stop the tire spin for much better 60's. I am also running 27x11.5-15 QTP's on 15x10 RTS's. Did that answer your question about the back? I wasn't sure what you were asking about specifically.
M6 or Auto?
I'm running Mad Man's Afco coil overs and an Auto with MT radicals.