Brian Black's X275 TA Build at Midwest Chassis......


 11-28-2012, 03:06 PM
#47
TECH Resident
iTrader: (46)

Join Date: Dec 2001
Location: Some where in the Corn Fields of Illinois
Posts: 821
Likes: 0
Received 0 Likes
on
0 Posts

Outside Pictures!
The logo on the hood is completely air brushed by the painter.....this is all we had time to get done before the LS Fest, so we held off on the rest of the air brushing. The car is going back this weekend to get the rest of the air brushing done on the front end.....
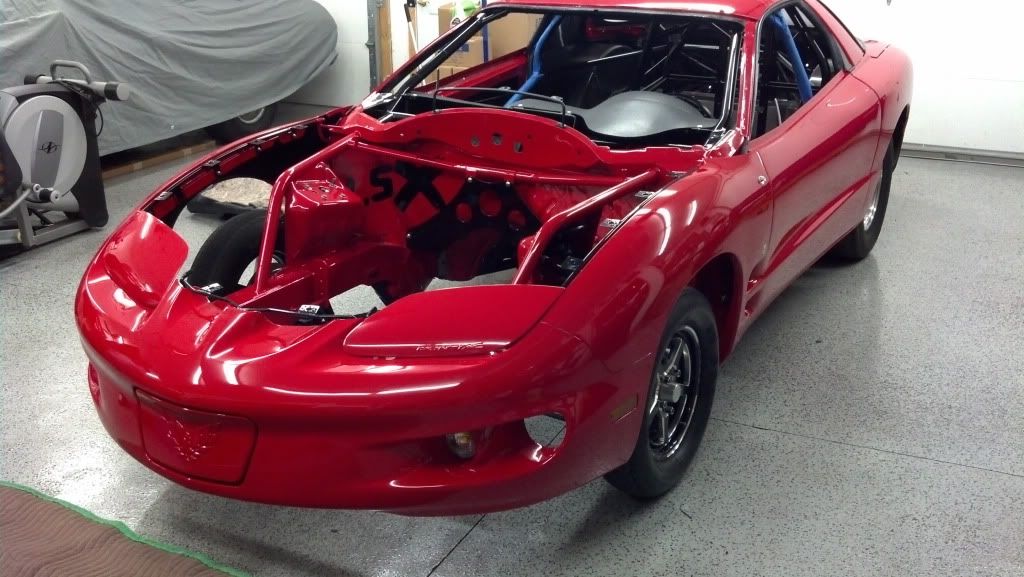
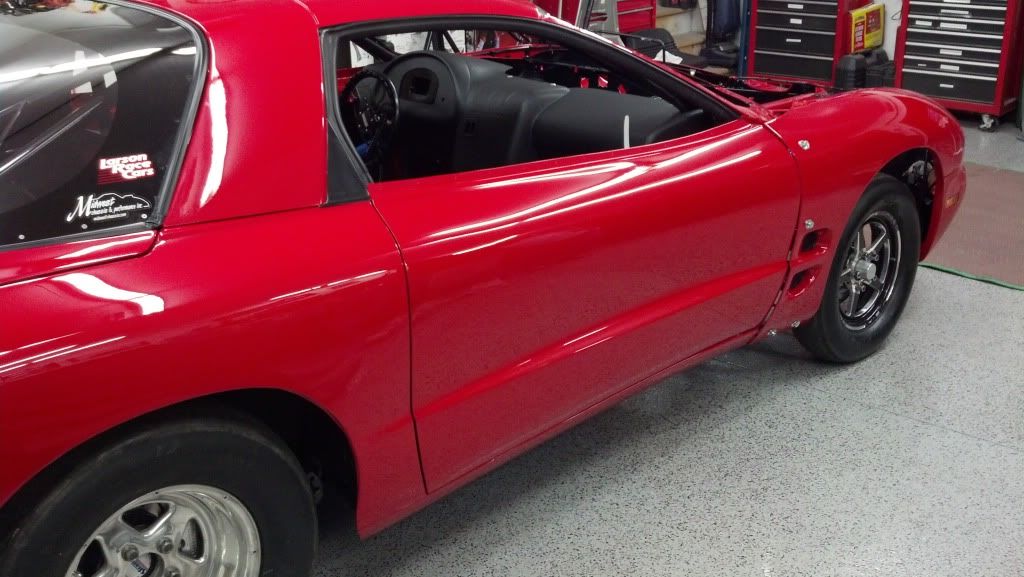
The logo on the hood is completely air brushed by the painter.....this is all we had time to get done before the LS Fest, so we held off on the rest of the air brushing. The car is going back this weekend to get the rest of the air brushing done on the front end.....
Last edited by SMKN TA 95; 01-14-2013 at 09:36 AM.
11-29-2012, 07:56 AM
#51
TECH Resident
iTrader: (46)
Join Date: Dec 2001
Location: Some where in the Corn Fields of Illinois
Posts: 821
Likes: 0
Received 0 Likes
on
0 Posts
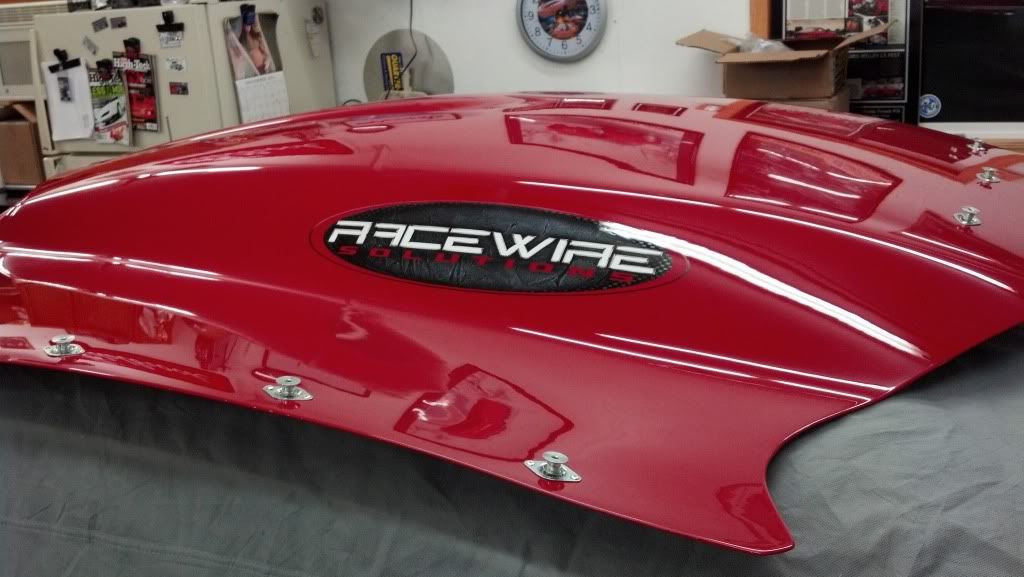
I've had this carbon Joe Van O hood since 2007

Thanks! I will be putting up some more pictures of the assembly process of the car here shortly....and I've got some rearend stuff in there.
11-29-2012, 03:51 PM
#55
TECH Resident
iTrader: (46)
Join Date: Dec 2001
Location: Some where in the Corn Fields of Illinois
Posts: 821
Likes: 0
Received 0 Likes
on
0 Posts
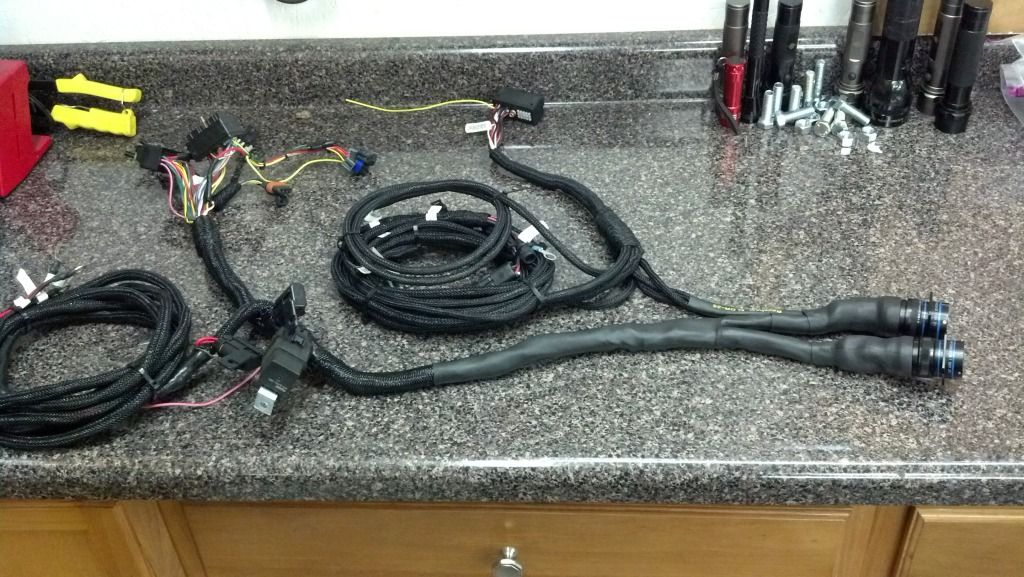
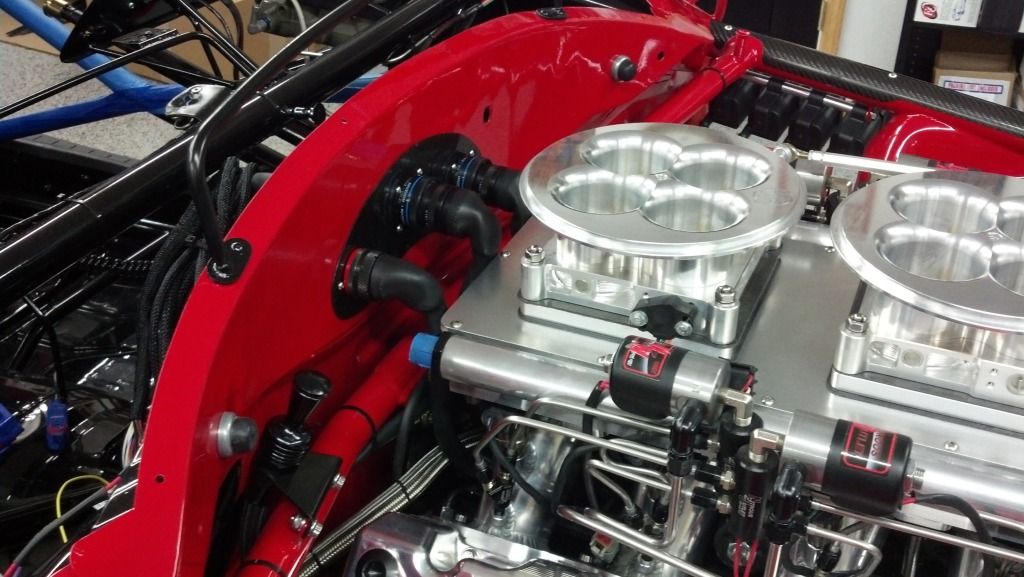
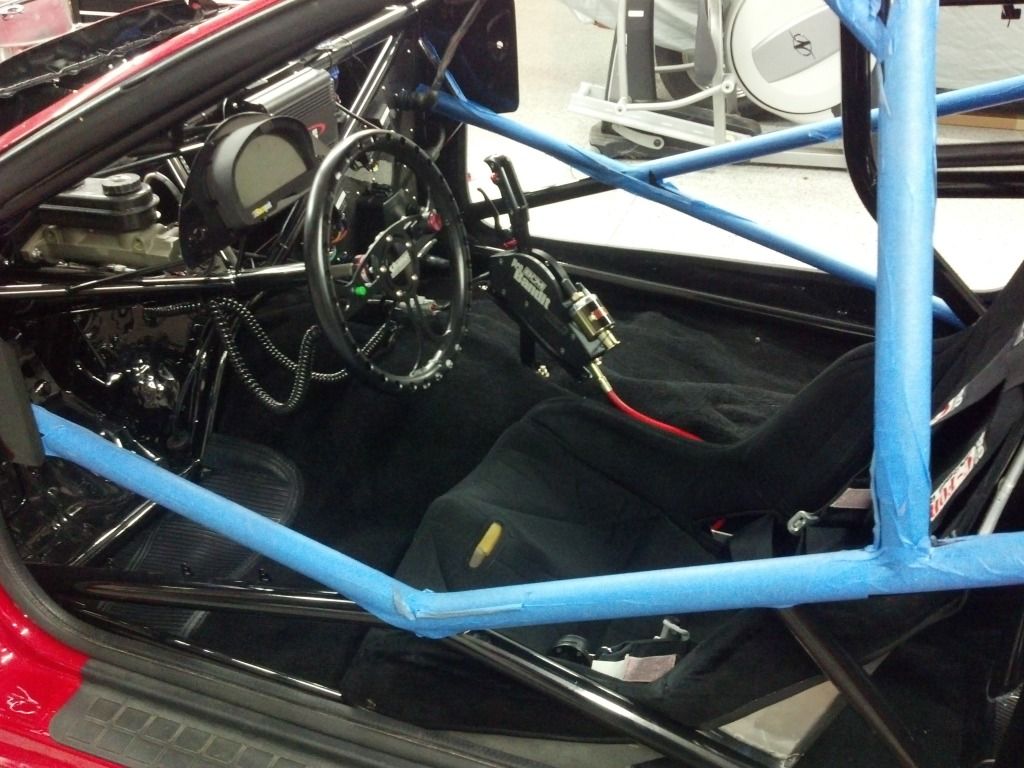
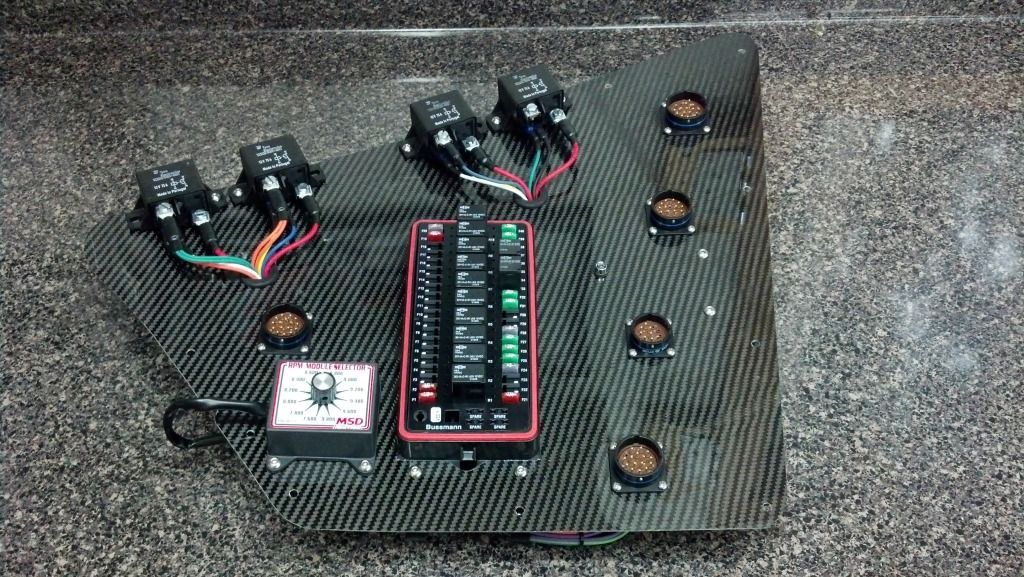
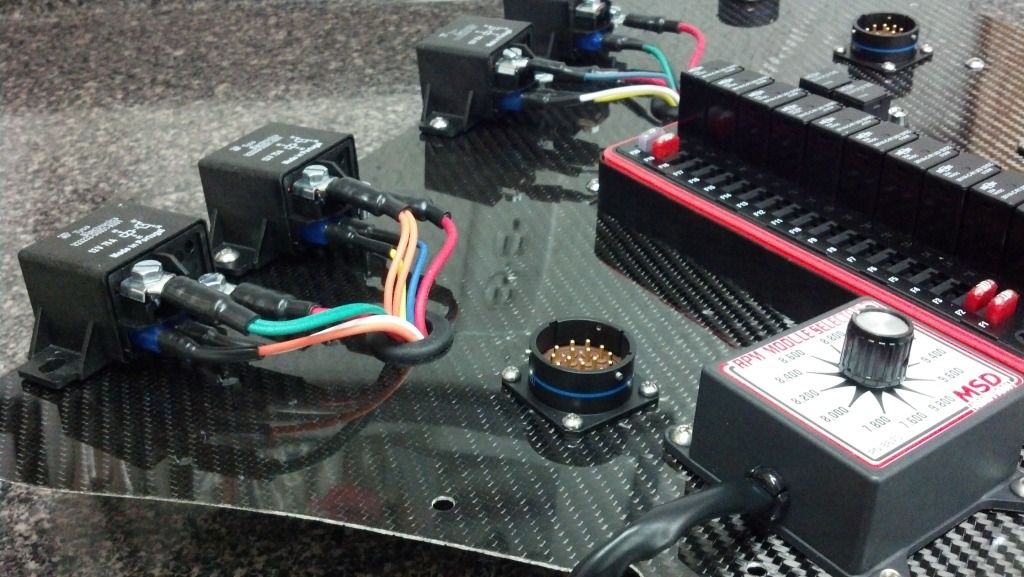
As most of you know, I own a company that builds custom electrical systems for race and street cars. I have been extremely busy with customer builds this year, but I was ready to do something for my own car and a little different than the rest. Since the whole car was torn apart and completely, I decided it was time to to start completely over with the electrical system in my car.
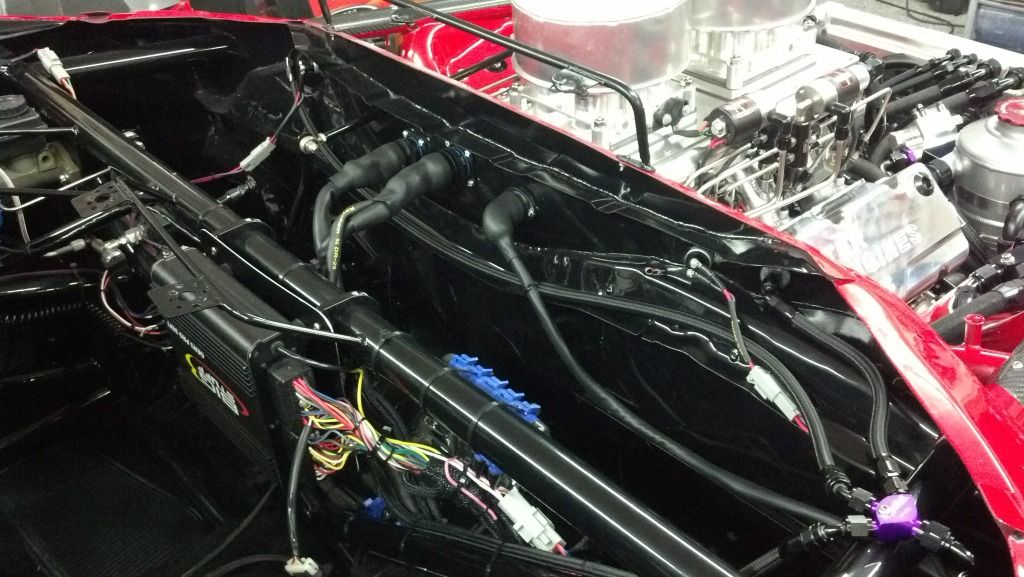
Normally I use Deutsch connectors on my panels, but for my own personal build, I decided to go with Mil-spec flanged connectors in black annodized finish. As I found out, these are a very rare connector to find in the style I was looking for. Definitely not cheap, but added up to a very nice fit and finish. I ended up using these on the panel, and the firewall for the BS3 and nitrous harnesses. I also combined both of my dash and overhead switch panels into one, 11 switch setup above my head.
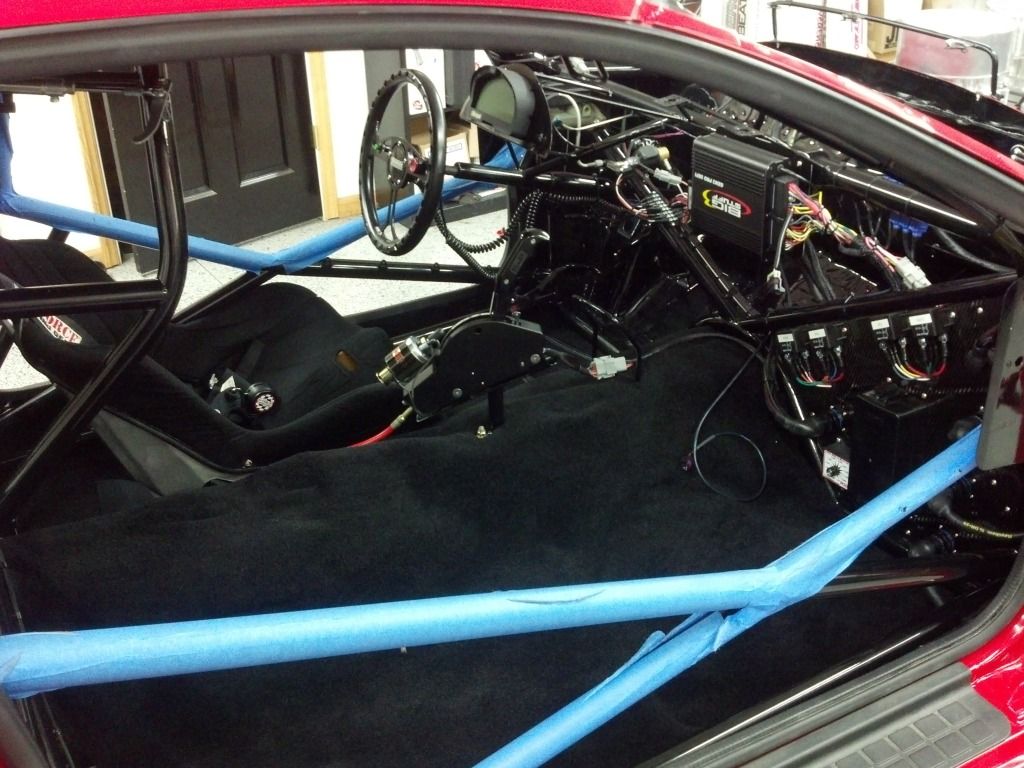
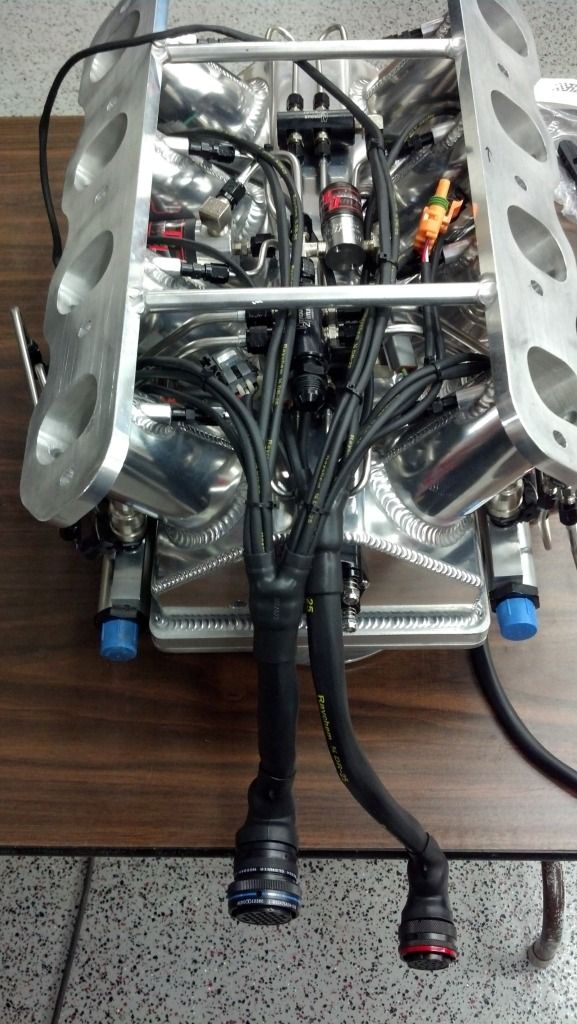
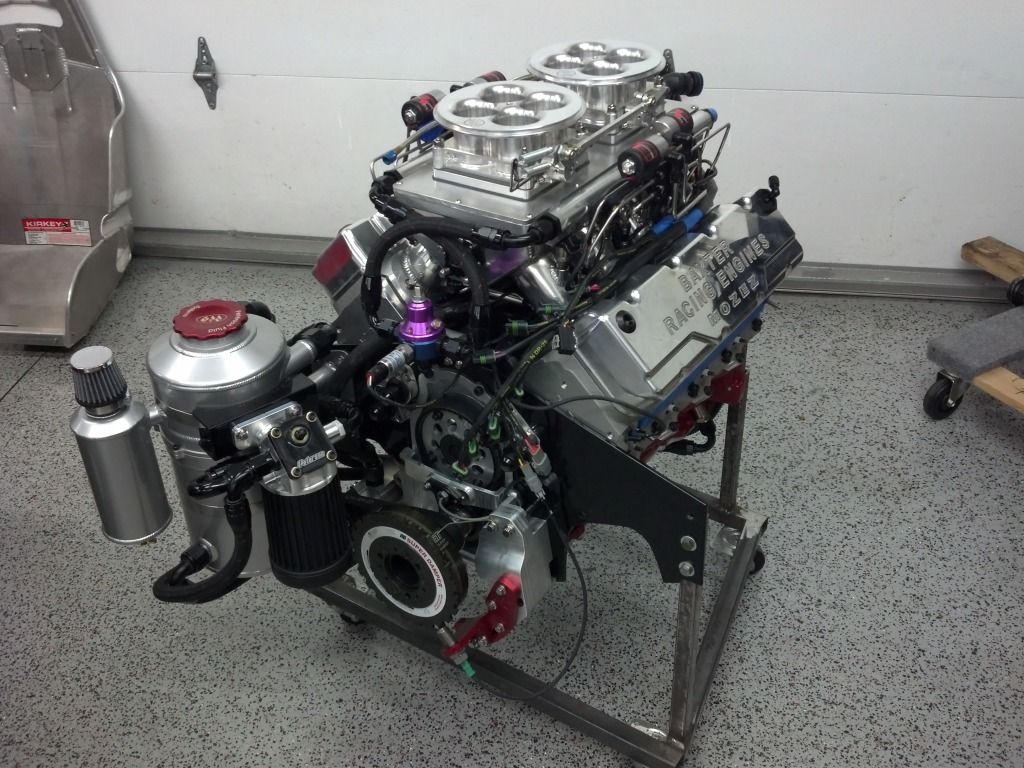
On the BS3 side, I cut the harness and re-pinned it using those black mil-spec connectors. I have it split across two of them due to pinouts, splices etc. Everything BS3/DAE above the valley cover is setup into one connector, while everything below that is in the smaller connector on the right. From the firewall out to the engine, I completely redid the engine harness wiring. Every sensor is re-wired to the proper length for my engine and wiring location so there is no slack. I covered every bit of the EFI harness in Raychem DR-25 heat shrink which is surprisingly flexible. I used this covering along with the expensive raychem heat shrink boots for the firewall and the control panel harnesses themselves. I also switched to the AEM/Firecore COP setup from my stock LS truck coils. Due to the coils needing a new harness, I made new coil harnesses with splices etc from the firewall out to each side. Those pictures will be a little later.
Here is the first set of pictures!
Normally I use Deutsch connectors on my panels, but for my own personal build, I decided to go with Mil-spec flanged connectors in black annodized finish. As I found out, these are a very rare connector to find in the style I was looking for. Definitely not cheap, but added up to a very nice fit and finish. I ended up using these on the panel, and the firewall for the BS3 and nitrous harnesses. I also combined both of my dash and overhead switch panels into one, 11 switch setup above my head.
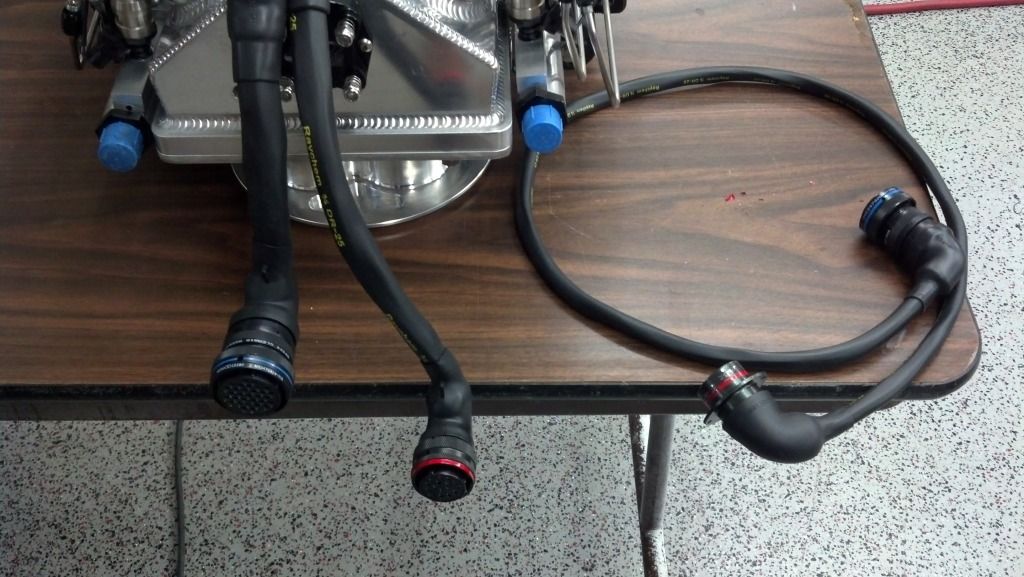
On the BS3 side, I cut the harness and re-pinned it using those black mil-spec connectors. I have it split across two of them due to pinouts, splices etc. Everything BS3/DAE above the valley cover is setup into one connector, while everything below that is in the smaller connector on the right. From the firewall out to the engine, I completely redid the engine harness wiring. Every sensor is re-wired to the proper length for my engine and wiring location so there is no slack. I covered every bit of the EFI harness in Raychem DR-25 heat shrink which is surprisingly flexible. I used this covering along with the expensive raychem heat shrink boots for the firewall and the control panel harnesses themselves. I also switched to the AEM/Firecore COP setup from my stock LS truck coils. Due to the coils needing a new harness, I made new coil harnesses with splices etc from the firewall out to each side. Those pictures will be a little later.
Here is the first set of pictures!
11-29-2012, 03:54 PM
#56
TECH Resident
iTrader: (46)
Join Date: Dec 2001
Location: Some where in the Corn Fields of Illinois
Posts: 821
Likes: 0
Received 0 Likes
on
0 Posts
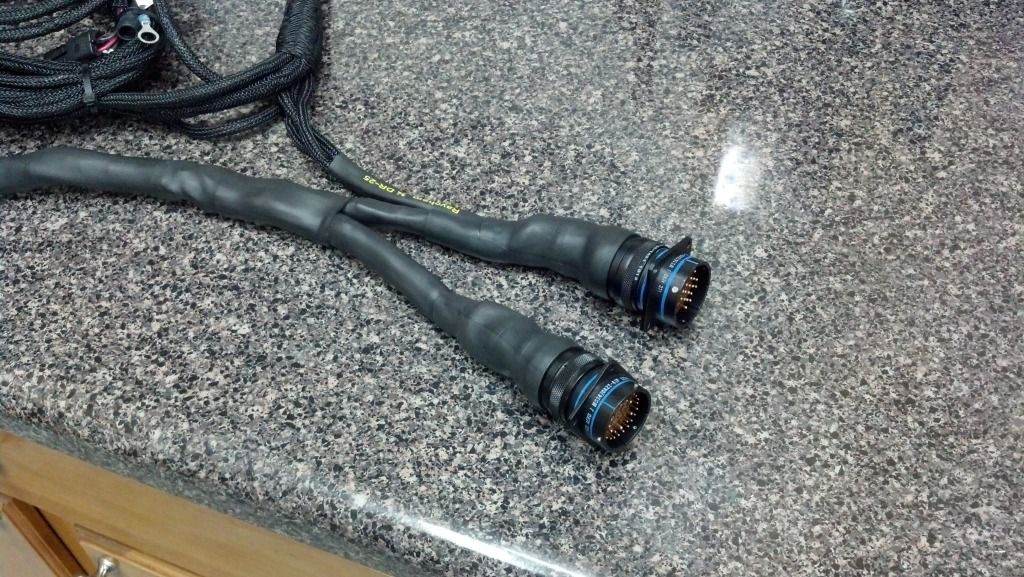
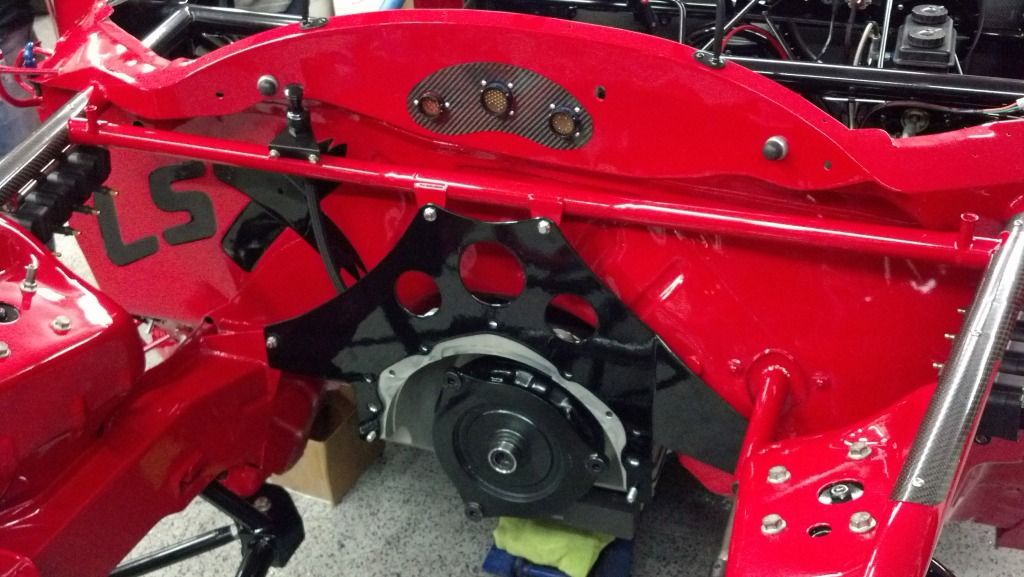
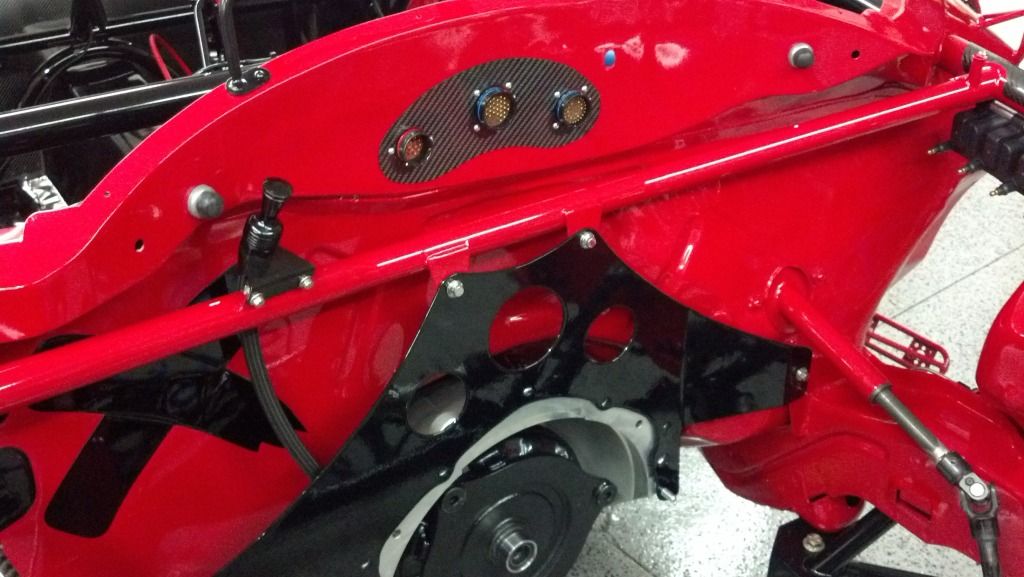
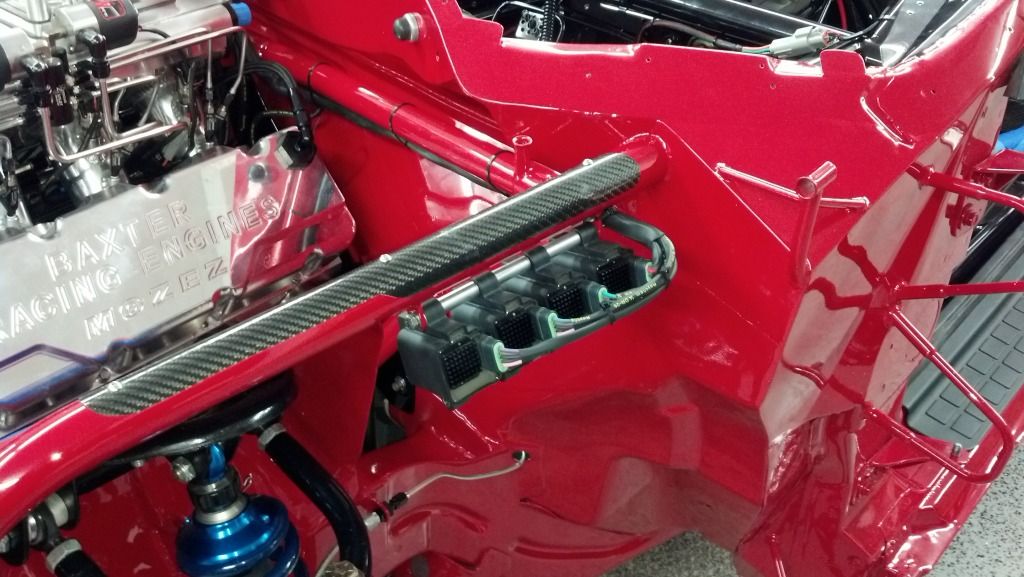
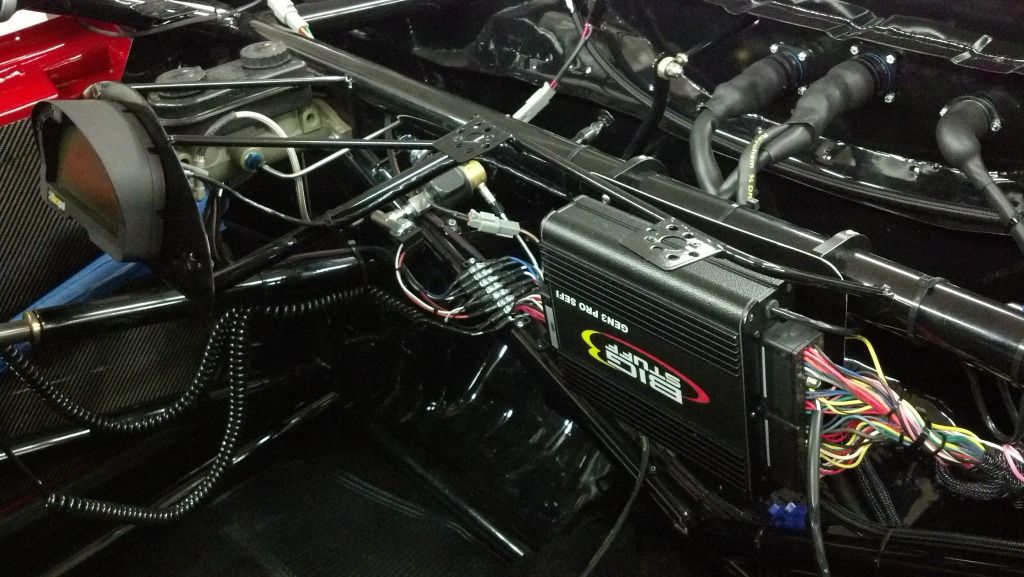
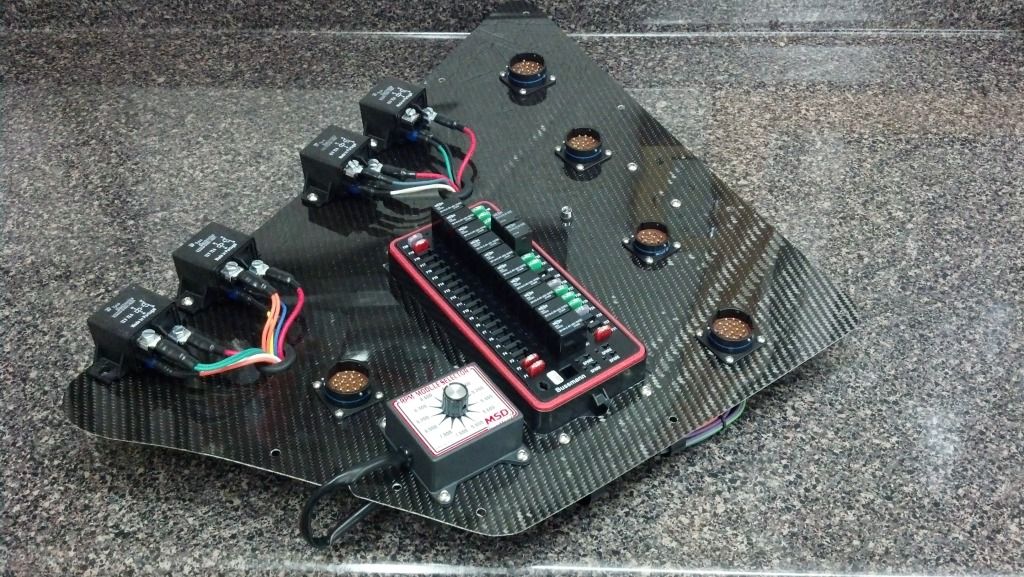
As I mentioned above, here are some pictures of the firewall where both the BS3 harness connectors are, along with the nitrous harness. The last picture is of my new COP wiring harness to run the coils.