
project "Shop Rag" 1965 El Camino drag car build
 05-03-2013, 01:56 PM
#41
10 Second Club

Join Date: Apr 2013
Location: Carlinville, IL
Posts: 317
Likes: 0
Received 0 Likes
on
0 Posts
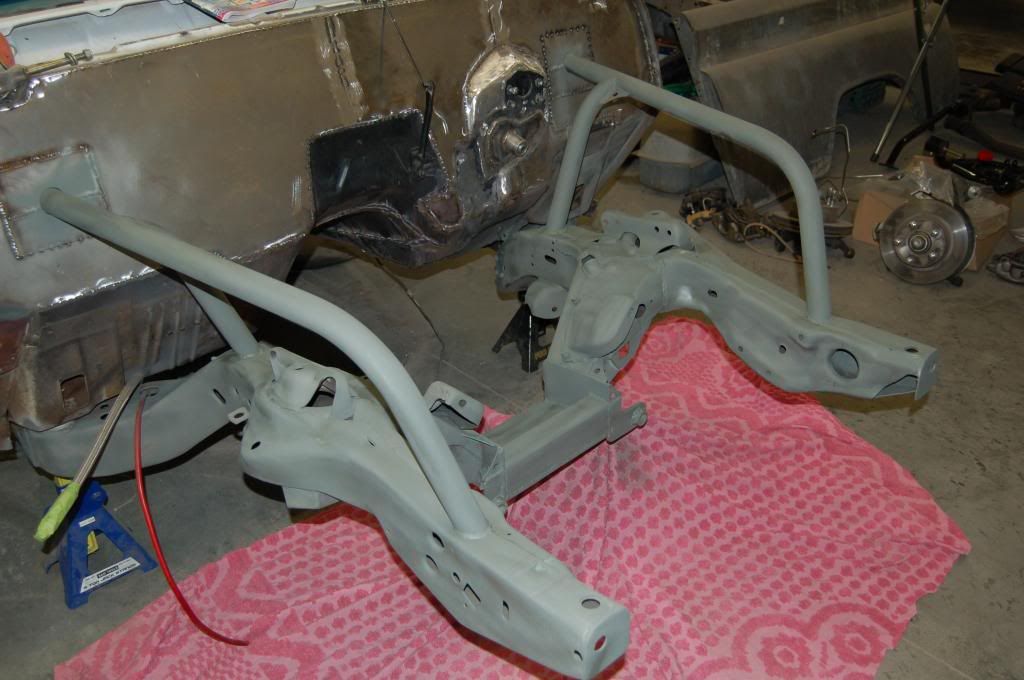
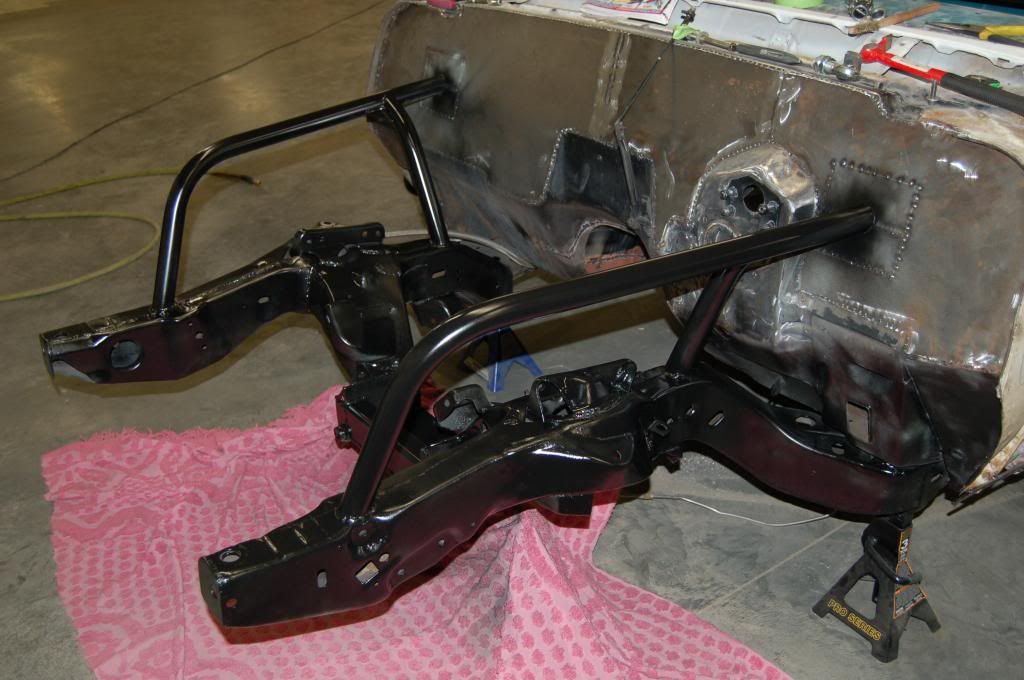
In prep for hanging the front suspension, we got the front end in prime and paint out of rattle cans. We got a good coat of etching primer and followed up with just a light coat of gloss black because it was cool and damp last night, We will go back in a couple of days and scuff it and apply a good final coat of black.


Last edited by 65drag; 06-18-2013 at 08:38 PM.
 05-08-2013, 08:33 AM
#42
10 Second Club
Join Date: Apr 2013
Location: Carlinville, IL
Posts: 317
Likes: 0
Received 0 Likes
on
0 Posts
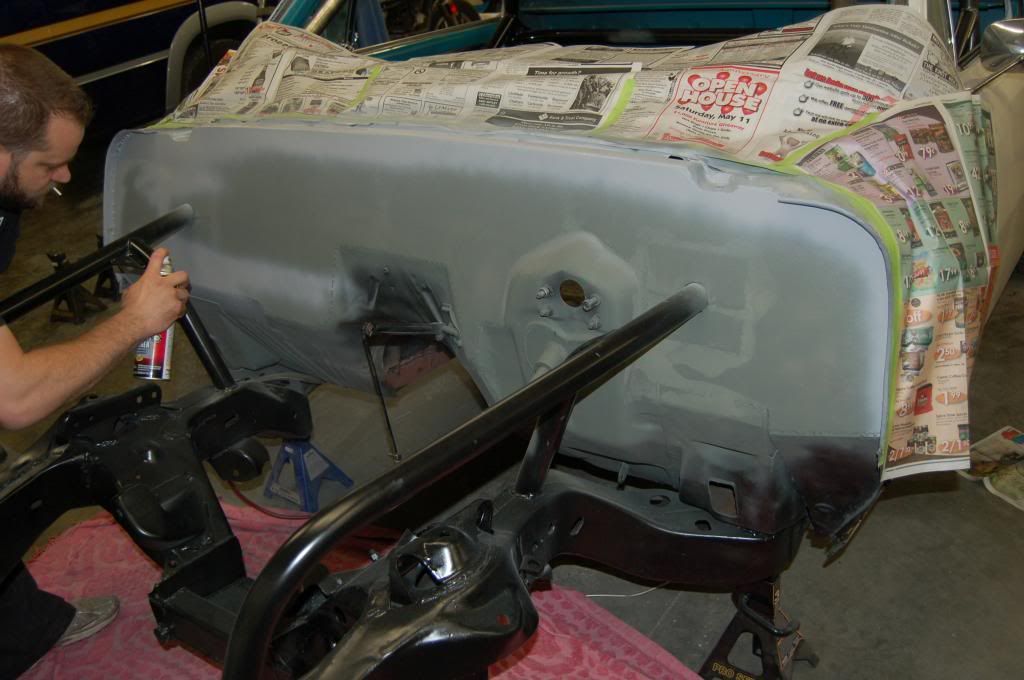
Last Monday night was shop night again and we decided to get the firewall in shape. We smoothed out the welds on the down tube cover plates and spread a little filler around them. We laid down a coat of etching primer them followed it up with a coat of filler primer.


 05-08-2013, 08:33 AM
#43
10 Second Club
Join Date: Apr 2013
Location: Carlinville, IL
Posts: 317
Likes: 0
Received 0 Likes
on
0 Posts
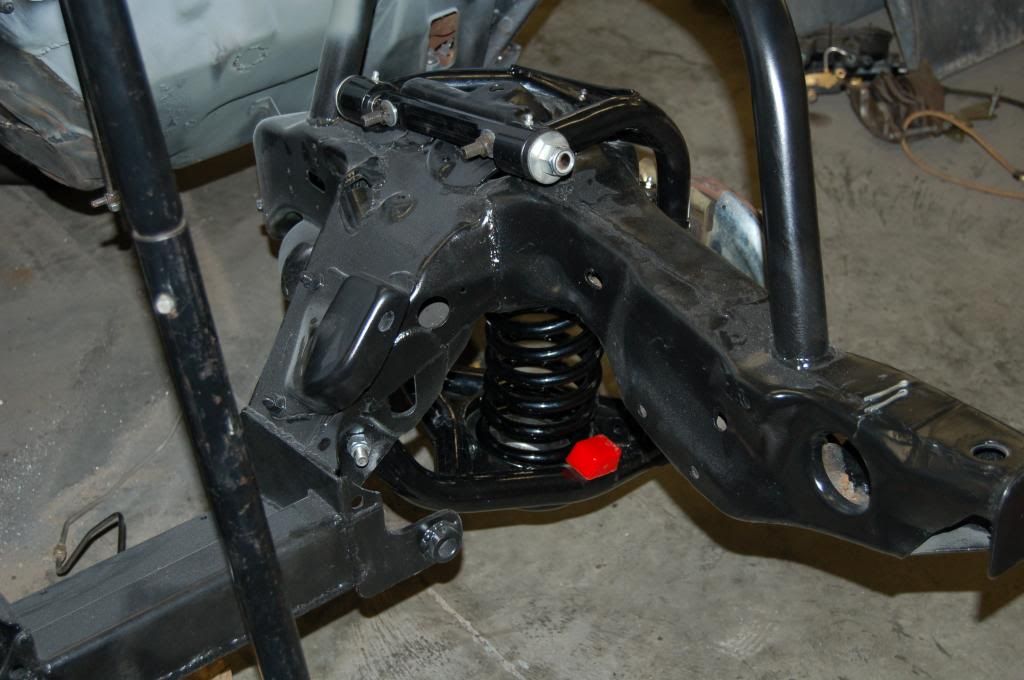
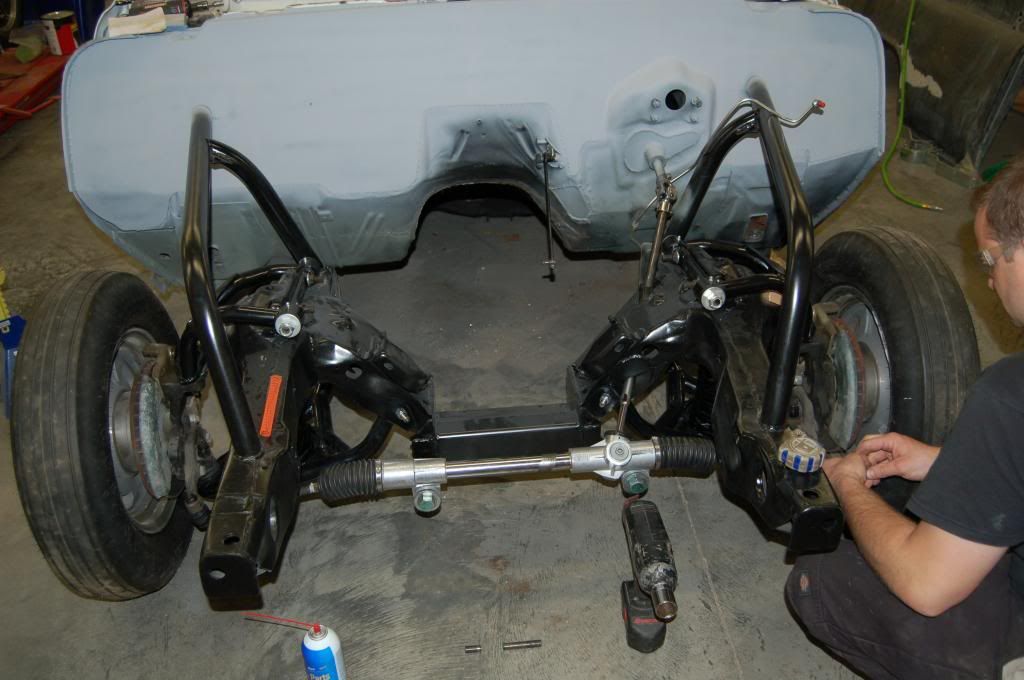
We got the tubular A arms, spindles, and springs hung.
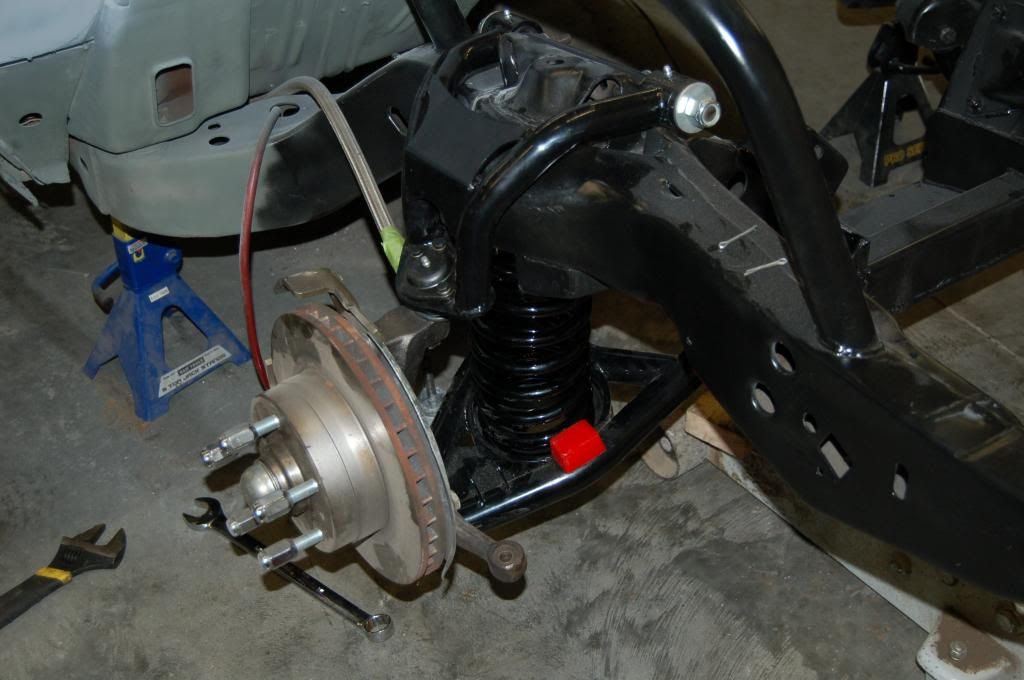
Springs are Moroso Trick drag springs. We had a little trouble putting the drivers side in, once we got that one squared away, the other almost fell into place because we knew what NOT to do on that one.

Springs are Moroso Trick drag springs. We had a little trouble putting the drivers side in, once we got that one squared away, the other almost fell into place because we knew what NOT to do on that one.

Last edited by 65drag; 05-08-2013 at 03:55 PM.
05-08-2013, 08:35 AM
#44
10 Second Club
Join Date: Apr 2013
Location: Carlinville, IL
Posts: 317
Likes: 0
Received 0 Likes
on
0 Posts
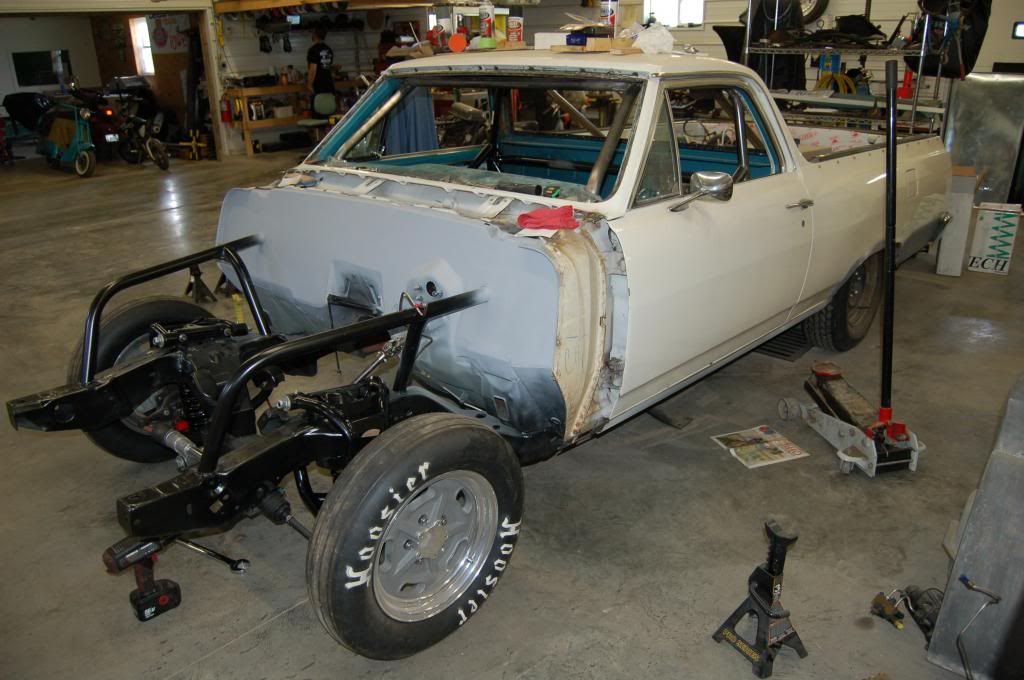
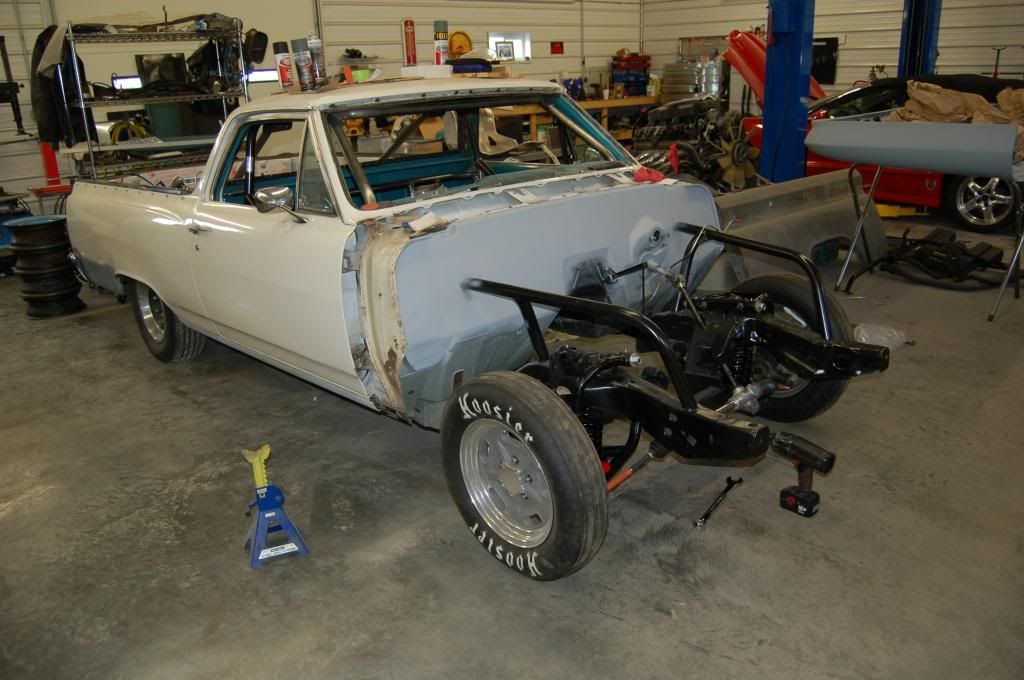
With all that done, we got it back up on all 4s. We still need to finish up the small stuff in the interior, button up the trans tunnel from the underneath side, paint the entire frame front end including the firewall, install the motor and trans with the fiberglass front end hanging so we can check for ride height to see if we need to cut the springs any.


Last edited by 65drag; 05-08-2013 at 04:00 PM.
05-18-2013, 09:56 AM
#45
10 Second Club
Join Date: Apr 2013
Location: Carlinville, IL
Posts: 317
Likes: 0
Received 0 Likes
on
0 Posts
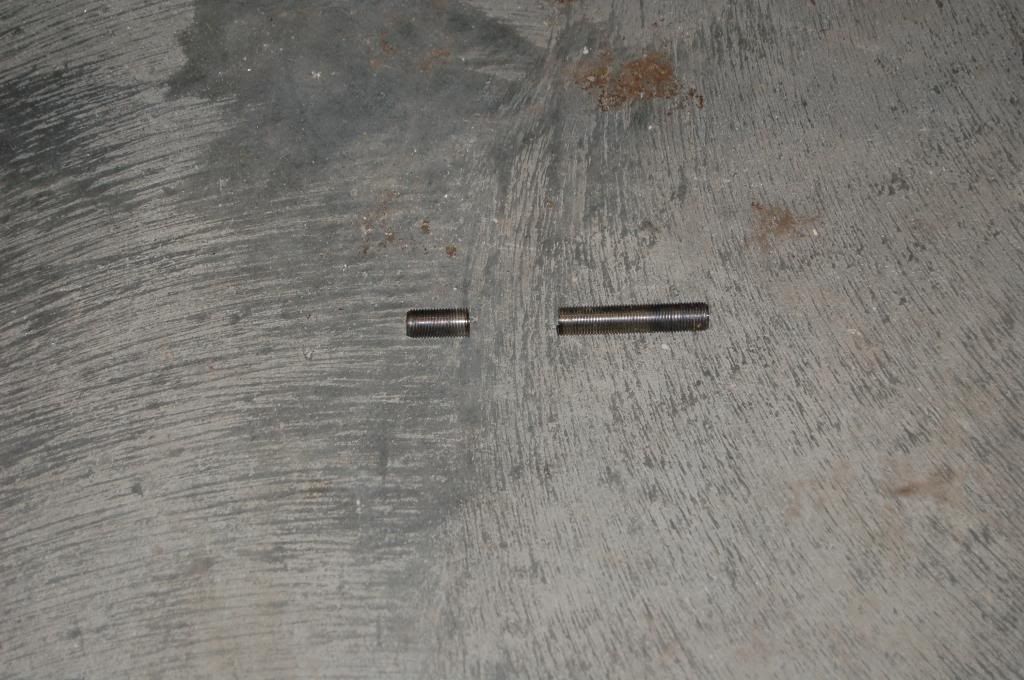
We had originally bought this rack and pinion for a 1929 Ford 2 door sedan project that we sold before we got around to starting on it. This rack is for a Mustang II and is a little long for our needs so we cut off the excess threaded portion. Since we had to offset the rack to fit the steering rod, you can see how much of each end we cut off.

 05-18-2013, 09:57 AM
#46
10 Second Club
Join Date: Apr 2013
Location: Carlinville, IL
Posts: 317
Likes: 0
Received 0 Likes
on
0 Posts
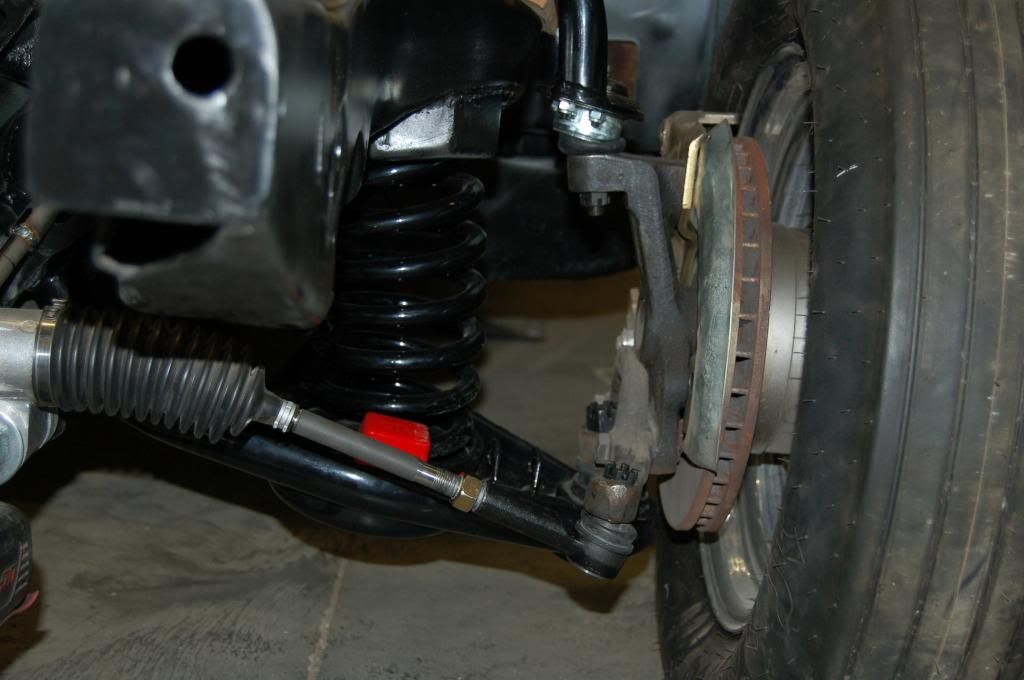
Chevy steering arms and Ford ball joints don't quite mix. Luckily the balljoints are larger so we can ream out the steering arms for a nice snug fit.
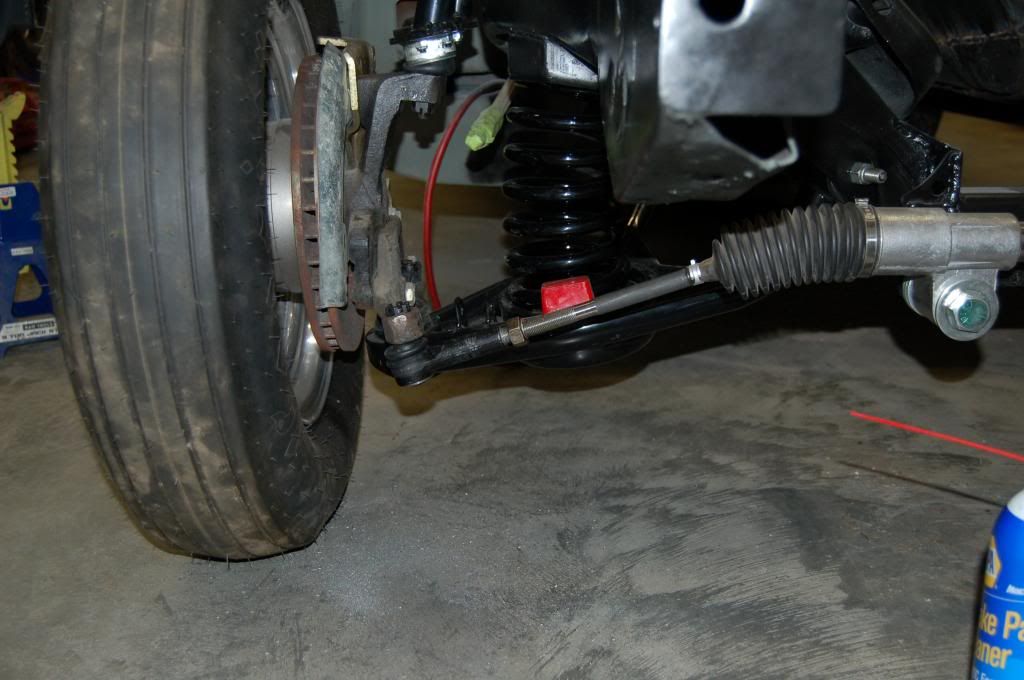
Clearance on the steering rod is close but will work just fine.
Overall fit of the entire setup worked out well for guessing on how to do this. If Joe has his way, eventually he would like a 65 Chevelle as a team car and we can use this one for a pattern.

Clearance on the steering rod is close but will work just fine.

Overall fit of the entire setup worked out well for guessing on how to do this. If Joe has his way, eventually he would like a 65 Chevelle as a team car and we can use this one for a pattern.
 05-22-2013, 07:50 PM
#47
10 Second Club
Join Date: Apr 2013
Location: Carlinville, IL
Posts: 317
Likes: 0
Received 0 Likes
on
0 Posts
Monday night we kept pecking away at the Shop Rag. We made a cover plate for the steering column where it comes through the dash, and got the shifter mounted.
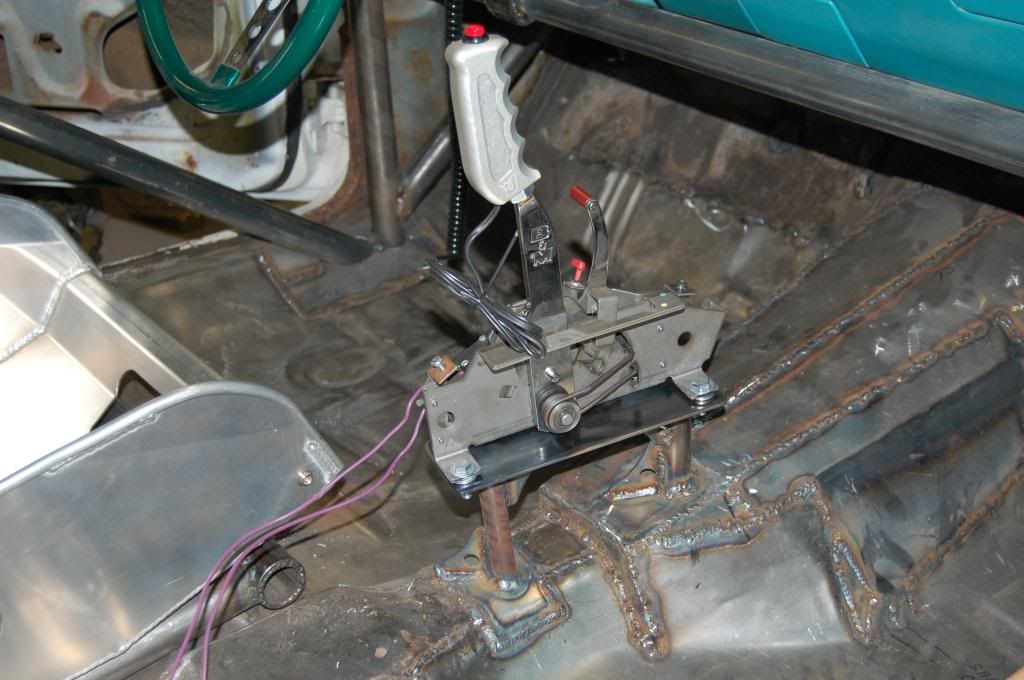
We're having a lot of fun doing this build, but fabrication is a time killer. I wish we had more time to spend all at once so things would go quicker.
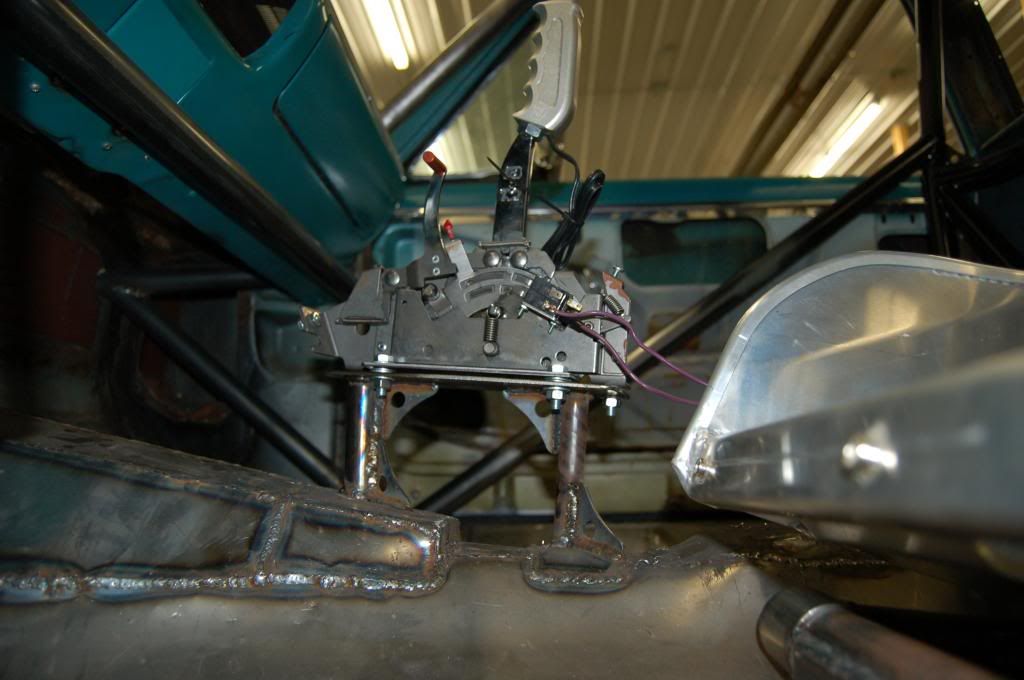

We're having a lot of fun doing this build, but fabrication is a time killer. I wish we had more time to spend all at once so things would go quicker.
 05-29-2013, 05:25 PM
#48
10 Second Club
Join Date: Apr 2013
Location: Carlinville, IL
Posts: 317
Likes: 0
Received 0 Likes
on
0 Posts
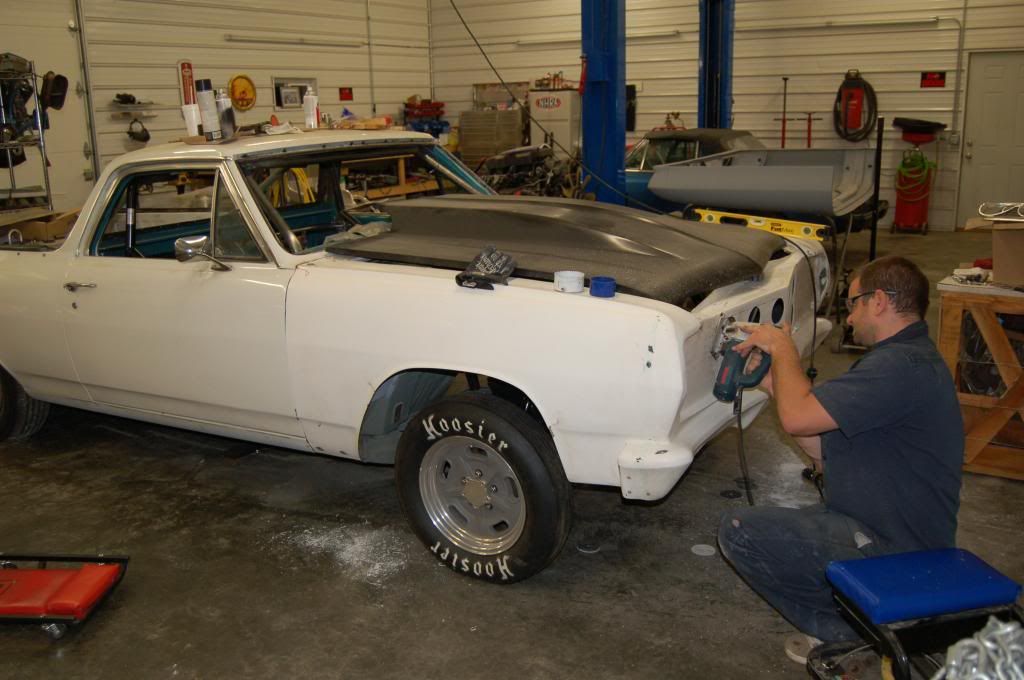
We hit it again last night and got the final fitment of the front end with Dzus fasteners in place and we started putting cooling holes in the grill for the radiator.
I used a 3 1/2" hole saw to make the holes.
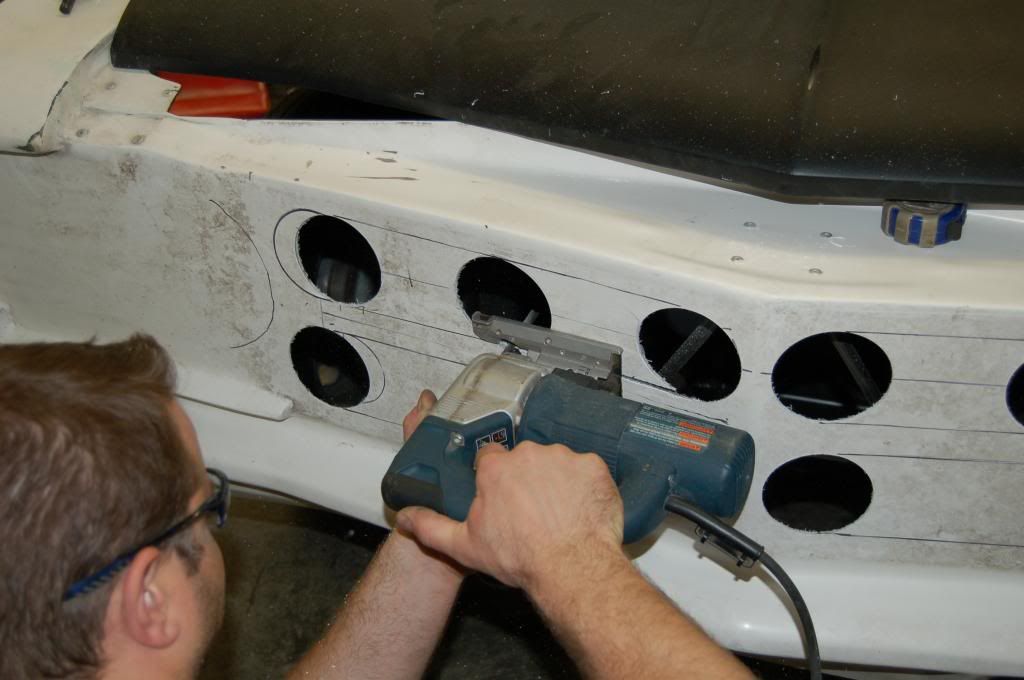

I used a 3 1/2" hole saw to make the holes.
 05-29-2013, 05:28 PM
#49
10 Second Club
Join Date: Apr 2013
Location: Carlinville, IL
Posts: 317
Likes: 0
Received 0 Likes
on
0 Posts
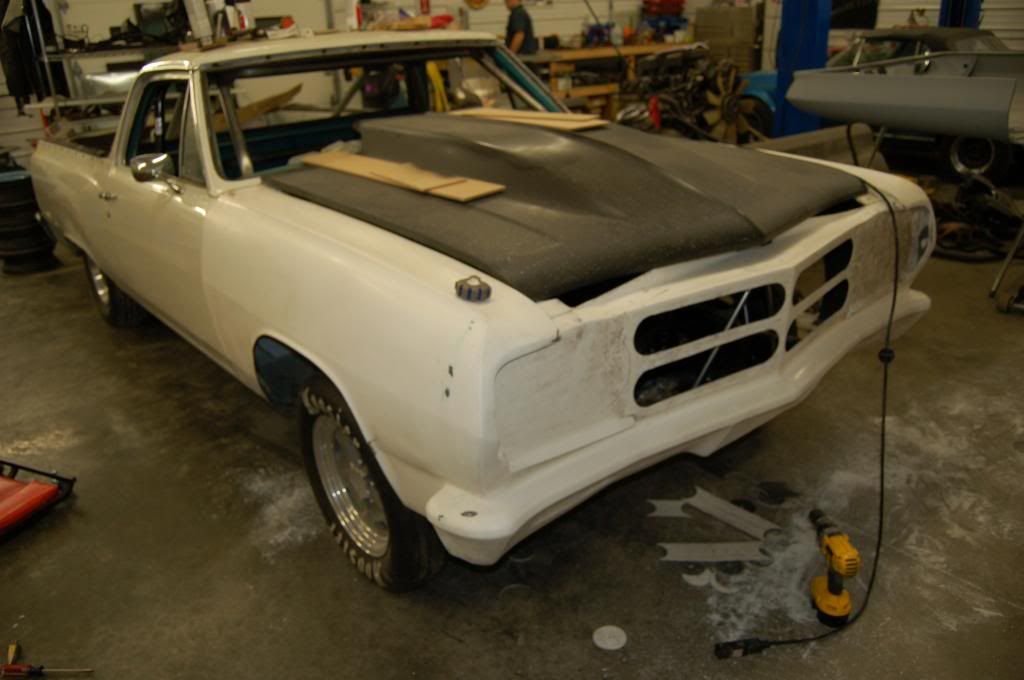
When I had all the holes done, I stood back to look and found I had drilled one of the holes off center, WAH-wah!
Joe suggested we just cut a big oval to cover them all and it turned out fine. We should have plenty of air flow now. We plan on bolting the original grill and headlight rings back in place so you won't really notice the holes.
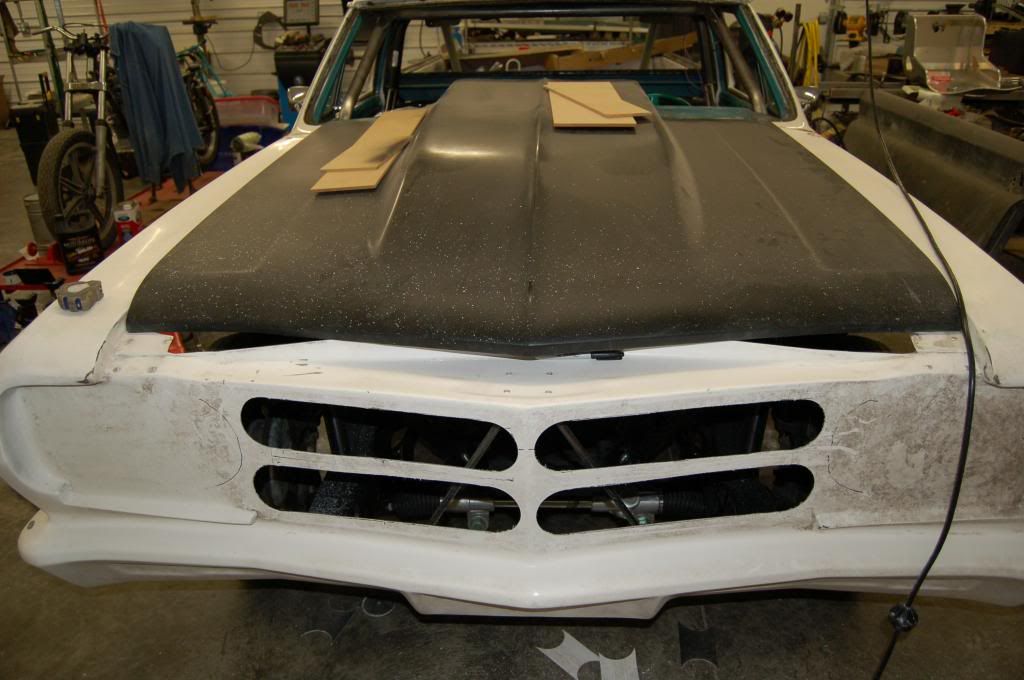

Joe suggested we just cut a big oval to cover them all and it turned out fine. We should have plenty of air flow now. We plan on bolting the original grill and headlight rings back in place so you won't really notice the holes.

 06-01-2013, 12:40 AM
#51
Thanks. I agree. I am very pleased with how this build is going. I am ready to be done with it and move on to the next project.
I started porting the ls3 vic.jr. carb intake yesterday. These intakes are all cast with bosses for the injectors. The carb intakes are just not drilled. These bosses protrude into the top of the runners severely, so I am grinding all the aluminum out in hopes to not hurt the flow into the cnc ported heads. I will post some pics of how i made an intake port template to port match the intake to the heads.
I hope to start bodywork next week. Once this thing is painted, it will come together quick.
06-02-2013, 09:08 AM
#52
10 Second Club
Join Date: Apr 2013
Location: Carlinville, IL
Posts: 317
Likes: 0
Received 0 Likes
on
0 Posts
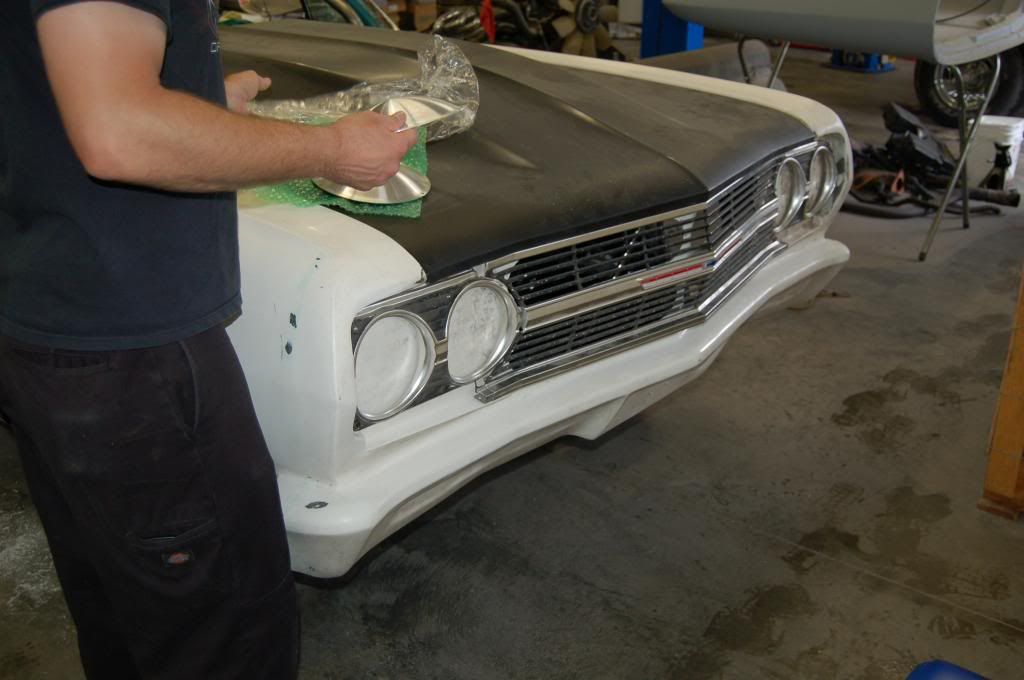
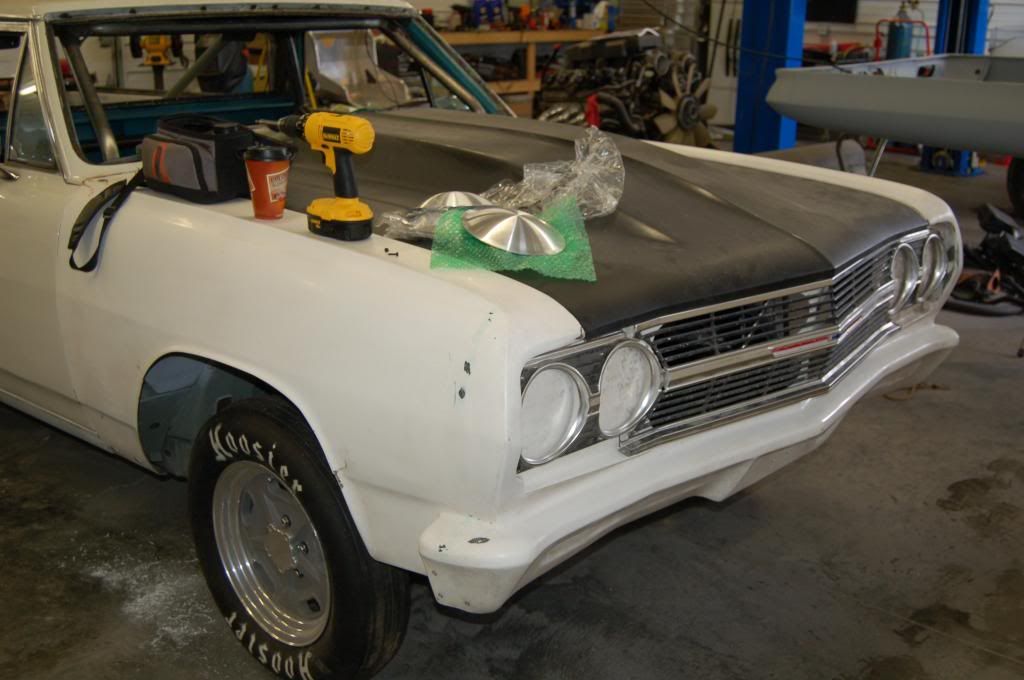
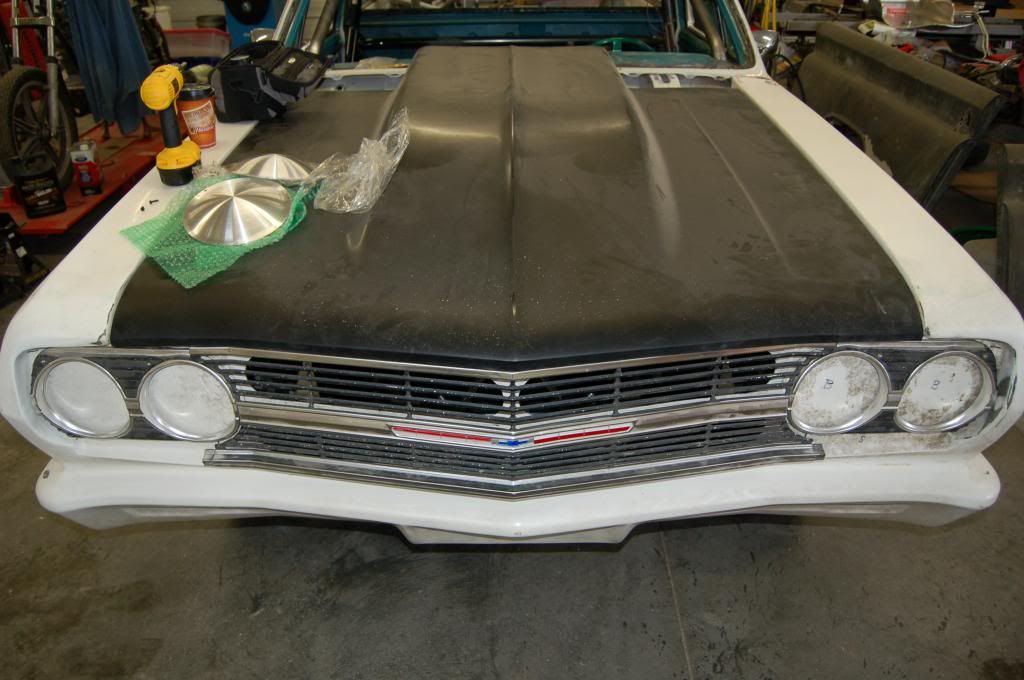
Ok, we got the original grill and headlight rings mounted and they will blend in nicely with the front end once it is all painted. The whole car will be satin black and the trim pieces will be satin silver. A friend of ours did his 55 Chevy in that scheme and it looks killer.


Last edited by 65drag; 06-02-2013 at 09:14 AM.
06-02-2013, 09:12 AM
#53
10 Second Club
Join Date: Apr 2013
Location: Carlinville, IL
Posts: 317
Likes: 0
Received 0 Likes
on
0 Posts
The Moon disc Joe is holding above and shown here laying on the car is a set I picked up from eBay meant to be dog dishes for steelies but the guy never used them. They are 7" diameter so we'll cut them down a little to fit behind the headlight rings for that old school look.

 06-18-2013, 04:56 AM
#54
10 Second Club
Join Date: Apr 2013
Location: Carlinville, IL
Posts: 317
Likes: 0
Received 0 Likes
on
0 Posts
Things have slowed down on the build because we are working on the remodeling the front of our building. We decided not to go with the Moon mini discs for headlight replacement. Although they would look cool, their a little big still for what we need so we'll go with headlight decals.
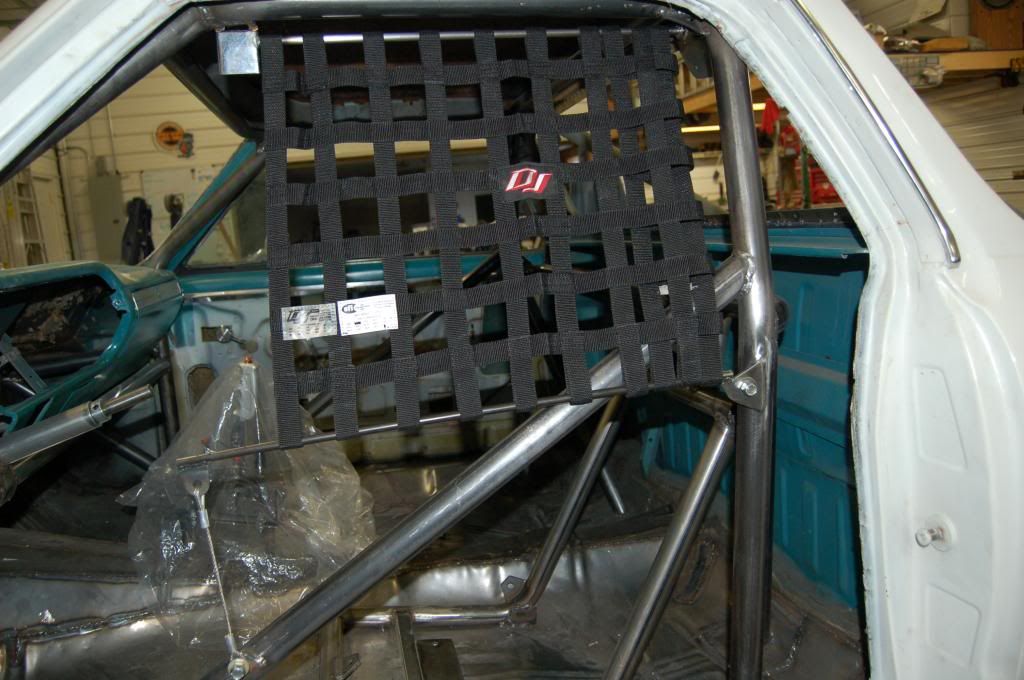
We got the window net installed which takes a pretty good amount of work itself because it comes as a generic kit that you have to customize for your installation. Again, as with the cage, these are meant for a full sized sedan or coupe not an El Camino but we made the best of it. You can see at the back of the net that we folded the excess back on itself rather than opting to cut off the excess.
We got the window net installed which takes a pretty good amount of work itself because it comes as a generic kit that you have to customize for your installation. Again, as with the cage, these are meant for a full sized sedan or coupe not an El Camino but we made the best of it. You can see at the back of the net that we folded the excess back on itself rather than opting to cut off the excess.
 06-22-2013, 04:08 PM
#55
10 Second Club
Join Date: Apr 2013
Location: Carlinville, IL
Posts: 317
Likes: 0
Received 0 Likes
on
0 Posts
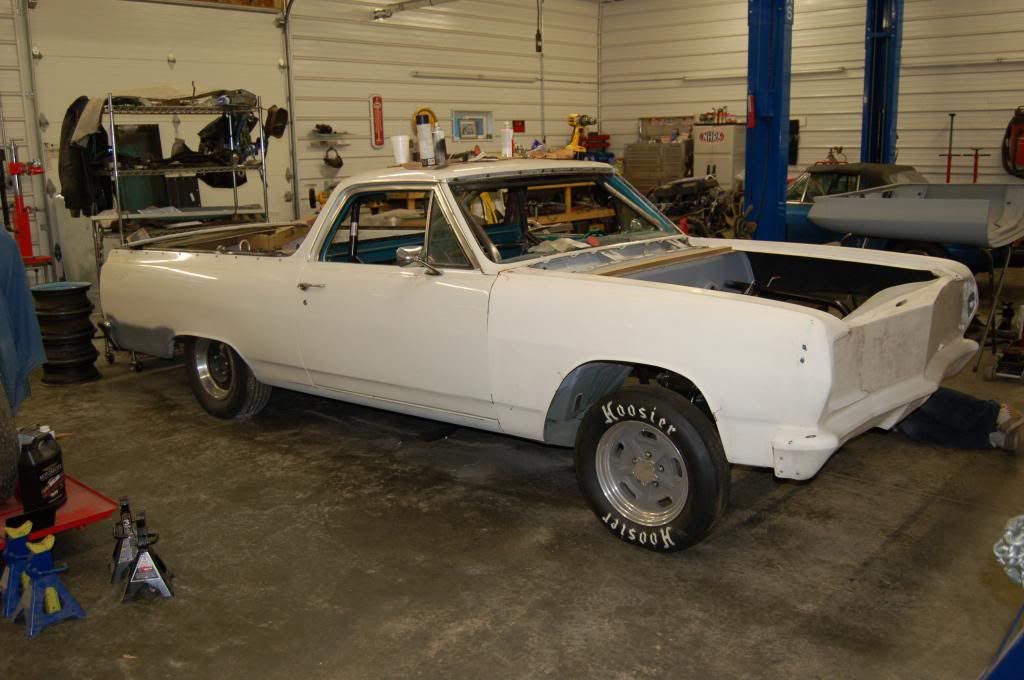
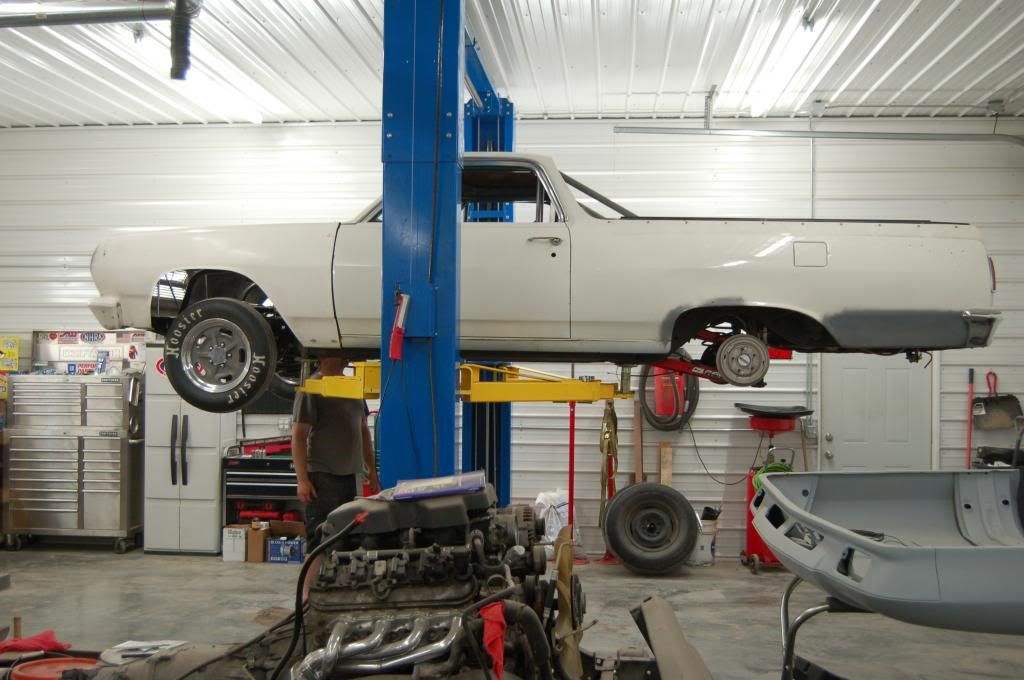
We put it up on the lift for several reasons. We need to do bodywork to the inside of the rear wheel arches for better clearance on the slicks, replace body bushings with steel, scrape and clean the undercarriage in prep for undercoating, finish welding up the trans tunnel from underneath to close up the gaps at the floor pan, and do a general overall inspection.
The fuel line, filter and pump are on there from when Joe built this as a street car and they will suffice for the race car.
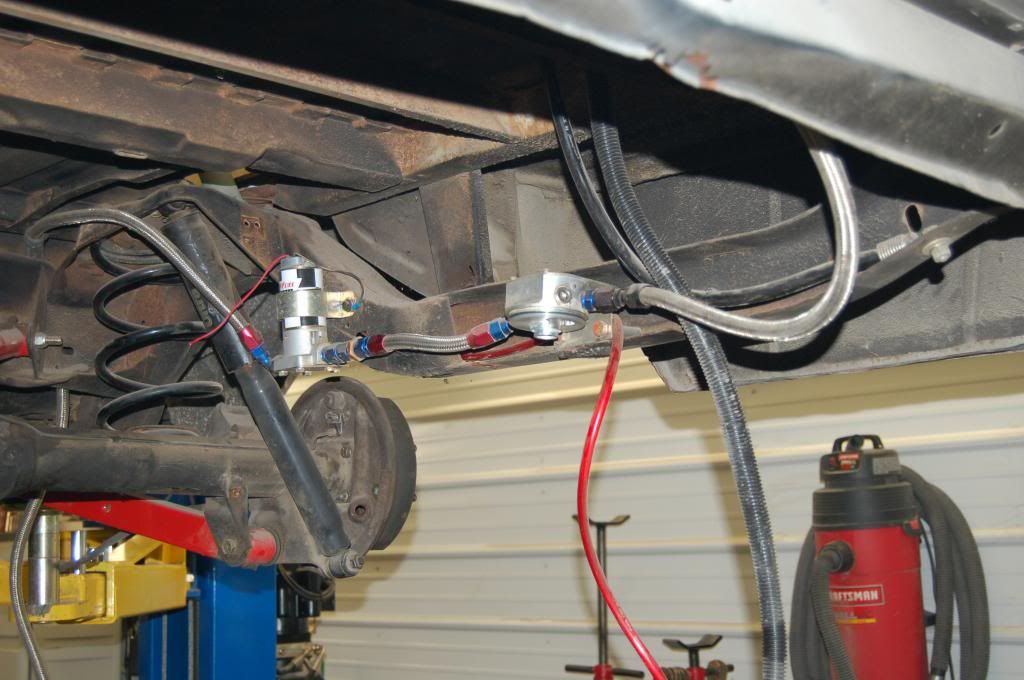

The fuel line, filter and pump are on there from when Joe built this as a street car and they will suffice for the race car.
 06-22-2013, 04:11 PM
#56
10 Second Club
Join Date: Apr 2013
Location: Carlinville, IL
Posts: 317
Likes: 0
Received 0 Likes
on
0 Posts
Before and after of closing up the gaps.
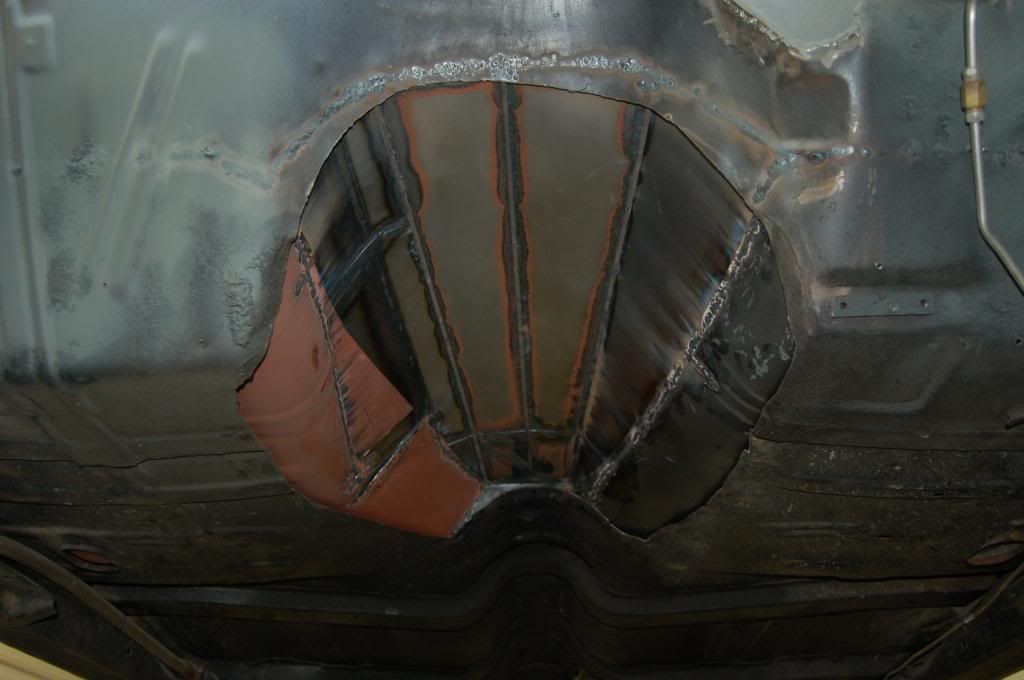
We didn't bother to stitch the entire perimeter, just got everything to fit tight and we will seam seal the edges to make it fluid tight.
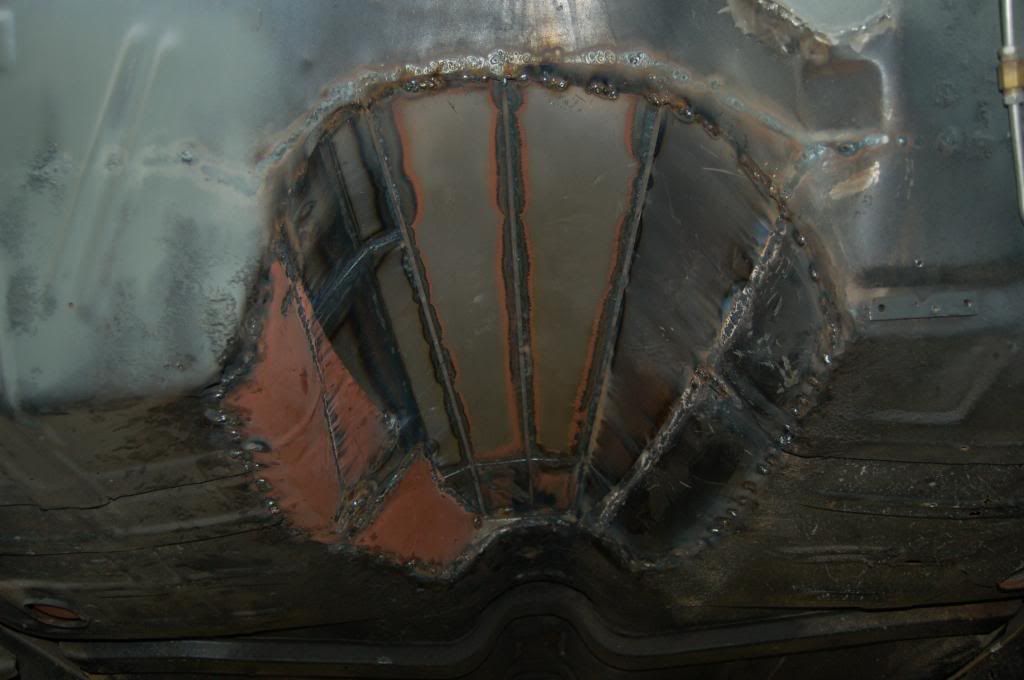

We didn't bother to stitch the entire perimeter, just got everything to fit tight and we will seam seal the edges to make it fluid tight.
 07-14-2013, 11:47 AM
#57
10 Second Club
Join Date: Apr 2013
Location: Carlinville, IL
Posts: 317
Likes: 0
Received 0 Likes
on
0 Posts
Kinda been sidetracked here for a while with other projects. While we had it up on the lift, we discovered that with weight off of the front tires (ie wheelie) the frame still had a small amount of flex in it, and the way we had the steering shaft set up with a single ujoint the steering got in a little bit of a bind. Our fix was to replace the single ujoint with a double ujoint which allows the steering shaft to move in four arcs simultaneously freeing up the bind.
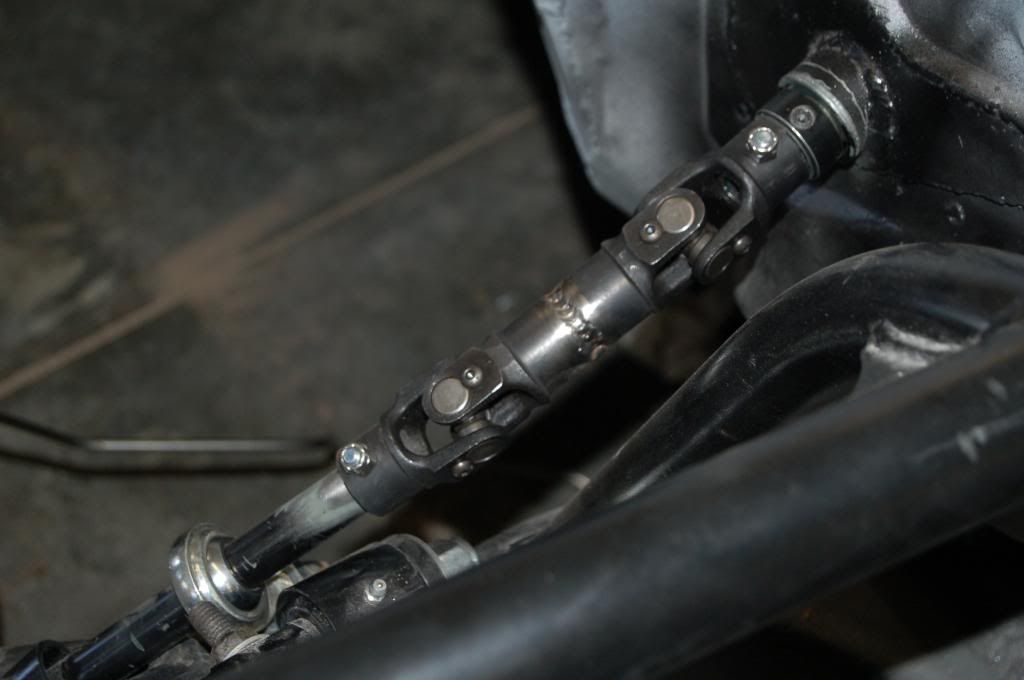
We made the double ujoint by welding two ujoints together with a piece of steering shaft inserted for extra strength. If you build one of these, be sure to "phase" the ujoints so they don't fight each other when rotated. We could have bought one of these ready made but we weren't sure how far they would need to be spaced apart until we cut out the original and saw what we had to work with. I had envisioned the them having a longer shaft between them but it did not work out that way. We also had to shorten up the steering column at the firewall by about an inch for this setup to work.

We made the double ujoint by welding two ujoints together with a piece of steering shaft inserted for extra strength. If you build one of these, be sure to "phase" the ujoints so they don't fight each other when rotated. We could have bought one of these ready made but we weren't sure how far they would need to be spaced apart until we cut out the original and saw what we had to work with. I had envisioned the them having a longer shaft between them but it did not work out that way. We also had to shorten up the steering column at the firewall by about an inch for this setup to work.

Last edited by 65drag; 08-10-2013 at 09:47 AM.
07-14-2013, 11:58 AM
#58
10 Second Club
Join Date: Apr 2013
Location: Carlinville, IL
Posts: 317
Likes: 0
Received 0 Likes
on
0 Posts
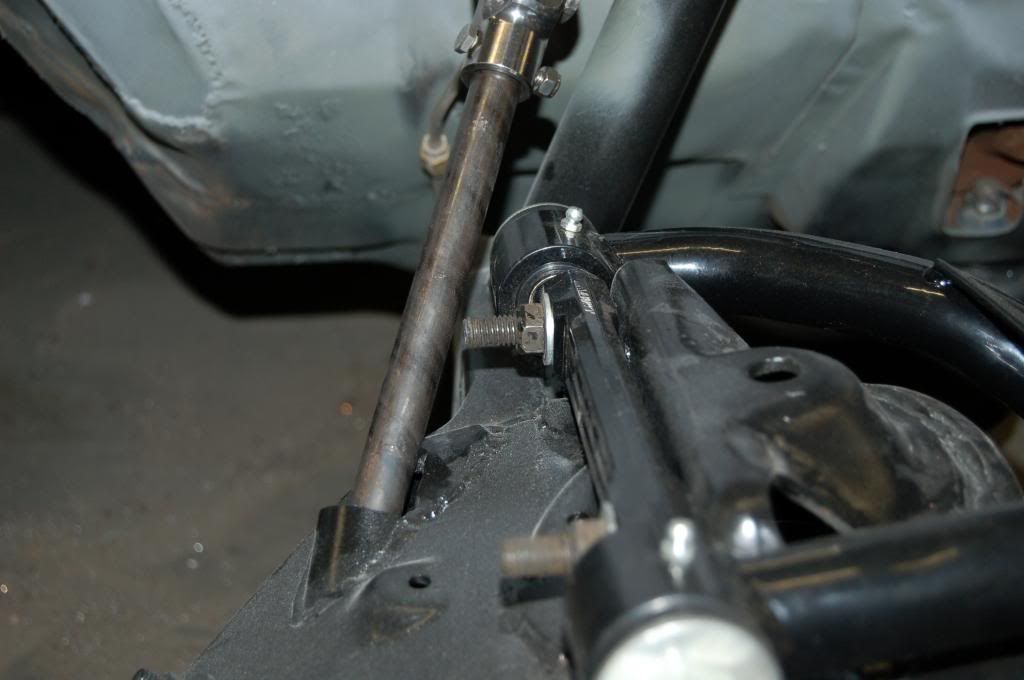
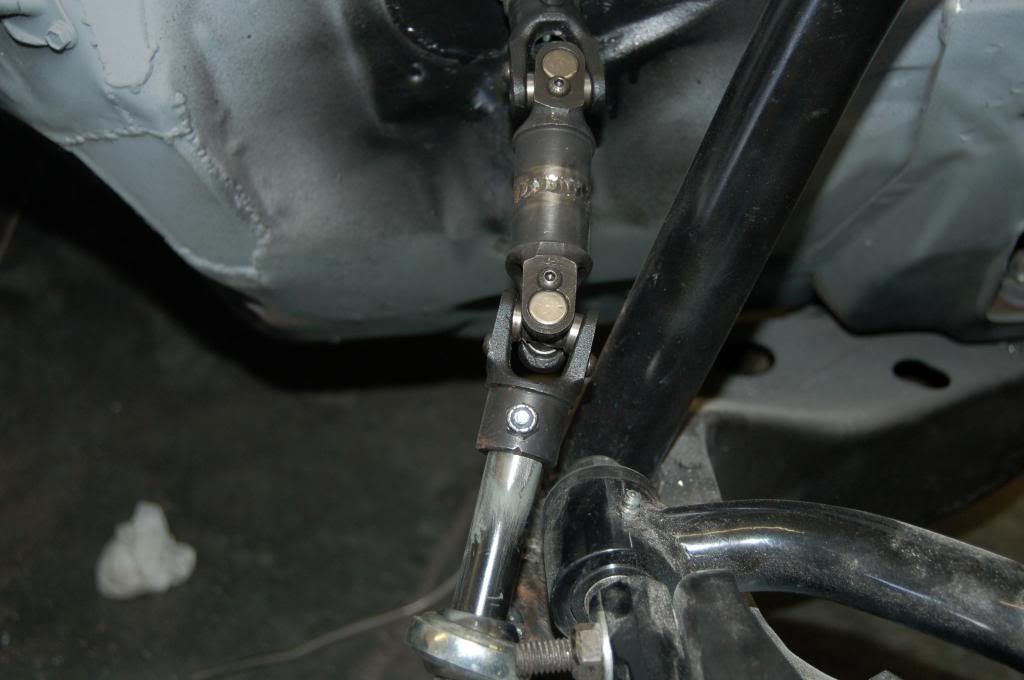
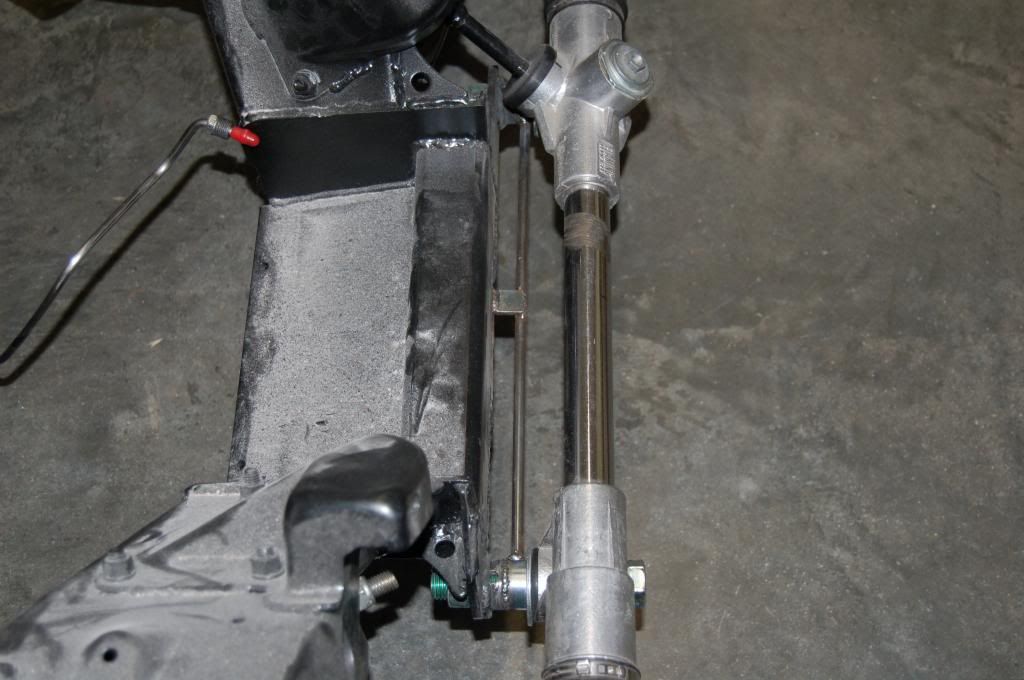
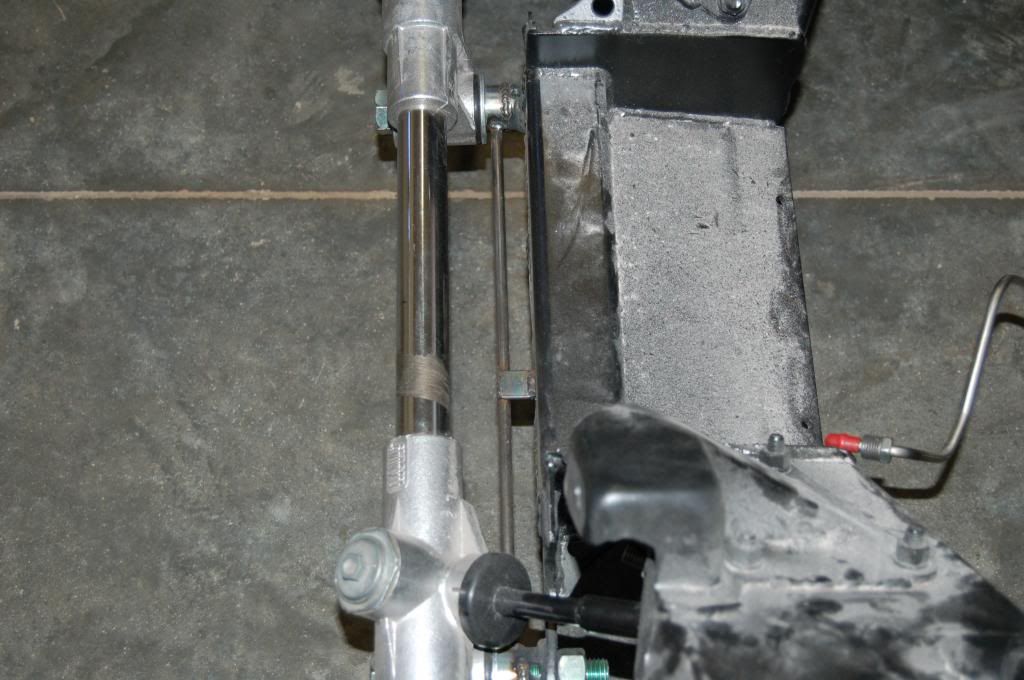
Now comes the next problem we encountered. When we had the single ujoint in place, everything was nice and tight. With the double unjoint curing the binding problem, we discovered that when we turned the wheels, the steering shaft coming up from the rack was moving side to side so we had to support it with a spherical rod end.
Limited space and shape of the frame for mounting pretty much told us where we could put the support.
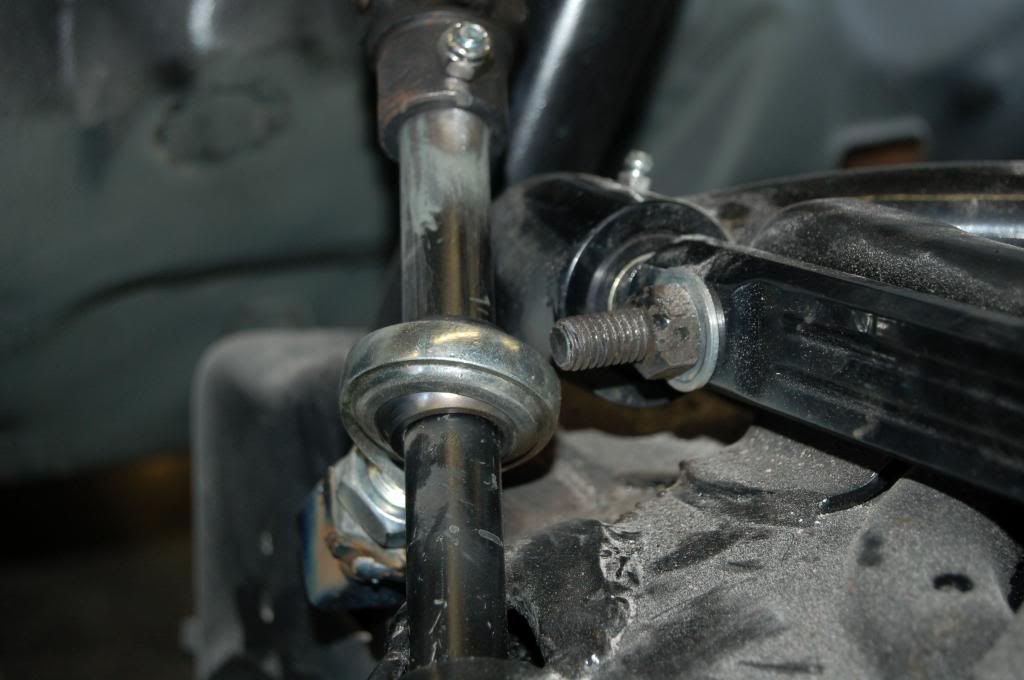

Limited space and shape of the frame for mounting pretty much told us where we could put the support.
 07-14-2013, 12:04 PM
#59
10 Second Club
Join Date: Apr 2013
Location: Carlinville, IL
Posts: 317
Likes: 0
Received 0 Likes
on
0 Posts
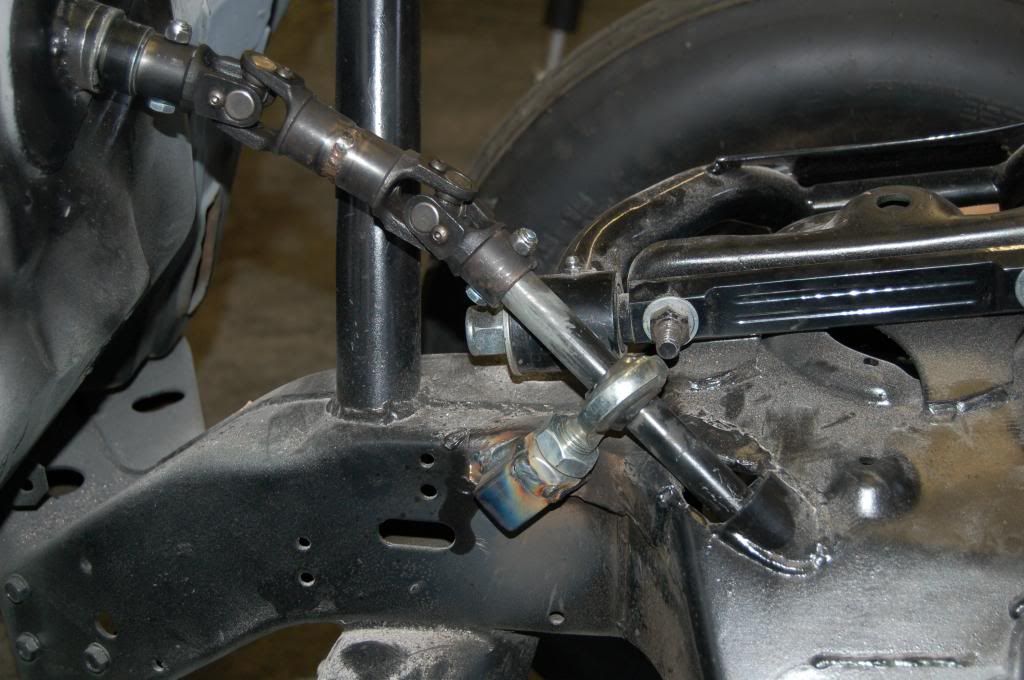
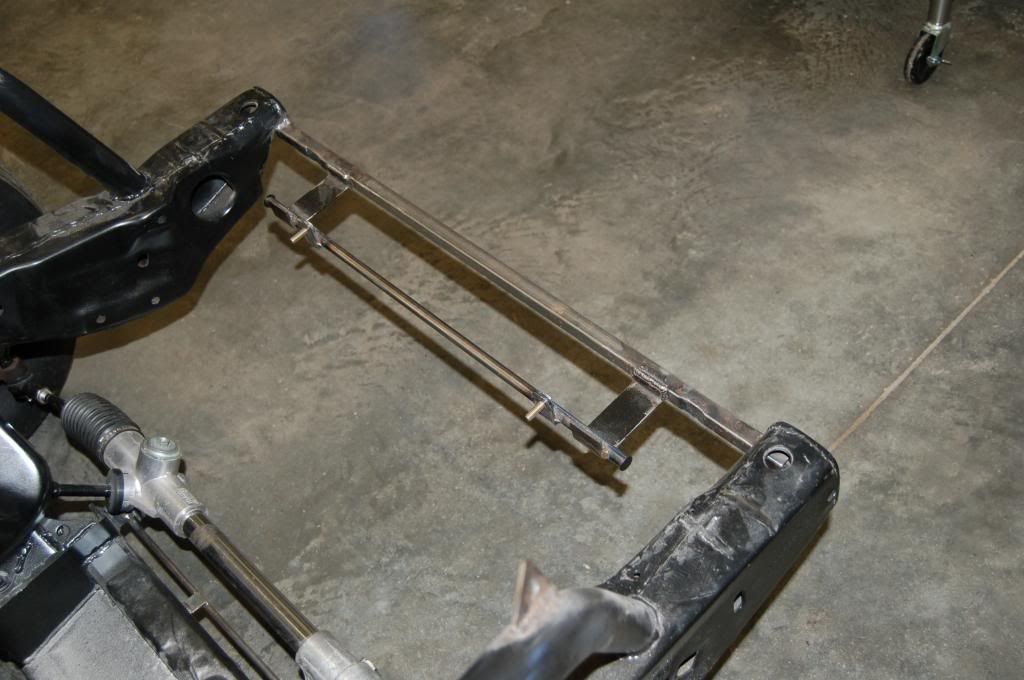
And on and on it goes. With everything else fixed, we had used stacked washers for set up as spacers to get the proper distance front to back of the rack. With these still in place, they were allowing the whole rack to move from side to side when turning the steering wheel. We cured that by coming up with proper spacers made from shaft collars welded to the mount with a rod in between for strength.


Last edited by 65drag; 07-14-2013 at 12:09 PM.
07-14-2013, 12:13 PM
#60
10 Second Club
Join Date: Apr 2013
Location: Carlinville, IL
Posts: 317
Likes: 0
Received 0 Likes
on
0 Posts
We got a very nice generic radiator from Summit with an electric fan as a kit. We just had to come up with our own unique mounting bracket. I had some top and bottom pieces left over from setting up the rad for my Nova so we started with them and added to it.
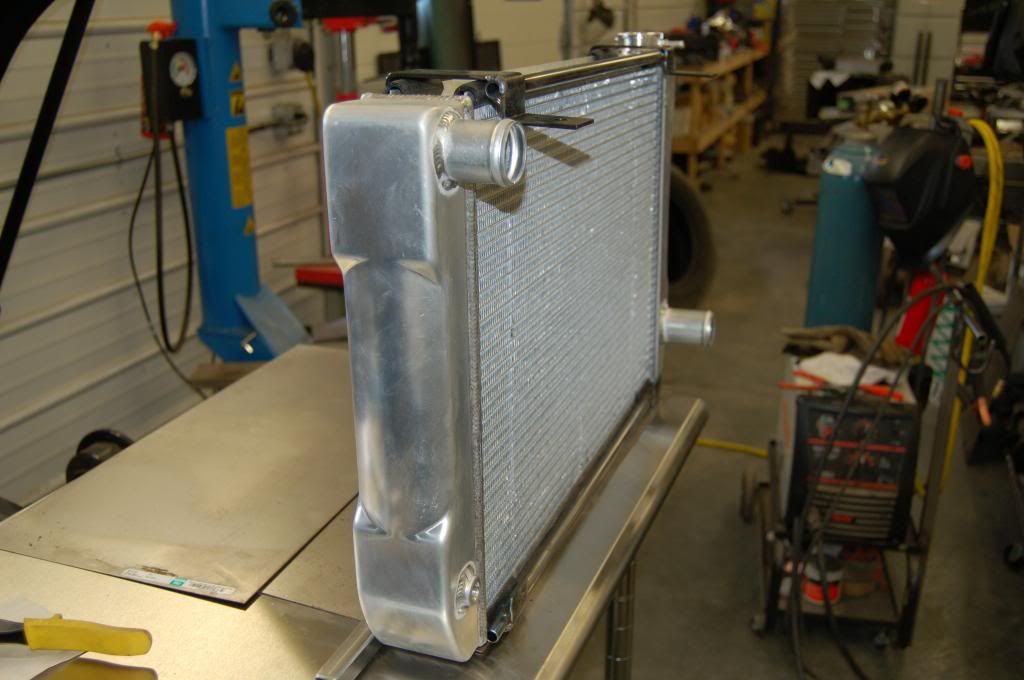
Here is the bottom bracket welded into place. We have most of the top bracket done but still need to build one more support rod to finish it.

Here is the bottom bracket welded into place. We have most of the top bracket done but still need to build one more support rod to finish it.
