

'99 WS6 LQ408 build. Update: 11.4 @ 125
 10-30-2015 | 04:05 AM
#161
Got some work done. But first before I forget, the ECU harness isnt the same pigtail as the factory oil pressure sensor in the rear of the block so you can either A. Dont use it, it wont effect performance or tuning in any way. B, drill and tap for a Holley 100 psi sensor on the thing above the oil filter. Or C, Buy an adaptor to fit a Holley 100psi sensor in the stock location in block. I bought the adapter and I'll add it to the list of part numbers thats coming up.
I had 42 lb injectors but didnt still have the calibration sheet. I have all of it in HP Tuners but trying to convert everything wasnt a sure thing. Long story and too much to explain, so I just bought the Holley 48lb injectors.
I actually bought 2 of the Holley 100psi sensors, the second was for fuel pressure. If you use any other fuel or oil pressure sensor, you can calibrate them in the tuning software to read right. Problem is good luck finding the specs. I'm lazy I know.
My old fuel rails with home made brackets were working fine, but they are a pain to remove and put back on. Plus they looked like crap. So I bought the Edelbrock Pro Flo XT fuel rails. I now see why people are complaining about them. They use NPT fittings on the ends and you can only screw the fittings in 3 full turns. Completely tight the fittings are barely in the rail. And I'm afraid if I go any further they will crack or break. Also the brackets and bolts that come with it are pure junk. Not only are the bolts too long but also the nuts werent even the same thread!! So I go to Lowes and buy some bolts, nuts, and washers, put everything on, but the placement of the hardware forces all 4 of the corner injectors to be pressed into the brackets making a nice little dent in your injectors. Hopefully the dent doesnt effect performance of the injectors. Needless to say, sometime before I go boosted and buy new injectors again, I'm going to buy the Holley high ram intake and fuel rails.
With the KUP steam kit it comes with 4 straight fittings making your lines go up to the block over your intake. But with the Pro Flo XT intake the block goes under it and the straight fittings will bend your lines nasty directions and creates the coolant high point in those lines. So I finally got some 90 degree fittings to fix both problems. So you know the fittings are 1/8" NPT male to 4AN male.
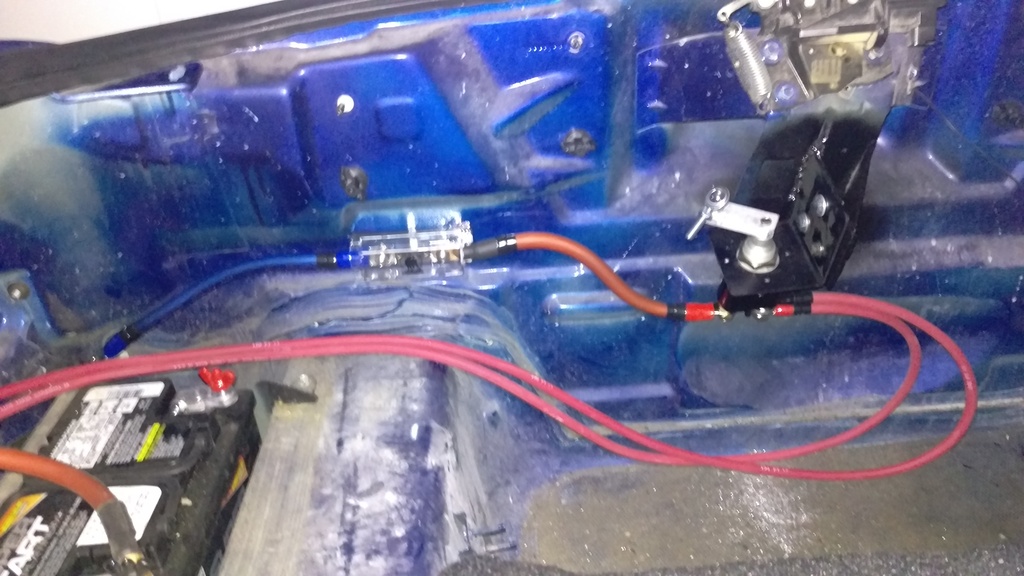
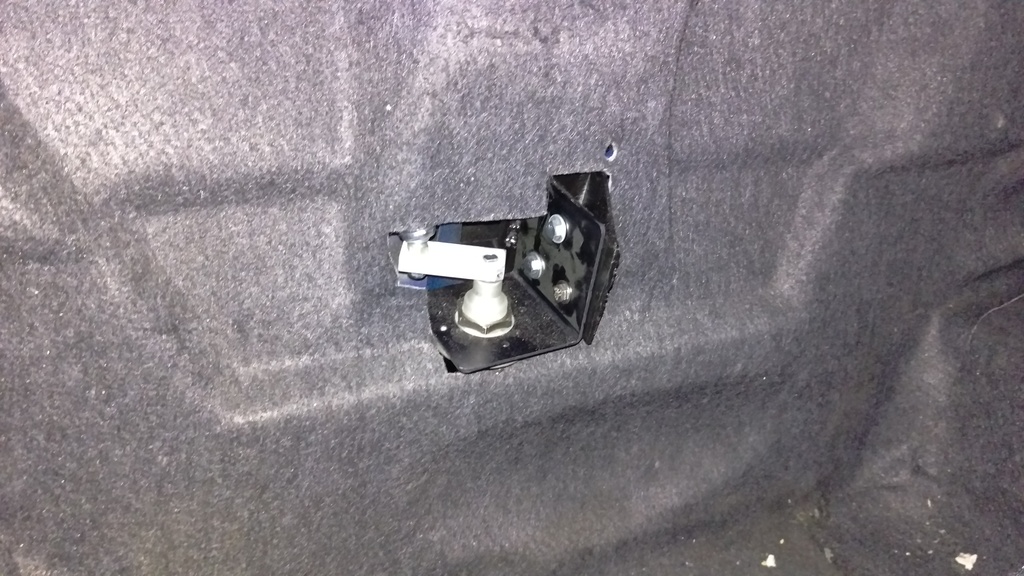
Finally bought a battery disconnect switch from Flaming River. It seems pretty good quality but havent tried it out yet. Mounted it next to the trunk latch and put the handle through the center piece between brake lights. I really didnt want to drill through my brake lights or rear bumper so I made it work. Kept the trunk carpet too. Check the pictures. Only problem is it comes with a "Push Off" decal in black. I've found some online in white but they want $8-$15 for them and $7-$9 for shipping. I'll wait.
Also bought the Painless Wiring turn signal kit. I thought about using a trailer adaptor to get my brake lights and turn signals working together but the reviews for all the boxes I looked at were horrible. I could have made something but I'm already sick of wiring so I spent the money on a kit.
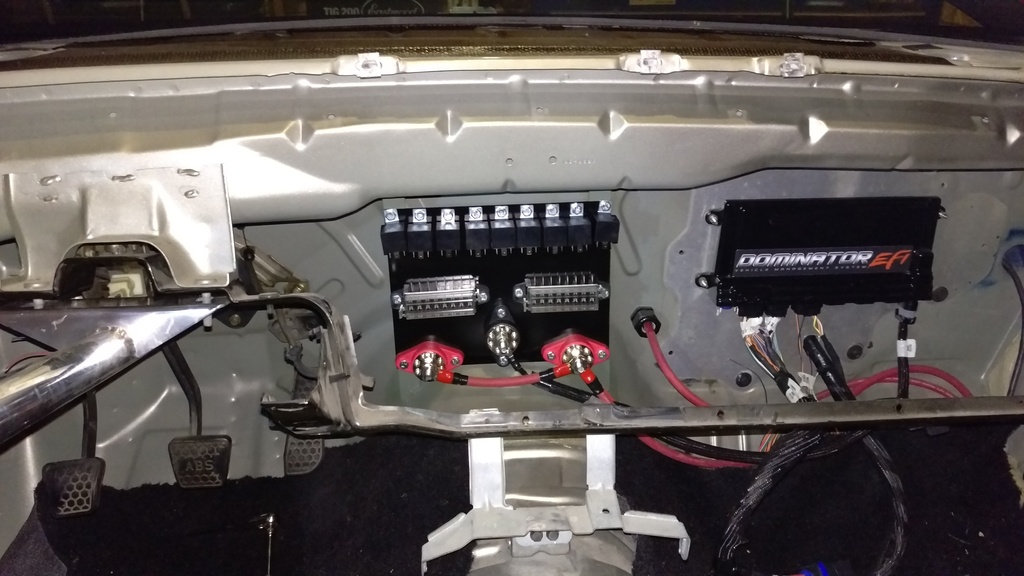
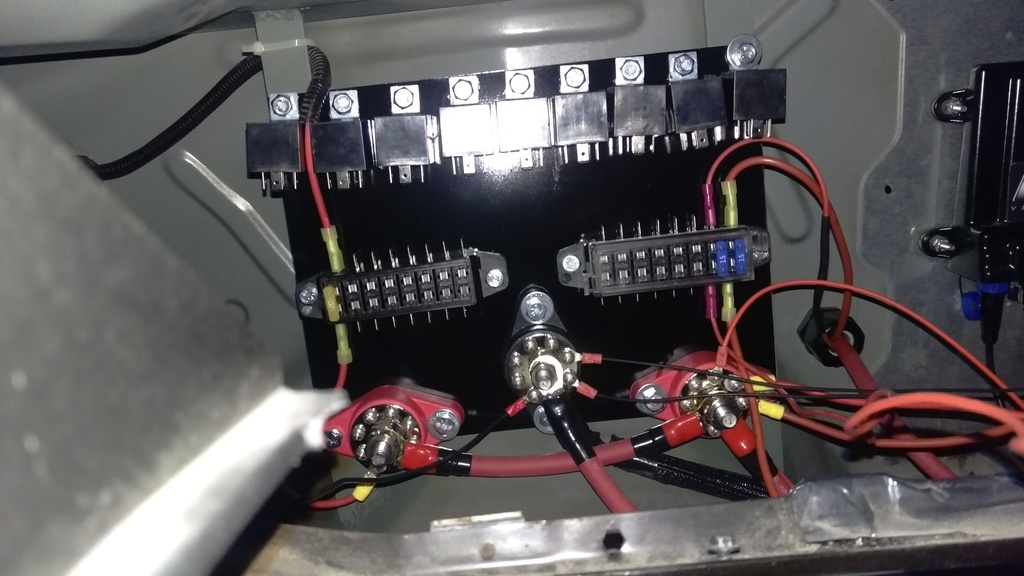
Plans changed again for wiring. I decided the most simple way, because I'm not keeping that much, would be 1/0ga from battery to disconnect with in line 250amp fuse, 2ga from disconnect to alt, 2ga from alt to starter. Then another 2ga from disconnect to power distribution block, and 2ga from 1st block to 2nd block. I didnt put a relay on either block because I'm just going to have switches for everything and everything that gets constant power will get a fuse but no switch.
Welded in brackets and made a removable panel for everything to go on. Consists of 9 relays, two 8 way fuse blocks, two power distribution blocks, and a ground block.
Everything about the Holley ECU and harness is quality. Have zero complaints of anything. But if you notice the trend in my updates they sure know how to make you buy nothing but their products and keep you coming back.
Part numbers for anyone thats interested:
Painless turn signal/brake kit-30120
Painless power block-80114
Painless ground block-80115
Hella fuse blocks-H84960111
Aeroquip 90 degree fittings for Kup kit-FBM2031
Auto Meter adaptor for oil pressure sensor in block-2268
Flaming River battery disconnect-FR1003-2
Allstar 2ga firewall bushing-ALL76137
But that is WAY oversized, you actually need a 4ga bushing with 2ga wire and even the 4ga bushing is still big-ALL76138

I had 42 lb injectors but didnt still have the calibration sheet. I have all of it in HP Tuners but trying to convert everything wasnt a sure thing. Long story and too much to explain, so I just bought the Holley 48lb injectors.
I actually bought 2 of the Holley 100psi sensors, the second was for fuel pressure. If you use any other fuel or oil pressure sensor, you can calibrate them in the tuning software to read right. Problem is good luck finding the specs. I'm lazy I know.
My old fuel rails with home made brackets were working fine, but they are a pain to remove and put back on. Plus they looked like crap. So I bought the Edelbrock Pro Flo XT fuel rails. I now see why people are complaining about them. They use NPT fittings on the ends and you can only screw the fittings in 3 full turns. Completely tight the fittings are barely in the rail. And I'm afraid if I go any further they will crack or break. Also the brackets and bolts that come with it are pure junk. Not only are the bolts too long but also the nuts werent even the same thread!! So I go to Lowes and buy some bolts, nuts, and washers, put everything on, but the placement of the hardware forces all 4 of the corner injectors to be pressed into the brackets making a nice little dent in your injectors. Hopefully the dent doesnt effect performance of the injectors. Needless to say, sometime before I go boosted and buy new injectors again, I'm going to buy the Holley high ram intake and fuel rails.
With the KUP steam kit it comes with 4 straight fittings making your lines go up to the block over your intake. But with the Pro Flo XT intake the block goes under it and the straight fittings will bend your lines nasty directions and creates the coolant high point in those lines. So I finally got some 90 degree fittings to fix both problems. So you know the fittings are 1/8" NPT male to 4AN male.
Finally bought a battery disconnect switch from Flaming River. It seems pretty good quality but havent tried it out yet. Mounted it next to the trunk latch and put the handle through the center piece between brake lights. I really didnt want to drill through my brake lights or rear bumper so I made it work. Kept the trunk carpet too. Check the pictures. Only problem is it comes with a "Push Off" decal in black. I've found some online in white but they want $8-$15 for them and $7-$9 for shipping. I'll wait.
Also bought the Painless Wiring turn signal kit. I thought about using a trailer adaptor to get my brake lights and turn signals working together but the reviews for all the boxes I looked at were horrible. I could have made something but I'm already sick of wiring so I spent the money on a kit.
Plans changed again for wiring. I decided the most simple way, because I'm not keeping that much, would be 1/0ga from battery to disconnect with in line 250amp fuse, 2ga from disconnect to alt, 2ga from alt to starter. Then another 2ga from disconnect to power distribution block, and 2ga from 1st block to 2nd block. I didnt put a relay on either block because I'm just going to have switches for everything and everything that gets constant power will get a fuse but no switch.
Welded in brackets and made a removable panel for everything to go on. Consists of 9 relays, two 8 way fuse blocks, two power distribution blocks, and a ground block.
Everything about the Holley ECU and harness is quality. Have zero complaints of anything. But if you notice the trend in my updates they sure know how to make you buy nothing but their products and keep you coming back.
Part numbers for anyone thats interested:
Painless turn signal/brake kit-30120
Painless power block-80114
Painless ground block-80115
Hella fuse blocks-H84960111
Aeroquip 90 degree fittings for Kup kit-FBM2031
Auto Meter adaptor for oil pressure sensor in block-2268
Flaming River battery disconnect-FR1003-2
Allstar 2ga firewall bushing-ALL76137
But that is WAY oversized, you actually need a 4ga bushing with 2ga wire and even the 4ga bushing is still big-ALL76138


 10-31-2015 | 02:37 AM
#162

A tip on the Edelbrock rails:
They cut their threads with a hammer and chisel. Because of this and as you mentioned, the fitting doesn't thread in very far, and also at some point, I promise you will gall a thread and be like what the ****.
Tip: Go back through the threads with a tap and tap them a little deeper to avoid these problems.
11-03-2015 | 03:04 AM
#163
Thanks for the idea that sounds good to me. Those threads are no joke.
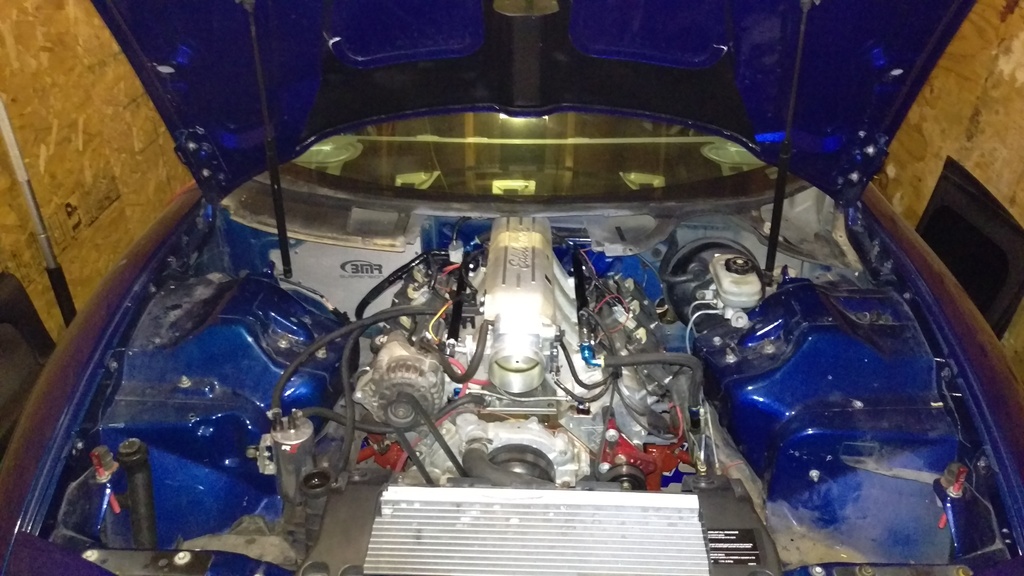
And its alive! I grabbed a fire extinguisher before I started it up just to be sure since I dont trust myself. So far I've wired power to PCM, starter, fuel pump power and relay, alternator exciter with 470ohm resistor in line, and LCD screen. I "calibrated" all the sensors if you want to call it that, and adjusted the fuel and timing in the base tune then uploaded it, calibrated TPS sensor, and it fired right up. Only let it run for a few seconds till I get the engine bay wires situated.
It amazes me how I went from who knows how many wires to just a few. Plus the ECU controls the fuel pump relay, fan relays, and much more so that saves even more wiring. Plus the engine bay looks so much cleaner. This is a dream come true.
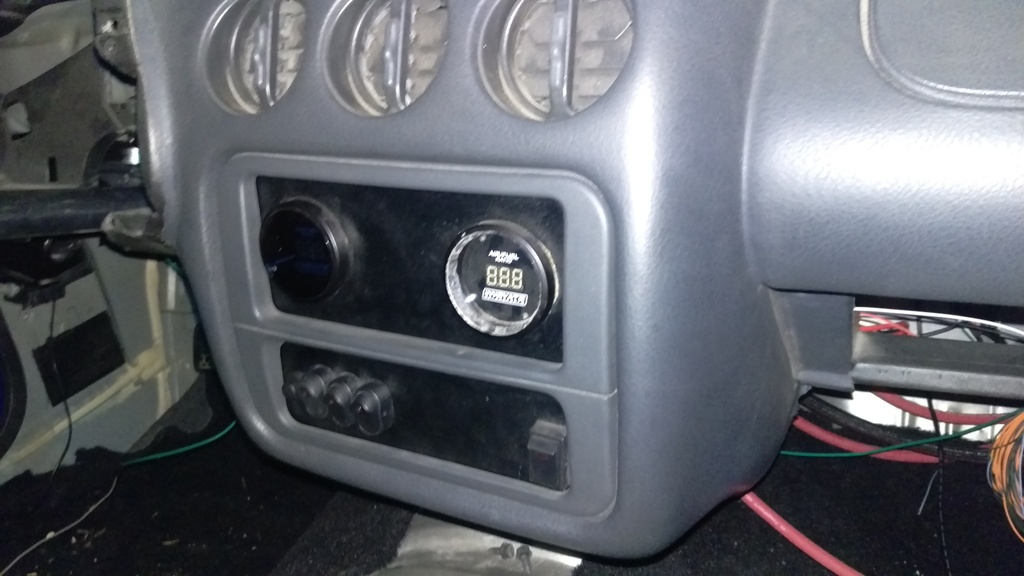
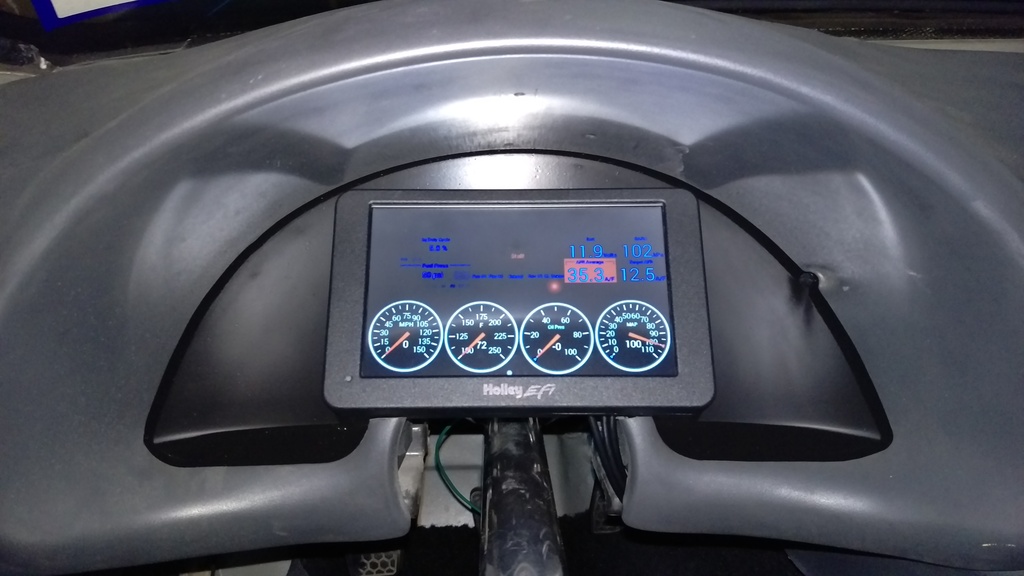
Still have to wire all the lights, fans, windows, and mount the LCD screen but this pic will show you guys just how few wires are needed to run a car. The second pic is the "switch panel" I've been using. I'll add more switches as I need to. The two gauges are widebands but since I dont need them anymore I might make a new panel or use gauges for something else.
I played with the LCD screen a little but havent customized it any. I think the coolest thing is the ability to put switches on the screen.
And its alive! I grabbed a fire extinguisher before I started it up just to be sure since I dont trust myself. So far I've wired power to PCM, starter, fuel pump power and relay, alternator exciter with 470ohm resistor in line, and LCD screen. I "calibrated" all the sensors if you want to call it that, and adjusted the fuel and timing in the base tune then uploaded it, calibrated TPS sensor, and it fired right up. Only let it run for a few seconds till I get the engine bay wires situated.
It amazes me how I went from who knows how many wires to just a few. Plus the ECU controls the fuel pump relay, fan relays, and much more so that saves even more wiring. Plus the engine bay looks so much cleaner. This is a dream come true.
Still have to wire all the lights, fans, windows, and mount the LCD screen but this pic will show you guys just how few wires are needed to run a car. The second pic is the "switch panel" I've been using. I'll add more switches as I need to. The two gauges are widebands but since I dont need them anymore I might make a new panel or use gauges for something else.
I played with the LCD screen a little but havent customized it any. I think the coolest thing is the ability to put switches on the screen.

 11-04-2015 | 09:49 PM
#168
Well I'm calling this project case closed. Engine is running, lights, windows, fuel pump, starter, and fans are wired. Just have to retune it, put body panels back in and throw some wire loom on. I'm not posting pics of the under dash wiring, just imagine the last pic I took with a few more wires and everything zip tied nice and neat.
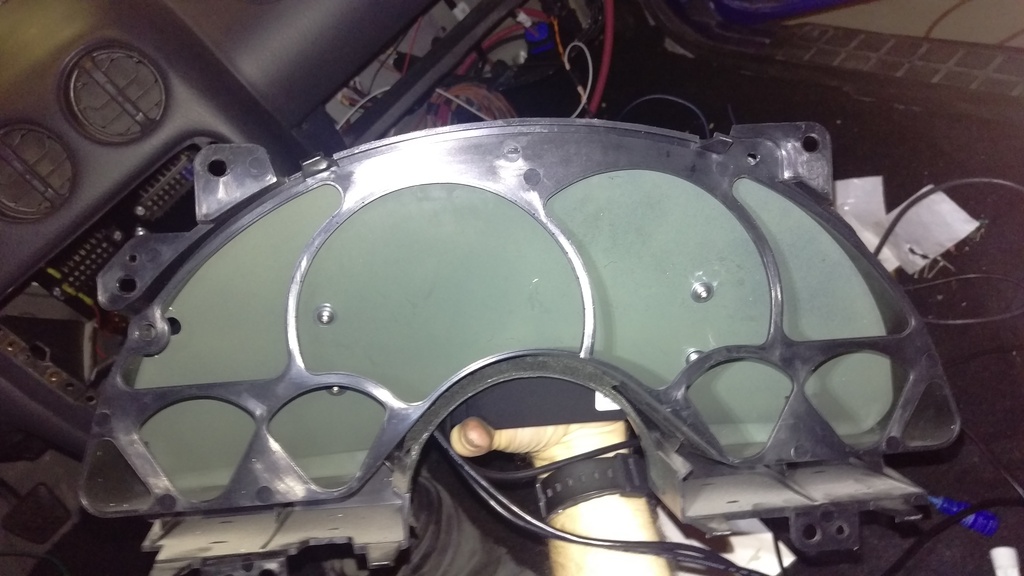
I will add the last couple pics of the LCD screen in case anyone needs some ideas on how to mount it. I just took the clear cover off the cluster. Good thing is it has the mounting points to the dash instead of it being on the cluster itself which saved me from having to fabricate something. Drilled the 4 holes. Sanded it, sprayed with self etching primer, then black paint, then snapped it right in. BTW you'll have to trim a little off the dash housing thing below the LCD screen. You'll have to buy bolts slightly longer than the ones supplied to make up for the extra distance the curve in the clear cluster cover creates (tongue twister). Also at first I didnt like the angle it was slanted at but after I put the seats and steering wheel back in I'm glad its at that angle. If it were straight up and down the steering wheel would cut off half the screen.
Blown06: The pic I posted of engine bay is it. I love how few wires there are. I ran the lights and fan wires under the passenger fender, drilled a hole, grommet, then ran wires through the hole to the left of the HVAC delete plate. I'll update pics after I wash it and get rid of all the dirt where the fuse boxes and PCM used to be.


Last edited by Jc803; 11-04-2015 at 10:06 PM.
11-04-2015 | 09:59 PM
#169
Now I'm just saving more money and planning what to do next. I'm thinking knocking the cooling system out to get it ready for boost. Griffen radiator mounted vertically, electric water pump, all that stuff.
Also going to buy slicks soon and give it a try at the track. Never ran slicks before and I'm tired of the "11 second club". Pretty embarassing that I have all this done to the car, trapping 125mph (in El Paso elevation) and I'm not in 10s yet. But I blame that on the 6,000ft DA and 91 octane of El Paso. Here in SC the DA has been below sea level almost every night and 93 octane at every pump. Might even get a 130mph trap speed. Slicks should help my usual 1.8 60ft too.
Also going to buy slicks soon and give it a try at the track. Never ran slicks before and I'm tired of the "11 second club". Pretty embarassing that I have all this done to the car, trapping 125mph (in El Paso elevation) and I'm not in 10s yet. But I blame that on the 6,000ft DA and 91 octane of El Paso. Here in SC the DA has been below sea level almost every night and 93 octane at every pump. Might even get a 130mph trap speed. Slicks should help my usual 1.8 60ft too.
 11-09-2015 | 12:24 AM
#171
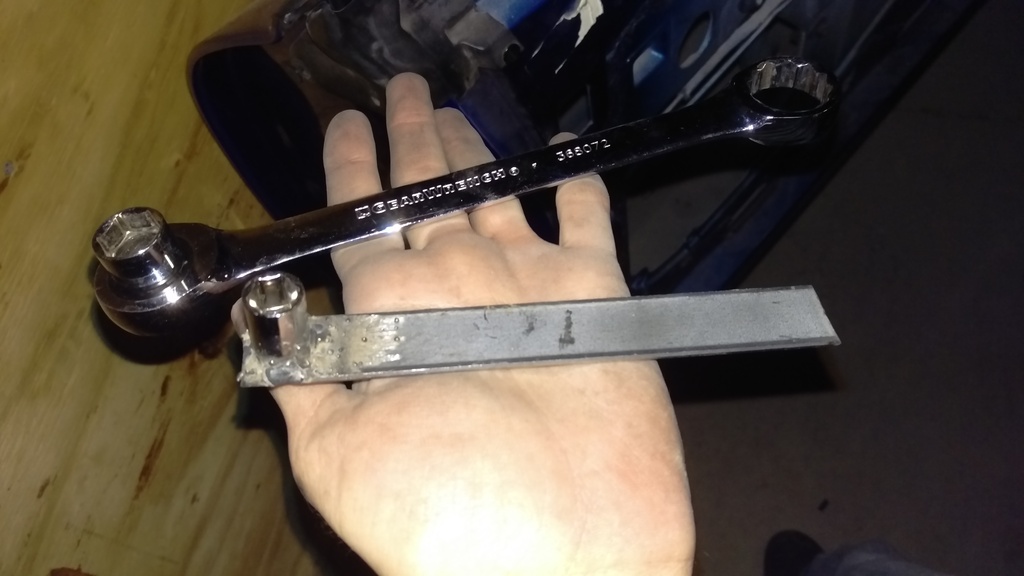
Removed the door bars today. Weighed in at 14.2 lbs. If anyone has never done it before, there is one 15mm bolt on the door handle side, and two 10mm bolts on the door hinge side. Before you remove those go ahead and pull all the wiring out the door and through the rubber grommet loom thing, then push the grommet off the door. The bar will go through that hole.
You can only use a ratchet to get the bolts 1/4 to halfway out because its too thick and will hit the door. To remove the 15mm bolt the last half I used a belt tensioner tool because its thin. 10mm bolts I welded a cheap 10mm socket to a piece of steel.
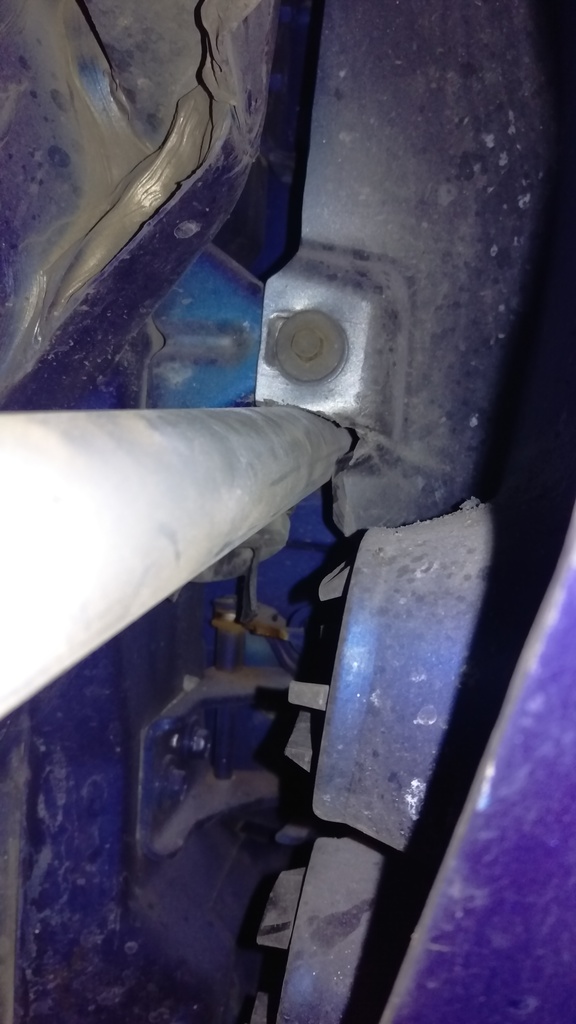
After you get the door bar 1/4 way through the hole it barely gets past the metal tab the fender bolts to, but will hit the edge of the fender. You could take the time to remove the fender, and to remove that you have to remove the bumper, which all means the bulbs, and also the side skirts on T/As. A lot of work. My problem is the two very bottom bolts by the frame rail. The tab has been crushed to where to bolts cannot possibly be removed. To add to removing removing the fender and side skirt I'd also have to cut that tab off, fabricate, then weld a new one back on, drill it, then put everything back on that you removed when you're done.
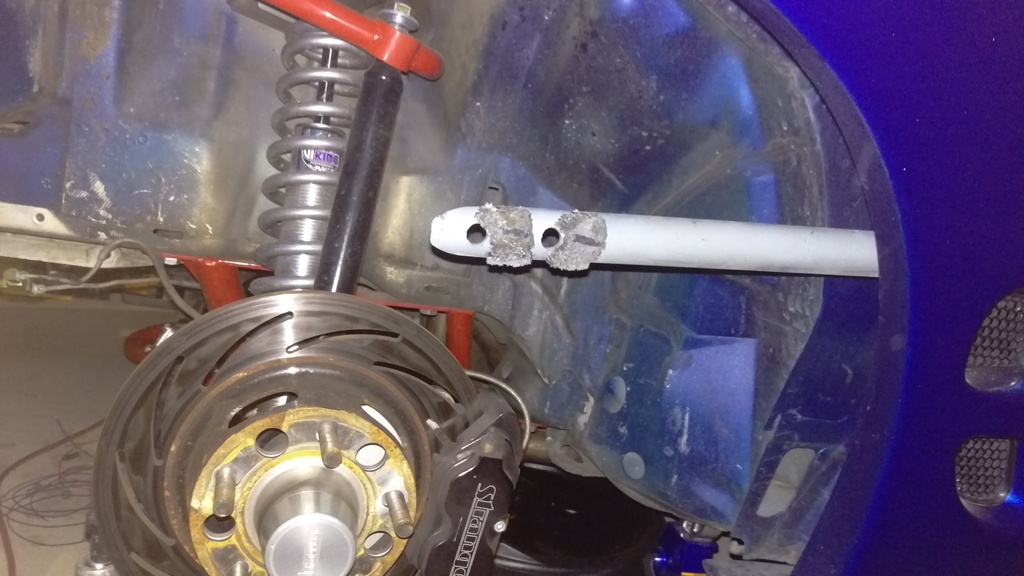
Or you can just simply cut a tiny piece of the fender off with a dremil tool like this.
And then it slides right out.
You can only use a ratchet to get the bolts 1/4 to halfway out because its too thick and will hit the door. To remove the 15mm bolt the last half I used a belt tensioner tool because its thin. 10mm bolts I welded a cheap 10mm socket to a piece of steel.

After you get the door bar 1/4 way through the hole it barely gets past the metal tab the fender bolts to, but will hit the edge of the fender. You could take the time to remove the fender, and to remove that you have to remove the bumper, which all means the bulbs, and also the side skirts on T/As. A lot of work. My problem is the two very bottom bolts by the frame rail. The tab has been crushed to where to bolts cannot possibly be removed. To add to removing removing the fender and side skirt I'd also have to cut that tab off, fabricate, then weld a new one back on, drill it, then put everything back on that you removed when you're done.
Or you can just simply cut a tiny piece of the fender off with a dremil tool like this.

And then it slides right out.
 11-10-2015 | 02:54 AM
#172
Since all I have remaining to get the turbo build going is redoing the fuel system, cooling system, and all the turbo related stuff, I've created a new build thread in the boosted section for all my turbo related questions. I'll no longer be posting here. Redirect all comments or questions to this link
https://ls1tech.com/forums/forced-in...l#post19033744
https://ls1tech.com/forums/forced-in...l#post19033744