1991 Nissan 240sx – T76 LQ4 with T56
 09-18-2013, 09:48 AM
#81


I see a few things that I don't like. First look in system > fuel cut vss = 0 MPH. Change Fuel cut VSS= 255mph. Also your maf is not set to fail. Go to Engine diagnostics> airflow> maf fail=0, then go to Engine diagnostics> DTC> p0101 thru p0103 should be checked and set to no mil light. I'm also not to sure whover tuned it has ever tuned for the 60lb injectors you have installed. I think the IFR table should be 72.4 all the way across since you should be using your FPR boost referenced off the intake.
60lb Siemens injectors flow 60lb at 3 bar and 70-2ish at 4 bar. Is your FPR boost referenced? If so your flow rate vs. KPA should be the same number all the way across. Looking at your VE table I noticed you haven't applied the HPT 2 bar OS. Also your MAF needs to failed. Fix these issues first and see if the car will run.
Sweet car man!
Sweet car man!
i'll try and load this tune tonight and give it another try and let everyone know.
 09-18-2013, 12:39 PM
#82
9 Second Club

Join Date: Jun 2013
Posts: 271
Likes: 0
Received 0 Likes
on
0 Posts
One other thing to look for is that whatver os you flash in make sure the map sensor you use is the correct one. My tuner did a base tune for me on my pcm before I even started my build for things like the correct injector scaling, vats, disabled, 2 bar os and set to run without a maf. When I first tried to start it, it would fire and immediately die and then after a while just crank over and never fire. It was all because I had a stock 1 bar map, swapped in a 2 bar map my buddy had extra and it fired right up and ran fine.
09-22-2013, 10:41 PM
#84
I've been able to take some of your suggestions and make some changes with no luck. I did update to the 2 bar OS this evening, but haven't had a chance to test it out yet. I've attached my newest tune file
Here are some items i've done prior to the OS change.
-I've tried all 3 VATS settings - none, serial and pwm
-i've been trying to find accurate injector data, but for starters i have
-updated my IFR to 72.4
-IFR mult = 1
-updated short pulse limit and short pulse adder by comparing several other Siemens 60lb tunes in the HP Tuner repository.
-with the help of friend/tuner, i've made some changes to several fuel tables and a few others that i dont recall off the top of my head
If anyone has any suggestions please take a look at this file and let me know. Thanks so much for all the help/suggestions so far.
10-07-2013, 03:07 PM
#85
I've spent the last few weeks doubling checking my wiring and found 2 pinched wires (one to crank sensor and one to IAT). I've also updated my tune to a 2 bar OS and have added the correct injector data for my Siemens 60lb injectors.
I have a little bit more to do, but here are 2 new clips of it running before it dies.
I have a little bit more to do, but here are 2 new clips of it running before it dies.
Last edited by 91 240; 10-16-2013 at 06:26 PM.
10-11-2013, 04:12 PM
#86
It lives!!
I've done some more tweaking with the tune and now have it to a point where it runs consistently on it's own without dying.
I'm having issue embedding the video directly without the link. any thoughts?
now I can focus on cleaning up all the wiring as everything is hooked up correctly and working. I can finish looming the engine harness and putting the dash harness back together.
Huge step for me and my motivation has picked up again. More progress to come over the long weekend.
Avery
Last edited by 91 240; 10-16-2013 at 06:26 PM.

 10-14-2013, 09:59 AM
#90
Thanks. Yes i'm keeping the "ricer" exhaust. It is angled to keep it as straight as possible but yet still clear the rear end, stock gas tank and IRS. Personal opinion, but it looks a hell of a lot better than a single 4" or 5" like every other "ricer"
10-16-2013, 06:23 PM
#91
I did a little more on my day off for Columbus Day.
after i got it started and running i developed a pretty big power steering leak. I had to pull most of the front of the motor apart to add a restrictor valve to the pump.
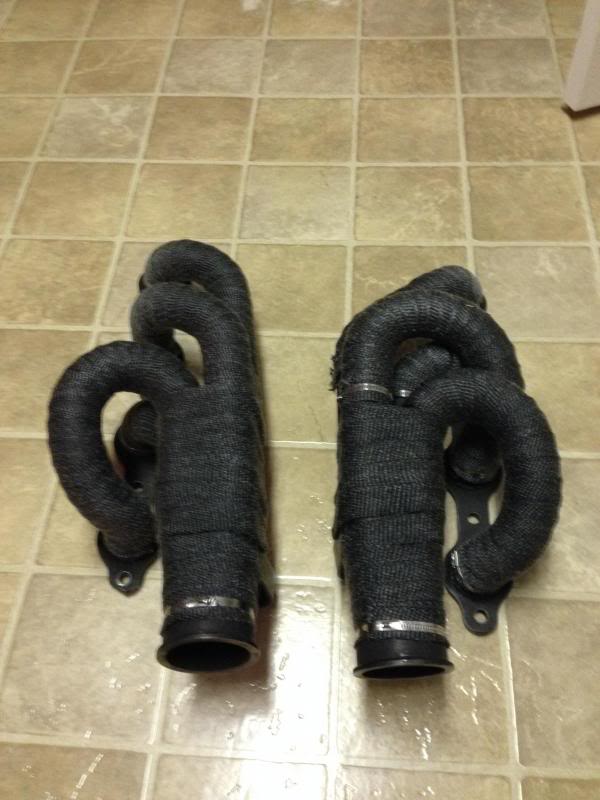
while i was at it, i pulled the manifolds off and wrapped them. with the manifolds generating a ton of heat and very close to my relocated coils, i figured it wasn't a bad idea. i wanted to do the crossover as well, but ran out. each manifold took 50ft of 1" wrap
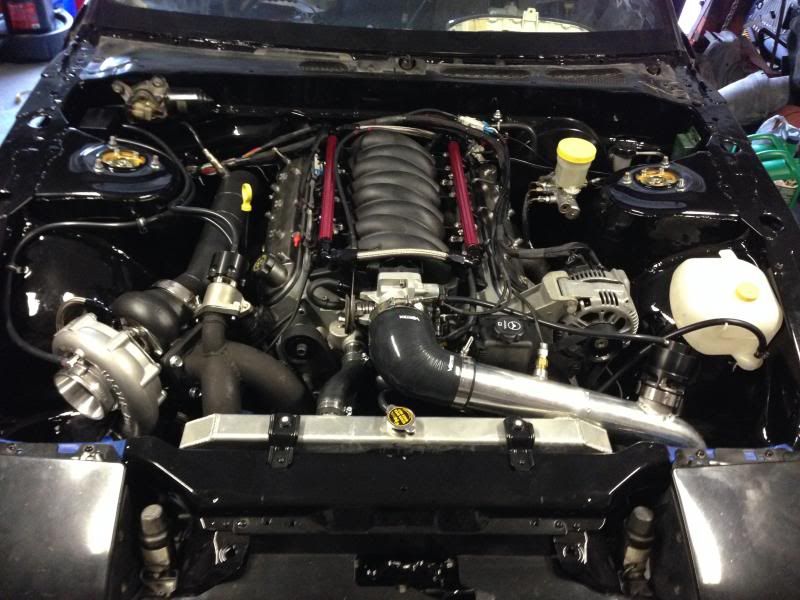
Next I put everything back together, drained the oil added the compressor and center housing, oil feed and drain lines, wastegate and vacuum lines. Engine bay is 98% done, all i have left to do looming a section of the engine harness and all should be good. just need to bleed the brakes and clutch and finish the interior.
after i got it started and running i developed a pretty big power steering leak. I had to pull most of the front of the motor apart to add a restrictor valve to the pump.
while i was at it, i pulled the manifolds off and wrapped them. with the manifolds generating a ton of heat and very close to my relocated coils, i figured it wasn't a bad idea. i wanted to do the crossover as well, but ran out. each manifold took 50ft of 1" wrap

Next I put everything back together, drained the oil added the compressor and center housing, oil feed and drain lines, wastegate and vacuum lines. Engine bay is 98% done, all i have left to do looming a section of the engine harness and all should be good. just need to bleed the brakes and clutch and finish the interior.

The following users liked this post:
85GPLEf41 (01-29-2021)
 11-12-2013, 04:45 PM
#93
I have a little bit of an update guys.
after my last update, i had several other issues come up that slowed my progress.
1. after the p/s restrictor i added, i still had a pretty bad leak. this ended being a bad seal with Russell Powerflex p/s lines i made. the way i had the lines running put some stress on the fittings down at the rack. I added a couple inches to each line to take the stress off the lines and so far it's holding strong now.
2. next my clutch was not disengaging right and catching right off the floor. i had to drop the transmission to shim the slave cylinder out with a .078" shim. now the engagement is more in line with where it should be.
3. another item was my valve train noise. I originally went with a set of Thunder Racing 7.350" pushrods based off my measurements with a PR checker. Looking back, i was using a preload value of .060" from a stock LS1 lifter instead of the .080"-.100" for the LS7 lifters. I changed out a set of Speed Inc. 7.400" pushrods. i still have some noise, but it's better than before.
4. Lastly, i modified my exhaust some this weekend as part of it was hitting my rear diff.
I drove the car around the neighborhood yesterday to get a little feel for it, but didn't do too much with it. Coolant temps were getting a little high just from putting around, still need to troubleshoot this some more.
Here's a quick little vid of me backing it out of the garage and a little walk around. I still have a ways to go with wiring and getting the rest of the interior/exterior put back together.
can anyone confirm if the ticking/noise in the video is normal valve train noise? definitely does NOT sound like rod knock, but it's really hard to detect.


 01-08-2014, 04:56 PM
#98
thanks man! haven't had much time to diagnose further, but I have an engine stethoscope i'll be using to pinpoint the noise
Thanks! who knows, track rules may change by the time I actually make it....
haha, touché!
Thanks man! Holidays sucked all spare time out of me, so i dont have too many updates.
I was having an issue with the motor getting HOT (230-240 after 5-10 minutes of idling) that took some time to trouble shoot. I plugged the heater ports on the water pump, which ended up severely blocking flow through the tstat which would keep it from completely opening. Coolant would just back up in the motor and radiator and eventually overheat after a short time. I made a modification to the WP and took it back out for a 5-10 mile drive. Ran good and never got about 205* with only 1 pusher fan hooked up at the time.
After that I started taking stuff apart to finish cleaning up some wiring to get it to a point where i could get an alignment.
Also, i recently snagged a pair of CTS-V front Brembo calipers that i'll be installing over the weekend.
Hopefully i'll have more updates in the next week or 2.

 01-27-2014, 05:38 PM
#100
I have a few updates of things I was able to do over the last couple weekends.
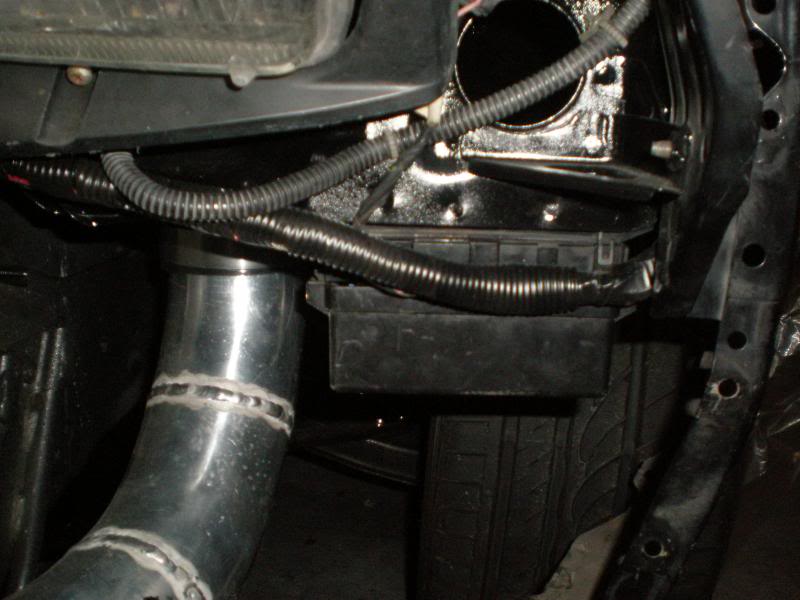
I pretty much finished my engine bay wire tuck. I condensed and relocated the pass side fuse box under the dash (pics of this coming) and moved the driver's side relay/fuse box under the wheel well, basically the same location. cleaned up the bundle of wires i had zip-tied around the driver's headlight (if you noticed in the video) and ran the wiring along the lower radiator core support. Only have one pic of the box location.
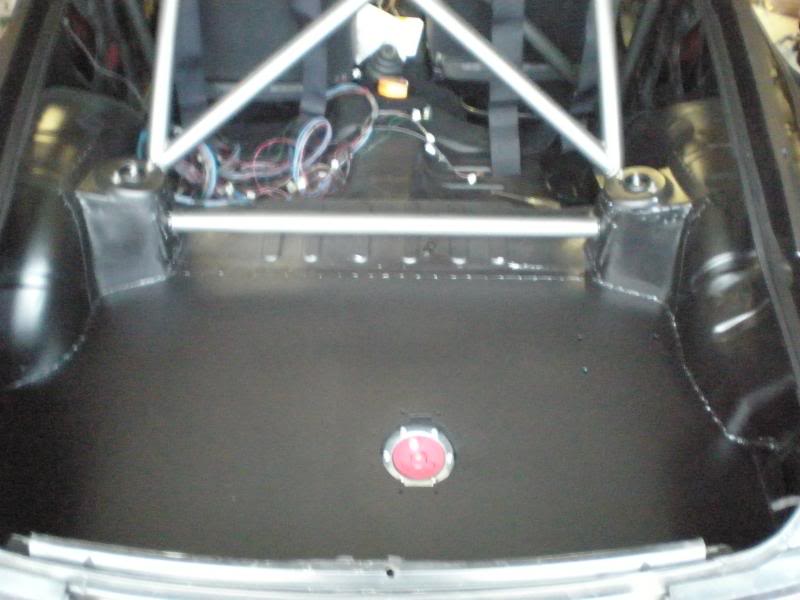
Then i was able to finally take care of something that i've been wanting to do for quite a while....i painted the hatch and quarter window areas with 2 coats of epoxy primer. Now i can put the quarter windows back on, get taillights mounted, relocate battery, mount the fuel door to the floor and then i can get the hatch back on. One step closer to being road worthy.
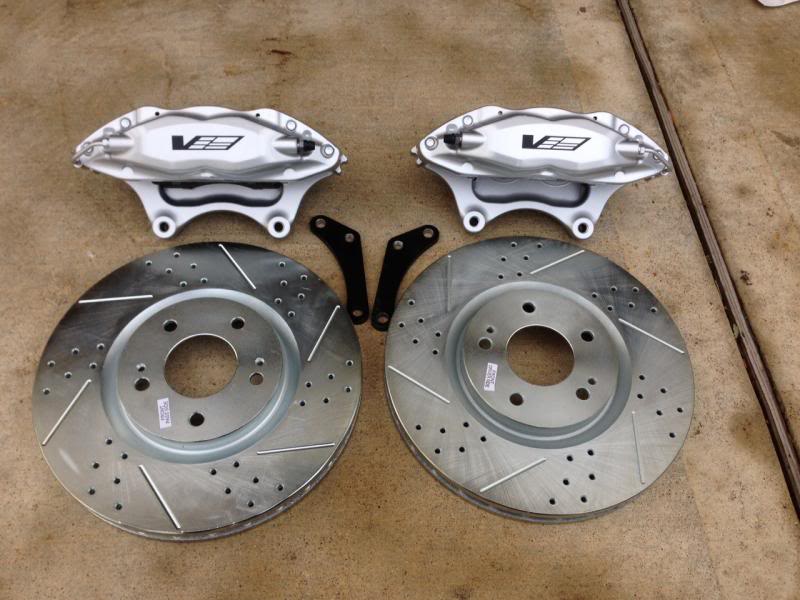
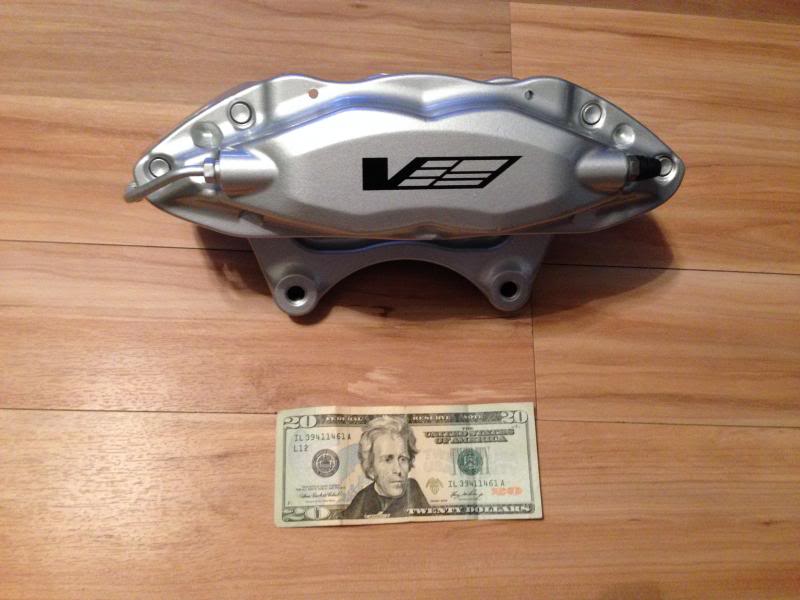
As I mentioned in my last post, I came across a deal that i couldn't pass up. I found a brand new set of CTS-V Brembos at a killer price. Rotors are 12.65" from a Mistubishi Evo 8/9 and custom brackets.
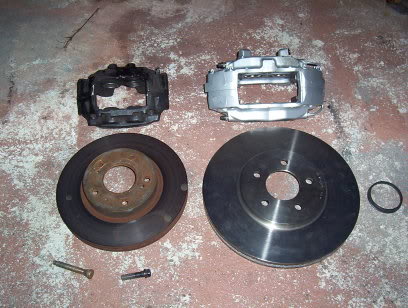
Pretty big size difference compared to the 300ZX TT calipers I had before(not my pic, I was working quick to get it done and didn't get a comparison pic)
Here's a wheel shot, i'll get better ones when I move it out of the garage again.

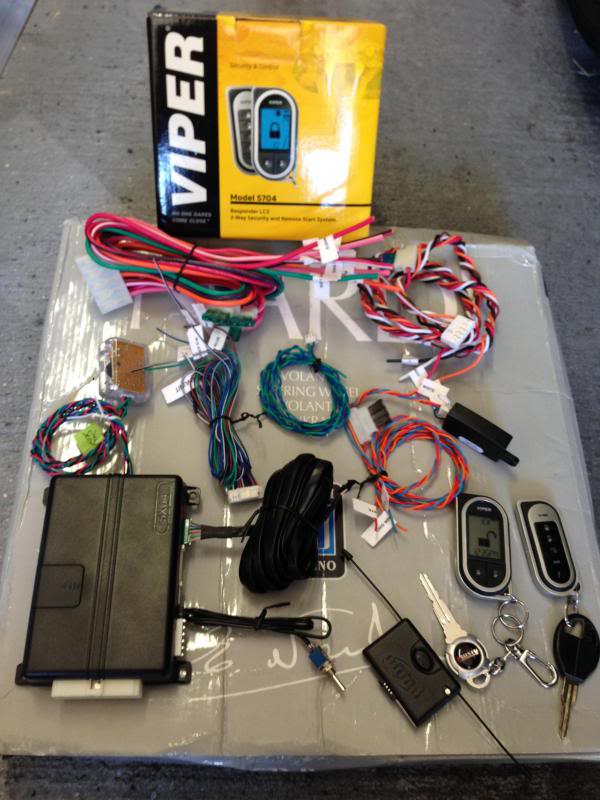
Finally, over the weekend i pulled the dash back out and have been working cleaning up all the wiring since everything works now, i need to make it a little more presentable. While i'm at it, i'm installing a new Viper alarm w/ remote start.
i'm hoping to finish all the dash wiring this weekend and start piecing the interior back for good.
I pretty much finished my engine bay wire tuck. I condensed and relocated the pass side fuse box under the dash (pics of this coming) and moved the driver's side relay/fuse box under the wheel well, basically the same location. cleaned up the bundle of wires i had zip-tied around the driver's headlight (if you noticed in the video) and ran the wiring along the lower radiator core support. Only have one pic of the box location.

Then i was able to finally take care of something that i've been wanting to do for quite a while....i painted the hatch and quarter window areas with 2 coats of epoxy primer. Now i can put the quarter windows back on, get taillights mounted, relocate battery, mount the fuel door to the floor and then i can get the hatch back on. One step closer to being road worthy.

As I mentioned in my last post, I came across a deal that i couldn't pass up. I found a brand new set of CTS-V Brembos at a killer price. Rotors are 12.65" from a Mistubishi Evo 8/9 and custom brackets.


Pretty big size difference compared to the 300ZX TT calipers I had before(not my pic, I was working quick to get it done and didn't get a comparison pic)

Here's a wheel shot, i'll get better ones when I move it out of the garage again.

Finally, over the weekend i pulled the dash back out and have been working cleaning up all the wiring since everything works now, i need to make it a little more presentable. While i'm at it, i'm installing a new Viper alarm w/ remote start.

i'm hoping to finish all the dash wiring this weekend and start piecing the interior back for good.