
Satan z31
 12-13-2011, 08:44 PM
#41
TECH Regular
Thread Starter
iTrader: (2)

Join Date: Oct 2010
Location: Denver, CO.
Posts: 430
Likes: 0
Received 0 Likes
on
0 Posts

Yeah, I ran a 134mph trap last year. They told me any faster and I have to leave. I said, "But I have all the safety equipment you guys require?" They said, "Your cage isn't certified yet, sorry"
Anything faster than 135mph or 9's in the 1/4 and it quickly becomes an SFI/NHRA money game.

Anything faster than 135mph or 9's in the 1/4 and it quickly becomes an SFI/NHRA money game.

 01-02-2012, 05:10 PM
#47
TECH Regular
Thread Starter
iTrader: (2)
Join Date: Oct 2010
Location: Denver, CO.
Posts: 430
Likes: 0
Received 0 Likes
on
0 Posts
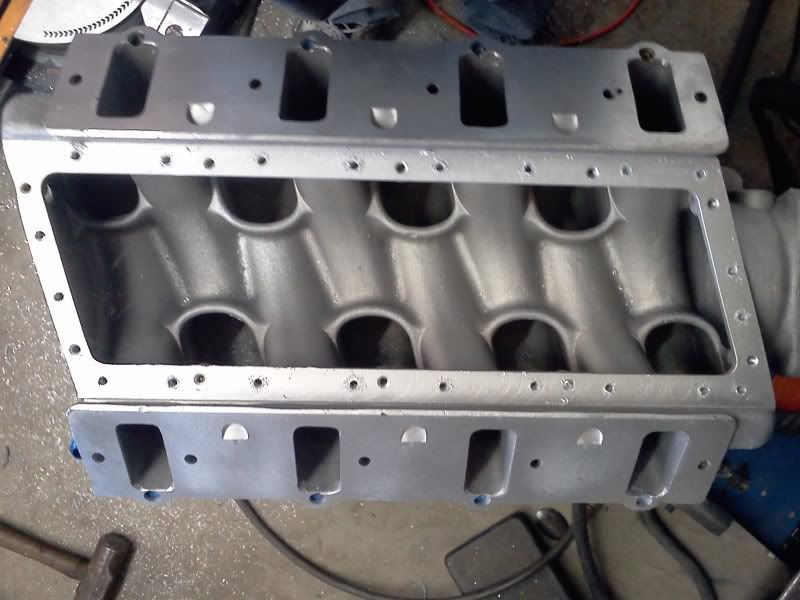
So I got this Pro Comp intake manifold, which is essentially the same thing as the Typhoon intake that you read about here and there. My advice to anyone thinking of purchasing one of these intakes is to stay away from it. The bottom of it has a steel plate that is bolted on. It doesn't have enough bolt holding it on, therefore you will hear people complain about it leaking under boost. Also, it looks like it was put together using a couple different cast pieces. The cast sections do not like up very well and are in need of some smoothing.
I decided to go ahead and tackle both of these issues. I was going to simply weld on a 1/4" thick aluminum plate onto the bottom, but I have decided to just drill and tap 21 more holes to clamp it shut more. It only had 10 bolts holding the lid on. Now it will have 31. I'm also going to seal it with some silicone in between the gasket and manifold and gasket and plate. If it proves to be a problem after that, then I will just sell it and buy a FAST or maybe make my own.
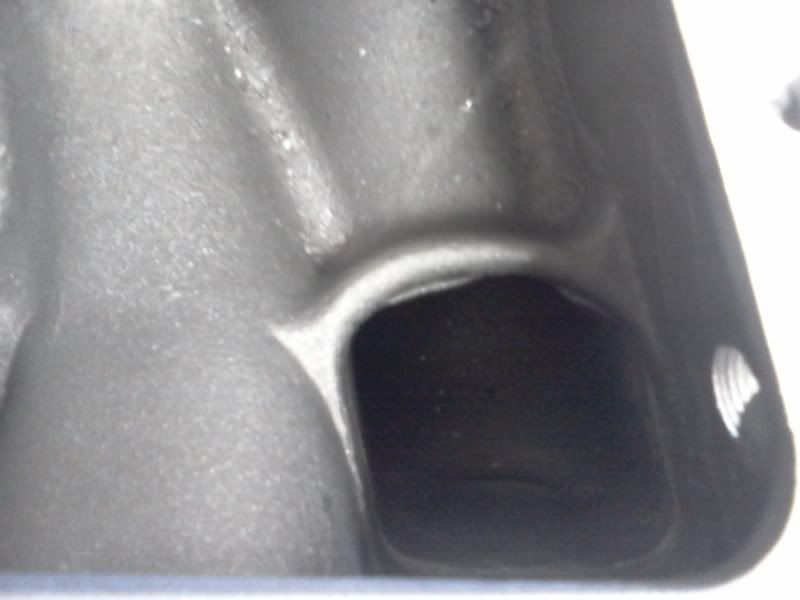
I also went ahead and took care of a lot of the casting overlaps and extreme flashing that looked like obvious restrictions. I didn't take any pics of that though. I did take a picture of the flashing that was sticking out into one of the ports though.
Over all, just not a good intake manifold in my opinion. But, you get what you pay for. I think this one was something like $300 shipped.
Sorry for the crappy phone pics. I didn't feel like running inside to grab the camera.
I decided to go ahead and tackle both of these issues. I was going to simply weld on a 1/4" thick aluminum plate onto the bottom, but I have decided to just drill and tap 21 more holes to clamp it shut more. It only had 10 bolts holding the lid on. Now it will have 31. I'm also going to seal it with some silicone in between the gasket and manifold and gasket and plate. If it proves to be a problem after that, then I will just sell it and buy a FAST or maybe make my own.
I also went ahead and took care of a lot of the casting overlaps and extreme flashing that looked like obvious restrictions. I didn't take any pics of that though. I did take a picture of the flashing that was sticking out into one of the ports though.
Over all, just not a good intake manifold in my opinion. But, you get what you pay for. I think this one was something like $300 shipped.
Sorry for the crappy phone pics. I didn't feel like running inside to grab the camera.
 01-02-2012, 06:40 PM
#49
TECH Regular
Thread Starter
iTrader: (2)
Join Date: Oct 2010
Location: Denver, CO.
Posts: 430
Likes: 0
Received 0 Likes
on
0 Posts
I agree. However, most people are not going to go to that extent on an intake manifold that is supposed to be a simple bolt on. But I figured I would do what I could while I had it apart.
01-03-2012, 11:47 PM
#51
TECH Regular
Thread Starter
iTrader: (2)
Join Date: Oct 2010
Location: Denver, CO.
Posts: 430
Likes: 0
Received 0 Likes
on
0 Posts
It's that time of the year man. I wake up and go to work and it's dark. By the time I get home, it's dark. Oh yeah, it's cold too. That's not helping my motivation either. The wife and dogs need to be beat... By the time I'm done with all of that, I'm just burnt out.
Mostly I have to get customers stuff done before I can work on my own stuff though.
I did get that intake all sealed up though and the brackets for my fuel rails made. I don't see that intake leaking now. It may still surprise me, but I doubt it.
Mostly I have to get customers stuff done before I can work on my own stuff though.
I did get that intake all sealed up though and the brackets for my fuel rails made. I don't see that intake leaking now. It may still surprise me, but I doubt it.
01-08-2012, 10:07 PM
#52
TECH Regular
Thread Starter
iTrader: (2)
Join Date: Oct 2010
Location: Denver, CO.
Posts: 430
Likes: 0
Received 0 Likes
on
0 Posts
Ok, so I know I have already expressed my disapproval of this intake manifold, but today really pissed me off.
I was putting the intake manifold on and torquing it down. Gave it more torque that I should have, and still could not get it to seat all the way. Gasket by one of the back injectors was still loose between the head and the intake. Clearly the intake was hitting something.
I pull it off to find that I cannot run my water lines under the intake due to the intake hitting them. The water lines had dents in them from me trying to torque down the intake. Also, the gaskets did not have holes in them to accommodate the small head studs. So they were hitting there too. I had to remove material there so I would not bind as well.
Now I am going to have to cut up my water manifold (or whatever it's called) and run individual hoses off of each outlet to make it work like it is supposed too.
Over all, just a shitty situation for something that is supposed to be a bolt on part.
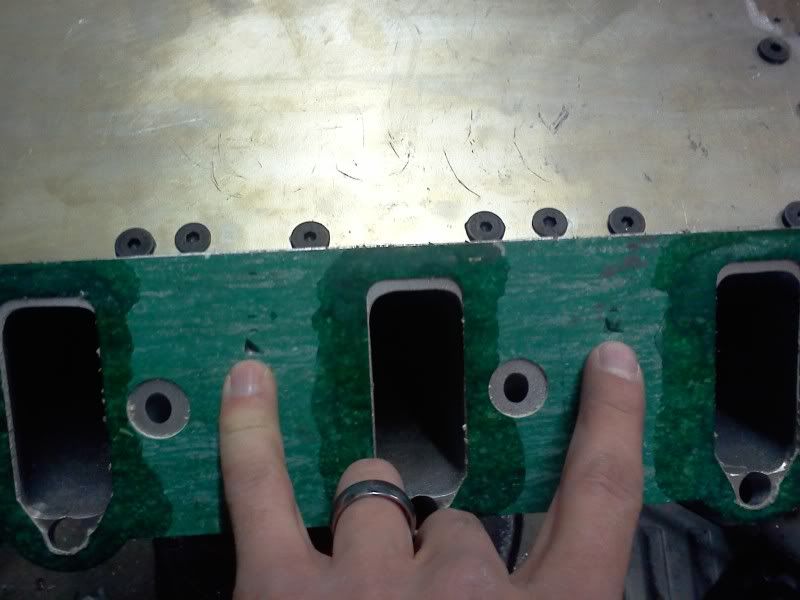
Here you can see where I removed gasket material on one side to make room for where the bolts are supposed to go. Still had to do the other side when I took this pic.

I was putting the intake manifold on and torquing it down. Gave it more torque that I should have, and still could not get it to seat all the way. Gasket by one of the back injectors was still loose between the head and the intake. Clearly the intake was hitting something.
I pull it off to find that I cannot run my water lines under the intake due to the intake hitting them. The water lines had dents in them from me trying to torque down the intake. Also, the gaskets did not have holes in them to accommodate the small head studs. So they were hitting there too. I had to remove material there so I would not bind as well.
Now I am going to have to cut up my water manifold (or whatever it's called) and run individual hoses off of each outlet to make it work like it is supposed too.
Over all, just a shitty situation for something that is supposed to be a bolt on part.
Here you can see where I removed gasket material on one side to make room for where the bolts are supposed to go. Still had to do the other side when I took this pic.
01-16-2012, 09:44 PM
#53
TECH Regular
Thread Starter
iTrader: (2)
Join Date: Oct 2010
Location: Denver, CO.
Posts: 430
Likes: 0
Received 0 Likes
on
0 Posts
So I got enough stuff done in the engine bay to where I ran out of stuff to do, and had to pull the engine to go further. I took the belt tensioner off of the passenger head; flipped it upside down and put it on the driver side head. There's that ear on the iron blocks for the alternator that is blank. I drilled and tapped that part of the block to put the alternator down low. It, with the tensioner up top works pretty good.
Now I can hack about 3" out of the oil pan so it won't scrap on the ground; then make it wider to get back some of that lost capacity.
While the engine is out, I am pulling the front of the engine apart so I can put my turbo cam in and my Melling high volume oil pump. Probably get a double roller chain set while I'm in there too.
Crappy cell phone pics
Last edited by SATAN; 01-16-2012 at 10:00 PM.
01-22-2012, 12:20 AM
#55
TECH Regular
Thread Starter
iTrader: (2)
Join Date: Oct 2010
Location: Denver, CO.
Posts: 430
Likes: 0
Received 0 Likes
on
0 Posts
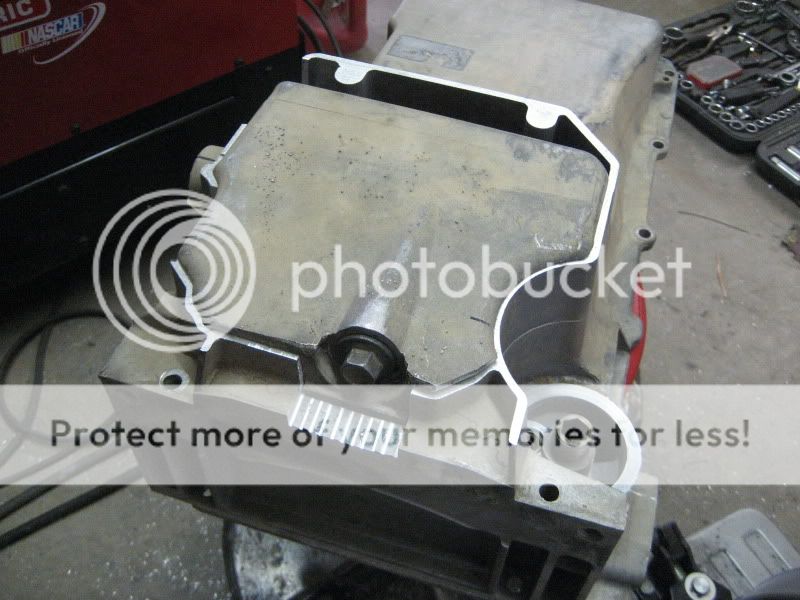
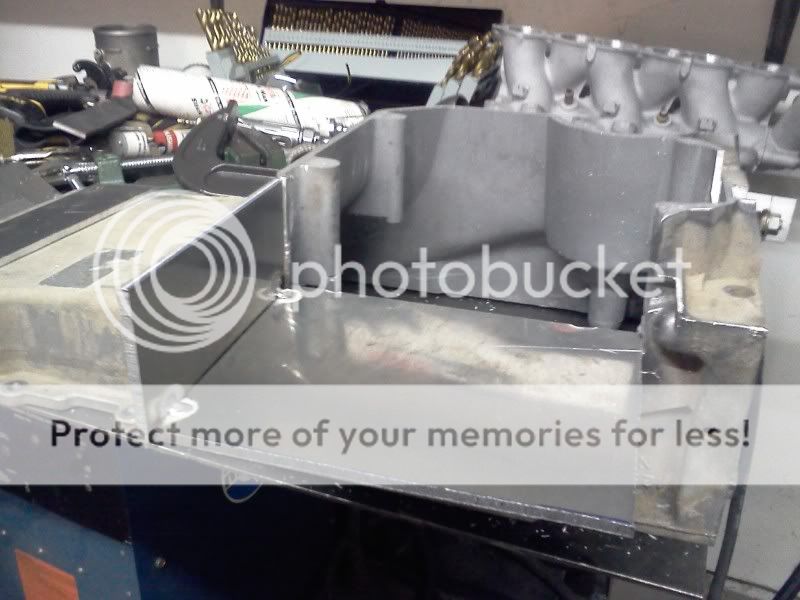
So I got to a point where I couldn't do a whole lot more. So I pulled the engine back out to start replacing the cam, oil pump, timing chain and stuff like that. Also, the main reason, is to hack up the oil pan so it clears the ground.
Here it is. I took about 3" out of it. I also welded on an extra area to get back some of the capacity I hacked out of it. The nice new aluminum always welds really good. But even after having the old pan washed and then wire wheel/ brushing it, it still welds like crap. So I decided I will just take it to work and hit all the cast sections with the MIG welder instead of wasting my gas and filler rod. I hate aluminum MIG welding, but it is fast and this is under the car, so nobody will ever see it anyways.
I was able to incorporate the original oil drain too!


I also have some equal length headers I made laying around for a z31 that I am trying to sell. After that is said and done, I can afford to buy some lifters and push rods and double timing chain as well.
Here it is. I took about 3" out of it. I also welded on an extra area to get back some of the capacity I hacked out of it. The nice new aluminum always welds really good. But even after having the old pan washed and then wire wheel/ brushing it, it still welds like crap. So I decided I will just take it to work and hit all the cast sections with the MIG welder instead of wasting my gas and filler rod. I hate aluminum MIG welding, but it is fast and this is under the car, so nobody will ever see it anyways.
I was able to incorporate the original oil drain too!
I also have some equal length headers I made laying around for a z31 that I am trying to sell. After that is said and done, I can afford to buy some lifters and push rods and double timing chain as well.
01-29-2012, 10:47 AM
#57
On The Tree
Join Date: Feb 2011
Location: Katy, Texas
Posts: 116
Likes: 0
Received 0 Likes
on
0 Posts
Jon did you get any pics of the finished pan? I would like to see what it turned out like. I'm catching up to you faster than I expected when do you think your going to get it on the streets? Are you going to run a muffler? Get some clear idle video when it is running and complete please.


01-29-2012, 11:25 AM
#58
TECH Regular
Thread Starter
iTrader: (2)
Join Date: Oct 2010
Location: Denver, CO.
Posts: 430
Likes: 0
Received 0 Likes
on
0 Posts
Thanks man. I went with a Comp Cams 224/230 114LSA .590"
Wire Guy, I didn't take any pictures of the finished pan because I finished it with the MIG welder at work. I hate aluminum MIG welds, but I figured this would be under the car and nobody would ever see it anyways.
I'm not in a hurry to get it running. My goal however is to have it driving around by the middle of March. We'll see if that happens though. If not, no big deal since it still snows in April here anyways LOL.
Yours looks like it is coming along quickly. Keep it up!
03-09-2012, 09:59 PM
#59
TECH Regular
Thread Starter
iTrader: (2)
Join Date: Oct 2010
Location: Denver, CO.
Posts: 430
Likes: 0
Received 0 Likes
on
0 Posts
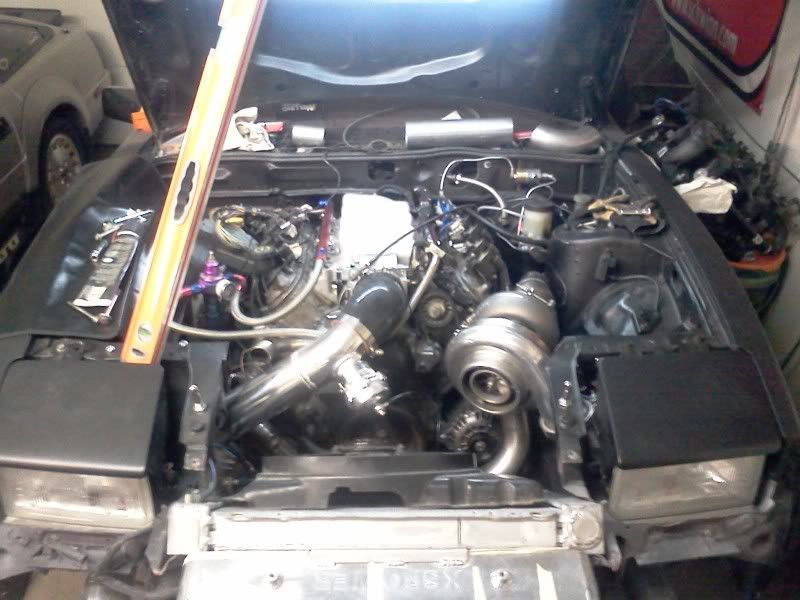
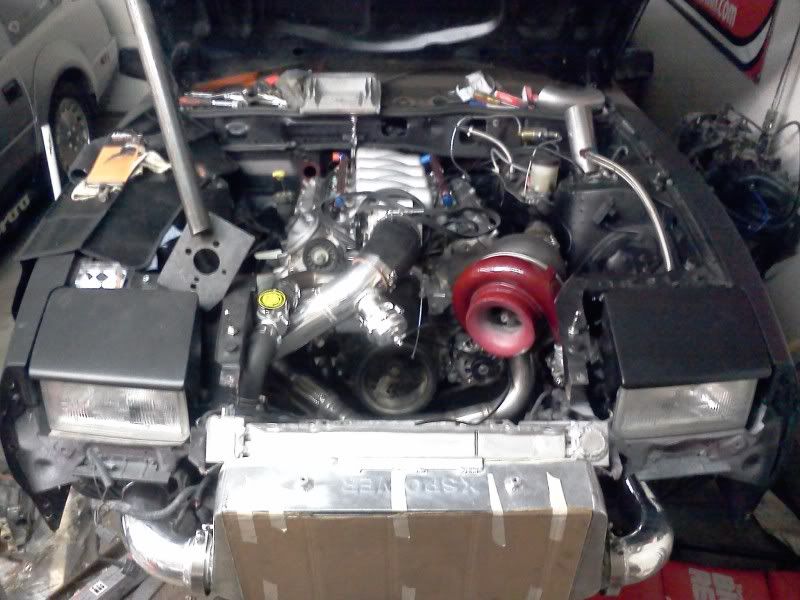
Figured I would post an update so my thread doesn't get lost.
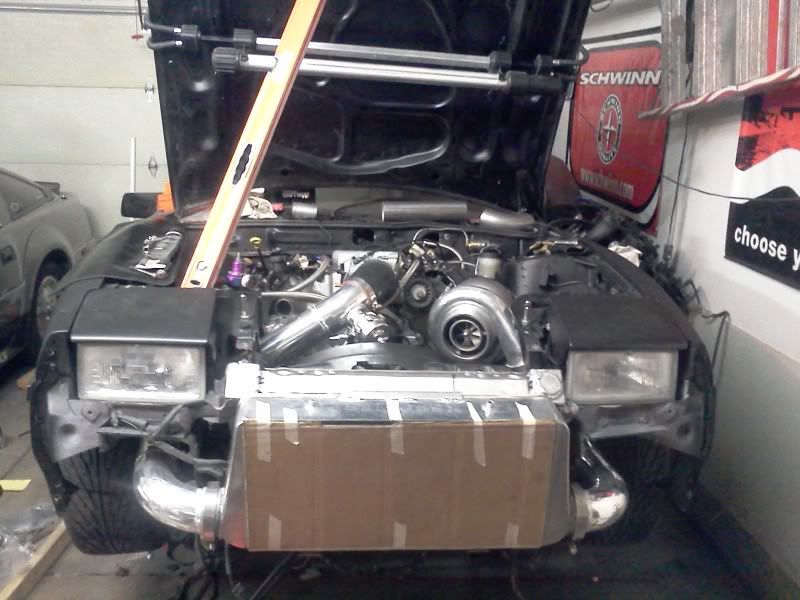
I ended up selling the S374 and buying a Garrett GT45R with a 1.44 turbine housing. Any doubts I had about the S374 not being big enough, are now gone while using this turbo. I bought it used for $1400. It has an anti surge delete welded into the housing, which I like. I had to cut off a cast elbow that was welded on the outlet, and weld on my own Vband fitting. The compressor housing is powder coated red, which I'm not a huge fan of, but I'll deal with it for now.
I am getting my drive shaft back either Monday or Tuesday. Then the biggest thing I have to do is finish the down pipe. Other than that it is all little stuff. However, there is a ton of little stuff to do. Stuff like, wire in the gauges, the peak and hold driver, run the -10 fuel line, hook up all the vacuum lines, etc.
This is the most current picture I have right now.
03-11-2012, 11:12 AM
#60
TECH Regular
Thread Starter
iTrader: (2)
Join Date: Oct 2010
Location: Denver, CO.
Posts: 430
Likes: 0
Received 0 Likes
on
0 Posts
I made a video talking about the build. It's pretty much everything in this thread minus some details. But people like video's so...
http://www.youtube.com/watch?v=DWrmD...1&feature=plcp
I was also trying to figure out a way to put my -10 weld bungs on my valve covers and have it to where oil would not just be puking into the catch can.
Here is the stock setup. You can see the hole where I put the weld bung.

Then here, you can see all I had to do was move that plastic thing over to that section. It is what GM used as sortof a "maze" that the oil would have to make it's way through before it could get out of the valve cover. Simply moved it right over there, fit perfect.

http://www.youtube.com/watch?v=DWrmD...1&feature=plcp
I was also trying to figure out a way to put my -10 weld bungs on my valve covers and have it to where oil would not just be puking into the catch can.
Here is the stock setup. You can see the hole where I put the weld bung.
Then here, you can see all I had to do was move that plastic thing over to that section. It is what GM used as sortof a "maze" that the oil would have to make it's way through before it could get out of the valve cover. Simply moved it right over there, fit perfect.