JY 5.3 turbo build question
#41
TECH Regular
Thread Starter
iTrader: (10)
Join Date: Nov 2009
Posts: 472
Likes: 0
Received 0 Likes
on
0 Posts
Those bearings look pretty damn good. Well if your pistons and rods look like, that mine are going to look like they were dipped in hot fudge. Ill post up some pics when their out. My local shop said it would be between $60 and $100 to hot tank my block and rotating assembly. Not sure if its going to get everything off but hopefully it will be good enough. Do you not have access to a local hot-tank, or do you just want to do it by hand?
#42
TECH Enthusiast
iTrader: (21)
I would get a quick ball hone on those cylinder walls, the trick is to get a nice movement up and down to get a good cross hatch.
When I did this I got the total seal ring set from summit racing for the 5.3 pistons and I was planning on a turbo build and was told by the guys over at total seal that they recommend between .020" gap and .022" for the first two rings. I did .021" for both. Sadly my cylinder walls were worse off and another unexpected purchase was made so I never got to finish.
looks good, looks like it is a 5.3, nicely done.
#43
8 Second Club
iTrader: (3)
Those bearings look pretty damn good. Well if your pistons and rods look like, that mine are going to look like they were dipped in hot fudge. Ill post up some pics when their out. My local shop said it would be between $60 and $100 to hot tank my block and rotating assembly. Not sure if its going to get everything off but hopefully it will be good enough. Do you not have access to a local hot-tank, or do you just want to do it by hand?
My engine builder friend doesn't have a cold tank. Too many govt regulations etc. I'm surprised they have let him keep the hot tank.
#44
TECH Regular
Thread Starter
iTrader: (10)
Join Date: Nov 2009
Posts: 472
Likes: 0
Received 0 Likes
on
0 Posts
Just removed the cam from the block and when I did the #2 and #3 cam bearings came out with it lol (pulled it out slow and careful too). They are toast! DEEP grooves worn into the cam and the bearings, and the tips of two pushrods were damaged pretty bad as well. Not too worried about it as I'm replacing all this stuff anyways, I wonder what happened to this thing?
#48
TECH Regular
Thread Starter
iTrader: (10)
Join Date: Nov 2009
Posts: 472
Likes: 0
Received 0 Likes
on
0 Posts
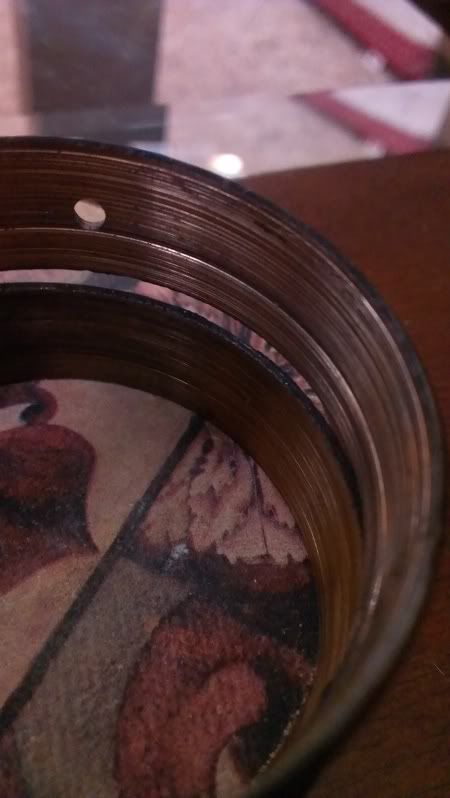
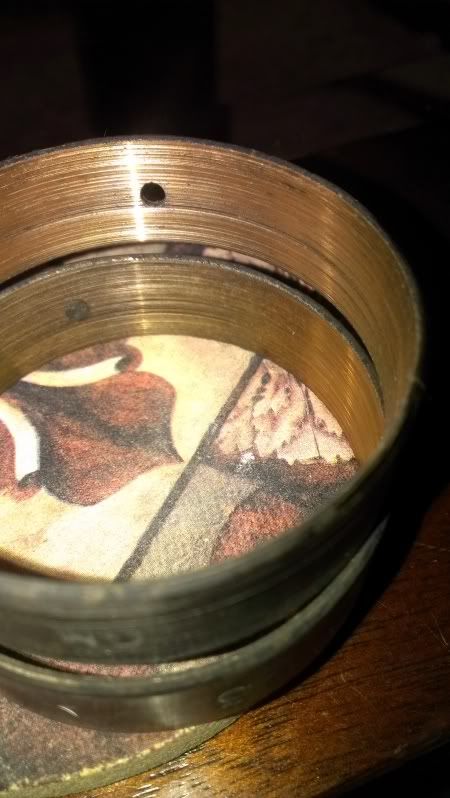
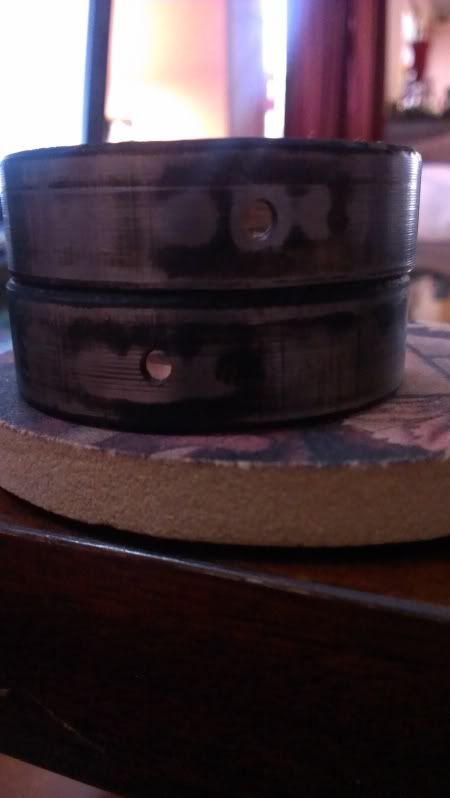
What a deal, I got my entire long block (oil pan to intake/heads) for $200, hopefully it doesn't turn out to be a boat anchor haha. Heres a couple pics of the two spun bearings....those grooves are nasty!


#49
TECH Regular
Thread Starter
iTrader: (10)
Join Date: Nov 2009
Posts: 472
Likes: 0
Received 0 Likes
on
0 Posts
Also...two pushrod tips were chewed up pretty bad. Im not sure if two lifters went bad or if that was due to the cam bearings going bad? It looked like someone put the prod tips on a grinder.
Last edited by schmendog; 05-04-2013 at 08:28 AM.
#52
TECH Regular
Thread Starter
iTrader: (10)
Join Date: Nov 2009
Posts: 472
Likes: 0
Received 0 Likes
on
0 Posts
I was trying to figure out what the backside of a bearing would look like that has spun in the block looked like, but had no luck. Thanks for the intel.
What did you find most useful for the cleanup? I've been using some Lacquer thinner, which seems to be working well.
What did you find most useful for the cleanup? I've been using some Lacquer thinner, which seems to be working well.
#53
8 Second Club
iTrader: (3)
I started with Purple power cleaner, but don't let it dry....
Then paint thinner and brake cleaner, I bought a case.
Then laundry soap mixed with dish soap and hot water. Followed by pressure washing. Hand brushes, scotchbrie pads and a small wire brush.
Took me quite a few hours.
I got a bath too, and now smell like the above mentioned cleaners.
Good thing I'm single.
Maybe I'll throw some coals in the valley and put a grill on top.....
Sorry to tread on your post.
#55
TECH Regular
Thread Starter
iTrader: (10)
Join Date: Nov 2009
Posts: 472
Likes: 0
Received 0 Likes
on
0 Posts
I started with Purple power cleaner, but don't let it dry....
Then paint thinner and brake cleaner, I bought a case.
Then laundry soap mixed with dish soap and hot water. Followed by pressure washing. Hand brushes, scotchbrie pads and a small wire brush.
Took me quite a few hours.
I got a bath too, and now smell like the above mentioned cleaners.
Good thing I'm single.
Maybe I'll throw some coals in the valley and put a grill on top.....
Sorry to tread on your post.
Then paint thinner and brake cleaner, I bought a case.
Then laundry soap mixed with dish soap and hot water. Followed by pressure washing. Hand brushes, scotchbrie pads and a small wire brush.
Took me quite a few hours.
I got a bath too, and now smell like the above mentioned cleaners.
Good thing I'm single.
Maybe I'll throw some coals in the valley and put a grill on top.....
Sorry to tread on your post.
Sounds like a stout combo, Ill have to try some of that purple stuff.......tread on my friend, any info is helpful.
#58
TECH Regular
Thread Starter
iTrader: (10)
Join Date: Nov 2009
Posts: 472
Likes: 0
Received 0 Likes
on
0 Posts
I removed my plugs, didn't find any sediment there, nor any in the pick up tube screen which makes me happy. I started the clean up finally, hopefully it will come out looking as good as both of yours. Ill tell you this much...Evaporust works wonders! My water jackets were really bad (caked in rust), so I sealed the water pump inlet and filled up the water jackets with the stuff over night...amazing results! I plan on using it for my cylinder walls too, using a method I read online for soaking them. After that it will get a scrub down with the Dawn, then its off to the machine shop for inspection! If that goes well it'll be the hot-tank, a light hone (hopefully no bore required) and some new cam bearings while its there.
#59
TECH Addict
iTrader: (6)
Yeah I no longer have access to the one I used on that block. Dealings gone bad and getting tools taken, just a bad scene so I got away from that place. I am sure a $100 hot tank could do the same or some good old fashioned elbow grease, but that sped things up a touch! I got a buddy who may be doing the same in his Nova if he can ever finish his rat rod truck, lol. I miss my '63 SS that I had years ago.
#60
TECH Regular
Thread Starter
iTrader: (10)
Join Date: Nov 2009
Posts: 472
Likes: 0
Received 0 Likes
on
0 Posts
New question, I'm looking at a pair of worked stock heads ( Ported 862 Heads , with valve job 2.02/1.57 ferra valves milled .030 over to 58cc chambers) and wondering if I use these with my build, would I run into any PTV clearance issues? I'm planning on having Martin @ tick do a custom cam after heads are selected.


