Father and Son Turbo'd LQ4 83' Jimmy
 12-21-2013, 02:48 PM
#1
Staging Lane
Thread Starter
Join Date: Nov 2013
Location: East Texas
Posts: 50
Likes: 0
Received 0 Likes
on
0 Posts
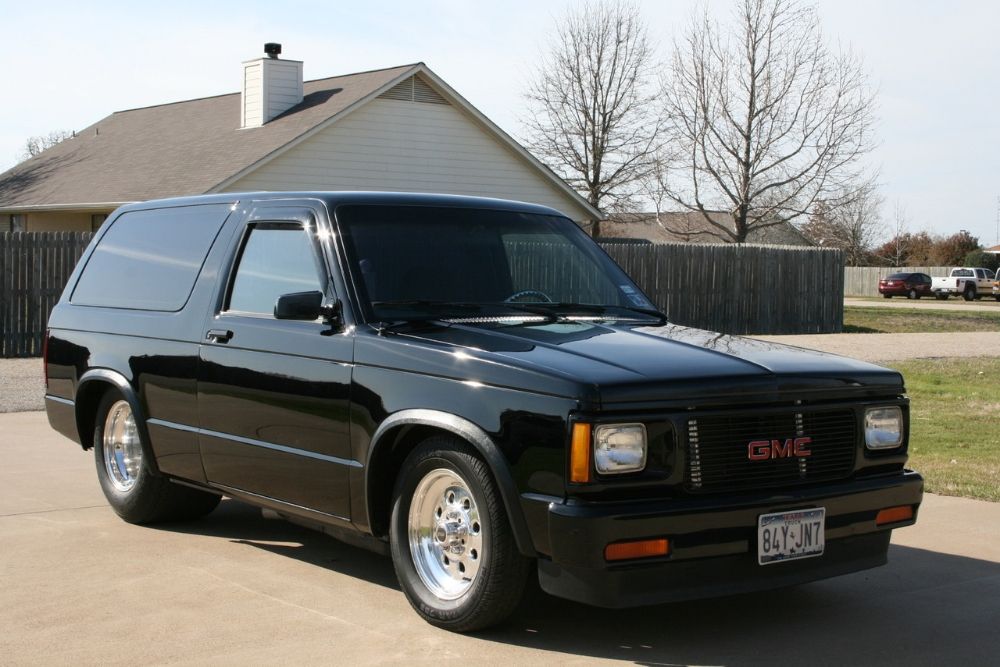
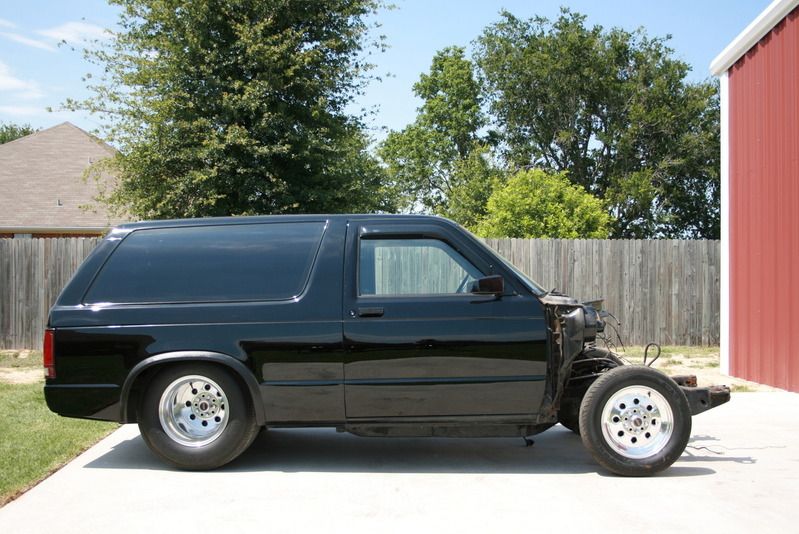
There's already been some build progress with this! I'm about to be 21 and going to college for Mechanical Engineering and my dad and I work on this when we can!
My dad bought this ride a couple years ago. Already narrowed with a Ford 9", Forged SBC 350, junk heads, and a FAST EFI system on it. Its been running around our town for years and then one day it pops up for sale so we got it!
We always thought we'd throw a nicer 600hp SBC in it and after recent discoveries on how good the LS-series motors hold up to boost we decided why not!
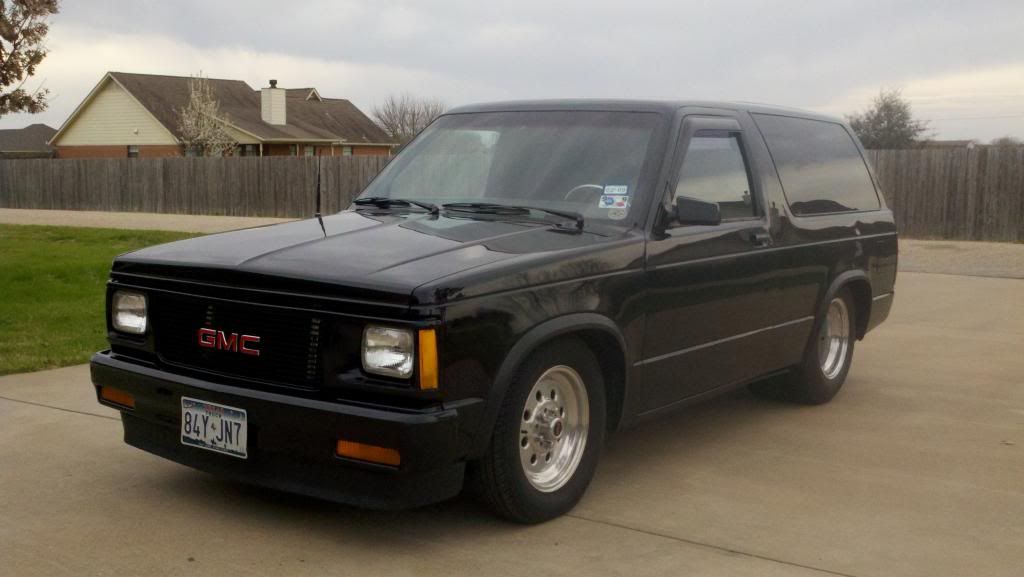
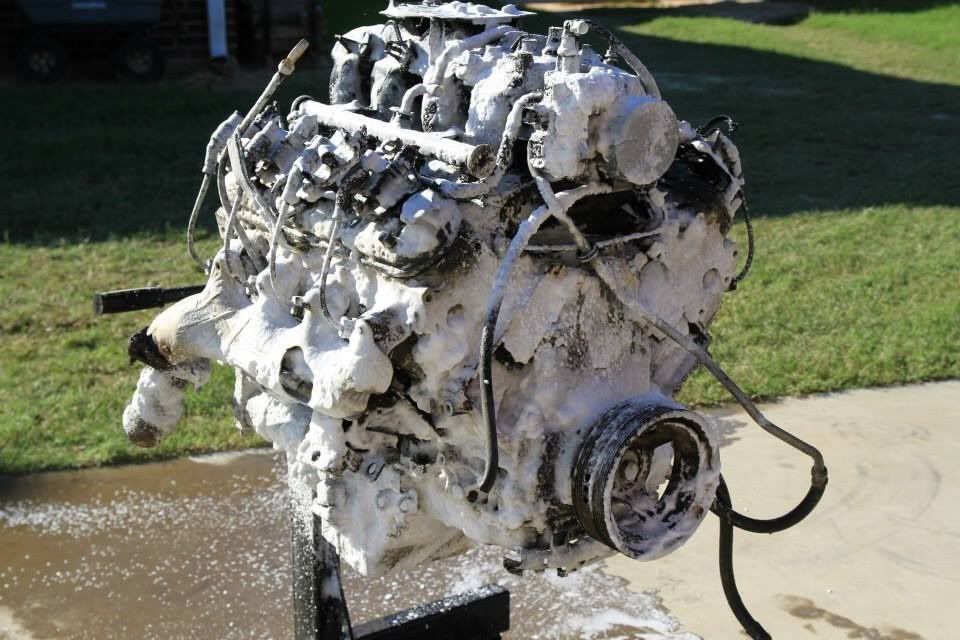
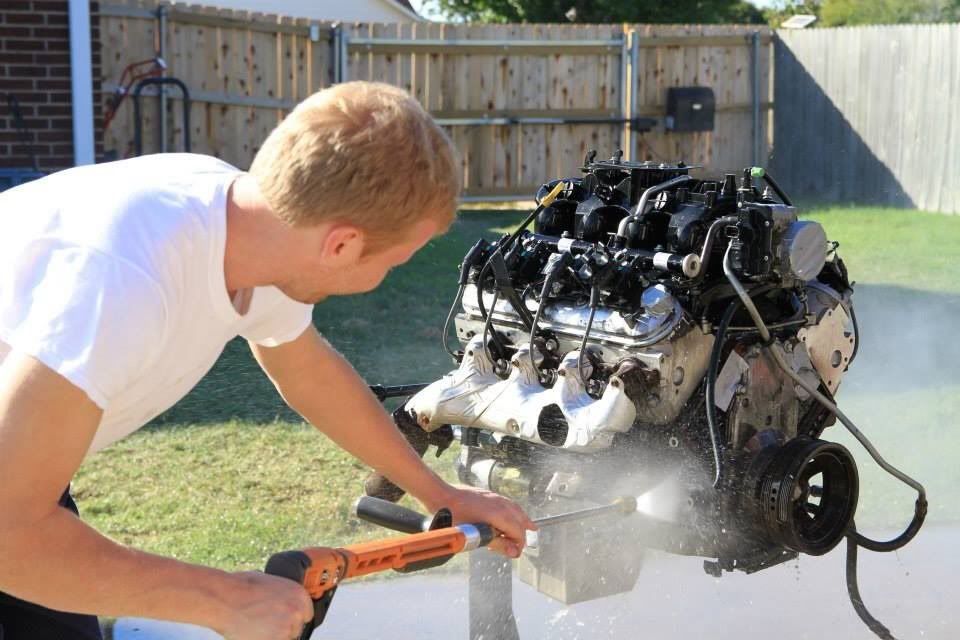
Detailed it!

After!
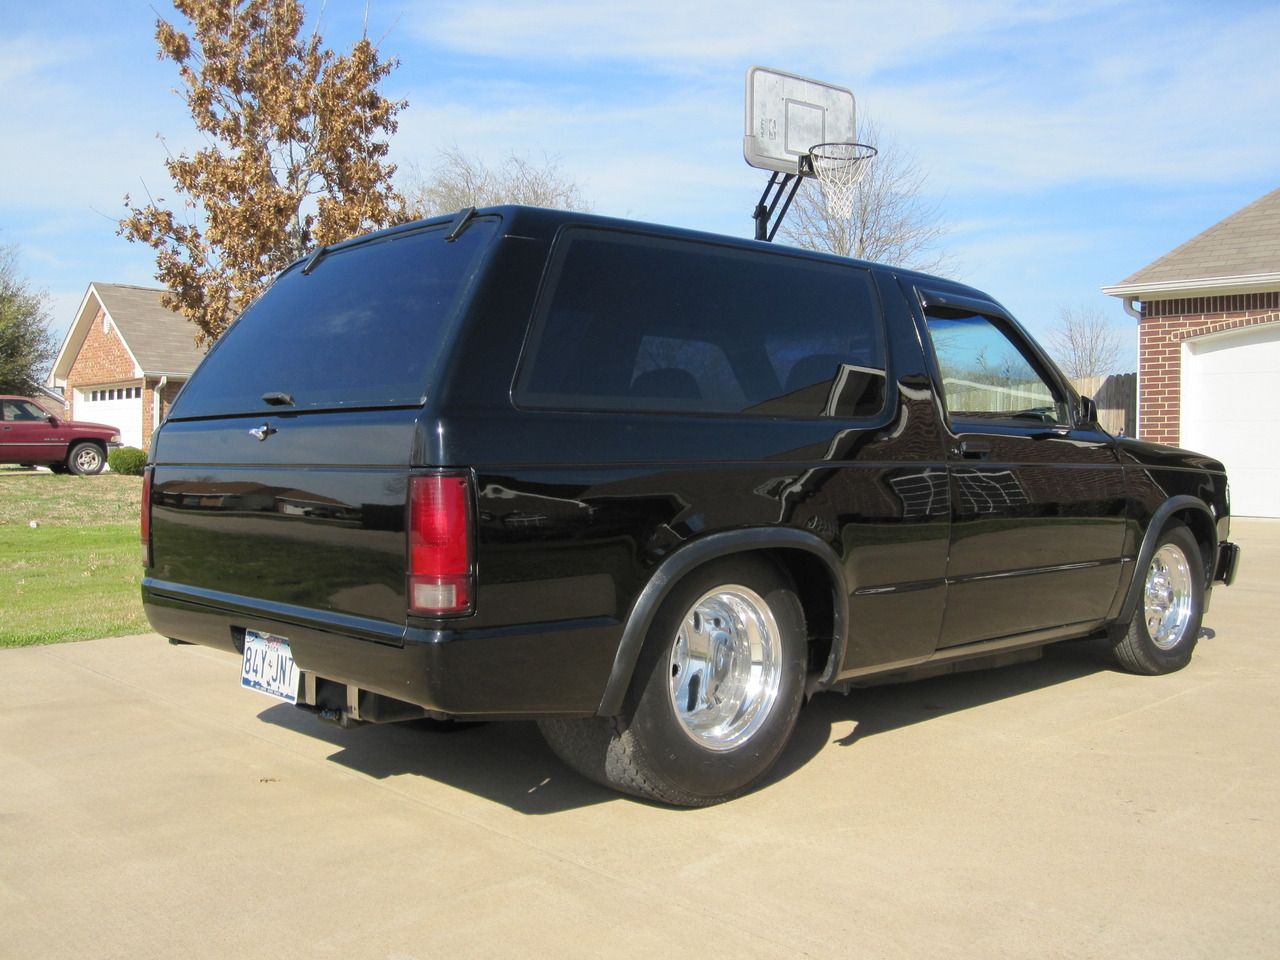
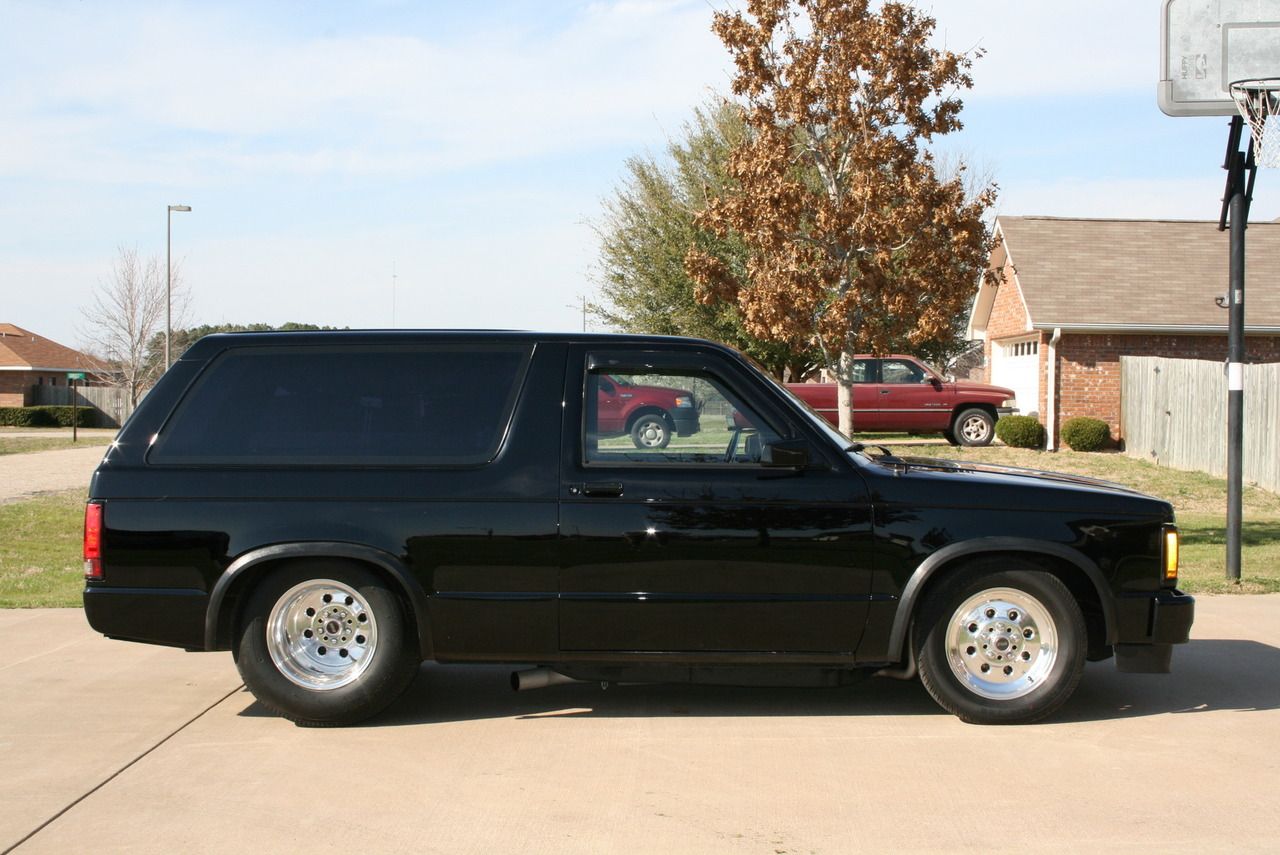
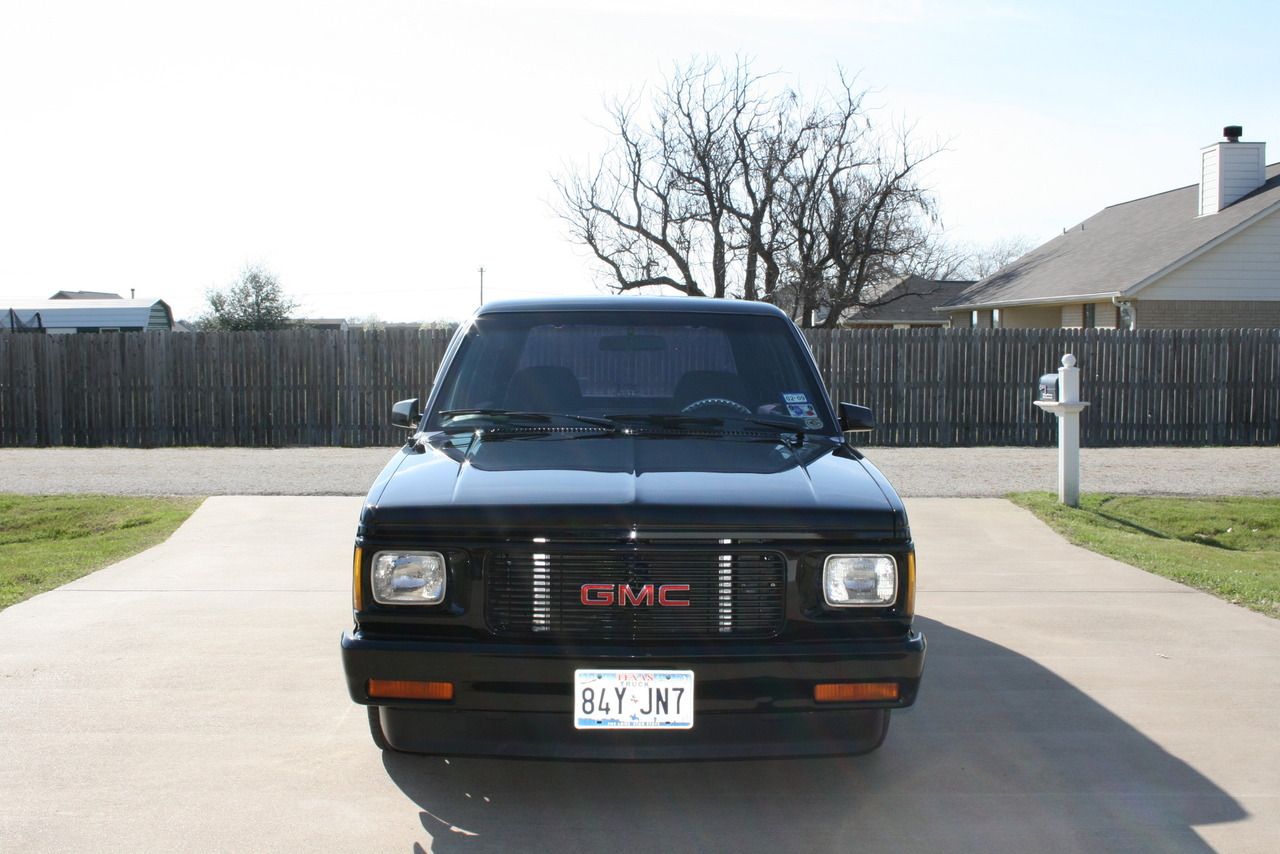
My dad bought this ride a couple years ago. Already narrowed with a Ford 9", Forged SBC 350, junk heads, and a FAST EFI system on it. Its been running around our town for years and then one day it pops up for sale so we got it!
We always thought we'd throw a nicer 600hp SBC in it and after recent discoveries on how good the LS-series motors hold up to boost we decided why not!

Detailed it!


After!


 12-21-2013, 03:01 PM
#2
Staging Lane
Thread Starter
Join Date: Nov 2013
Location: East Texas
Posts: 50
Likes: 0
Received 0 Likes
on
0 Posts
Then we started to dissemble everything.

My Dad!
What a mess!
Pulled out to be pressure washed!
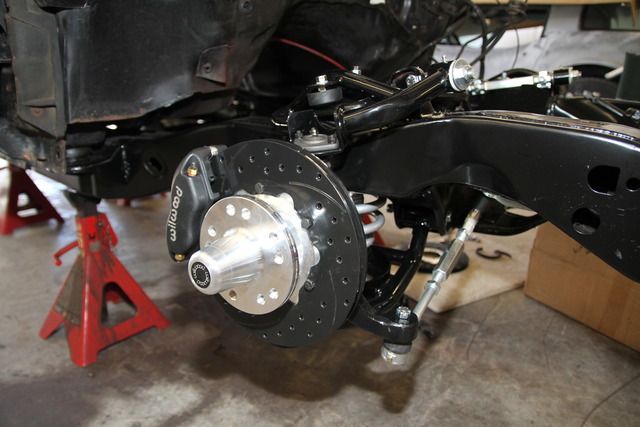
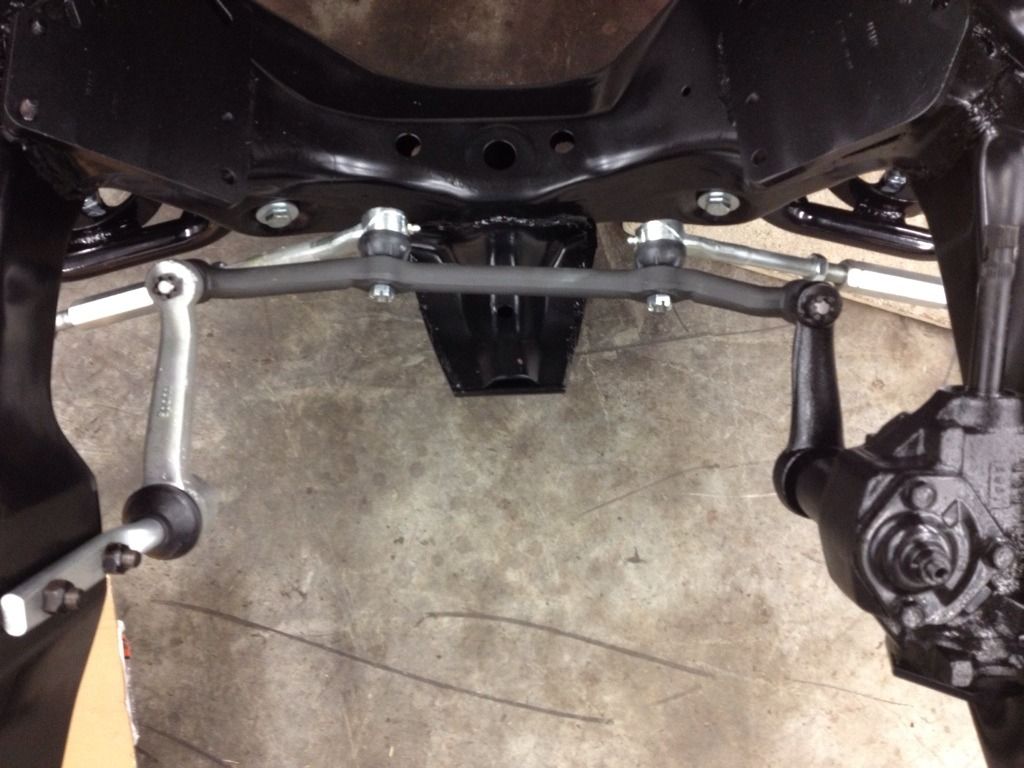
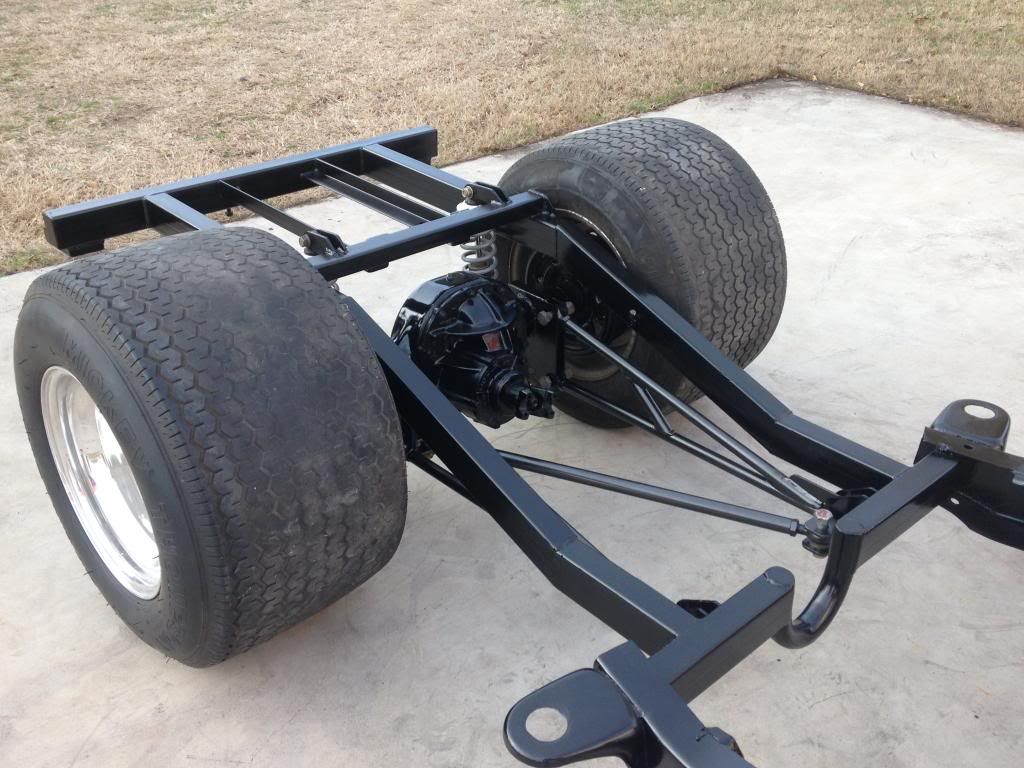
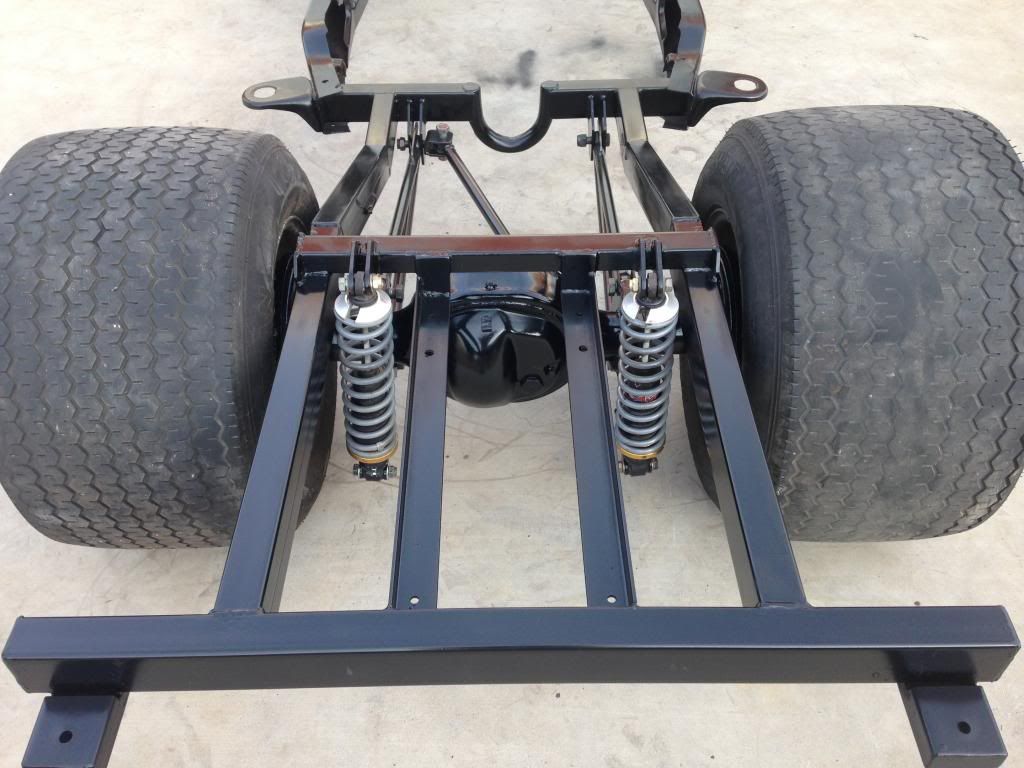
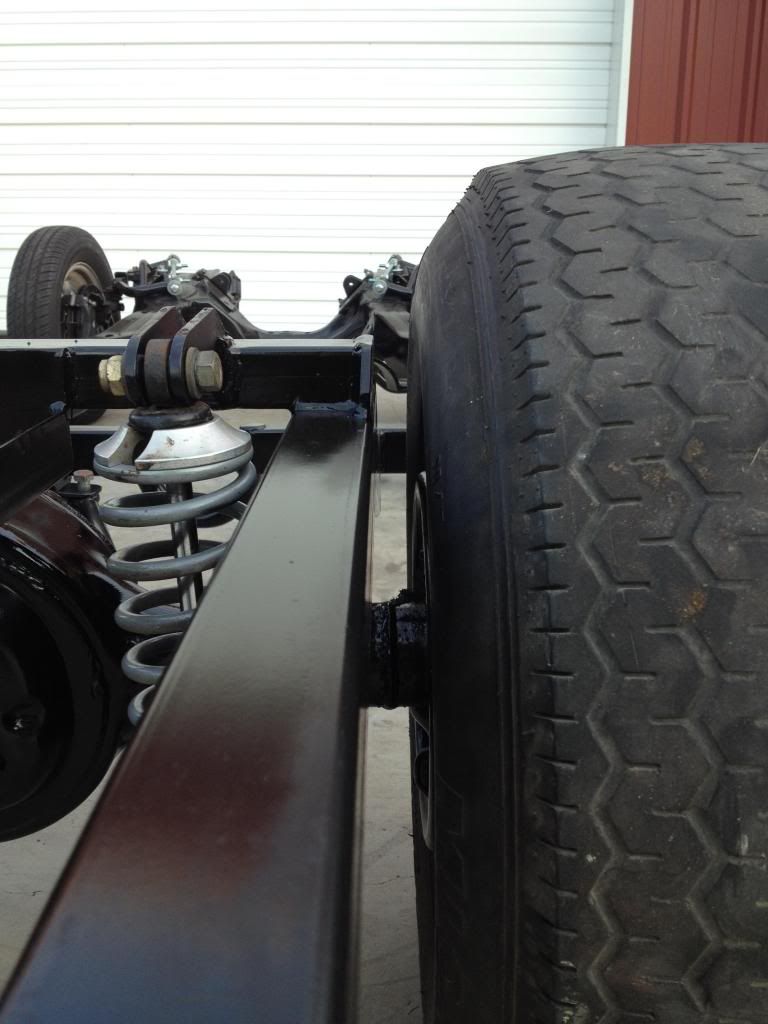
After cleaning and paint we started assembling the front end!
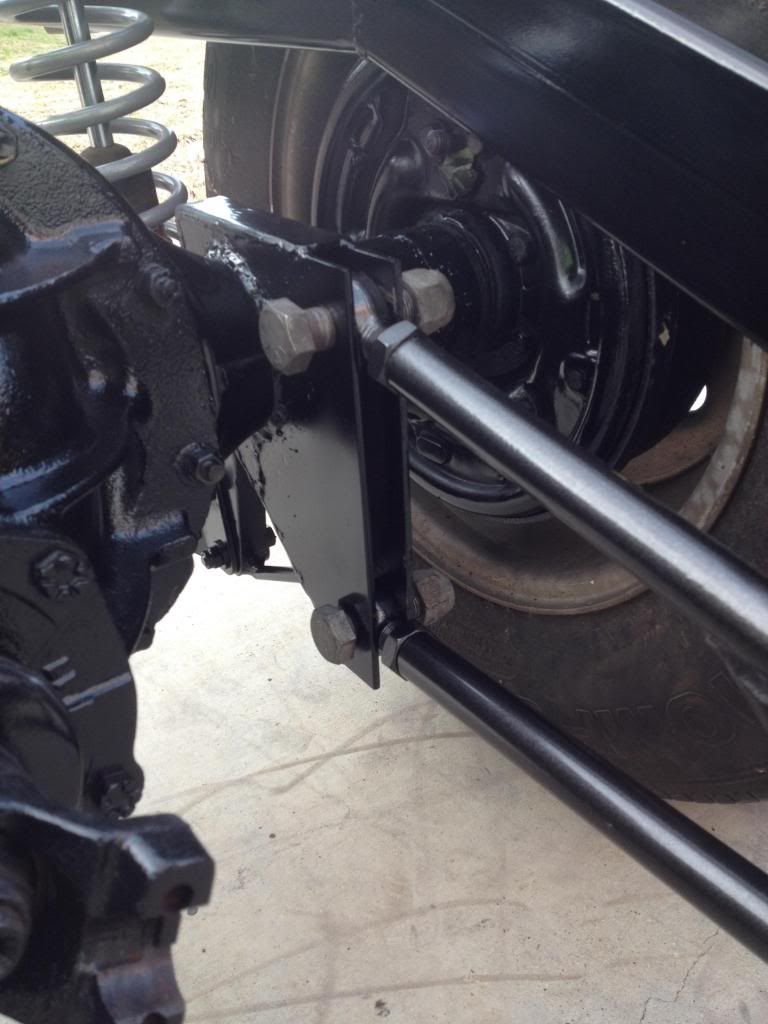
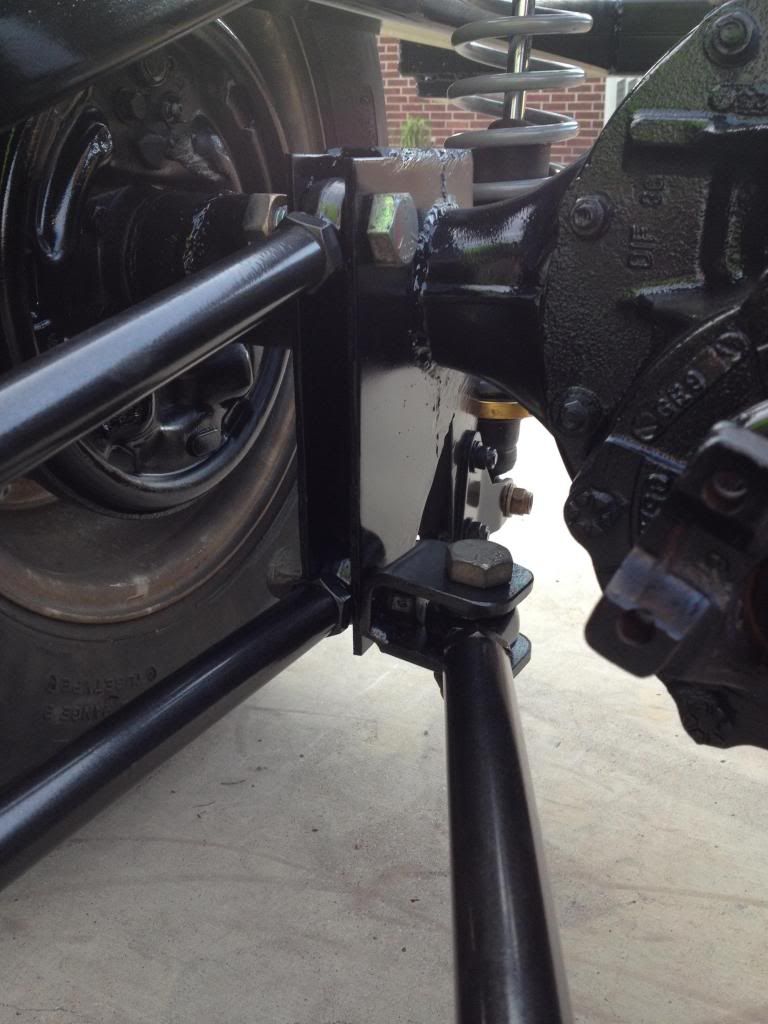
New Spohn Tubular Control arms
http://www.spohn.net/shop/1982-2003-...s-Package.html
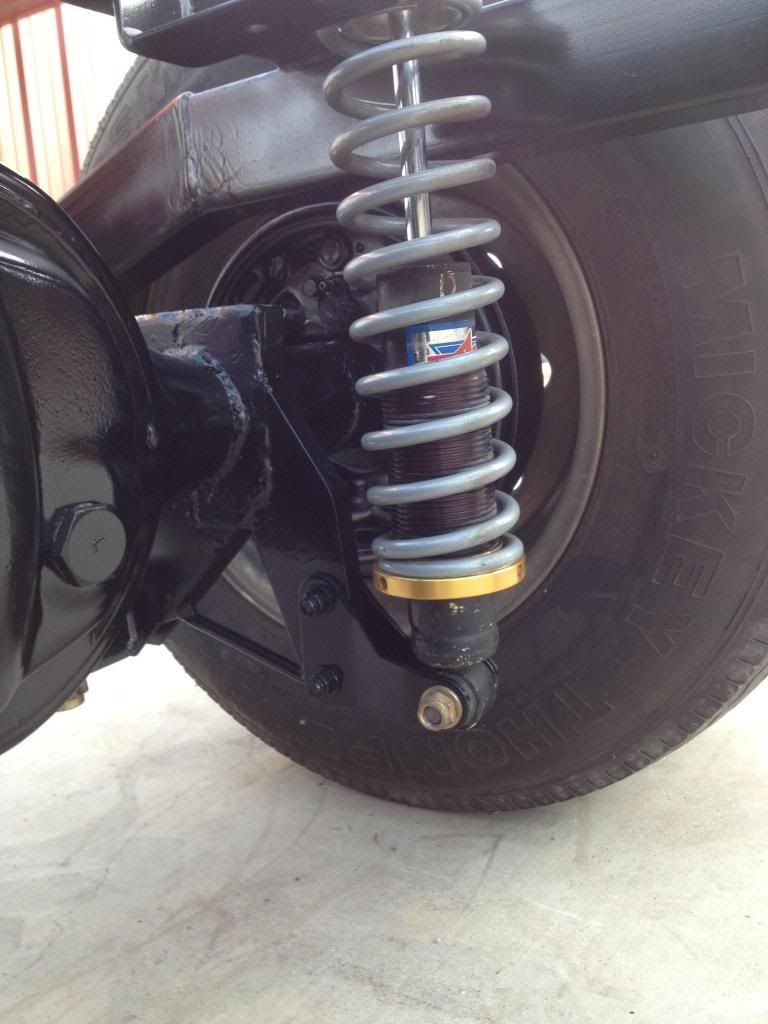
and QA1 Double Adjustable Coil-Overs
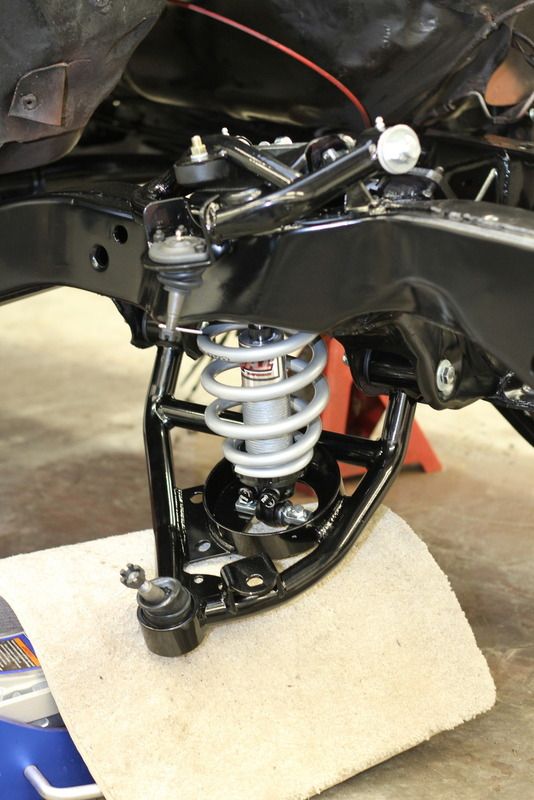
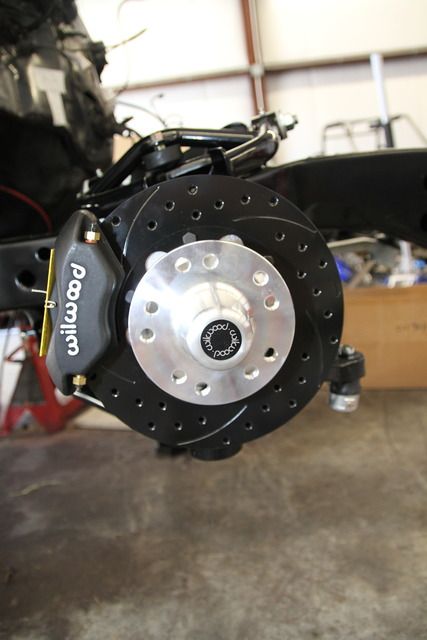
All Aluminum Wilwood breaks to help stop at the end of the track!
http://www.summitracing.com/parts/wi...olet/model/s10
Spohn Heavy Duty Steering Components. Yes we have the correct Pitman arm now!
http://www.spohn.net/shop/1982-2003-...-S-10-2WD.html

My Dad!

What a mess!

Pulled out to be pressure washed!


After cleaning and paint we started assembling the front end!
New Spohn Tubular Control arms
http://www.spohn.net/shop/1982-2003-...s-Package.html
and QA1 Double Adjustable Coil-Overs

All Aluminum Wilwood breaks to help stop at the end of the track!
http://www.summitracing.com/parts/wi...olet/model/s10


Spohn Heavy Duty Steering Components. Yes we have the correct Pitman arm now!
http://www.spohn.net/shop/1982-2003-...-S-10-2WD.html
 12-21-2013, 03:24 PM
#3
Staging Lane
Thread Starter
Join Date: Nov 2013
Location: East Texas
Posts: 50
Likes: 0
Received 0 Likes
on
0 Posts
The ride was kinda at a stand still, with minor work being done to it! This is around the time we knew we were going LSx style!!!
Traced out a template and had a local company cut it out of 18ga steel
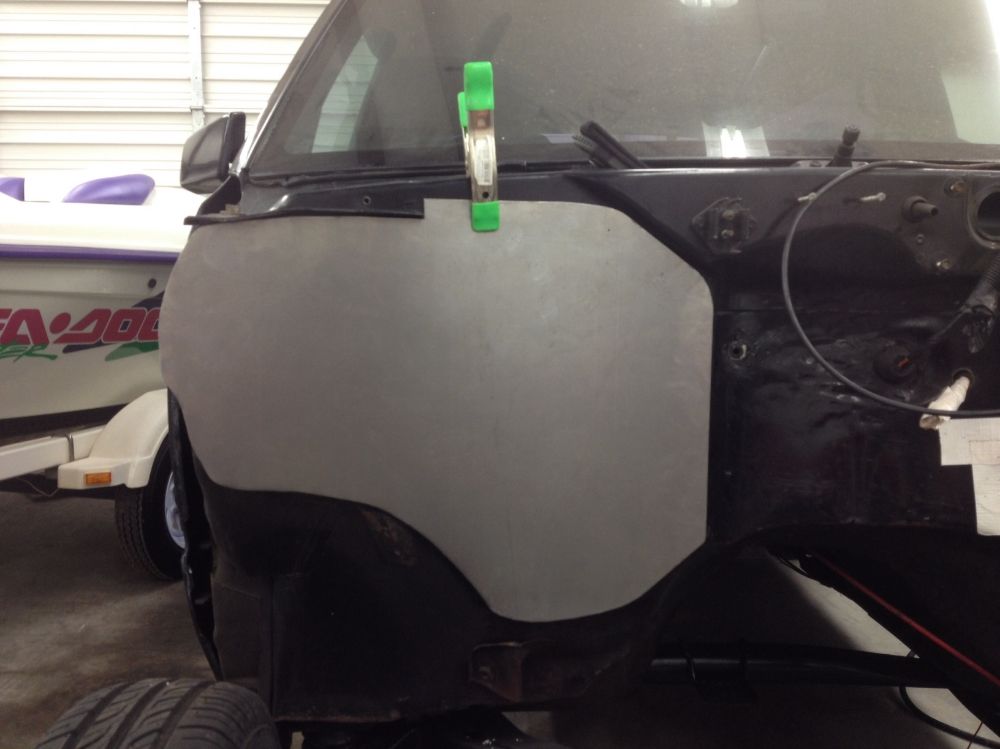
We decided to cut more than we originally planned so I had a lot of filling work with the welder to do after we cut this lip off!
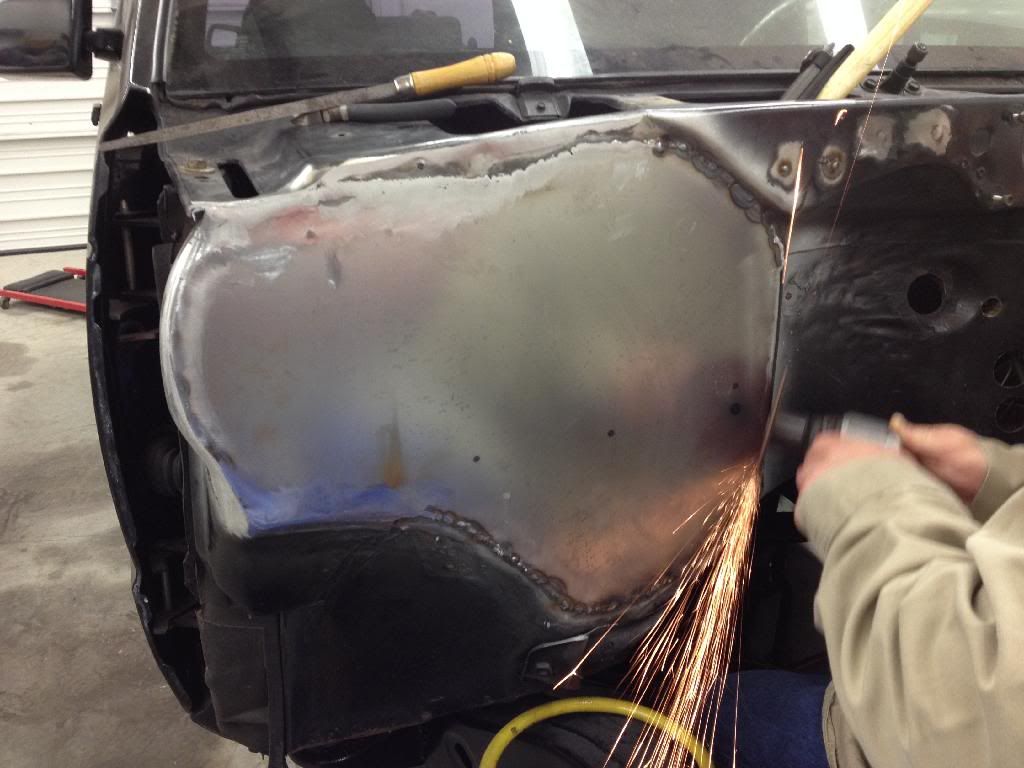
Came out pretty good all together!
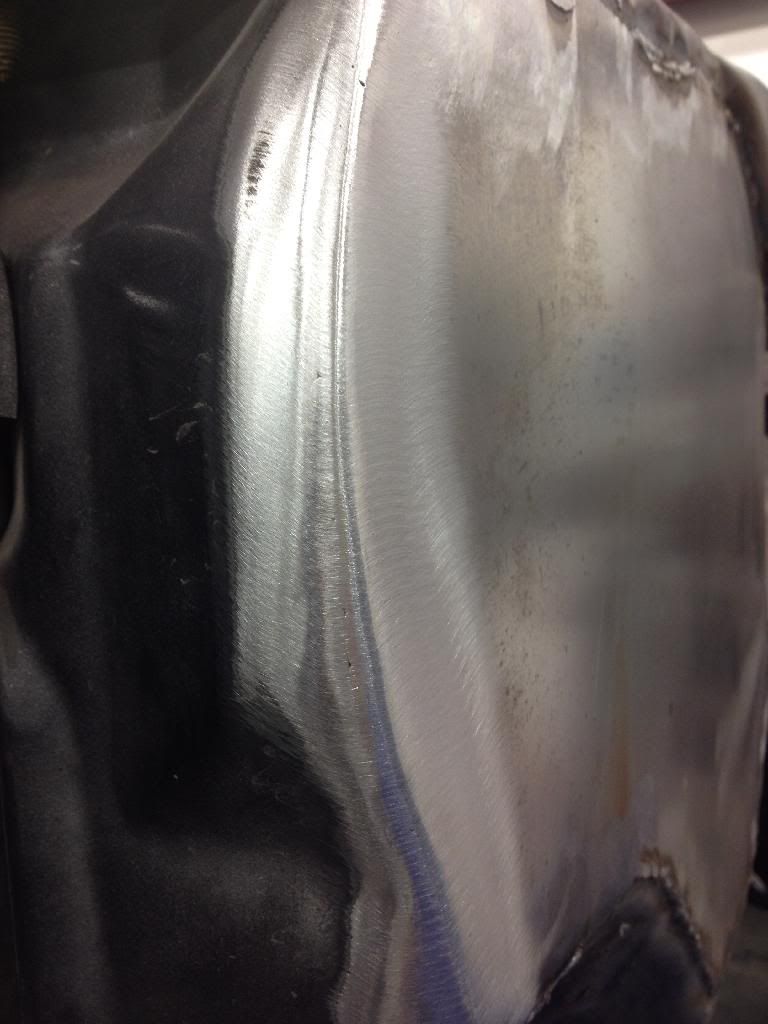
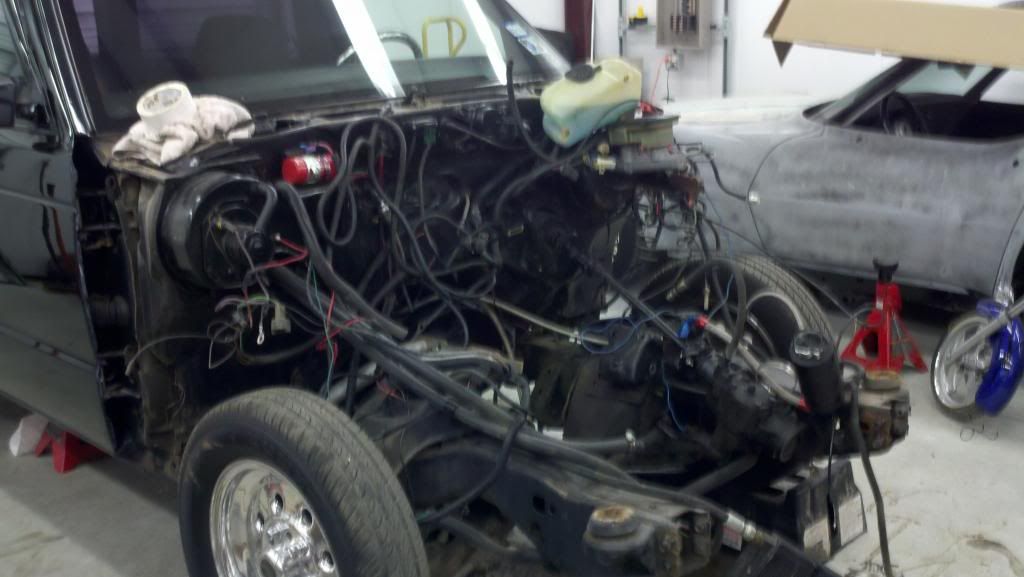
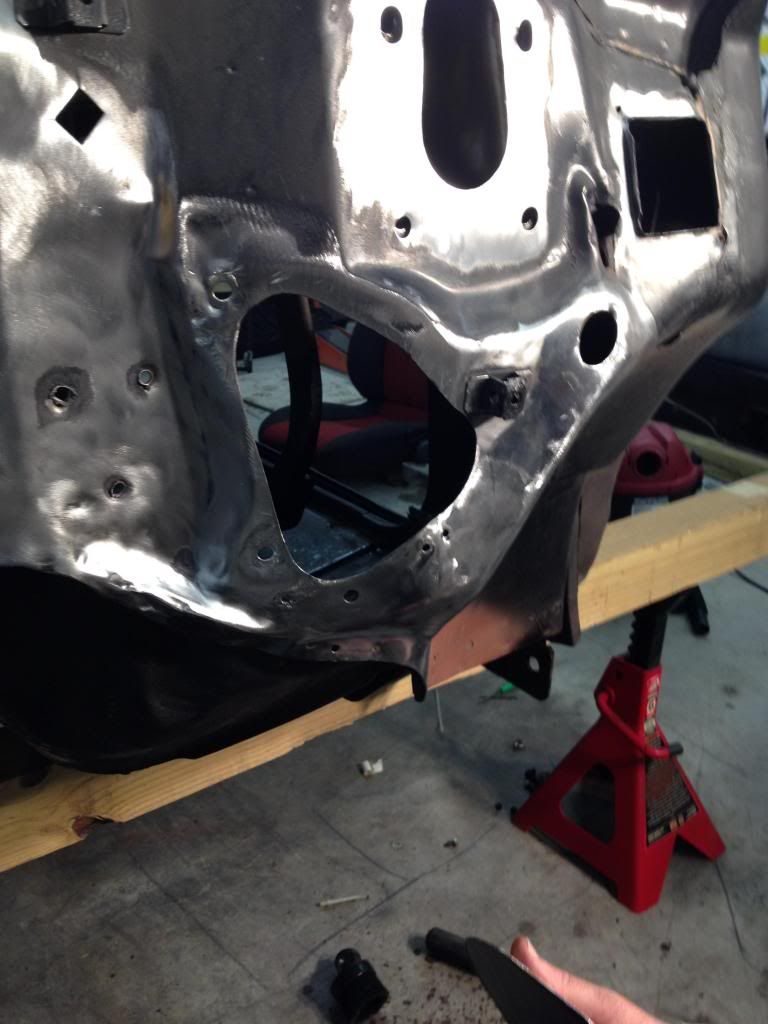
There is still a lot of firewall work to be done! more shaving and fixing dents from the previous owners hammer blows!
Smoothing this out!
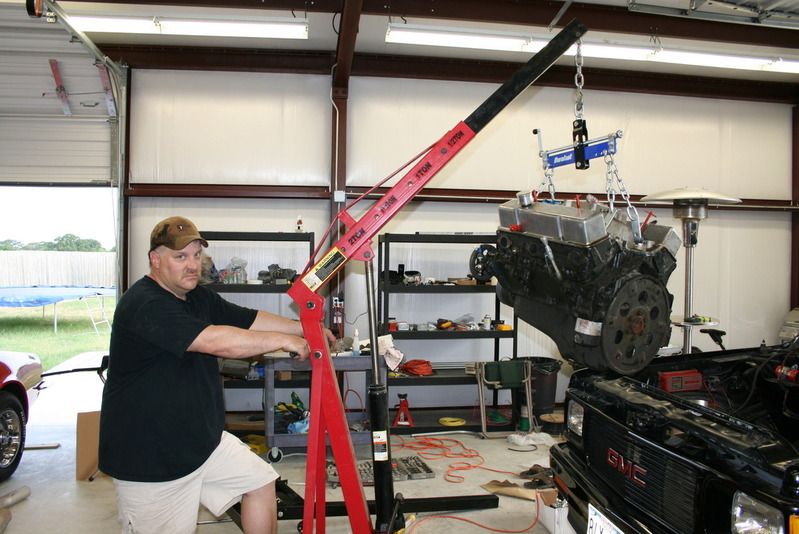
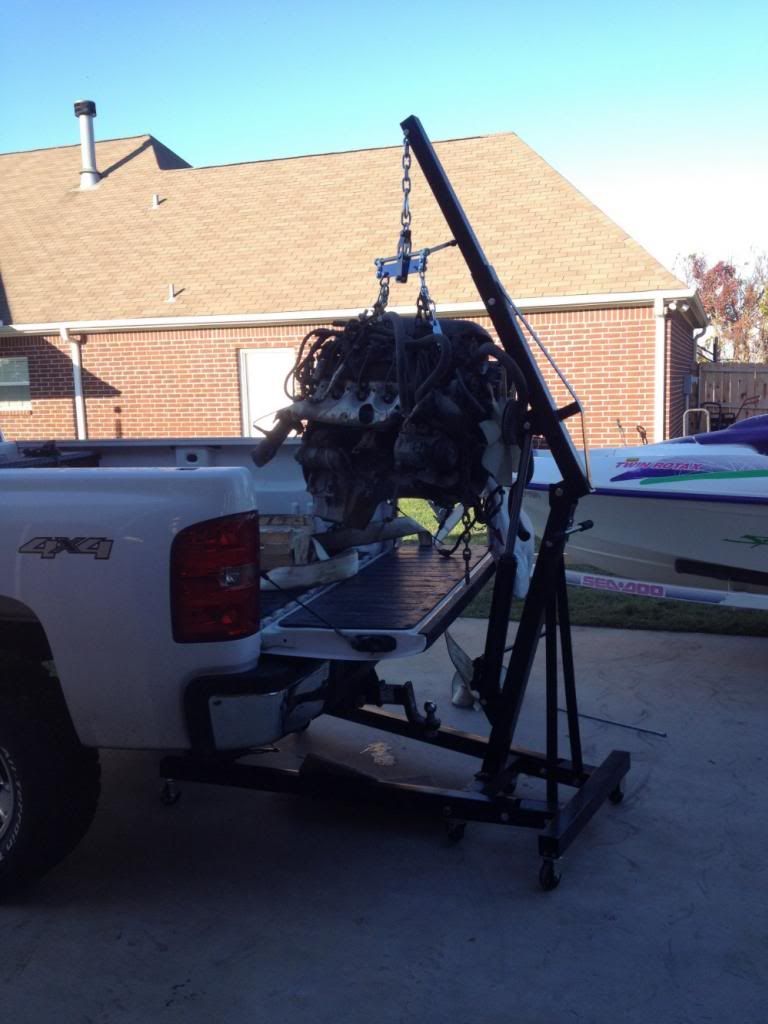
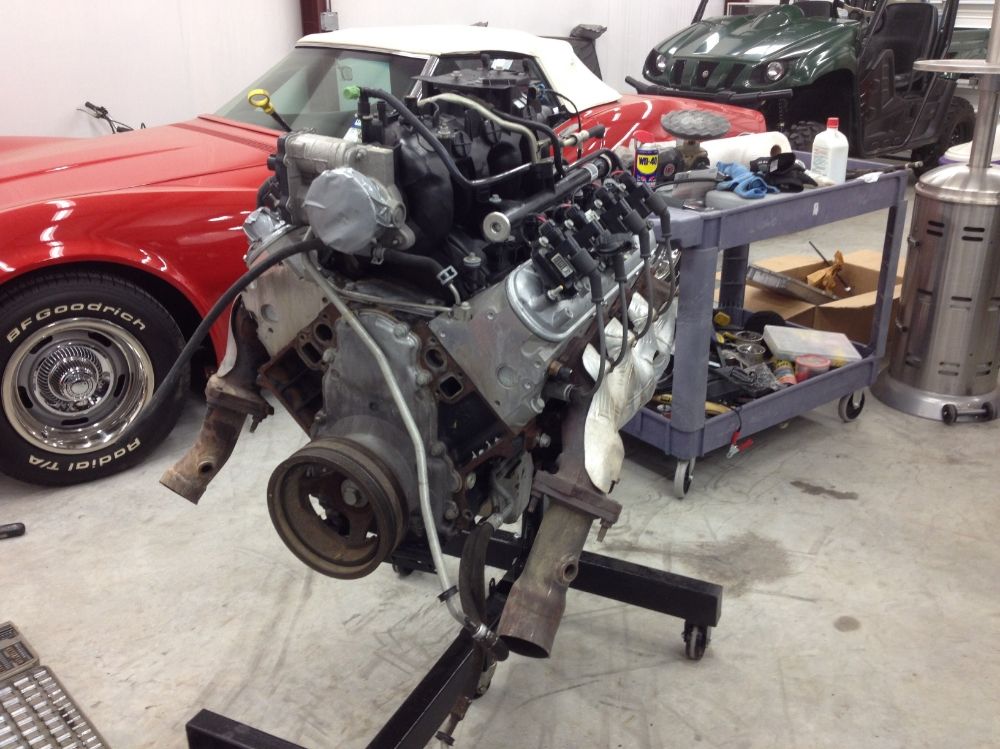
One day I came across a LQ4 at a local recycling yard with 130K miles on it! It came from a 2005 Silverado 2500. Harness, Pedal, just about everything came with it!

Took off the front accessories
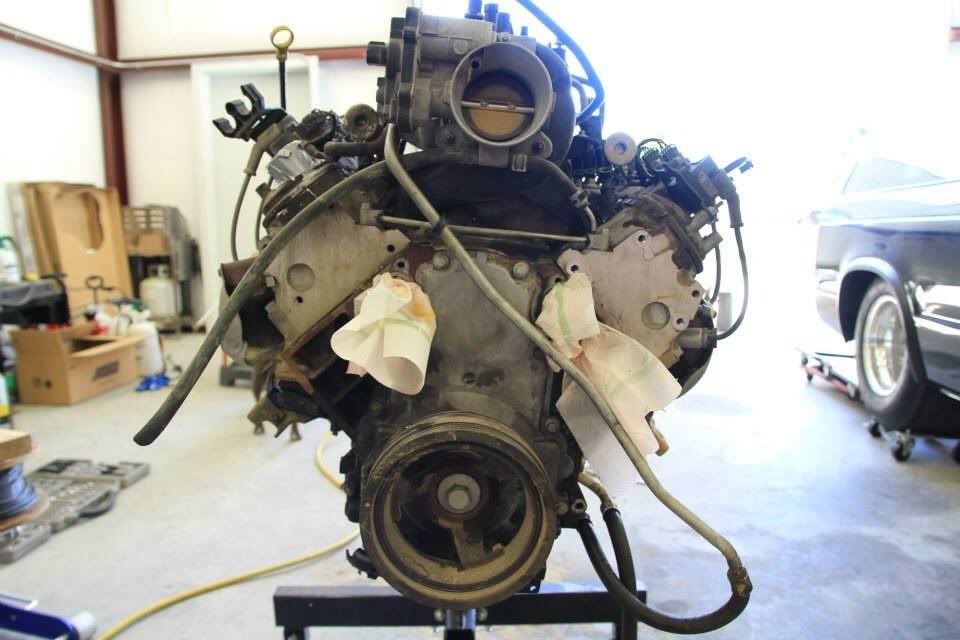
Cleaning stage
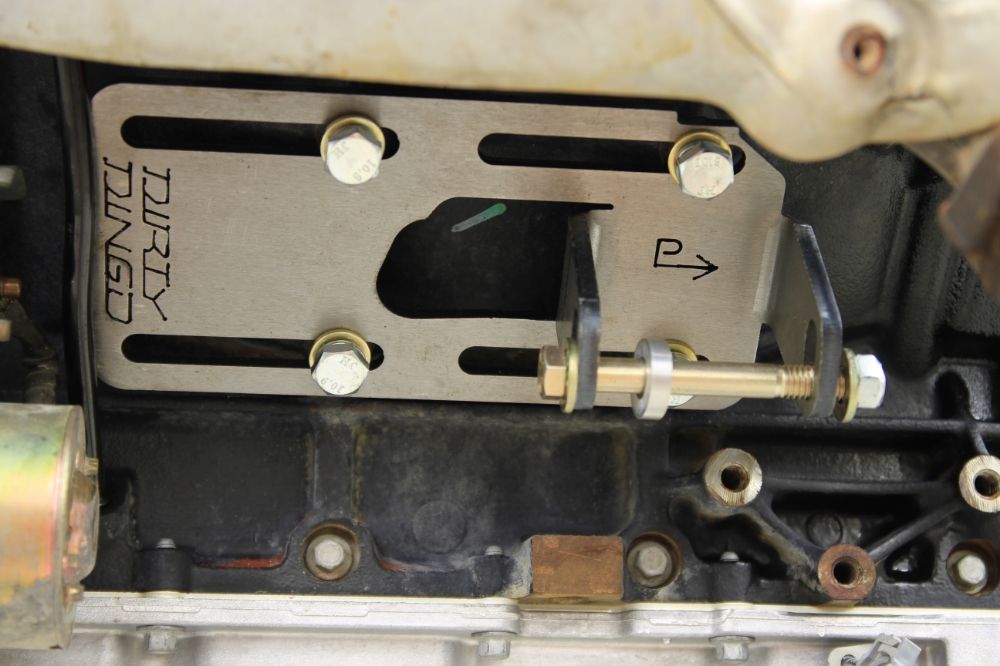
Ordered Solid Mounts from JEGS for a 80's Camaro to fit the already welded SBC Trans-Adapt mounts.
Then went onto Dirty Dingo and purchased these adjustable Solid mounts
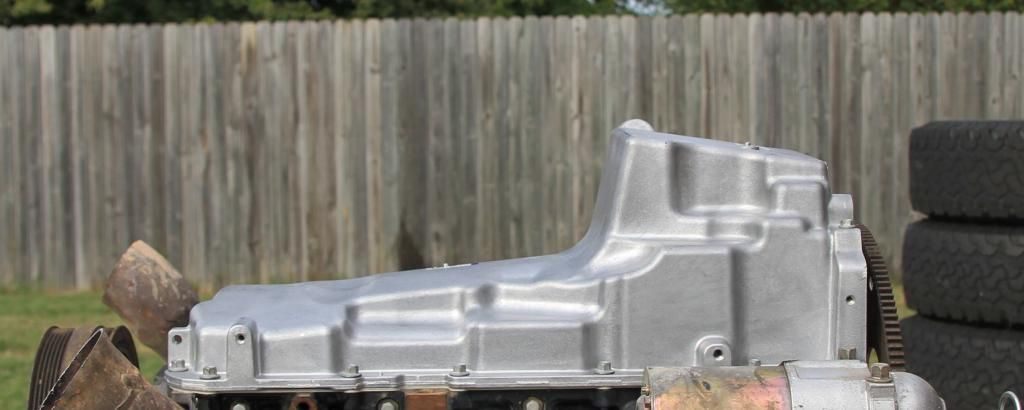
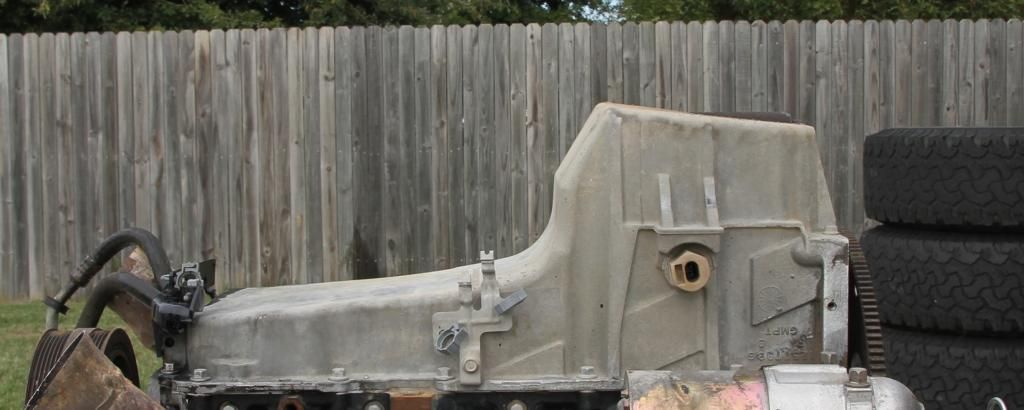
H3 Oil Pan Kit. New vs Old Truck
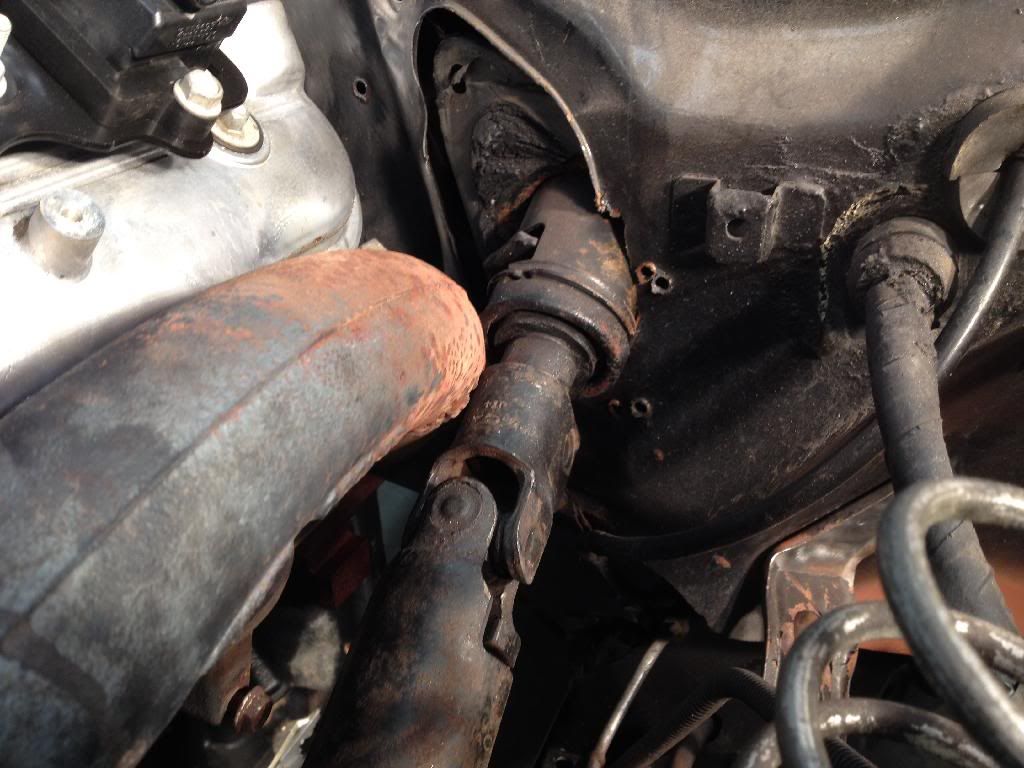
Reversed truck manifolds won't fit with the factory flanges. Will have to V-Band them and hope they fit!
Upside down Manifolds for now, to see clearance for everything.
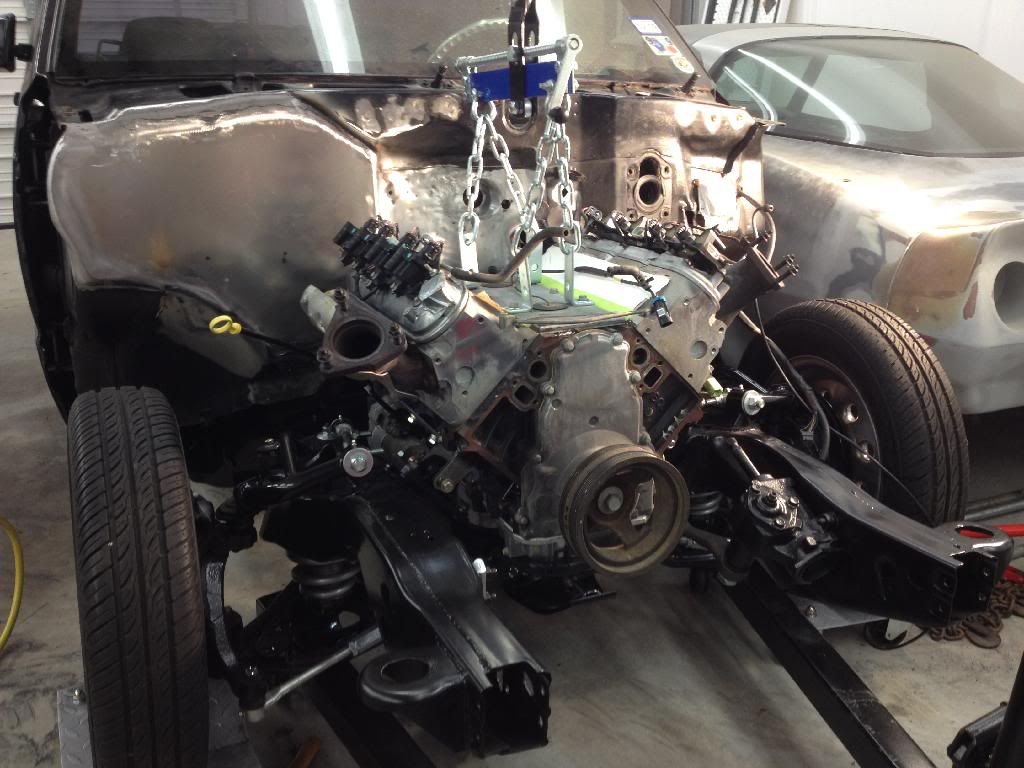
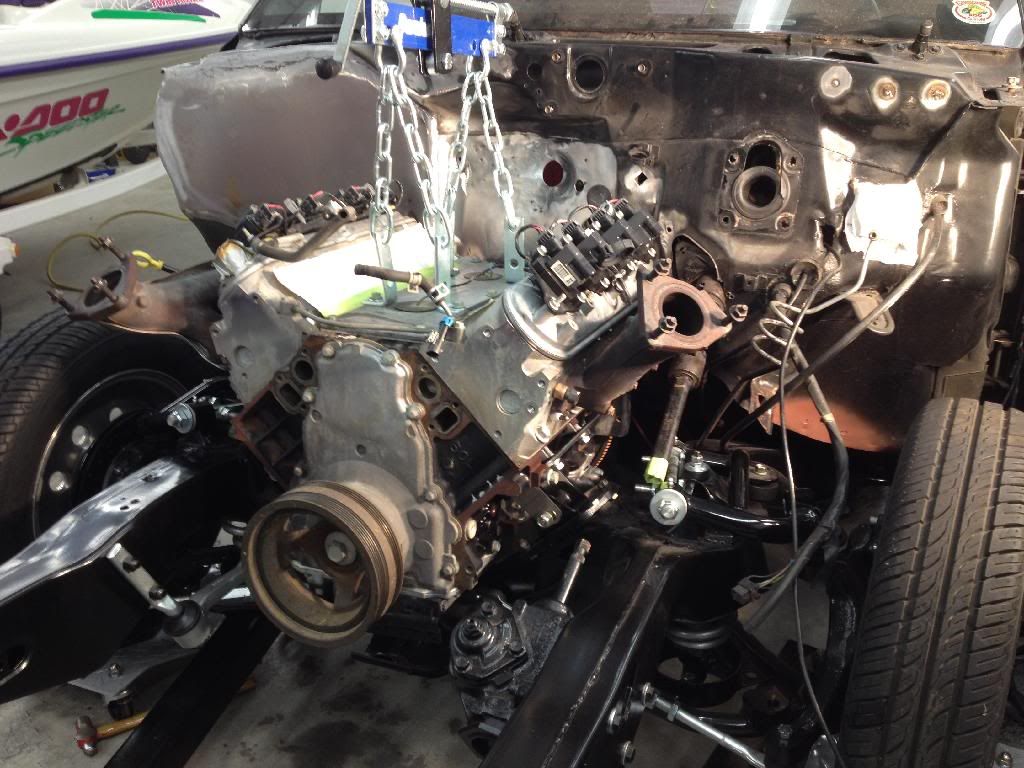
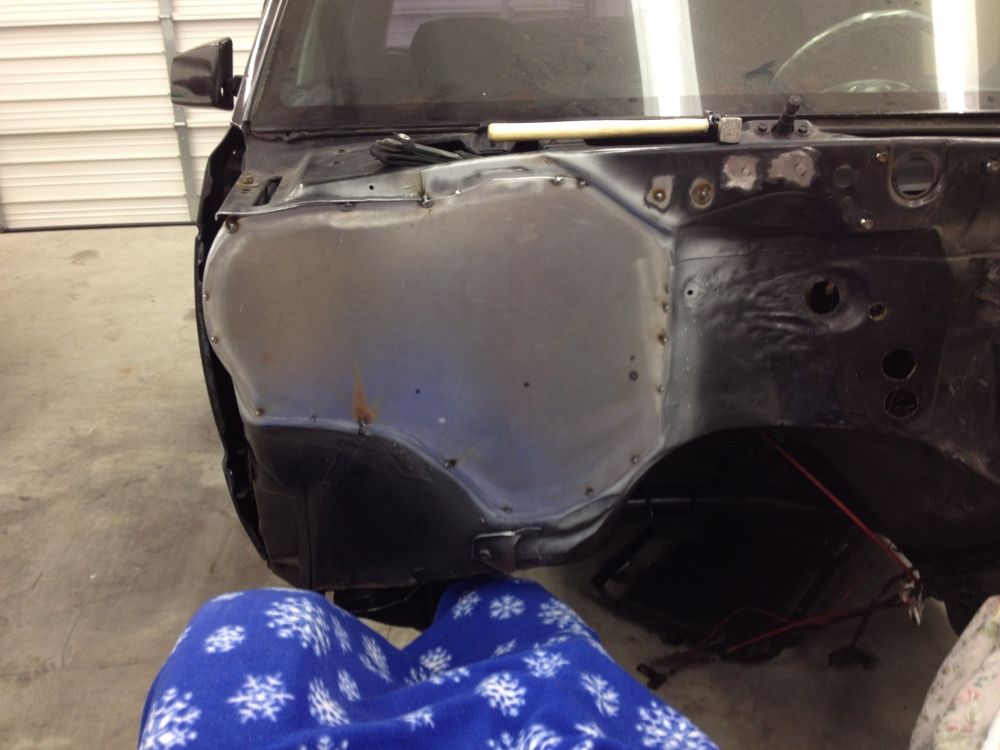
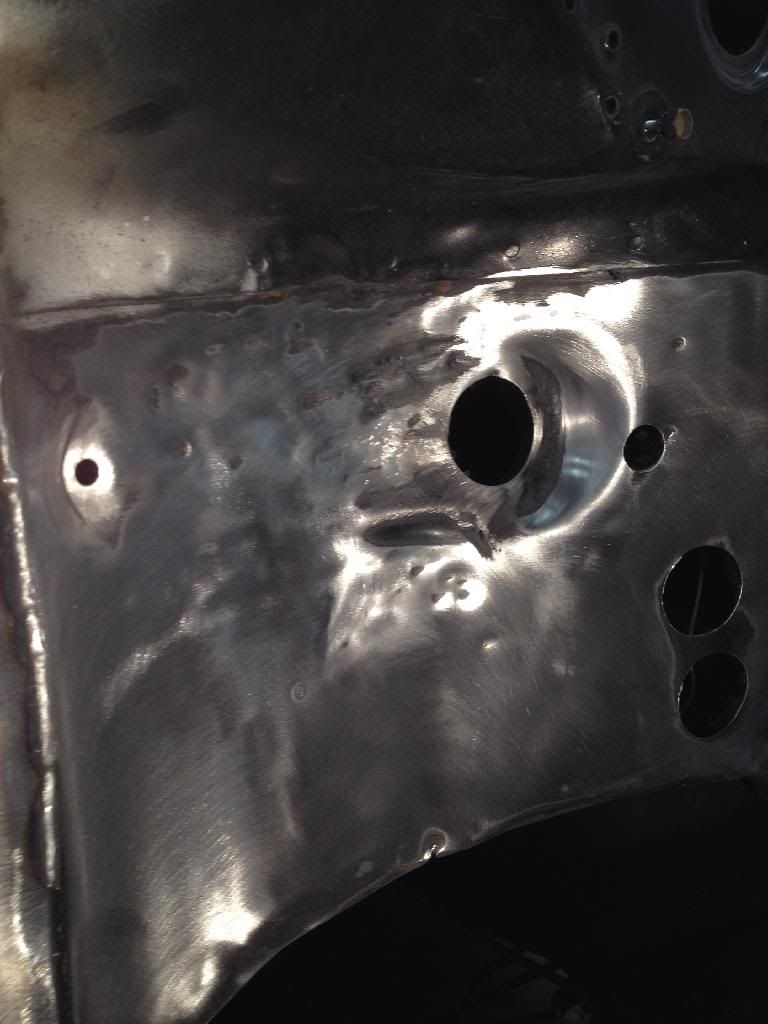
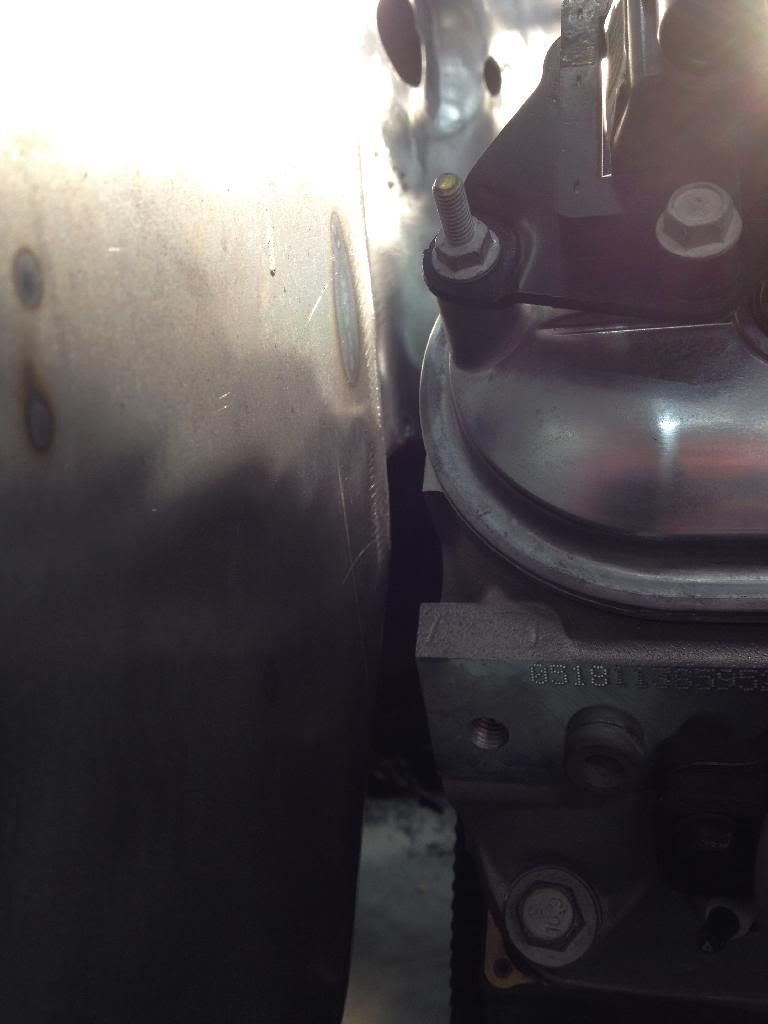
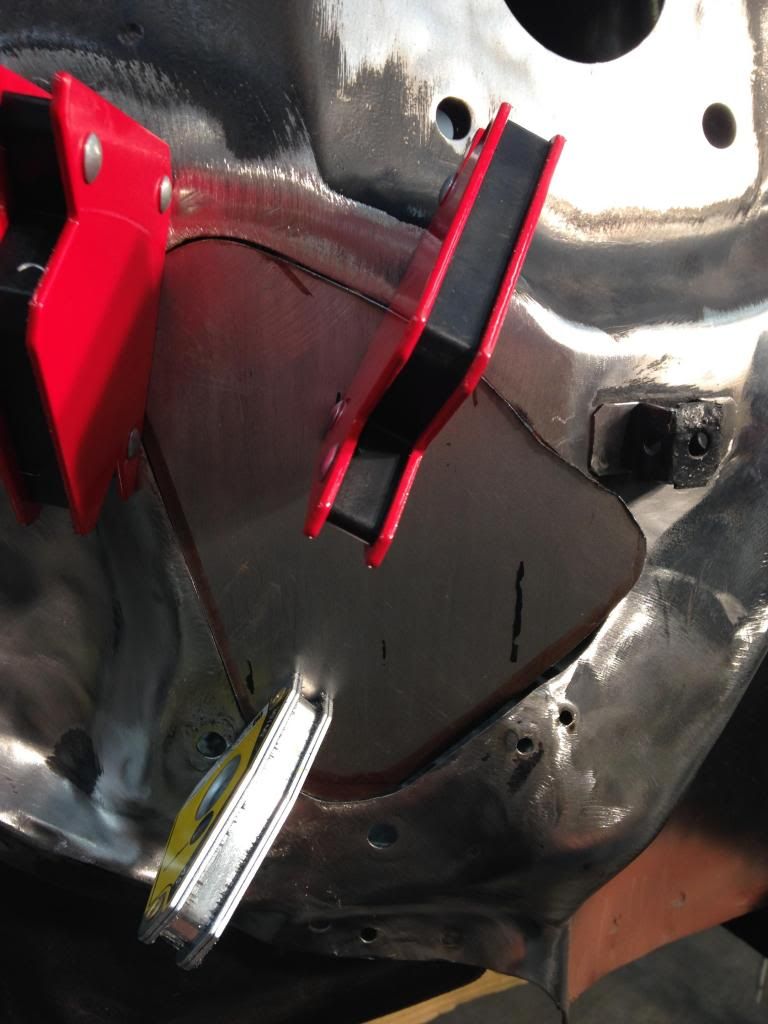
Steering contacts
Good Firewall Clearance
The solid mounts set this LQ4 super low! H3 Oil Pan contacts the cross member...no problem though!
Traced out a template and had a local company cut it out of 18ga steel


We decided to cut more than we originally planned so I had a lot of filling work with the welder to do after we cut this lip off!


Came out pretty good all together!

There is still a lot of firewall work to be done! more shaving and fixing dents from the previous owners hammer blows!
Smoothing this out!

One day I came across a LQ4 at a local recycling yard with 130K miles on it! It came from a 2005 Silverado 2500. Harness, Pedal, just about everything came with it!


Took off the front accessories

Cleaning stage


Ordered Solid Mounts from JEGS for a 80's Camaro to fit the already welded SBC Trans-Adapt mounts.
Then went onto Dirty Dingo and purchased these adjustable Solid mounts

H3 Oil Pan Kit. New vs Old Truck


Reversed truck manifolds won't fit with the factory flanges. Will have to V-Band them and hope they fit!

Upside down Manifolds for now, to see clearance for everything.


Steering contacts

Good Firewall Clearance

The solid mounts set this LQ4 super low! H3 Oil Pan contacts the cross member...no problem though!


 12-21-2013, 03:41 PM
#5
Staging Lane
Thread Starter
Join Date: Nov 2013
Location: East Texas
Posts: 50
Likes: 0
Received 0 Likes
on
0 Posts
The truck pedal isn't going to fit I don't think
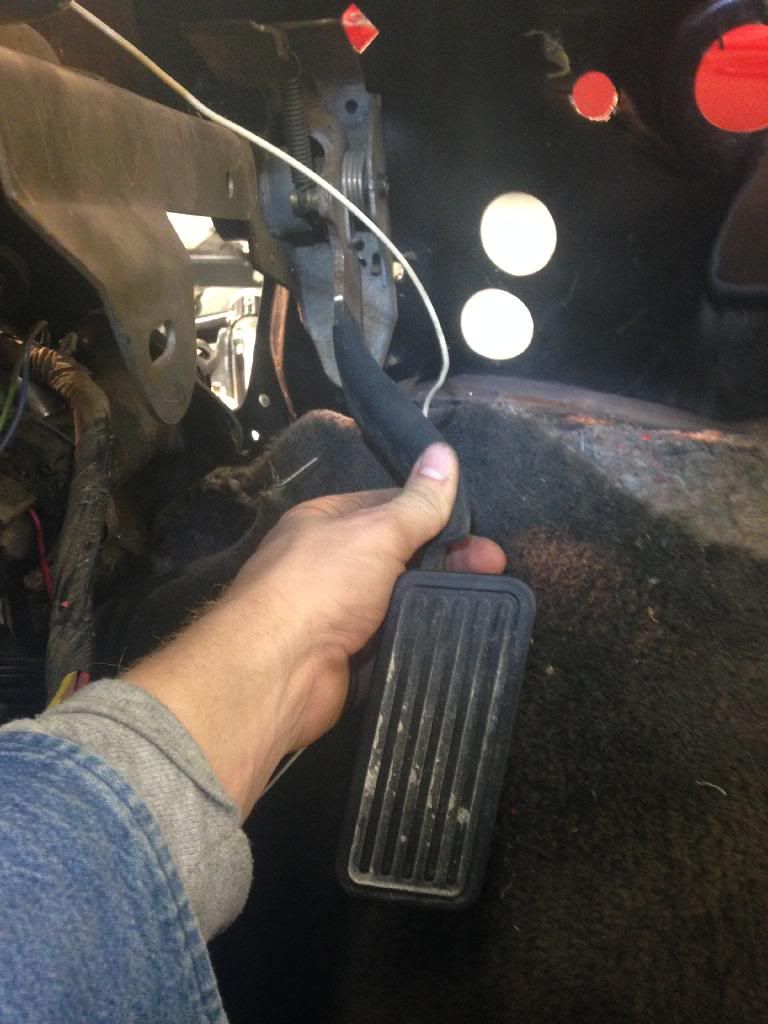
Its offset to the right way too much.
I'm thinking this will solve the problem
http://www.jegs.com/i/Chevrolet+Perf...79038/10002/-1
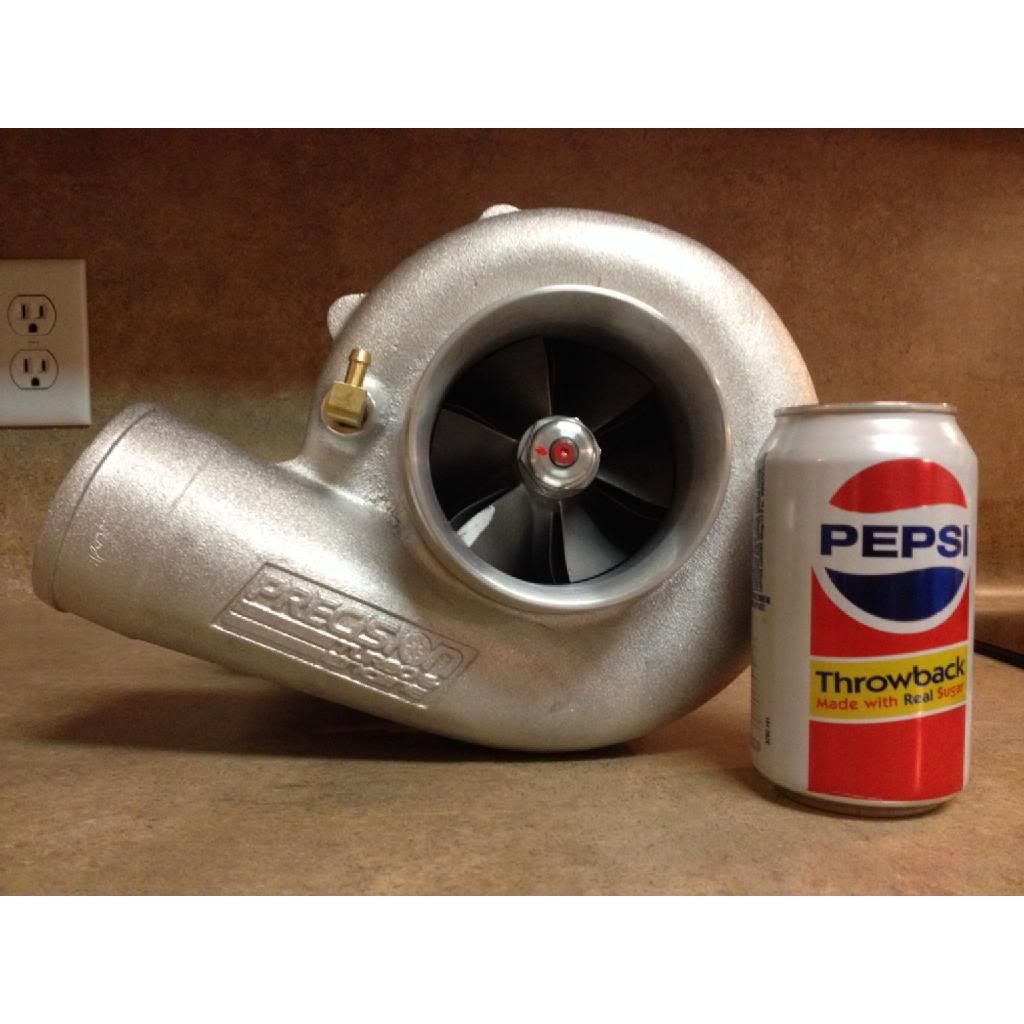
In between Finals week at UT Tyler, I was ordering parts
It took a month for this to come in!
PT8847
88mm
.96 AR
T4 flange
I have a month off for the christmas holiday and we have been trying to get as much done as possible and wanted as many parts already here that we could!
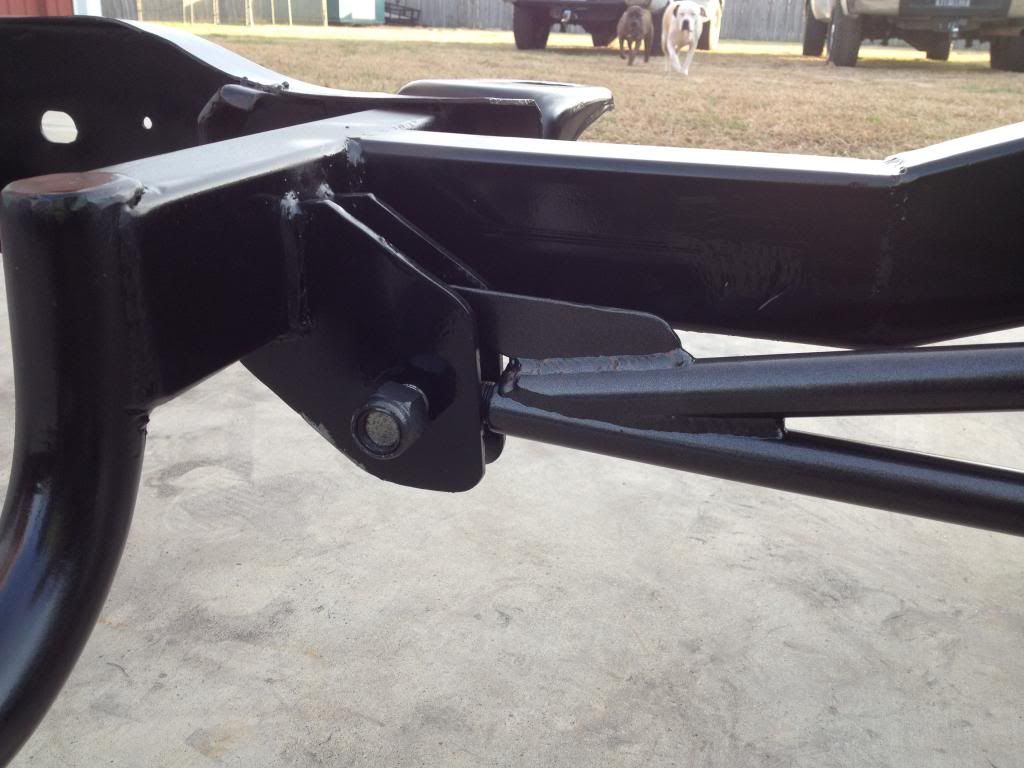
I started working on replacing the body mounts! Who ever built the back half made this simple task into a project on its own!
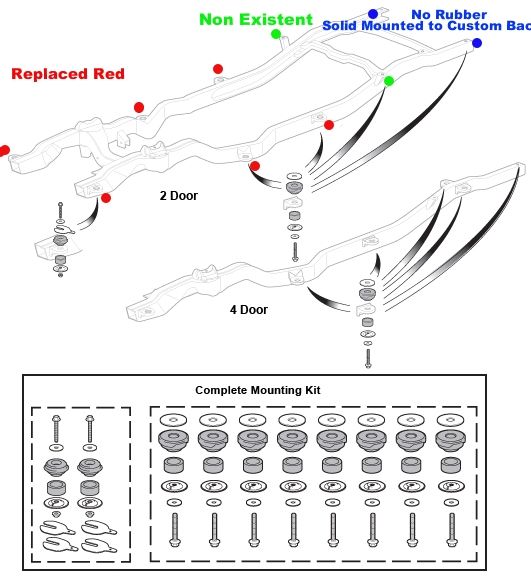
There rear wheel tubs were tacked to the frame with and had a horrible amount of silicone.
The far rear mounts had 3/4" bolts off in here solid mounting the body to the frame
Luckily my dad found a nice thin Snap On socket that fit up in there and the impact got the job done!
Here's when the un-thinkable happened
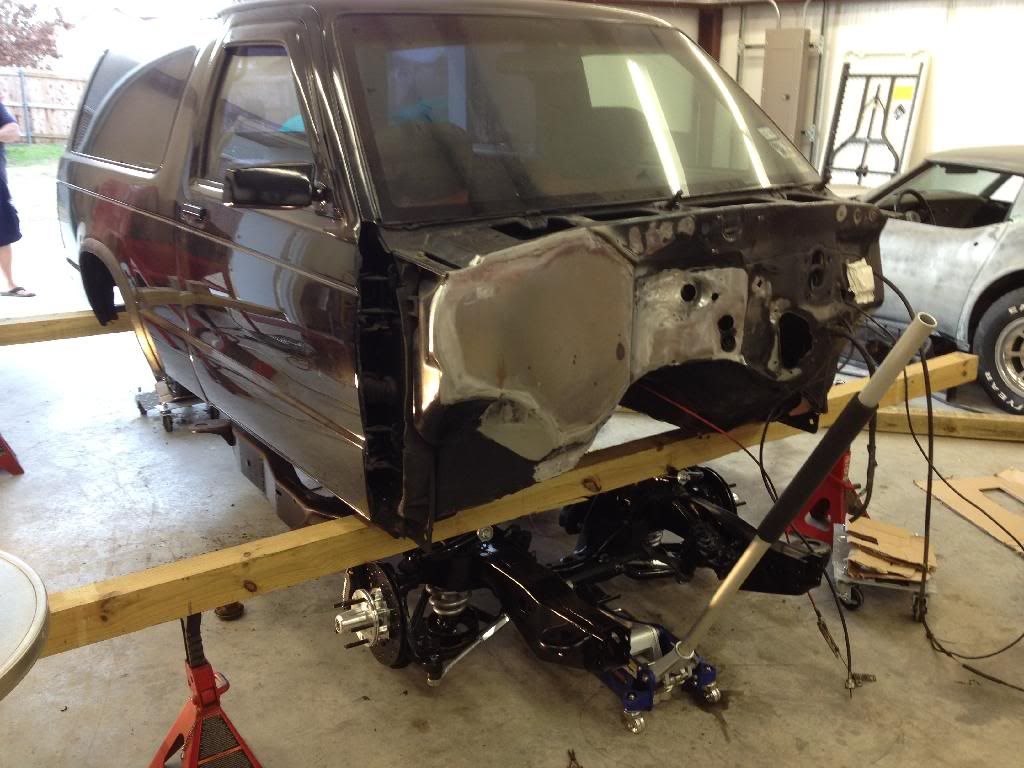
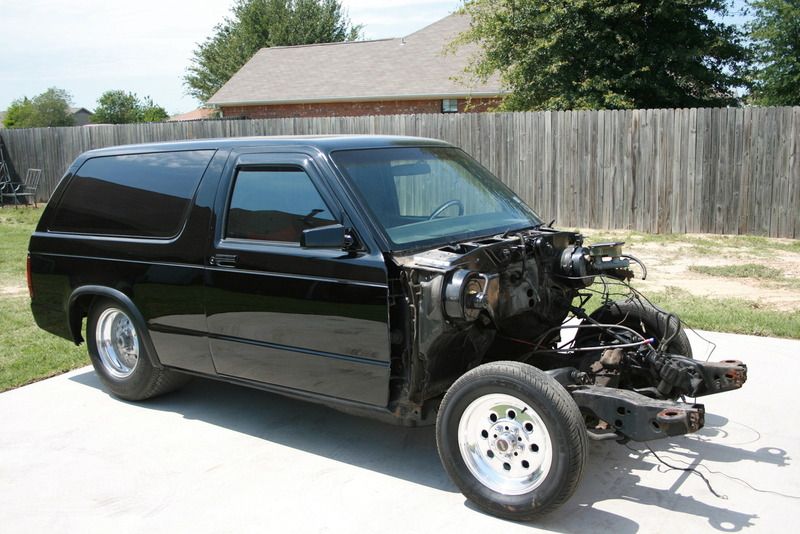
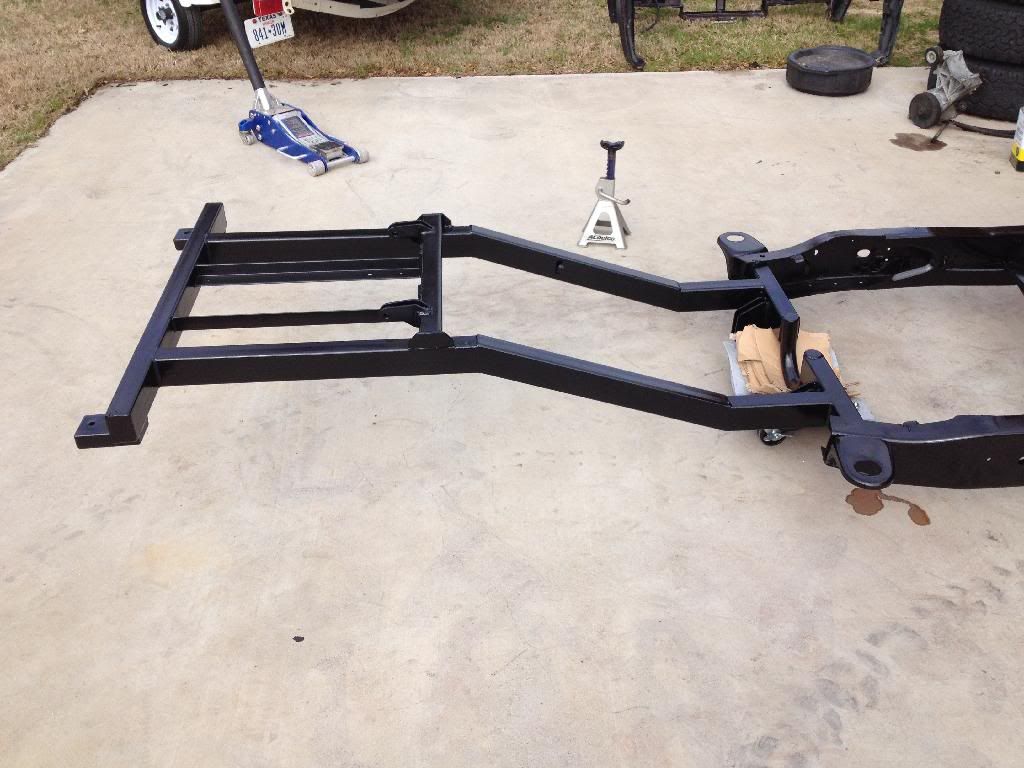
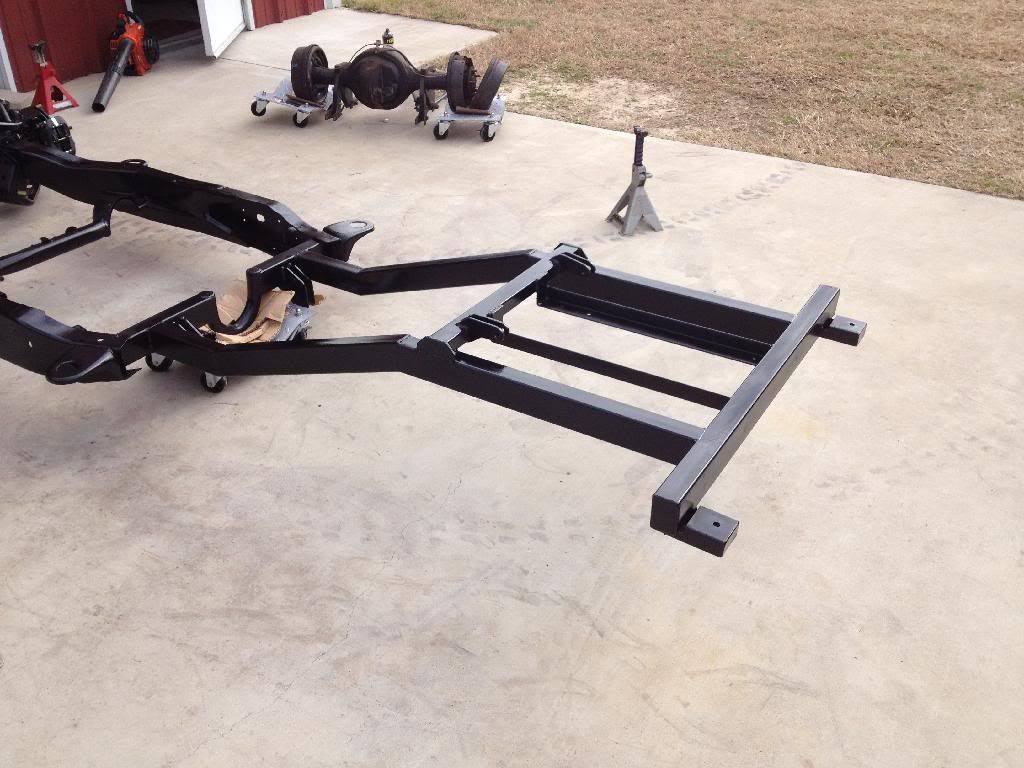
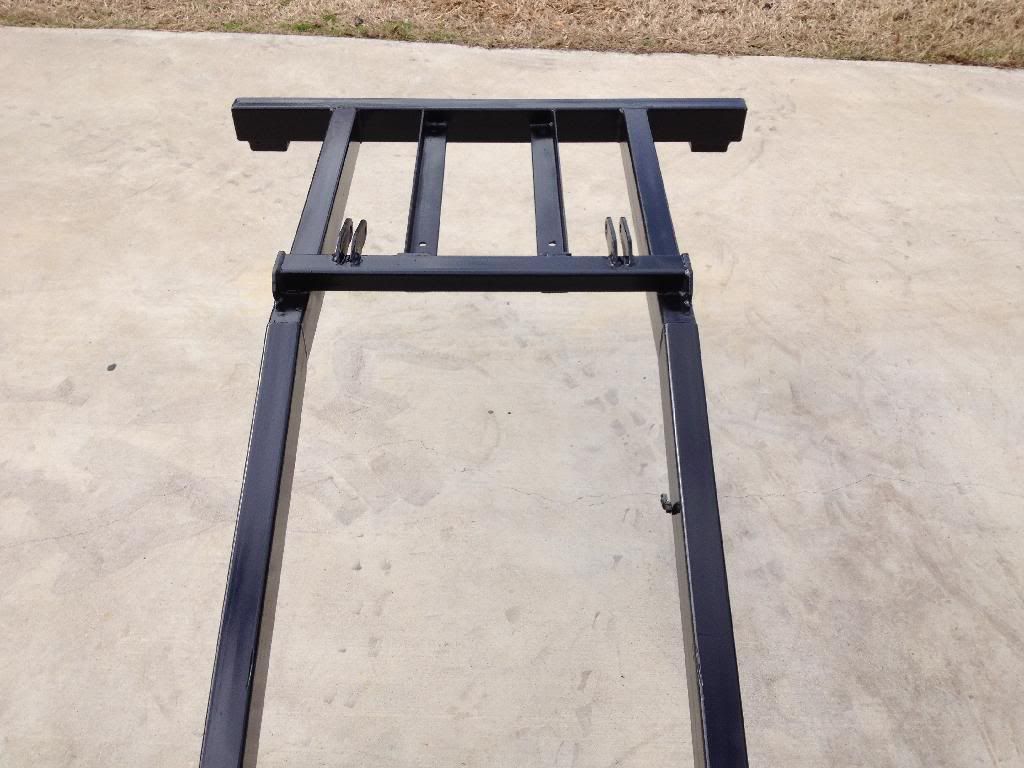
Taking the body off was always stuck in the back of our head and after all the work that went into separating the body and frame, it was a no brainer!
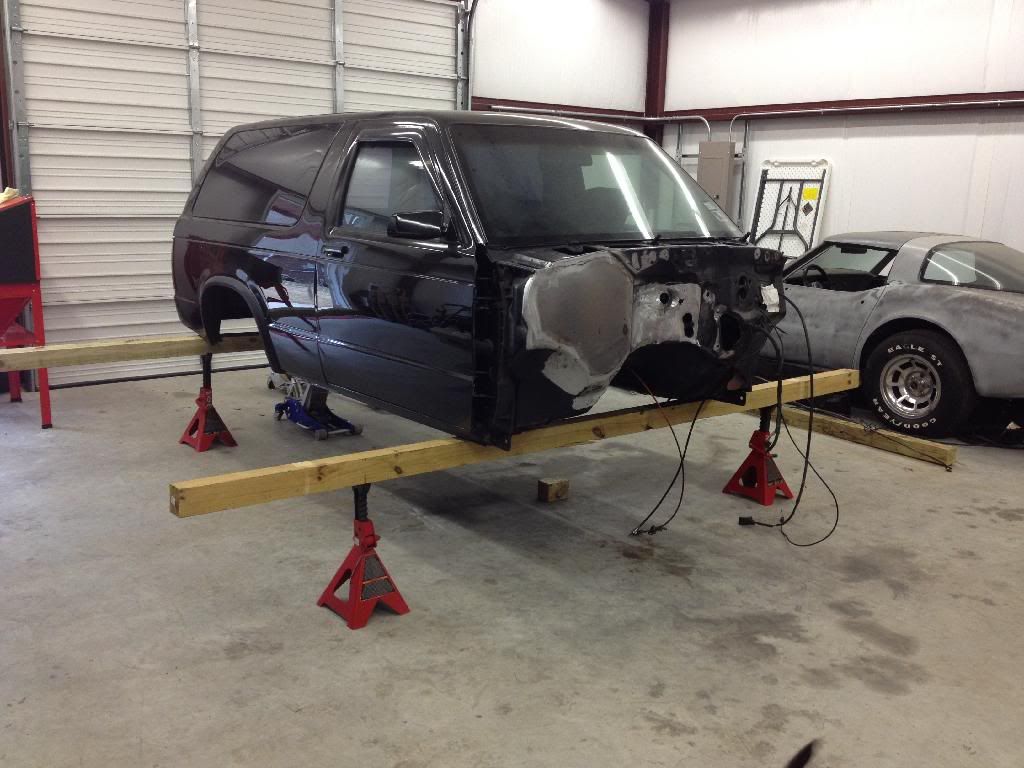
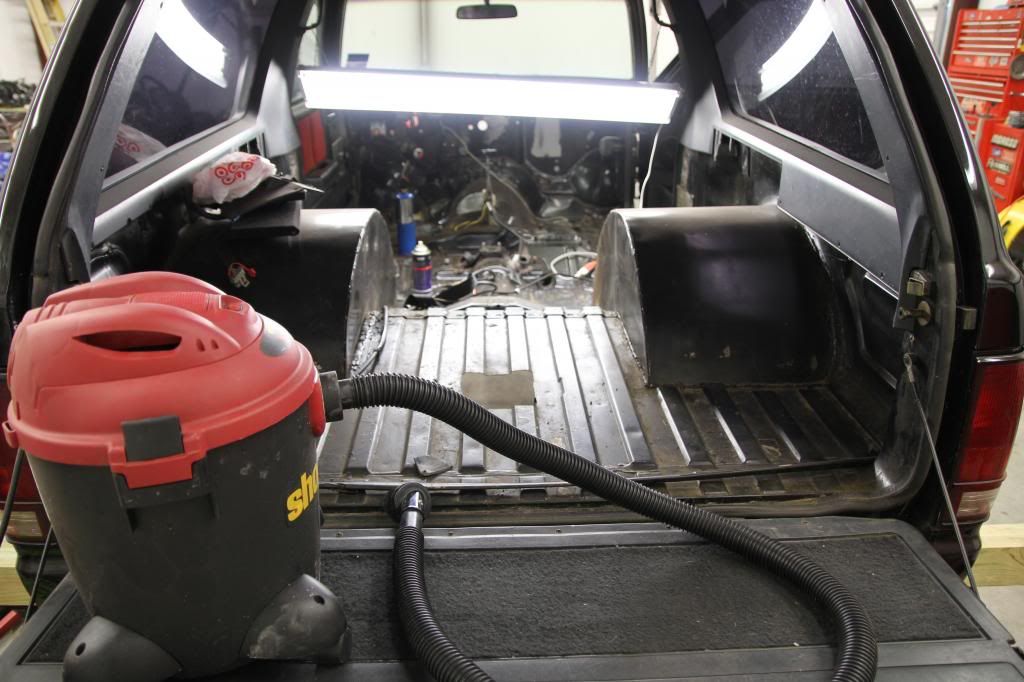
Unlike the photos, the axle, fuel lines, brake lines are out, and we had already started on cleaning up the frame last night.

Its offset to the right way too much.
I'm thinking this will solve the problem
http://www.jegs.com/i/Chevrolet+Perf...79038/10002/-1
In between Finals week at UT Tyler, I was ordering parts

It took a month for this to come in!
PT8847
88mm
.96 AR
T4 flange

I have a month off for the christmas holiday and we have been trying to get as much done as possible and wanted as many parts already here that we could!
I started working on replacing the body mounts! Who ever built the back half made this simple task into a project on its own!
There rear wheel tubs were tacked to the frame with and had a horrible amount of silicone.

The far rear mounts had 3/4" bolts off in here solid mounting the body to the frame

Luckily my dad found a nice thin Snap On socket that fit up in there and the impact got the job done!
Here's when the un-thinkable happened

Taking the body off was always stuck in the back of our head and after all the work that went into separating the body and frame, it was a no brainer!


Unlike the photos, the axle, fuel lines, brake lines are out, and we had already started on cleaning up the frame last night.

Trending Topics
 12-21-2013, 09:09 PM
#9
Staging Lane
Thread Starter
Join Date: Nov 2013
Location: East Texas
Posts: 50
Likes: 0
Received 0 Likes
on
0 Posts


 I have always liked these.
  12-28-2013, 01:03 PM
#13
Staging Lane
Thread Starter
Join Date: Nov 2013
Location: East Texas
Posts: 50
Likes: 0
Received 0 Likes
on
0 Posts
Hope everyone had a wonderful Christmas!
Between the weather, holidays, and family visits, we still managed to get some progress going!
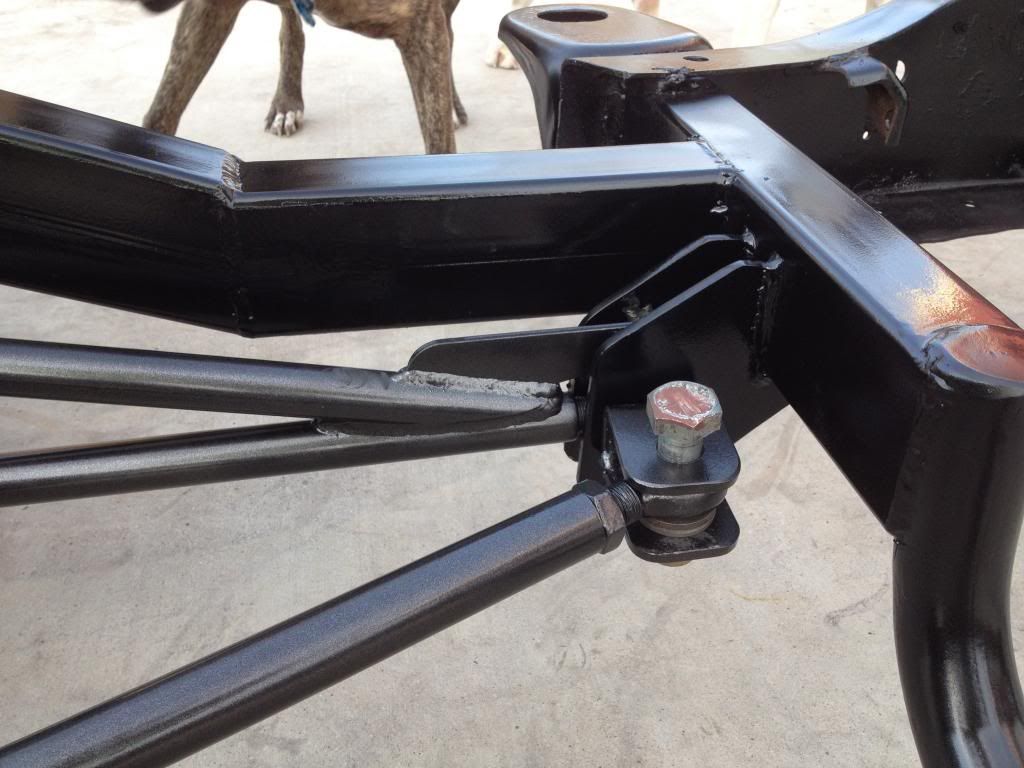
We got an idea for the steering, and hopefully this all works out!
Cut it out to bring the steering way over to the right and missing the exhaust manifolds.
Made a template and filled in the hole with some scrap sheet metal! and Will only be cutting out the correct size hole for the steering shaft to fit through
Went and picked up some fender washers to help fill in the un-needed holes

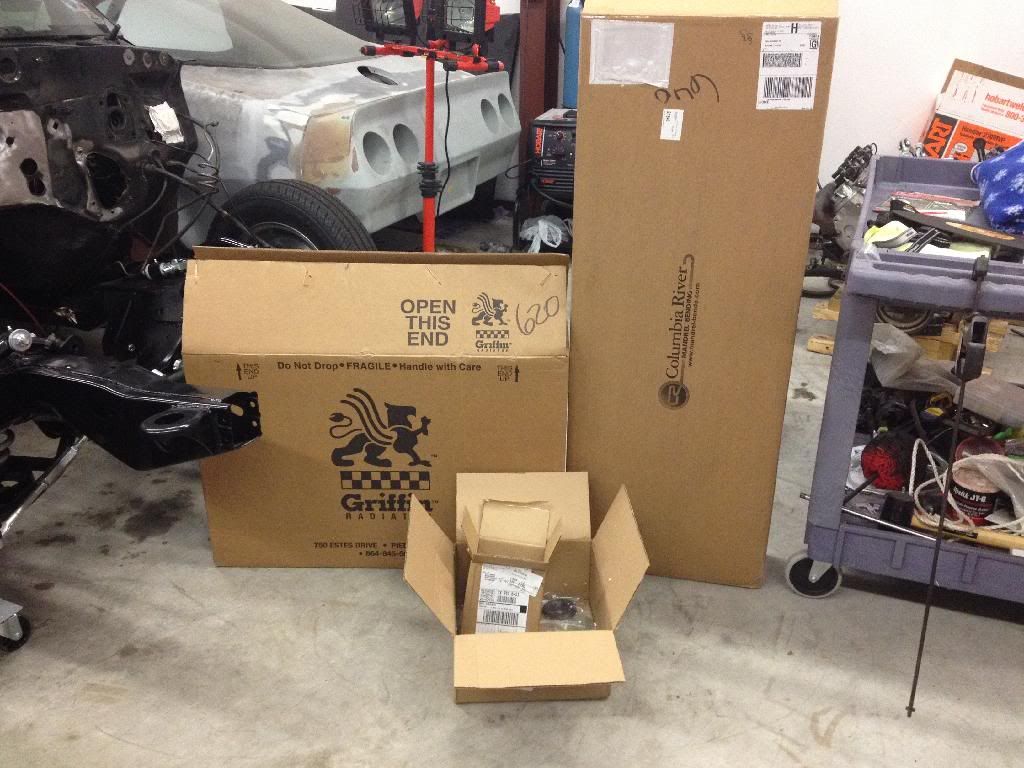
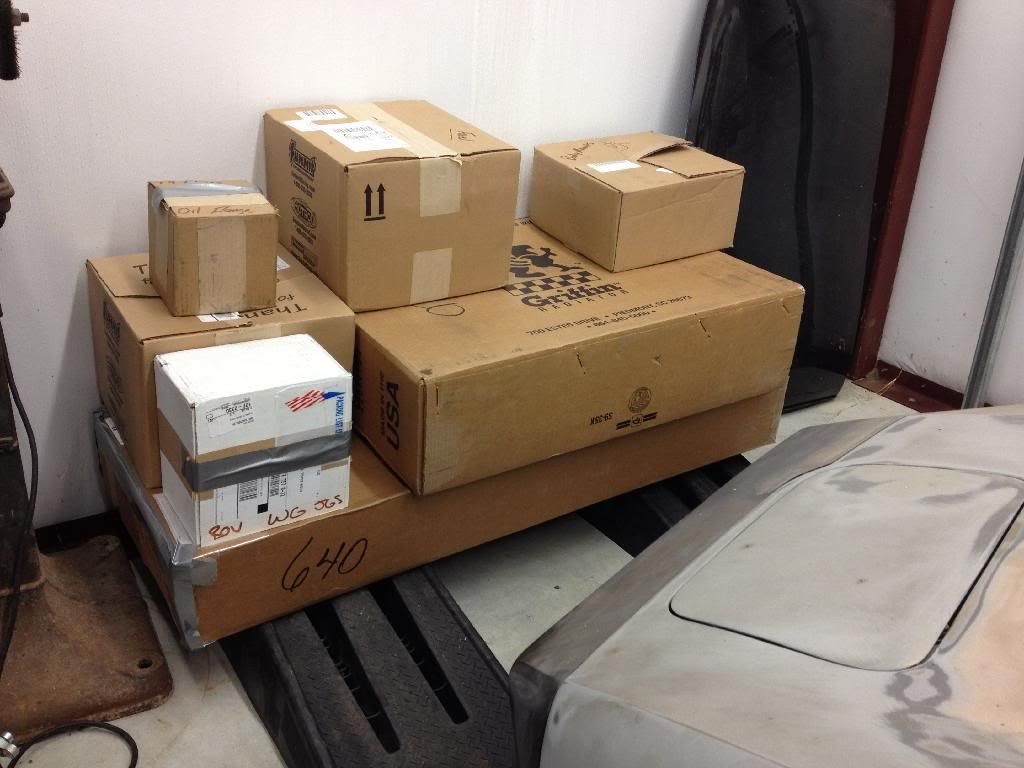
A lot of parts were showing up before Christmas!
This pic kinda shows the firewall right now

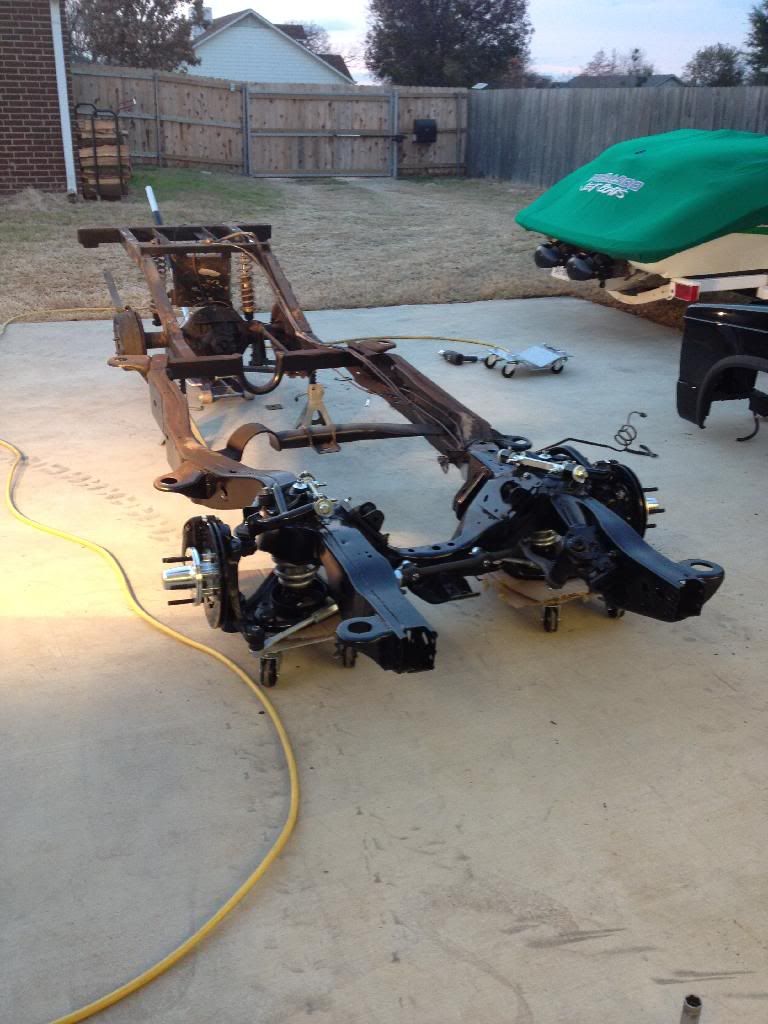
Finally had decent weather! It was 50* and sunny. Rustoleum said it needed to be atleast 50 so I went for it! I would a set of our 1000watt shop lights to help dry and heat it some.
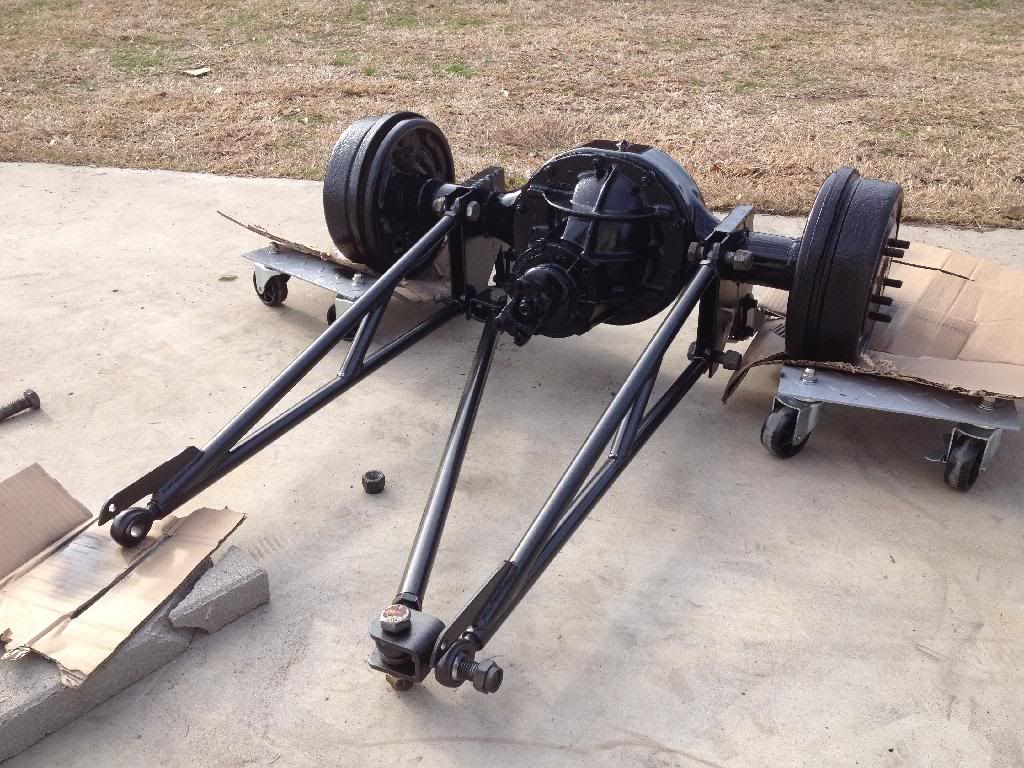
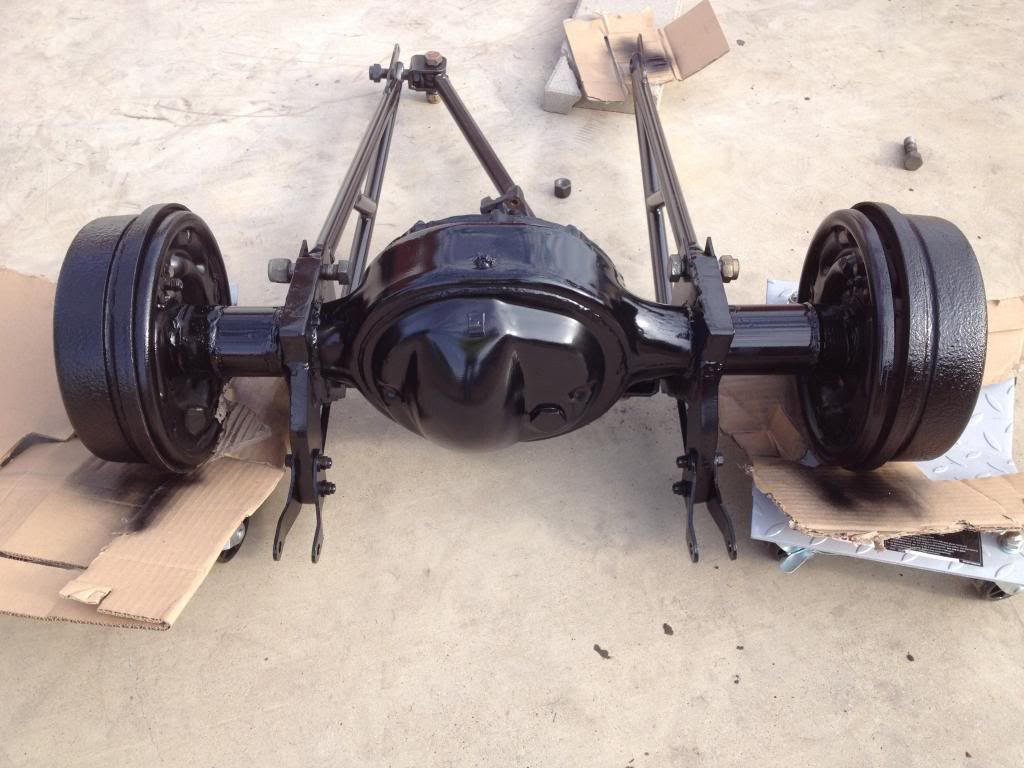
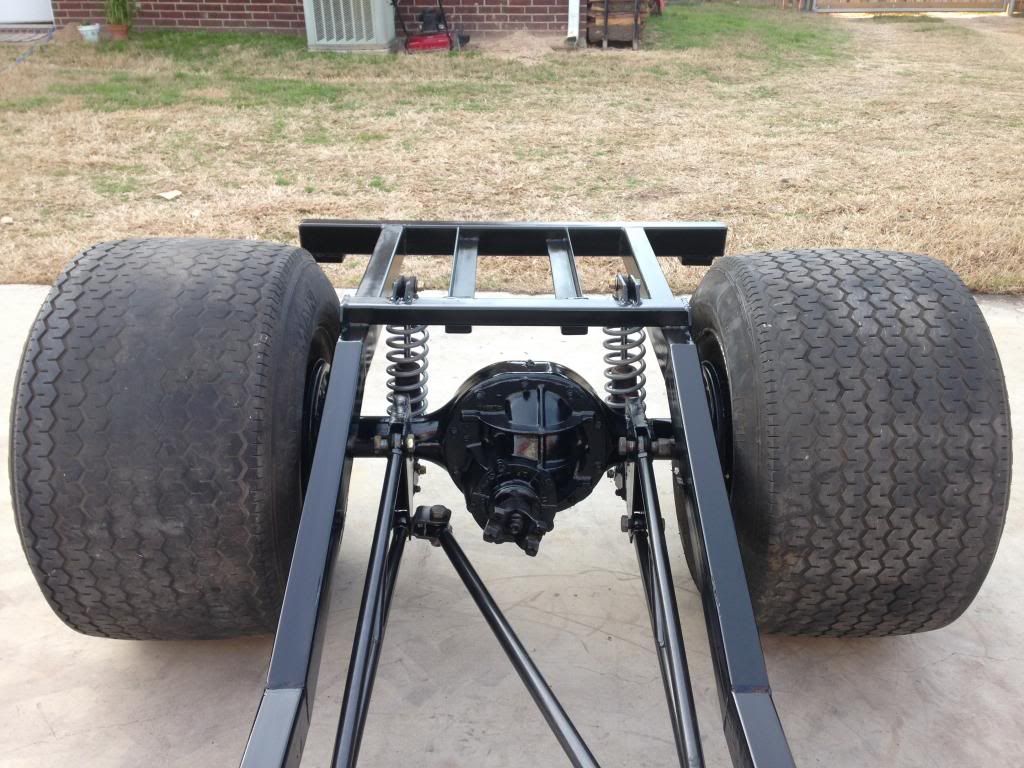
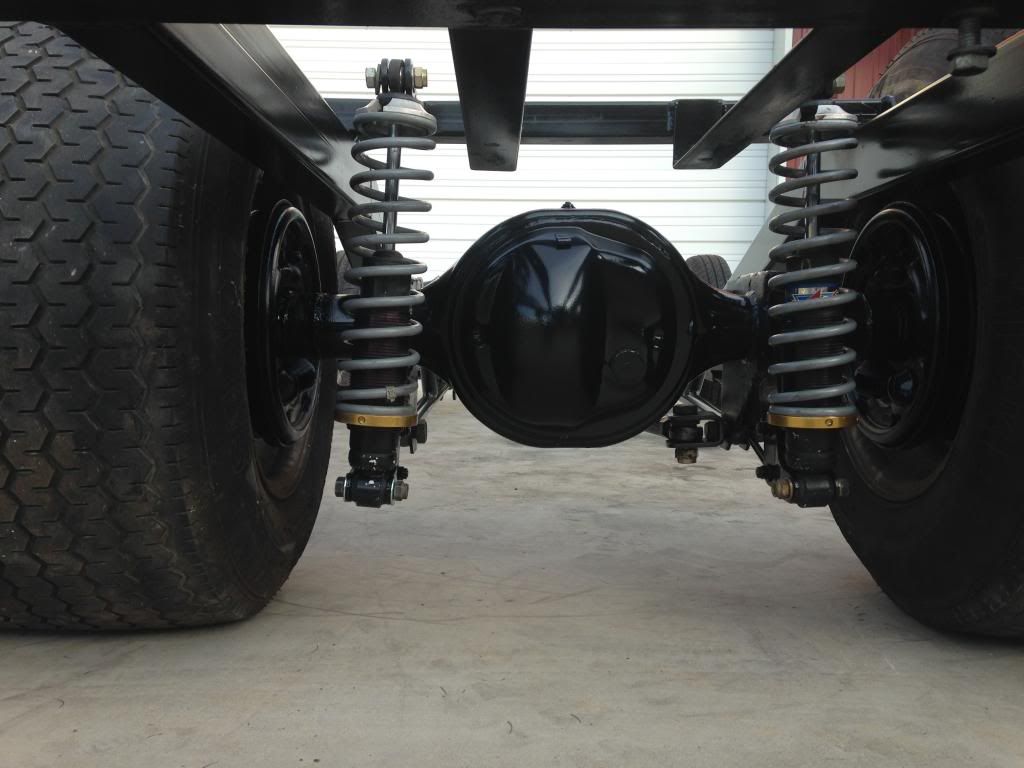
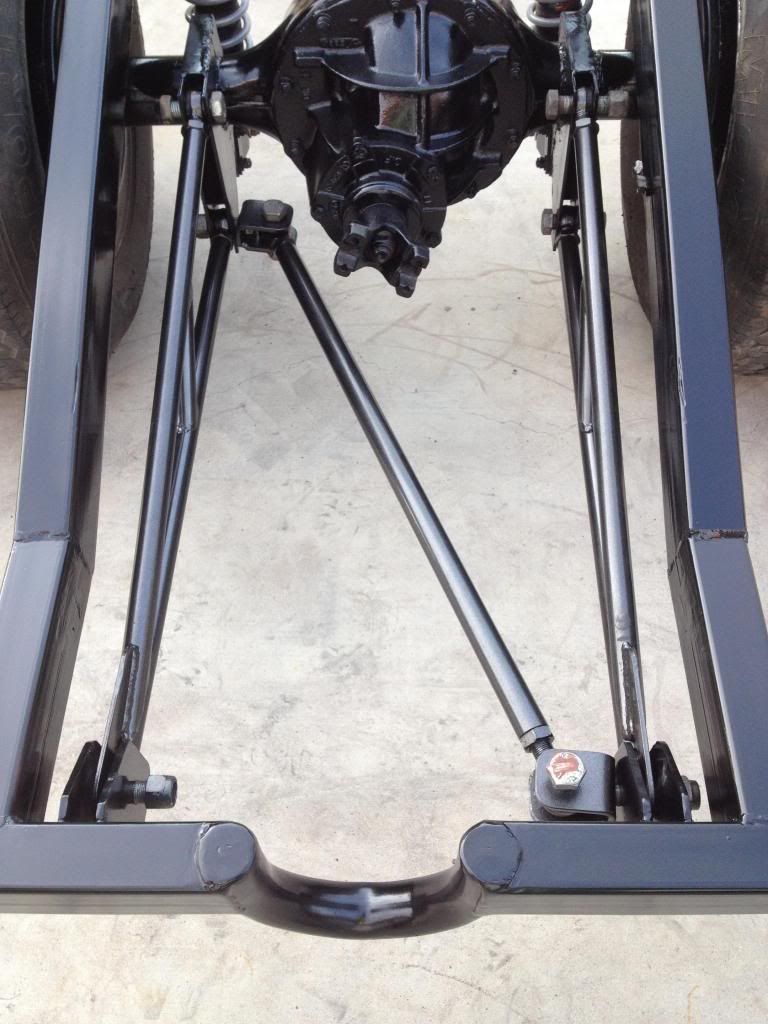
Then Christmas day after opening presents, and not having to go anywhere I started on the rear end. Buffed all the paint off that I could with a wire will, cleaned, primed, and sprayed with Krylon (used all of the rustoleum on the frame). Also was able to scuff with a scotch brite and spray the trac bars. I was now out of Black Krylon and Rustoleum on christmas day, so I decided to see what some metallic contrast to the black would be like!

The Paint matched the can exactly!

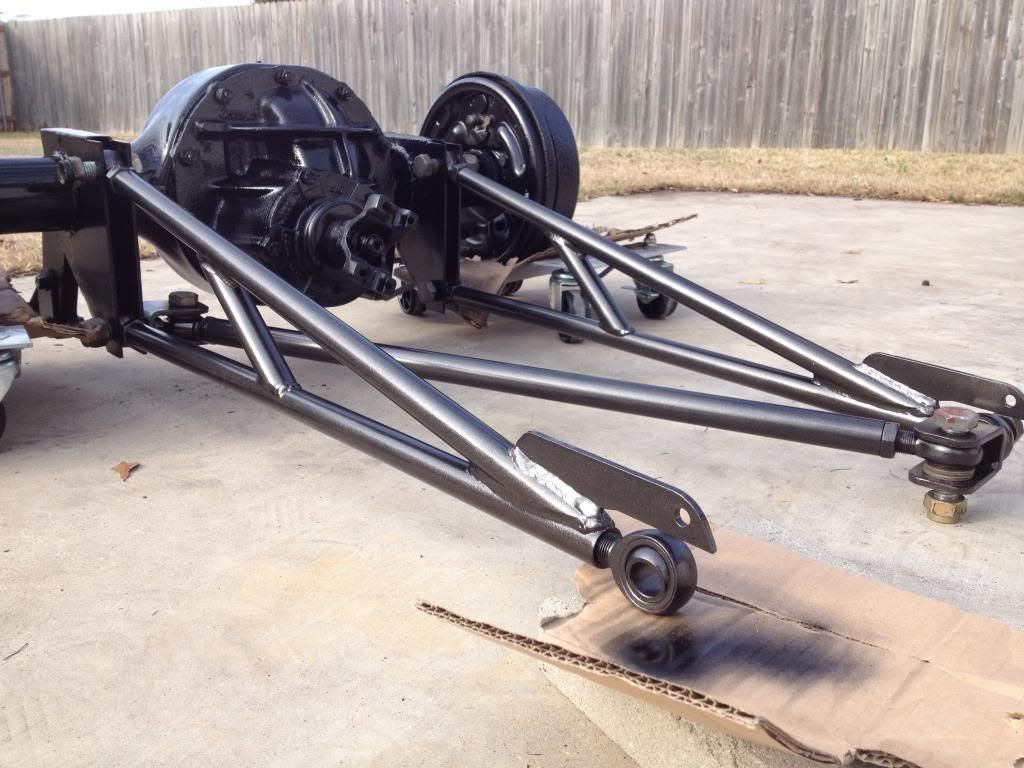
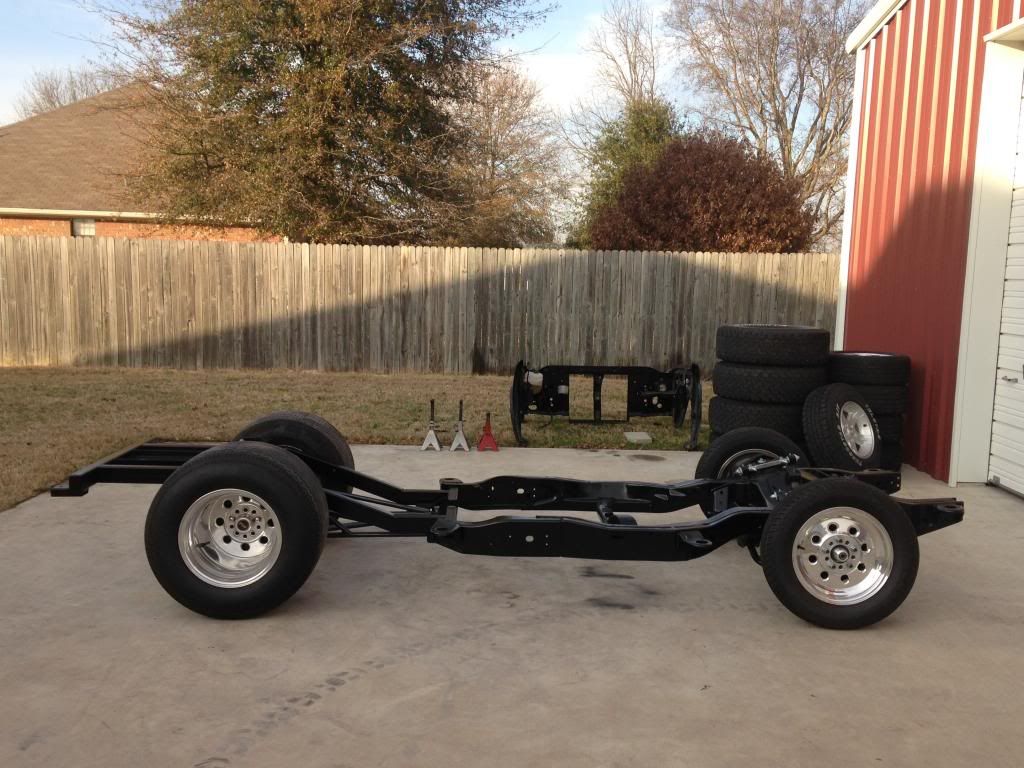
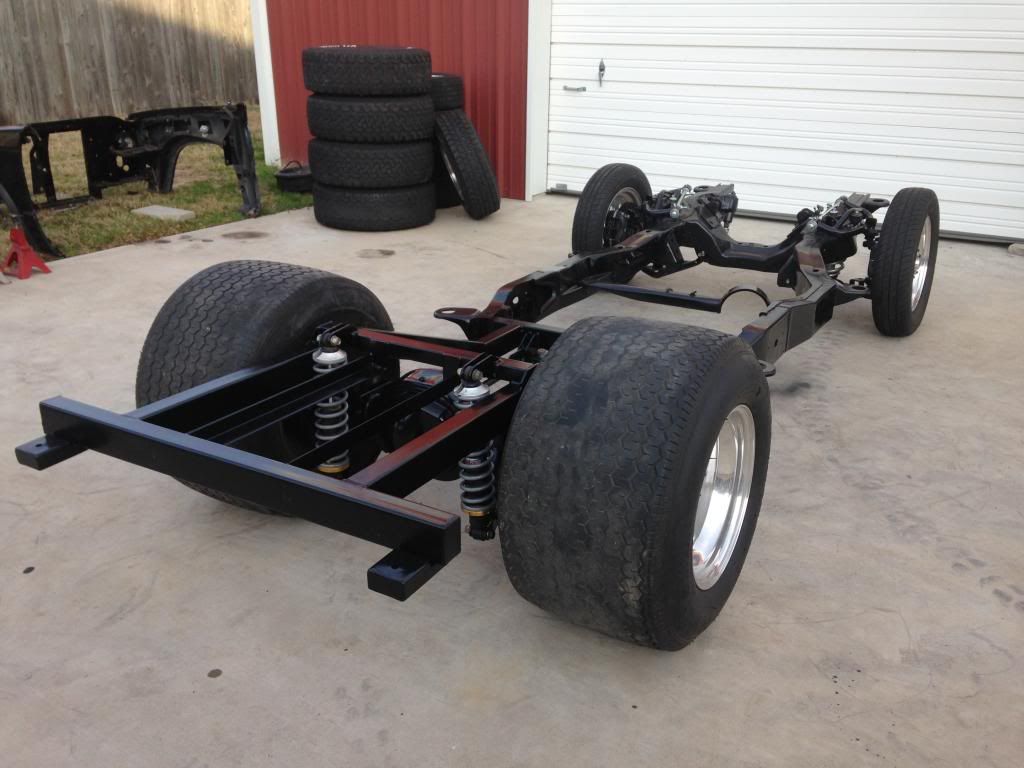
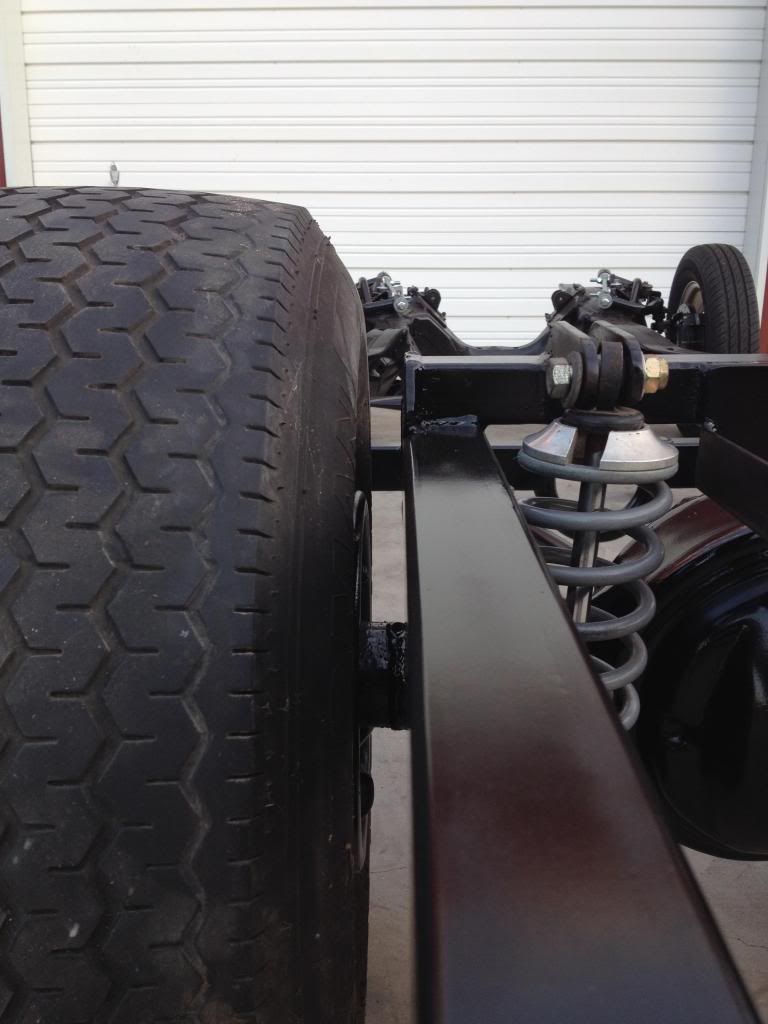
Got everything bolted back up to the frame and decided to throw the tires on for some pics....lots of pics

Between the weather, holidays, and family visits, we still managed to get some progress going!
We got an idea for the steering, and hopefully this all works out!

Cut it out to bring the steering way over to the right and missing the exhaust manifolds.
Made a template and filled in the hole with some scrap sheet metal! and Will only be cutting out the correct size hole for the steering shaft to fit through


Went and picked up some fender washers to help fill in the un-needed holes

A lot of parts were showing up before Christmas!

This pic kinda shows the firewall right now

Finally had decent weather! It was 50* and sunny. Rustoleum said it needed to be atleast 50 so I went for it! I would a set of our 1000watt shop lights to help dry and heat it some.


Then Christmas day after opening presents, and not having to go anywhere I started on the rear end. Buffed all the paint off that I could with a wire will, cleaned, primed, and sprayed with Krylon (used all of the rustoleum on the frame). Also was able to scuff with a scotch brite and spray the trac bars. I was now out of Black Krylon and Rustoleum on christmas day, so I decided to see what some metallic contrast to the black would be like!

The Paint matched the can exactly!


Got everything bolted back up to the frame and decided to throw the tires on for some pics....lots of pics


 12-28-2013, 01:05 PM
#14
Staging Lane
Thread Starter
Join Date: Nov 2013
Location: East Texas
Posts: 50
Likes: 0
Received 0 Likes
on
0 Posts
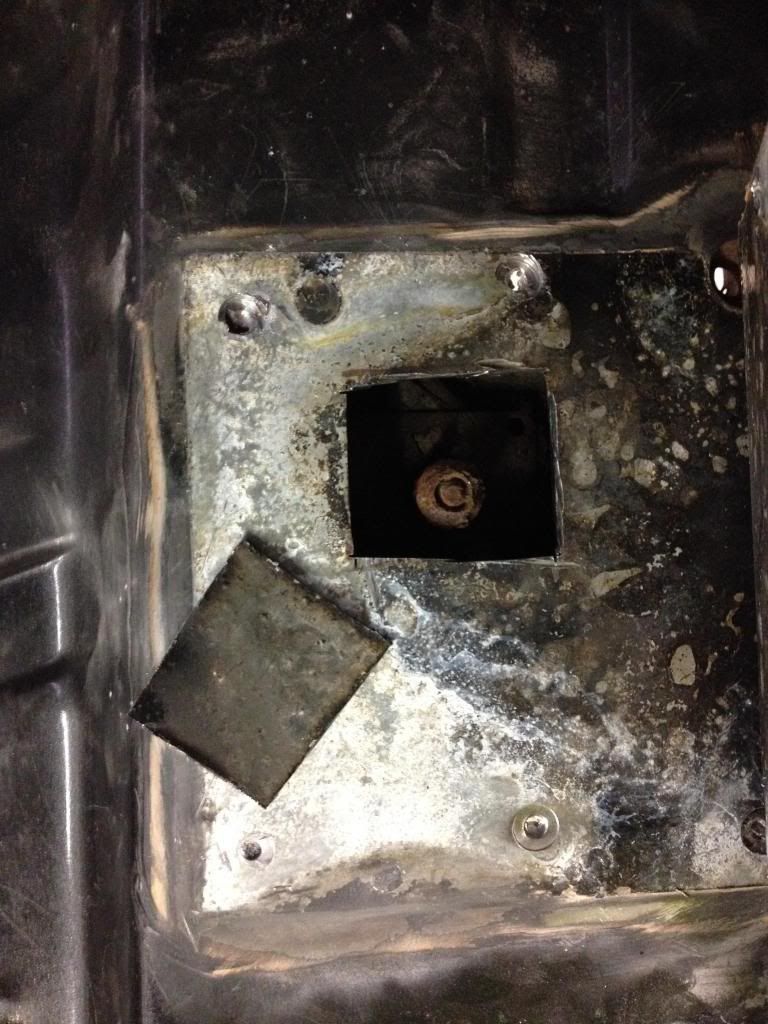
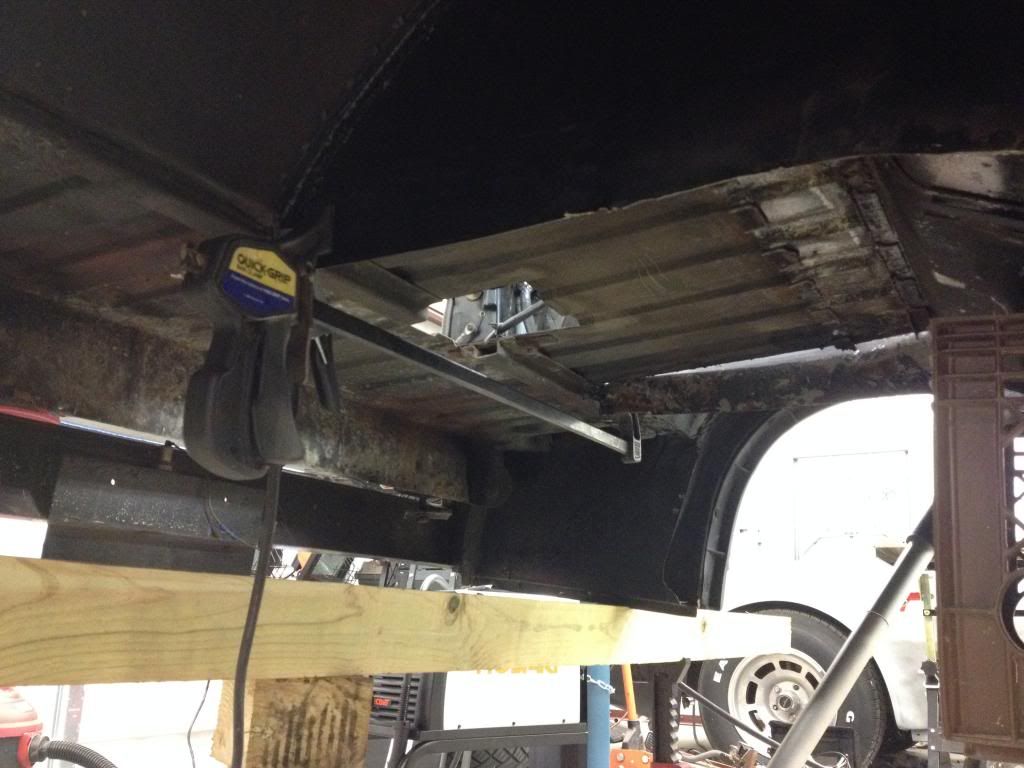
Next on the list, was to work on the broken body mount bolt I never talked about! 
My dad worked on this the most! Getting that top panel bent up
Cut a square out to be on top of the bolt
I tried hooking Vise Grips and twisted the broken bolt as my dad heated up the nut. We had no luck!
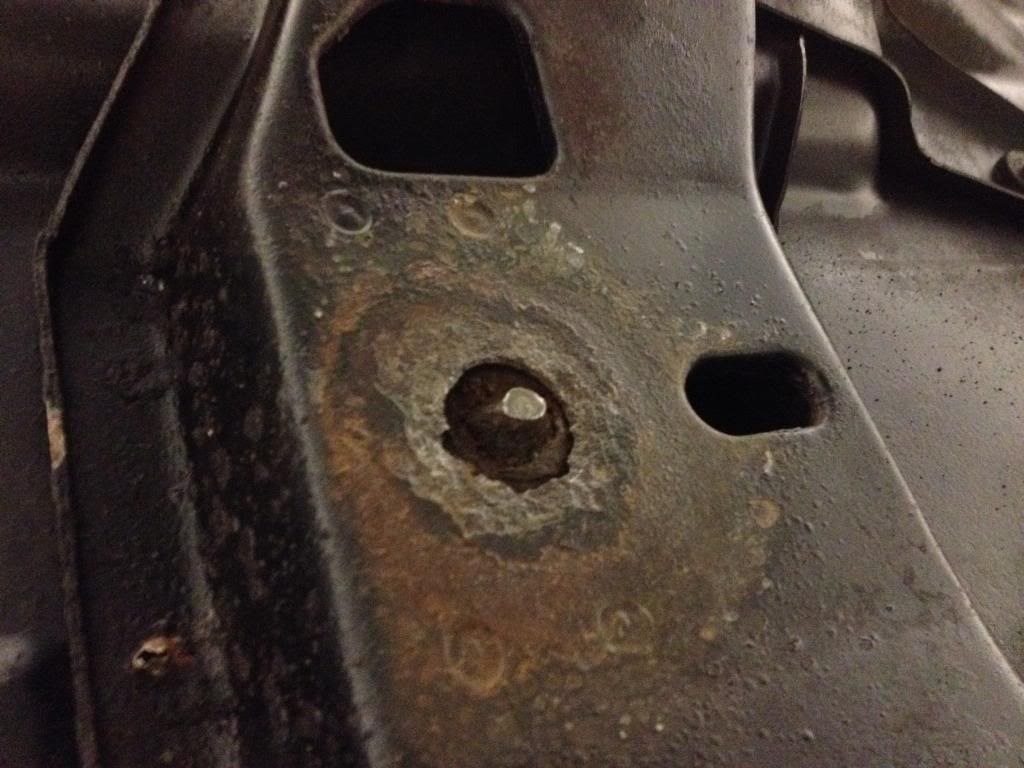 Thats all I had to grab onto
Next thing to try will be to using the impact and loosing it that way! I welded a Nut on to and have been spraying Royal Purple on the top side over night and some this morning.
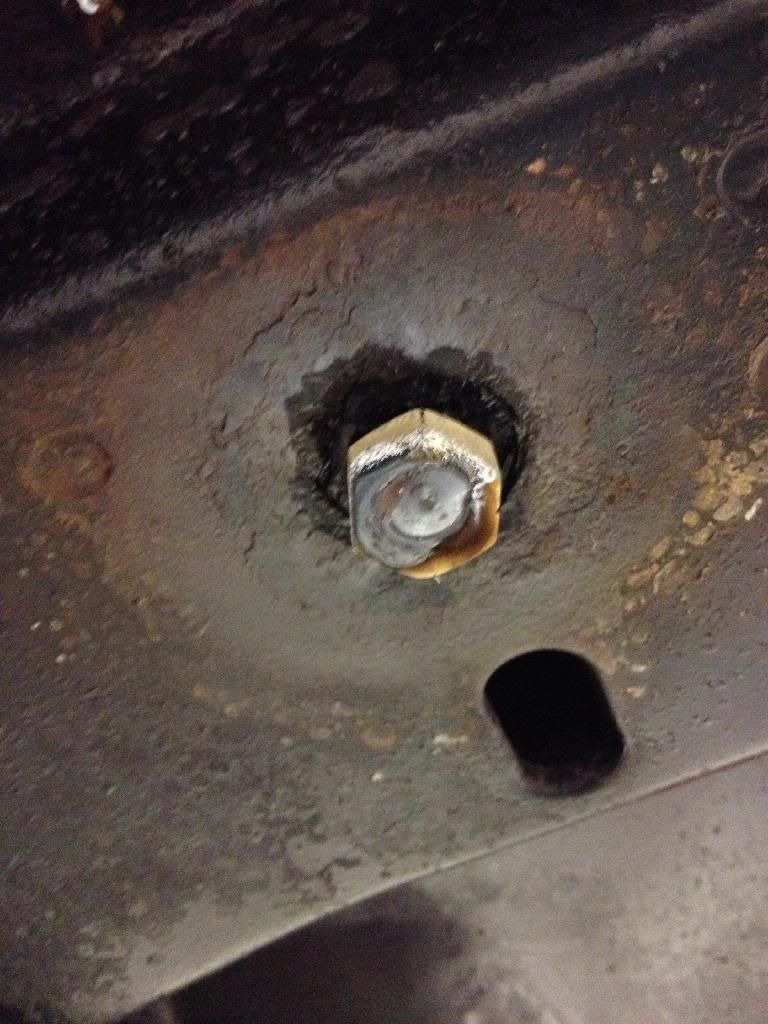
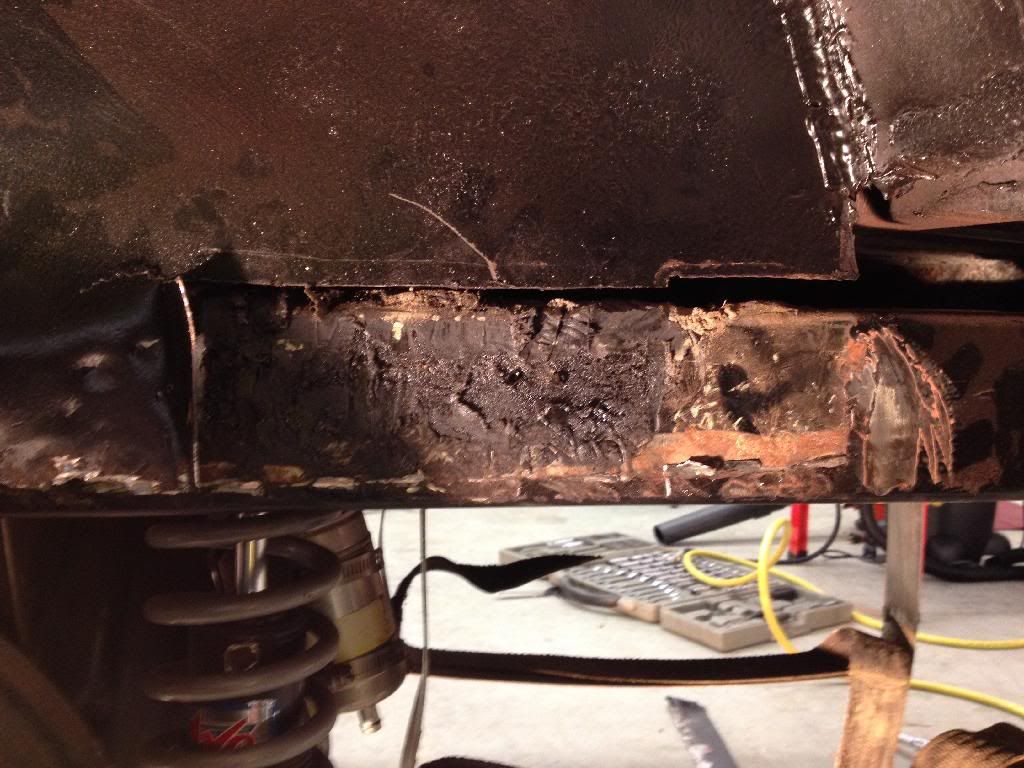
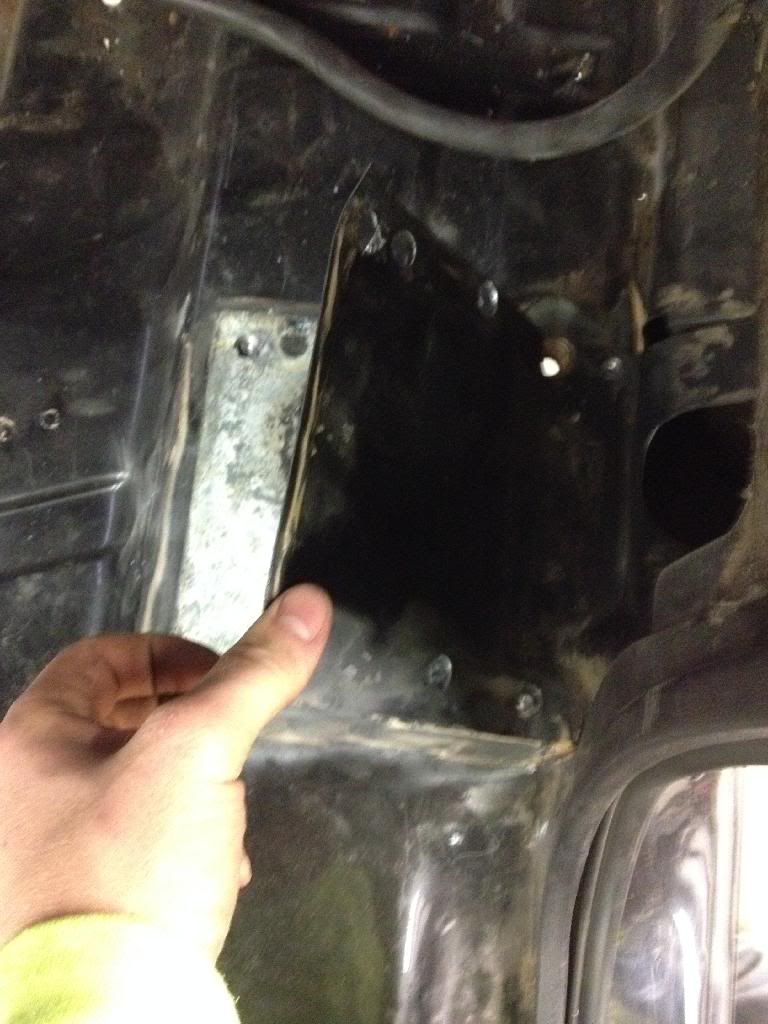
Something else to point out. This truck came from the factory with no A/C. We're assuming it's a northern vehicle that made its way down to Texas some years ago! I found rust on the drivers side floor pan. Sucks to have to get off into this little project, but it will be nicer and cleaner.
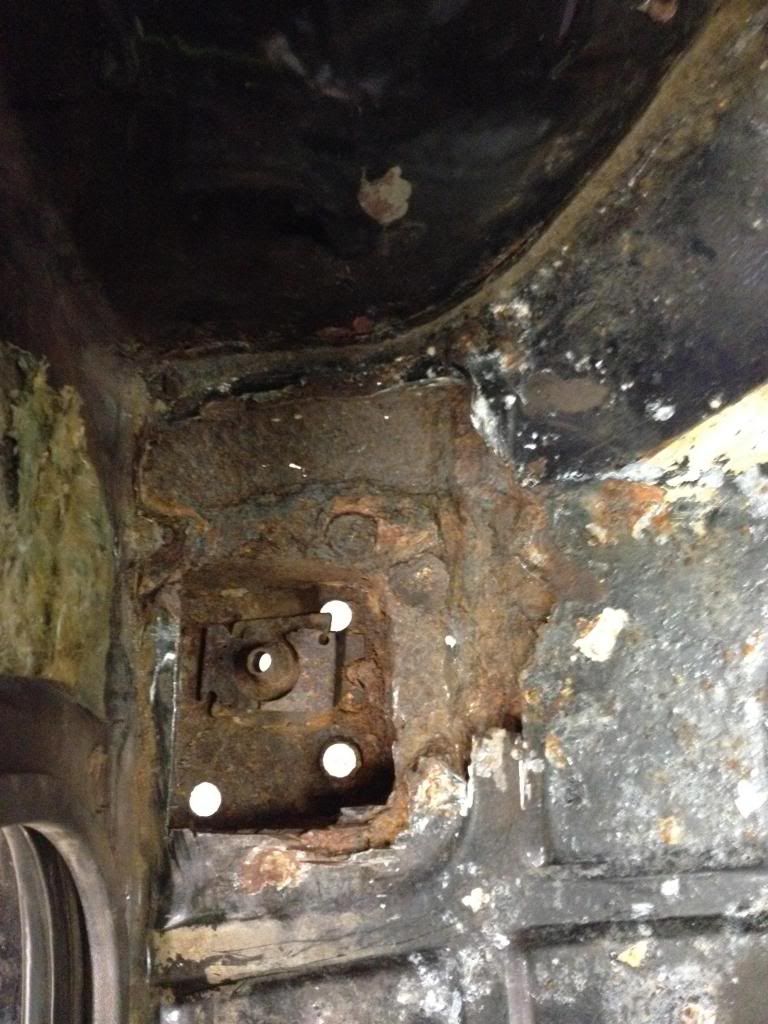
The body mount bucket underneath will also need replacing.
My dad worked on this the most! Getting that top panel bent up

Cut a square out to be on top of the bolt

I tried hooking Vise Grips and twisted the broken bolt as my dad heated up the nut. We had no luck!
 Thats all I had to grab onto
Next thing to try will be to using the impact and loosing it that way! I welded a Nut on to and have been spraying Royal Purple on the top side over night and some this morning.

Something else to point out. This truck came from the factory with no A/C. We're assuming it's a northern vehicle that made its way down to Texas some years ago! I found rust on the drivers side floor pan. Sucks to have to get off into this little project, but it will be nicer and cleaner.

The body mount bucket underneath will also need replacing.
01-05-2014, 08:02 PM
#19
Staging Lane
Thread Starter
Join Date: Nov 2013
Location: East Texas
Posts: 50
Likes: 0
Received 0 Likes
on
0 Posts
Only worked on the Jimmy a couple hours these past few days!
Surprising how long it took for something so simple!
Cleaning things up a bit
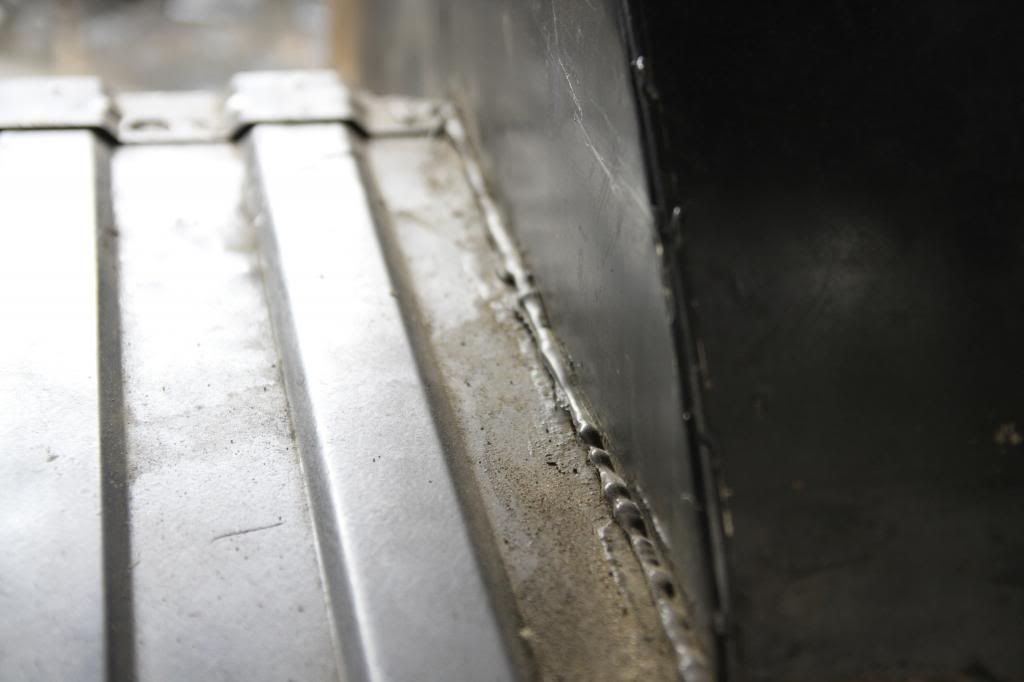
The junk we are getting rid of! The tubs were only siliconed to the floor.
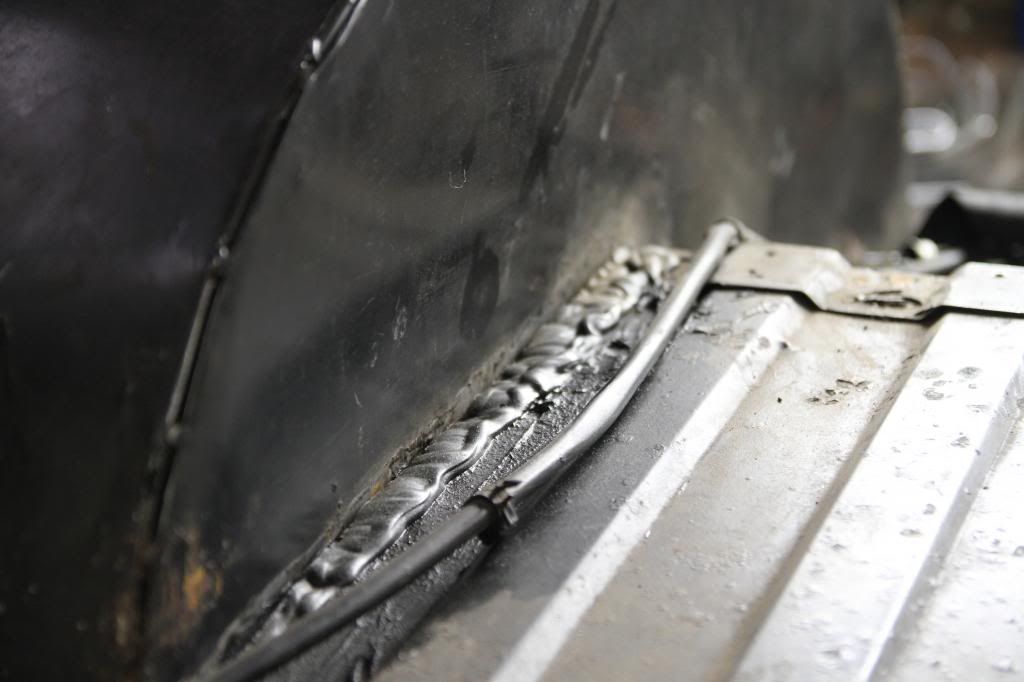
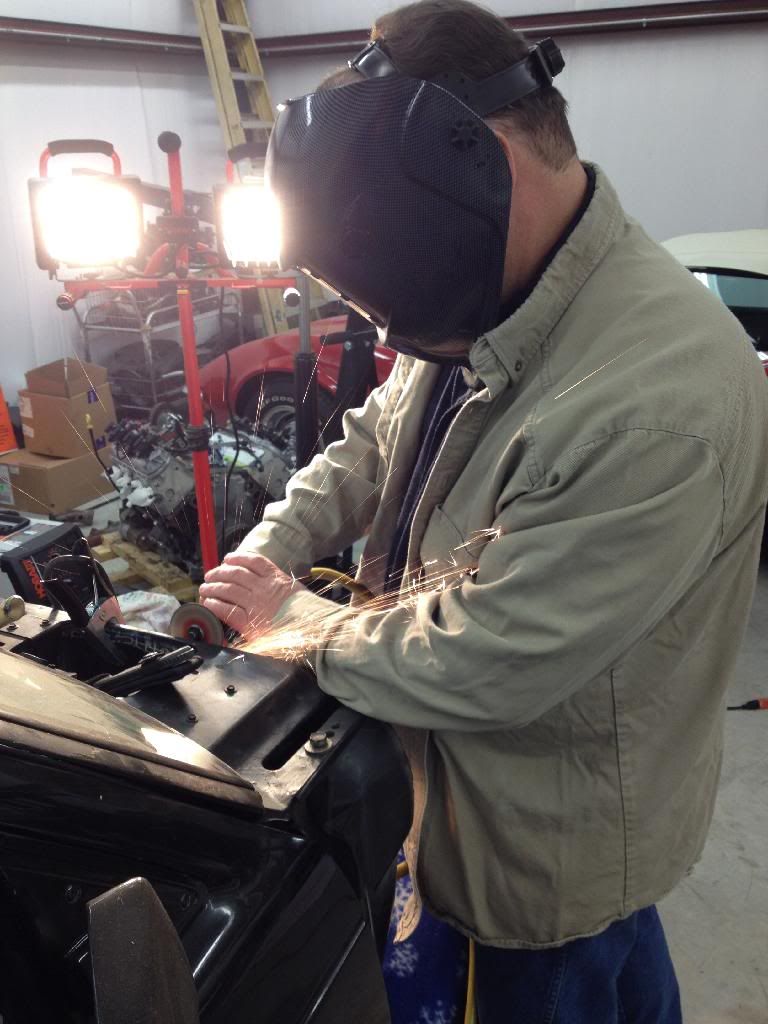
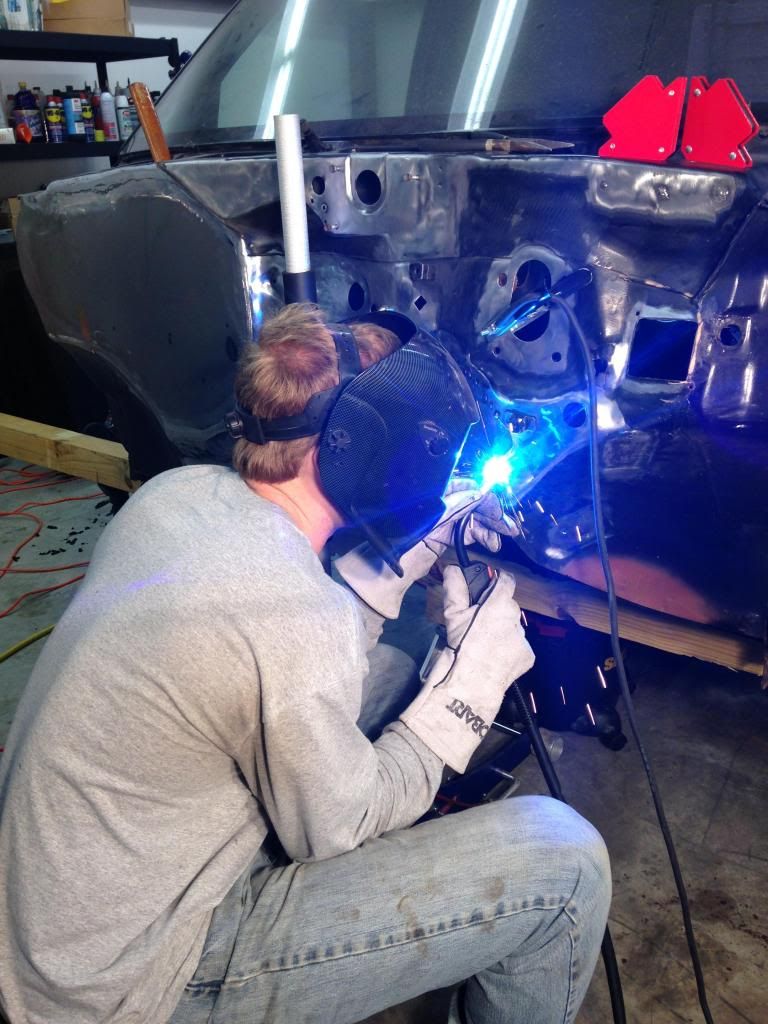
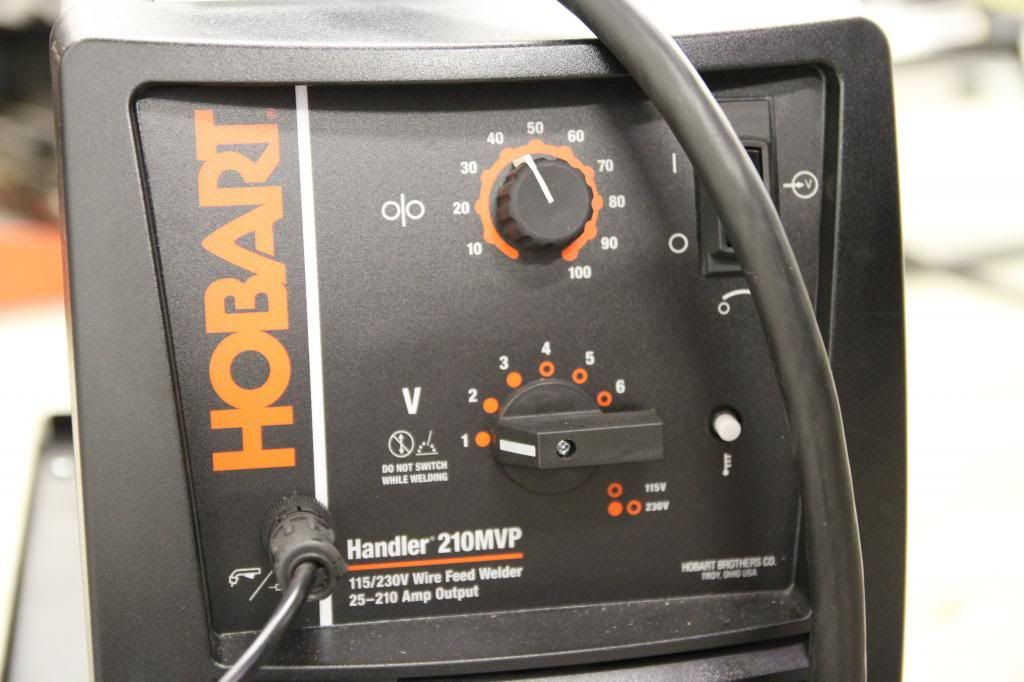
For anyone wanted to know the setting I've used for the majority of the sheet metal work! This is with .24 wire
Cleaned and tacked
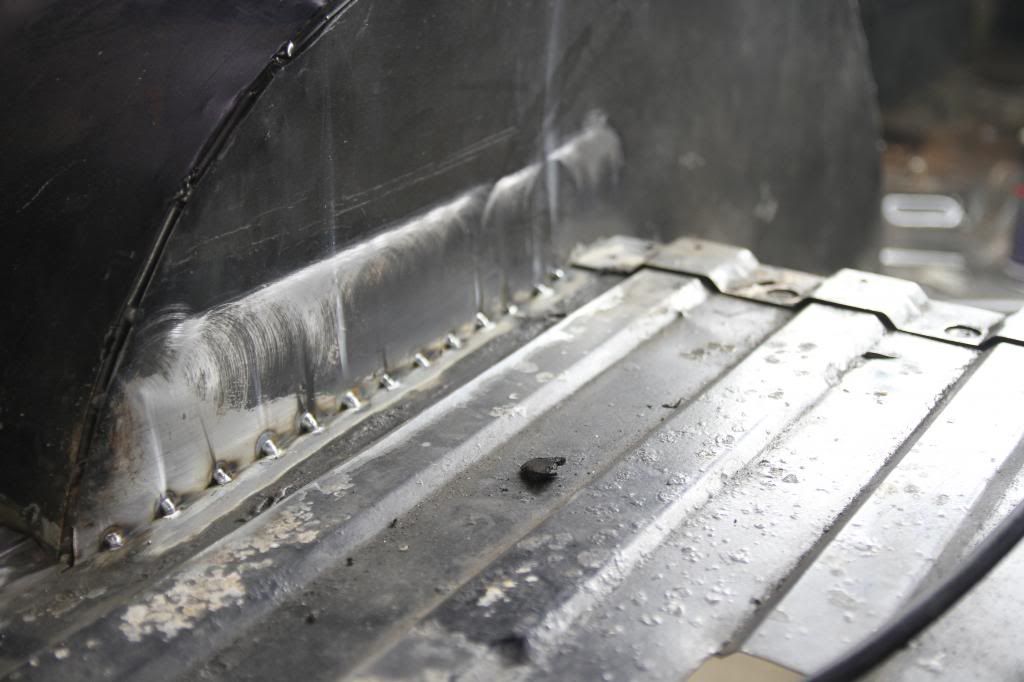
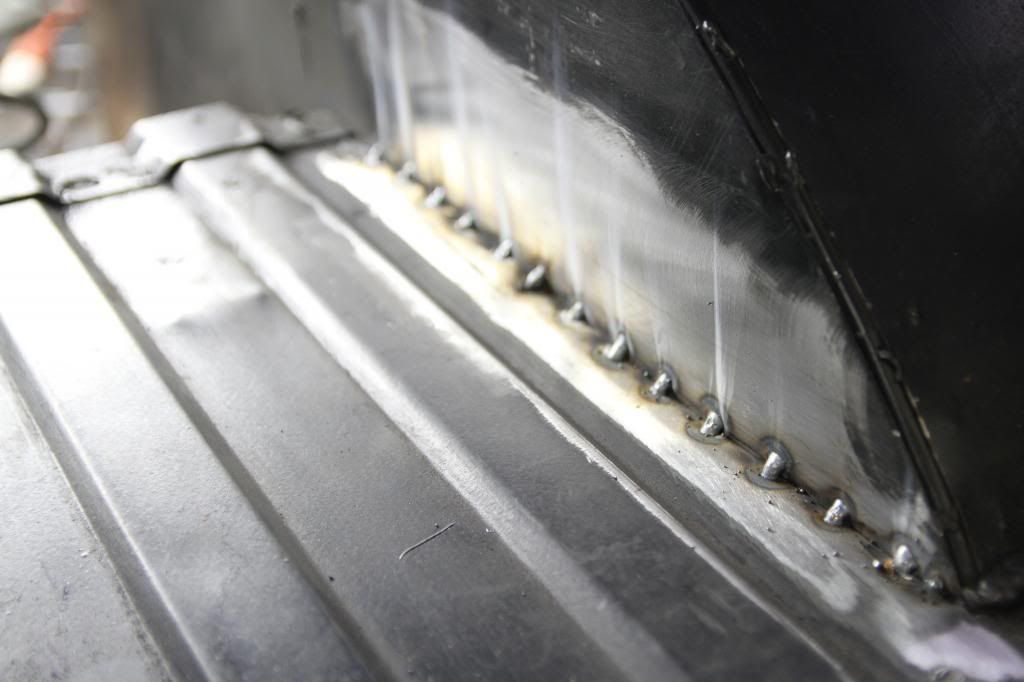
This came in pretty handy to suck the tubs to the floor!
Its fully tacked in, but forgot to take a photo!
That's about it for now. Still waiting on my order for the new front floor boards and body mount buckets. Hoping to get that tomorrow!
Surprising how long it took for something so simple!
Cleaning things up a bit

The junk we are getting rid of! The tubs were only siliconed to the floor.


For anyone wanted to know the setting I've used for the majority of the sheet metal work! This is with .24 wire

Cleaned and tacked


This came in pretty handy to suck the tubs to the floor!

Its fully tacked in, but forgot to take a photo!
That's about it for now. Still waiting on my order for the new front floor boards and body mount buckets. Hoping to get that tomorrow!
