SOM LAG Project: 394ci, 25.3, Twin PT7675 Gen 2's, PG, E85, 7-second Street Car


 02-16-2018, 09:52 AM
#522
Week's recap:
Made a couple of trips back and forth to Napa this week to get the best fitting serpentine belt as well as pick up an oil filter. The part numbers will be pretty useless but will be in a spot for me to easily find them when needing to replace:
Oil Filter: Napa 1522.
Serpentine Belt: 25-060555.
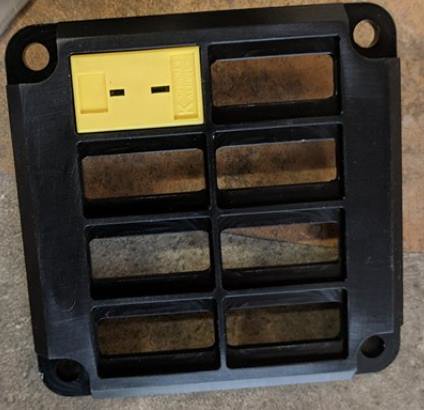
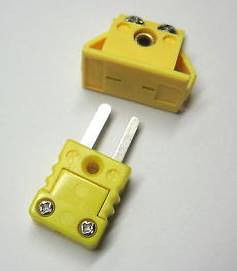
I have also been spending a fair amount of time looking at more solutions to clean up my wiring and/or make things simpler during maintenance. A buddy of mine had an EGT Quick Disconnect panel built. I originally wasn't going to switchover to this, but it looks like a nice piece and again, should make things easier when pulling the engine. He is also selling the panel / connectors. Feel free to contact LS1Tech user transam69230.

I also really want to have my Main Engine Harness to have a quick disconnect on the firewall. This would allow to easily unplug the engine harness and eventually can pull the harness with the engine on the stand. Would make things much simpler for install / removing when pulling an engine. I had put an ad out looking for a Used Holley LS1 Harness that I would be able to start with and modify as needed to build my new harness. Sure enough, bought one the other day. Will be constructing this with Mil Spec Connectors and won't switch over to it until I have the car up and running and no bugs. Already have been planning how I am going to pin the harness to keep things neat.
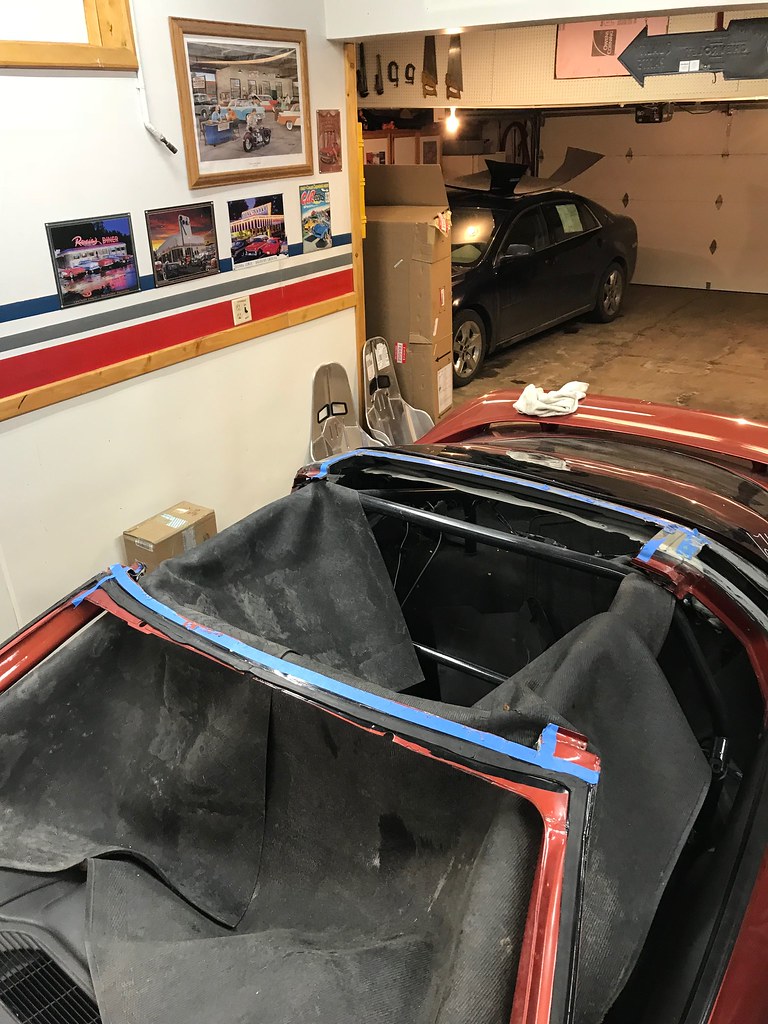
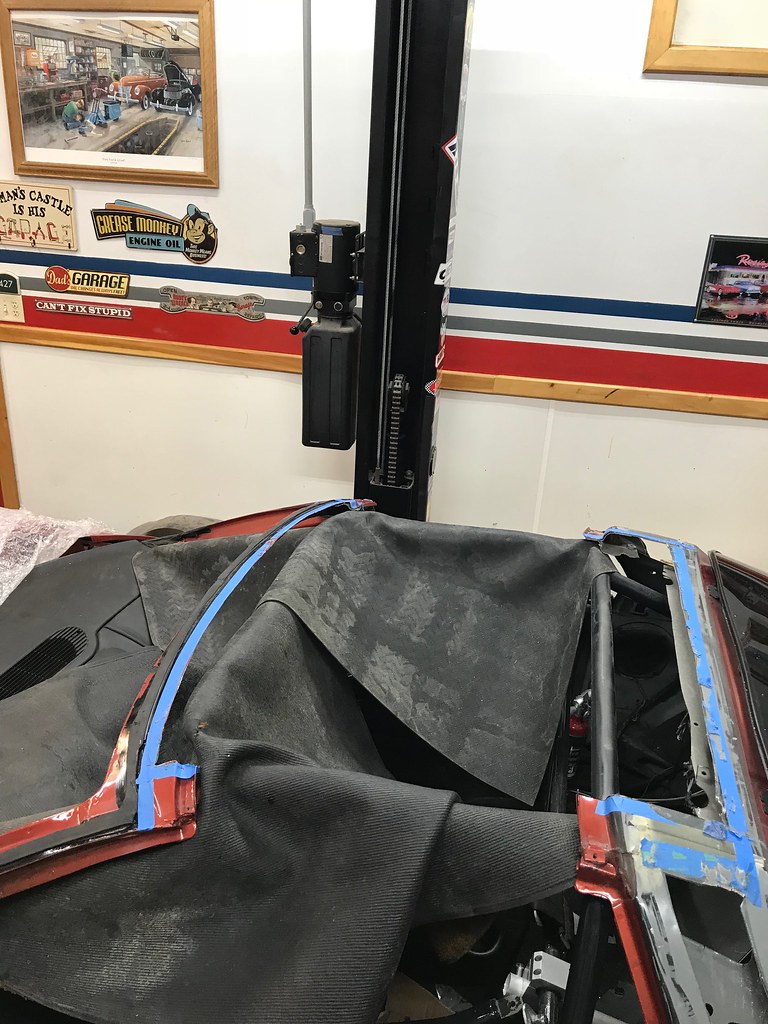
Last night, we finally got started with the dreaded cutting of the roof structure to remove some weight prior to the install of the Carbon Fiber roof. Didn't know what to expect with this. Mostly used sawzall's and some other miscellaneous saws to do the cutting. The plan last night was to get as much of the larger, easily removed components off. Then we will try to remove some of the more difficult, tighter area stuff. Started by marking a couple areas with tape, just to show / plan the general areas of the metal to be removed. Used some rugs, as well as a plate of aluminum to protect the cage from getting hit with the saw blades. There are plenty of areas that get pretty tight and just used caution around those areas.

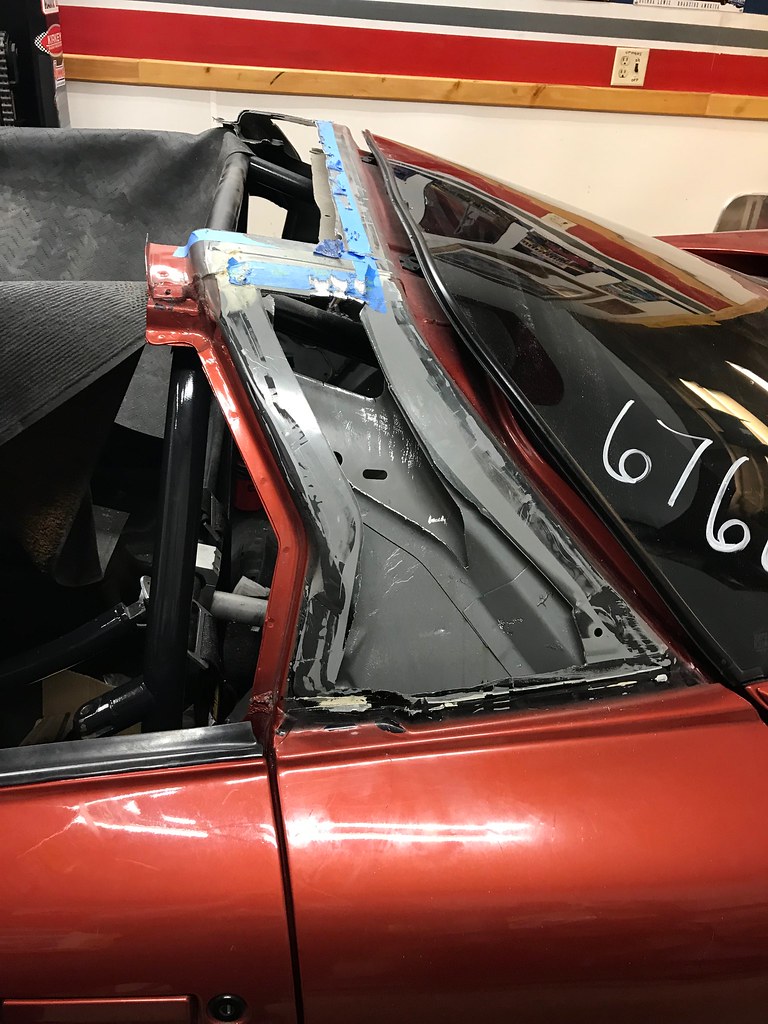
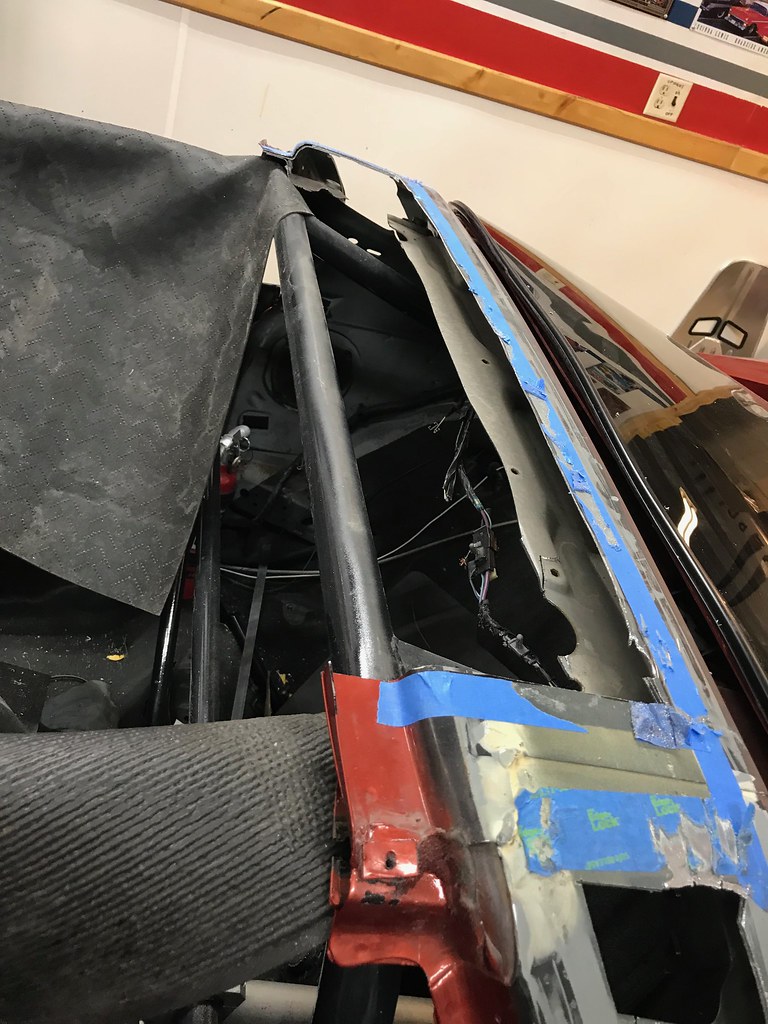
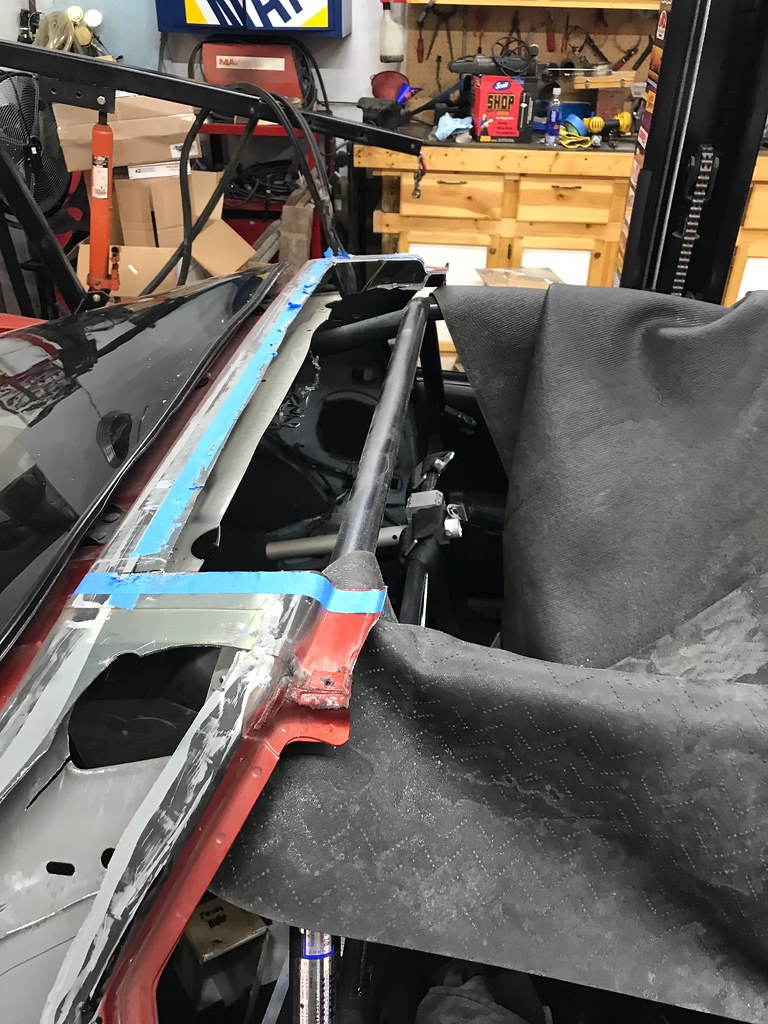
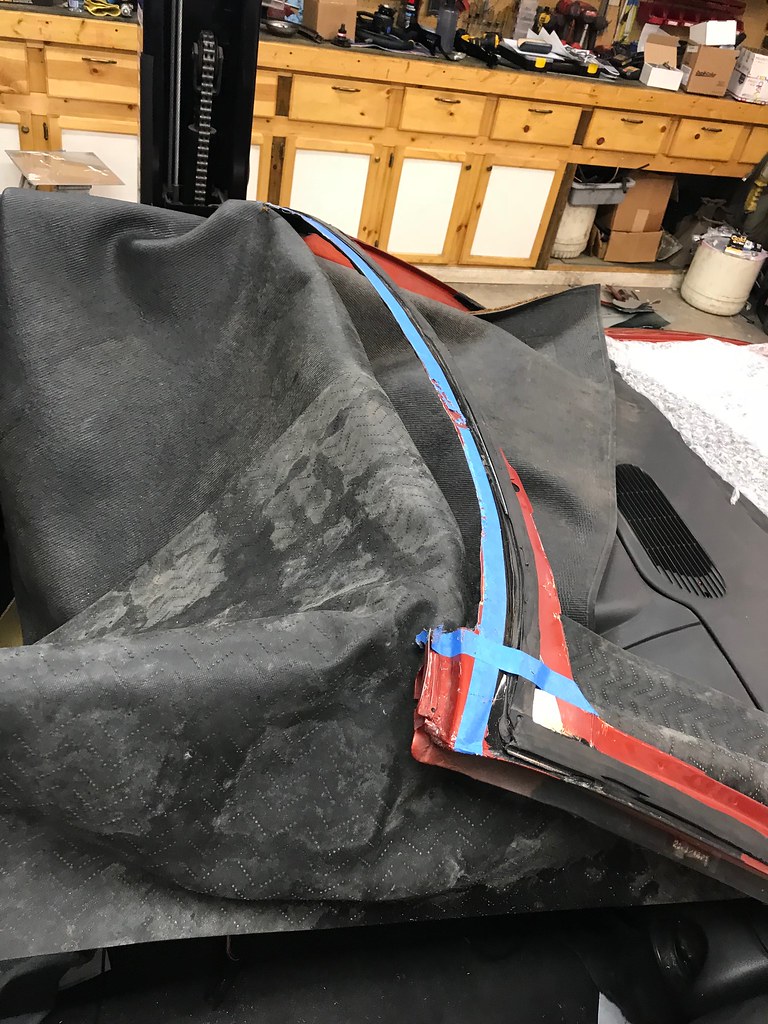
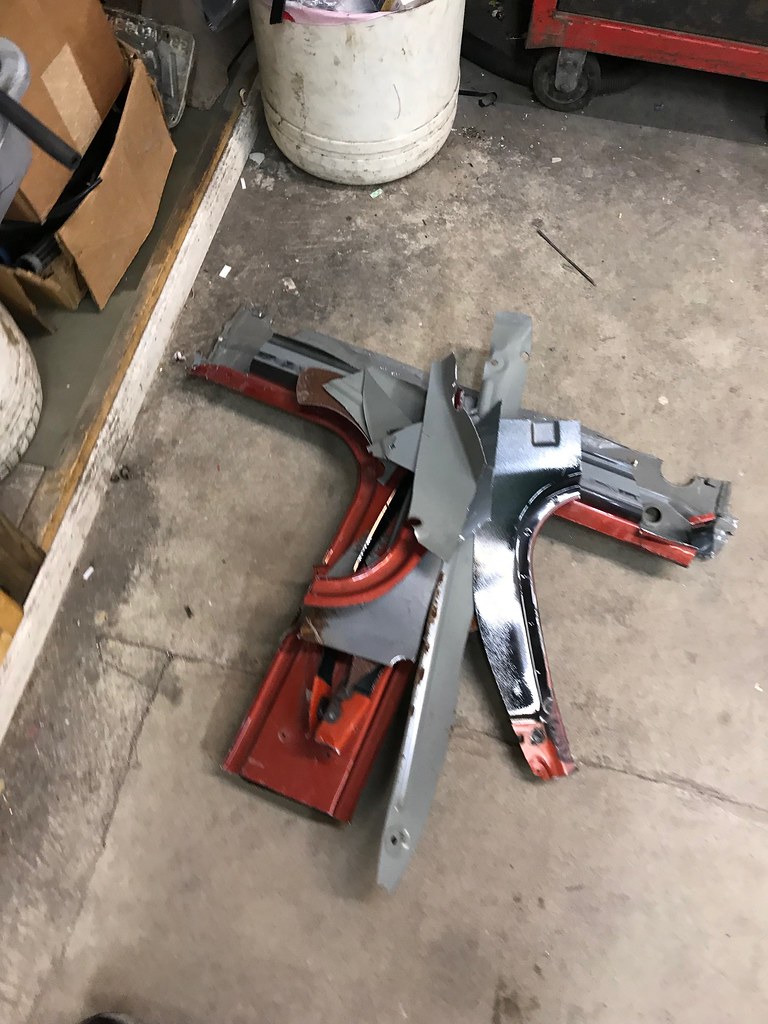
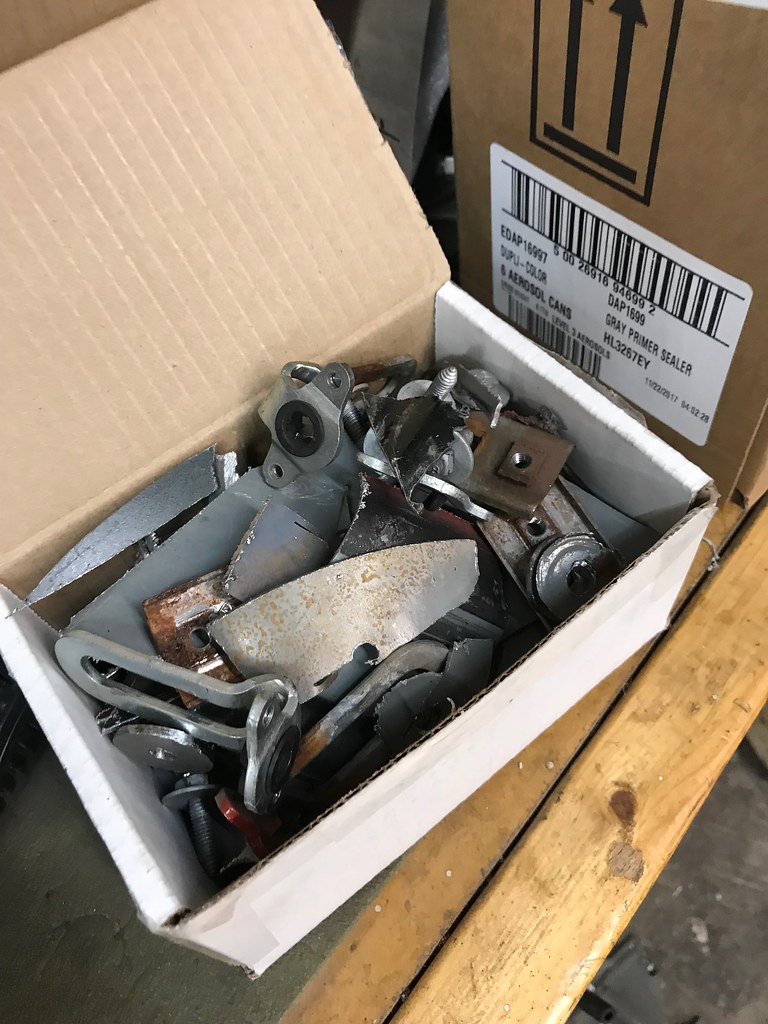
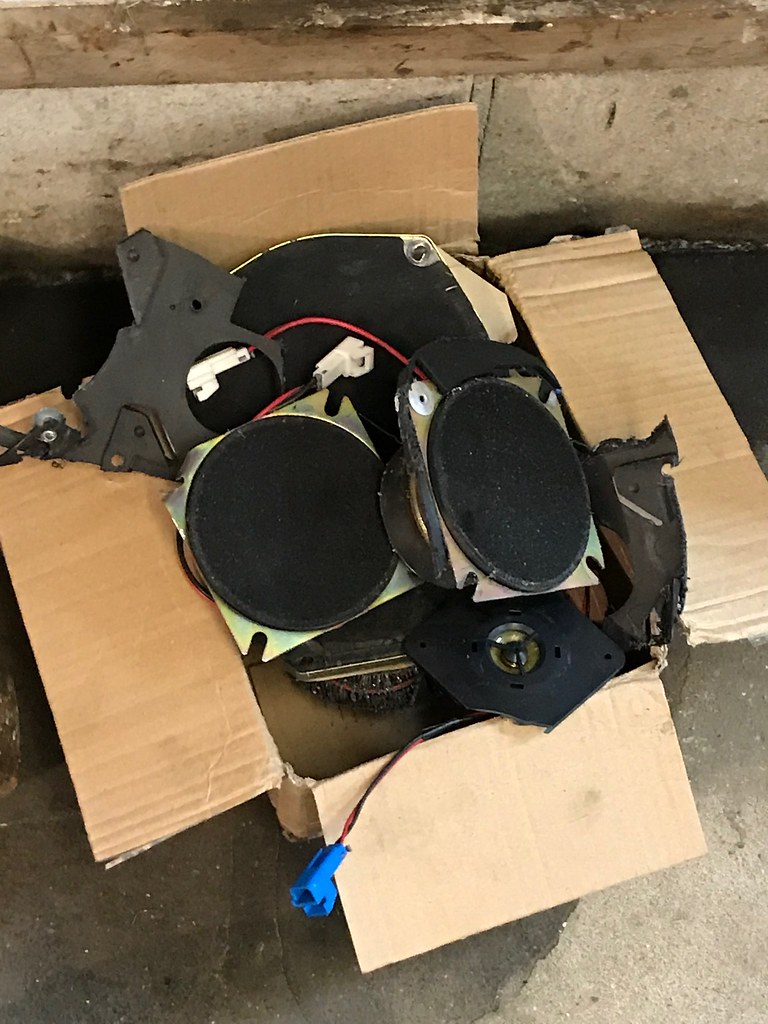
End result: I pile of the larger chunks, and a box of the smaller chunks. Every little bit adds up in weight removal.
Small steps in the entire process towards Spring.
Made a couple of trips back and forth to Napa this week to get the best fitting serpentine belt as well as pick up an oil filter. The part numbers will be pretty useless but will be in a spot for me to easily find them when needing to replace:
Oil Filter: Napa 1522.
Serpentine Belt: 25-060555.
I have also been spending a fair amount of time looking at more solutions to clean up my wiring and/or make things simpler during maintenance. A buddy of mine had an EGT Quick Disconnect panel built. I originally wasn't going to switchover to this, but it looks like a nice piece and again, should make things easier when pulling the engine. He is also selling the panel / connectors. Feel free to contact LS1Tech user transam69230.
I also really want to have my Main Engine Harness to have a quick disconnect on the firewall. This would allow to easily unplug the engine harness and eventually can pull the harness with the engine on the stand. Would make things much simpler for install / removing when pulling an engine. I had put an ad out looking for a Used Holley LS1 Harness that I would be able to start with and modify as needed to build my new harness. Sure enough, bought one the other day. Will be constructing this with Mil Spec Connectors and won't switch over to it until I have the car up and running and no bugs. Already have been planning how I am going to pin the harness to keep things neat.
Last night, we finally got started with the dreaded cutting of the roof structure to remove some weight prior to the install of the Carbon Fiber roof. Didn't know what to expect with this. Mostly used sawzall's and some other miscellaneous saws to do the cutting. The plan last night was to get as much of the larger, easily removed components off. Then we will try to remove some of the more difficult, tighter area stuff. Started by marking a couple areas with tape, just to show / plan the general areas of the metal to be removed. Used some rugs, as well as a plate of aluminum to protect the cage from getting hit with the saw blades. There are plenty of areas that get pretty tight and just used caution around those areas.
End result: I pile of the larger chunks, and a box of the smaller chunks. Every little bit adds up in weight removal.
Small steps in the entire process towards Spring.
02-20-2018, 09:13 AM
#523
Worked on the car for a little while on Friday as well as last night. Forgot to take photos of most of the stuff that we did. It seemed like it is just some odds and ends and what not.
The majority of Friday was finalizing the cleaning and cutting of the roof structure. Only cut a little more metal out, but spent most of the time grinding to smooth and clean the edges of the metal. Seemed like we were to a point where it was a lot of work to get very little metal out. Many of the locations we were looking to remove were very close to the cage. Wanted to avoid those at all costs. I figure those areas could be revisited if / when the cage gets upgraded to a 25.x spec cage. I will try to remember to get photos the next time I am over there.
Ended up removing about 28.4lbs of steel. I believe the T-tops are about 26lbs and the roof around 6-8lbs. Net weight loss going from the T-tops to the hardtop was 46-48lbs.
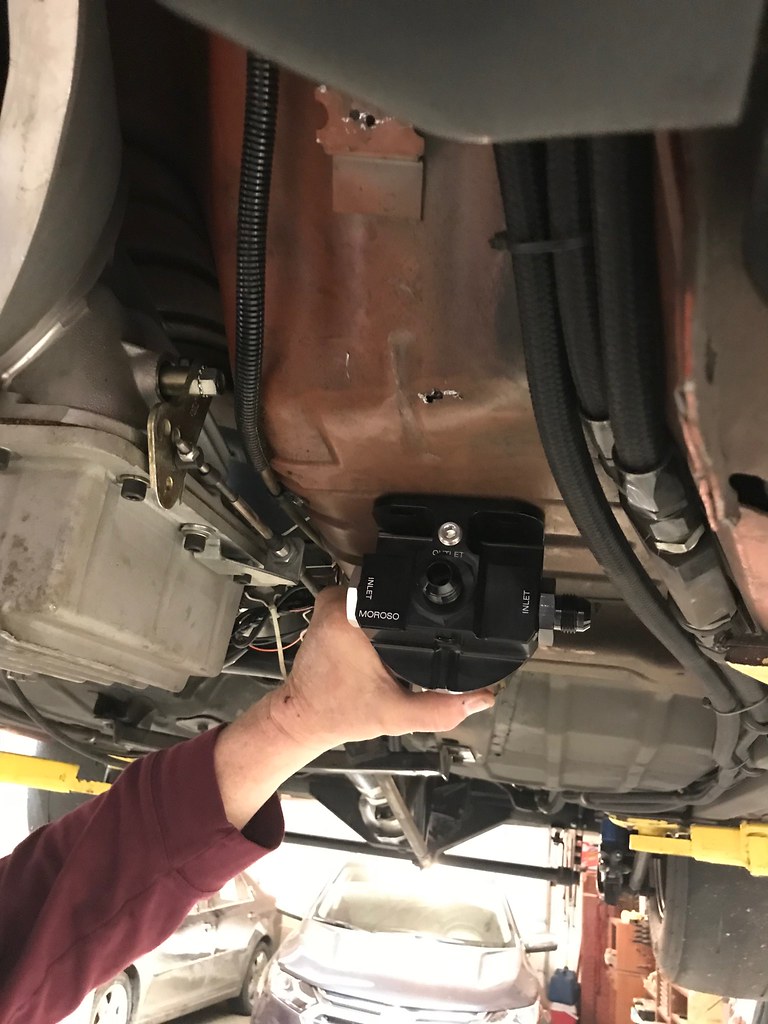
Next up was mounting the remote oil filter. You would think there should be plenty of areas with enough room to mount this seeing that I won't have to run exhaust towards the back. The only areas seemed to be between the engine and radiator on the factory frame rails. However, I wanted to avoid these areas as they will be cut out for the Tubular front as well as have the turbos, wastegates, piping, etc. up there.
One area that seemed to allow easy access to the filter was adjacent to the transmission on the driver's side floor panel. I was hesitant about this location but everything is higher than the transmission pan and seems to fit okay. Drilled holes and installed nuts and bolts to hold the bracket. The location will allow short hoses to be routed to the pan, but I will most likely need longer turbo feed hoses, depending on installation location. I had the 10AN hose at home, but needed to order a couple of hose ends. Will grab final photos after those are installed.
Spent some minor time wiring and installing sensors. Received the proper fittings, adaptors, pressure transducers, etc to install a pressure transducer for coolant pressure as well as converter pressure. More data for this year! This will also lead to a little more wiring.
Ended the night by getting the passenger seat mounted and installed. I used the Racecraft bolt in brackets for mounting the seat. Overall, I think the install turned out fine, but I wish the seat was back a little farther to allow a little more room for passenger legs (bracket would not allow to be back farther). Again, I have a bunch of wiring, components, etc on the passenger firewall there. Every little bit of space is helpful.
Sorry again about the limited amount of photos. A lot of writing rather than the pictures this time.
Also received word that Nate at One Guy's Garage should be ready by this weekend for the car! Those picture updates should be a lot better than what I was doing! Will actually get to see some larger progress with the tubular front, turbos, exhaust, etc. Will get this thing much closer to being ready for Spring! We will see what the weather brings later this week and get the car up there!
Also sent a message yesterday to check on the status of the hood. Yes, 3-1/2 weeks ago, I was told I should have the hood within 2 weeks. The performance industry delays continue to happen!
I will remind myself, more photos next time!
The majority of Friday was finalizing the cleaning and cutting of the roof structure. Only cut a little more metal out, but spent most of the time grinding to smooth and clean the edges of the metal. Seemed like we were to a point where it was a lot of work to get very little metal out. Many of the locations we were looking to remove were very close to the cage. Wanted to avoid those at all costs. I figure those areas could be revisited if / when the cage gets upgraded to a 25.x spec cage. I will try to remember to get photos the next time I am over there.
Ended up removing about 28.4lbs of steel. I believe the T-tops are about 26lbs and the roof around 6-8lbs. Net weight loss going from the T-tops to the hardtop was 46-48lbs.
Next up was mounting the remote oil filter. You would think there should be plenty of areas with enough room to mount this seeing that I won't have to run exhaust towards the back. The only areas seemed to be between the engine and radiator on the factory frame rails. However, I wanted to avoid these areas as they will be cut out for the Tubular front as well as have the turbos, wastegates, piping, etc. up there.
One area that seemed to allow easy access to the filter was adjacent to the transmission on the driver's side floor panel. I was hesitant about this location but everything is higher than the transmission pan and seems to fit okay. Drilled holes and installed nuts and bolts to hold the bracket. The location will allow short hoses to be routed to the pan, but I will most likely need longer turbo feed hoses, depending on installation location. I had the 10AN hose at home, but needed to order a couple of hose ends. Will grab final photos after those are installed.
Spent some minor time wiring and installing sensors. Received the proper fittings, adaptors, pressure transducers, etc to install a pressure transducer for coolant pressure as well as converter pressure. More data for this year! This will also lead to a little more wiring.
Ended the night by getting the passenger seat mounted and installed. I used the Racecraft bolt in brackets for mounting the seat. Overall, I think the install turned out fine, but I wish the seat was back a little farther to allow a little more room for passenger legs (bracket would not allow to be back farther). Again, I have a bunch of wiring, components, etc on the passenger firewall there. Every little bit of space is helpful.
Sorry again about the limited amount of photos. A lot of writing rather than the pictures this time.
Also received word that Nate at One Guy's Garage should be ready by this weekend for the car! Those picture updates should be a lot better than what I was doing! Will actually get to see some larger progress with the tubular front, turbos, exhaust, etc. Will get this thing much closer to being ready for Spring! We will see what the weather brings later this week and get the car up there!
Also sent a message yesterday to check on the status of the hood. Yes, 3-1/2 weeks ago, I was told I should have the hood within 2 weeks. The performance industry delays continue to happen!
I will remind myself, more photos next time!
02-21-2018, 11:16 AM
#524
Another day, and a little more progress on the car.
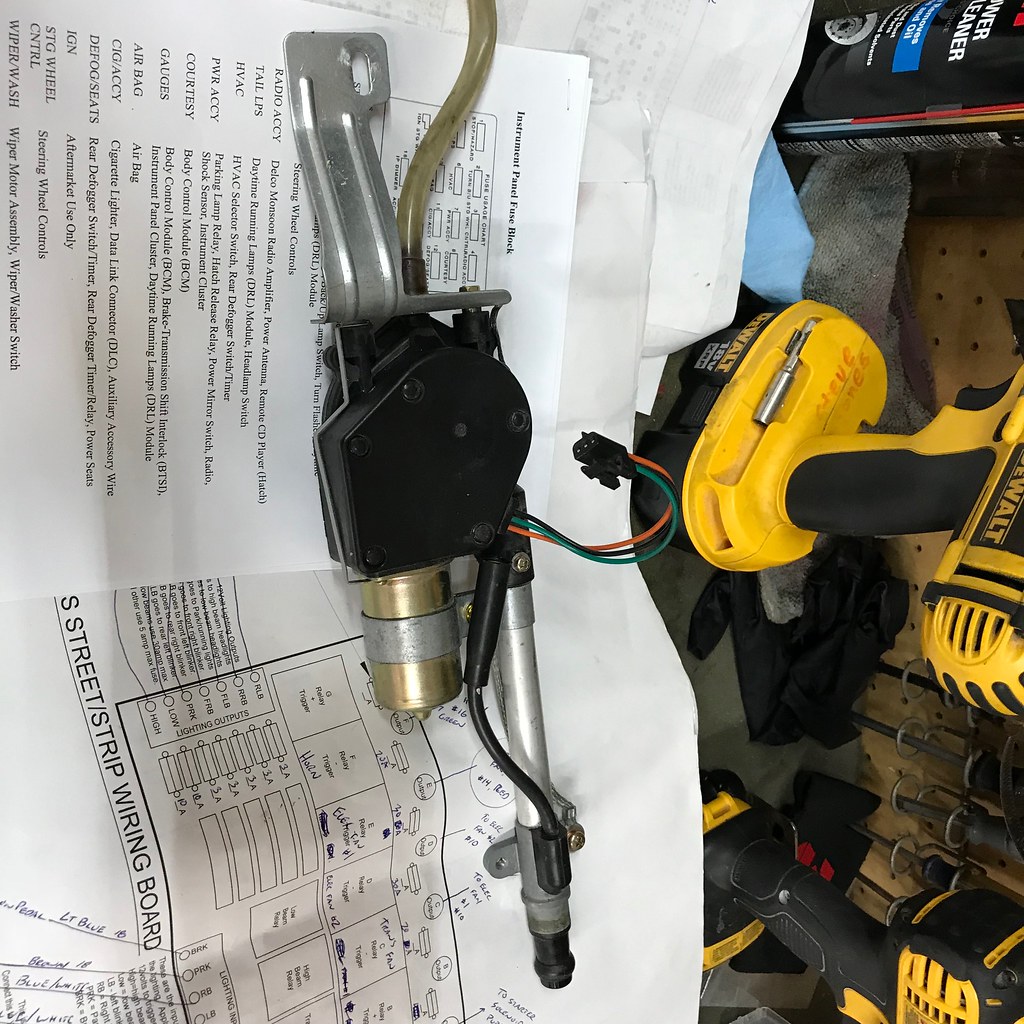
I have been spending some time looking at wiring manuals as well as trying to update my wiring diagram I have for my car. It is a mess, but it is a great starting spot if issues ever come up. We had a short that magically appeared the other day and used the diagram to trace everything out and isolate the issue. I highly recommend keeping these documents or labeling wires for future reference.
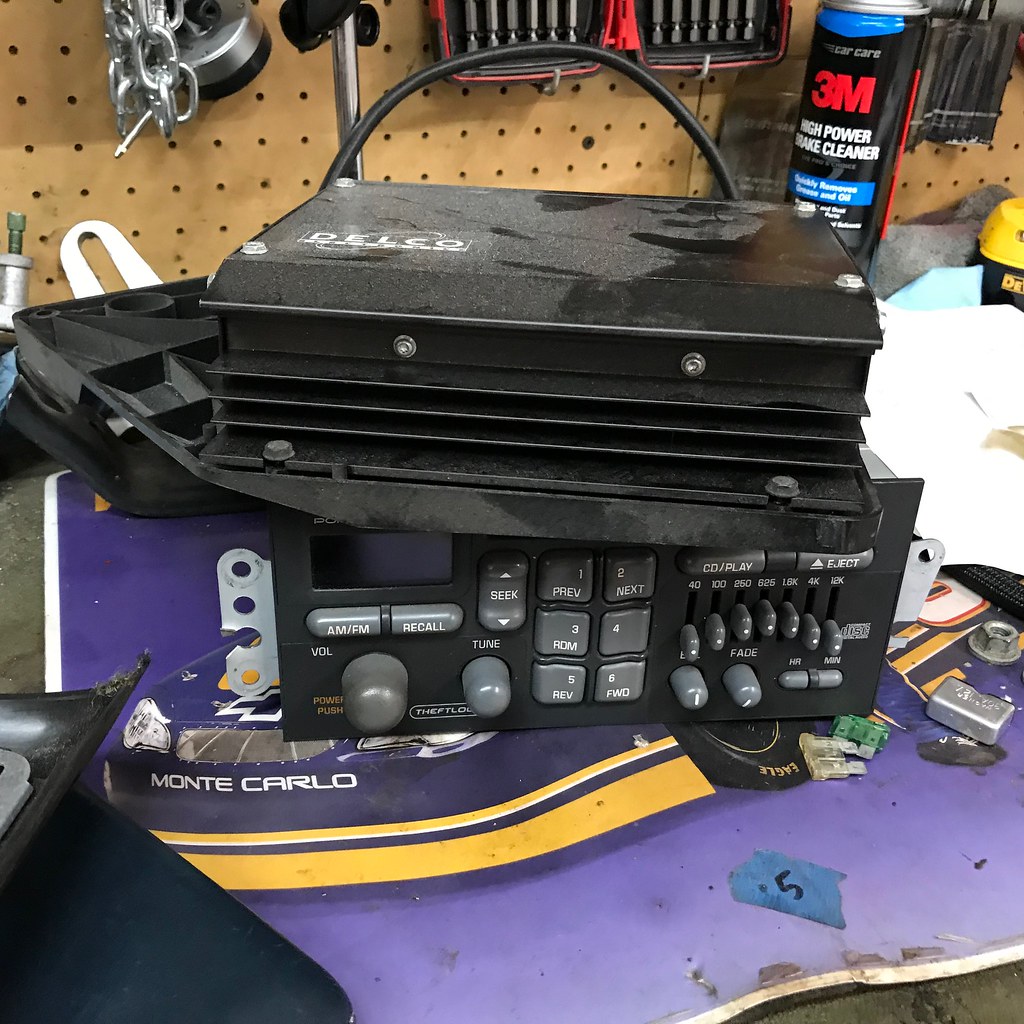
Spent a little time working on wiring last night. Since changing to the Grant steering wheel, I started by removing the wires that were routed to the airbag, as well as the wires routed to the steering wheel radio controls. I had been contemplating removing my radio and speakers for a while and figured now is as good of time as any. Most of the speakers were blown, and sounded like crap, so I figured I can easily get by with a Bluetooth speaker and my phone (today's technology!) for any kind of driving.
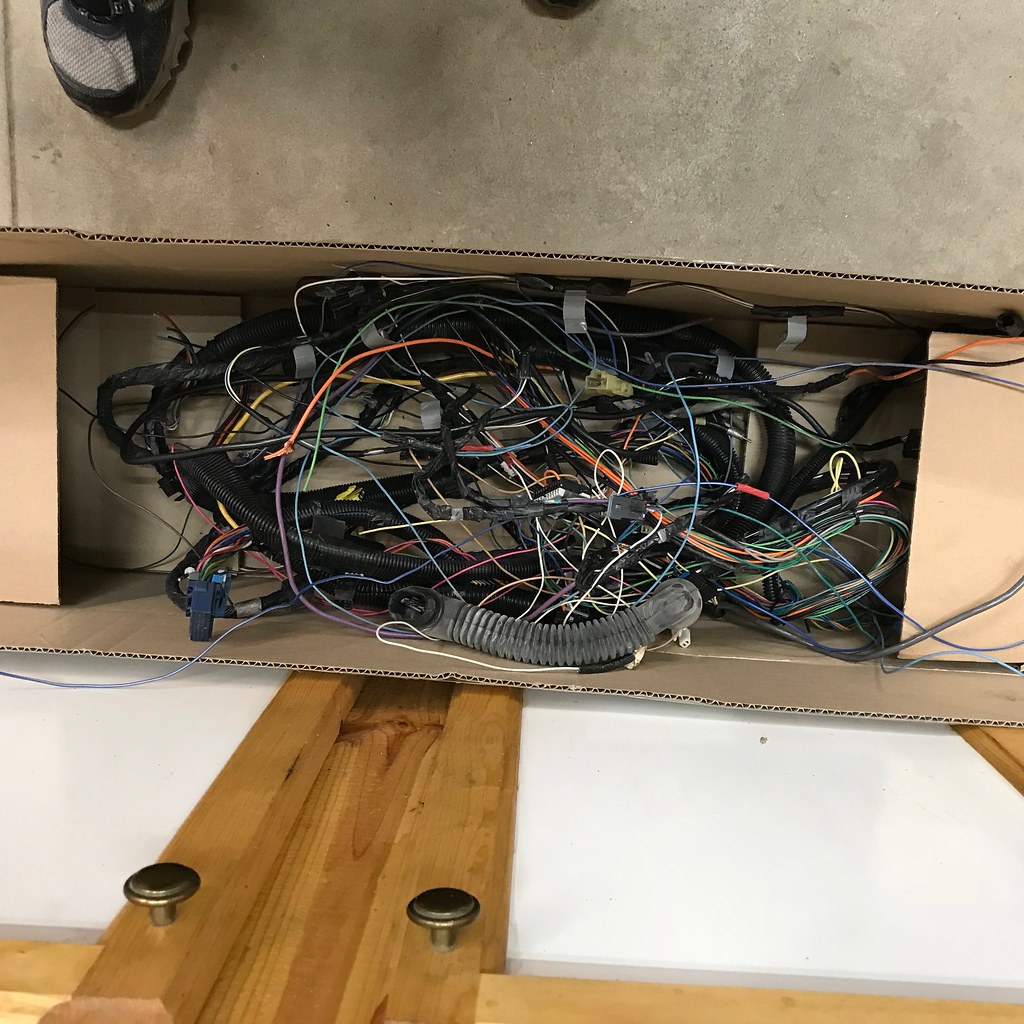
When looking at the wiring diagrams, and comparing them to the car, it really cleans up a lot of stuff. Unbelievable how many wires are tied into the speakers, amp, powered antenna, deck, etc. It removes all of the wiring routed down the passenger side to the back of the car. The driver's side rear speakers get connected under the back seat area. The only wiring left routed to the back of the car are for my taillights (driver's side), hatch release (driver's side), and fuel pump stuff (passenger side).
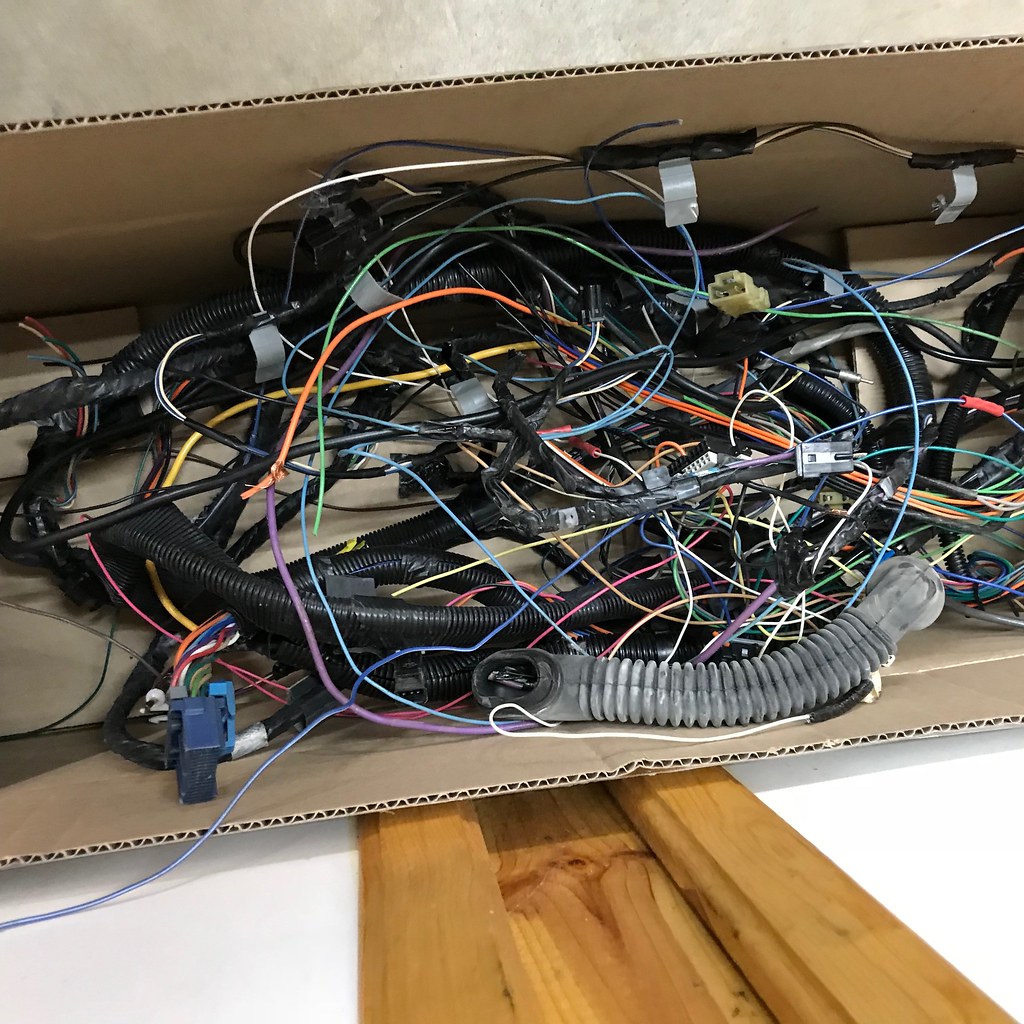
So far, I was able to remove the rear speakers, the sail panel speakers, the amp, the deck, and the powered antenna. Still have to remove the door speakers. I went right to the shop after work and didn't have a scale there to weigh everything. Will have to update the next time I am there. The two things that were significantly noticeable: 1. The rear panels without speakers are super light. 2. There is a ton of wires associated with this equipment.
Also removed the wiring to the dome light (seeing this was removed for the roof / roof structure), rear defogger (disconnected for a while now), and the air / power to the factory power seats.
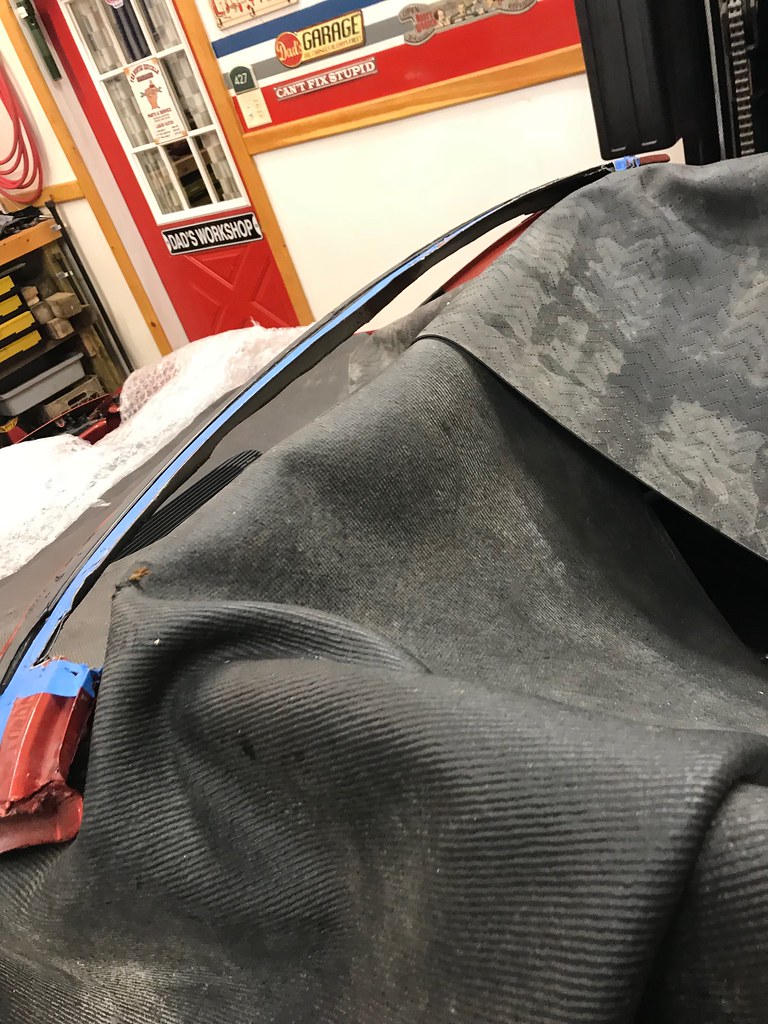
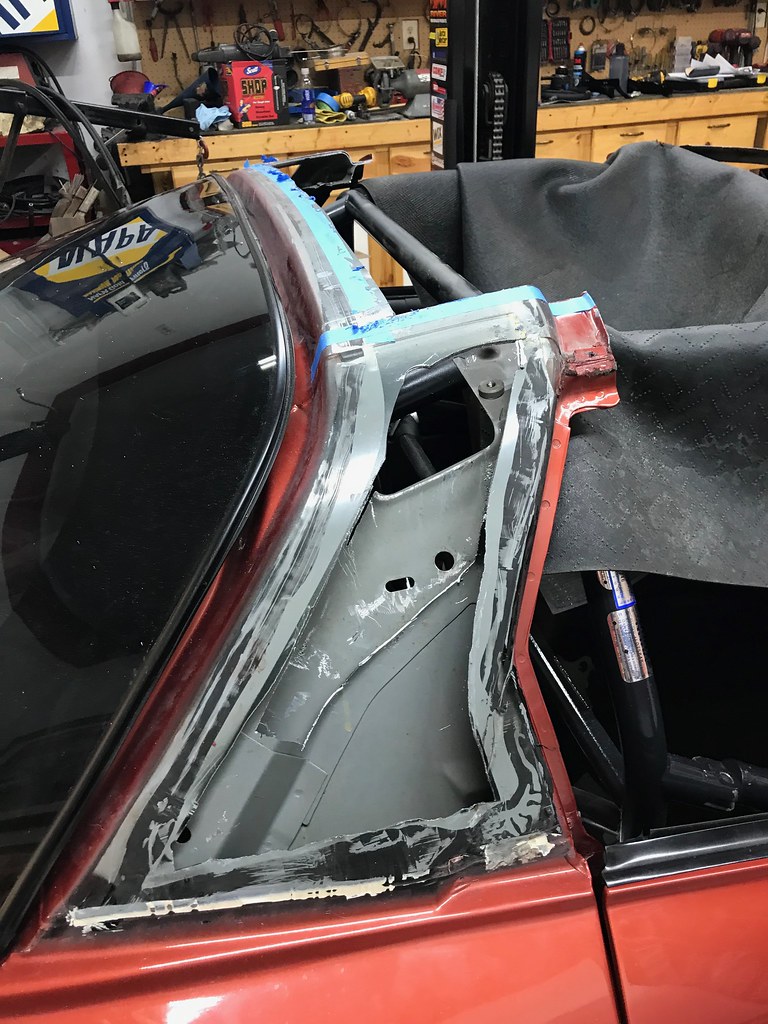
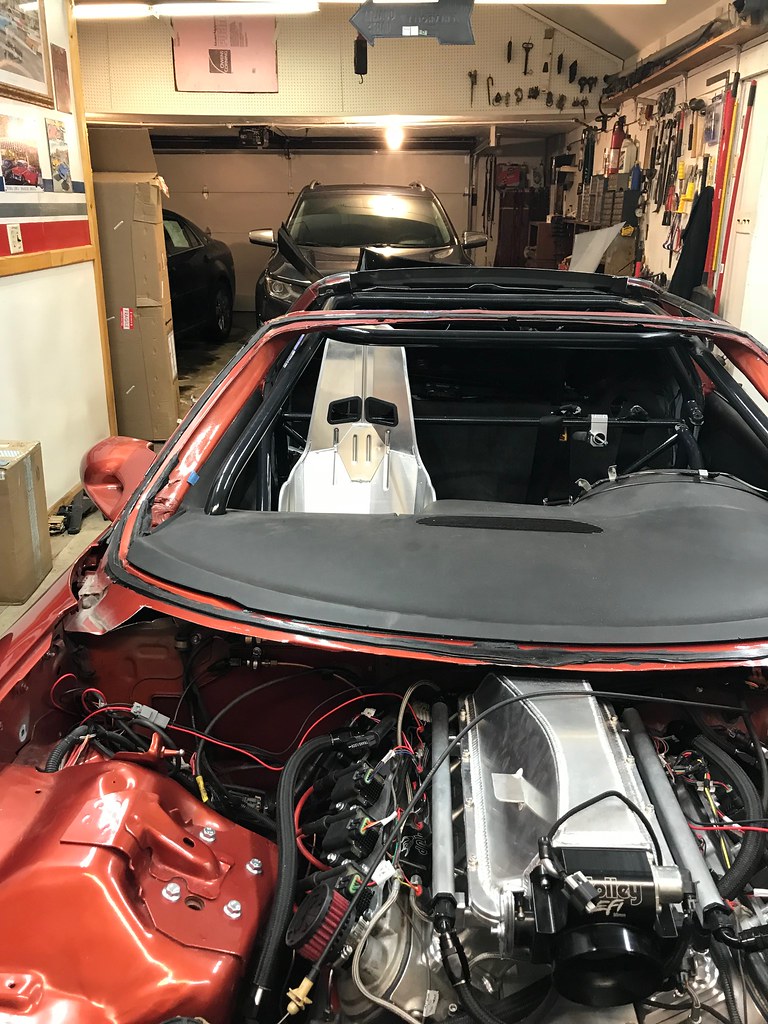
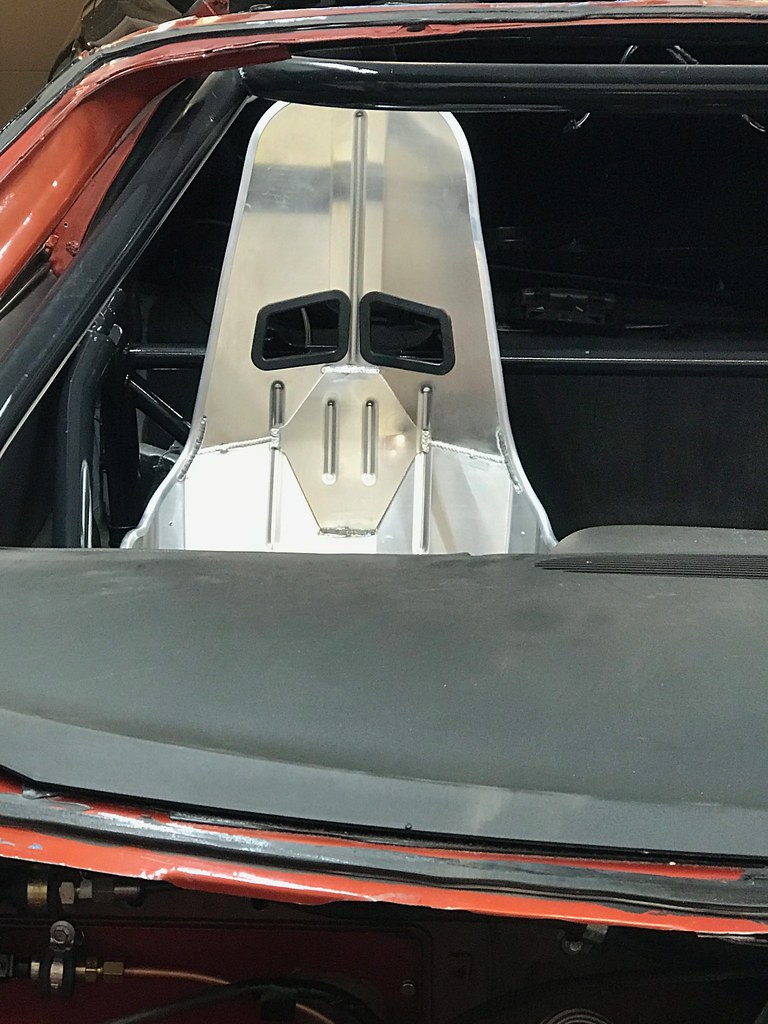
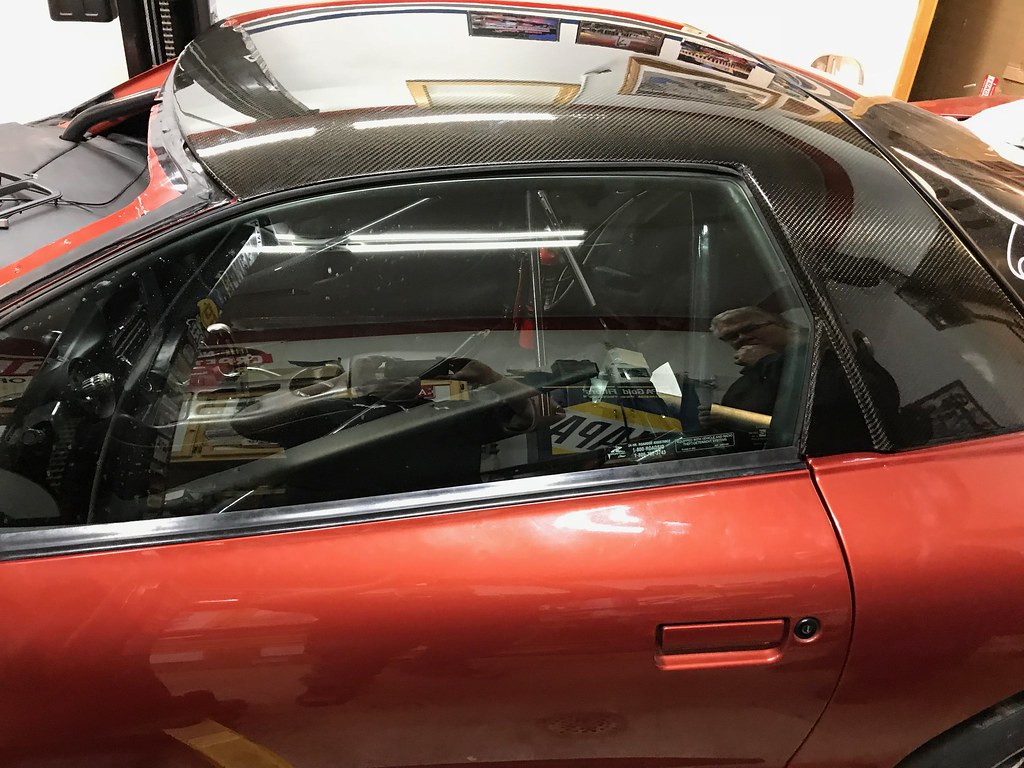
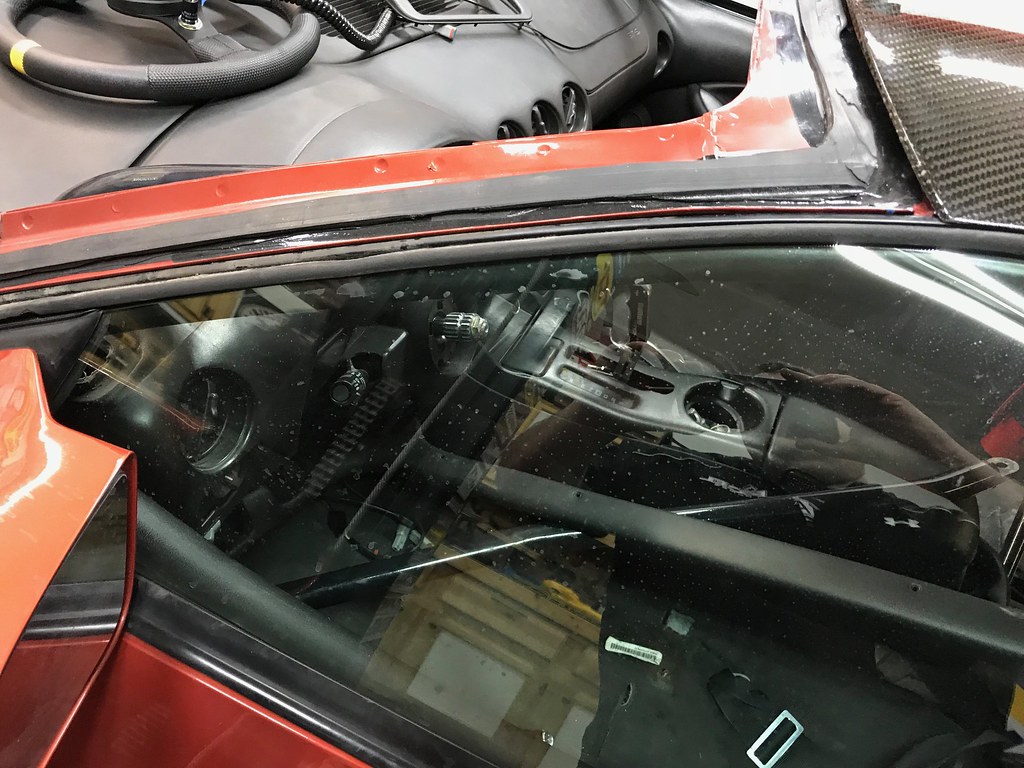
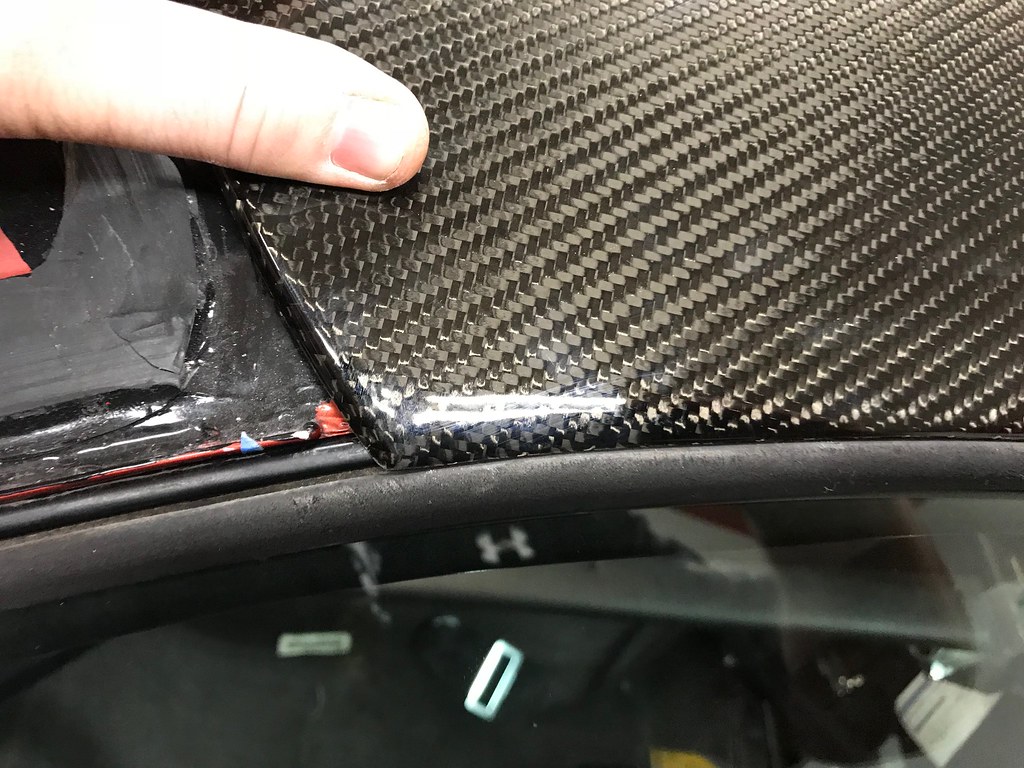
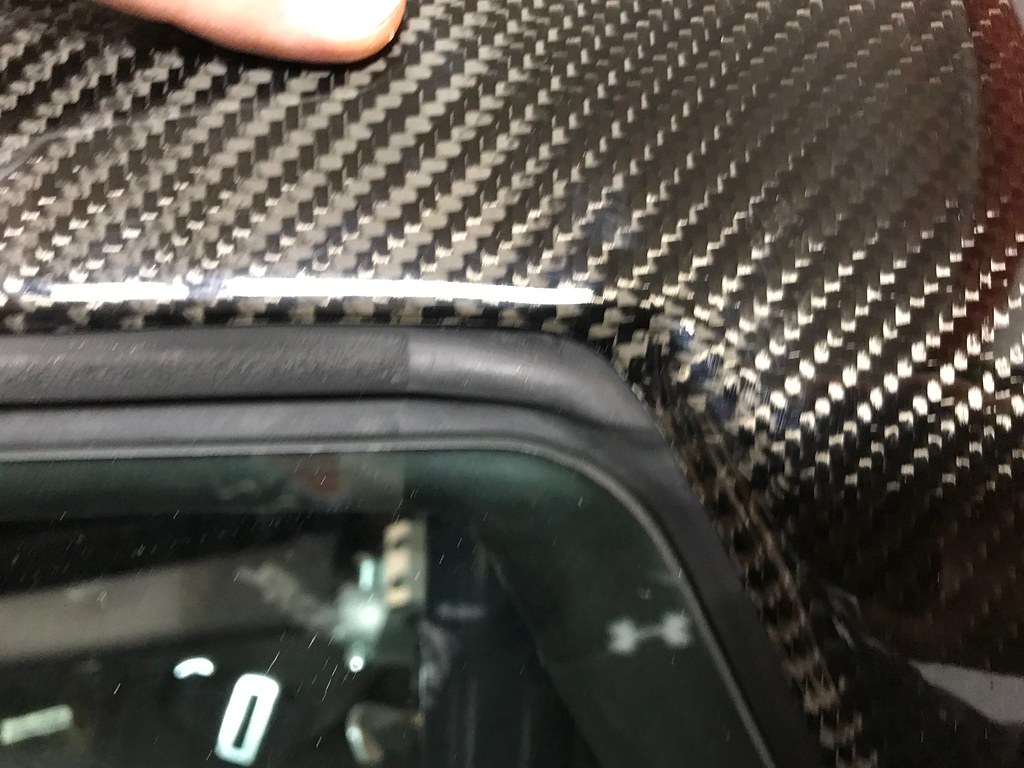
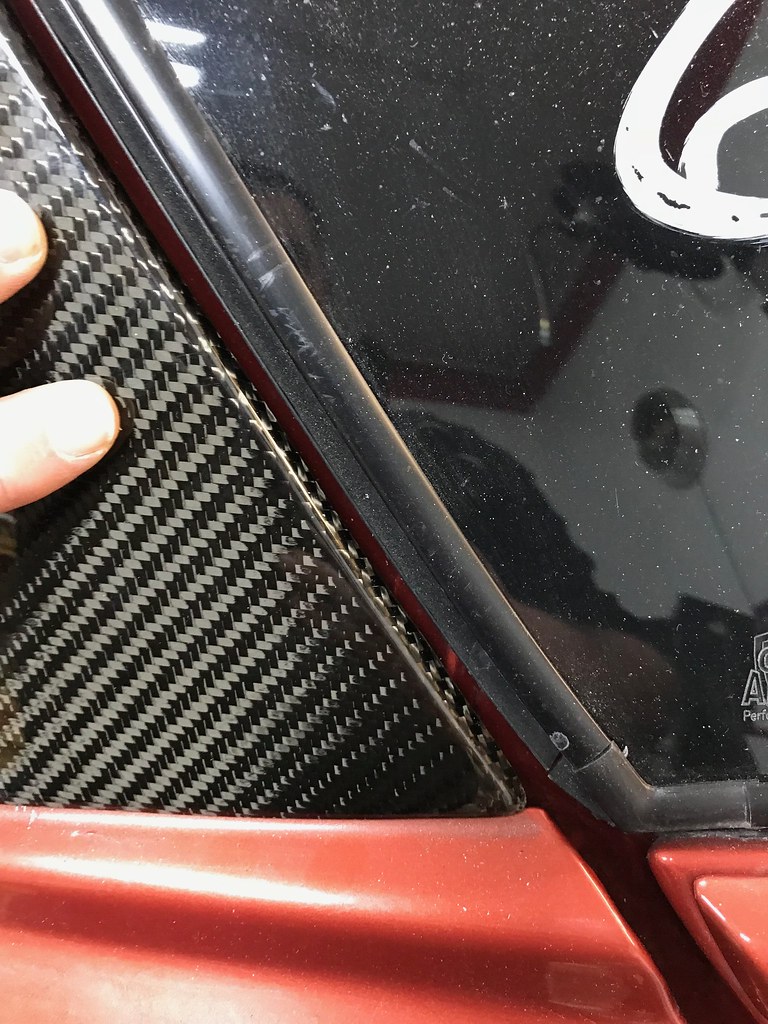
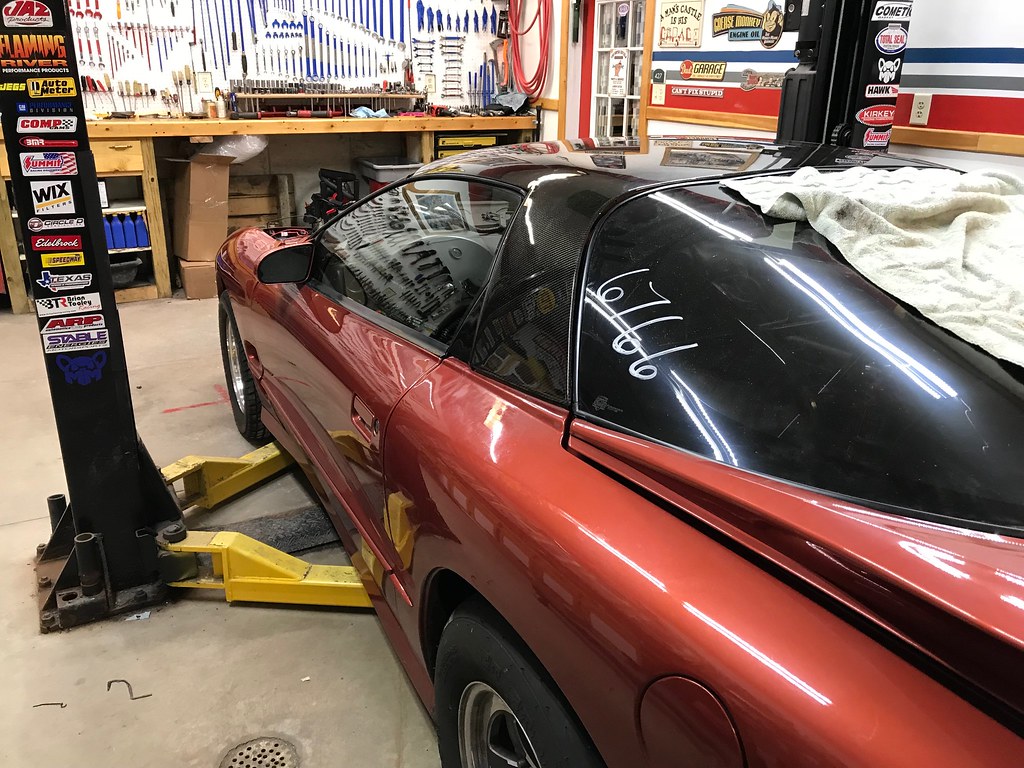
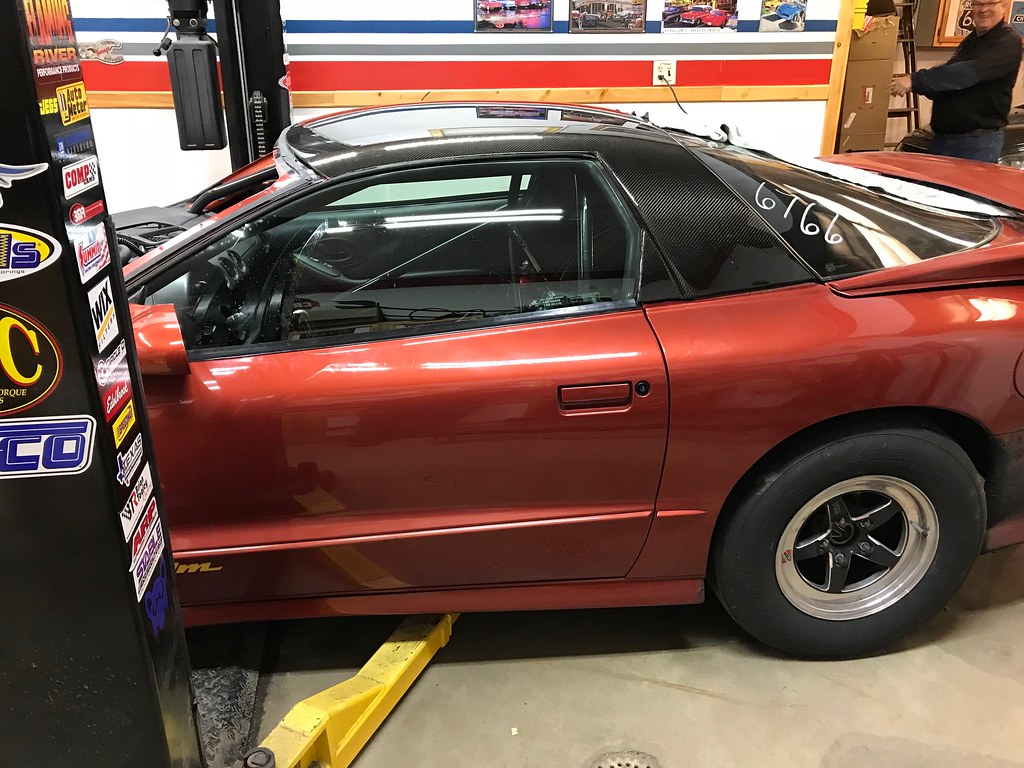
We thought it would be a good idea to install the retainers and weatherstripping and see how the actual roof looks with this equipment installed. I am amazed how well the roof fits. I figured it would be difficult for it to fit this nicely with aftermarket composite components. Really blown away with Mike Kostick's carbon fiber roof. Can't wait to get the brackets welded in and this actually glued on.


All in all, a positive night of progress!
I have been spending some time looking at wiring manuals as well as trying to update my wiring diagram I have for my car. It is a mess, but it is a great starting spot if issues ever come up. We had a short that magically appeared the other day and used the diagram to trace everything out and isolate the issue. I highly recommend keeping these documents or labeling wires for future reference.
Spent a little time working on wiring last night. Since changing to the Grant steering wheel, I started by removing the wires that were routed to the airbag, as well as the wires routed to the steering wheel radio controls. I had been contemplating removing my radio and speakers for a while and figured now is as good of time as any. Most of the speakers were blown, and sounded like crap, so I figured I can easily get by with a Bluetooth speaker and my phone (today's technology!) for any kind of driving.
When looking at the wiring diagrams, and comparing them to the car, it really cleans up a lot of stuff. Unbelievable how many wires are tied into the speakers, amp, powered antenna, deck, etc. It removes all of the wiring routed down the passenger side to the back of the car. The driver's side rear speakers get connected under the back seat area. The only wiring left routed to the back of the car are for my taillights (driver's side), hatch release (driver's side), and fuel pump stuff (passenger side).
So far, I was able to remove the rear speakers, the sail panel speakers, the amp, the deck, and the powered antenna. Still have to remove the door speakers. I went right to the shop after work and didn't have a scale there to weigh everything. Will have to update the next time I am there. The two things that were significantly noticeable: 1. The rear panels without speakers are super light. 2. There is a ton of wires associated with this equipment.
Also removed the wiring to the dome light (seeing this was removed for the roof / roof structure), rear defogger (disconnected for a while now), and the air / power to the factory power seats.
We thought it would be a good idea to install the retainers and weatherstripping and see how the actual roof looks with this equipment installed. I am amazed how well the roof fits. I figured it would be difficult for it to fit this nicely with aftermarket composite components. Really blown away with Mike Kostick's carbon fiber roof. Can't wait to get the brackets welded in and this actually glued on.
All in all, a positive night of progress!

 02-24-2018, 12:45 AM
#527
Spent last night loaded up parts and getting the car ready to haul. The car was dropped off tonight to Nate @ One Guy's Garage for fabrication.

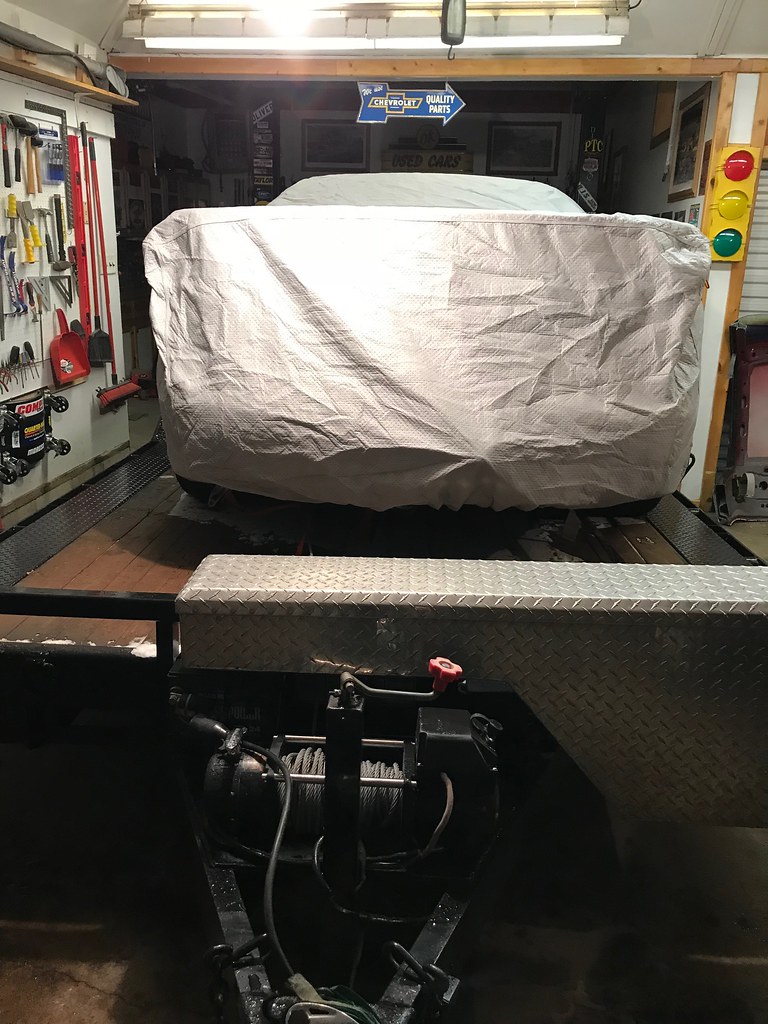
The mad scramble will be on when it comes back.
Nate will be keeping me updated with photos and will continue to update in here as it goes.
The mad scramble will be on when it comes back.
Nate will be keeping me updated with photos and will continue to update in here as it goes.
02-26-2018, 04:59 PM
#528
Received my first update from Nate. He has done quite nicely at "chopping" up the car!
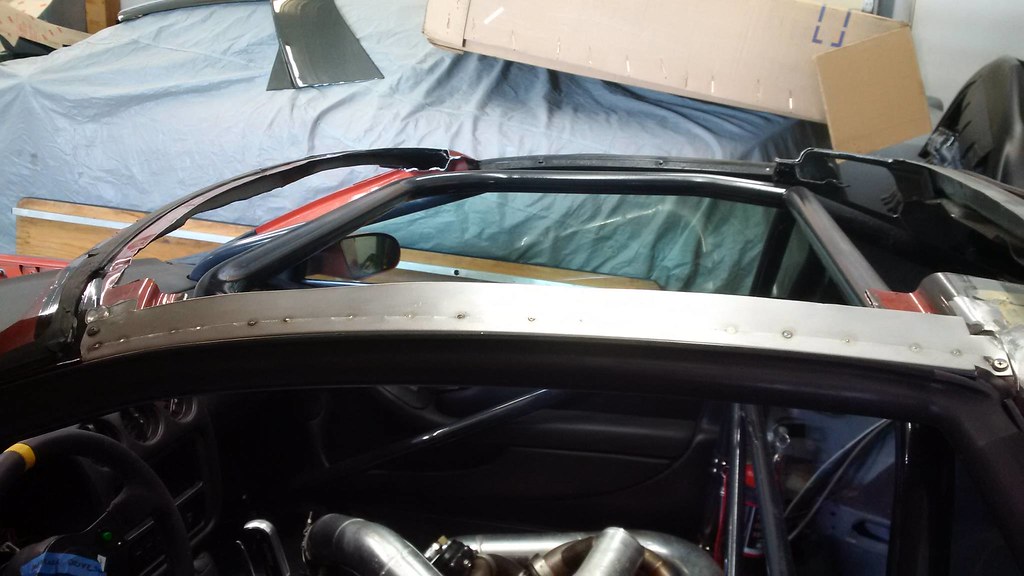
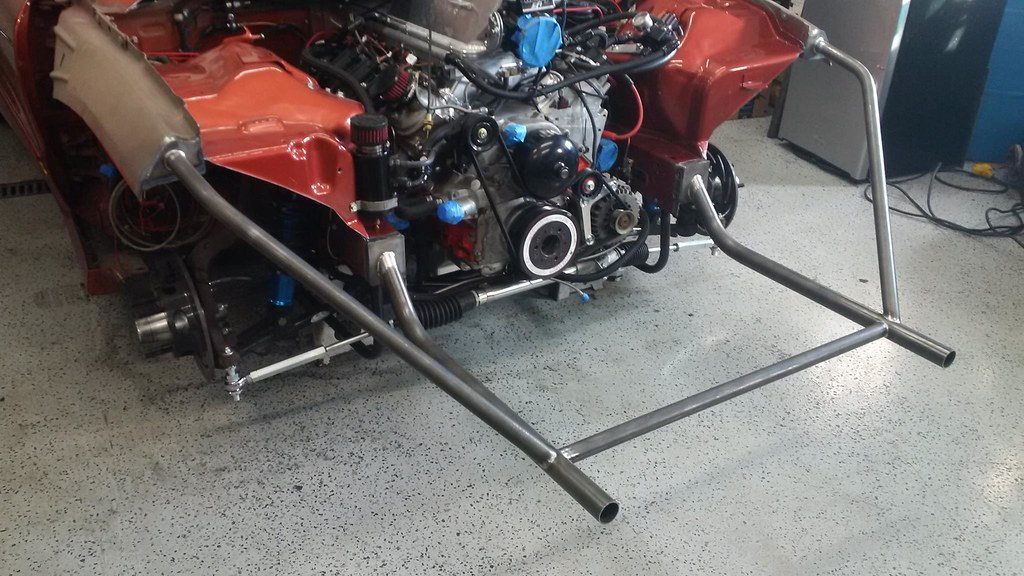
He first started with installing the roof rails. I am planning to upgrade the cage to a 25.3 cage next winter, so Nate mentioned he screwed the brackets at each end to allow them to be removed for future cage work. I made two calls today to discuss cages for this coming winter. Planning to get something scheduled for this coming November with JT Raceshop. This turned out to be quite simple!
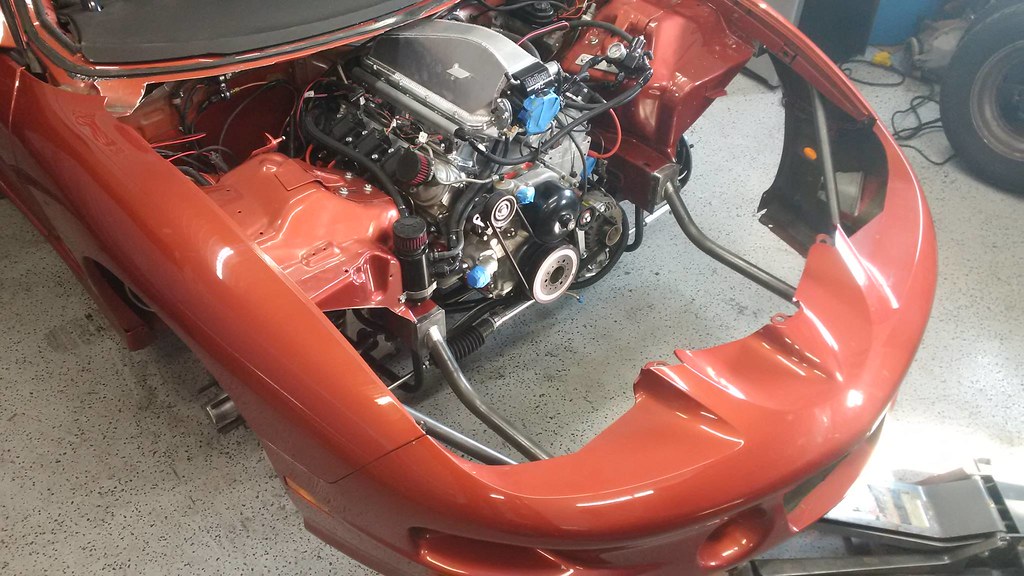
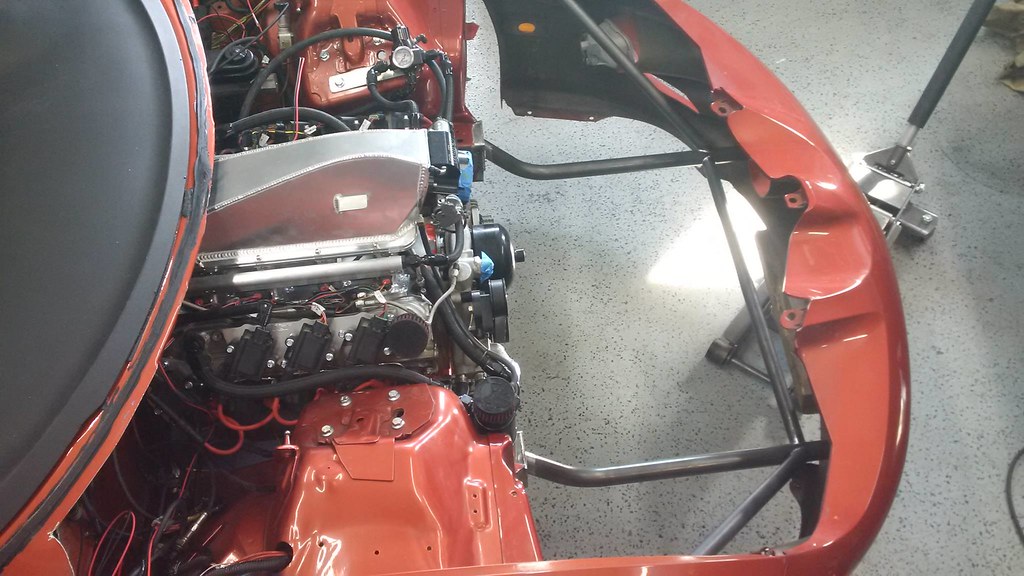
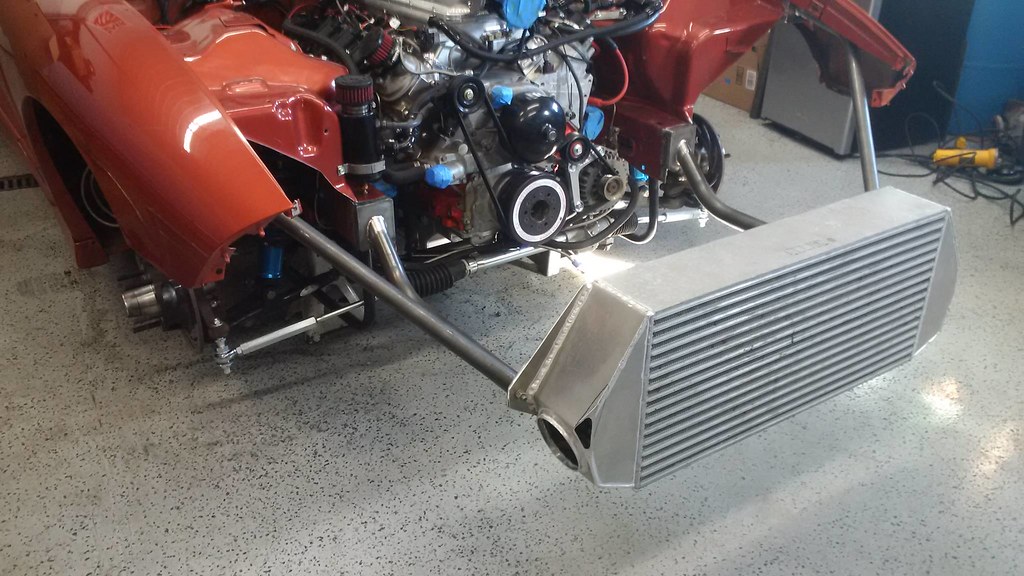
Next, Nate focused on the removing the front assembly where the new Rock Solid Motorsports tubular assembly will be installed.
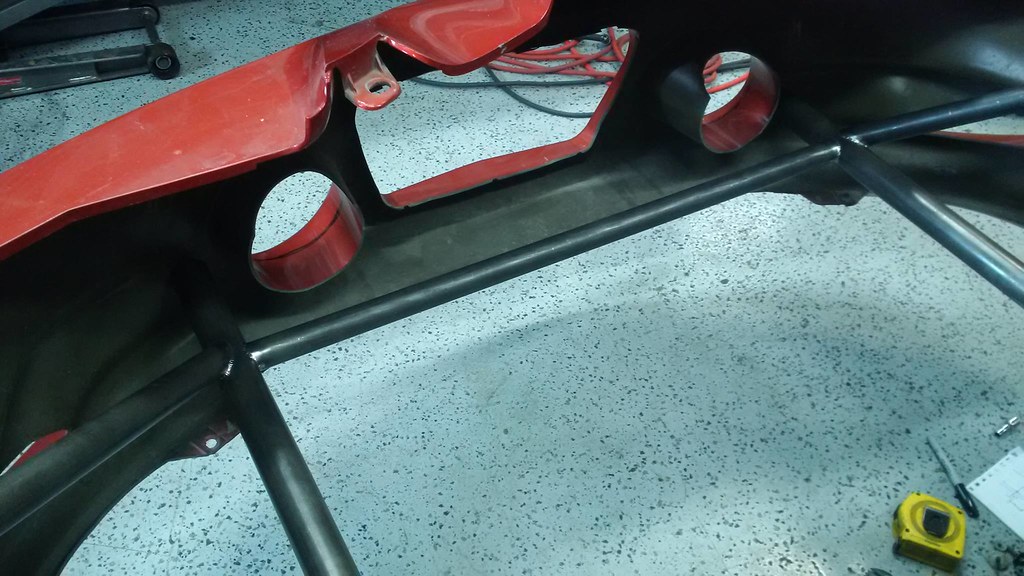
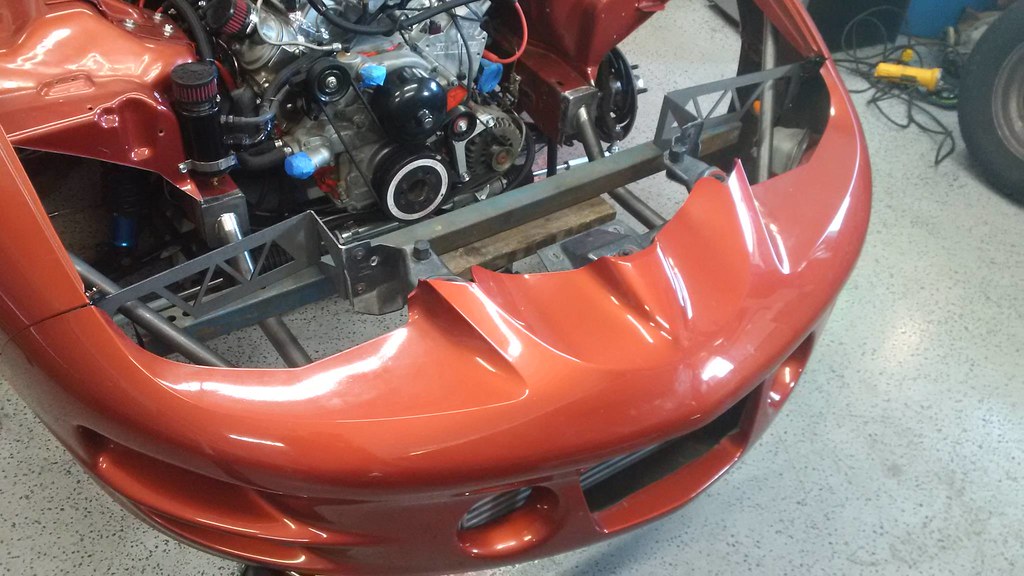
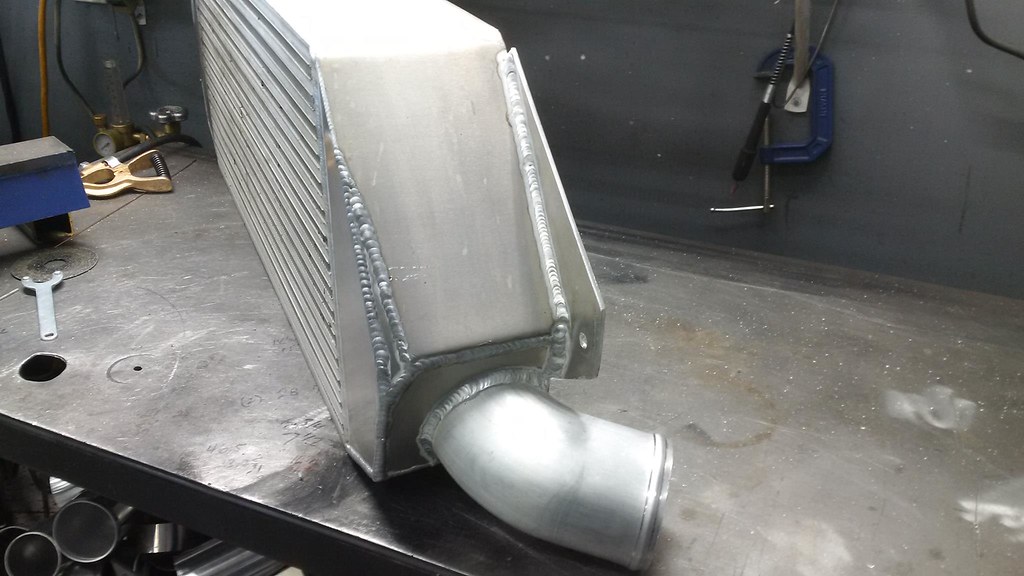
Started by removing the front bumper, exposing the monster intercooler.

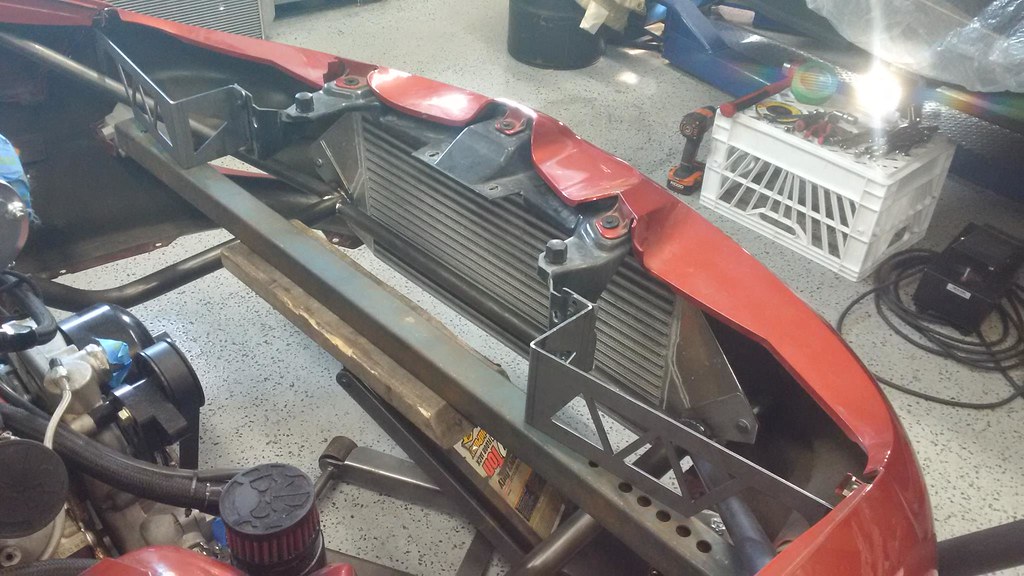
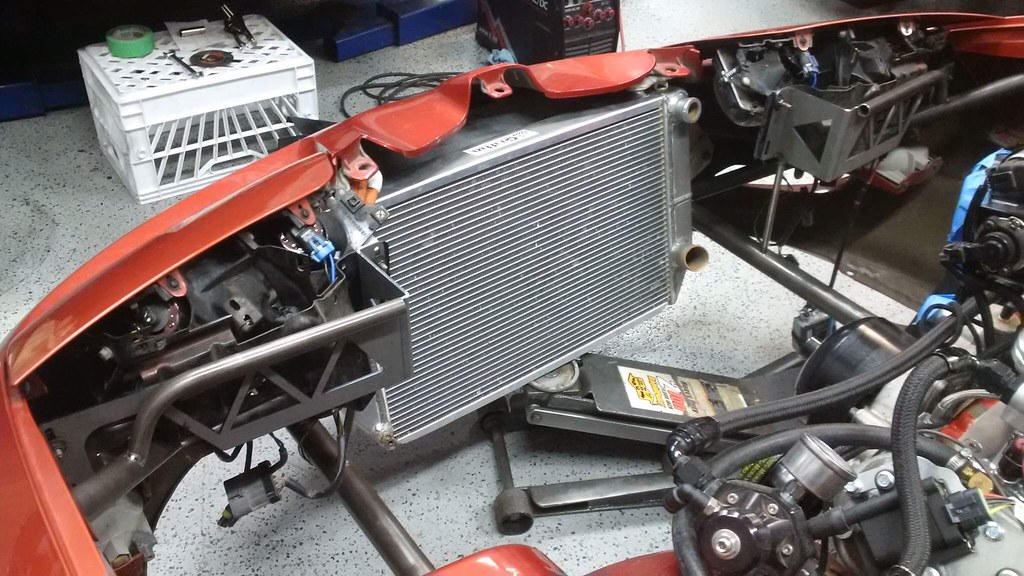
Then there is the bare assembly without the intercooler and front headlights:
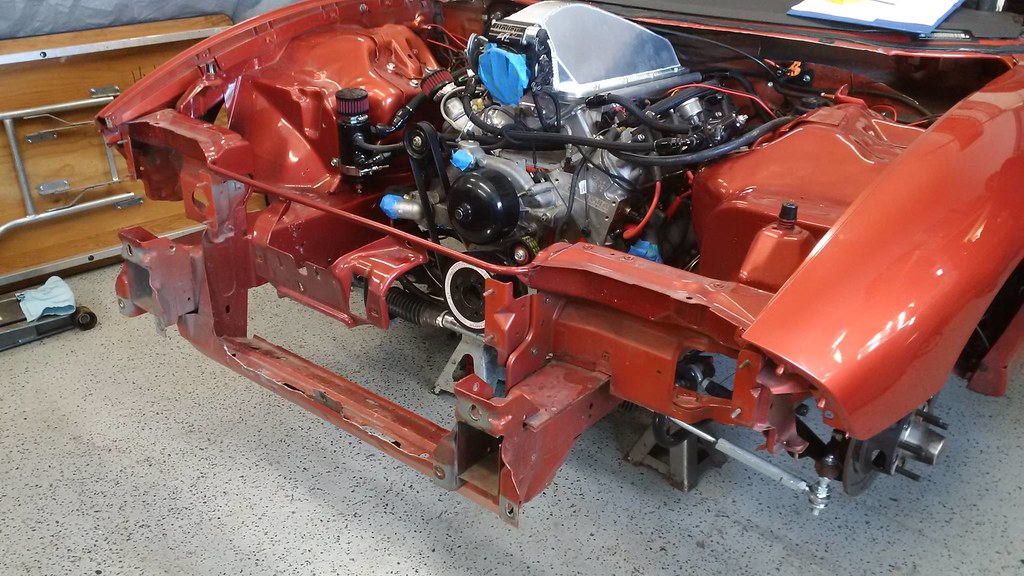
From there, Nate got wild and started some cutting. Off came the front assembly:
And finally the components that came off:

The first thing that catches my eye in the photos is all of the excess metal within the fenders. Will probably have to look at lightening that up as well.
I believe Rock Solid advertised as 63lbs coming out from the front assembly. I knew I wouldn't have that much as I have already had the upper radiator support removed. Nate weighed the front assembly and it came in at 53.25lbs.
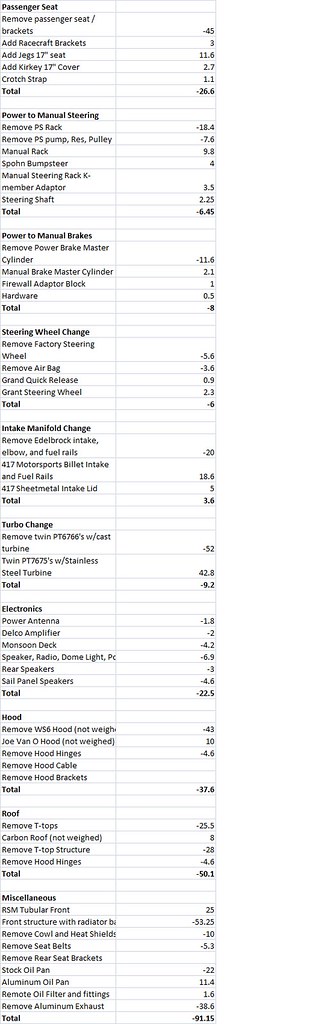
The RSM Tubular Front was 25lbs when I weighed it. We will have a few more lbs added to the front to support the radiator and intercooler.
Off to a good start at One Guy's Garage.
He first started with installing the roof rails. I am planning to upgrade the cage to a 25.3 cage next winter, so Nate mentioned he screwed the brackets at each end to allow them to be removed for future cage work. I made two calls today to discuss cages for this coming winter. Planning to get something scheduled for this coming November with JT Raceshop. This turned out to be quite simple!
Next, Nate focused on the removing the front assembly where the new Rock Solid Motorsports tubular assembly will be installed.
Started by removing the front bumper, exposing the monster intercooler.
Then there is the bare assembly without the intercooler and front headlights:
From there, Nate got wild and started some cutting. Off came the front assembly:
And finally the components that came off:
The first thing that catches my eye in the photos is all of the excess metal within the fenders. Will probably have to look at lightening that up as well.
I believe Rock Solid advertised as 63lbs coming out from the front assembly. I knew I wouldn't have that much as I have already had the upper radiator support removed. Nate weighed the front assembly and it came in at 53.25lbs.
The RSM Tubular Front was 25lbs when I weighed it. We will have a few more lbs added to the front to support the radiator and intercooler.
Off to a good start at One Guy's Garage.
02-26-2018, 05:10 PM
#529
The following Spreadsheet is approximately where I am at for weight removal this winter. Most of the items have been weighed and should give a pretty good idea as to where I am at going into this year.
If my math is correct, should be around -258.6lbs to this point.
If my math is correct, should be around -258.6lbs to this point.
02-27-2018, 04:38 PM
#530
More updates from Nate and kicking out the fabrication side.
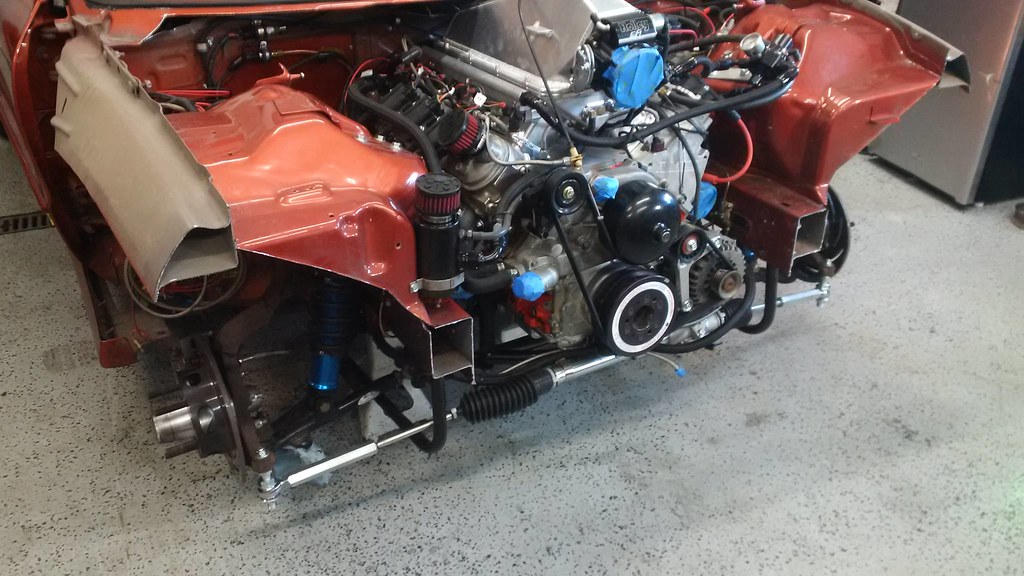
He was able to get the main portion of the Rock Solid Motorsports tubular front end kit installed and welded. Said it fit perfect.
He mentioned the Intercooler will sit about 3" farther forward from where it was previously installed. There will need to be some trimming on the bumper where the fog lights were installed once upon a time. Also the ends of the intercooler may need to be modified based on the new location.
The progress looks great and starting to look like a car again.
03-01-2018, 05:45 PM
#531
Here we come with another update.
Nate spent some time today and started mounting the Intercooler. He said it was quite tedious to get it in there. I wonder if that has anything to do with how big the Intercooler is!!
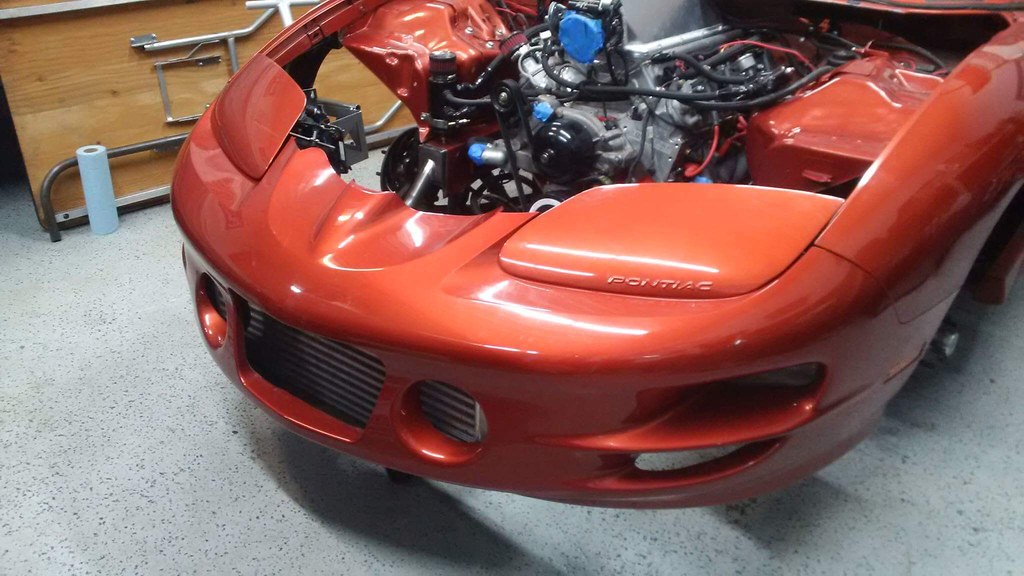
So, when looking at this photo, what are the odds the Intercooler would fit in there with the bumper?
Tanks needed slight notching and the ends will need to be modified. But it all fit.
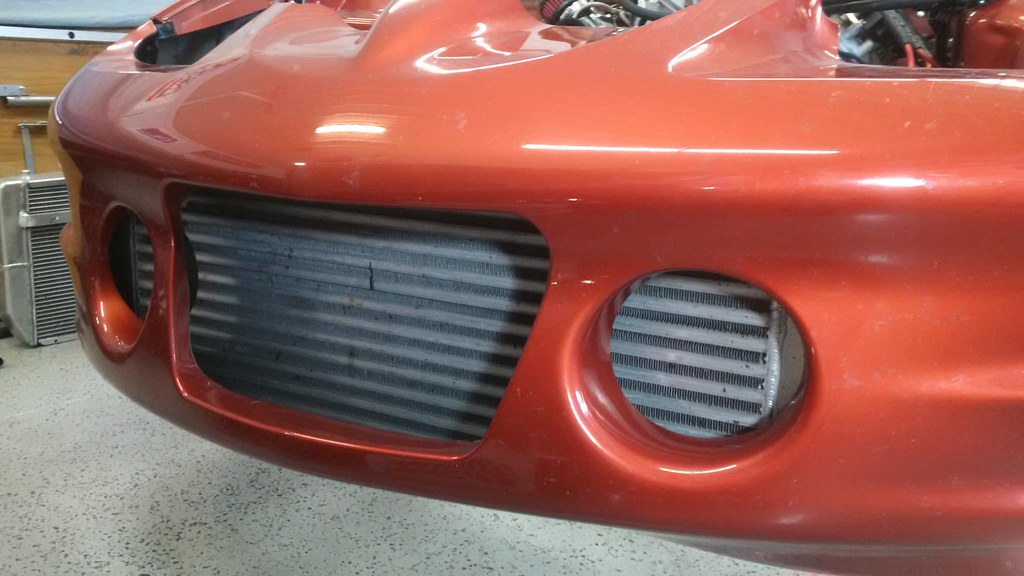
Can see how large the intercooler is in there. Sits below the lower bars and all the way towards the bumper.
Nate said there would be approximately 4" of space gained between the engine in the radiator, depending on where we decide to mount that. Would allow for more space and clearance around the turbos.
He started fitting up the headlamps brackets and will finish mounting those next week. From there, it will be starting on the hot side.
More to come next week.
Nate spent some time today and started mounting the Intercooler. He said it was quite tedious to get it in there. I wonder if that has anything to do with how big the Intercooler is!!
So, when looking at this photo, what are the odds the Intercooler would fit in there with the bumper?
Tanks needed slight notching and the ends will need to be modified. But it all fit.
Can see how large the intercooler is in there. Sits below the lower bars and all the way towards the bumper.
Nate said there would be approximately 4" of space gained between the engine in the radiator, depending on where we decide to mount that. Would allow for more space and clearance around the turbos.
He started fitting up the headlamps brackets and will finish mounting those next week. From there, it will be starting on the hot side.
More to come next week.
 03-05-2018, 08:34 PM
#533
Let's start the new week off with a little update.
Had some inclement weather hit the area and piled a bunch of snow on us. If I had to guess, it was somewhere in the neighborhood of 6-8" of snow. And the local airport had wind gusts up to 60mph. Needless to say, most schools were either cancelled or early release. Nate had the kids today and worked on a car a little bit tonight.
He worked on mocking up the headlights/ headlight brackets. Needless to say, he wasn't very happy with this part of the kit. Said it was a pain to deal with but got everything tacked up. Will need another brace or two for support.
But the lights are supported:

More and more progress.
Had some inclement weather hit the area and piled a bunch of snow on us. If I had to guess, it was somewhere in the neighborhood of 6-8" of snow. And the local airport had wind gusts up to 60mph. Needless to say, most schools were either cancelled or early release. Nate had the kids today and worked on a car a little bit tonight.
He worked on mocking up the headlights/ headlight brackets. Needless to say, he wasn't very happy with this part of the kit. Said it was a pain to deal with but got everything tacked up. Will need another brace or two for support.
But the lights are supported:
More and more progress.
03-07-2018, 09:02 AM
#534

WHere are the other two rails? I know it comes with 4... any pics
Received my first update from Nate. He has done quite nicely at "chopping" up the car!
He first started with installing the roof rails. I am planning to upgrade the cage to a 25.3 cage next winter, so Nate mentioned he screwed the brackets at each end to allow them to be removed for future cage work. I made two calls today to discuss cages for this coming winter. Planning to get something scheduled for this coming November with JT Raceshop. This turned out to be quite simple!
Next, Nate focused on the removing the front assembly where the new Rock Solid Motorsports tubular assembly will be installed.
Started by removing the front bumper, exposing the monster intercooler.
Then there is the bare assembly without the intercooler and front headlights:
From there, Nate got wild and started some cutting. Off came the front assembly:
And finally the components that came off:
The first thing that catches my eye in the photos is all of the excess metal within the fenders. Will probably have to look at lightening that up as well.
I believe Rock Solid advertised as 63lbs coming out from the front assembly. I knew I wouldn't have that much as I have already had the upper radiator support removed. Nate weighed the front assembly and it came in at 53.25lbs.
The RSM Tubular Front was 25lbs when I weighed it. We will have a few more lbs added to the front to support the radiator and intercooler.
Off to a good start at One Guy's Garage.
03-07-2018, 11:22 AM
#535
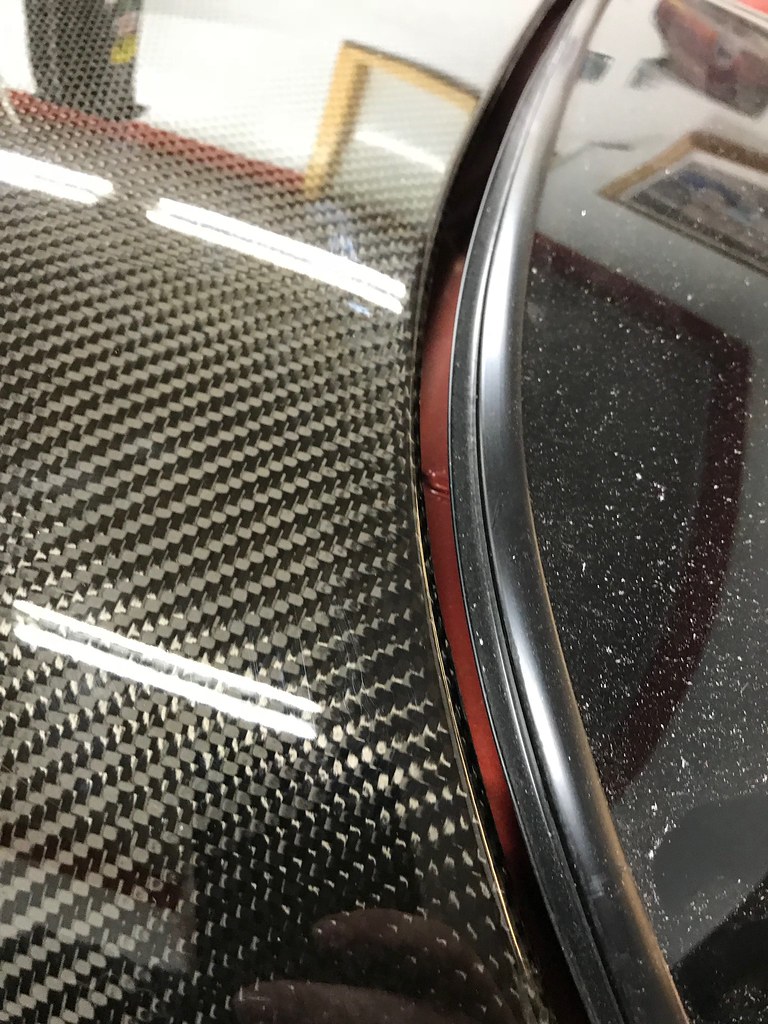
They are there in the photo. Also take a look at Post #520. There are two pieces per side. And inner and and outer. The outer is used to be able to screw the retainer to it. The inner is used to support the roof and for the glue.
You can see the weld tacks in the photo in Post #536 where the pieces are connected.
Believe me, it took a little while to figure those pieces out. Eric was even laughing when I was messaging him about them. Made a lot more sense with the T-tops and roof off and the retainers installed.
You can see the weld tacks in the photo in Post #536 where the pieces are connected.
Believe me, it took a little while to figure those pieces out. Eric was even laughing when I was messaging him about them. Made a lot more sense with the T-tops and roof off and the retainers installed.
03-07-2018, 05:02 PM
#536
I talked to Scott at B&B Race Cars earlier this (I ordered my hood through them). He had gotten in contact with Joe Van O on the status of my hood. The message relayed to me was the first hood had imperfections and Joe would not let it out the door like that. The new hood is supposed to ship by the end of this week. I sure am hoping...
Also received a message on Sunday night asking if I am interested in putting my car in the World Of Wheels show at US Bank Stadium on March 23-25. I was quite honored to be invited, but there is no way we would have the car ready for it. I said I appreciate the offer and would gladly do that in the future.
Nate made a shopping list for fabrication stuff and I got right to work ordering that stuff. Planning to get everything to him as soon as possible. I swore I would never order anything from Treadstone again, but ended up ordering some piping from them. Sure enough, a day and a half later, I get an email stating they didn't have some of the pipe in stock. I should have known better. My response was, credit me, including the shipping credit for less weight / package / etc and I will get it elsewhere. Oh, and I expect the other components on Friday, like the initial tracking number was stated for. Have dealt with their **** in the past.
Onto some fabrication photos for the week. Nate started modifying the hotside for the new 7675's. I still like how the turbines looked on the inside rather than the outside of the car, but I think this will grow on me. I also was hoping to reuse the air filters I have, and was originally worried about fitment. Well, it looks like Nate was able to make that work. I see R2C is out of business or at least no longer manufacturing product. That is a shame. They seem to have nice stuff and it looks great.
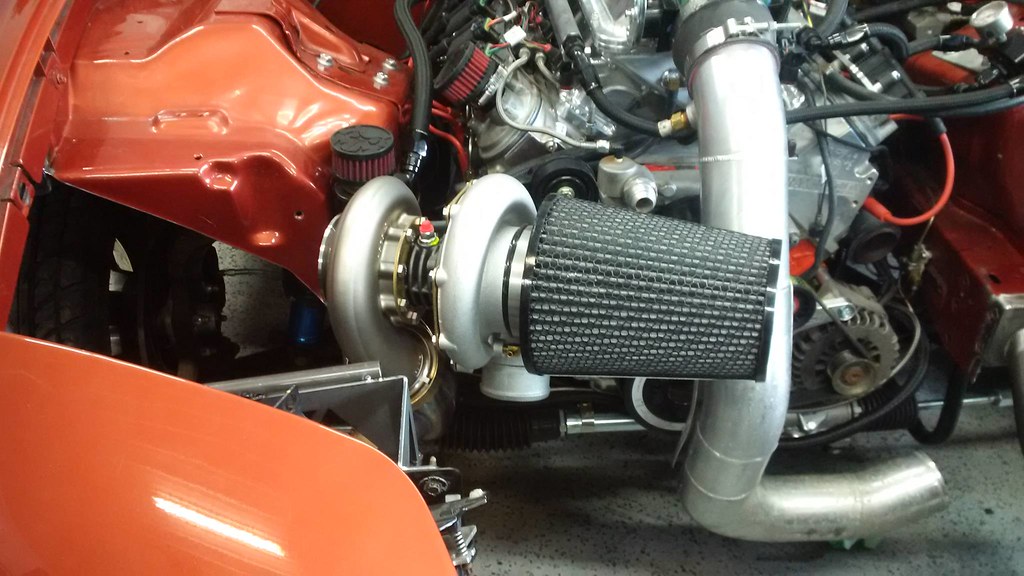
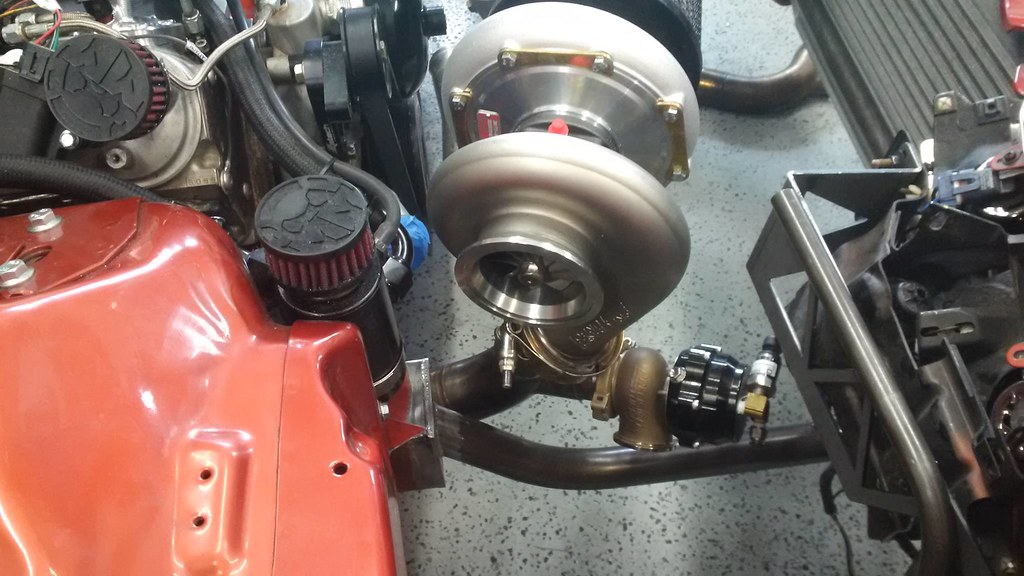
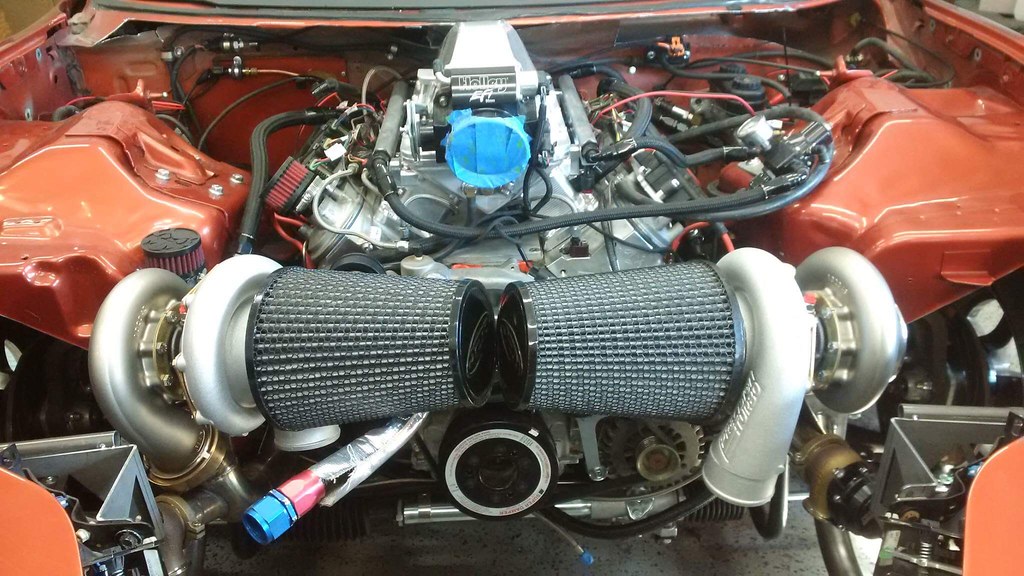

Those turbos look so small inside the engine bay right now!
Also received a message on Sunday night asking if I am interested in putting my car in the World Of Wheels show at US Bank Stadium on March 23-25. I was quite honored to be invited, but there is no way we would have the car ready for it. I said I appreciate the offer and would gladly do that in the future.
Nate made a shopping list for fabrication stuff and I got right to work ordering that stuff. Planning to get everything to him as soon as possible. I swore I would never order anything from Treadstone again, but ended up ordering some piping from them. Sure enough, a day and a half later, I get an email stating they didn't have some of the pipe in stock. I should have known better. My response was, credit me, including the shipping credit for less weight / package / etc and I will get it elsewhere. Oh, and I expect the other components on Friday, like the initial tracking number was stated for. Have dealt with their **** in the past.
Onto some fabrication photos for the week. Nate started modifying the hotside for the new 7675's. I still like how the turbines looked on the inside rather than the outside of the car, but I think this will grow on me. I also was hoping to reuse the air filters I have, and was originally worried about fitment. Well, it looks like Nate was able to make that work. I see R2C is out of business or at least no longer manufacturing product. That is a shame. They seem to have nice stuff and it looks great.
Those turbos look so small inside the engine bay right now!
03-12-2018, 09:44 PM
#538
This entire wait on the hood is starting to really get to me. Order in November and should be ready in January. Mid March now and still nothing. Lovely.
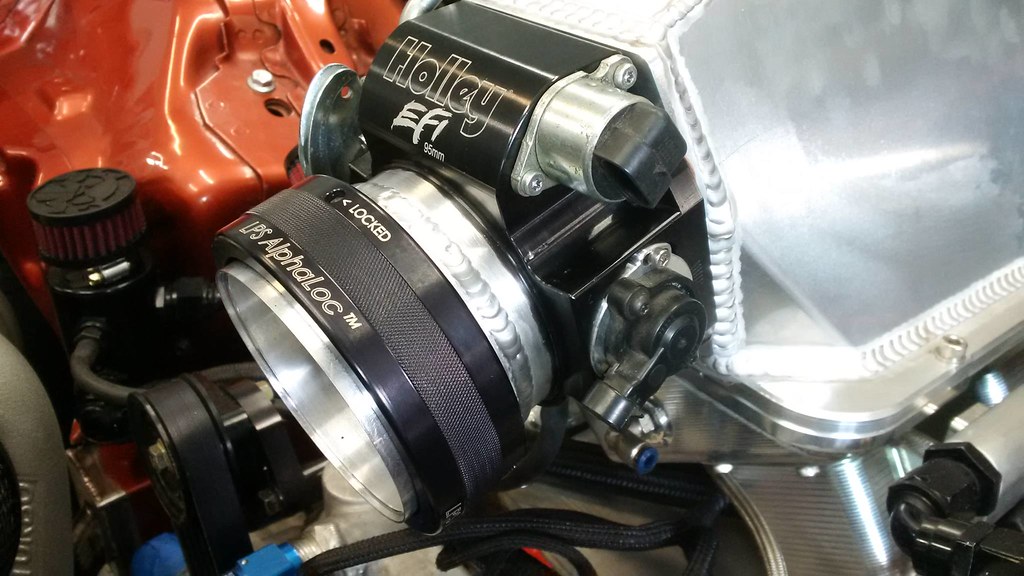
But aside from that, Nate keeps clawing away at different things. He did some minor modifications to the Driveshaft loop for some additional clearance. From there, he welded the first of my Alphaloc couplers onto the cold side. This one was to the throttle body.
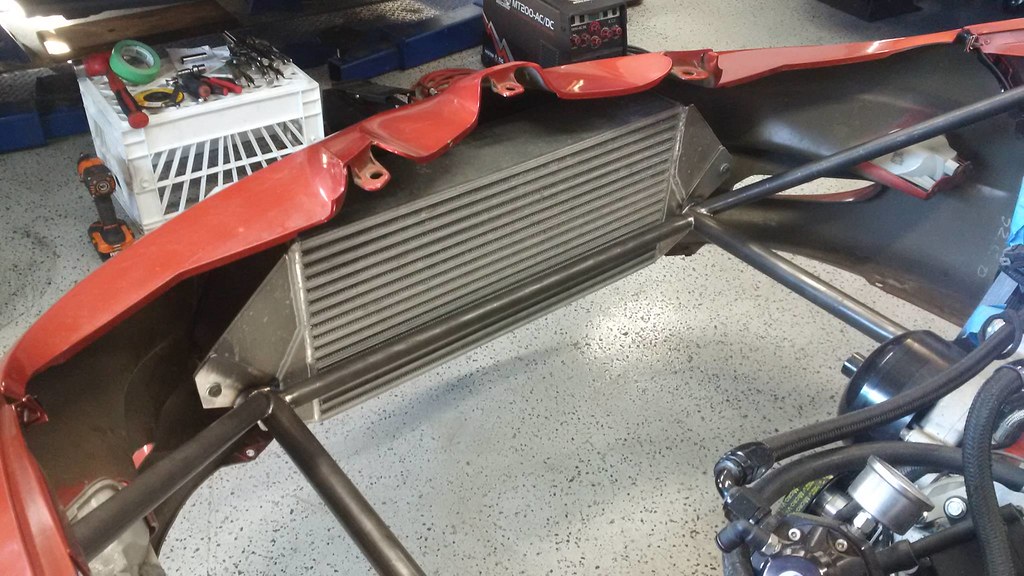
Next up was some revisions to the Intercooler to make it fit with the tubular front. It is a tight squeeze to fit under the bumper. The tanks were modified and rewelded to adjust to the new conditions.
Last week I had ordered the remaining components needed for the turbo kit. I believe we are scheduled for deliveries from three companies on Wednesday. Should be able to get most of the turbo kit completed then. Would really like the hood to make sure we are still good on the height of the intake.
Nate continued to make a little progress on the cold side today. Was able to get everything completed from the turbos to the intercooler.
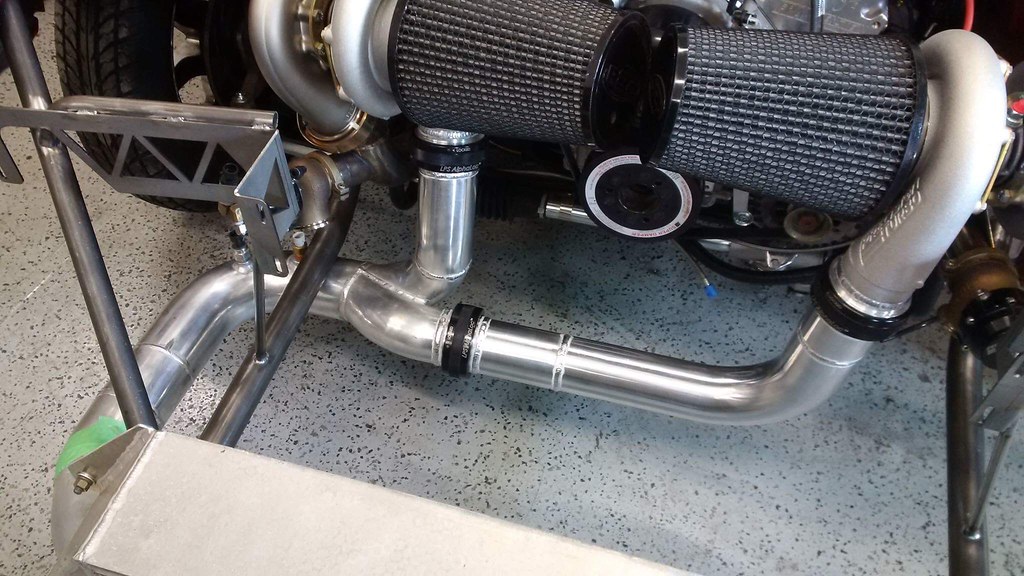
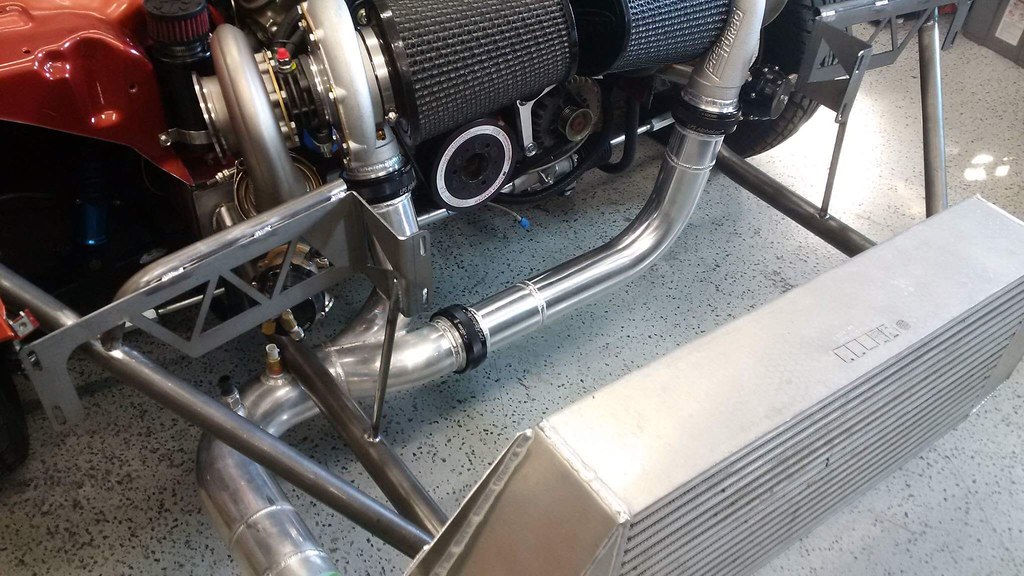

Can get a good look at the Linder Power Systems Alphaloc couplers. A buddy mentioned these to me over the late fall and early Winter and I was instantly sold. They looked like a great piece. Figured these would make installation much simpler as well as should prevent any lost charge pipes / coupler issues. Nate provided some early feedback and said they are awesome. Great news. They are not cheap, but I think they will be worth it.
Following the coldside, was the new Wastegate piping. Last year I had it recirculated to the exhaust. This year is just being dumped.
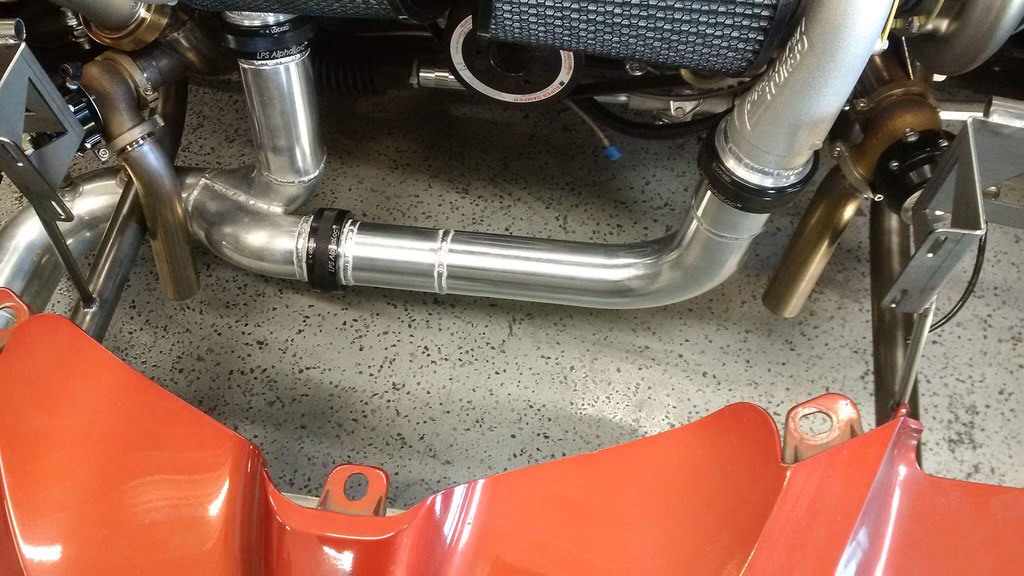
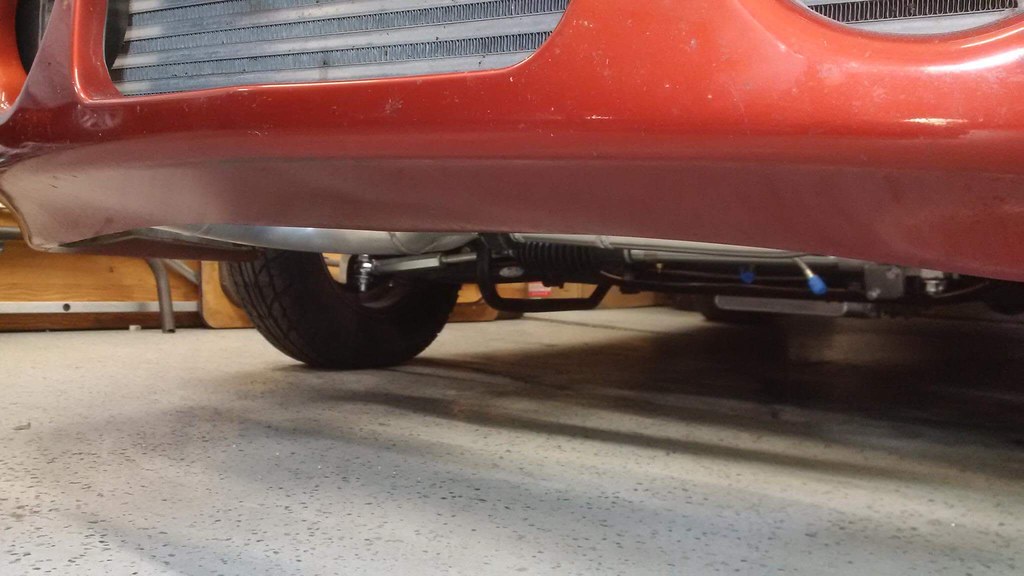
Some of the above photos make the cold side look like it sits pretty low. But Nate passed this photo along to make me feel a little more at ease.
The final update for today was some destruction to the fenders. Started the preparation for the new exhaust. Created some new routing locations and installed the exhaust trim rings.
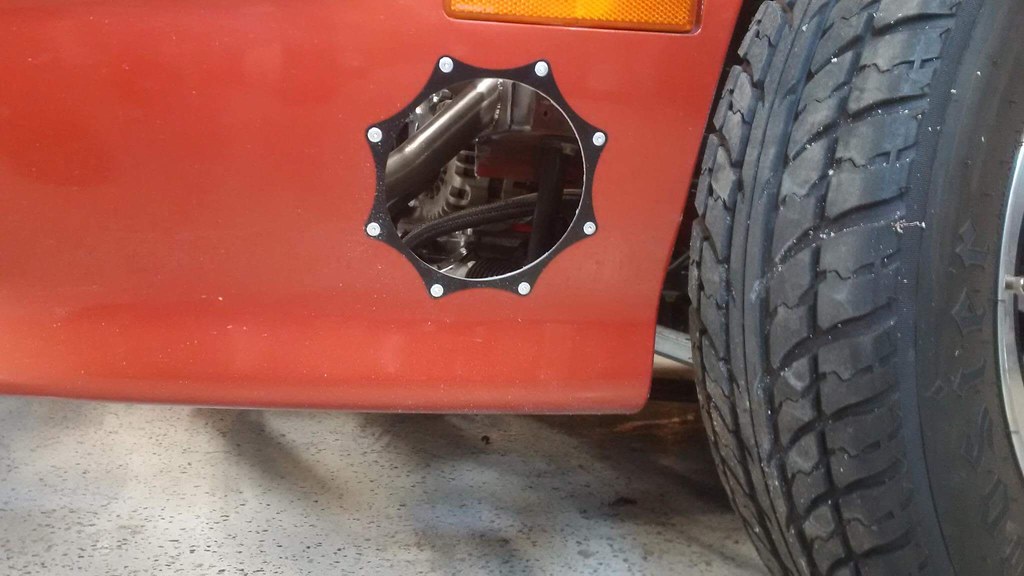
Overall, getting quite a bit closer. Will be seeing some finishing touches very soon.
Aside from that, I have been focusing on wiring revisions. Been looking at building a quick disconnecting engine harness. I bought a spare Holley LS engine harness that I am going to use to start my new harness. Will be installing a Mil Spec bulkhead at the firewall for routing to the engine. Will make the change over to this a little later after I know I have worked out any bugs from this year.
Also have been putting together a new wiring diagram / wiring board for my car. Been thoroughly planning this and drawing in AutoCAD. Been trying to research and find the proper components to keep this looking somewhat professional. More to come on this. Planning on making the entire change next winter. Should give me plenty of time to work on this and find deals on components.