Forced Induction Superchargers | Turbochargers | Intercoolers

My Turbo LSX Z31 Build.

Thread Tools
 
Search this Thread
 
Old 01-26-2016, 10:49 AM
  #41  
TECH Enthusiast
Thread Starter
iTrader: (3)
 
Nismo Kid's Avatar
 
Join Date: Dec 2010
Location: San Antonio TX
Posts: 636
Likes: 0
Received 4 Likes on 4 Posts

Default

Originally Posted by chuxdelux
The fabrication work is amazing! This is a legit grassroots build.
Thanks man!
Old 01-28-2016, 07:58 PM
  #42  
TECH Resident
iTrader: (13)
 
roastin240's Avatar
 
Join Date: Apr 2011
Location: Melbourne, FL
Posts: 904
Likes: 0
Received 4 Likes on 4 Posts

Default

This is the first time I have seen your build. I am roastin300 from z31performance back in the day that use to fab and sell the holset downpipe adapters. I just finished all my hot side and intercooler plumbing as well as the downpipe for my turbo LS1 swap in my Z31. Strange how many things we did similarly without ever seeing each others builds. My turbo is in the same exact location, radiator modified similar but different. I am also running my collector pipes exactly like that with the passenger bank doing a 180 and drivers side under crank pulley and then up and over the passenger collector....super weird how similar your dude plumbed yours to way I welded mine. I am running a built t56 with a twin disc and shooting for 800whp....so my LS1 got forged pistons and rods, as well as some valve train upgrades. Running a 7875 BB turbonetics. When will you be driving yours? What are you using for engine management? I am going with the Holley Dominator and Holley 120 lb'ers.
Old 01-28-2016, 09:02 PM
  #43  
TECH Regular
iTrader: (2)
 
dburt86's Avatar
 
Join Date: Jun 2015
Location: CT
Posts: 498
Likes: 0
Received 1 Like on 1 Post
Default

that kit is unreal. So sick
Old 01-31-2016, 11:16 AM
  #44  
TECH Enthusiast
Thread Starter
iTrader: (3)
 
Nismo Kid's Avatar
 
Join Date: Dec 2010
Location: San Antonio TX
Posts: 636
Likes: 0
Received 4 Likes on 4 Posts

Default

Originally Posted by roastin240
When will you be driving yours? What are you using for engine management? I am going with the Holley Dominator and Holley 120 lb'ers.
How have you been? I've chatted with you via email a few months back about the mounts. Originally Holley Dominator was the plan but, now I'm leaning towards the MS3 Gold Box. I'm hoping to have the car running by the end of summer (fingers crossed). Hopefully I'll have a substantial update within the next couple months. There's a few projects I've been working on that are nearly complete. I personally like to post up finished sections/chunks of my progress. Once I complete those projects I'll share finished product. Stay tuned.

Originally Posted by dburt86
that kit is unreal. So sick
Thank you.
Old 05-08-2016, 11:39 AM
  #45  
Teching In
 
chuxdelux's Avatar
 
Join Date: May 2014
Posts: 49
Likes: 0
Received 0 Likes on 0 Posts
Default

Any updates?
Old 05-29-2016, 10:30 PM
  #46  
TECH Enthusiast
Thread Starter
iTrader: (3)
 
Nismo Kid's Avatar
 
Join Date: Dec 2010
Location: San Antonio TX
Posts: 636
Likes: 0
Received 4 Likes on 4 Posts

Default

Name:  brace%20yourselves%2029052016222500.jpg
Views: 698
Size:  71.2 KB
Old 06-02-2016, 09:09 PM
  #47  
TECH Enthusiast
Thread Starter
iTrader: (3)
 
Nismo Kid's Avatar
 
Join Date: Dec 2010
Location: San Antonio TX
Posts: 636
Likes: 0
Received 4 Likes on 4 Posts

Default

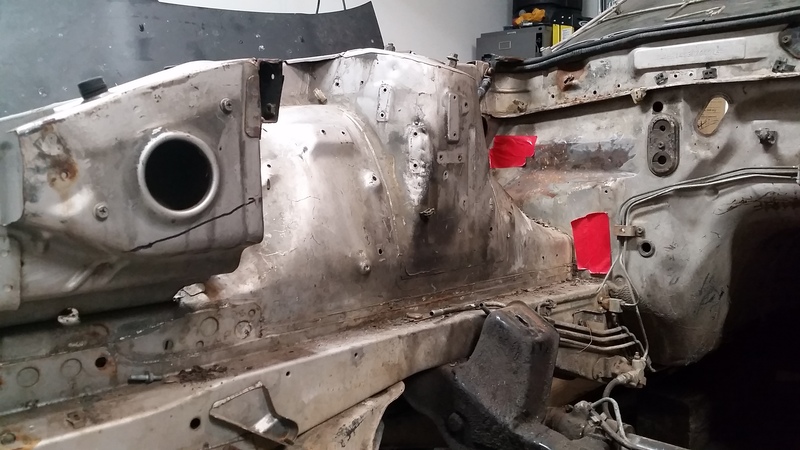
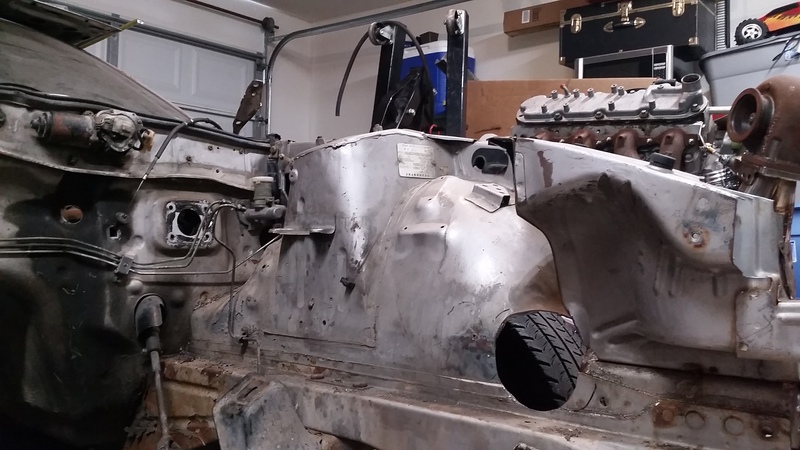
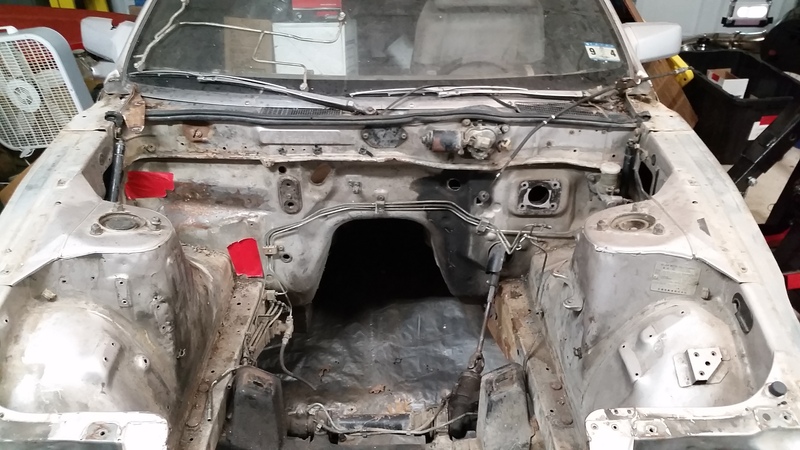
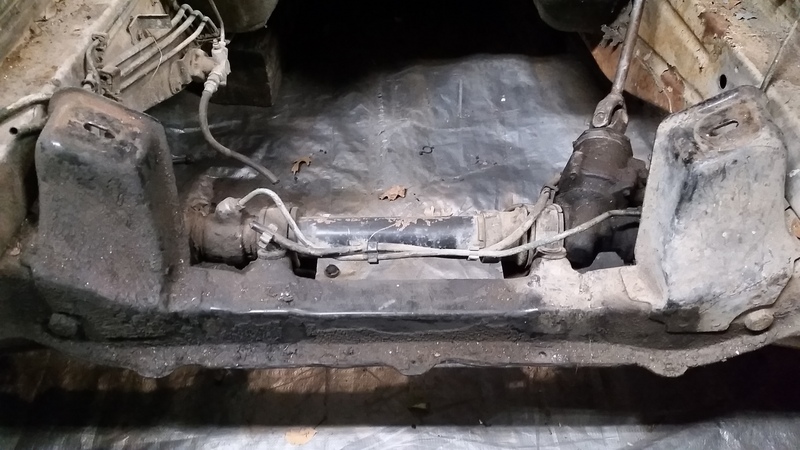
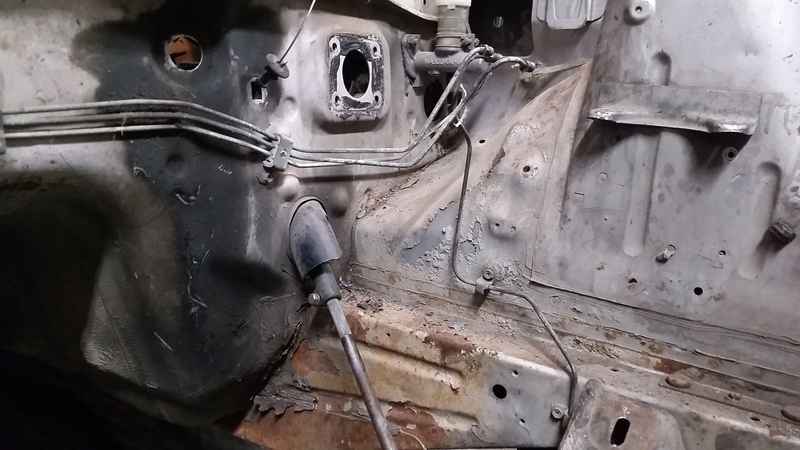
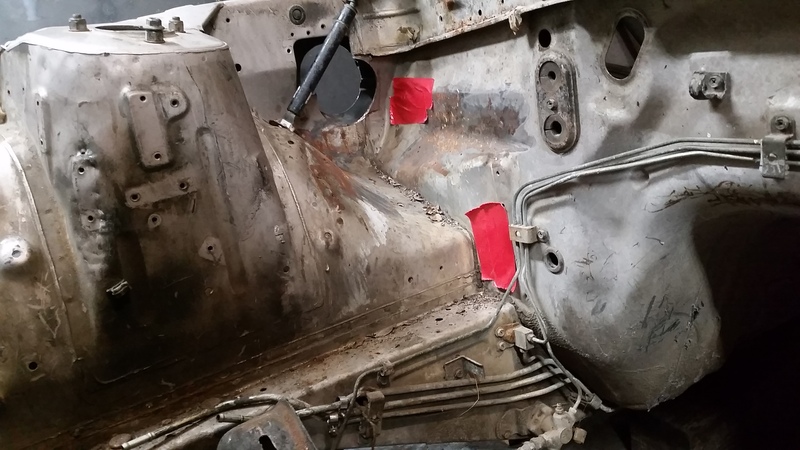
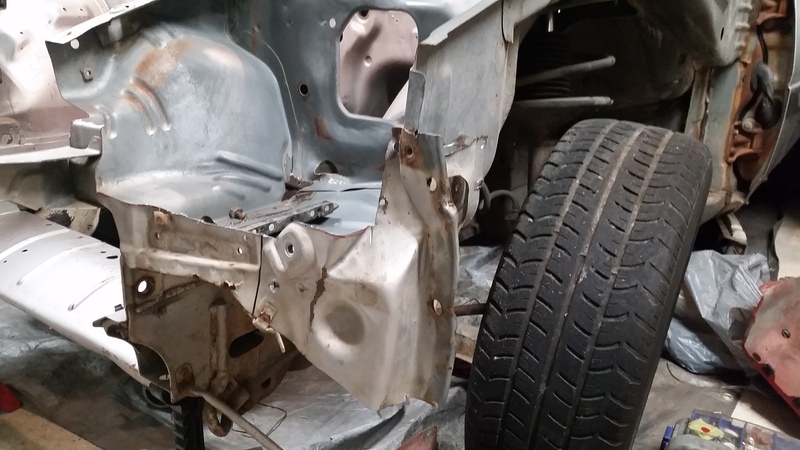
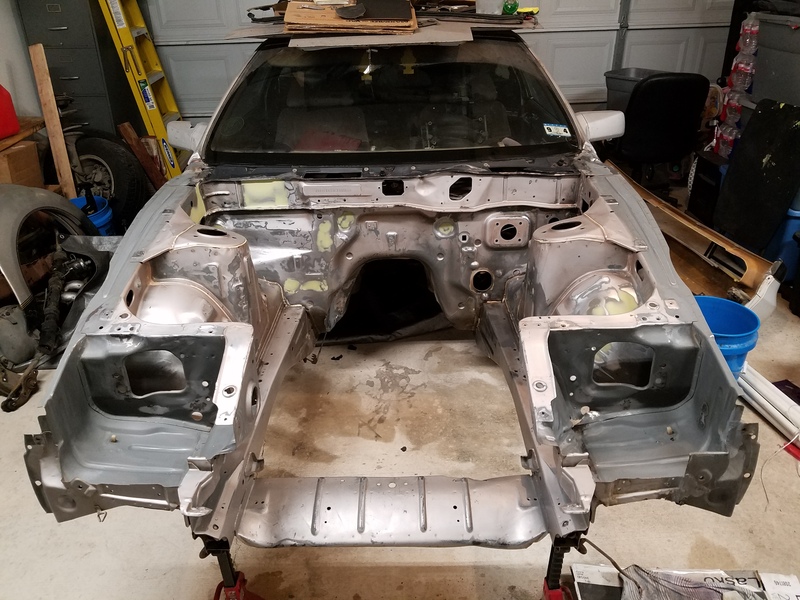
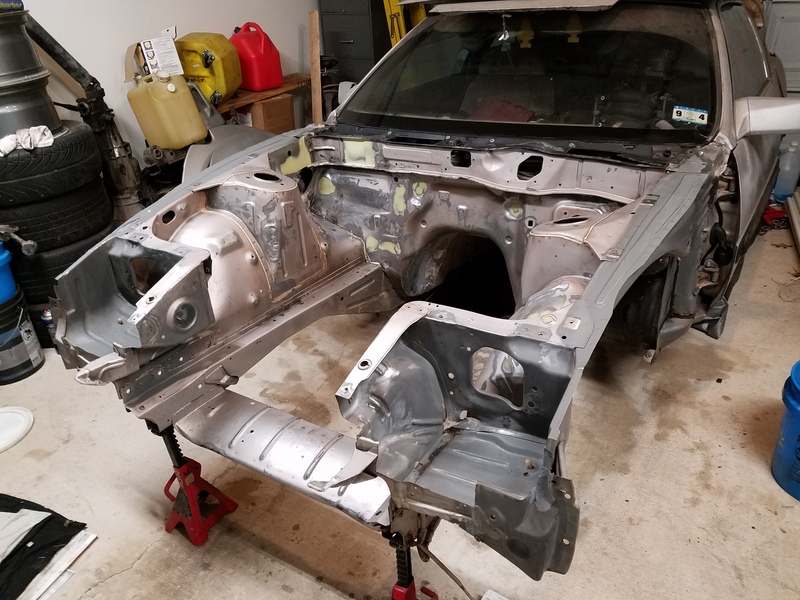
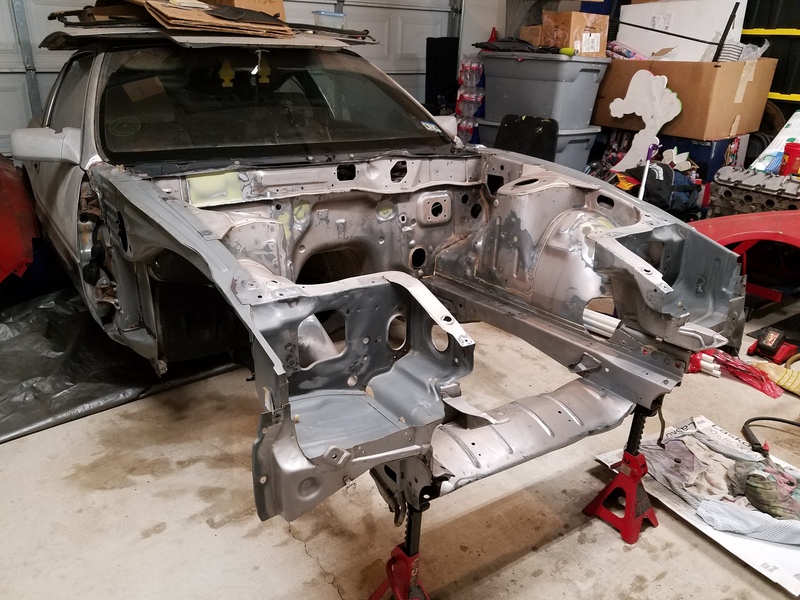
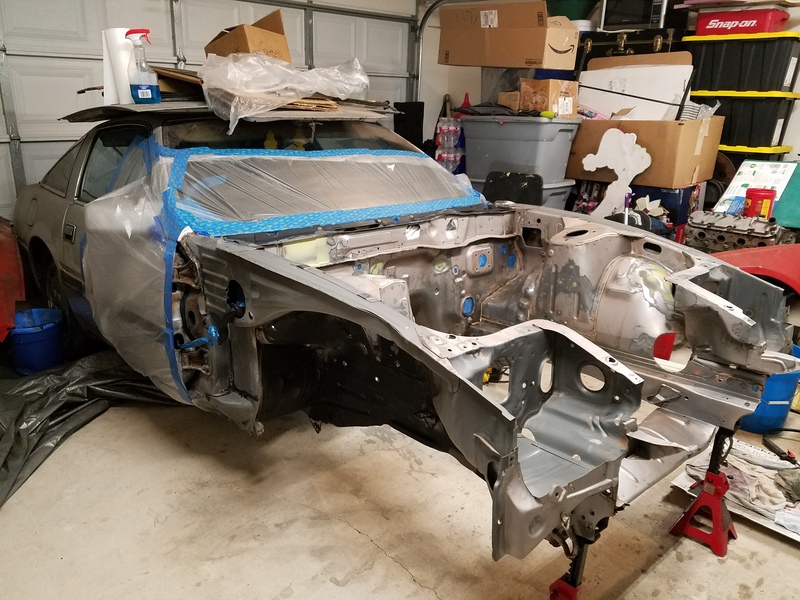
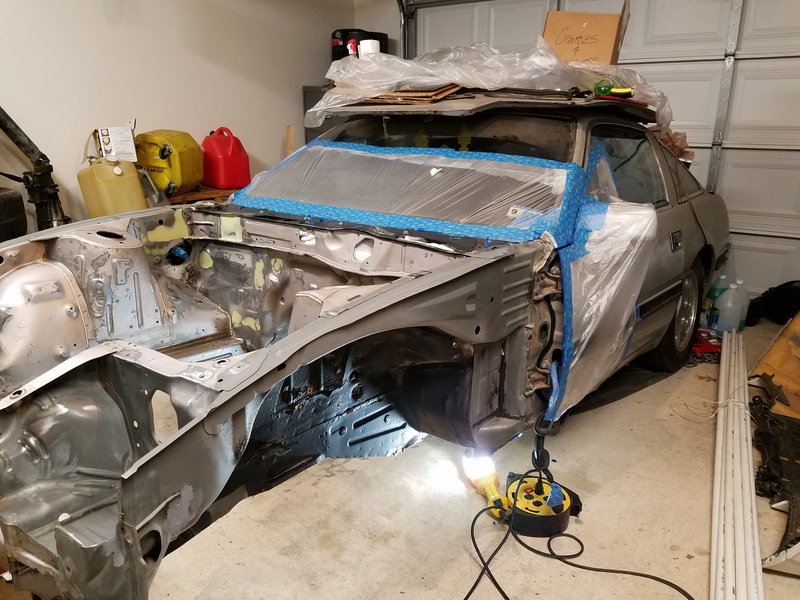
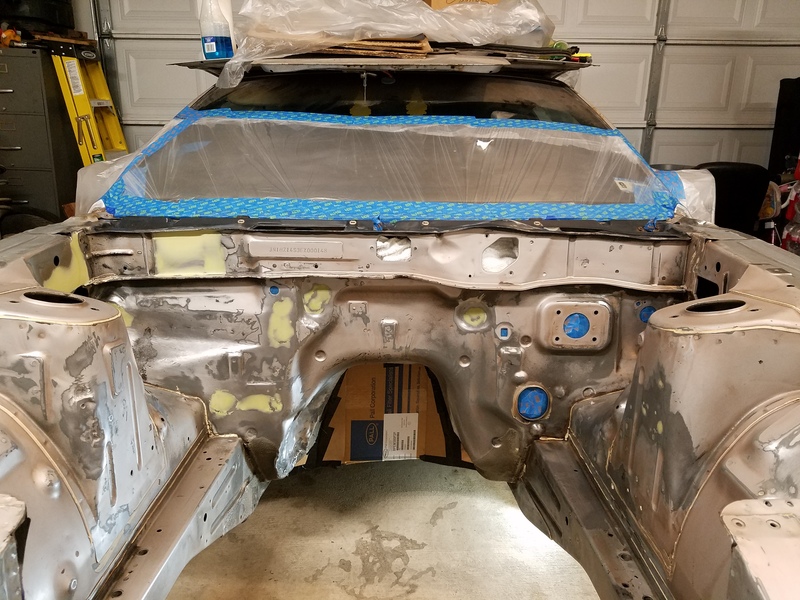
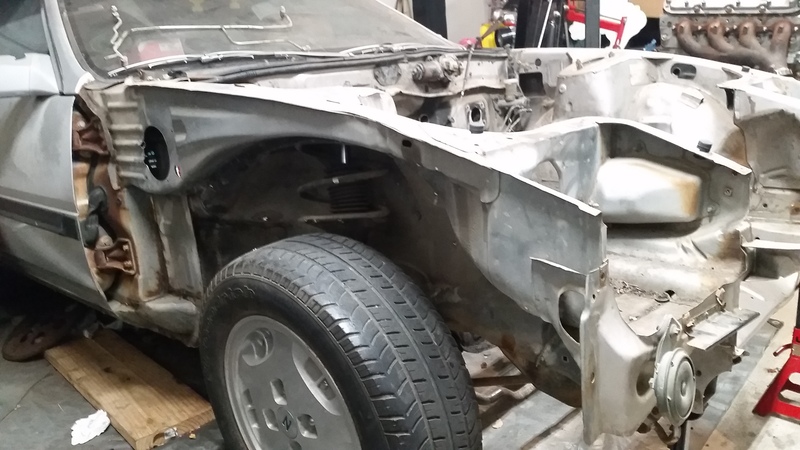
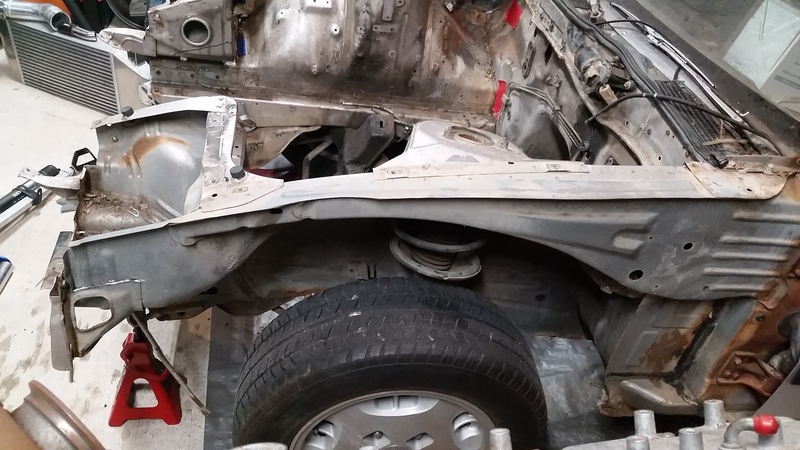
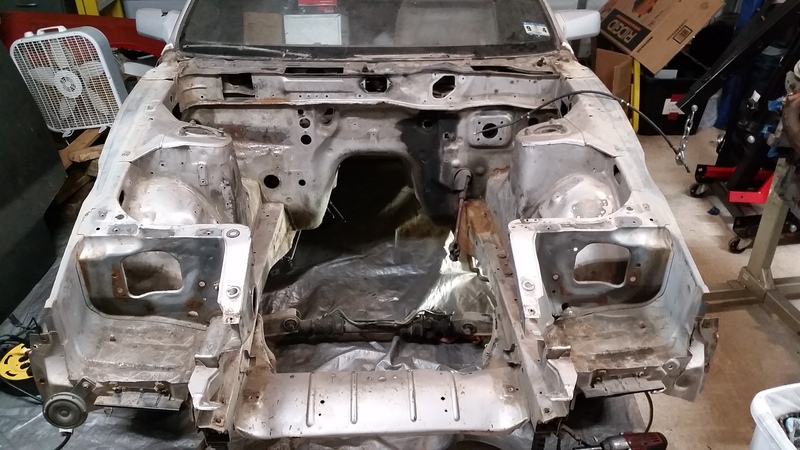
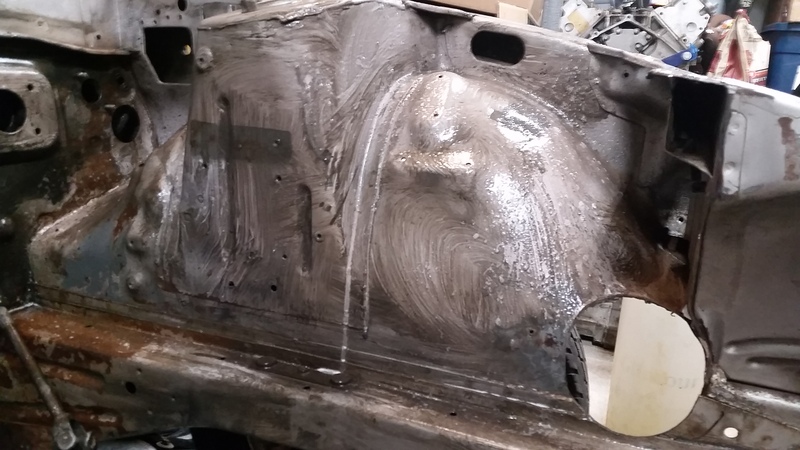
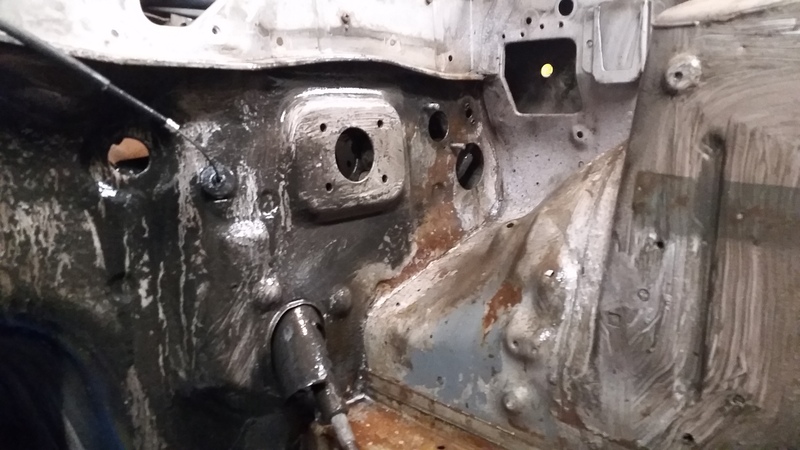
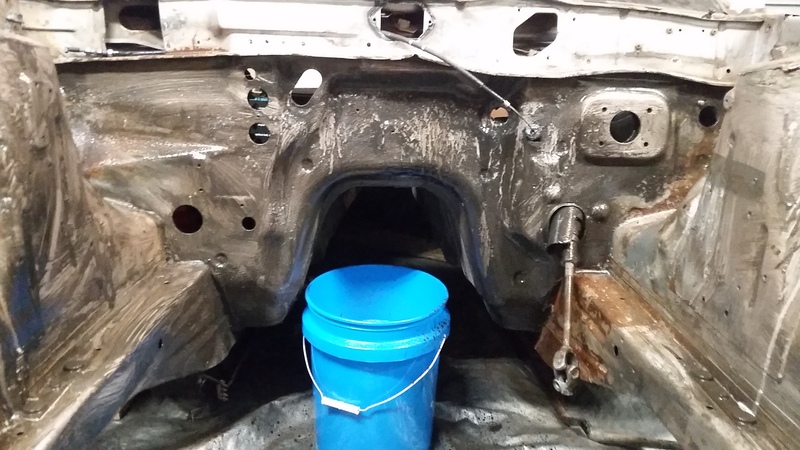
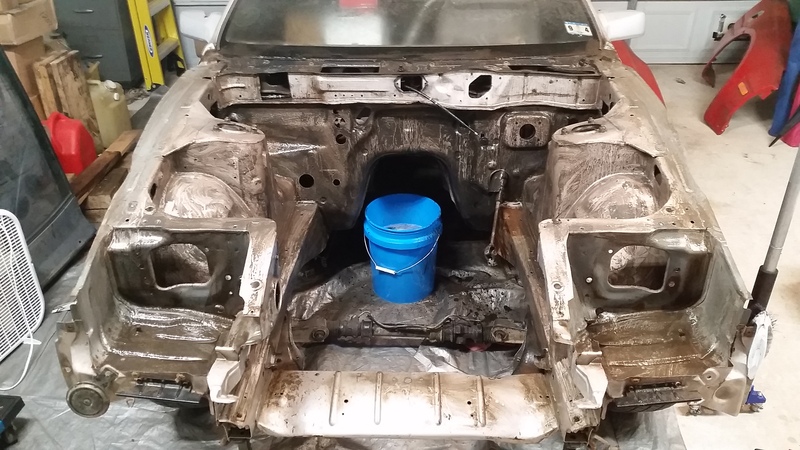
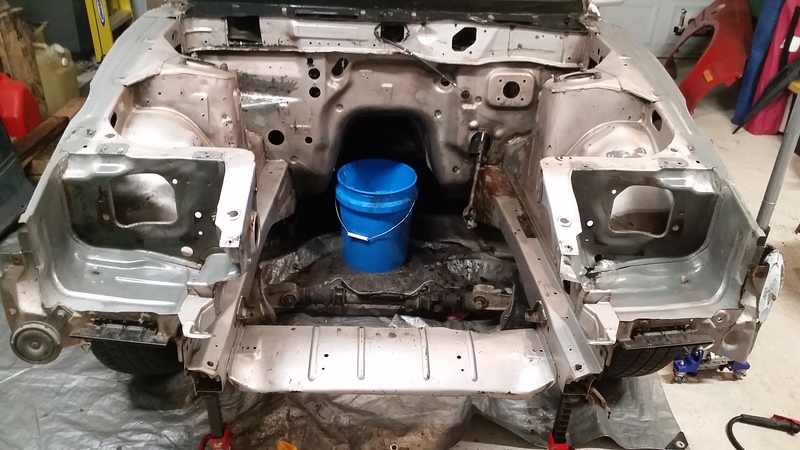
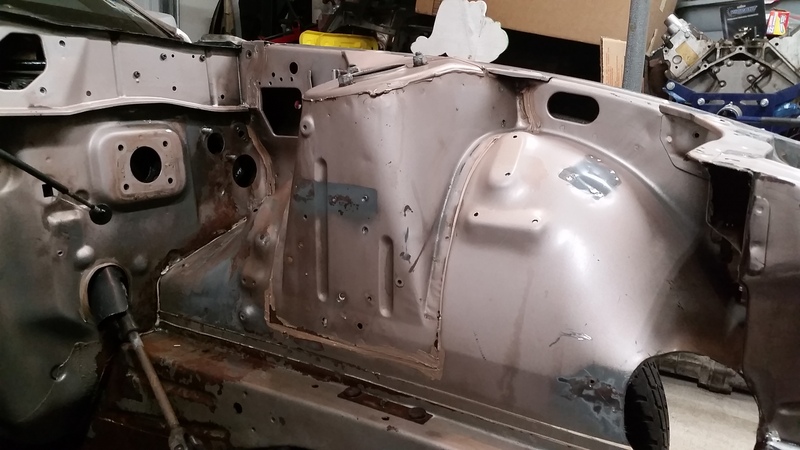
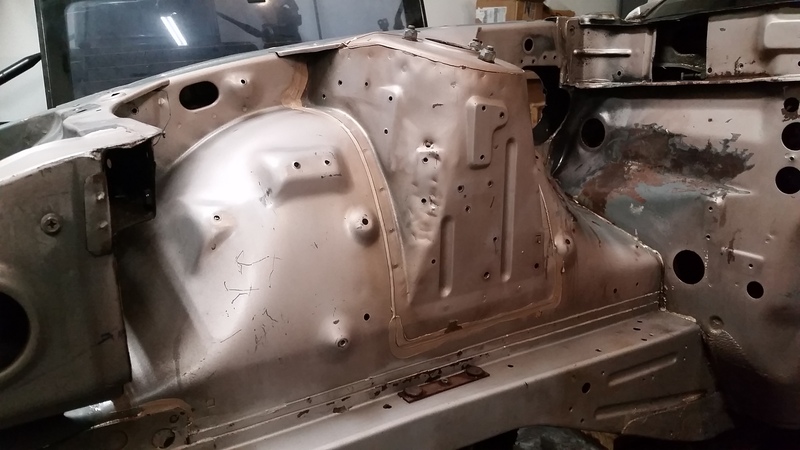
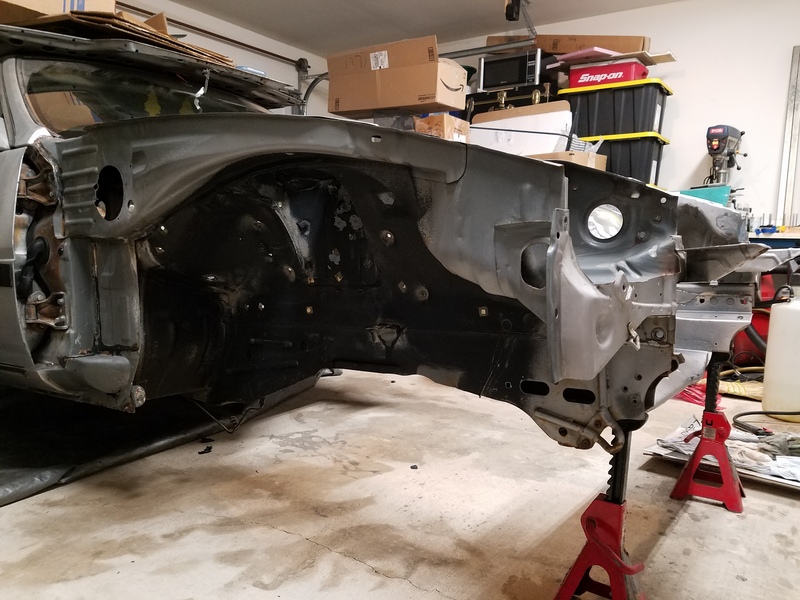
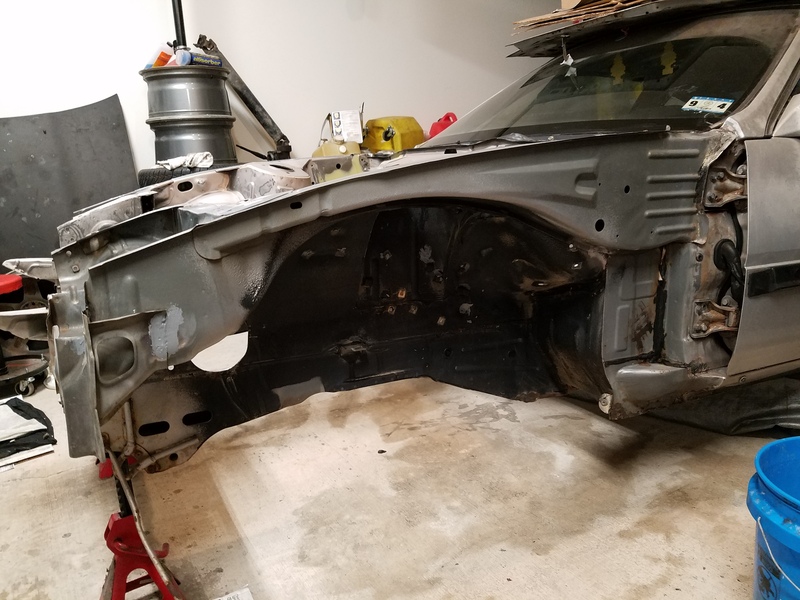
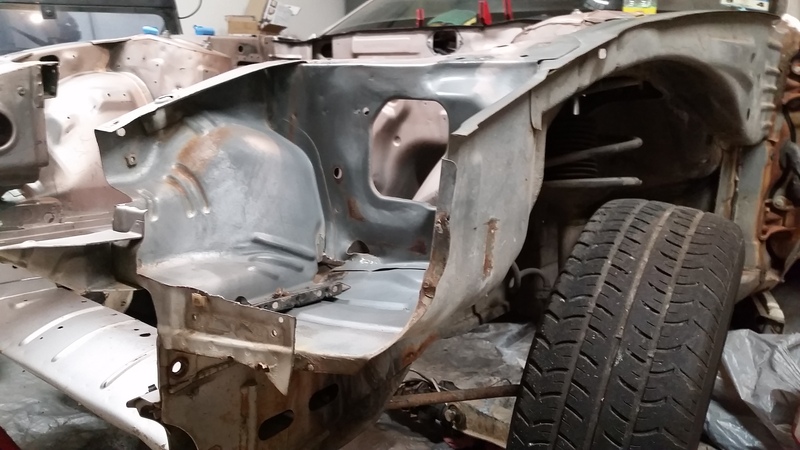
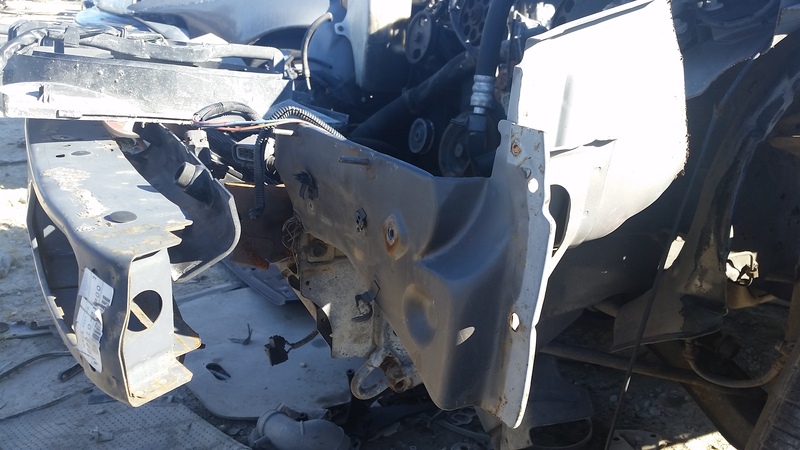
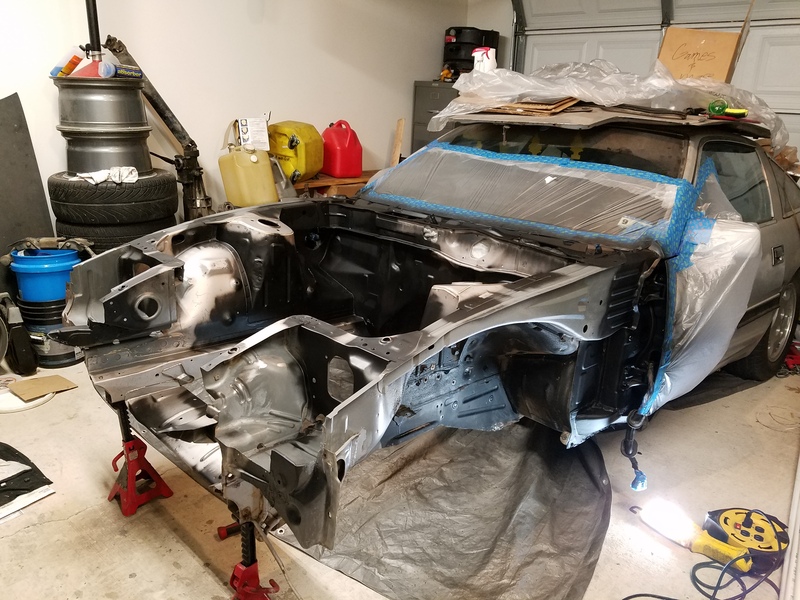
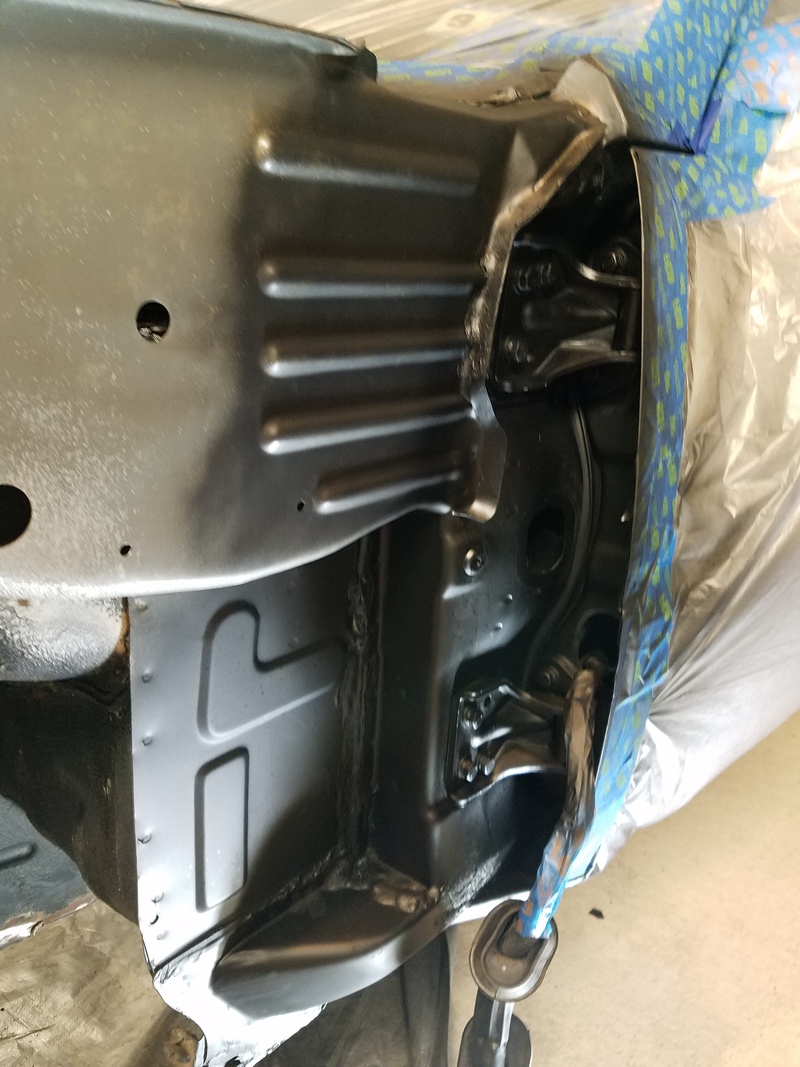
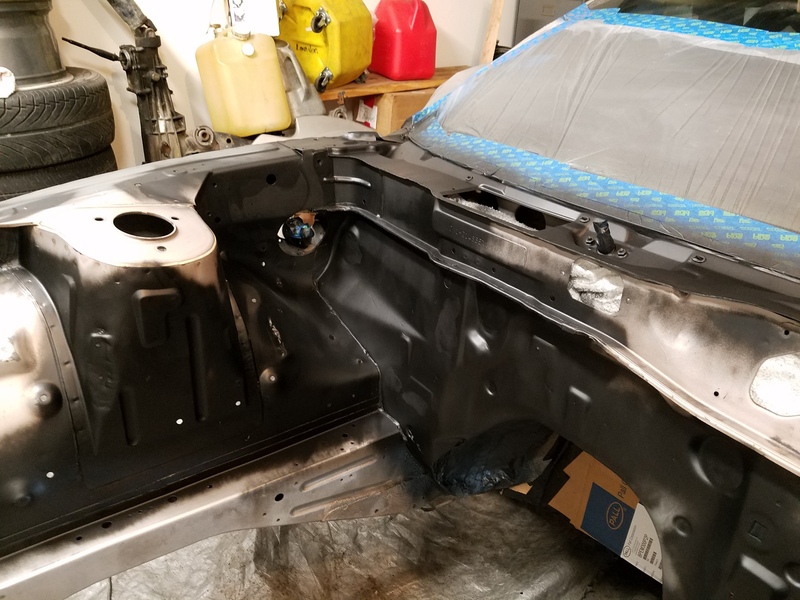
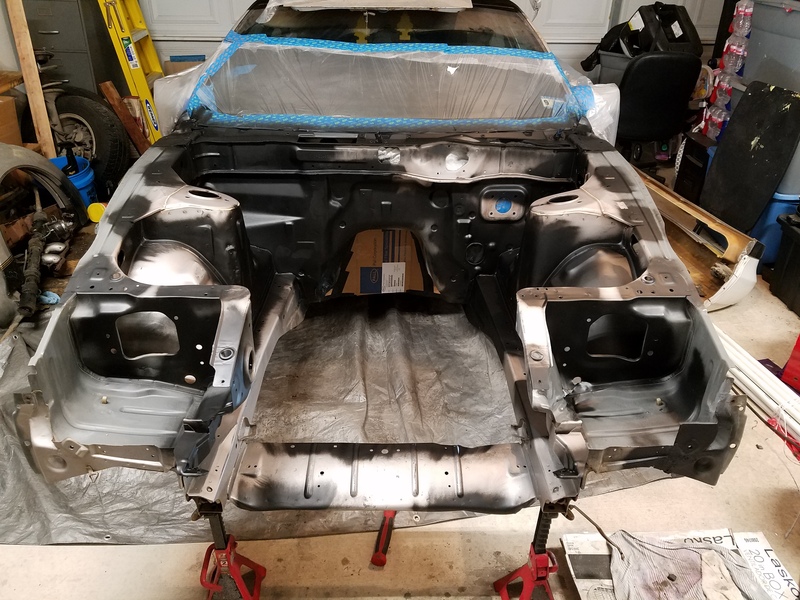
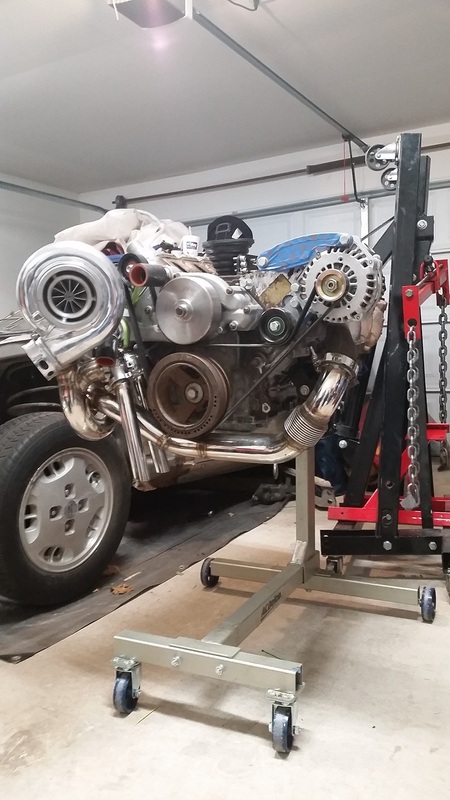
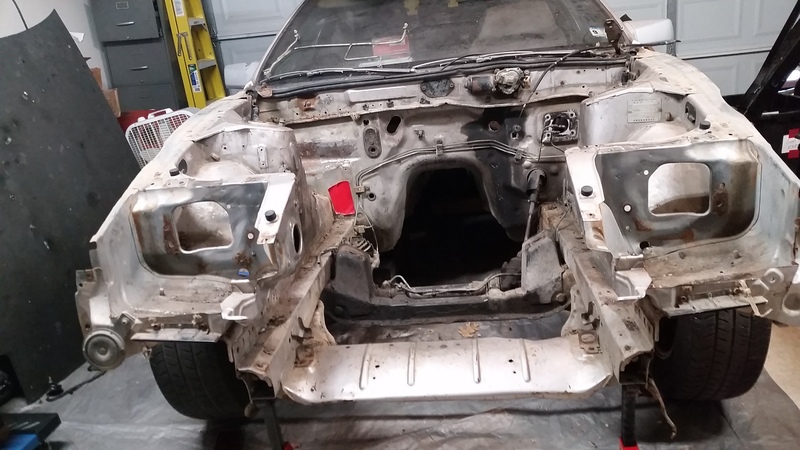
It's official! The time has come for the long over due update of my build. So I changed a few things with my build. First on the list was addressing my filthy engine bay/compartment. Up until this point I had never even cleaned it. Lol Knowing that I had to do justice to my turbo kit a plan of attack was formed. I was going to semi-shave my engine bay! So out came the engine & transmission.

Wanted to see how my hotside looked on my engine outside of the car.
Name:  stand.jpg
Views: 691
Size:  143.1 KB

Now with everything out of the way the cleaning began.
Name:  20160121_092534.jpg
Views: 728
Size:  175.4 KB
Name:  20160121_092632.jpg
Views: 712
Size:  167.4 KB
Name:  20160121_092621.jpg
Views: 708
Size:  168.3 KB
Name:  20160121_092944.jpg
Views: 727
Size:  186.1 KB
Name:  20160121_092653.jpg
Views: 694
Size:  169.6 KB
Name:  20160121_092711.jpg
Views: 726
Size:  165.0 KB
Name:  20160121_092719.jpg
Views: 742
Size:  168.8 KB
Name:  20160121_092759.jpg
Views: 718
Size:  104.1 KB
Name:  20160121_101959.jpg
Views: 693
Size:  119.2 KB
Old 06-02-2016, 09:10 PM
  #48  
TECH Enthusiast
Thread Starter
iTrader: (3)
 
Nismo Kid's Avatar
 
Join Date: Dec 2010
Location: San Antonio TX
Posts: 636
Likes: 0
Received 4 Likes on 4 Posts

Default

Name:  20160121_092752.jpg
Views: 694
Size:  109.6 KB
Name:  20160121_102902.jpg
Views: 717
Size:  119.7 KB
Name:  20160121_093039.jpg
Views: 734
Size:  166.3 KB
Name:  20160121_105402.jpg
Views: 688
Size:  134.6 KB
Name:  20160121_092850.jpg
Views: 715
Size:  168.5 KB
Name:  20160121_092916.jpg
Views: 703
Size:  186.4 KB
Name:  20160121_132901.jpg
Views: 723
Size:  194.0 KB
Name:  20160121_201353.jpg
Views: 685
Size:  188.7 KB
Name:  20160121_201937.jpg
Views: 695
Size:  164.8 KB
Name:  20160121_201947.jpg
Views: 744
Size:  156.8 KB
Old 06-02-2016, 09:10 PM
  #49  
TECH Enthusiast
Thread Starter
iTrader: (3)
 
Nismo Kid's Avatar
 
Join Date: Dec 2010
Location: San Antonio TX
Posts: 636
Likes: 0
Received 4 Likes on 4 Posts

Default

Name:  20160121_201933.jpg
Views: 722
Size:  184.9 KB
Name:  20160121_203237.jpg
Views: 746
Size:  203.2 KB
Name:  20160121_205426.jpg
Views: 734
Size:  187.7 KB
Name:  20160121_220025.jpg
Views: 732
Size:  131.4 KB
Name:  20160121_220057.jpg
Views: 726
Size:  146.2 KB
Name:  20160121_220116.jpg
Views: 734
Size:  148.3 KB
Name:  20160121_220122.jpg
Views: 683
Size:  140.4 KB
Name:  20160121_220135.jpg
Views: 722
Size:  145.3 KB
Name:  20160420_205202.jpg
Views: 689
Size:  216.3 KB
Name:  20160420_205225.jpg
Views: 748
Size:  211.3 KB
Old 06-02-2016, 09:11 PM
  #50  
TECH Enthusiast
Thread Starter
iTrader: (3)
 
Nismo Kid's Avatar
 
Join Date: Dec 2010
Location: San Antonio TX
Posts: 636
Likes: 0
Received 4 Likes on 4 Posts

Default

Name:  20160221_110553.jpg
Views: 711
Size:  108.7 KB

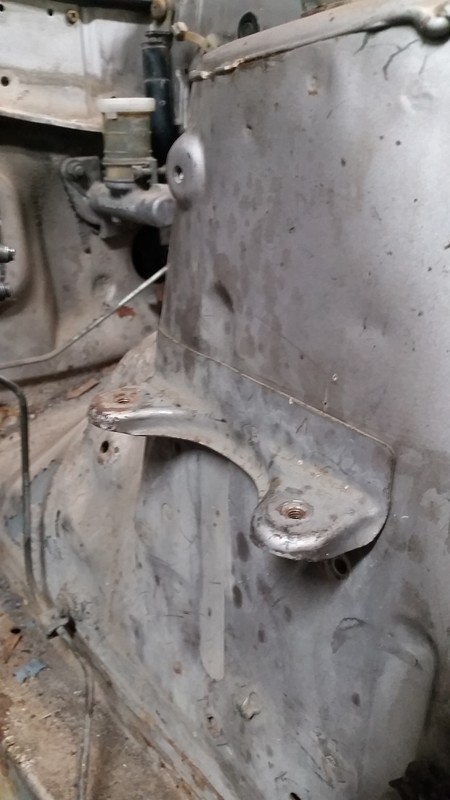
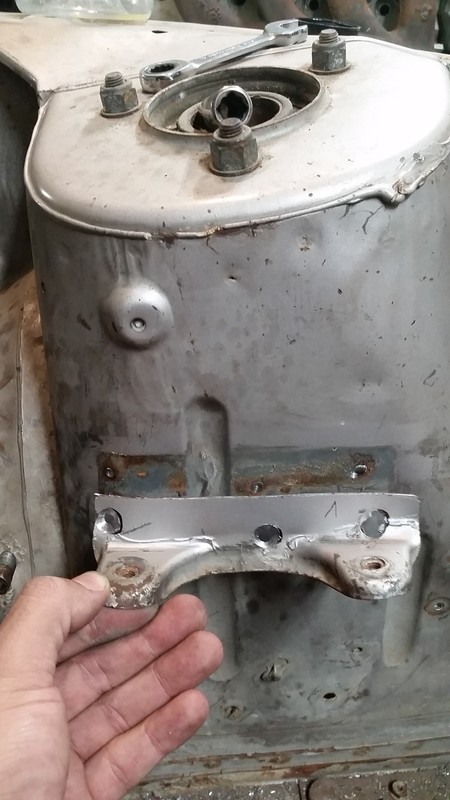
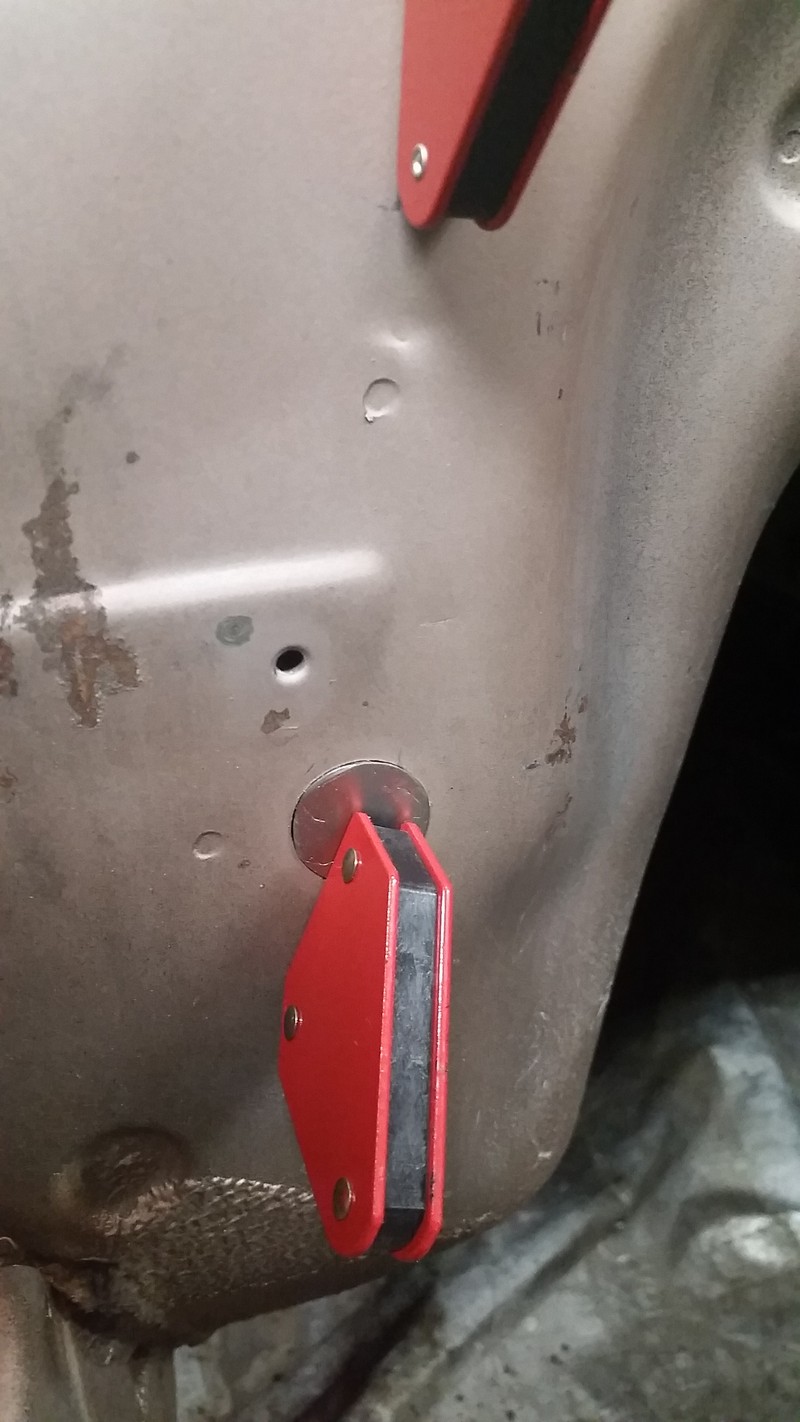
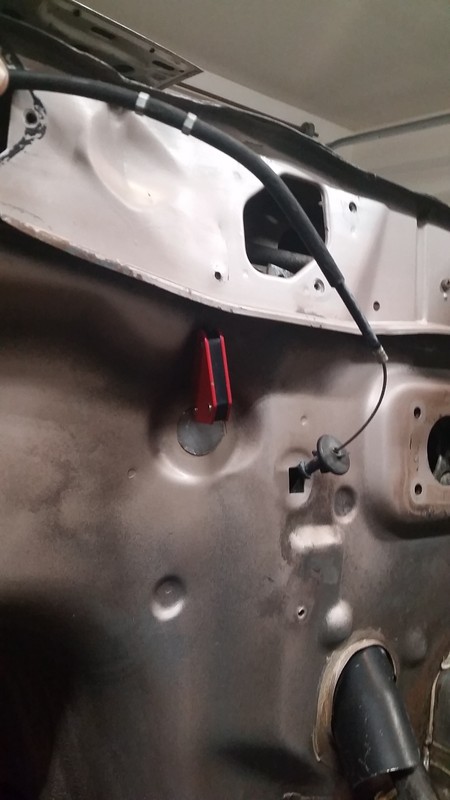
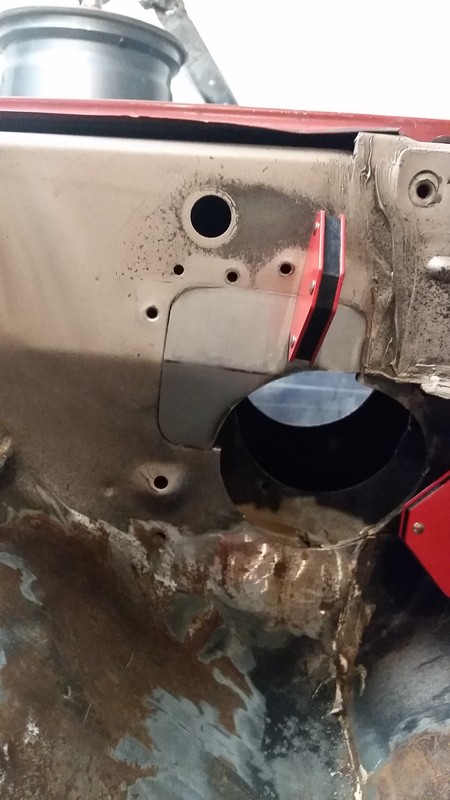
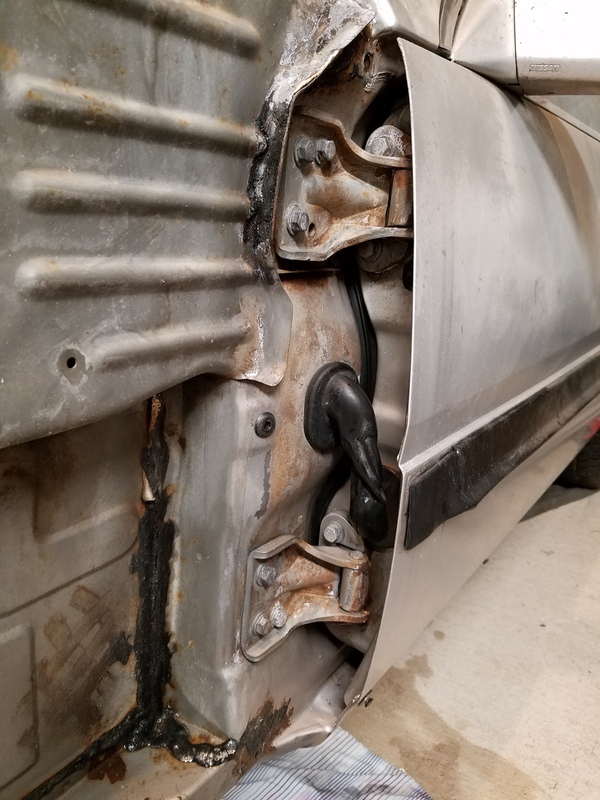
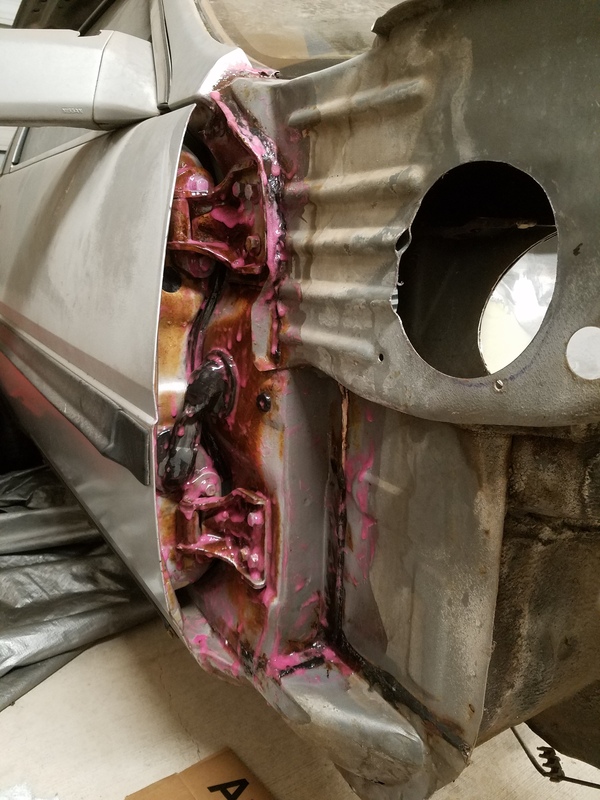
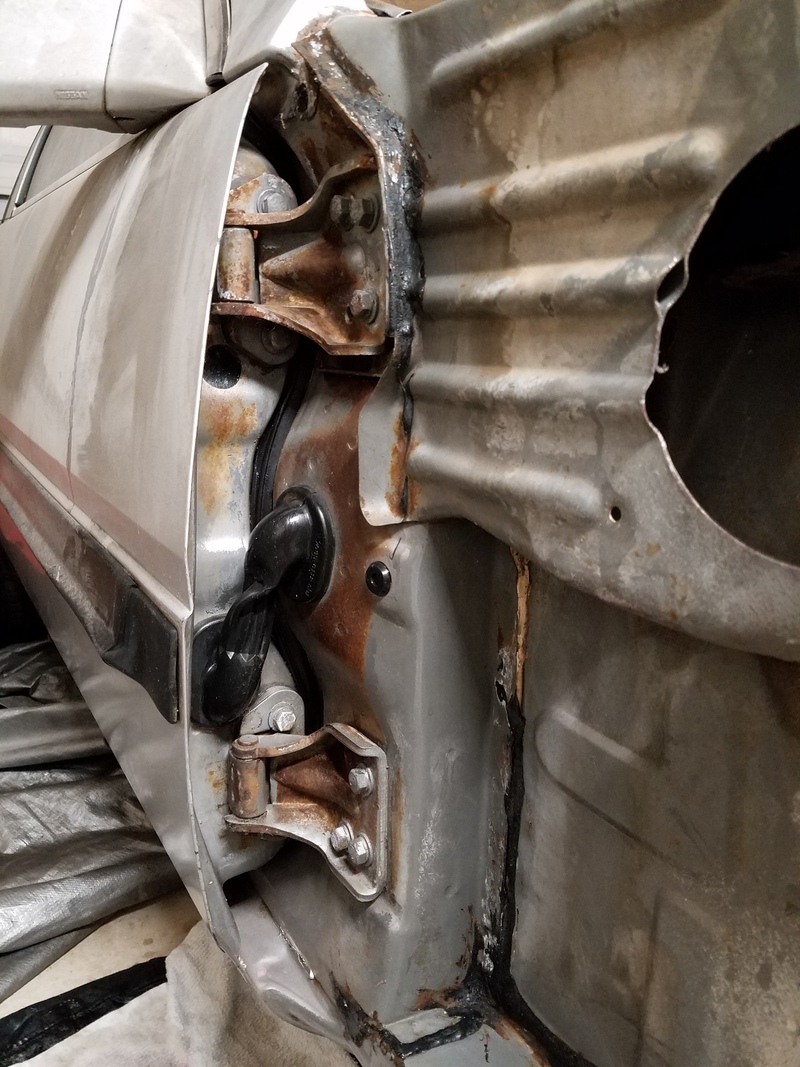
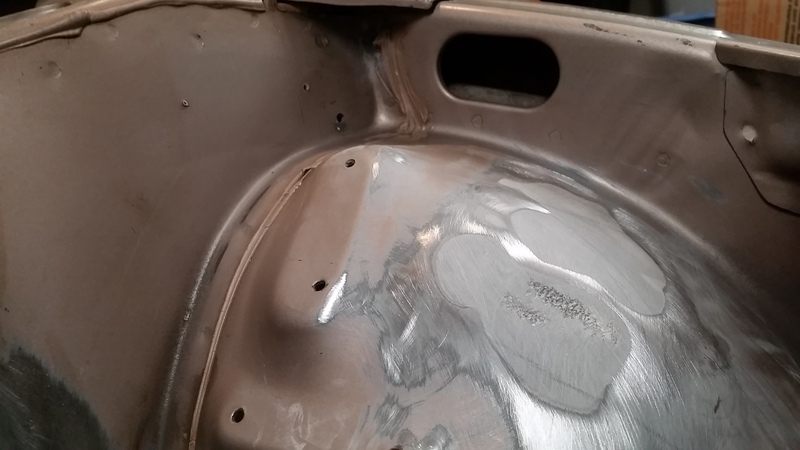
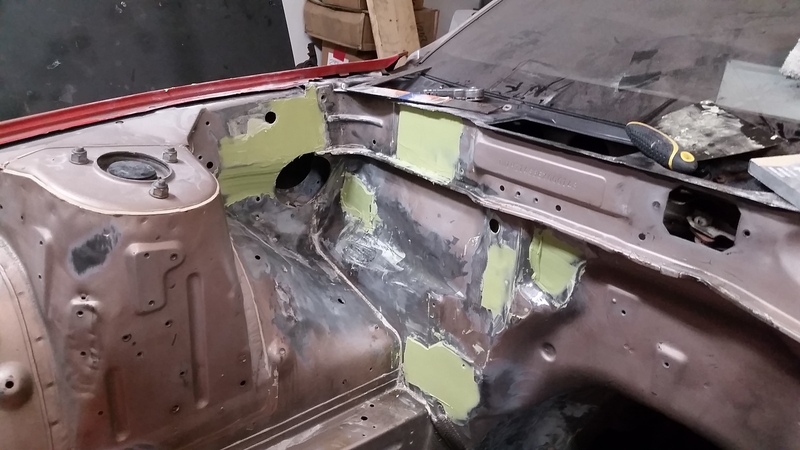
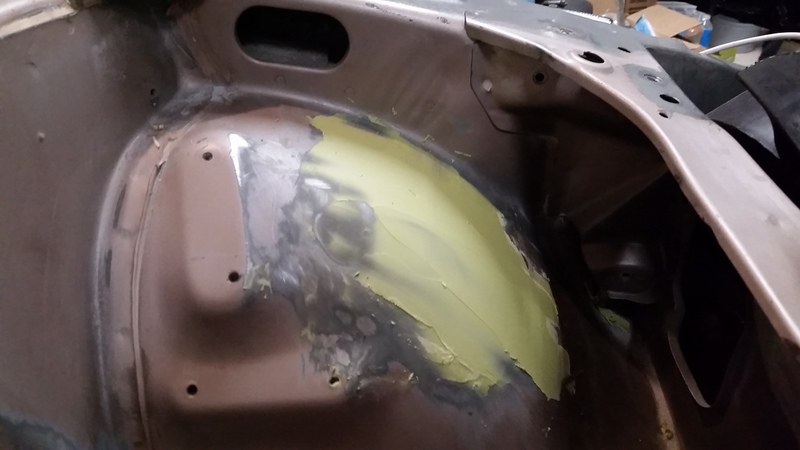
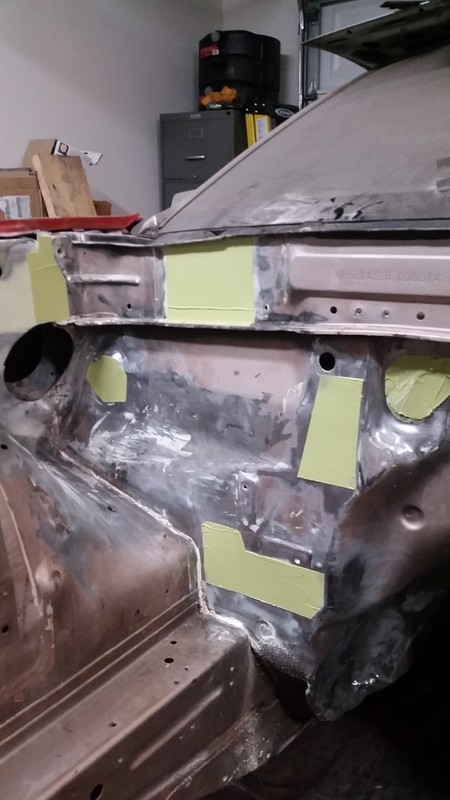
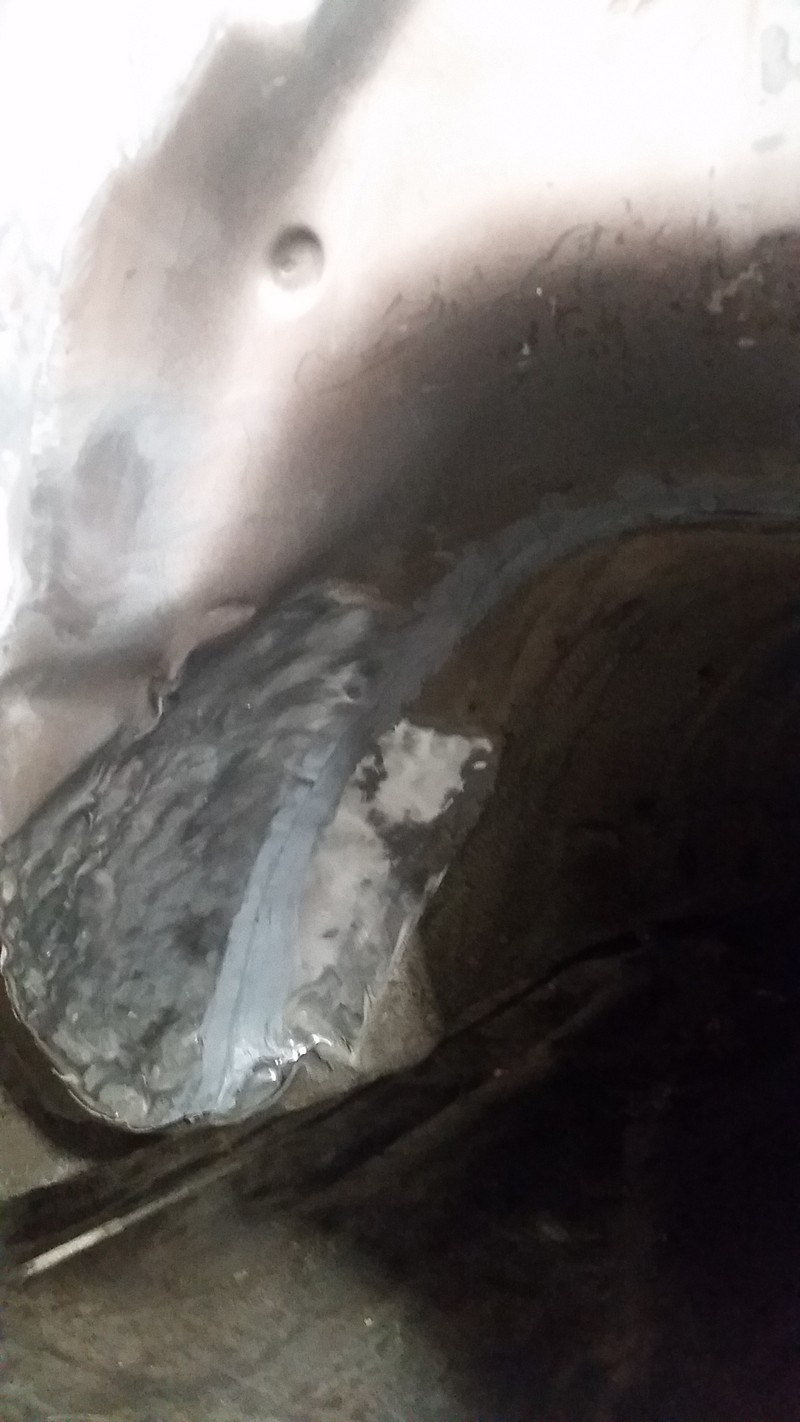
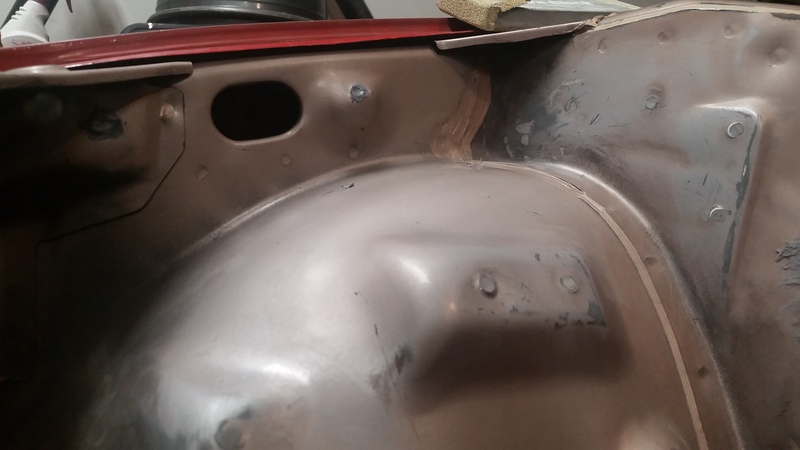
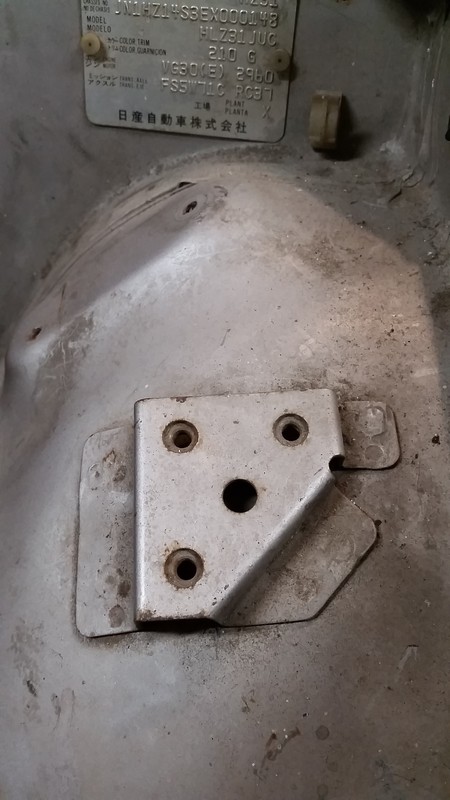
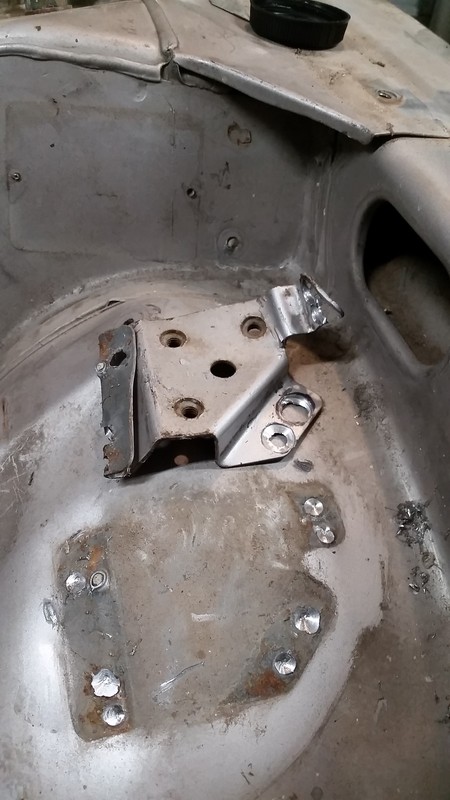
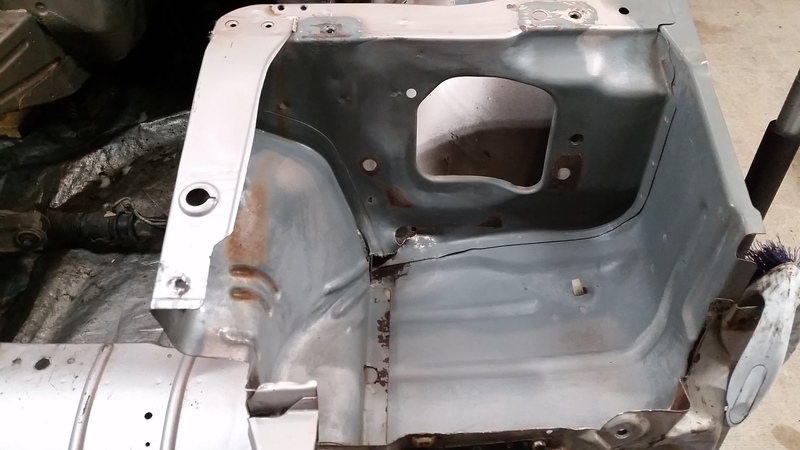
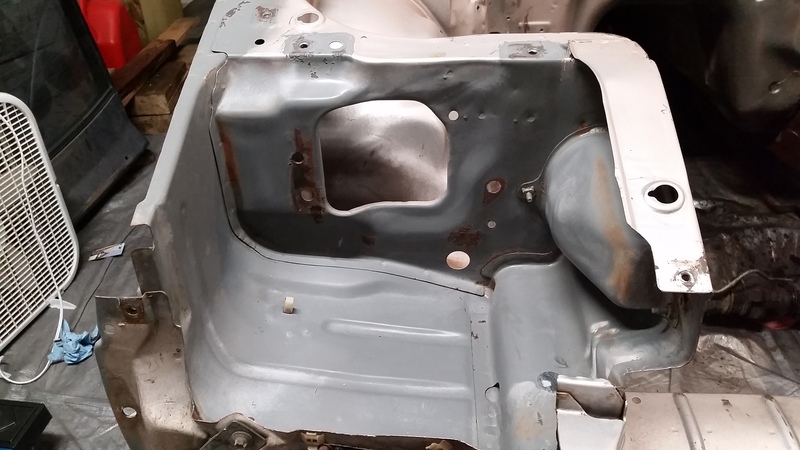
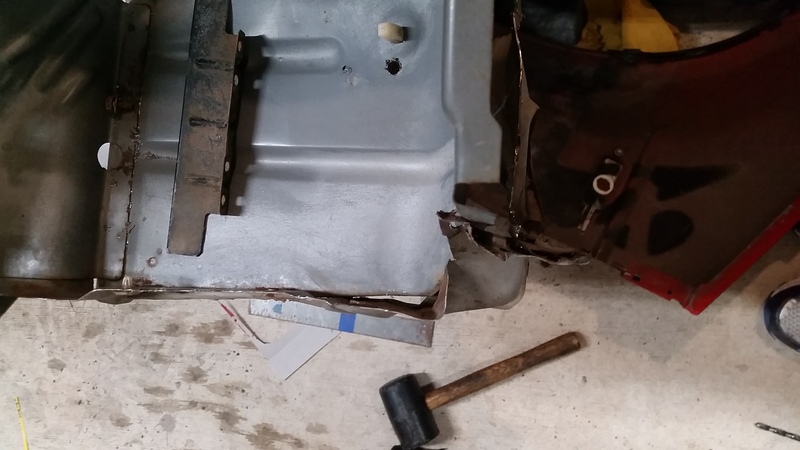
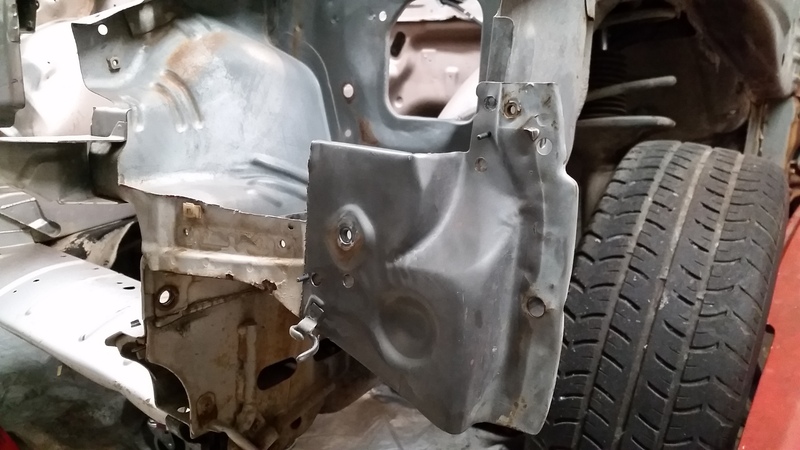
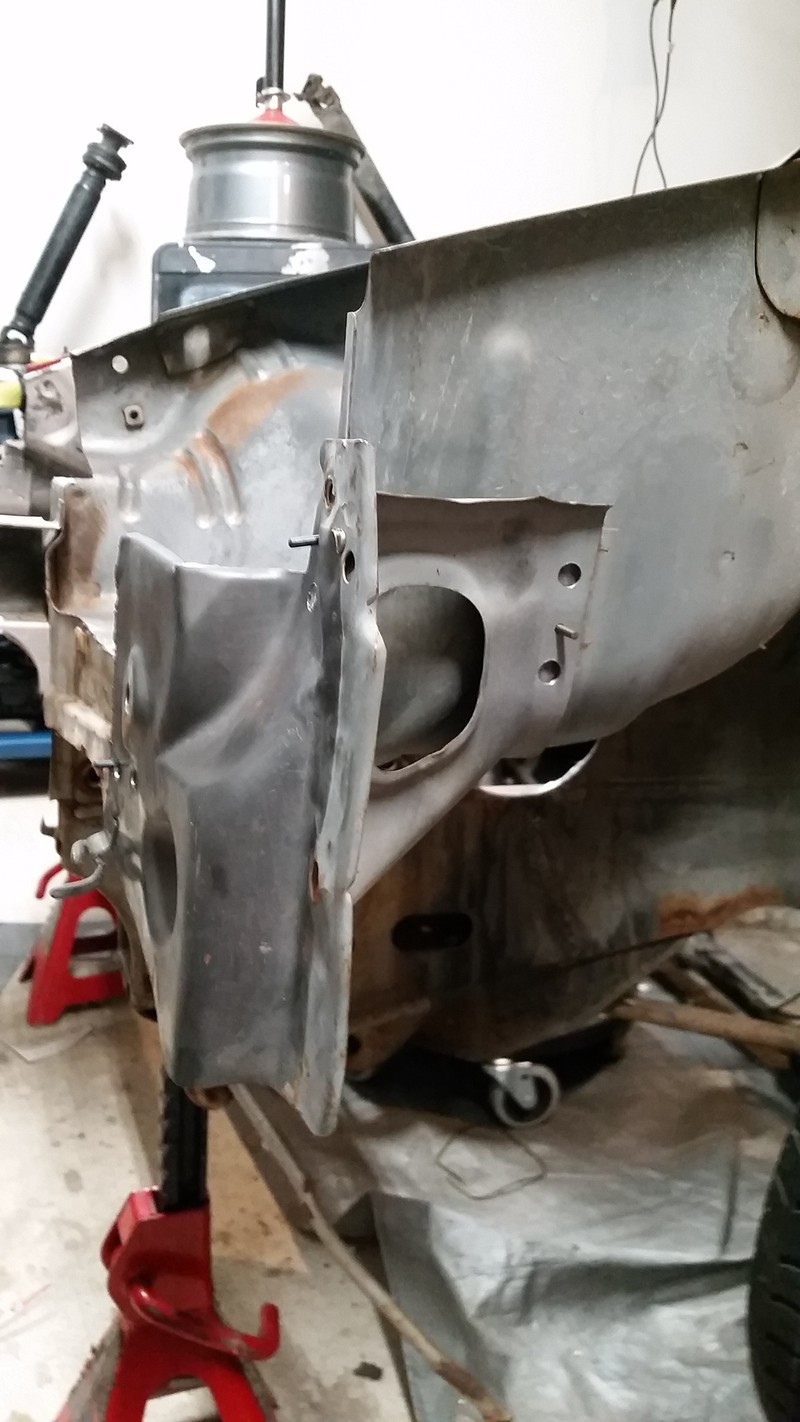
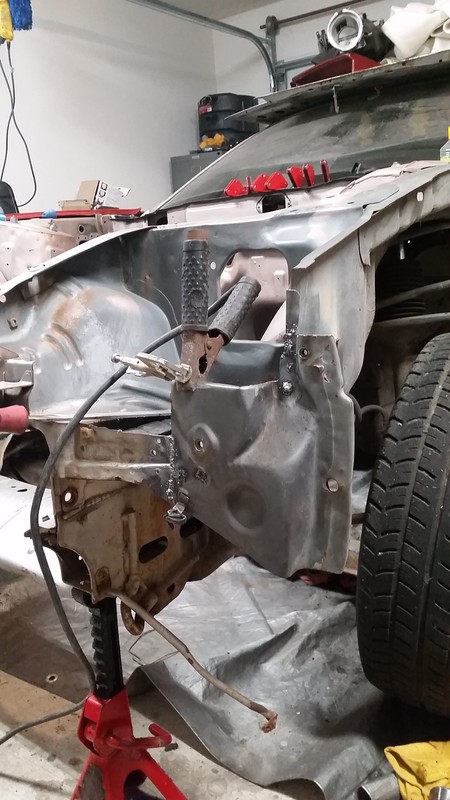
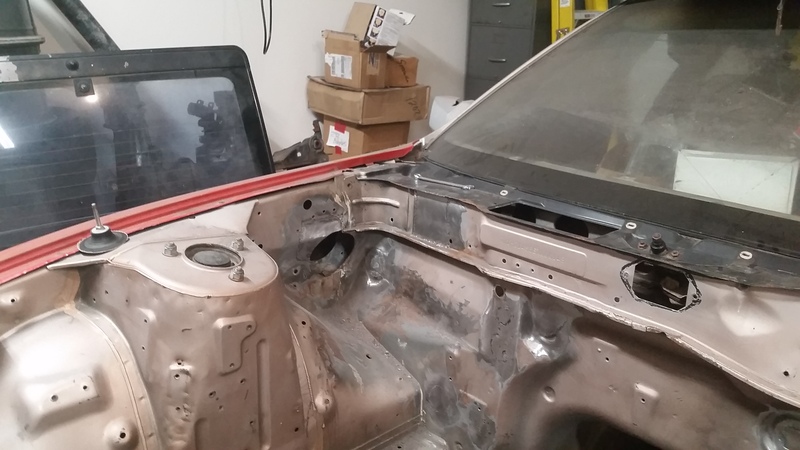
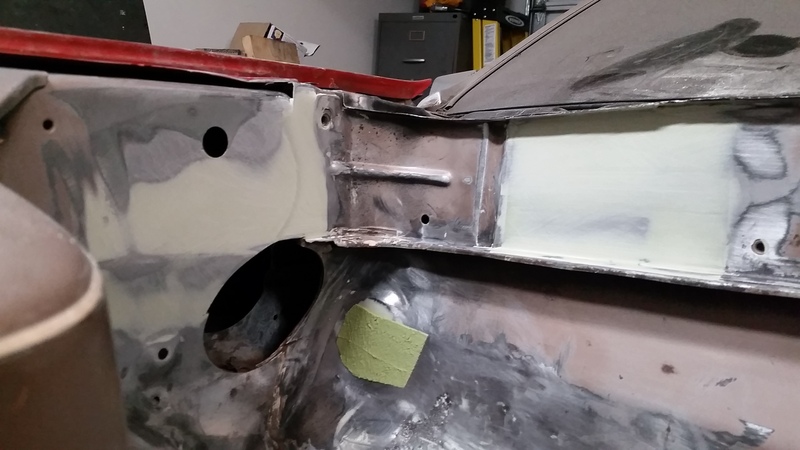
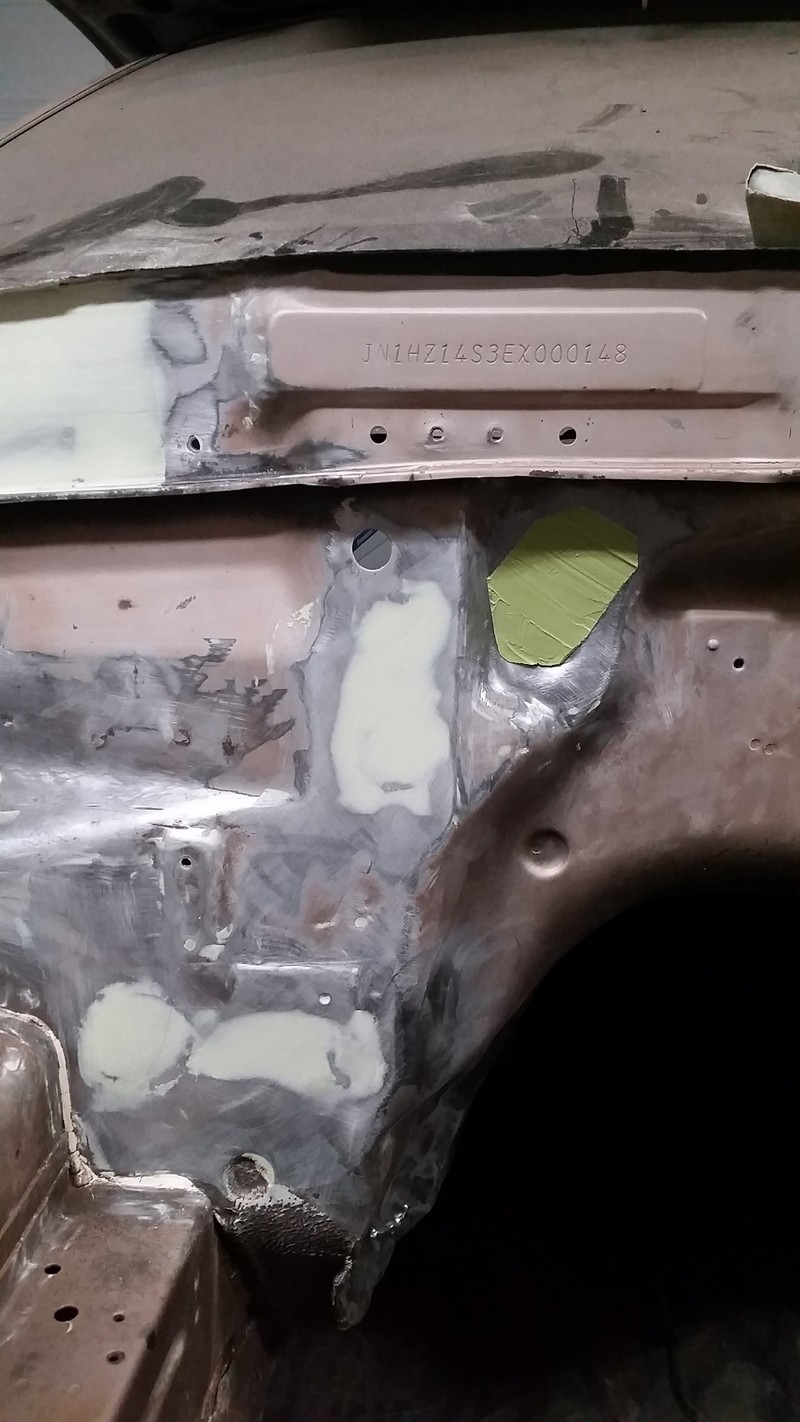
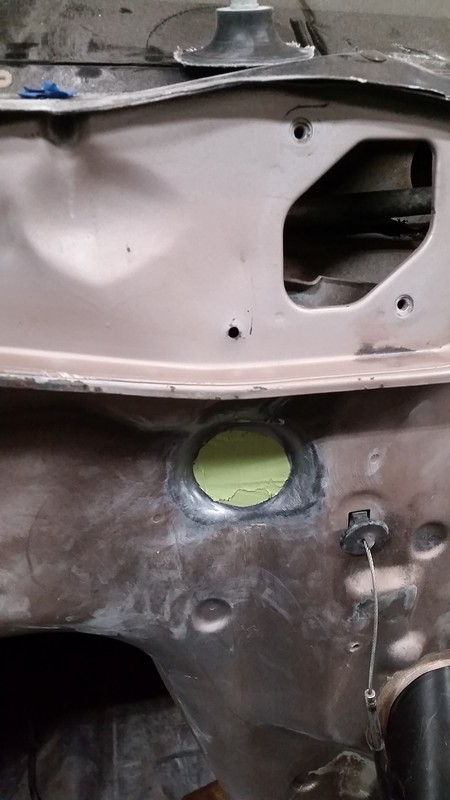
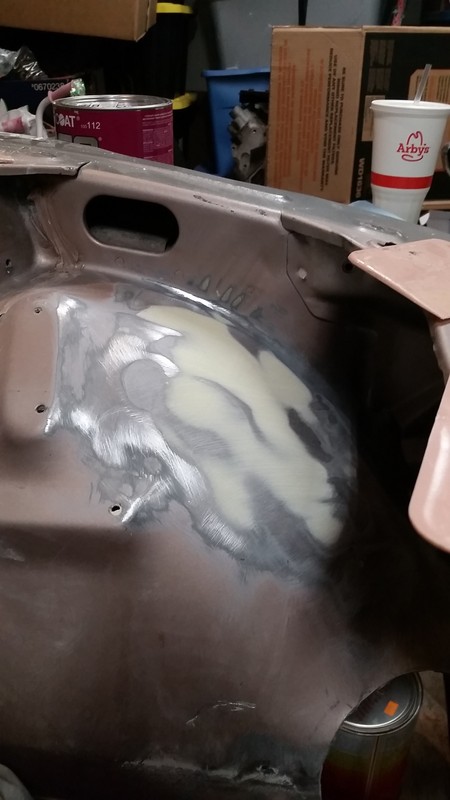
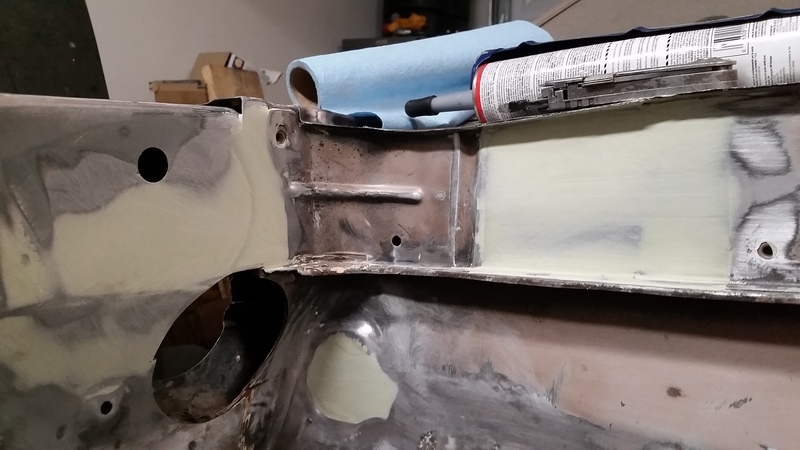
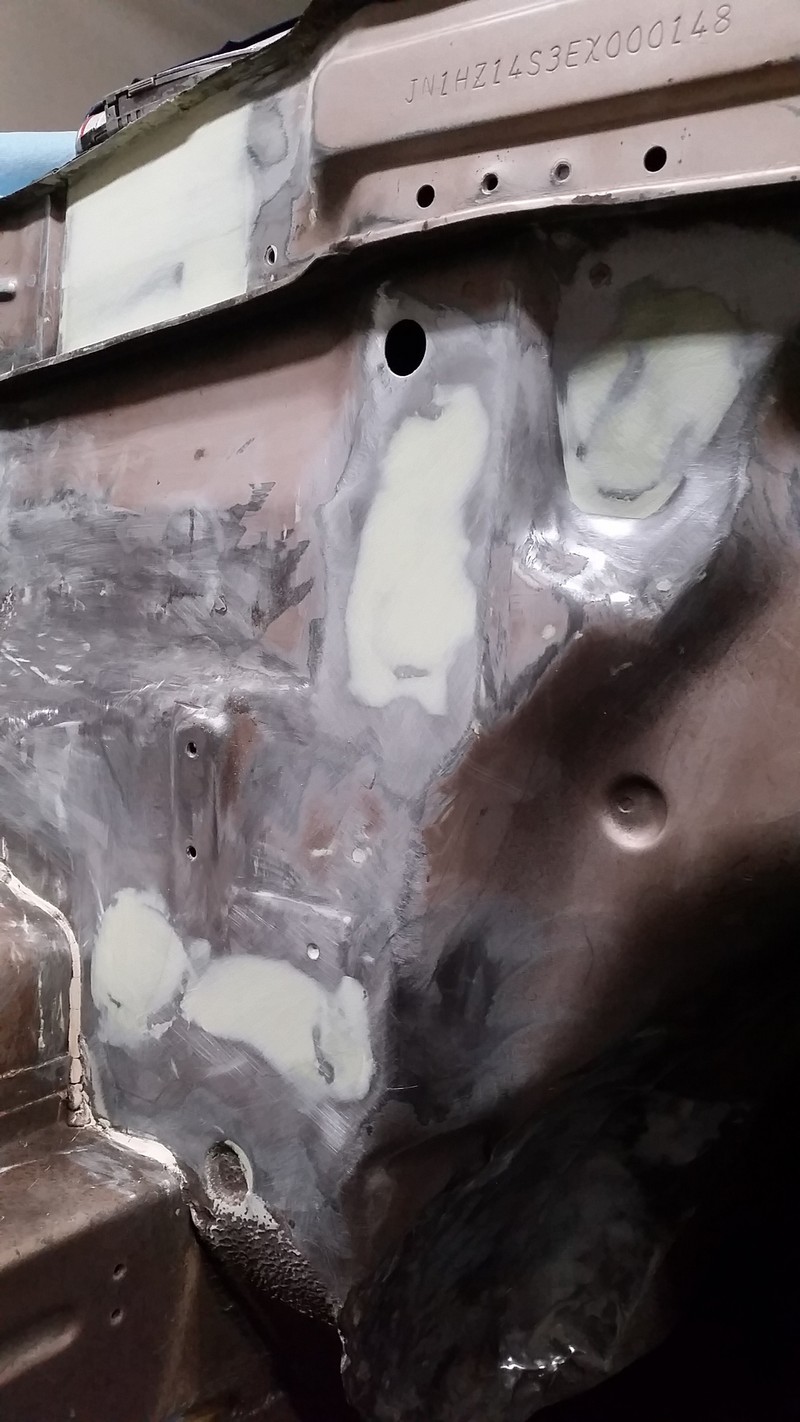
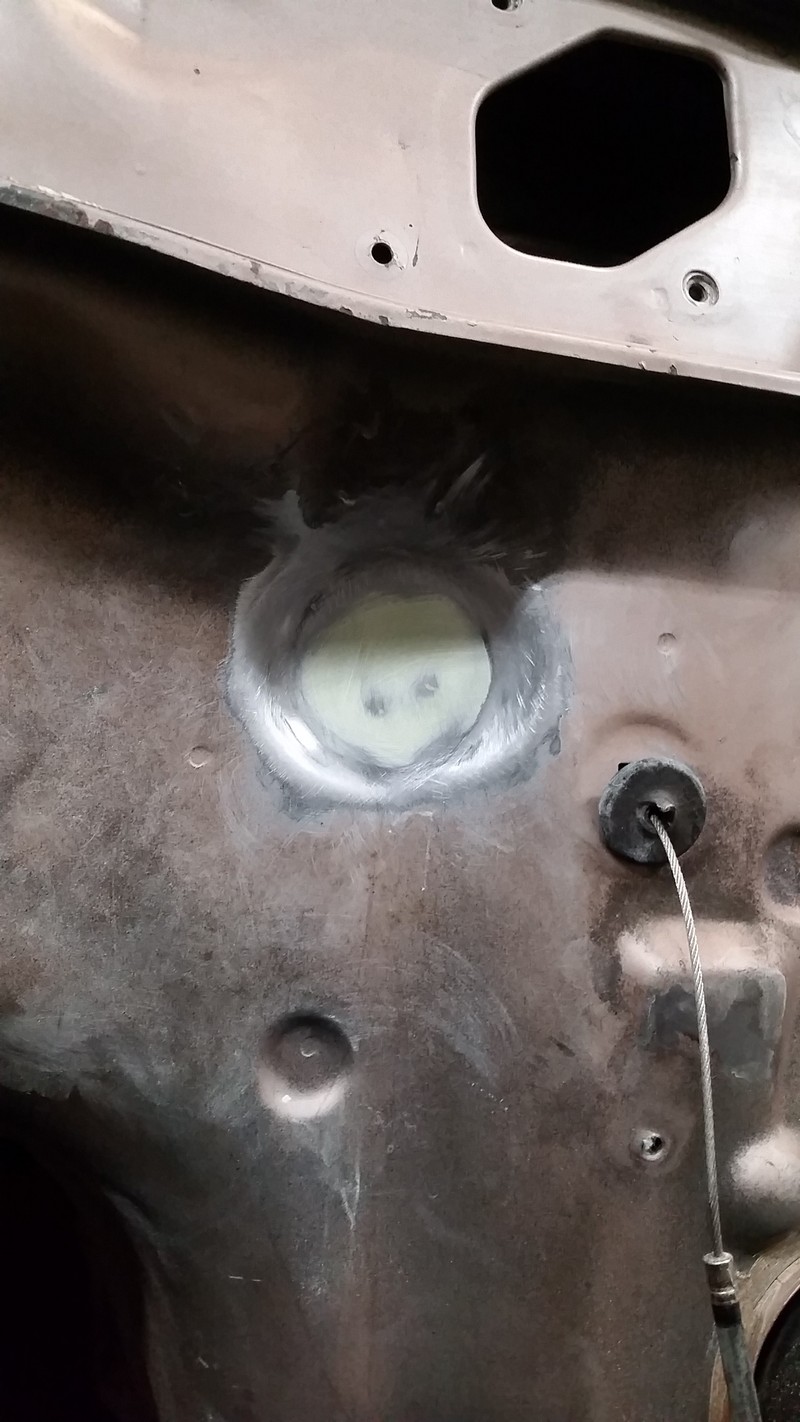
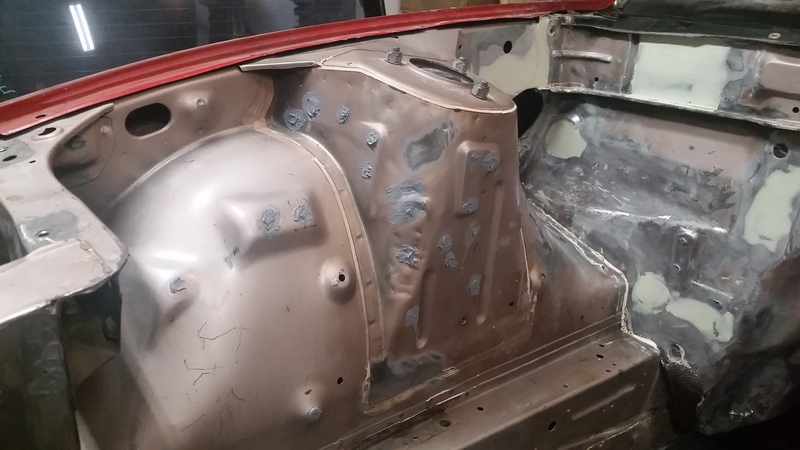
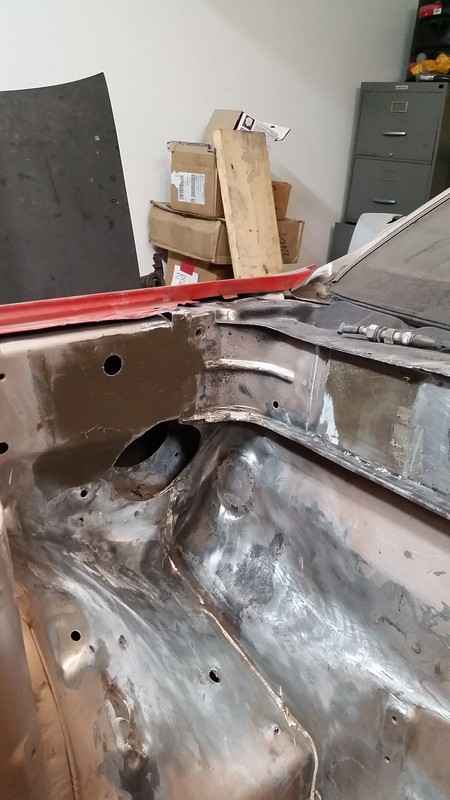
It's surprising how far some elbow grease & plenty of patience can go. I would've never thought it could clean up as nice as did. With the engine bay & wheel wells cleaned up I began removing all the brackets I no longer needed. This was also the perfect time to massage my transmission tunnel. When a Z32 transmission is used in a Z31 you have to massage the transmission tunnel for starter clearance. It may not be pretty but it's functional.

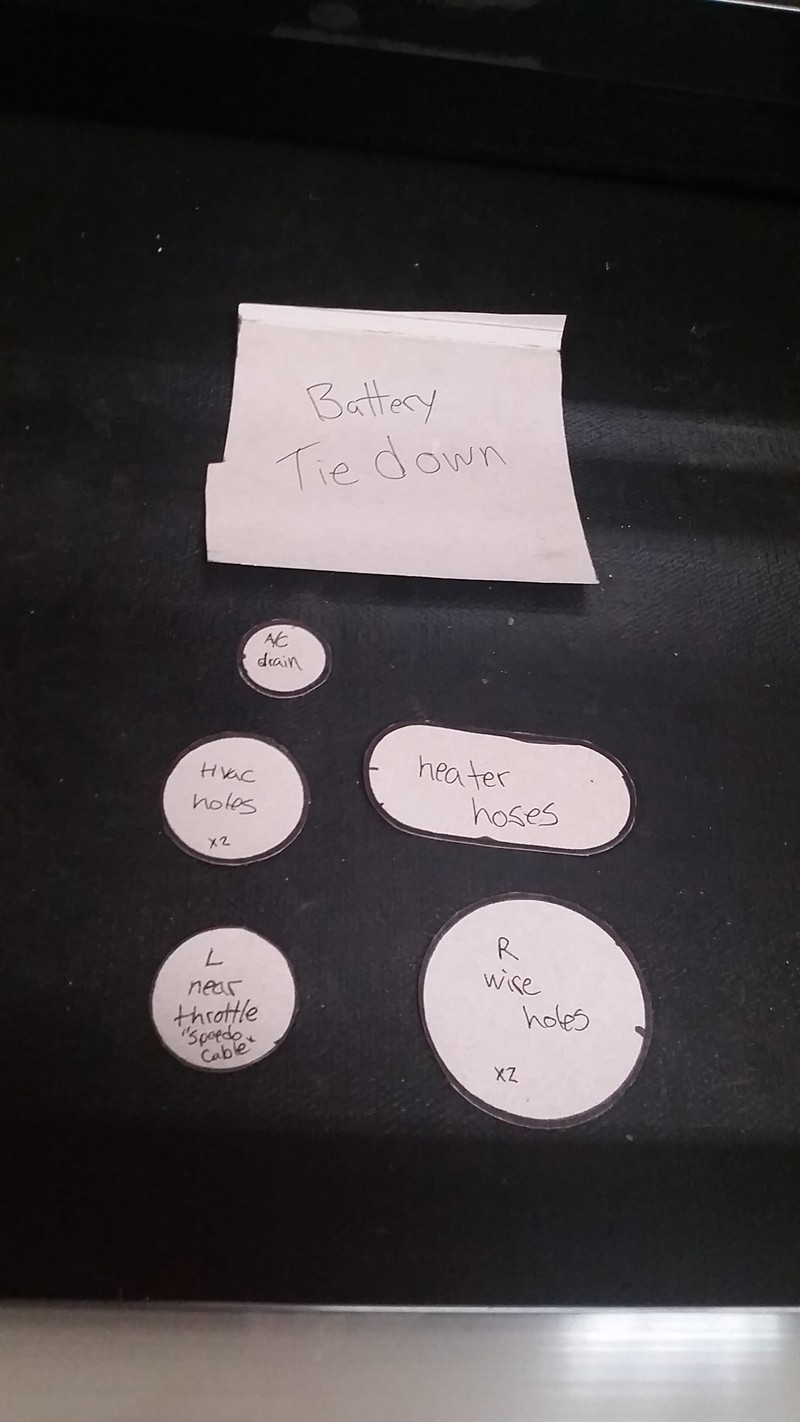
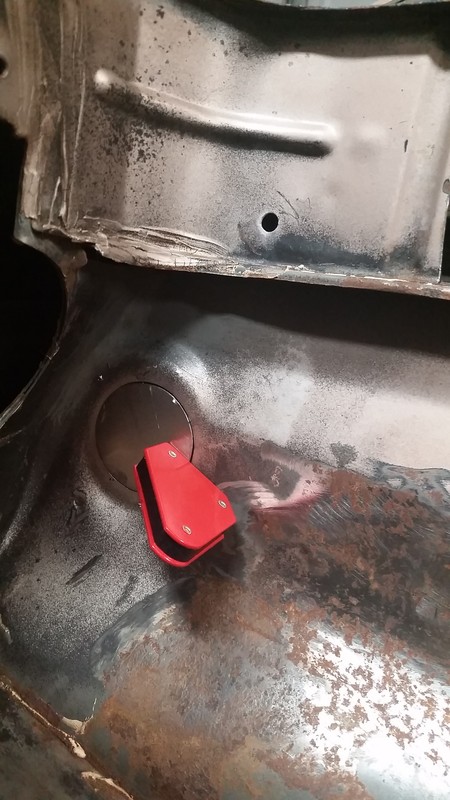
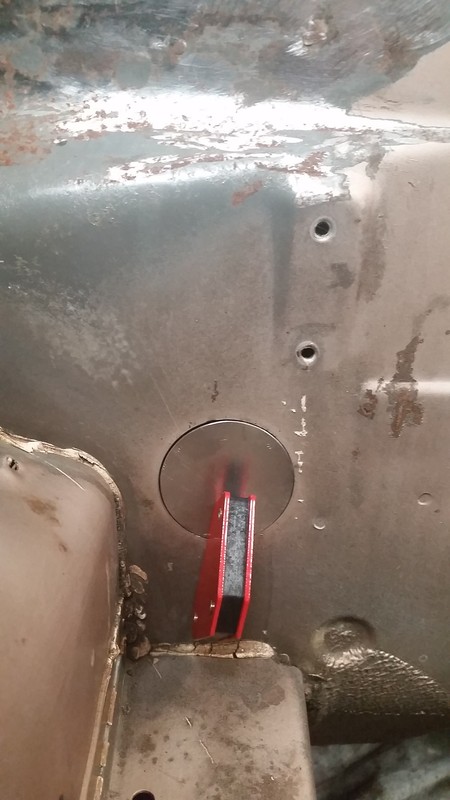
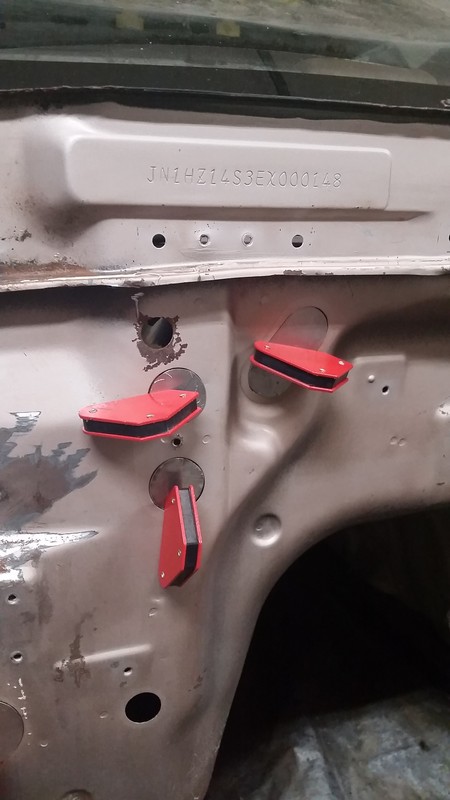
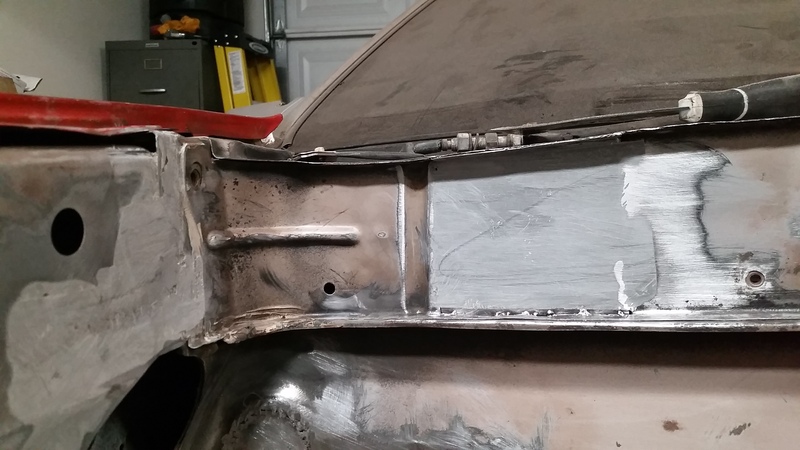
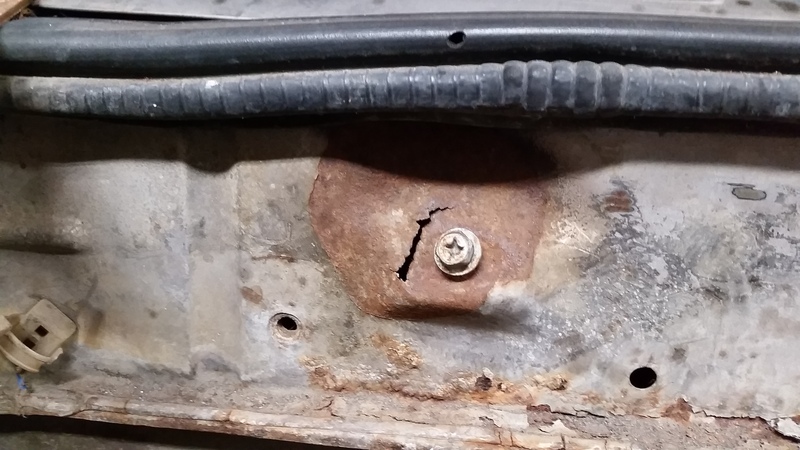
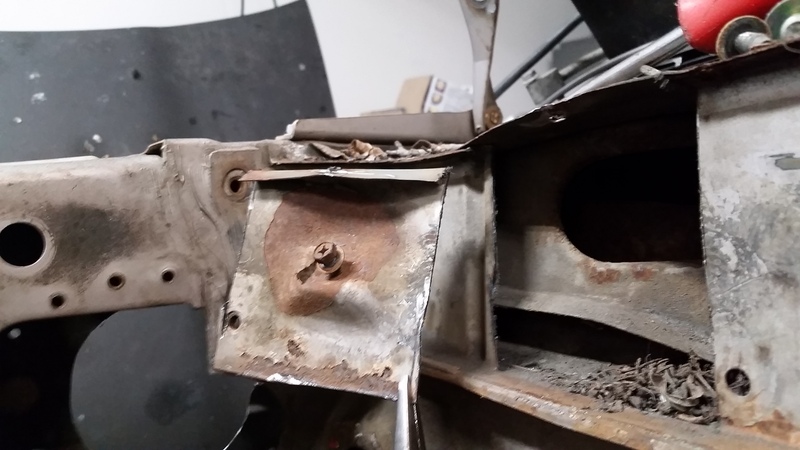
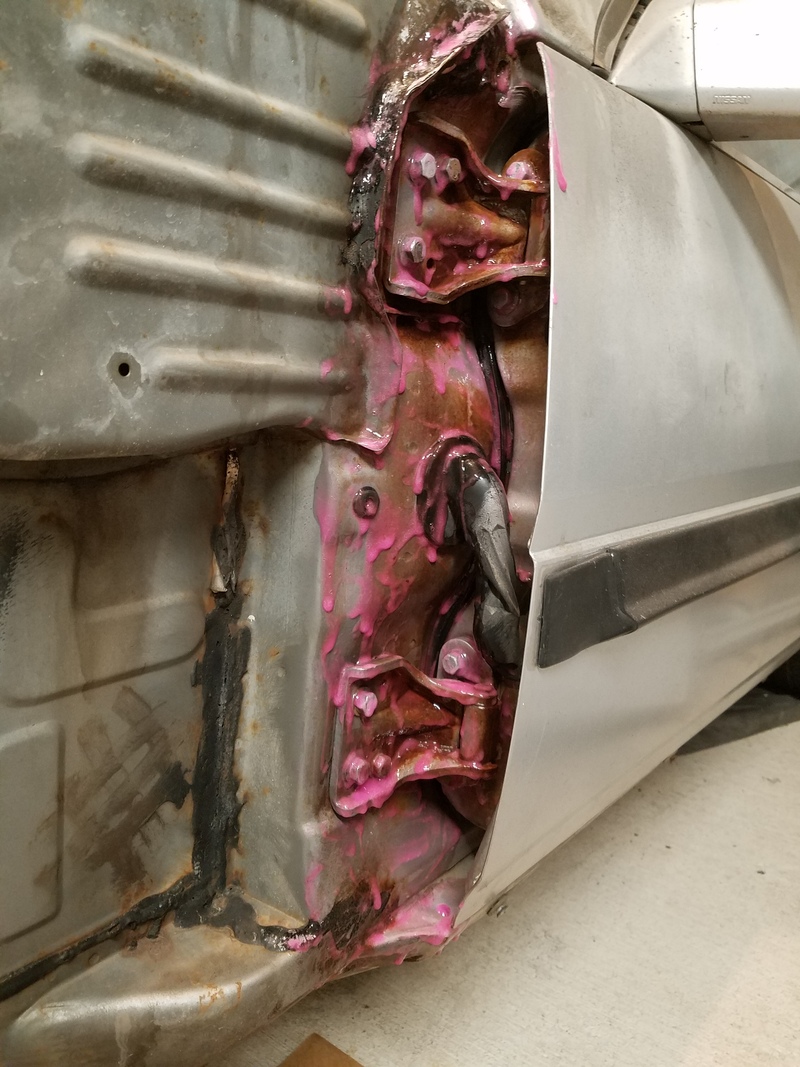
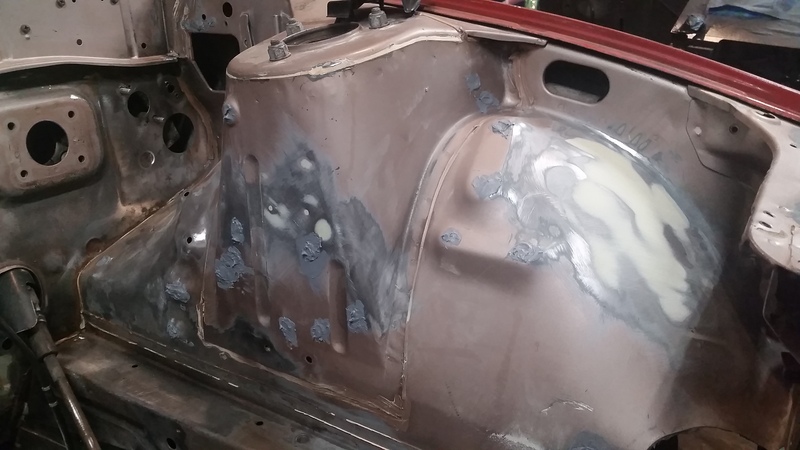
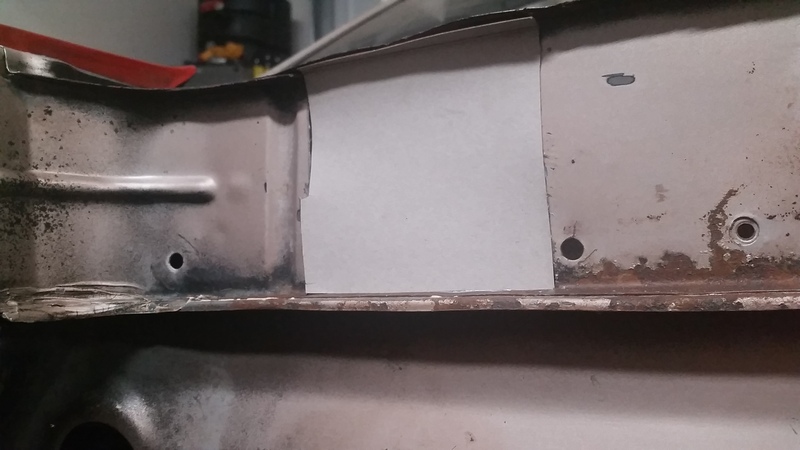
Then I made some templates for all the holes I was going to fill. (That's what she said) Then transferred the patterns over to 22ga sheet metal. Using a pair of shears & my dremel I careful cut them all out. After plenty of file fitting they were ready to be welded in. I also repaired my damaged headlight bucket/fender mount. With my buddies tig being tied up I borrowed another friends Hobart 210. So dangerously armed with the Hobart 210 WITHOUT gas, incorrect sized flux core wire I went to town.(Hobart/Miller advised me not to even to attempt to weld 22ga with Flux core wire) But I was in a time crunch. This was by far the least enjoyable welding experience I've had with the car. But I made it work. After the welding was completed I removed all the surface rust & grounded the welds smooth. In the harder to reach areas I used Loctite Naval jelly.
Name:  20160122_162751.jpg
Views: 717
Size:  110.2 KB
Name:  20160122_175942.jpg
Views: 688
Size:  159.3 KB
Name:  20160123_203245.jpg
Views: 680
Size:  136.9 KB
Name:  20160123_203252.jpg
Views: 688
Size:  106.7 KB
Name:  20160123_203425.jpg
Views: 687
Size:  96.8 KB
Name:  20160123_203459.jpg
Views: 715
Size:  190.8 KB
Name:  20160123_203702.jpg
Views: 683
Size:  92.8 KB
Name:  20160130_185726.jpg
Views: 702
Size:  113.7 KB
Name:  20160127_165350.jpg
Views: 710
Size:  161.5 KB
Old 06-02-2016, 09:11 PM
  #51  
TECH Enthusiast
Thread Starter
iTrader: (3)
 
Nismo Kid's Avatar
 
Join Date: Dec 2010
Location: San Antonio TX
Posts: 636
Likes: 0
Received 4 Likes on 4 Posts

Default

Name:  20160127_165357.jpg
Views: 737
Size:  205.0 KB
Name:  20160127_165403.jpg
Views: 725
Size:  127.2 KB
Name:  20160127_165757.jpg
Views: 720
Size:  159.3 KB
Name:  20160128_100901.jpg
Views: 692
Size:  162.0 KB
Name:  20160128_120427.jpg
Views: 719
Size:  149.1 KB
Name:  20160128_120441.jpg
Views: 719
Size:  211.7 KB
Name:  20160128_115511.jpg
Views: 712
Size:  127.2 KB
Name:  20160129_162253.jpg
Views: 692
Size:  144.0 KB
Name:  20160212_172041.jpg
Views: 729
Size:  142.2 KB
Name:  20160420_191725.jpg
Views: 710
Size:  338.7 KB
Old 06-02-2016, 09:11 PM
  #52  
TECH Enthusiast
Thread Starter
iTrader: (3)
 
Nismo Kid's Avatar
 
Join Date: Dec 2010
Location: San Antonio TX
Posts: 636
Likes: 0
Received 4 Likes on 4 Posts

Default

Name:  20160420_194541.jpg
Views: 720
Size:  236.2 KB
Name:  20160420_192347.jpg
Views: 712
Size:  240.8 KB
Name:  20160420_194554.jpg
Views: 709
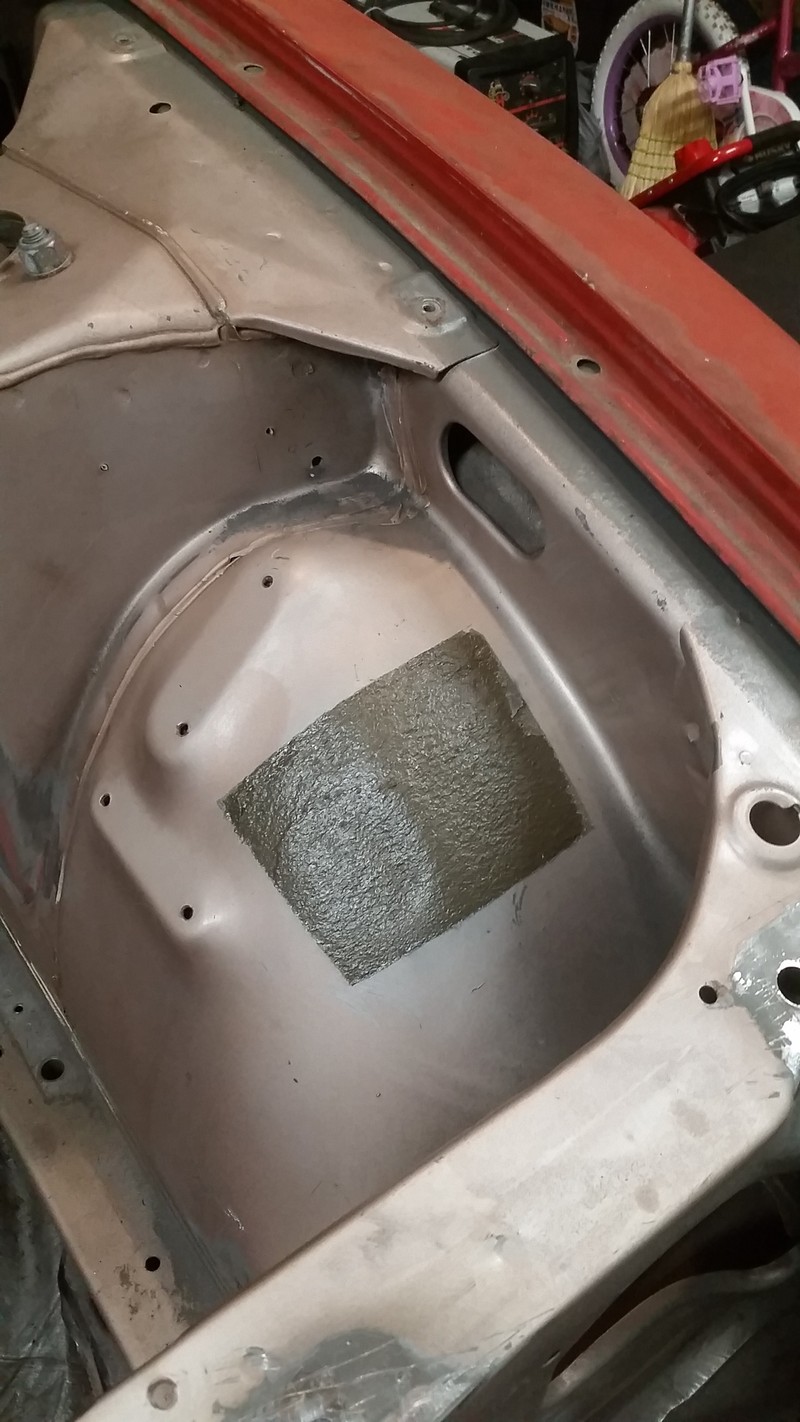
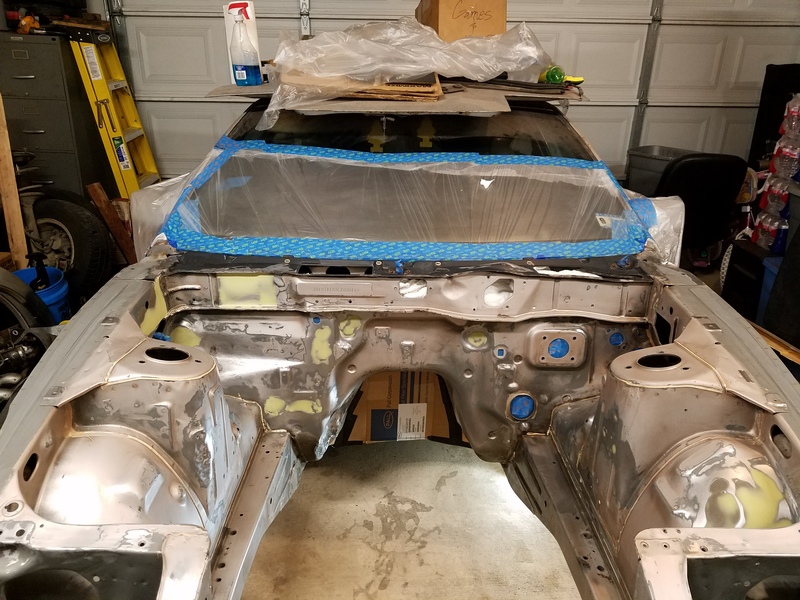
Size:  362.8 KB I quickly decided that I wasn't going to weld all the 6mm holes in the entire engine bay. My solution was 3m seam sealer. Many people may not be keen on the idea but it worked flawlessly for me. It's sand-able, Non-Shrinking, Non-Cracking, & Paintable. I only used it on the 6mm holes. I finished off all the filler plates with Evercoat rage gold for a nice smooth finish. This is hands down the best body filler I've ever used. It sets quick & sands nicely. Once the seam sealer & body filler were fully cured I blocked the entire engine bay. The blocking was followed up by tack cloth & acetone.
Name:  20160222_153359.jpg
Views: 728
Size:  234.9 KB
Name:  20160222_205418.jpg
Views: 682
Size:  126.1 KB
Name:  20160222_165515.jpg
Views: 715
Size:  143.5 KB
Name:  20160222_165507.jpg
Views: 734
Size:  111.5 KB
Name:  20160222_225736.jpg
Views: 734
Size:  157.0 KB
Name:  20160222_225745.jpg
Views: 720
Size:  105.7 KB
Name:  20160223_105511.jpg
Views: 709
Size:  112.9 KB
Old 06-02-2016, 09:12 PM
  #53  
TECH Enthusiast
Thread Starter
iTrader: (3)
 
Nismo Kid's Avatar
 
Join Date: Dec 2010
Location: San Antonio TX
Posts: 636
Likes: 0
Received 4 Likes on 4 Posts

Default

Name:  20160223_152914.jpg
Views: 693
Size:  128.6 KB
Name:  20160223_152923.jpg
Views: 692
Size:  214.8 KB
Name:  20160223_152933.jpg
Views: 695
Size:  101.4 KB
Name:  20160223_152943.jpg
Views: 722
Size:  96.3 KB
Name:  20160223_162915.jpg
Views: 693
Size:  131.3 KB
Name:  20160223_162924.jpg
Views: 702
Size:  226.9 KB
Name:  20160223_162932.jpg
Views: 716
Size:  213.0 KB
Name:  20160307_091808.jpg
Views: 723
Size:  139.4 KB
Name:  20160307_091819.jpg
Views: 690
Size:  131.4 KB
Name:  20160307_091825.jpg
Views: 712
Size:  137.1 KB
Old 06-02-2016, 09:13 PM
  #54  
TECH Enthusiast
Thread Starter
iTrader: (3)
 
Nismo Kid's Avatar
 
Join Date: Dec 2010
Location: San Antonio TX
Posts: 636
Likes: 0
Received 4 Likes on 4 Posts

Default

Name:  20160307_131848.jpg
Views: 683
Size:  177.6 KB
Name:  20160307_093339.jpg
Views: 716
Size:  98.8 KB

Name:  20160420_205139.jpg
Views: 701
Size:  241.5 KB
Name:  20160420_205245.jpg
Views: 722
Size:  245.1 KB
Name:  20160420_205300.jpg
Views: 715
Size:  253.9 KB
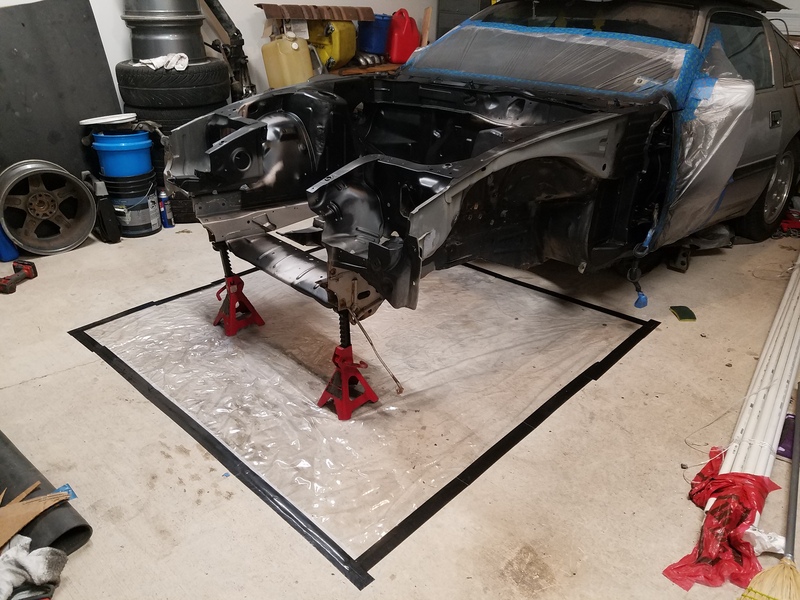
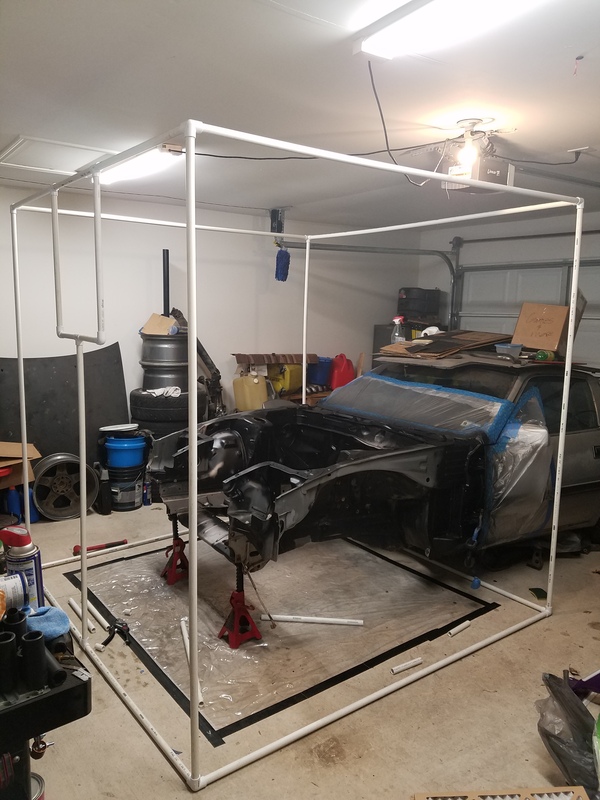
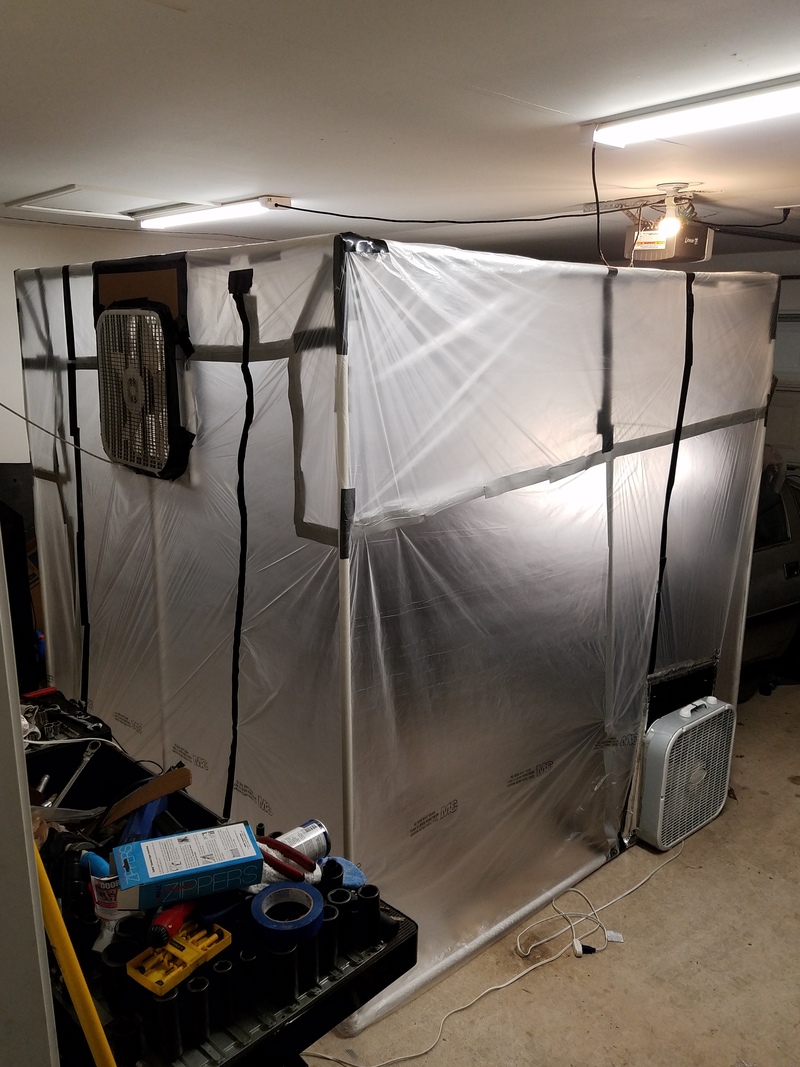
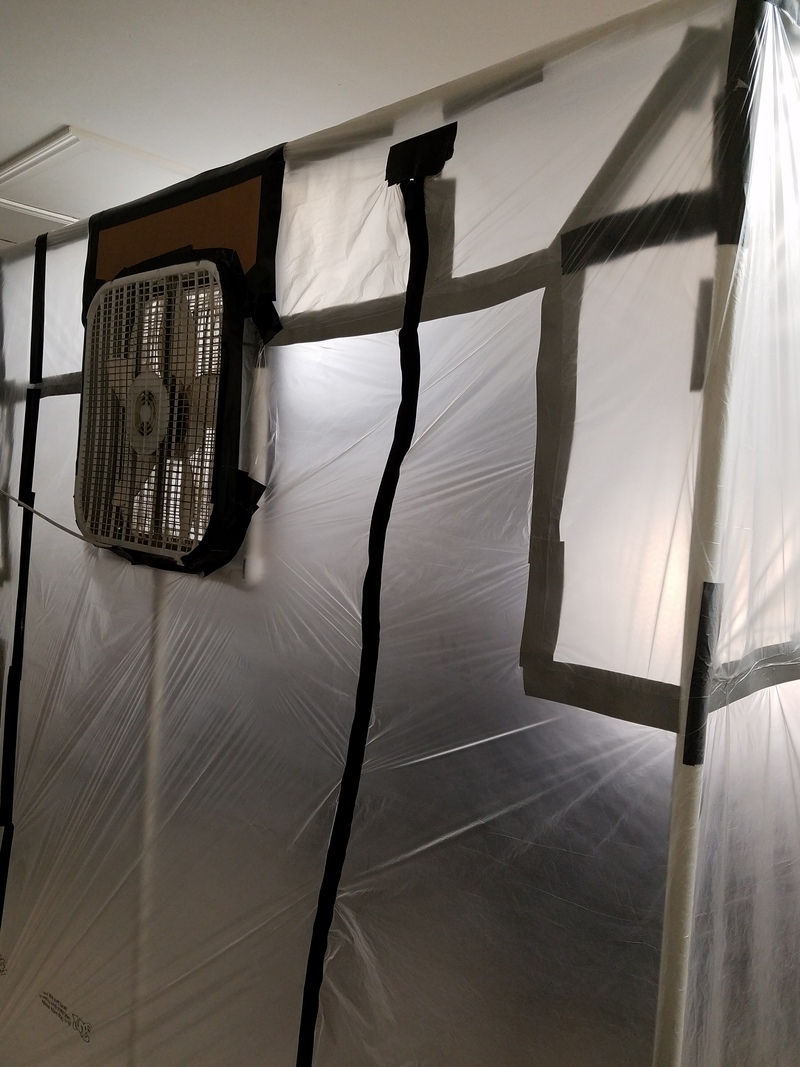
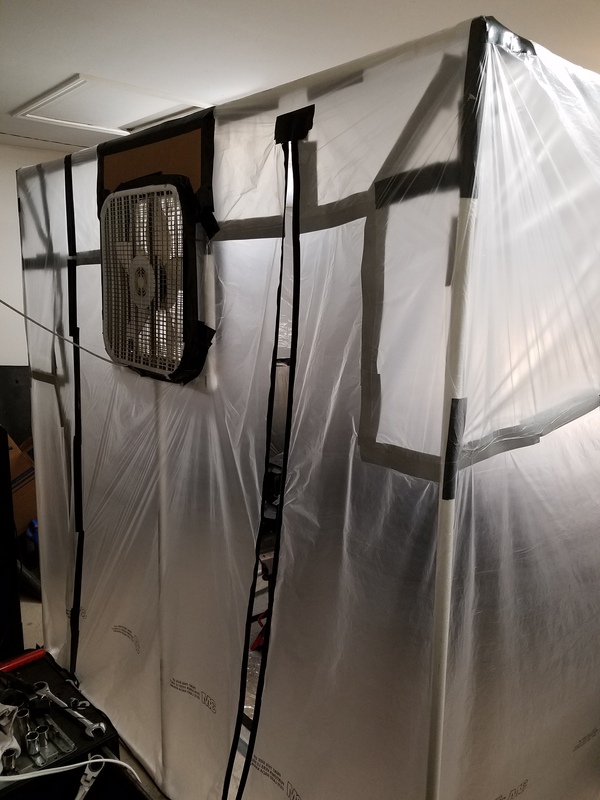
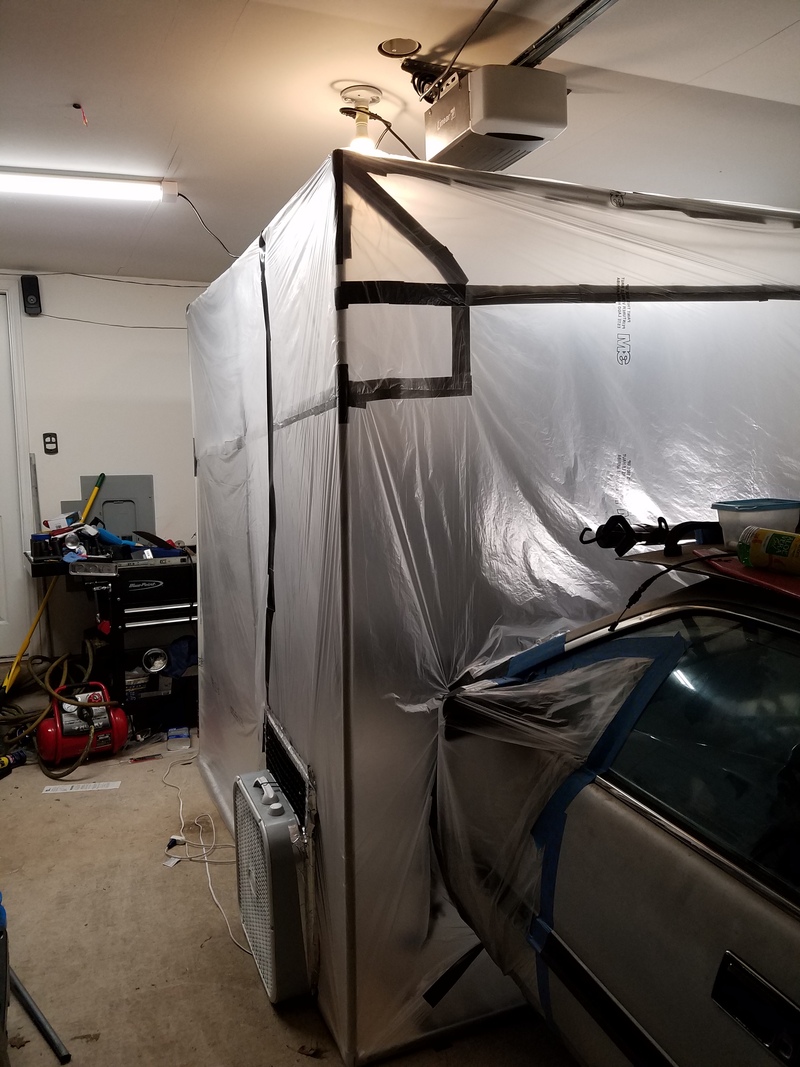
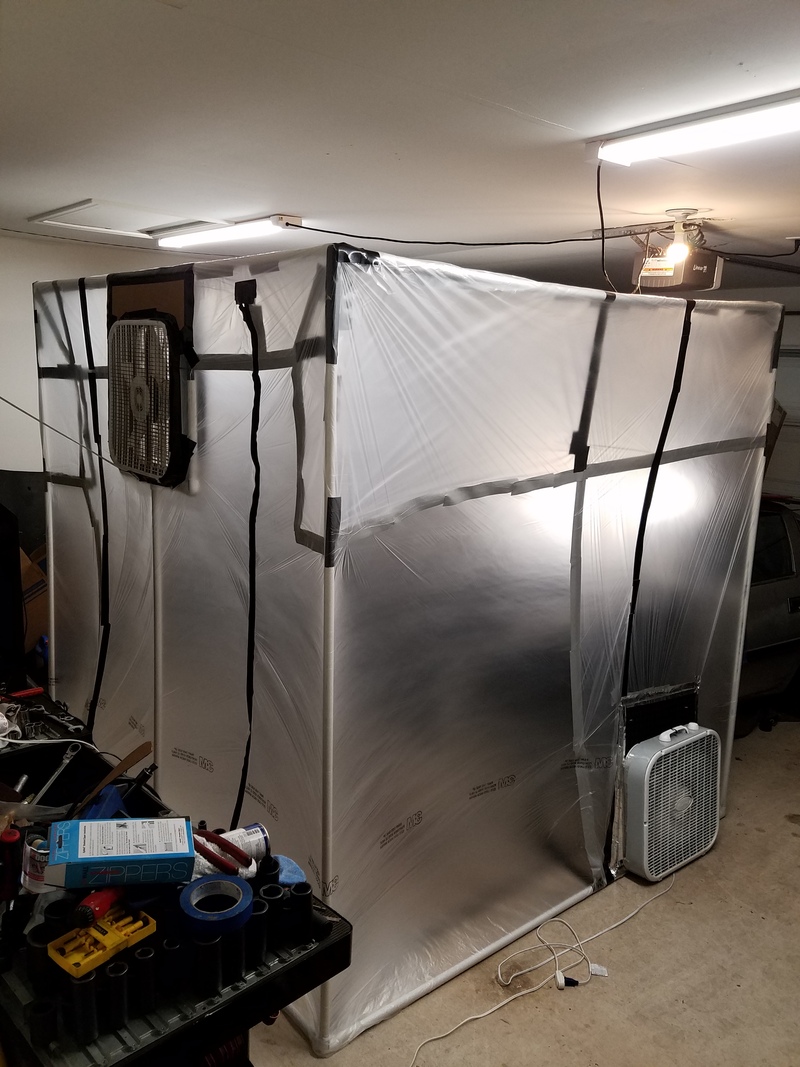
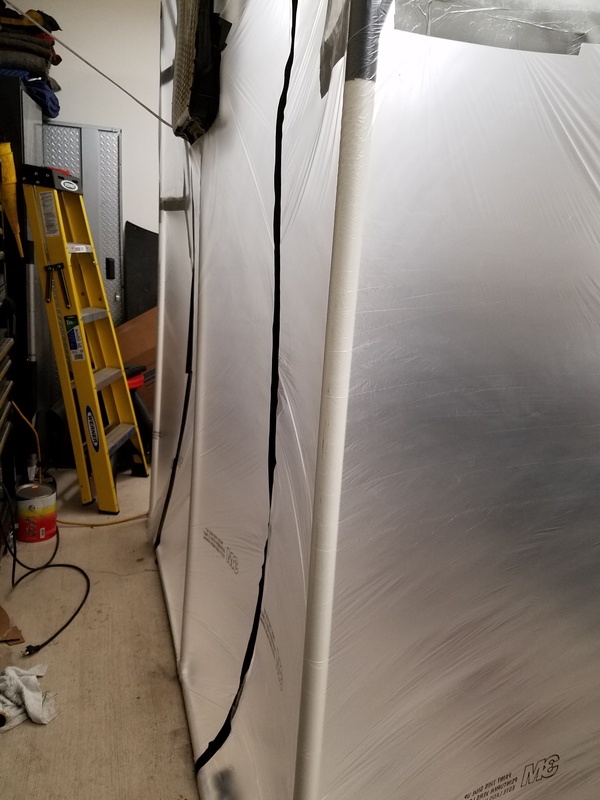
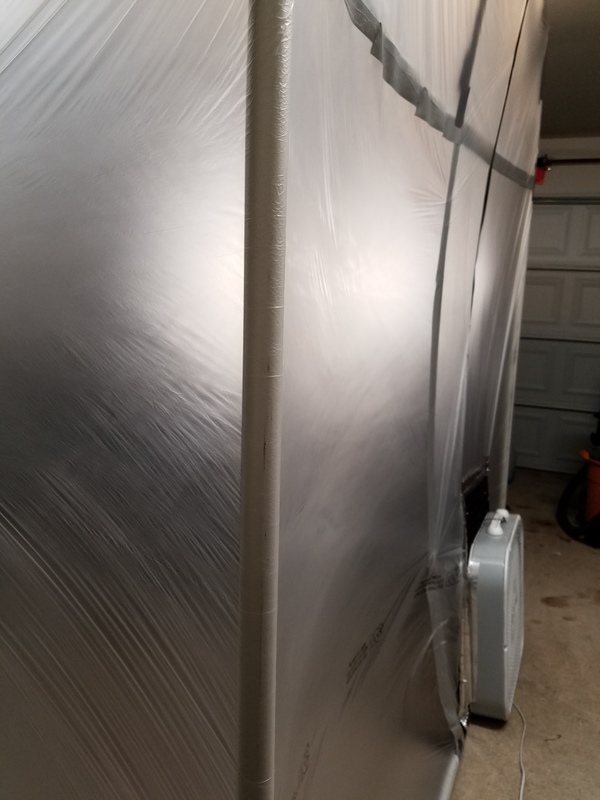
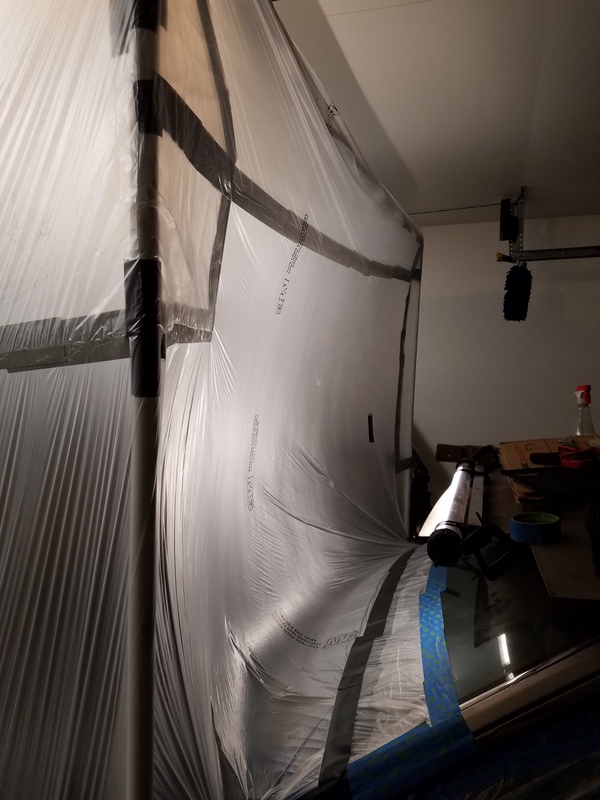
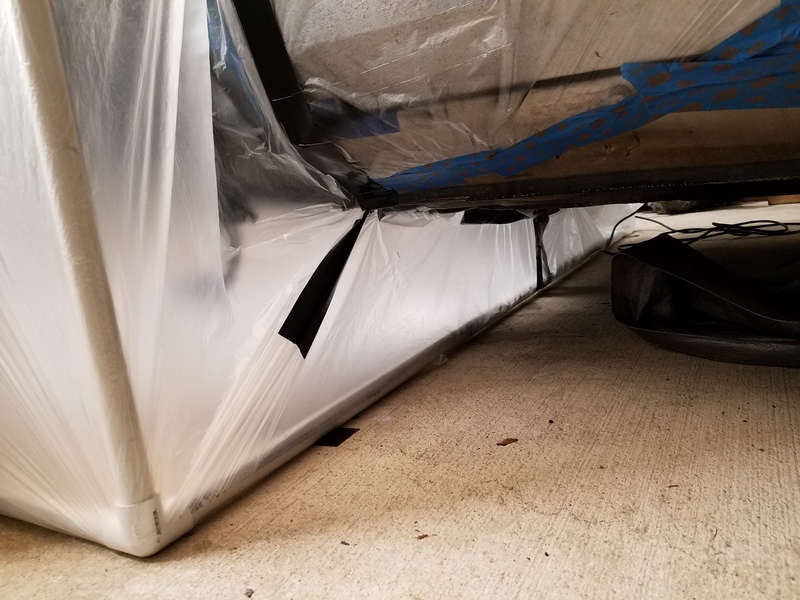
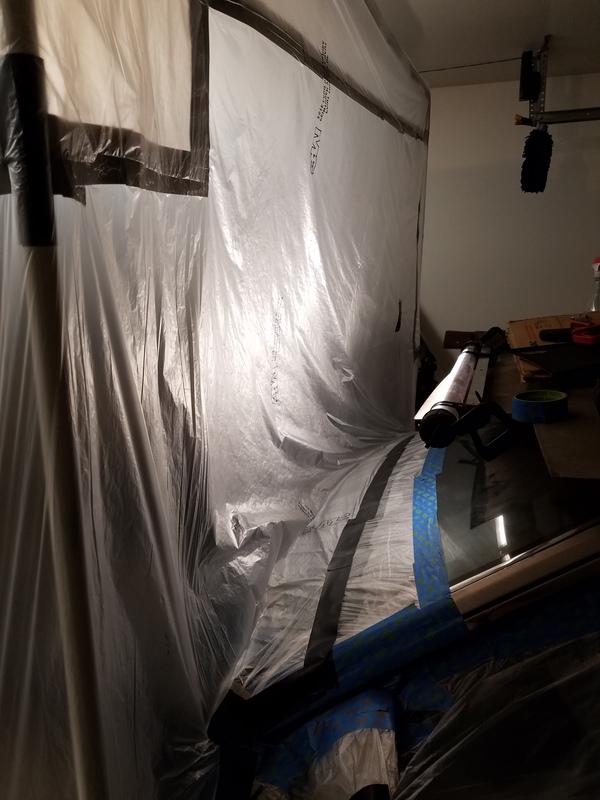
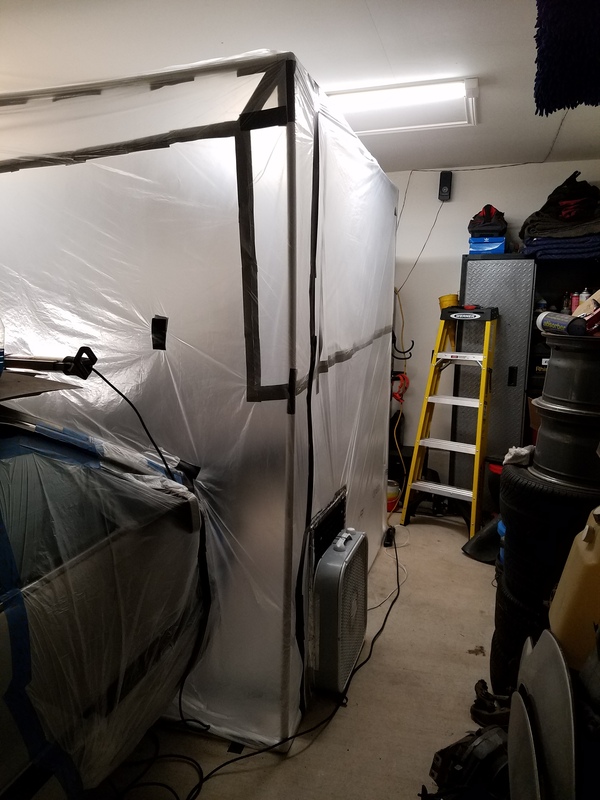
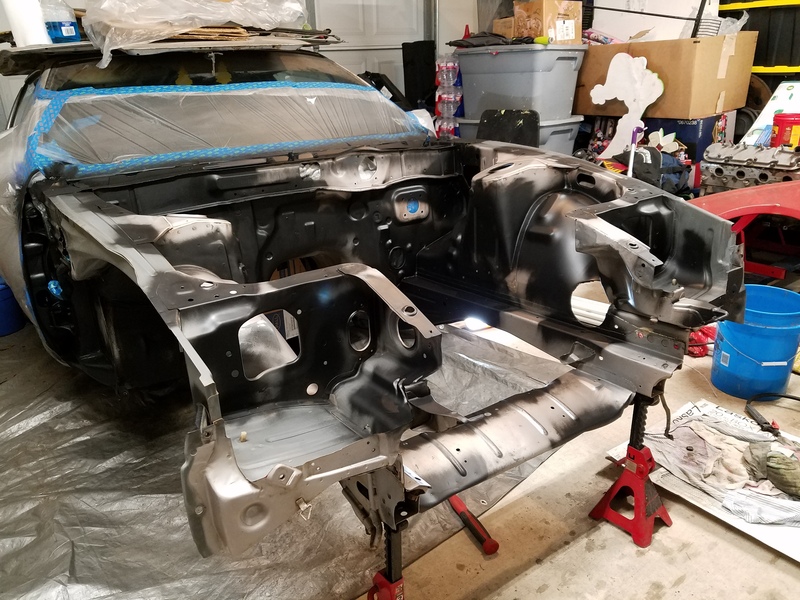
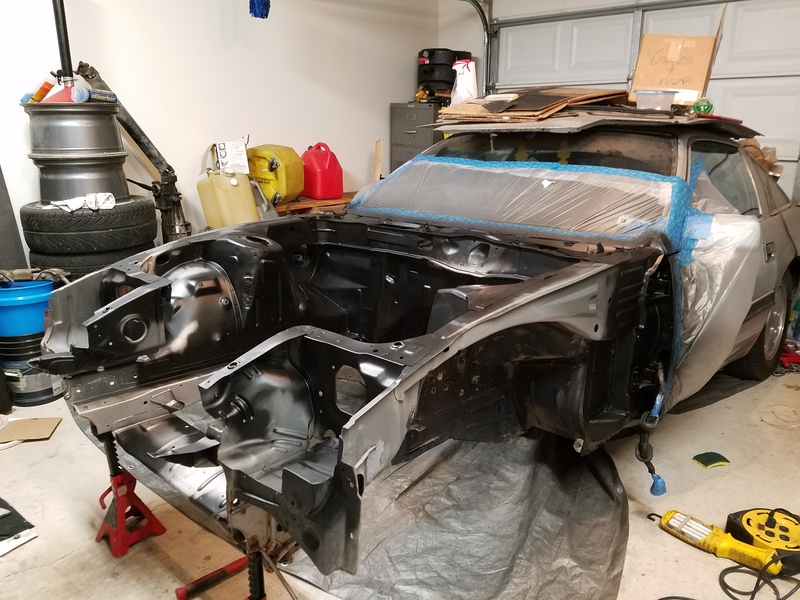
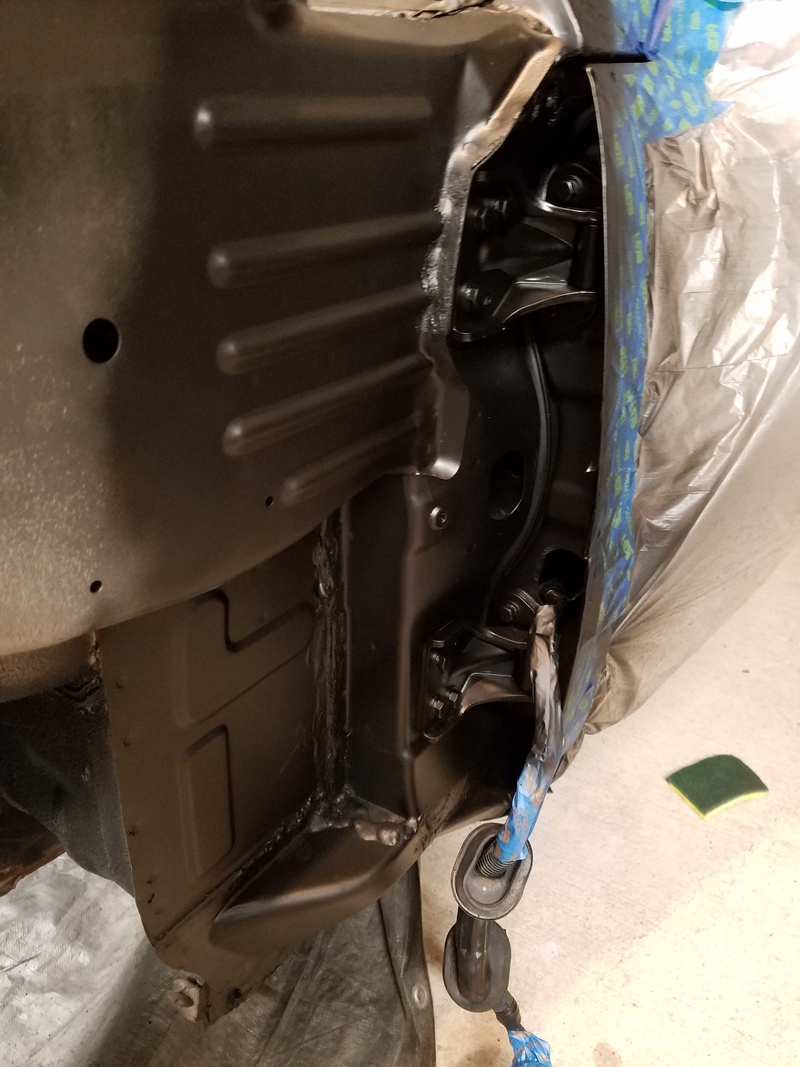
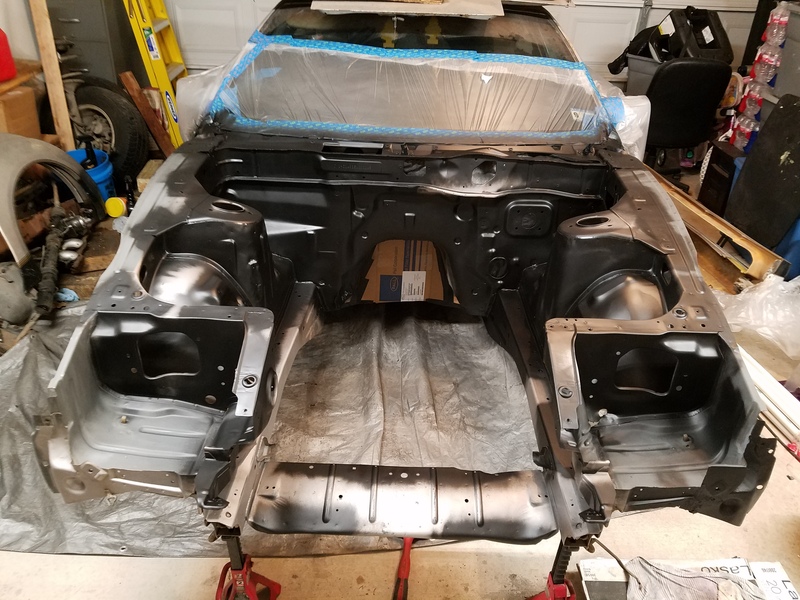
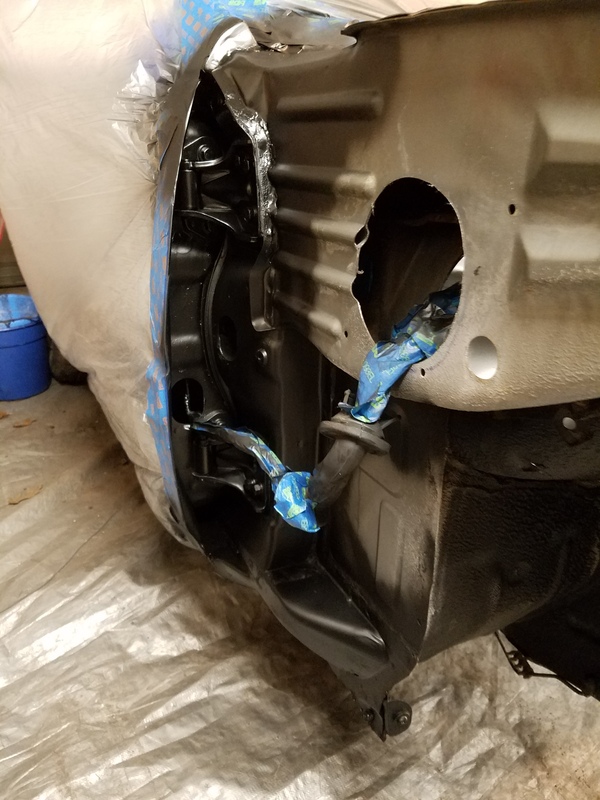
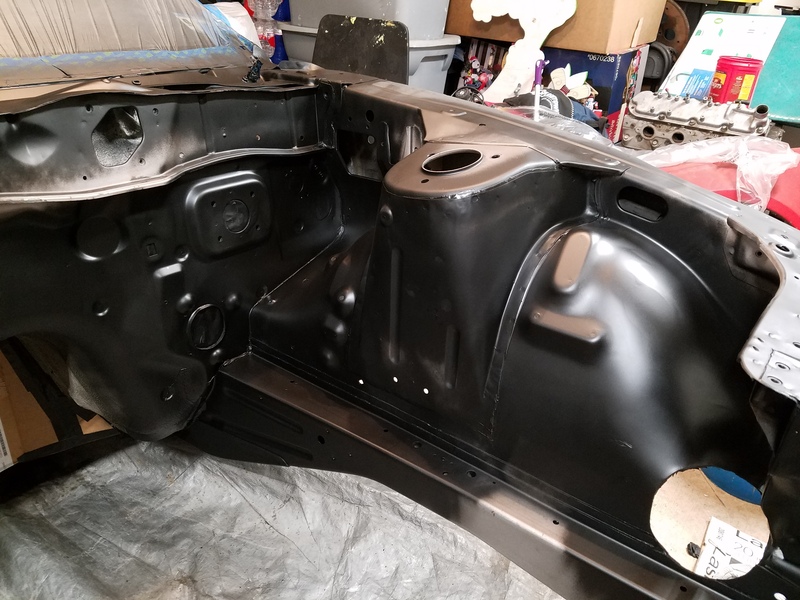
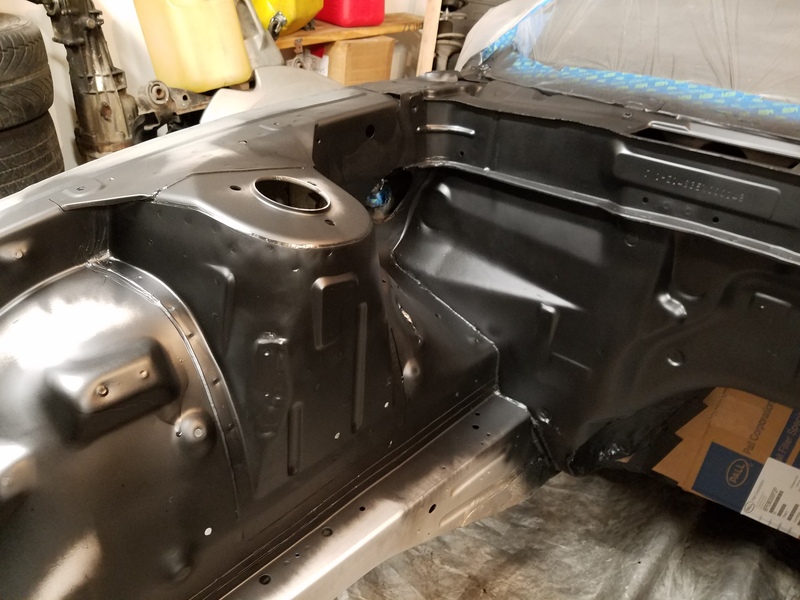
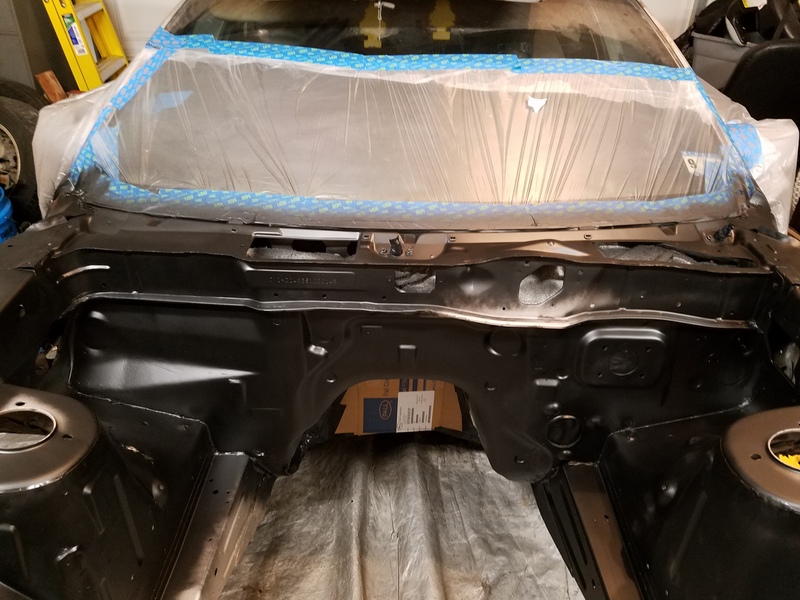
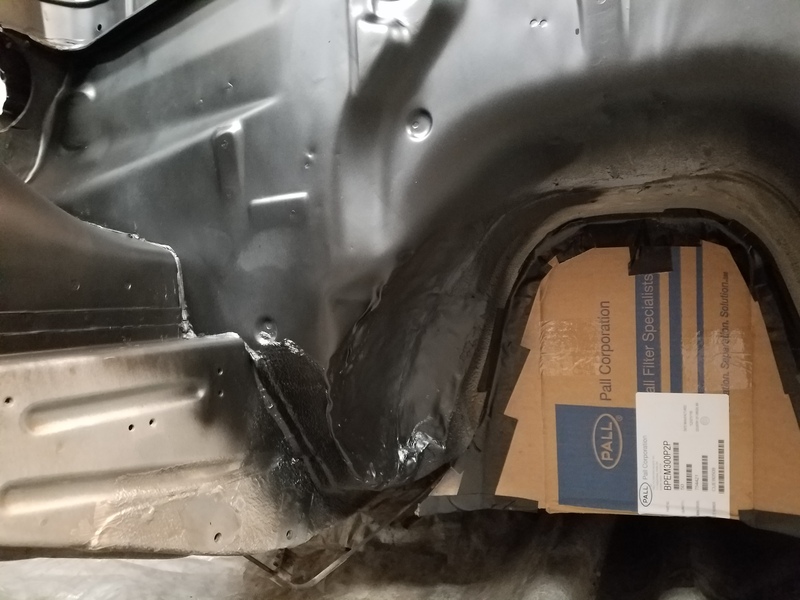
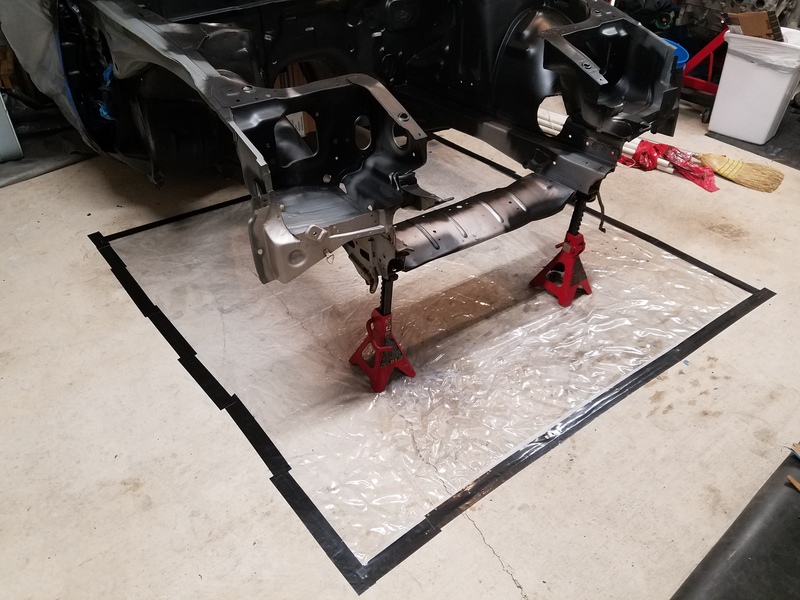
With my engine bay to my settled liking, I began to search for a body shop. I originally was trying to shy away from rattle canning it. Well after spending 2 days searching for a body shop I failed to find any that were interested. There was only 1 body shop that was willing to do it only if I painted the entire car. An entire paint job wasn't in my budget. So that left me with 1 option. Paint the engine bay myself. I came to the conclusion to tackle my wheel wells too. Majority of spray paints tend fail to hold up most against fluids found in an engine bay. I've used engine paint in the past with pretty good success. Then I stumbled on Eastwood's 2k Aero-Spray paints. It's a 2-component coating, without the paint gun. Figured I'd give these try, so I purchased 6 cans of Eastwood's 2K Ceramic Underhood Black Aerosol & Eastwood's 2K AeroSpray High Build Urethane Primer Aerosol. I also ordered 2 cans of Eastwood's Black Rust Encapsulator. With all my paint ordered I moved onto constructing a temporary spray booth inside my garage. Ideally most prefer a positive pressure spray booth. Due to the fact it is less likely to draw in contaminates. But I chose to do a negative pressure spray booth. I personally felt it kept the overspray to a lower minimum over the positive pressure booth. My booth was very well sealed & I never had an issue with contaminates entering the booth. Here's what I used

12 sticks 3/4" PVC for my frame cut them down to 7'
3 20" regular box fans (A big no no I know)
6 20"x25" Regular air filters (enough for 2 sets of changes)
2 20"x25" Activated charcoal air filters
8 3/4" 90°corners/3 way T
3 3/4" T fittings
2 3/4" 90° fittings
1 old shower curtain for the floor
10 rolls of gorilla glue duct tape
1 tarp zipper
2 rolls of painters tape
3M tear-resistant plastic sheeting(body shops use it. I used it for my walls & ceiling.

This is what it looked like all assembled.
Name:  20160421_104433.jpg
Views: 698
Size:  217.3 KB
Name:  20160421_104458.jpg
Views: 731
Size:  239.8 KB
Name:  20160421_142121.jpg
Views: 679
Size:  222.6 KB
Name:  20160421_214645.jpg
Views: 687
Size:  328.6 KB
Name:  20160421_214712.jpg
Views: 692
Size:  298.3 KB
Name:  20160421_214924.jpg
Views: 713
Size:  192.8 KB
Name:  20160421_214802.jpg
Views: 683
Size:  316.6 KB
Old 06-02-2016, 09:13 PM
  #55  
TECH Enthusiast
Thread Starter
iTrader: (3)
 
Nismo Kid's Avatar
 
Join Date: Dec 2010
Location: San Antonio TX
Posts: 636
Likes: 0
Received 4 Likes on 4 Posts

Default

Name:  20160421_214833.jpg
Views: 705
Size:  202.9 KB
Name:  20160421_214841.jpg
Views: 684
Size:  192.7 KB
Name:  20160421_215009.jpg
Views: 683
Size:  202.1 KB
Old 06-02-2016, 09:13 PM
  #56  
TECH Enthusiast
Thread Starter
iTrader: (3)
 
Nismo Kid's Avatar
 
Join Date: Dec 2010
Location: San Antonio TX
Posts: 636
Likes: 0
Received 4 Likes on 4 Posts

Default

With the fans on.
Name:  20160421_215104.jpg
Views: 680
Size:  308.6 KB
Name:  20160421_215113.jpg
Views: 689
Size:  187.2 KB
Name:  20160421_215121.jpg
Views: 692
Size:  154.2 KB
Name:  20160421_215131.jpg
Views: 718
Size:  181.9 KB

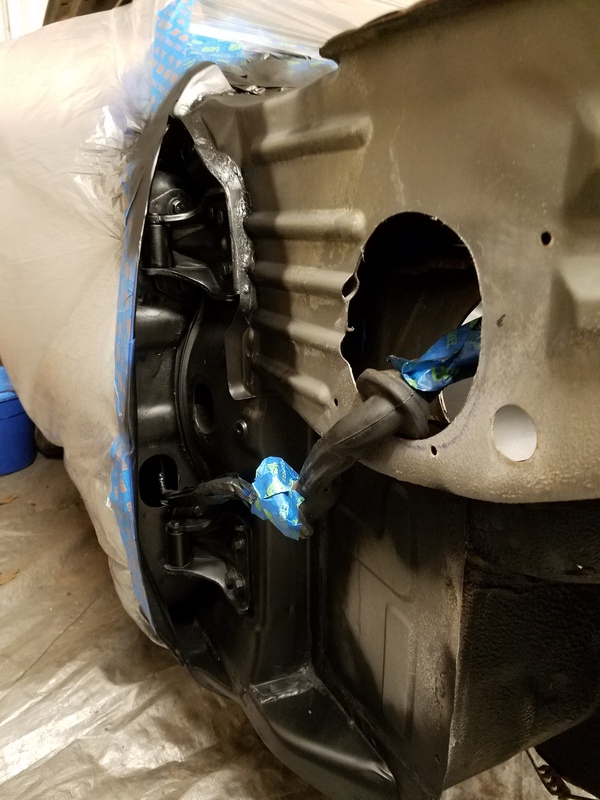
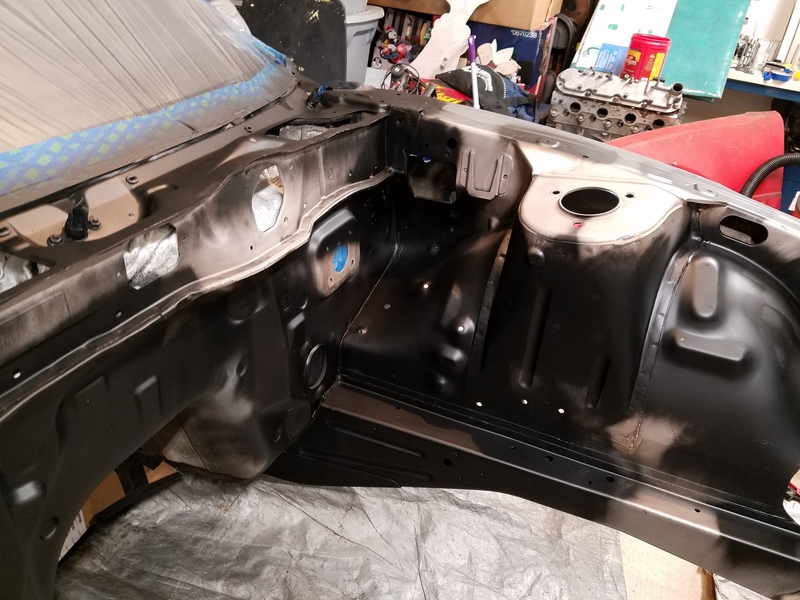
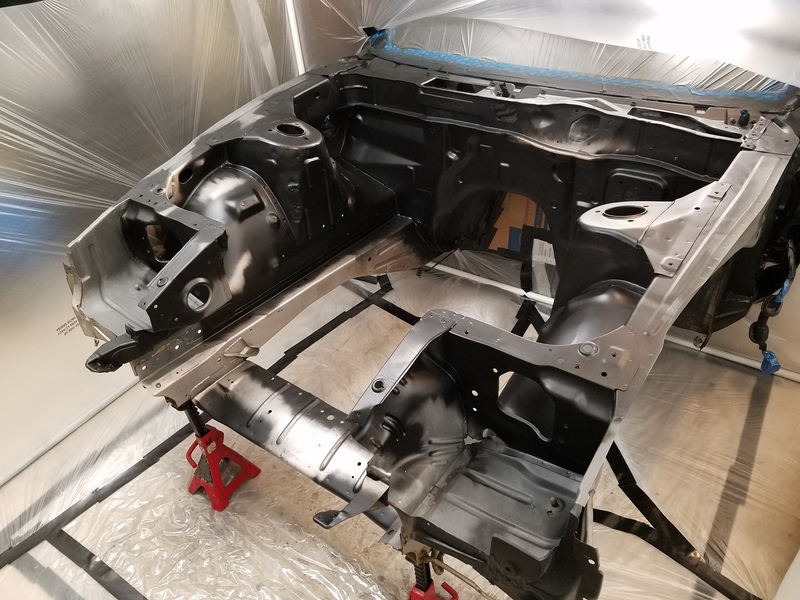
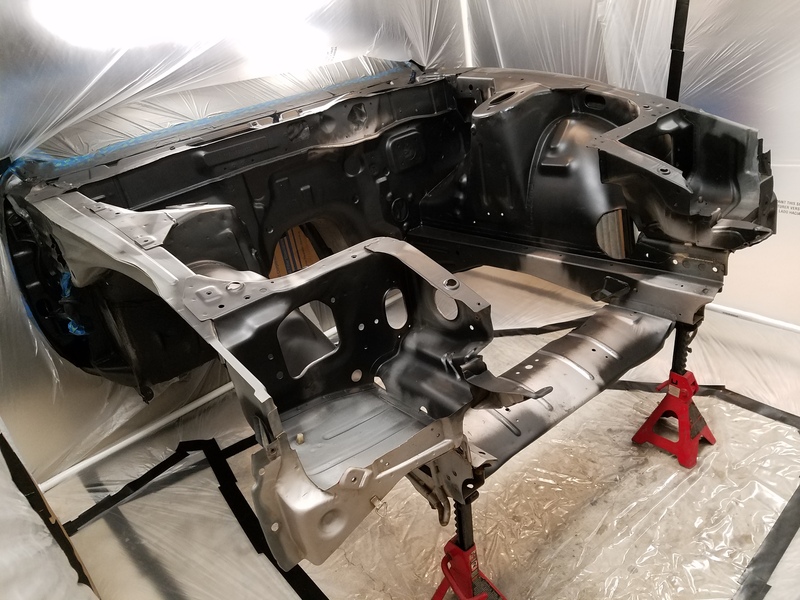
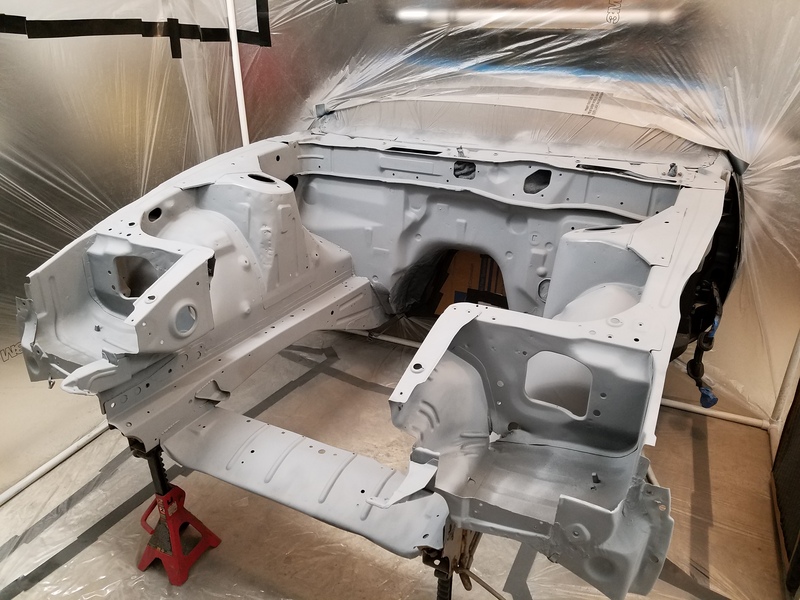
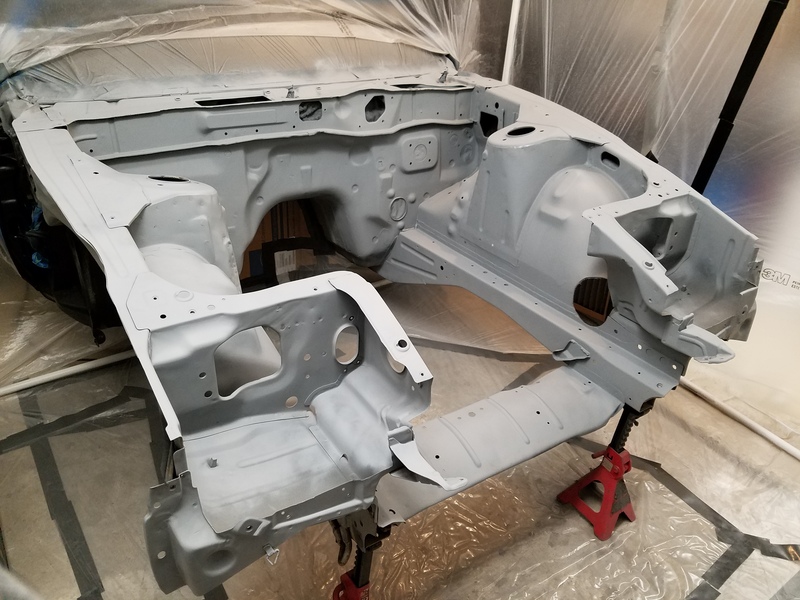
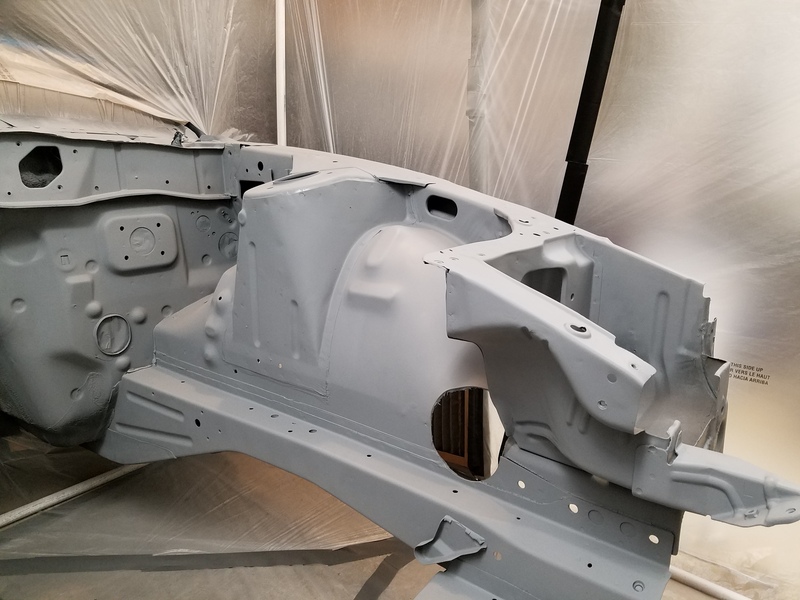
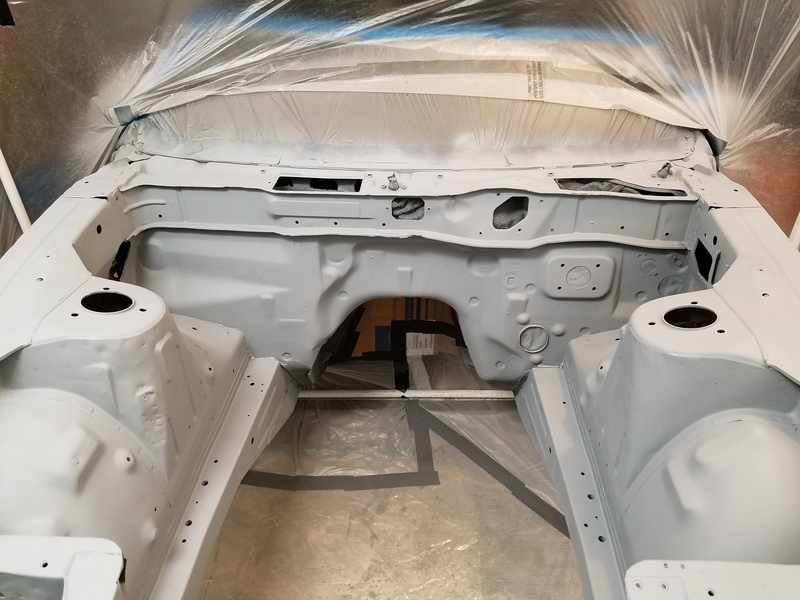
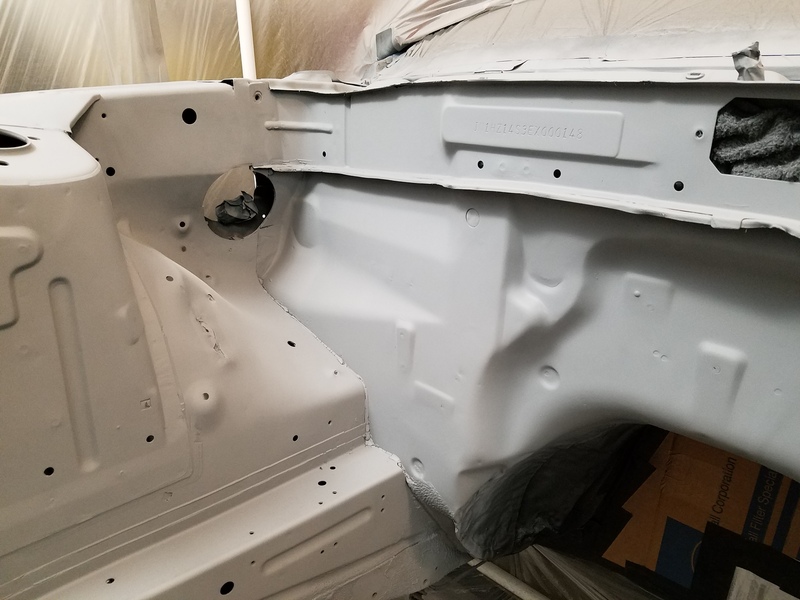
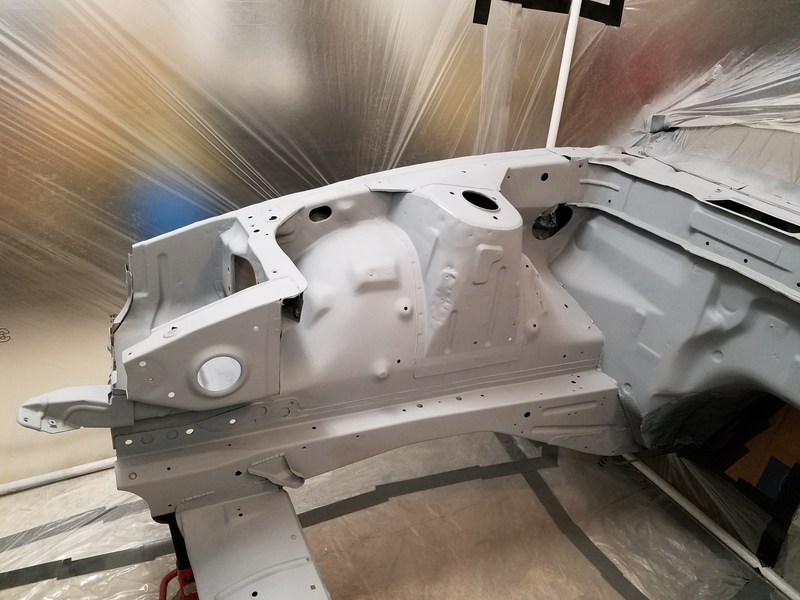
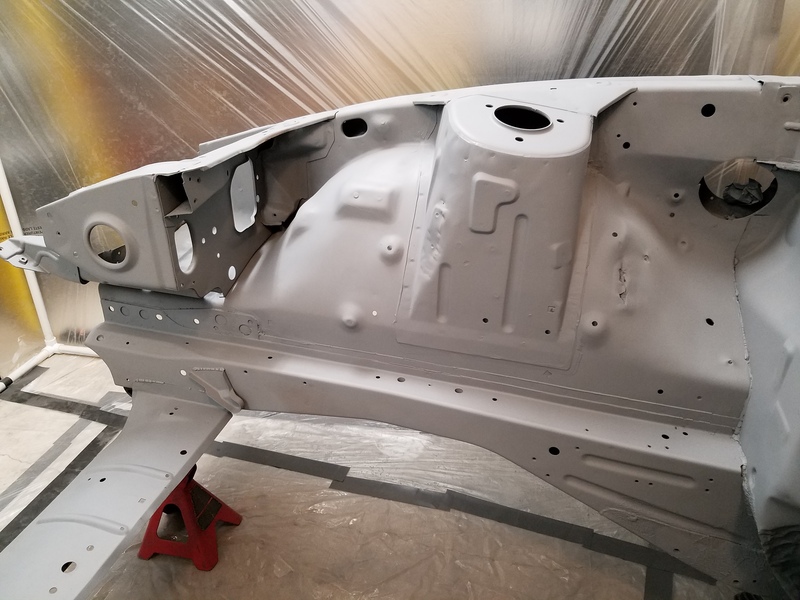
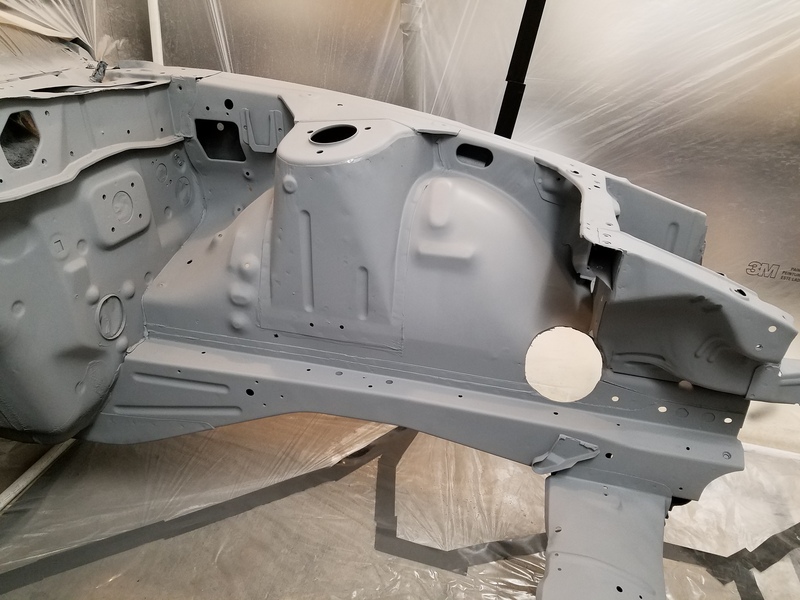
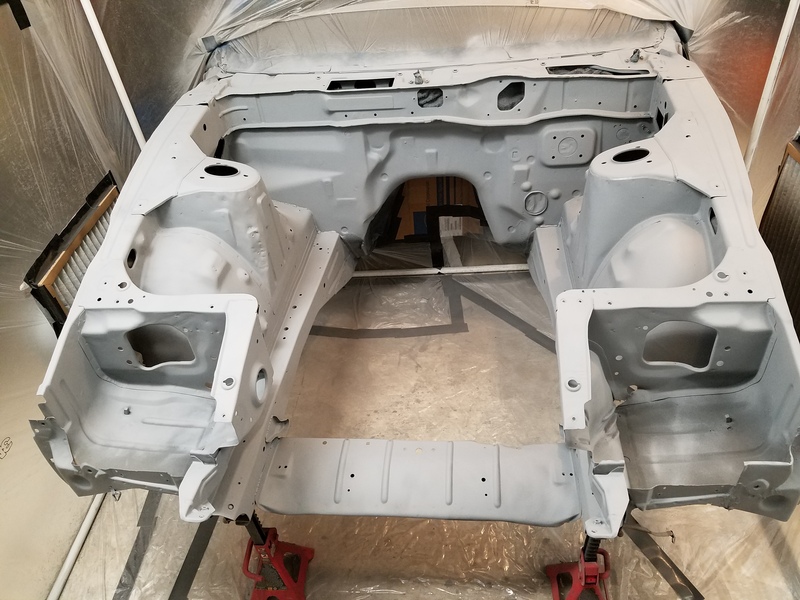
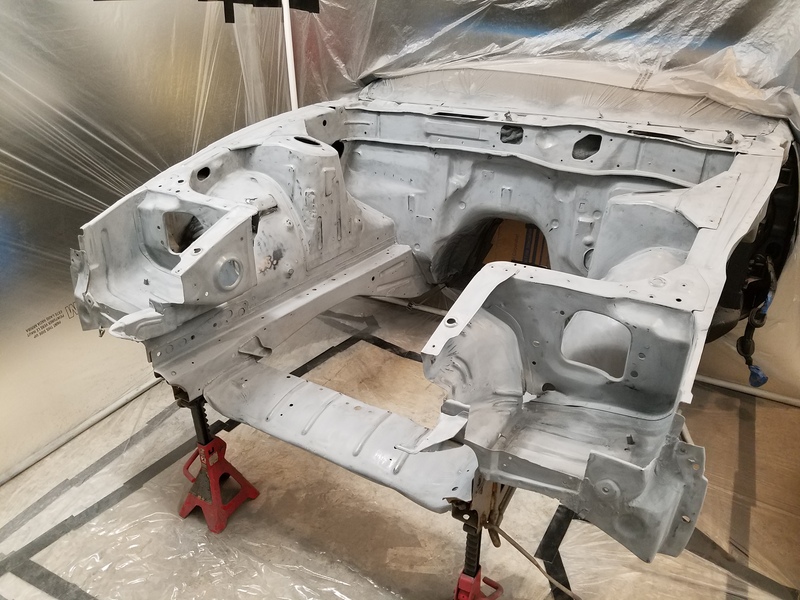
These are the steps I took to paint my engine bay. Note steps 1-3 were prior to the booth being constructed

(1) Used wire brushes & 80 grit to knock all surface rust away.

(2) Feathered bare metal areas back towards factory paint with 220 grit.

(3) Scuffed all paint with red Scotch Brite

(4) Prepped surface with tack cloth & acetone

(5) Coated all bare metal with 2 coats of Rust Encapsulator. Waited 1hr between coats. Allowed 6-8hrs before Primer.

(6) Prepped surface with tack cloth

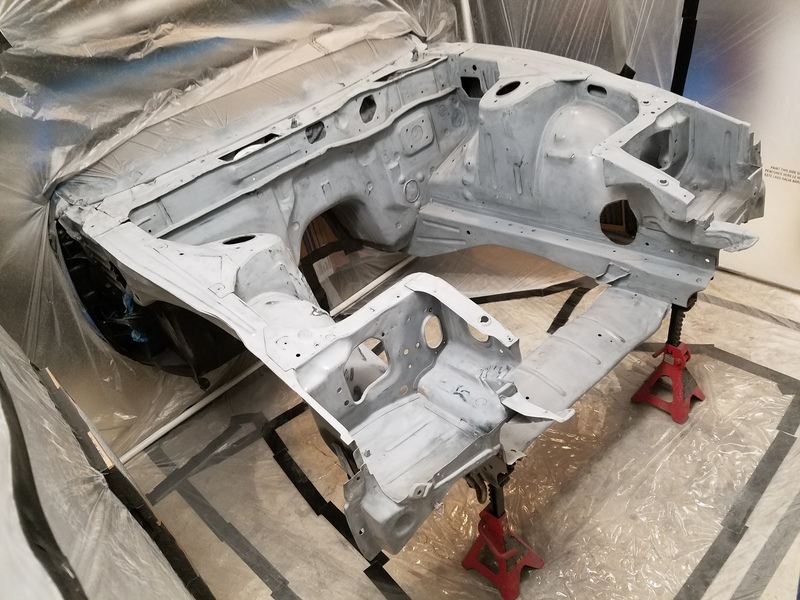
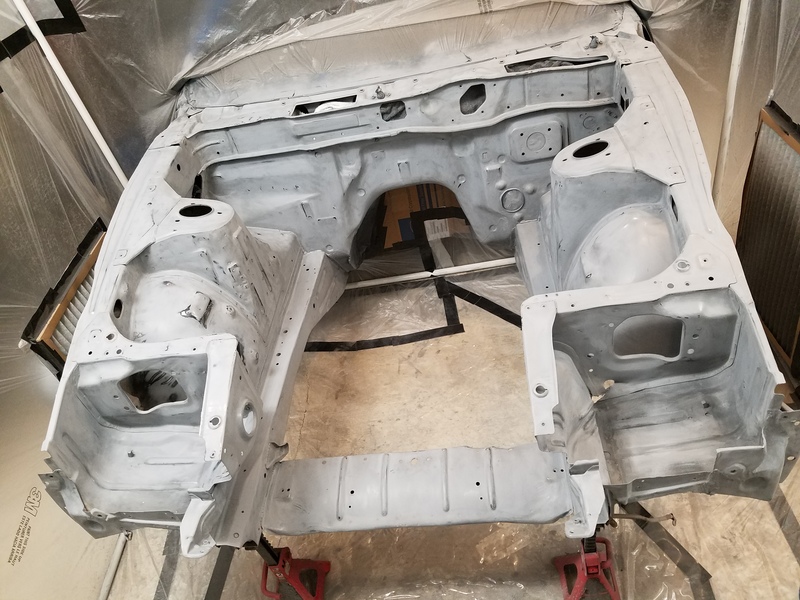
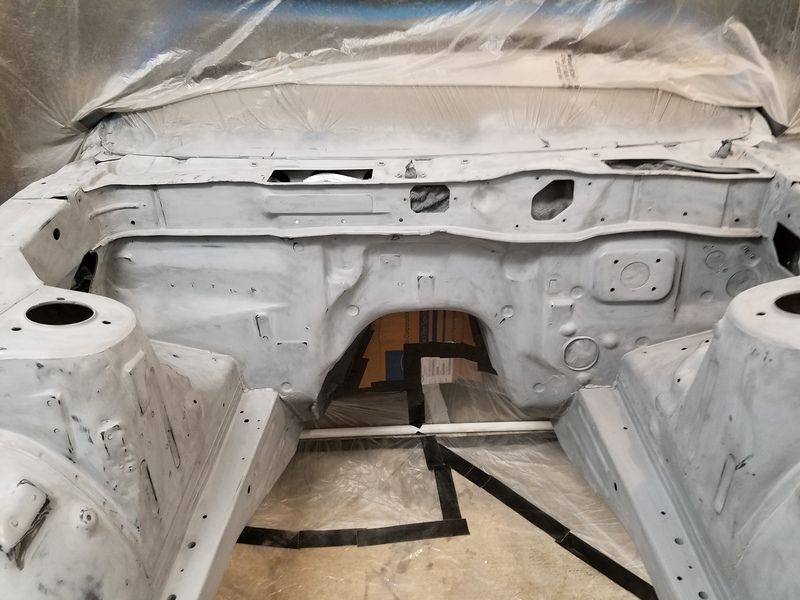
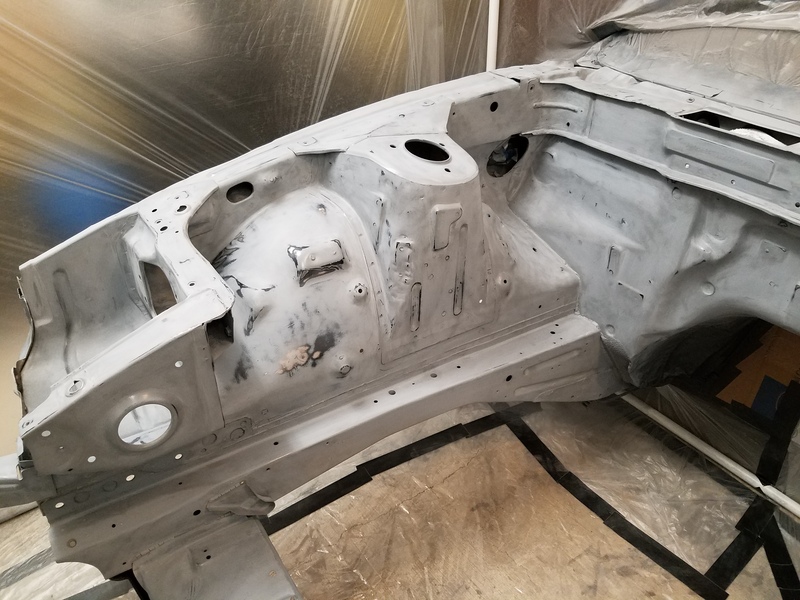
(7) Coated engine bay with Eastwood's 2K AeroSpray High Build Urethane Primer.

(8) Waited 3-4hrs & knocked down highs with 400 grit.

(9) Prepped surface with tack cloth

(10) Sprayed 3 coats of Eastwood's 2K Ceramic Underhood Black Aerosol. Waited 2-5 minutes between coats.

Scuffed the entire engine bay
Name:  20160420_230716.jpg
Views: 675
Size:  251.6 KB
Name:  20160420_230724.jpg
Views: 683
Size:  255.4 KB
Name:  20160420_230741.jpg
Views: 683
Size:  245.4 KB
Name:  20160420_230802.jpg
Views: 667
Size:  252.8 KB
Old 06-02-2016, 09:14 PM
  #57  
TECH Enthusiast
Thread Starter
iTrader: (3)
 
Nismo Kid's Avatar
 
Join Date: Dec 2010
Location: San Antonio TX
Posts: 636
Likes: 0
Received 4 Likes on 4 Posts

Default

Sprayed the 1st coat of Rust Encapsulator.
Name:  20160421_002823.jpg
Views: 669
Size:  253.9 KB
Name:  20160421_002829.jpg
Views: 663
Size:  325.4 KB
Name:  20160421_002833.jpg
Views: 653
Size:  217.0 KB
Name:  20160421_002847.jpg
Views: 677
Size:  261.6 KB
Name:  20160421_002858.jpg
Views: 670
Size:  267.3 KB
Name:  20160421_002906.jpg
Views: 654
Size:  214.3 KB
Old 06-02-2016, 09:14 PM
  #58  
TECH Enthusiast
Thread Starter
iTrader: (3)
 
Nismo Kid's Avatar
 
Join Date: Dec 2010
Location: San Antonio TX
Posts: 636
Likes: 0
Received 4 Likes on 4 Posts

Default

Name:  20160421_002906.jpg
Views: 664
Size:  214.3 KB[/URL]
Name:  20160421_002919.jpg
Views: 675
Size:  224.7 KB
Here's the 2nd coat.
Name:  20160421_010951.jpg
Views: 657
Size:  237.6 KB
Name:  20160421_011001.jpg
Views: 659
Size:  304.1 KB
Name:  20160421_011017.jpg
Views: 660
Size:  251.3 KB
Name:  20160421_011041.jpg
Views: 657
Size:  220.7 KB
Name:  20160421_011057.jpg
Views: 658
Size:  222.1 KB
Name:  20160421_011104.jpg
Views: 657
Size:  189.3 KB
Name:  20160421_011132.jpg
Views: 652
Size:  208.4 KB
Name:  20160421_011143.jpg
Views: 649
Size:  162.4 KB
Name:  20160421_215235.jpg
Views: 654
Size:  235.2 KB
Name:  20160421_215310.jpg
Views: 656
Size:  226.5 KB
Old 06-02-2016, 09:15 PM
  #59  
TECH Enthusiast
Thread Starter
iTrader: (3)
 
Nismo Kid's Avatar
 
Join Date: Dec 2010
Location: San Antonio TX
Posts: 636
Likes: 0
Received 4 Likes on 4 Posts

Default

Sprayed Eastwood's 2k High Build Urethane Primer Aerosol
Name:  20160421_234612.jpg
Views: 661
Size:  215.2 KB
Name:  20160421_234656.jpg
Views: 653
Size:  212.4 KB
Name:  20160421_234719.jpg
Views: 648
Size:  172.6 KB
Name:  20160421_234731.jpg
Views: 647
Size:  190.4 KB
Name:  20160421_234740.jpg
Views: 648
Size:  157.5 KB
Name:  20160421_234753.jpg
Views: 648
Size:  191.4 KB
Name:  20160421_234804.jpg
Views: 655
Size:  187.2 KB
Name:  20160421_234820.jpg
Views: 661
Size:  178.9 KB
Name:  20160421_234859.jpg
Views: 659
Size:  212.0 KB
Old 06-02-2016, 09:15 PM
  #60  
TECH Enthusiast
Thread Starter
iTrader: (3)
 
Nismo Kid's Avatar
 
Join Date: Dec 2010
Location: San Antonio TX
Posts: 636
Likes: 0
Received 4 Likes on 4 Posts

Default

Primer knocked down.

Name:  20160422_113014.jpg
Views: 655
Size:  229.0 KB
Name:  20160422_113152.jpg
Views: 647
Size:  240.8 KB
Name:  20160422_113122.jpg
Views: 651
Size:  230.0 KB
Name:  20160422_113206.jpg
Views: 652
Size:  206.8 KB
Name:  20160422_113211.jpg
Views: 649
Size:  198.1 KB
Name:  20160422_113215.jpg
Views: 639
Size:  216.3 KB


Quick Reply: My Turbo LSX Z31 Build.


All times are GMT -5. The time now is 01:40 AM.