When you click on links to various merchants on this site and make a purchase, this can result in this site earning a commission. Affiliate programs and affiliations include, but are not limited to, the eBay Partner Network.
This one is the Street Twin ST-trim rated at 1595 ft-lbs. I've been happy with it so far. The pedal effort is a little more than stock and it engages nicely.
The charge pipe would have been 100% complete but a friend had a leftover Vibrant HD clamp assembly that was just begging to be used so I starting cutting it in on Sunday before church.
The work this weekend consisted of mocking up and cutting the motor plate for the passenger side. It will be fairly easy to work it out except for the A/C compressor. I'm still 50/50 on whether or not to try and fit it in there.
I also spent some time on the turbo drain line for the driver side. It took longer than planned but I think this will be the solution. The line will need to be removed one last time in order to slightly enlarge the openings in the frame.
Do you ever wish you could clone yourself a few times and get triple the work done?
I was able to get the ECU mount fabbed up this weekend. It consists of some 1/8" aluminum plate bolted to the frame. I strategically placed a 3/8" aluminum rod to stiffen it up and hold the weight of the ECU.
Last week, I was able to begin welding on the mounts for the motor plate.
The cradle was then dropped one last time for final welding of the mounts to the frame, balancer installation, and a general cleaning.
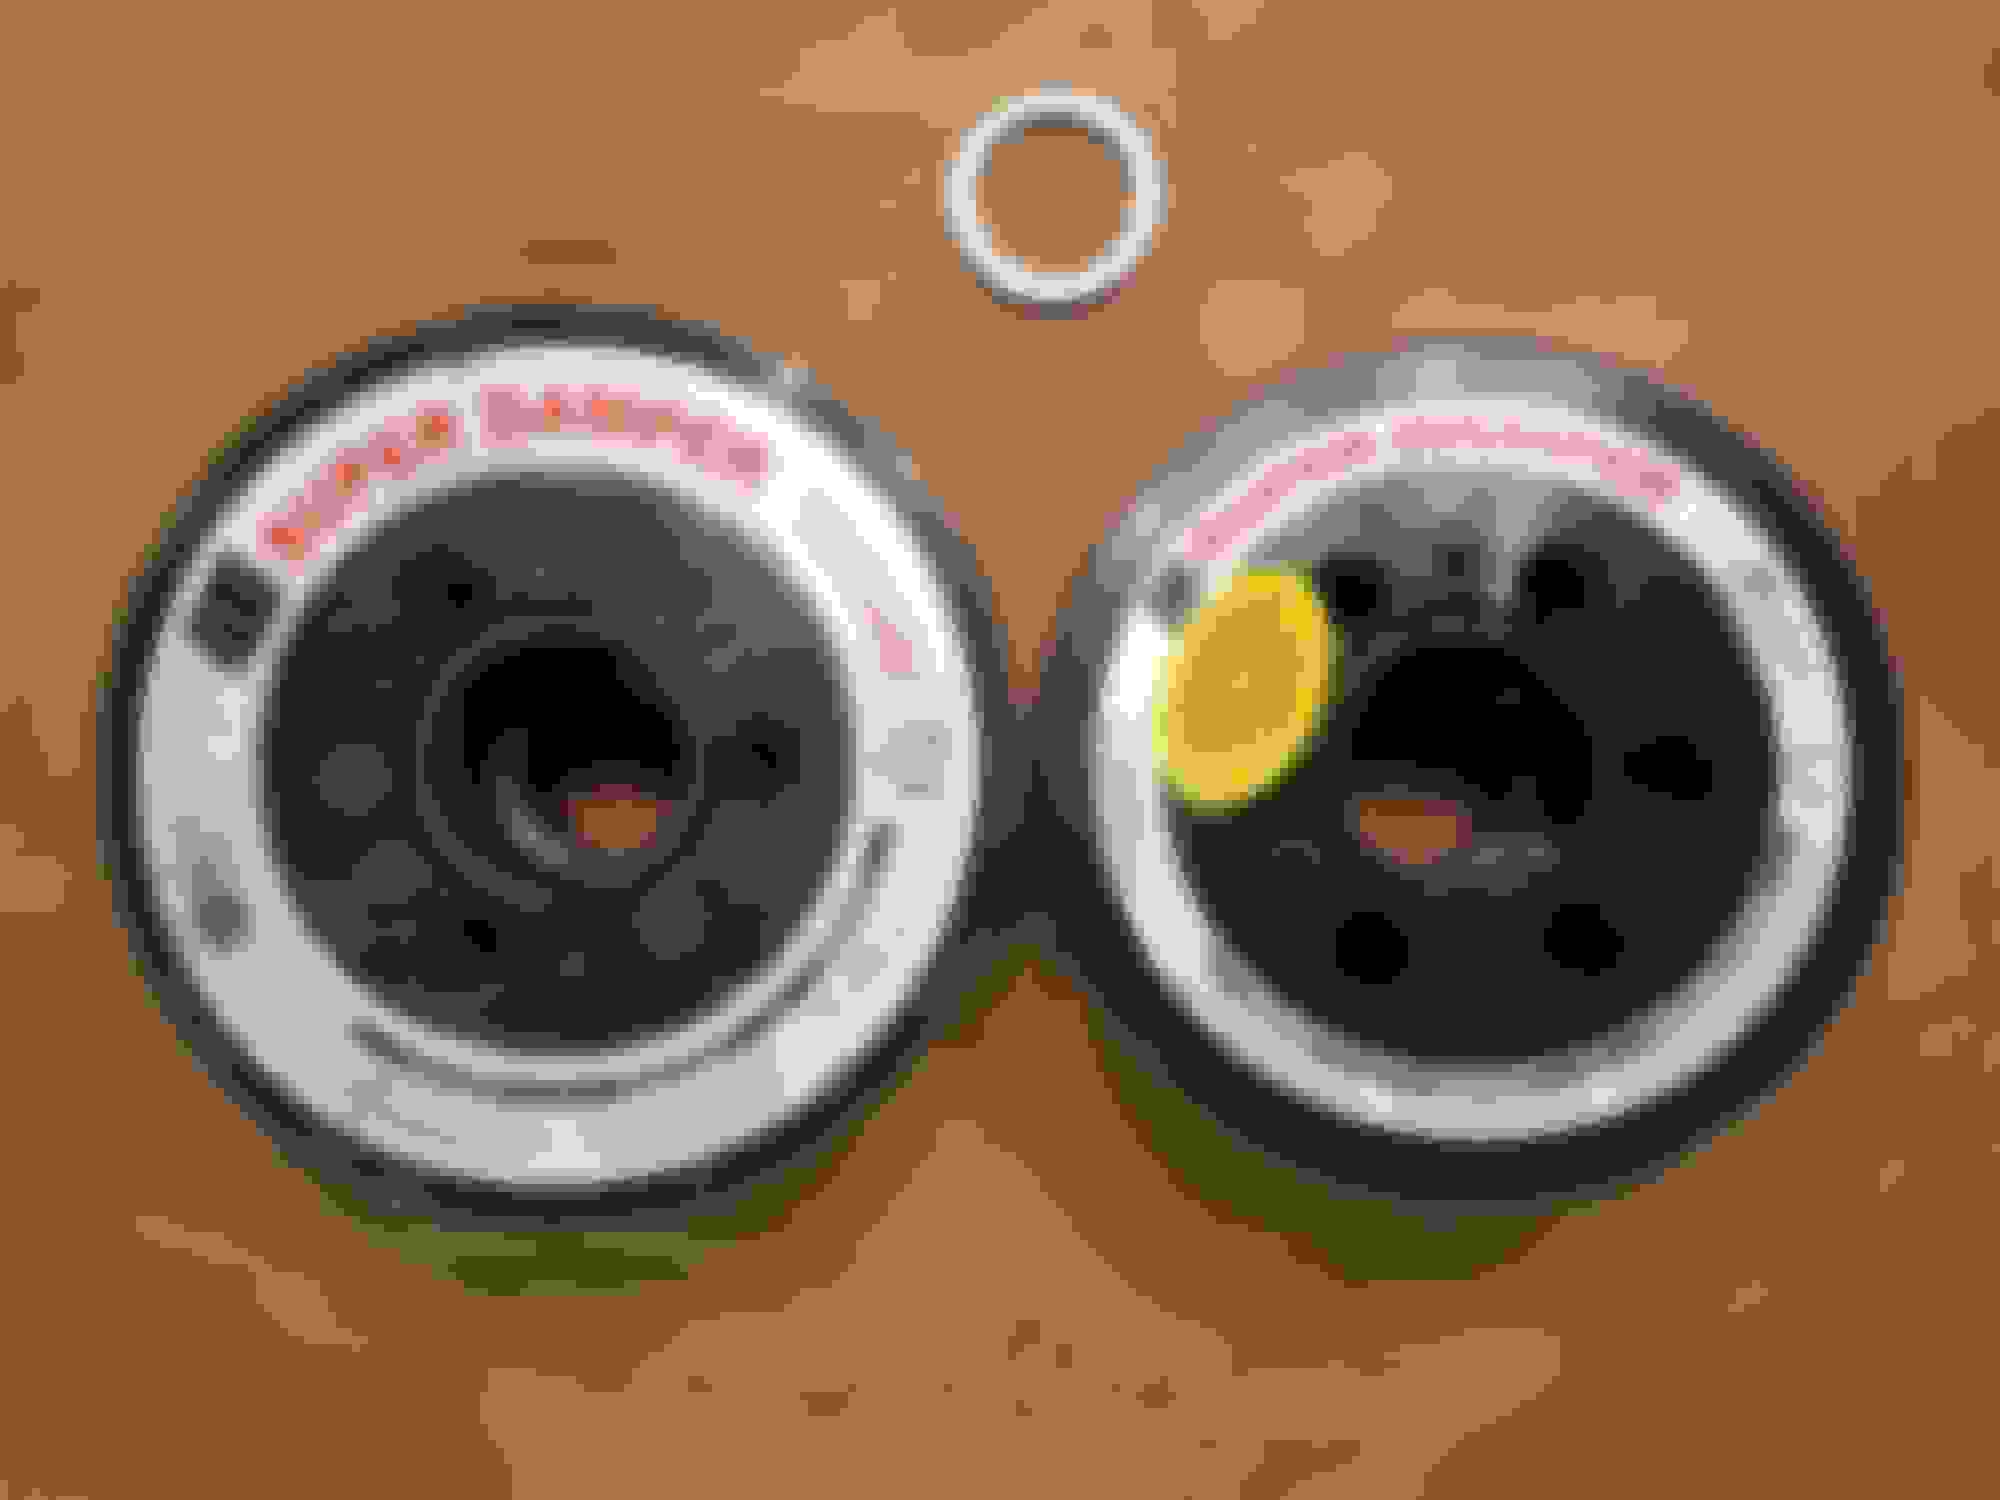
Here is the 10% under-drive pulley compared to the normal diameter ATI. You can also see the 1/4" spacer ring required due to the 1/4" thick motor plate.
I couldn't stand how grimy the cradle was and how my hands ended up dirty any time I had to mess with it. Today I embarked on the mission to do something about it. I ended up removing almost everything (rack, brakes, oil cooler, coil-overs, and sway bar) but the effort was worth it. The Eagle One Etching Mag cleaner was a real time saver.


 04-10-2018, 01:57 PM