
Dual Pump Install w/ Pics. Tutorial.
 02-07-2013, 08:53 PM
#1

So i redid the dual pumps in my SS. I tried to keep this as clean and OEM as possible.
I installed two Walbro 340's tied into an 8an braided stainless hose. I've added instructions below:
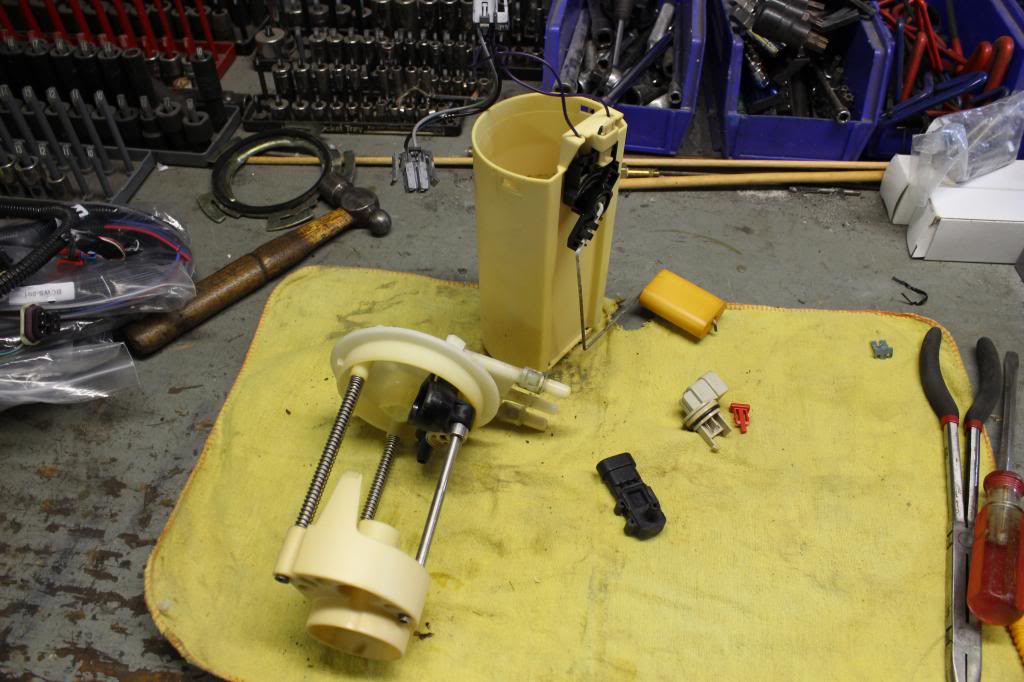
So we start with a stock 99+ fuel bucket assembly. It needs to be stripped of the Evap sensor (save for later) the pump, and the regulator.
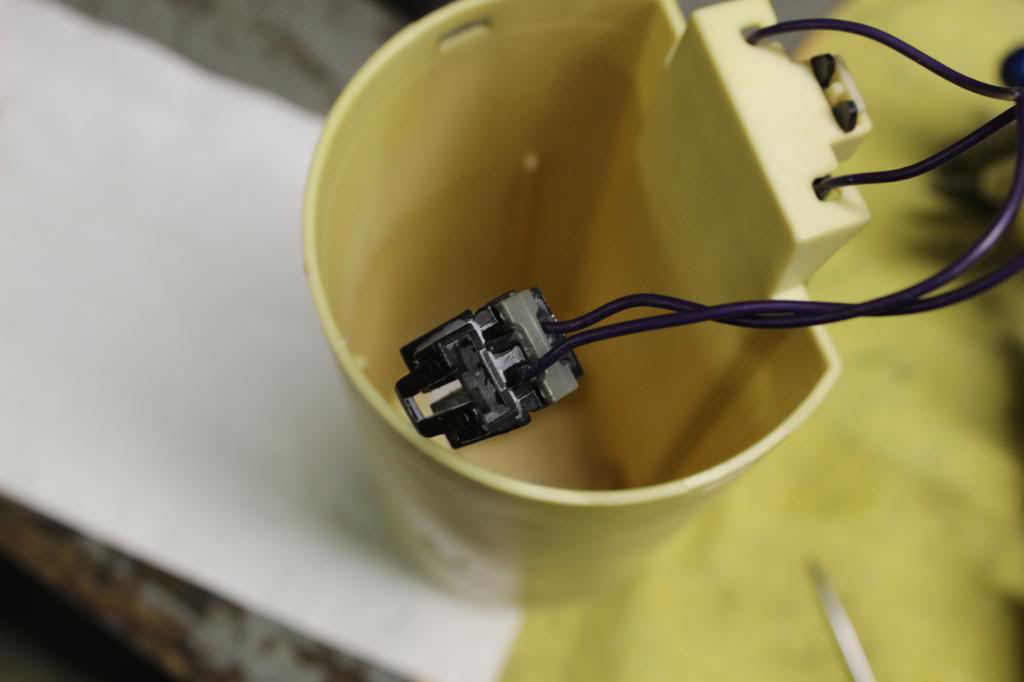
We need to relocate the evap sensor to make room for the bulkhead fitting and the larger wiring. So we tap the hole to 3/8 NPT to add a push to connect fitting.
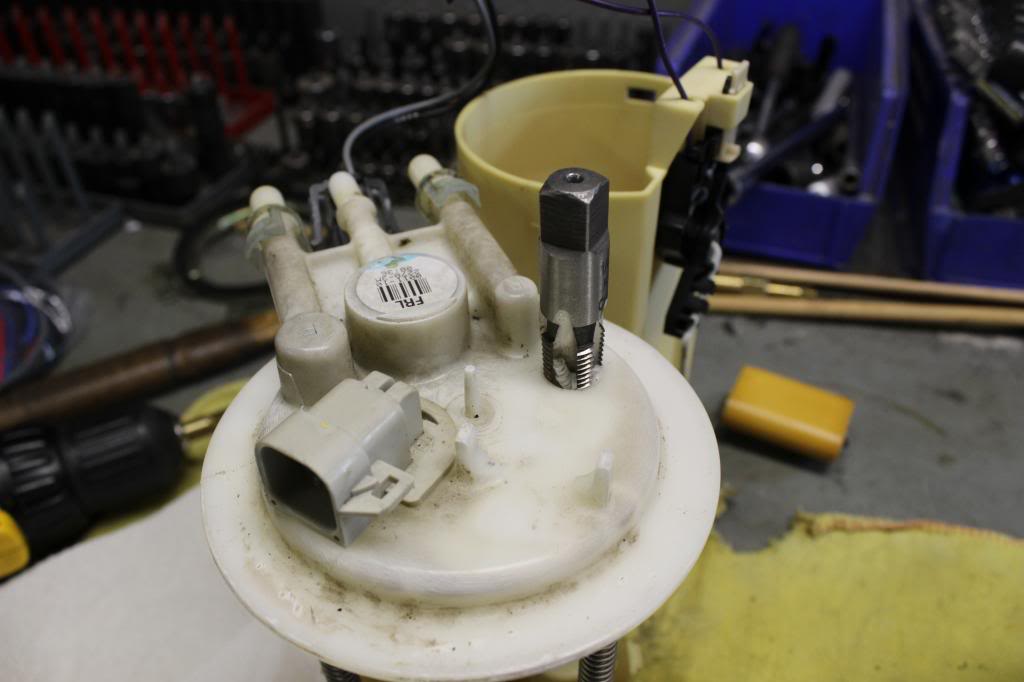
Once the hole is tapped, a 3/8 NPT x 3/8 OD Tube elbow fitting is installed.

The top of the sender assembly needs to be sanded smooth.

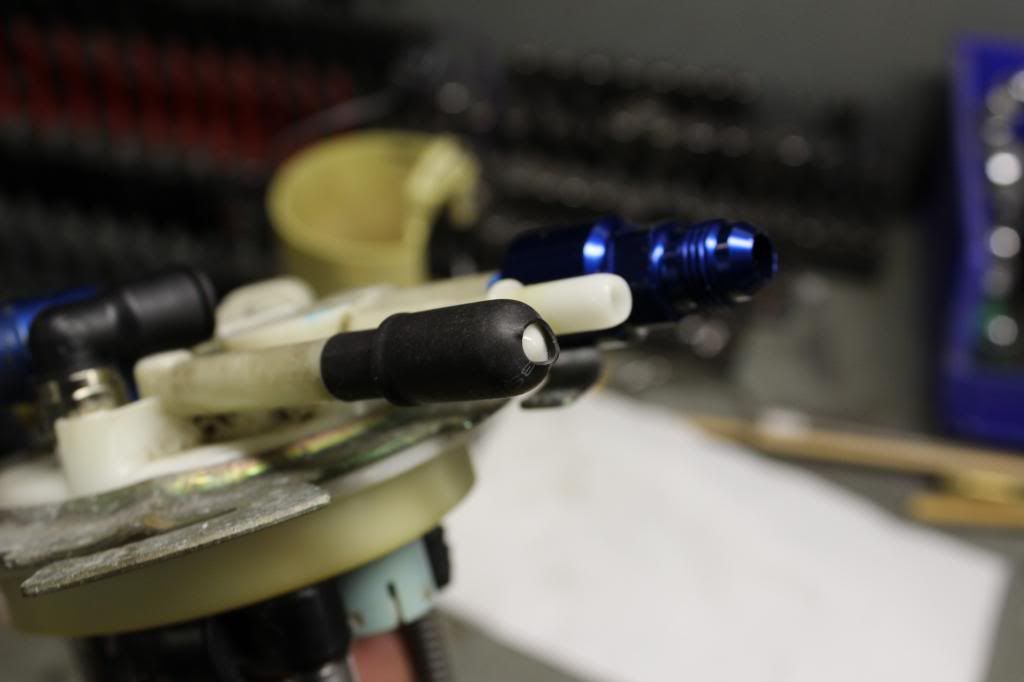
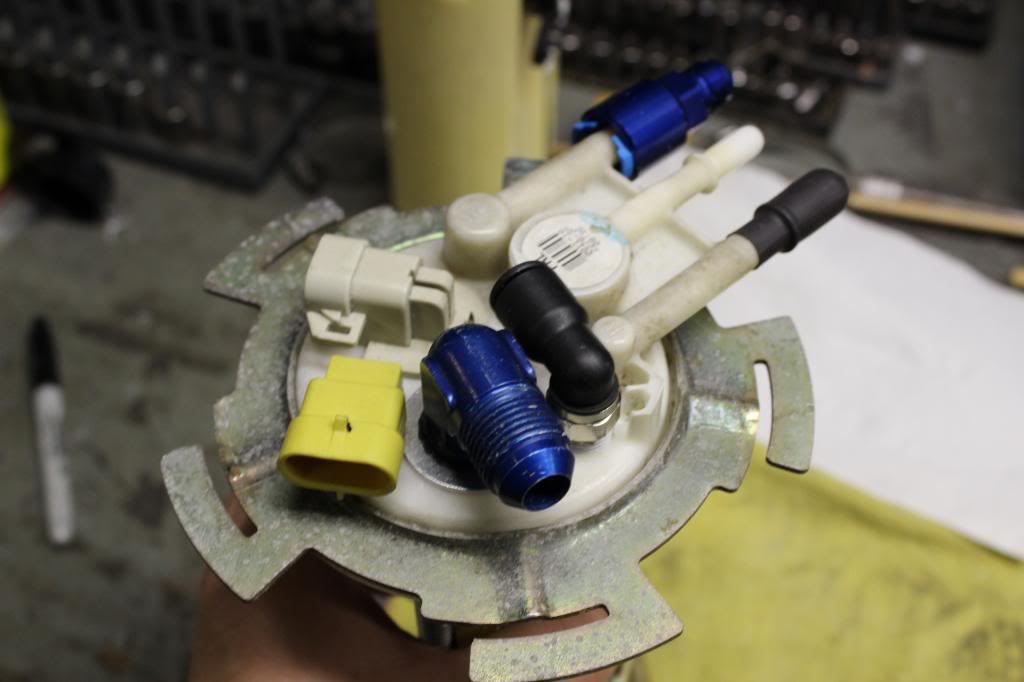
The old return port is plugged. I used a vacuum cap with some heat shrink tubing to retain it. Also, the old feed port will be used as a return. I installed a -6 AN adapter fitting.
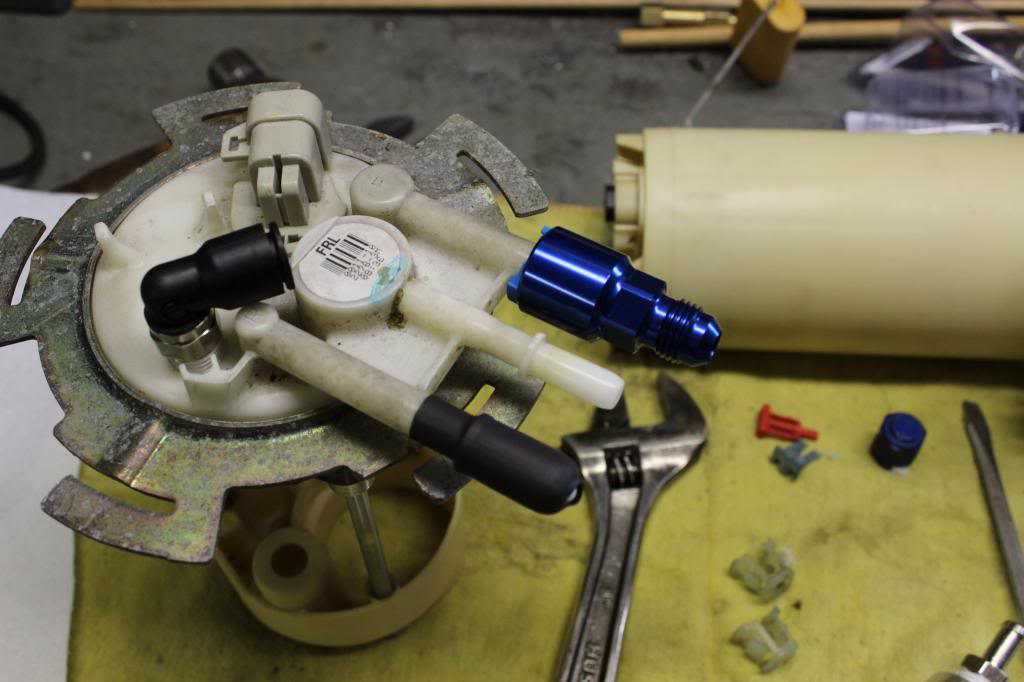
Next, The -8 bulkhead fitting as well as the 4 wire bulkhead fitting. rather than drill a hole through the top and seal it with goop, i found that racetronix carries a bulkhead fitting. This is nice because it allows 14 gauge (I believe) wire to be run to the pumps.


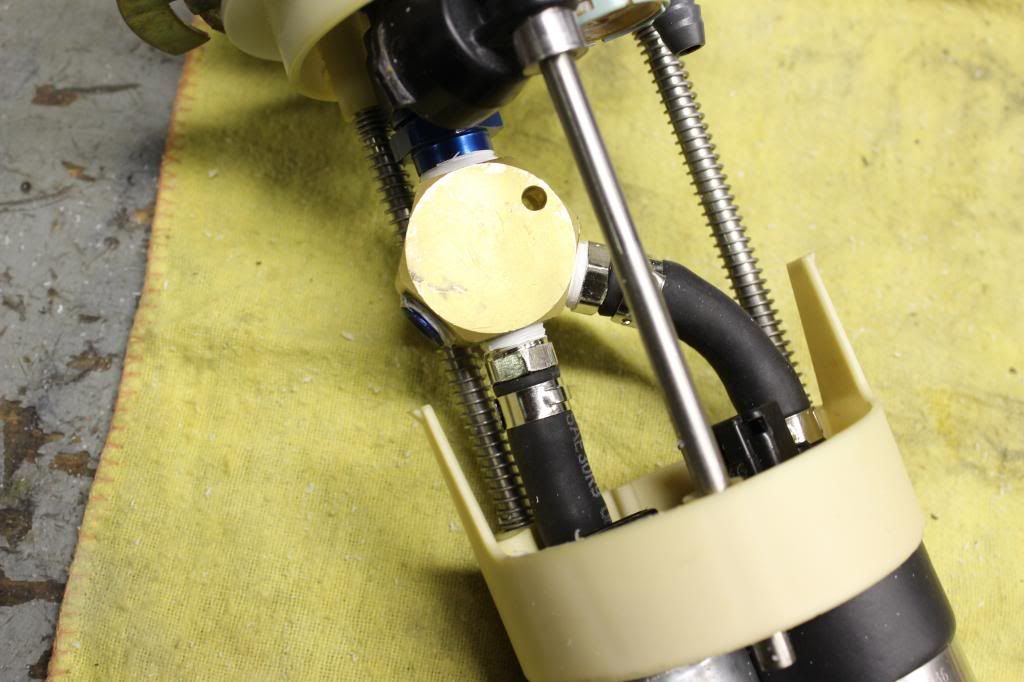
Some cuts need to be made to the bucket assembly to allow both pumps to fit. Rather than using a tee, i found a pneumatic flat hex manifold. The hoses are put onto the assembly, and the pumps are clamped together.


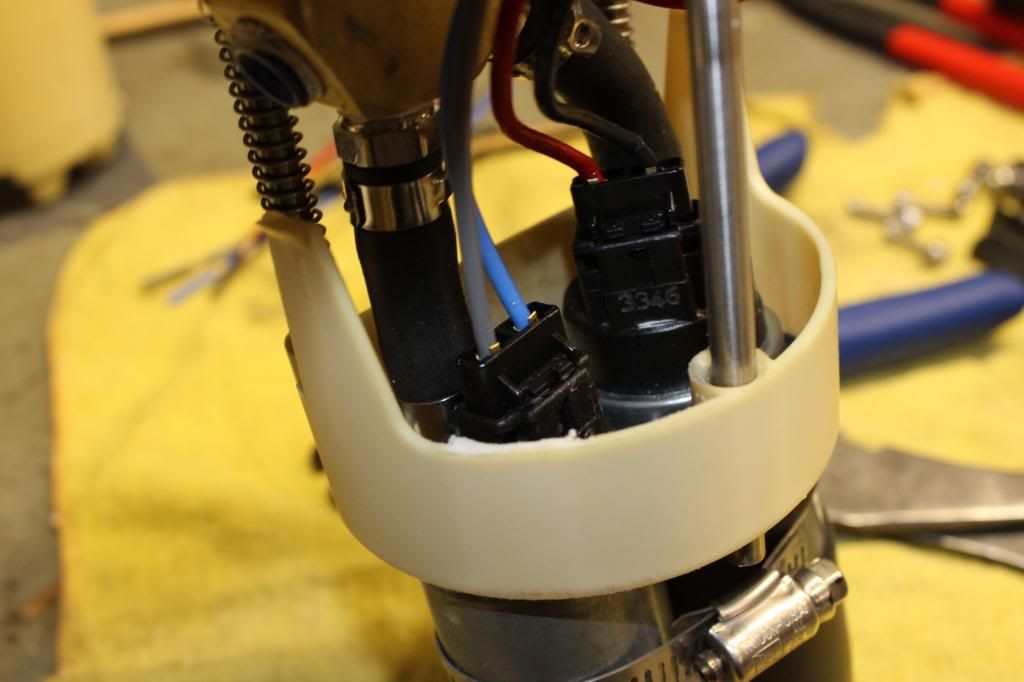
The stock fuel pump leads are removed. The two halves of the bucket are put together and the pumps are wired.

And now we're ready to install the pump assembly.
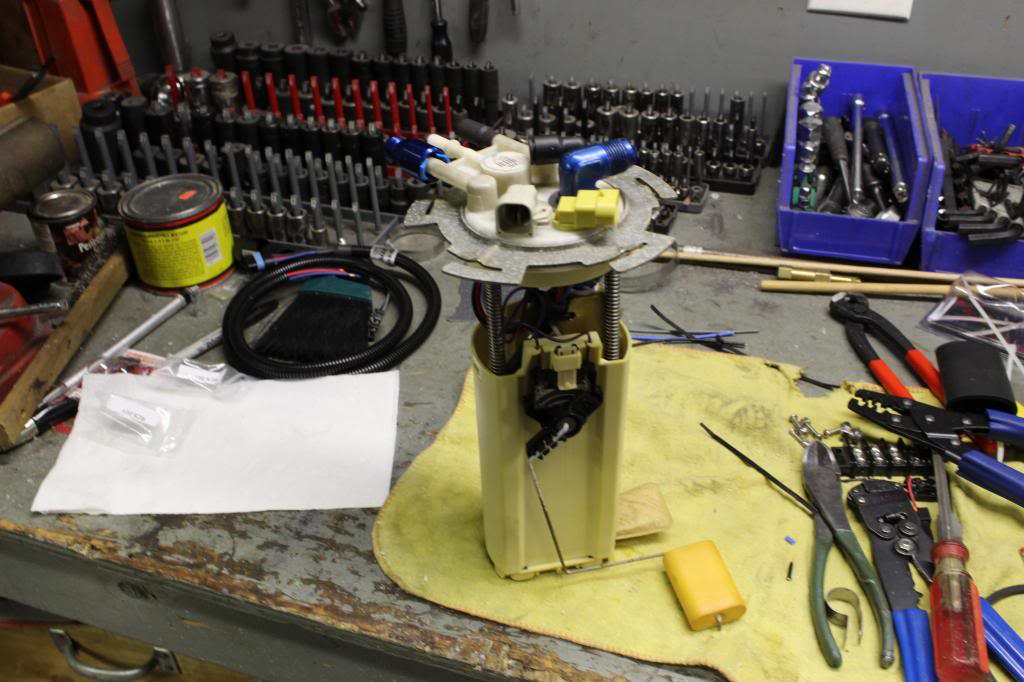
Here is the installed pump assembly. Note the relocated EVAP sensor

I installed two Walbro 340's tied into an 8an braided stainless hose. I've added instructions below:
So we start with a stock 99+ fuel bucket assembly. It needs to be stripped of the Evap sensor (save for later) the pump, and the regulator.
We need to relocate the evap sensor to make room for the bulkhead fitting and the larger wiring. So we tap the hole to 3/8 NPT to add a push to connect fitting.
Once the hole is tapped, a 3/8 NPT x 3/8 OD Tube elbow fitting is installed.
The top of the sender assembly needs to be sanded smooth.
The old return port is plugged. I used a vacuum cap with some heat shrink tubing to retain it. Also, the old feed port will be used as a return. I installed a -6 AN adapter fitting.
Next, The -8 bulkhead fitting as well as the 4 wire bulkhead fitting. rather than drill a hole through the top and seal it with goop, i found that racetronix carries a bulkhead fitting. This is nice because it allows 14 gauge (I believe) wire to be run to the pumps.
Some cuts need to be made to the bucket assembly to allow both pumps to fit. Rather than using a tee, i found a pneumatic flat hex manifold. The hoses are put onto the assembly, and the pumps are clamped together.
The stock fuel pump leads are removed. The two halves of the bucket are put together and the pumps are wired.
And now we're ready to install the pump assembly.
Here is the installed pump assembly. Note the relocated EVAP sensor
Last edited by Ping King; 01-10-2015 at 08:14 PM.

 02-08-2013, 07:39 AM
#3
Thanks for the kind words. I'm not sure what you mean by your question. The bucket stays full like any other setup. The holes on the bottom allow the fuel to flow into the bucket. There are no holes on the sides so that fuel doesn't slosh away from the pumps during cornering.
02-08-2013, 08:02 AM
#4
Very nice write up. I'm always interested to see peoples new innovative ways to stick two pumps in the factory bucket. I like the evap sensor relocation as well.
All of the fuel being returned through the regulator ends up back in the bucket so that helps keep the pumps submerged. Any fuel being picked up by the pumps comes through the socks at the bottom so there will almost always be plenty of fuel unless you run the tank quite low.
All of the fuel being returned through the regulator ends up back in the bucket so that helps keep the pumps submerged. Any fuel being picked up by the pumps comes through the socks at the bottom so there will almost always be plenty of fuel unless you run the tank quite low.
 02-08-2013, 08:55 PM
#8
TECH Apprentice
im getting a P442 small leak evap system i just replaced my faulty regulator so i just got a new assembly with pump.. then that code started to show up....
my point... your write up made me think that it aint fit or sealed well .... gnna see.
thanks and that's some great info.
are you using dual racetronix pumps?
my point... your write up made me think that it aint fit or sealed well .... gnna see.
thanks and that's some great info.
are you using dual racetronix pumps?
02-09-2013, 04:57 PM
#9
im getting a P442 small leak evap system i just replaced my faulty regulator so i just got a new assembly with pump.. then that code started to show up....
my point... your write up made me think that it aint fit or sealed well .... gnna see.
thanks and that's some great info.
are you using dual racetronix pumps?
my point... your write up made me think that it aint fit or sealed well .... gnna see.
thanks and that's some great info.
are you using dual racetronix pumps?
02-12-2013, 10:51 AM
#12
How much those 340s cost and how much HP they can handdle?
were you find the push conecting elbow for the 3/8 npt fitting?
And were can i buy the y pkug that you use to connect both pumps together?
Nice job man.
were you find the push conecting elbow for the 3/8 npt fitting?
And were can i buy the y pkug that you use to connect both pumps together?
Nice job man.
The elbow fitting is a legris-style 3/8 mpt x 3/8 tube push to connect fitting.
The manifold is a flat hex manifold. 3/8 inlet x 1/4 outlet.
What's the part number for that Racetronix 4-conductor bulkhead connector you used? That is pretty slick.
Bulkhead Connector: BCWS-001
Fuel Pump Connector: RCS-001 (2 required)
Fuel Line: FFHR-06 (6 inches to 1 ft)
Clamps: OCLMP15.3 (4 required)
Sleeve: 122-332C (only 1 fits)
Youll also need as mentioned above, a hex manifold and a 3/8 x 3/8 push to connect fitting as well as 6-8 inches of 3/8 OD nylon tubing.
Along with this youll need various fittings such as a -8AN bulkhead fitting and a -8 an female to 3/8 male NPT adaptor fitting.

The following users liked this post:
fucter (11-30-2022)
02-12-2013, 12:18 PM
#14
They're standard walbro 255 pumps. I'm not sure what the going price it, i bought them so long ago.
The elbow fitting is a legris-style 3/8 mpt x 3/8 tube push to connect fitting.
The manifold is a flat hex manifold. 3/8 inlet x 1/4 outlet.
Bulkhead Connector: BCWS-001
Fuel Pump Connector: RCS-001 (2 required)
Fuel Line: FFHR-06 (6 inches to 1 ft)
Clamps: OCLMP15.3 (4 required)
Sleeve: 122-332C (only 1 fits)
Youll also need as mentioned above, a hex manifold and a 3/8 x 3/8 push to connect fitting as well as 6-8 inches of 3/8 OD nylon tubing.
Along with this youll need various fittings such as a -8AN bulkhead fitting and a -8 an female to 3/8 male NPT adaptor fitting.
http://www.racetronix.biz/itemdesc.a...SS294M&eq=&Tp=
filter socks and accessories are listed to the right of the web ad as add-ons.
__________________

Manufacturer / Distributor of Automotive Fuel Systems, Components & Electronics
Please support a Racetronix dealer near you for personalized service.
>WEB SITE<
Manufacturer / Distributor of Automotive Fuel Systems, Components & Electronics
Please support a Racetronix dealer near you for personalized service.
>WEB SITE<
02-12-2013, 12:21 PM
#15
http://www.racetronix.biz/itemdesc.a...PH-001&eq=&Tp=
This harness now features weatherproof/sealed relays and sockets.
This harness now features weatherproof/sealed relays and sockets.
__________________
Manufacturer / Distributor of Automotive Fuel Systems, Components & Electronics
Please support a Racetronix dealer near you for personalized service.
>WEB SITE<
Manufacturer / Distributor of Automotive Fuel Systems, Components & Electronics
Please support a Racetronix dealer near you for personalized service.
>WEB SITE<
02-12-2013, 12:23 PM
#16
Teching In
iTrader: (5)

Join Date: Aug 2009
Location: Tewksbury, MA
Posts: 46
Likes: 0
Received 0 Likes
on
0 Posts

I'm doing almost the same thing. It looks like you have the tank out of the car. FYI the bulk head fitting will hit the floor if you don't clearance it. I built the clearance into a trap door.
 02-15-2013, 10:30 AM
#19
I also have pictures of my fuel pump access door as well as the relay wiring i did. I will take pictures this weekend of the completed project which will include the fuel rails up front.