


built-fabbed a case spreader
after reading this post and seeing that the OP fabbed his own,I decided to make one,but something simpler with materials on hand and only needing the drill press.
https://ls1tech.com/forums/gears-axl...t-weekend.html
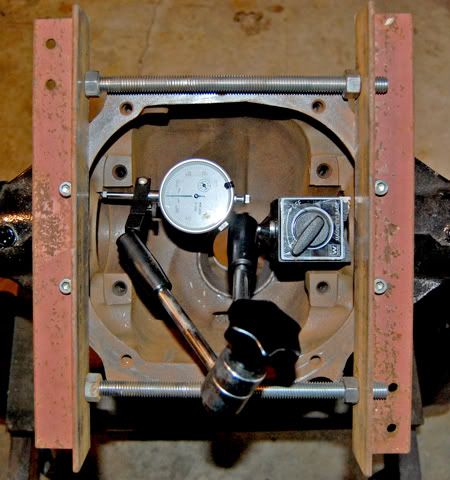
I'm able to get a .008" case spread,which should be enough to prevent 'beating' in OEM spacer/shims. The 1/2x13 threaded rods will eventually be replaced by 1/2x20 threaded rods and the angle iron by a heavier thickness angle iron,but maybe not if the current works.
https://ls1tech.com/forums/gears-axl...t-weekend.html
I'm able to get a .008" case spread,which should be enough to prevent 'beating' in OEM spacer/shims. The 1/2x13 threaded rods will eventually be replaced by 1/2x20 threaded rods and the angle iron by a heavier thickness angle iron,but maybe not if the current works.
Good deal, the angle iron may be your weak link though. The 10 bolt case spreads pretty easy. You may need something a little heavier on a bigger case. Anything you can do to keep from beating shims in is good.
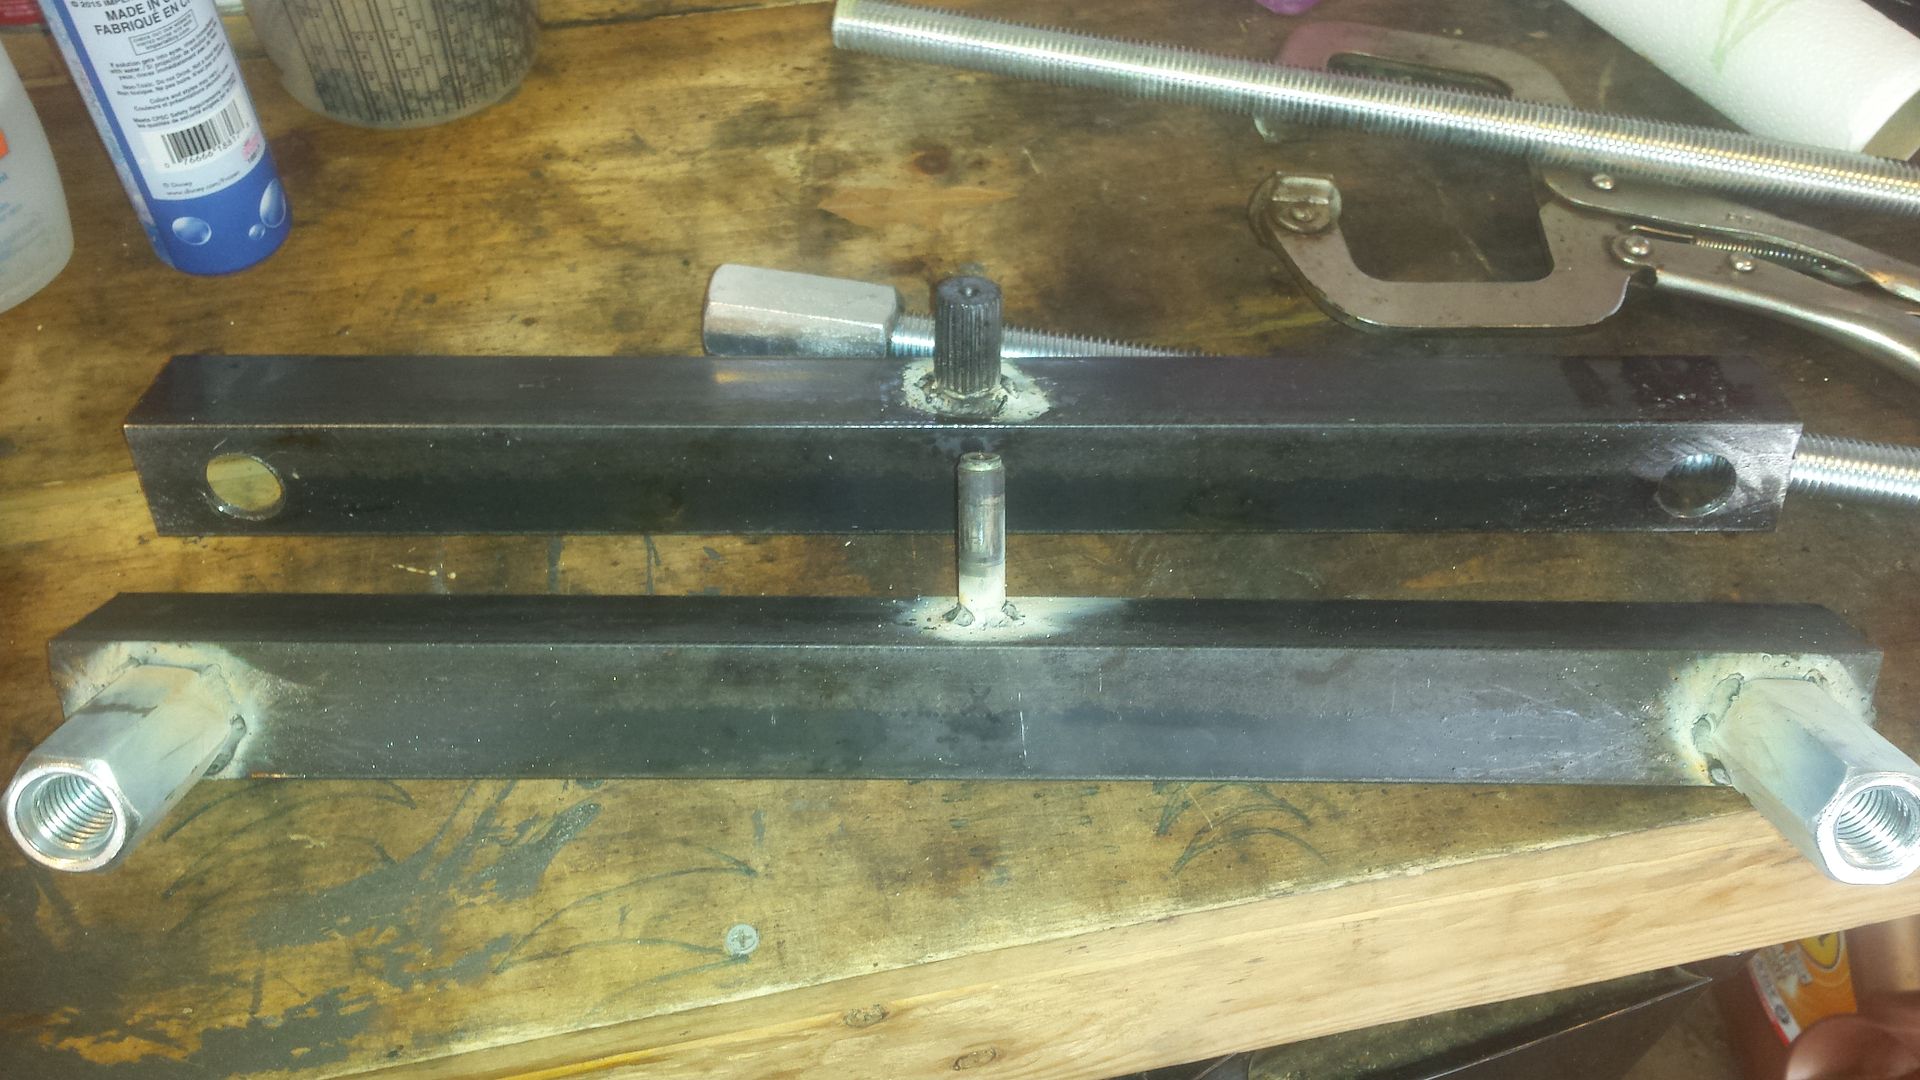
my higher concern are the 5/16-18 bolts holding the angle iron to the case. I used socket head cap screws as a socket head cap screw has a strength rating higher than a grade 8 bolt.
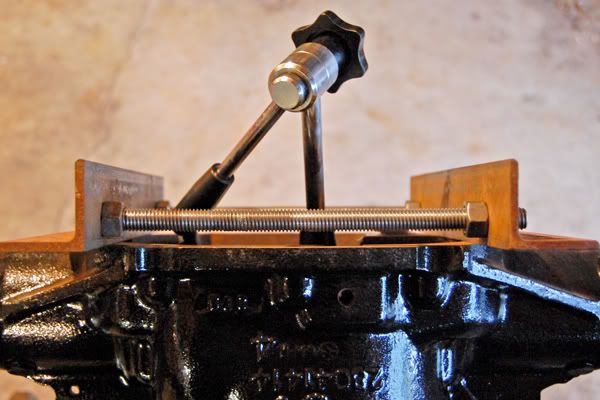
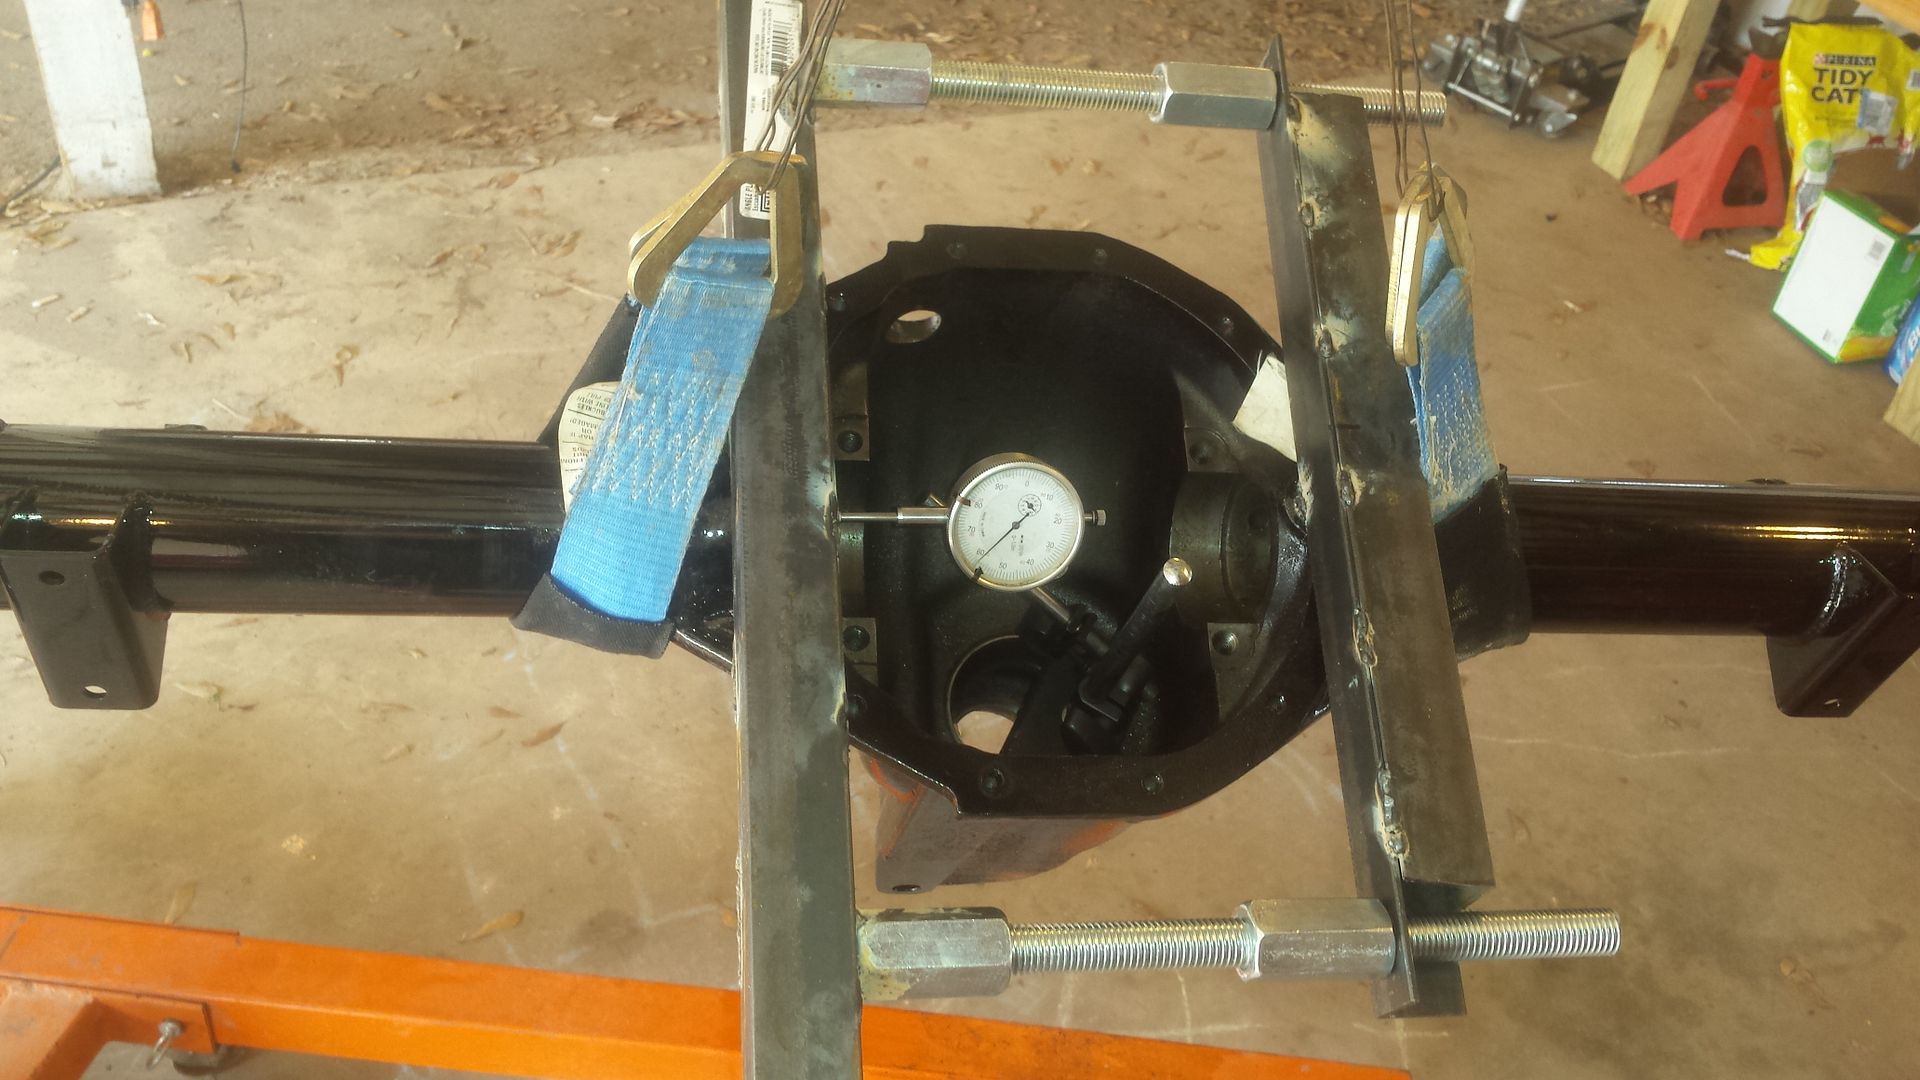
At the .008" force,the angle irons were not bending/flexing when viewing them from their end and since I put the 1/2" thru holes for the threaded rods at a point very close to the angle(2nd pic),there should't have been much flex of the angle irons.
I let it sit overnight at the .008" force setting and the case returned to .000" the following day. All parts seem OK(for now).
The housing in the pic is POR15 painted and put a 1/8 npt threaded hole in bottom of housing for draining before cover removal as that housing is getting the stock cover(also POR15'd).

TECH Apprentice

Joined: May 2010
Posts: 303
Likes: 0
This may be a dumbass question. Are you just tightening the right side nuts to get the case spread? Do the left side nuts just sit against the left angle iron or are they welded in place. I have my 3.73 and rebuild kit on order, it will be my first build so I'm trying to get all my bases covered. Thanks
You can 'tighten' left or right or left & right as long as you tighten upper and lower(based on the view in first pic) equally.
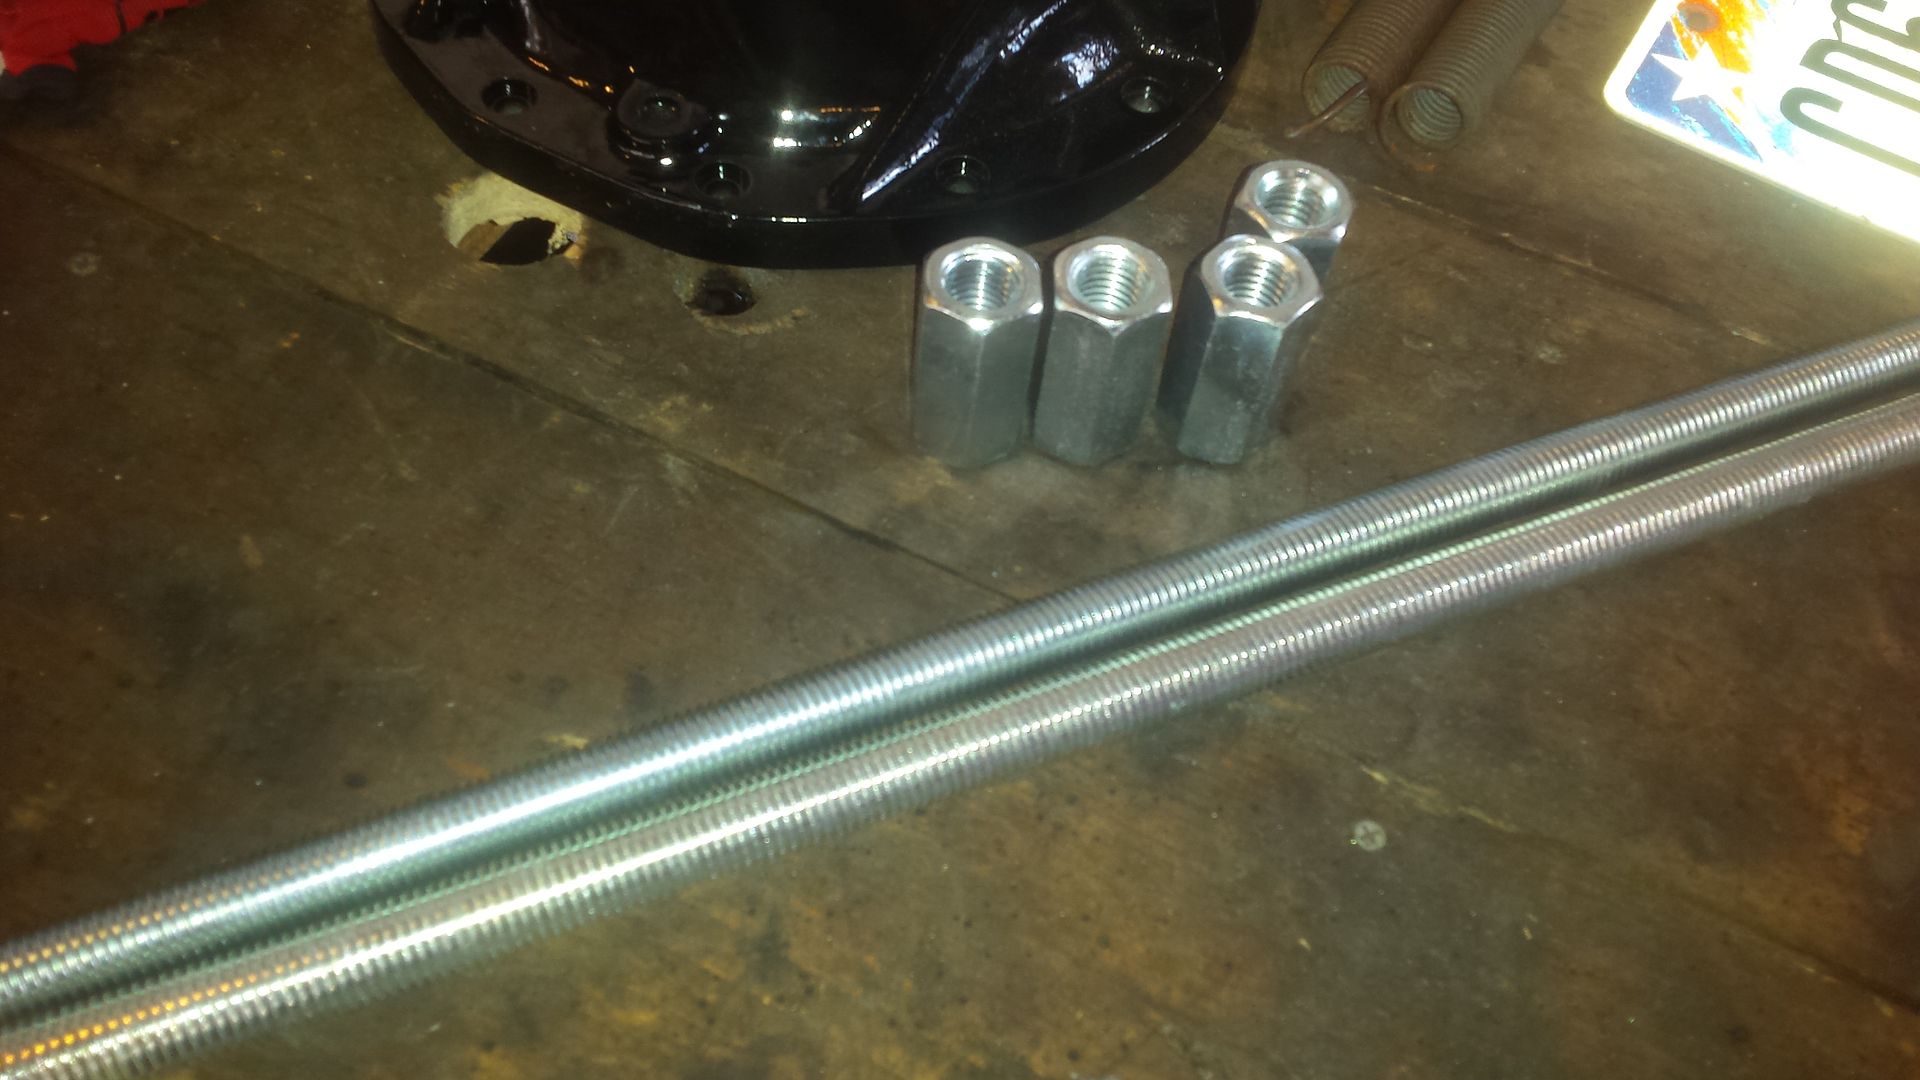
It's been working great,haven't changed the 1/2-13 threaded rods to 1/2-20 yet. It's best to use as thick a nut as possible to spread the load among more threads. I picked up some 1/2-13x 1 1/4"long coupling nuts for that purpose but have yet to use them,probably for the next rebuild.
It's been working great,haven't changed the 1/2-13 threaded rods to 1/2-20 yet. It's best to use as thick a nut as possible to spread the load among more threads. I picked up some 1/2-13x 1 1/4"long coupling nuts for that purpose but have yet to use them,probably for the next rebuild.
Trending Topics
Joined: Aug 2007
Posts: 24,241
Likes: 89
From: Turnin' Wrenches Infractions: 005
Here's mine.
Stopped at home depot and got some angle iron and some all thread. After all the rear ends ive built I'm finally building myself a case spreader.
The case has one 3/4 and one 1/2 hole for the case spreader to attach to, so I found some scraps that fit those dimensions. I did have to revise this design as it was blocking the bearing caps from going in. No big deal, we are learning.
Here it is set in place. You turn the buckles and the case spreads. Easy as pie.
And this is why you need a case spreader. I pulled this out during disassembly. No doubt it got bent during final carrier preloading last time when I swapped the spool in.
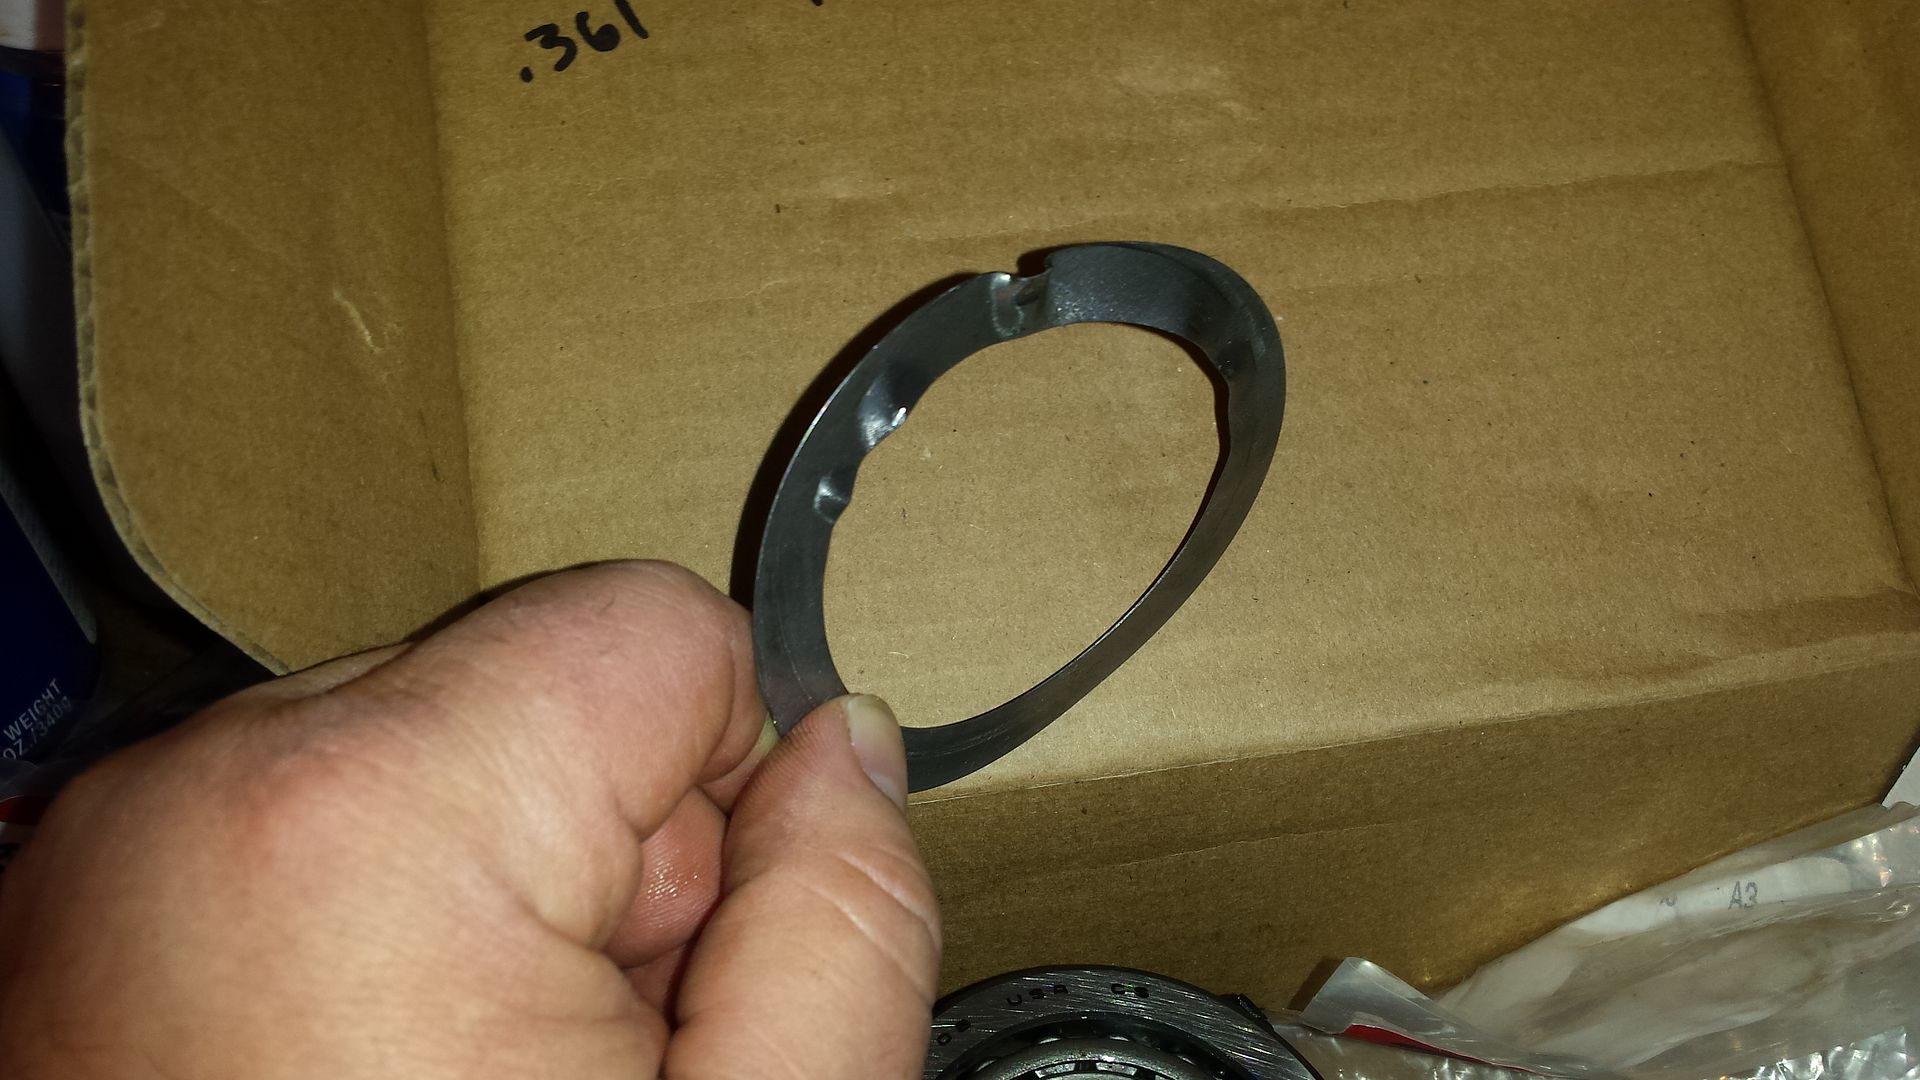

The case has one 3/4 and one 1/2 hole for the case spreader to attach to, so I found some scraps that fit those dimensions. I did have to revise this design as it was blocking the bearing caps from going in. No big deal, we are learning.

Here it is set in place. You turn the buckles and the case spreads. Easy as pie.

And this is why you need a case spreader. I pulled this out during disassembly. No doubt it got bent during final carrier preloading last time when I swapped the spool in.

LS1 Tech Stories
The Best V8 Stories One Small Block at Time

6 Common C5 Corvette Failures and What's Involved In Repairing Them
Pouria Savadkouei
Retro Modern Bandit Pontiac Trans AM Comes With Burt Reynolds' Autograph
Verdad Gallardo
Top 10 Greatest Cadillac V Series Performance Models Ever, Ranked
Pouria Savadkouei
Top 10 Most Powerful Chevy Trucks Ever Made!

Hennessey's New Supercharged Silverado ZR2 Has 700 HP
Verdad Gallardo
Coachbuilt N2A Anteros Is an LS2-Powered C6 Corvette In Italian Clothes
Verdad Gallardo
Awesome K5 Blazer Restomod Comes With C7 Corvette Power
Verdad Gallardo
10 Camaros You Should Never Buy

10 LS Engine Myths That Refuse to Die
Verdad Gallardo TECH Apprentice
Joined: May 2010
Posts: 303
Likes: 0
I hear your concerns firstyr, I have an easy solution to this dilemma.
Firstyr will have to do a auto to t56 swap
01ss will have a little more work to do cuz he will have to do a 12 bolt to 10 bolt swap along with a auto to t56 swap as well.
Issues solved, ping poom pow.
I can probably better organize this competition with a few beers in me. When I'm sober, I don't seem to make sense a lot of the time.
Joined: Aug 2007
Posts: 24,241
Likes: 89
From: Turnin' Wrenches Infractions: 005
My old 10 bolt was at the track next to me in an m6 car doing clutch drops last night! I'm telling you these little bastards wont hardly break, dunno why I even got rid of it....
TECH Apprentice
Joined: May 2010
Posts: 303
Likes: 0