Front turn signals


 05-23-2010, 09:51 AM
#22

So, did you determine where the water is coming from? Are your housings cracked?
All the discussion about socket gaskets is interesting... if you drive through flooded ravines backwards a lot... With forward motion of the car, one normally wouldn't get that much water in from the back.
All the discussion about socket gaskets is interesting... if you drive through flooded ravines backwards a lot... With forward motion of the car, one normally wouldn't get that much water in from the back.
 05-23-2010, 05:03 PM
#24

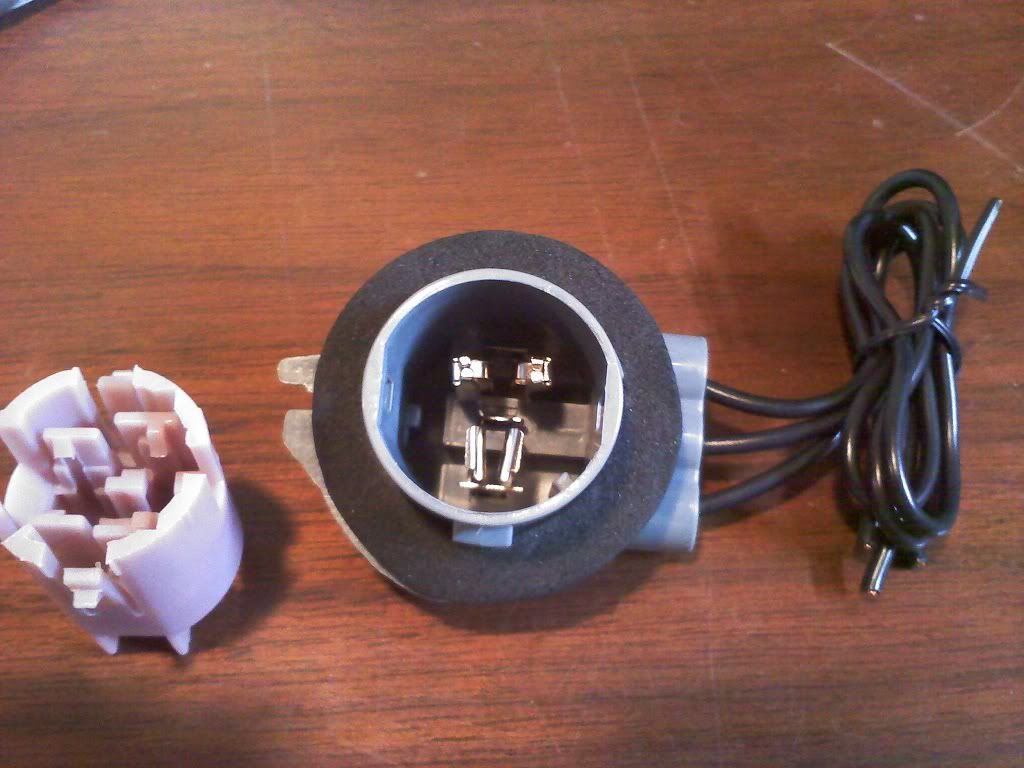
If you look on the sides of the socket, there are a couple little clips. Push those in, the center plastic piece slides out. The contacts plug into a connector on the wires, then the wires can pull out. Slide the wires into the new housing, plug in the new contacts, and slide in the new center plastic. Don't get the wires mixed up.
It'll make more sense when you take it apart. If you want I can get pics of the process in a bit.
It'll make more sense when you take it apart. If you want I can get pics of the process in a bit.
 05-23-2010, 06:01 PM
#26
OK here's a quickie writeup how to rebuild the socket. I don't take the credit for this, I had rewired my sockets when they went bad. Someone else pointed this procedure out to me but I'm not sure who it was. This procedure only takes about 5-10 minutes per socket.
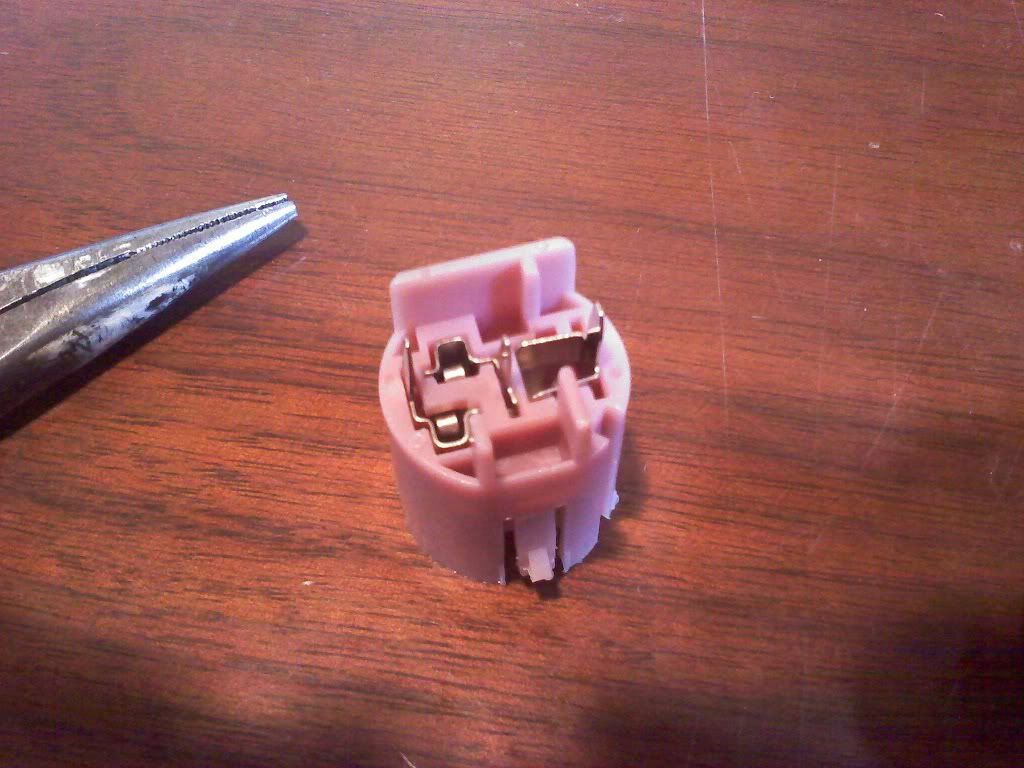
OK first on the socket there are two clips that hold the innards to the outside. Push those in. On the old socket these may break off as they are most likely brittle and heat damaged. That's OK.

Pull the center plastic section out.
Depending on the condition of the old socket some or all of the pins may come out with the center plastic piece. However many did not, remove them. They just pull straight out.
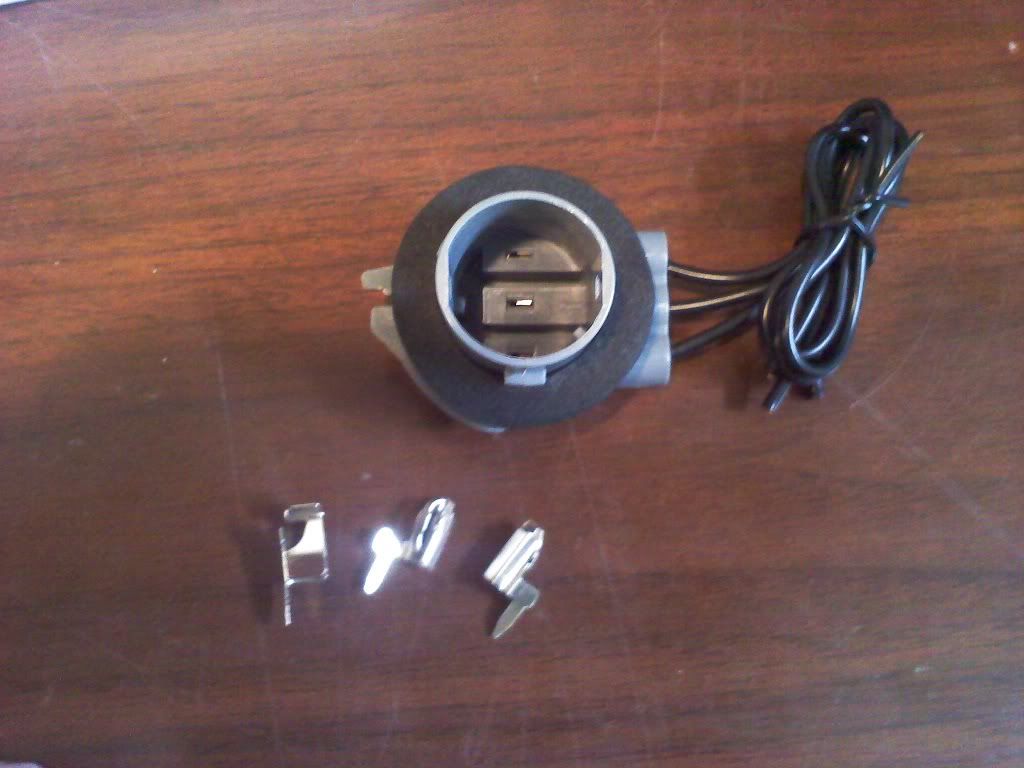
Take apart the replacement socket up to this point too. On the new socket, once you have the pins removed from the base, load them in the center piece. That way everything is lined up when you go to put it back together.
Now the wires will pull straight out from the socket bases. Go ahead and remove all the wires from the new socket base, as you won't be needing them. DON'T remove them all from the old base! It is easier to remove one, insert it into the new base, then move on to the next wire, and so on. You don't want to get the wire positions mixed up. If you do, it will either not work right or you could even potentially blow a fuse.
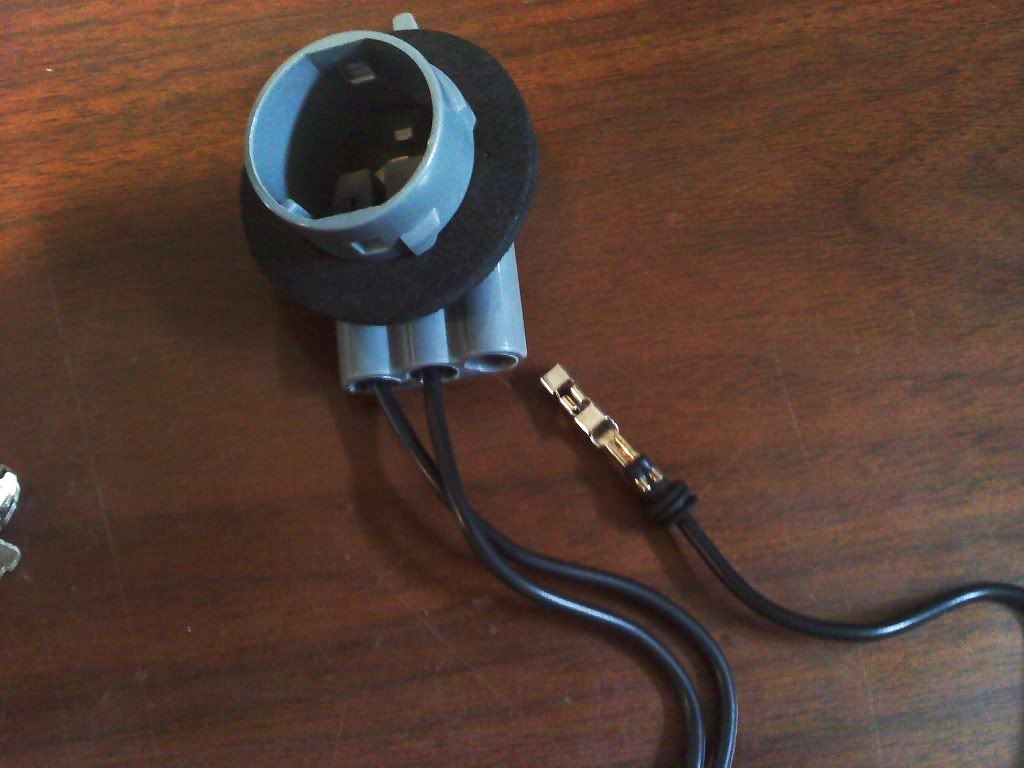
Now that the wires are transferred over to the new base, take the new socket center (with the pins in it) and stick it it in the base. It can only go in one way, it is keyed. Make sure to push it all the way in, and make sure the side clips that you released at the beginning are clipped in place.
Voila, you're done! No wire splicing, no loss of wire colors at the sockets, and you have brand new sockets.
OK first on the socket there are two clips that hold the innards to the outside. Push those in. On the old socket these may break off as they are most likely brittle and heat damaged. That's OK.
Pull the center plastic section out.
Depending on the condition of the old socket some or all of the pins may come out with the center plastic piece. However many did not, remove them. They just pull straight out.
Take apart the replacement socket up to this point too. On the new socket, once you have the pins removed from the base, load them in the center piece. That way everything is lined up when you go to put it back together.
Now the wires will pull straight out from the socket bases. Go ahead and remove all the wires from the new socket base, as you won't be needing them. DON'T remove them all from the old base! It is easier to remove one, insert it into the new base, then move on to the next wire, and so on. You don't want to get the wire positions mixed up. If you do, it will either not work right or you could even potentially blow a fuse.
Now that the wires are transferred over to the new base, take the new socket center (with the pins in it) and stick it it in the base. It can only go in one way, it is keyed. Make sure to push it all the way in, and make sure the side clips that you released at the beginning are clipped in place.
Voila, you're done! No wire splicing, no loss of wire colors at the sockets, and you have brand new sockets.
05-24-2010, 08:02 PM
#27
TECH Fanatic
iTrader: (24)
Join Date: Nov 2001
Location: Dallas, TX
Posts: 1,126
Likes: 0
Received 0 Likes
on
0 Posts

I just did this modification over the weekend. Both of my DRL housings were cracked and water kept getting into them and shorting out the amber bulbs. I ordered brand new DRL housings from Ebay for around $55 shipped. I also picked up two of the sockets from Autozone for $8/each.
I'm going to order LED bulbs for the DRL's this time. I don't want these stupid stock 3157 incandescent bulbs burning up my sockets again.
I'm going to order LED bulbs for the DRL's this time. I don't want these stupid stock 3157 incandescent bulbs burning up my sockets again.
05-24-2010, 09:17 PM
#28

I just did this modification over the weekend. Both of my DRL housings were cracked and water kept getting into them and shorting out the amber bulbs. I ordered brand new DRL housings from Ebay for around $55 shipped. I also picked up two of the sockets from Autozone for $8/each.
I'm going to order LED bulbs for the DRL's this time. I don't want these stupid stock 3157 incandescent bulbs burning up my sockets again.
I'm going to order LED bulbs for the DRL's this time. I don't want these stupid stock 3157 incandescent bulbs burning up my sockets again.
Where do you get the LED bulbs for them?
I may as well do this too. My housings are friggin old and cracked.
.
05-25-2010, 01:02 AM
#29
TECH Fanatic
iTrader: (24)
Join Date: Nov 2001
Location: Dallas, TX
Posts: 1,126
Likes: 0
Received 0 Likes
on
0 Posts
These are the two I bought:
-right side DRL housing
-left side DRL housing
They're priced at $29.88 each x 2 = $59.76 (free shipping)
I compared prices before I bought them and it was cheaper to buy them separately than together as a package. I believe it was around $66 (free shipping) to buy them together.
When you remove your existing DRL housings, you will see a gap between the lens and the gray plastic casing. I believe that over time, water may be able to get into the cracked housing through this gap. When I got my new DRL housings from Ebay, I took clear silicone RTV and sealed the perimeter gap on both of the new housings to insure that water never gets inside from there. This is also the reason why I'm switching to LED bulbs, they use less power and run much cooler. Therefore, these new housings should never crack from heat from the bulbs.
I also bought new DRL bulb sockets from Autozone for $7.99/each (same ones pictured in this thread). Search the Autozone website for part number "85881". These are the ones that I bought and are made for our cars. Here is a good write up on how to swap sockets without having to cut/solder any wires. I followed these instructions and it was a very simple and straight forward install.
As for the LED bulbs, I have been following this thread for a while, the general consensus seems to be the "48 Led SMT Tower" 3157 bulbs. These are "switchbacks" and are sold by autoillumination for $27.99 each. You also have to get new flashers, but all the information is in the thread linked above.
Let me know if you have any questions.
 05-25-2010, 01:03 AM
#30
TECH Fanatic
iTrader: (24)
Join Date: Nov 2001
Location: Dallas, TX
Posts: 1,126
Likes: 0
Received 0 Likes
on
0 Posts
I saw your sig., have you thought about ditching your LS6 intake and stock TB for a FAST 90/90? That would probably help a lot with your setup.
 05-25-2010, 01:28 AM
#31
I'm in Ft. Lauderdale. I'm actually having a 441ci built in 2-3 months and its gonna have new heads, intake and TB anyway.
My 427ci is friggin old as hell, 2002 is when it went in. ~140,000 miles on it and still running good. But its tired and I'm ready for 100+ more to the wheels N/A.......
.