


Another DIY ported TB
Thread Starter
Launching!
iTrader: (3)
Joined: Mar 2006
Posts: 289
Likes: 0
From: searching for the perfect driving line
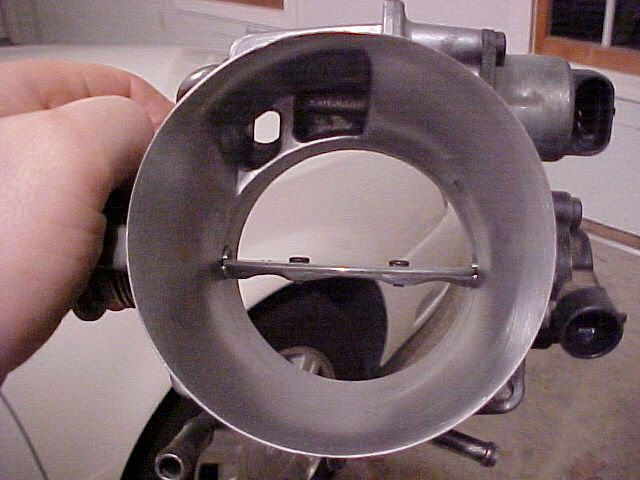
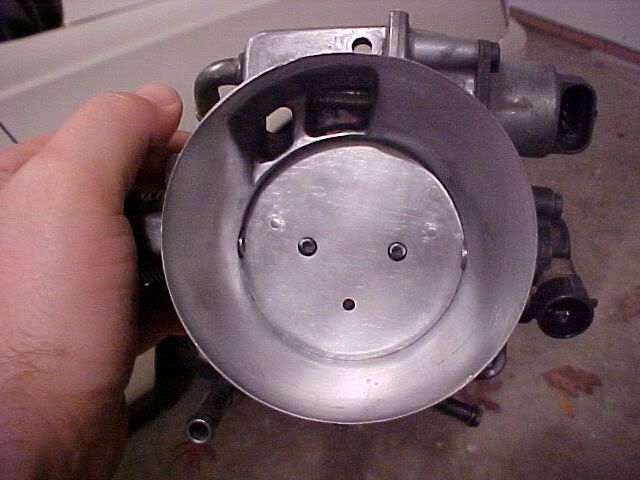
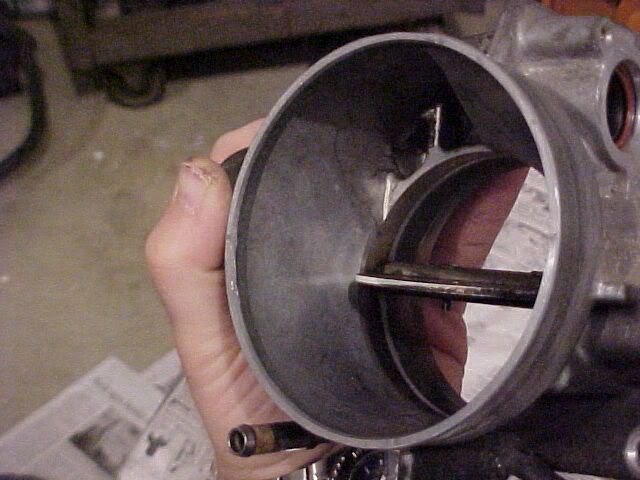
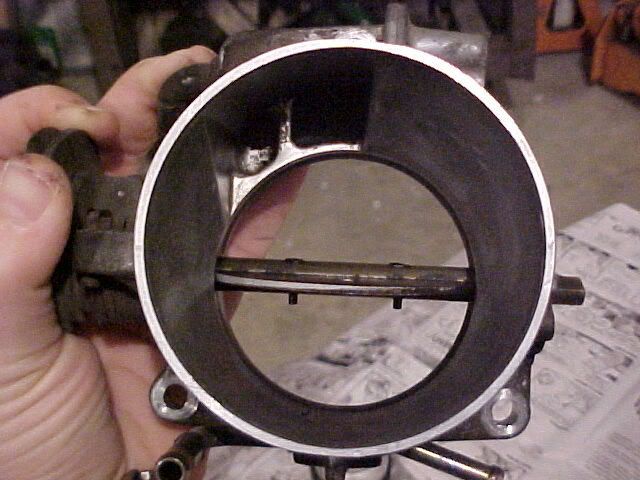
Ported the stock throttle body this weekend. How do you guys think it turned out? I did the port work, took it for a test drive, then did the bump stop mod. Seems like the porting gave better throttle response but the bs mod gave the most increase at WOT. About what I expected. Pretty easy to do but a little tedious. Included a couple of before and after shots. It could use some more polishing but I'm was feeling lazy. The back side of the throttle shaft looks like  also.
also.
PICS:
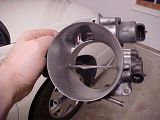
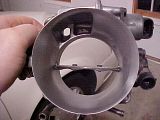


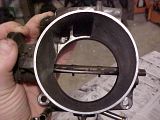
also.PICS:

Thread Starter
Launching!
iTrader: (3)
Joined: Mar 2006
Posts: 289
Likes: 0
From: searching for the perfect driving line
Originally Posted by Snuffles
Nice job.
How did you go about porting it?
How did you go about porting it?
Last edited by soulless; Nov 27, 2006 at 09:32 PM.
Thread Starter
Launching!
iTrader: (3)
Joined: Mar 2006
Posts: 289
Likes: 0
From: searching for the perfect driving line
Originally Posted by Snuffles
I still have yet to port a TB using a Dremel, I may have to give it a try.
Mind posting a pic or a link to what bit you used?
Mind posting a pic or a link to what bit you used?
cutting bit
sanding drums
Trending Topics
LS1 Tech Stories
The Best V8 Stories One Small Block at Time

6 Common C5 Corvette Failures and What's Involved In Repairing Them
Pouria Savadkouei
Retro Modern Bandit Pontiac Trans AM Comes With Burt Reynolds' Autograph
Verdad Gallardo
Top 10 Greatest Cadillac V Series Performance Models Ever, Ranked
Pouria Savadkouei
Top 10 Most Powerful Chevy Trucks Ever Made!

Hennessey's New Supercharged Silverado ZR2 Has 700 HP
Verdad Gallardo
Coachbuilt N2A Anteros Is an LS2-Powered C6 Corvette In Italian Clothes
Verdad Gallardo
Awesome K5 Blazer Restomod Comes With C7 Corvette Power
Verdad Gallardo
10 Camaros You Should Never Buy

10 LS Engine Myths That Refuse to Die
Verdad Gallardo
You did a great job bro. Also that is not the cutting bit you would want to use. At least that's not even close to what i use. I use a rounded sort of tree shaped carbide bit, then either sanding drums or a flapper wheel, (flapper works better and it last waaaaaaaay longer), then 120-600 grit sandpaper, then polishing compound with a cotton wheel, then emory paper then clean it up with seafoam.

Looks good. Now you just need to cut half of the throttle shaft off and then grind down the threaded side of the 2 screws that hold the plate to the shaft and you're set. Did you do the bumpstop mod while you were at it?
Thread Starter
Launching!
iTrader: (3)
Joined: Mar 2006
Posts: 289
Likes: 0
From: searching for the perfect driving line
Originally Posted by 02gixxersix
You did a great job bro. Also that is not the cutting bit you would want to use. At least that's not even close to what i use. I use a rounded sort of tree shaped carbide bit, then either sanding drums or a flapper wheel, (flapper works better and it last waaaaaaaay longer), then 120-600 grit sandpaper, then polishing compound with a cotton wheel, then emory paper then clean it up with seafoam.
Thread Starter
Launching!
iTrader: (3)
Joined: Mar 2006
Posts: 289
Likes: 0
From: searching for the perfect driving line
Originally Posted by Red99TA
Looks good. Now you just need to cut half of the throttle shaft off and then grind down the threaded side of the 2 screws that hold the plate to the shaft and you're set. Did you do the bumpstop mod while you were at it?