

Radical Radiator Relocation?
 05-02-2009, 11:04 AM
#81
Misc stuff
If there is anything else under the hood you guys think looks off, let me know. I plan to hide the coil packs later on and shave the bosses off the valvecovers. I liked that water pump idea. If I took both the water and steering pumps off it would certainly be a unique look!
When I cut that boss off the bottom of the radiator, I found it was hollow and had sand inside. I guess it proves they use a sand mold to make them.
Chevroletfreak, how do you plan to reconnect all those wires to the fusebox again? On the passenger side they are grouped into 3 lengths and then color coded making it easy. The fuse box looks like a pandoras box.
For the air scoop I had a novel idea. Why not take 18ga aluminum sheet, roll some beads on it for stiffness and then tack weld it straight to the condensor? They are both aluminum. I can't weld it, but I know someone who can. If shaped properly, it can be installed and removed through the front. I can also make a small shroud along the top between the condensor and radiator. Hmmm, that might work out sweet.
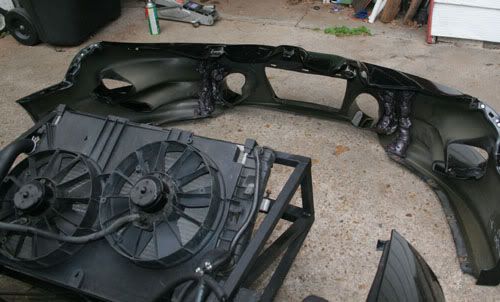
Today I think I'm going to wrap the tubing in the front with tin foil and then spray some black, low expansion foam onto the nose in a few spots. That way it will shape itself to the tubing and support the weight of the bumper cover. It will stick to the nose, but not the tubing.
If there is anything else under the hood you guys think looks off, let me know. I plan to hide the coil packs later on and shave the bosses off the valvecovers. I liked that water pump idea. If I took both the water and steering pumps off it would certainly be a unique look!
When I cut that boss off the bottom of the radiator, I found it was hollow and had sand inside. I guess it proves they use a sand mold to make them.
Chevroletfreak, how do you plan to reconnect all those wires to the fusebox again? On the passenger side they are grouped into 3 lengths and then color coded making it easy. The fuse box looks like a pandoras box.
For the air scoop I had a novel idea. Why not take 18ga aluminum sheet, roll some beads on it for stiffness and then tack weld it straight to the condensor? They are both aluminum. I can't weld it, but I know someone who can. If shaped properly, it can be installed and removed through the front. I can also make a small shroud along the top between the condensor and radiator. Hmmm, that might work out sweet.
Today I think I'm going to wrap the tubing in the front with tin foil and then spray some black, low expansion foam onto the nose in a few spots. That way it will shape itself to the tubing and support the weight of the bumper cover. It will stick to the nose, but not the tubing.
Last edited by JasonWW; 05-02-2009 at 11:16 AM.
 05-02-2009, 02:35 PM
#82
TECH Apprentice
iTrader: (6)

Join Date: Nov 2002
Location: Oklahoma City
Posts: 305
Likes: 0
Received 0 Likes
on
0 Posts

I considered that a long time ago. There's only so many places you can run those wires. The reason I don't want them in the frame rail is because I plan to route cool air for my brakes through the frame. It's very difficult to route a 3" tube from the nose to the rotor and most folks have it hanging under or above the sway bar. It tends to get pinched or scraped up like that. I plan to run air into the frame, the front of which will be welded shut. Then cut a hole to let the air out in the wheel well. You squirt some foam into the rail to force the air out and attach a hose from the rail to the rotor. It's a very clean looking setup and hard to spot unless the wheel is removed.
Hmmm, I might be able to run both the wires and the air through there. Or maybe have the wires exit through the bottom of the frame before it gets to the air duct part. The main thing is to keep the heat away from them. I'm going to have to do some measuring and looking to see what's possible. Thanks for getting my gears turning on this idea.
Did you say your doing this on the drivers side? I'm leaving that side as is becuase they are pretty much already hidden over there. I'm mainly focused on the passenger side. Why are doing the drivers side? Do you have any pics you can post? Go ahead, I want to see.
Ps. Hey, you know SRZ. I remember him, he would tell me about his autobahn runs and such. Small world. Have you ran into Ragtop Rat? He's over there with a killer candy apple maroon TA. His car is amazing as well.
Yeah, I am trying to do the driver side because I want to relocate my ABS under the fuse boxes. That would clean up the clutter on the framerail and make it much easier to keep clean. It would also allow me to hide the crossover going to the passenger side because I can put it inside the crossover beam on top of the radiator (it is also hollow). My delay now is time and finding all the correct fitting and brake lines to make them longer.
05-02-2009, 02:39 PM
#83
TECH Apprentice
iTrader: (6)
Join Date: Nov 2002
Location: Oklahoma City
Posts: 305
Likes: 0
Received 0 Likes
on
0 Posts
EDIT: I think I misunderstood your question and went back out to look at my car. My initial intentions were to disconnect the firewall connector and route that end into the framerail from front to back. Now that I have looked at it more, I have realised it will not work. There are too many bolts boing into the space. The only way to make it happen would be to cut and splice. Maybe a custom made panel attached to the framerail covering it.
Last edited by chevroletfreak; 05-02-2009 at 02:58 PM. Reason: new info
05-02-2009, 03:57 PM
#84
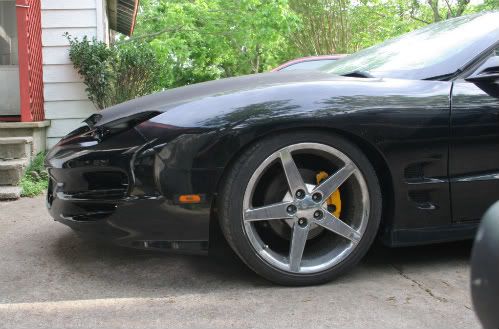
I think Ragtop is up north from you in Norway. He may not go to shows by you. The European F-bodies have got to stick together and show those guys what real muscle is all about.  Try a search on his name. He's got air ride suspension, I-forged rims and that wicked paint job I mentioned. He posts on this forum ocassionally. It used to be a red LT1 car with TTII rims but he updated the nose and hood and soon the engine. You got to see it. No offense to you or anyone else, but his exterior puts us all to shame.
Yes about that wiring. I thought you would pull each wire out of the fuse box and then plug it back in. You'd have to take good color photos to get them back in the right hole. I don't know if I would want to tackle that.
On those brake lines. I think they sell them already made up in different lengths at some autoparts stores. You may have to add a loop or something if they are too long, but it sure beats making them from scratch.
Try a search on his name. He's got air ride suspension, I-forged rims and that wicked paint job I mentioned. He posts on this forum ocassionally. It used to be a red LT1 car with TTII rims but he updated the nose and hood and soon the engine. You got to see it. No offense to you or anyone else, but his exterior puts us all to shame. Yes about that wiring. I thought you would pull each wire out of the fuse box and then plug it back in. You'd have to take good color photos to get them back in the right hole. I don't know if I would want to tackle that.
On those brake lines. I think they sell them already made up in different lengths at some autoparts stores. You may have to add a loop or something if they are too long, but it sure beats making them from scratch.
Last edited by JasonWW; 05-02-2009 at 07:00 PM.
05-02-2009, 04:35 PM
#85
TECH Apprentice
iTrader: (6)
Join Date: Nov 2002
Location: Oklahoma City
Posts: 305
Likes: 0
Received 0 Likes
on
0 Posts
I have not seen any premade with the right size fittings for our cars. They have dif. sizes on each end......and parts stores aren't so plentiful around here. GL!
05-04-2009, 11:36 PM
#86
Another update.
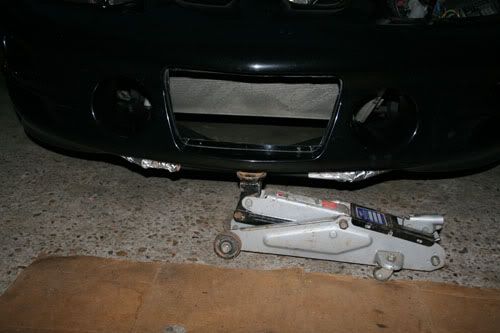
OK, I think I've done the final welding on the tubular nose section. I filled in the open tube ends and added my diagonal braces on the bottom.
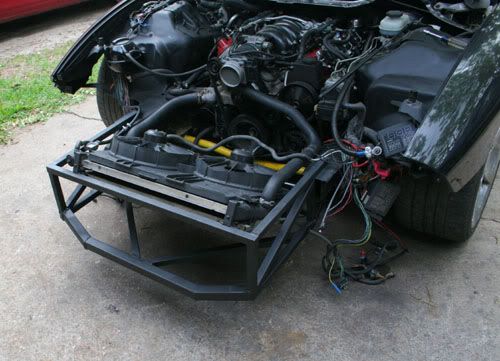
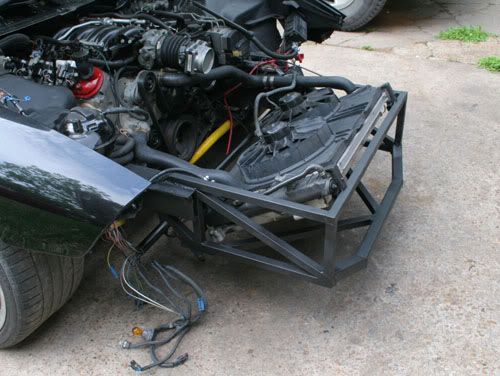
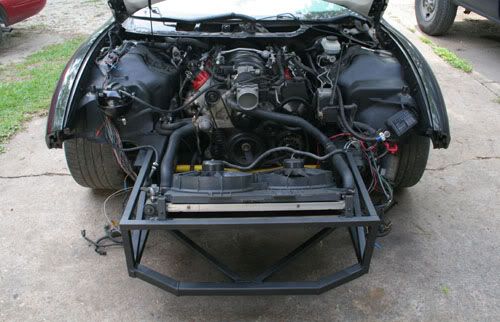
I can finally get the car off the jack stands.
Now to hold the nose in place. I wrapped the front tubes in tin foil and positioned things just right.
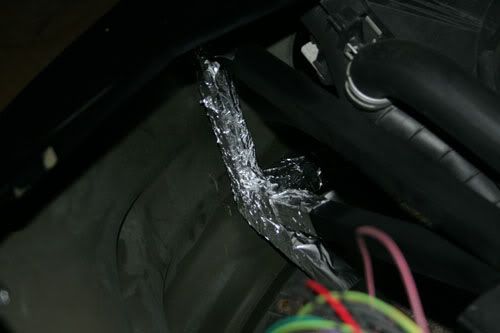
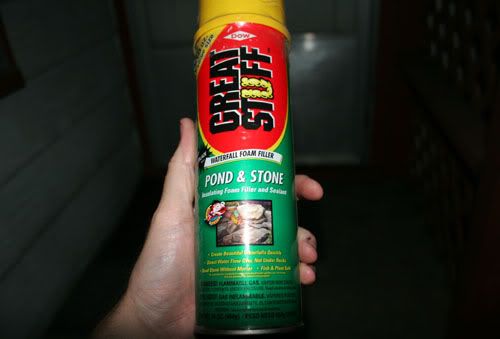
I then applied a black, low expansion foam. The cured foam looks a little funky, but the nose is held in place and supported excellently. I'll probably go back and trim away any foam I don't actually need. It cuts easily with a razer blade.
OK, I think I've done the final welding on the tubular nose section. I filled in the open tube ends and added my diagonal braces on the bottom.
I can finally get the car off the jack stands.
Now to hold the nose in place. I wrapped the front tubes in tin foil and positioned things just right.
I then applied a black, low expansion foam. The cured foam looks a little funky, but the nose is held in place and supported excellently. I'll probably go back and trim away any foam I don't actually need. It cuts easily with a razer blade.
Last edited by JasonWW; 05-05-2009 at 12:29 AM.
05-05-2009, 12:32 AM
#87
Next:
Make lower rad mount - Done
Make bumper cover supports - Done
Hoses - Done
Add expansion tank - Done
Add beefy lower front bar for lifting and towing - Done
Add more bracing - Done
Move battery to rear - Done
Filled in holes on shocktowers - Done
Relocated vacuum tank near PCM - Done
NOW:
Install hood latches (as in 2) - Got it, not installed yet
Finisg hiding all underhood wiring - In process
Hide TCS motor - In process
Build headlights - got projectors and HID's
Paint and install wiper parts
Fab up the radiator scoop
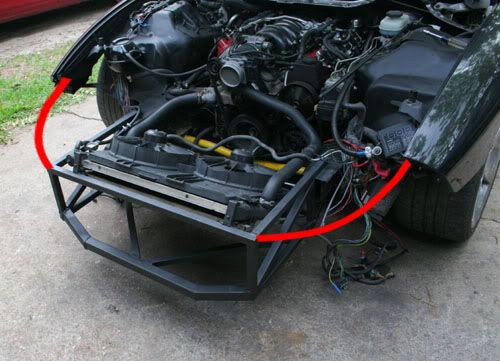
I can't find a good spot for the TCS motor. It won't fit under the cowl on either side. I think I'm going to extend the throttle cable and mount it by the fuse boxes along with the cruise control unit. The wiring loom on the passenger side will probably need to go through the frame.
If anyone wants to know how the cables run for cars with and without TCS, let me know and I'll explain it. I also locked the radiator into place. I'll show that pic later.
The only other steel tubing I can think of to add is maybe this. I may add it just for crash protection or if I spin into a wall. Full or partial rollcage will come later.
Make lower rad mount - Done
Make bumper cover supports - Done
Hoses - Done
Add expansion tank - Done
Add beefy lower front bar for lifting and towing - Done
Add more bracing - Done
Move battery to rear - Done
Filled in holes on shocktowers - Done
Relocated vacuum tank near PCM - Done
NOW:
Install hood latches (as in 2) - Got it, not installed yet
Finisg hiding all underhood wiring - In process
Hide TCS motor - In process
Build headlights - got projectors and HID's
Paint and install wiper parts
Fab up the radiator scoop
I can't find a good spot for the TCS motor. It won't fit under the cowl on either side. I think I'm going to extend the throttle cable and mount it by the fuse boxes along with the cruise control unit. The wiring loom on the passenger side will probably need to go through the frame.
If anyone wants to know how the cables run for cars with and without TCS, let me know and I'll explain it. I also locked the radiator into place. I'll show that pic later.
The only other steel tubing I can think of to add is maybe this. I may add it just for crash protection or if I spin into a wall. Full or partial rollcage will come later.
Last edited by JasonWW; 05-05-2009 at 12:41 AM.
05-05-2009, 07:02 AM
#88
I think I'm going to sport the Raptor hood. How can I install the male part of the hood latch to the fiberglass without it wanting to rip out under force? I need some kind of metal plate to spread the load, but the location is sealed. Maybe I cut an access hole, install the parts and then seal the hole back up?
Any suggestions are appreciated.
Any suggestions are appreciated.
 05-11-2009, 06:46 PM
#92
I have mixed feelings about the twin hood latches. I'm thinking a linear actuator would be better. No latches are needed and It would make the engine reveal more dramatic. I might be able to find one for $50-$60. What do you guys think?
BTW, I filled in the TCS notch on the shock tower. It was bugging me.
BTW, I filled in the TCS notch on the shock tower. It was bugging me.
05-11-2009, 07:00 PM
#93
TECH Senior Member
iTrader: (96)
Join Date: Aug 2007
Location: Turnin' Wrenches Infractions: 005
Posts: 24,241
Likes: 0
Received 81 Likes
on
72 Posts
I have mixed feelings about the twin hood latches. I'm thinking a linear actuator would be better. No latches are needed and It would make the engine reveal more dramatic. I might be able to find one for $50-$60. What do you guys think?
BTW, I filled in the TCS notch on the shock tower. It was bugging me.
BTW, I filled in the TCS notch on the shock tower. It was bugging me.
05-12-2009, 12:12 PM
#94
Picture update.
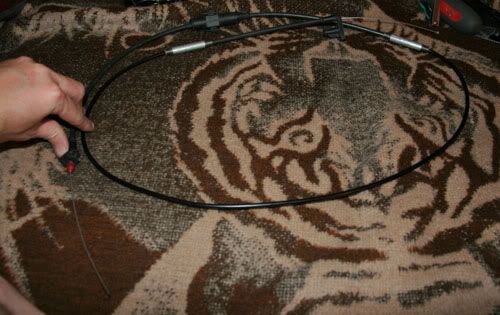
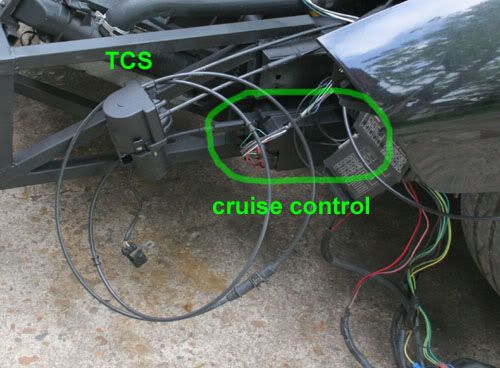
I extended the throttle cable about 2 1/2 feet.
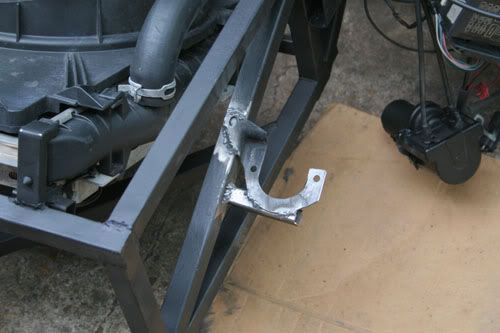
I trimmed the stock bracket for the TCS motor and found a nice spot for it.

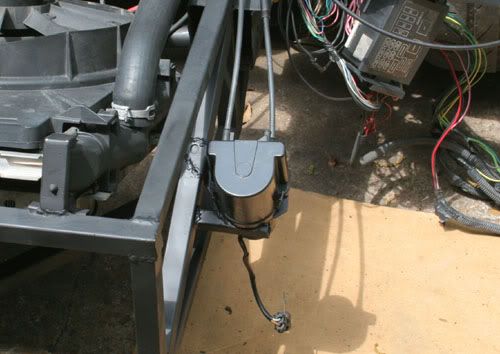
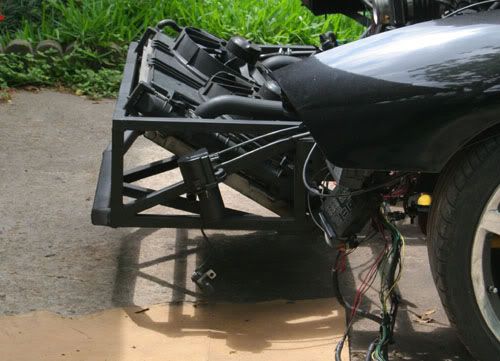
Here you can see the cruise control module. I welded the factory mount with rubber bushings to the frame. It's facing the opposite direction of stock in order for the cable to easily connect to the TCS motor. I thought about shortening the cable since it's way too long now, but it's not worth the trouble.
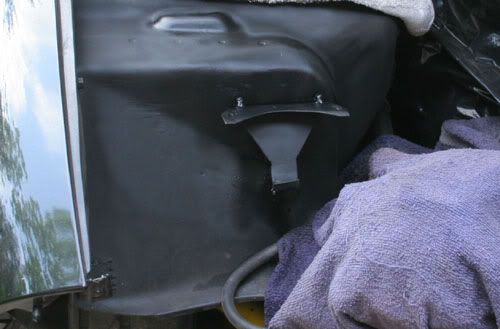
Finally, the new expansion tank location and smoothed shock tower. I've never seen anyone fill in the TCS notch in the tower before, so of course I had to do it.
I extended the throttle cable about 2 1/2 feet.
I trimmed the stock bracket for the TCS motor and found a nice spot for it.
Here you can see the cruise control module. I welded the factory mount with rubber bushings to the frame. It's facing the opposite direction of stock in order for the cable to easily connect to the TCS motor. I thought about shortening the cable since it's way too long now, but it's not worth the trouble.
Finally, the new expansion tank location and smoothed shock tower. I've never seen anyone fill in the TCS notch in the tower before, so of course I had to do it.
Last edited by JasonWW; 05-12-2009 at 12:25 PM.
