


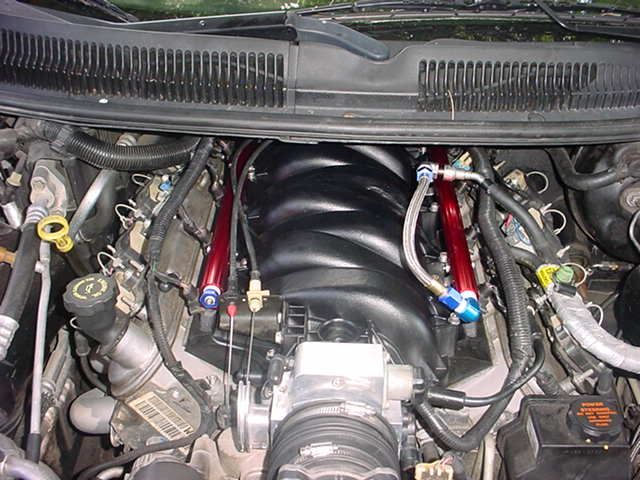
Ported mt FAST90 today with alot of pics
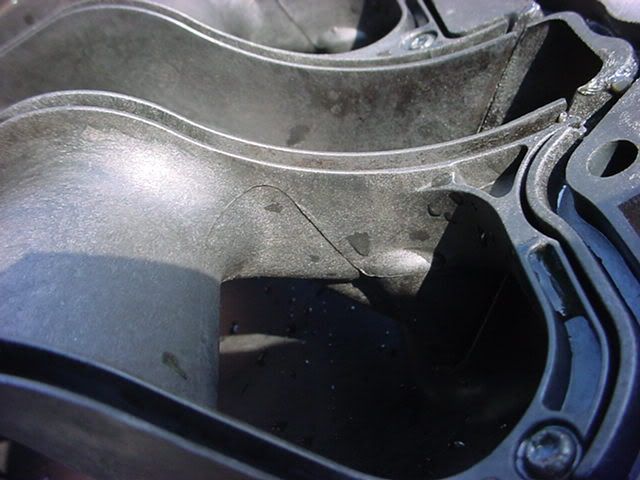
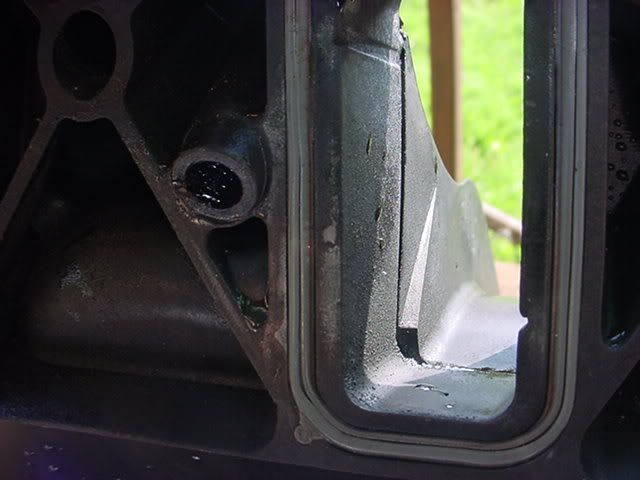
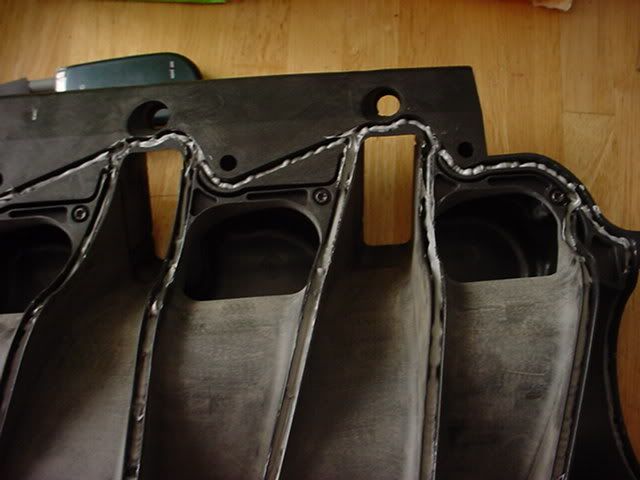
My car has been running kinda shitty lately, throwing goofy lean codes and such so I finally got around to checking my MAP sensor. Sure enough it is loose and sucking in crud from the valve cover breather I have back there. So I figured if I have to take the manifold off to clean it and fix the MAP I might as well port the sumbitch too. First of all, now I know now why it is so expensive. There is alot of stuff in there to touch on if you are going to do it right (IMO). I see most guys just take out the step near the head mating surface, but there is much more you could do, and more than even I was willing to grind on. Anyway, once I popped the top shell off I noticed there is a casting ridge right after the bellmouth entry of the runner and the sides of the runner have a rough surface like the exterior finish and a small casting line almost the length of the runner. Top shell before "porting", really I just used a Dremel and some long sanding rolls for everything.
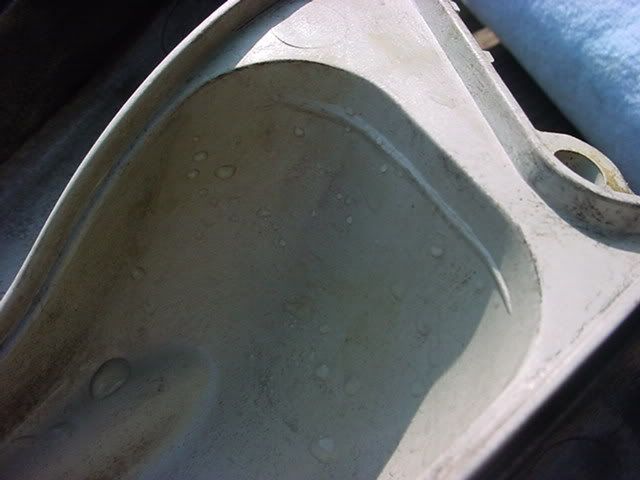

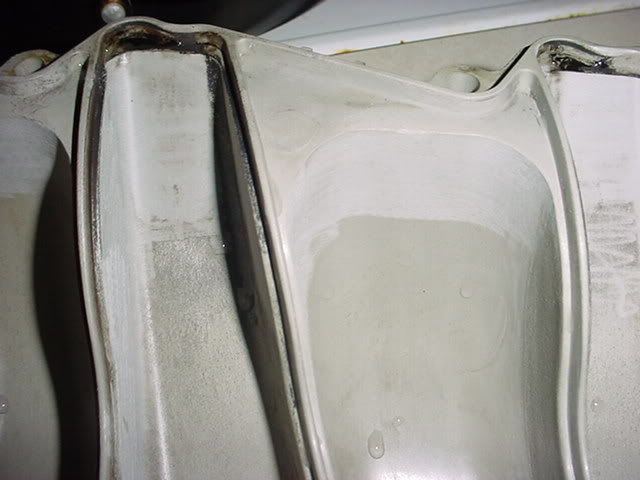
I have to finish the top shell tomorrow but this is what it looks like with most of that stuff taken off.
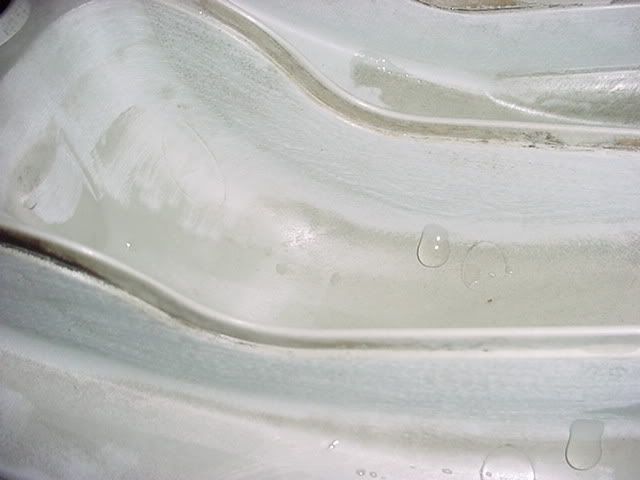
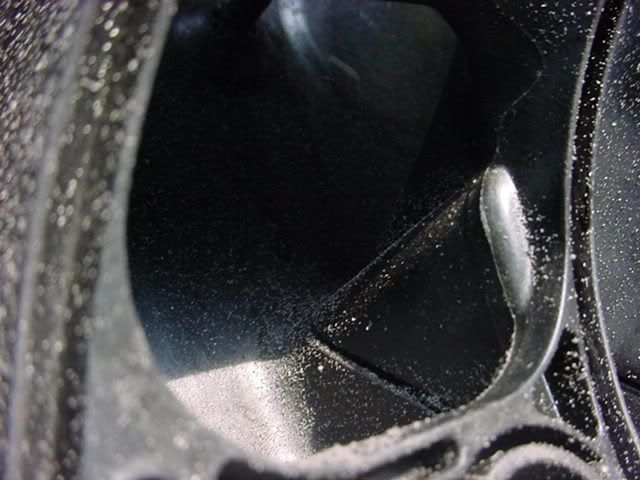
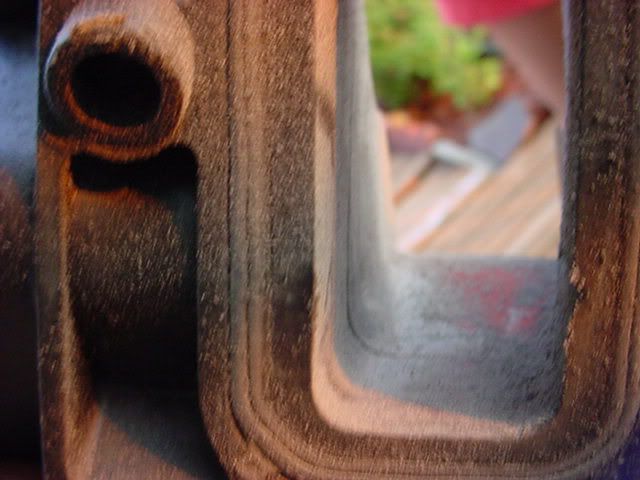
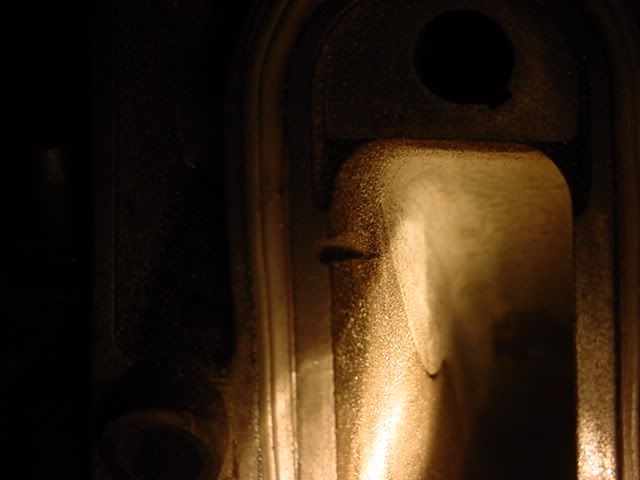
Now on to the middle/bottom shells. I kept these together because it looked like the intake was taken apart already and put back together using RTV. I destroyed the top seal taking the top portion off and it is a PITA to get out that RTV so I didn't want to do that again if I didn't have to. The bell mouth of the runner has a nice casting line all the way around.
There is also a good size "hump" right there as well.
I took off the casting line first, it is all around the circumference of the port entry.
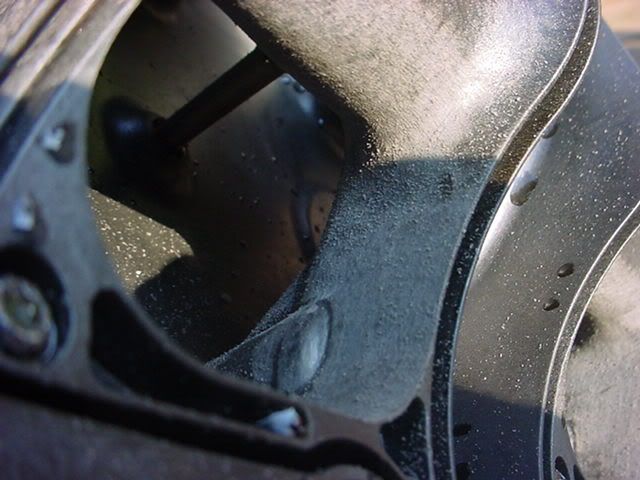
Then I blended the hump into the entry..
There was also a small imperfection where the bottom shell meets the middle just under the hump towards the outside wall of the intake. If you look hard you can see that I blended that area as well. I moved on to the head port entry and the infamous "step".
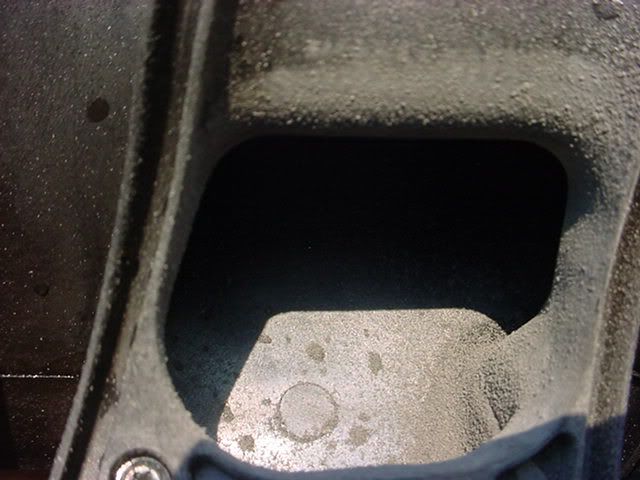
So I sanded that dowm and blended the circumference of the port where the bottom and middle shells meet just before the head port. I didn't port where the intake meets the head at all since I am running stock LS6 heads right now.
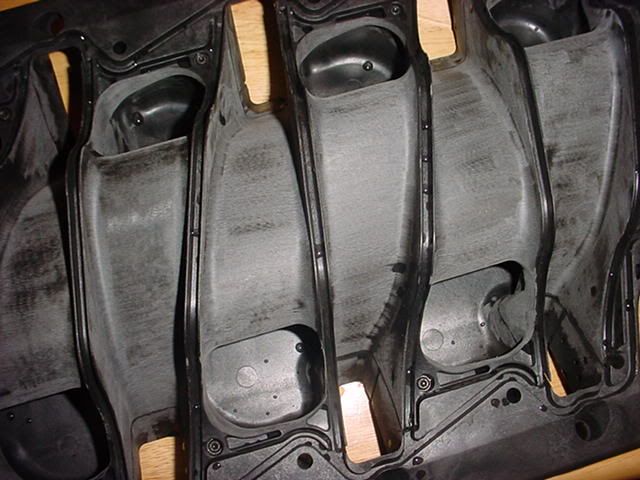
Then I sanded the whole runner from bell mouth to head entrance.
This took me 6 hours to do. I starting rushing a little and caught myself, went in the house, logged onto Youtube, and listened to Conway Twitty sing "Slow Hand"... lol. After that I took it easy. I still need to finish up the top shell and go over everything with some emery cloth. I don't know if this is how it is supposed to go but WTF, it was free..minus the dremel and misc/ stuff. I could of used my air tool but I feel like that would have burned right through the intake even with the sanding rolls. Anyway, I know I'm a bit long winded but maybe this will help someone. I'd like to do back to back dyno but I changed my headers so I can't. If there is someone local to Baltimore, I would be willing to meet you at a dyno to swap your FAST90 for my ported one just to see the gains.
Larry
Edit: I could defintely see that you could run (fabricate) an aftermarket fuel rail setup and space it upwards using the normal intake bolts for mounting. If you did that you could epoxy/JB Weld/Splash Zone the crossover intrusuons and fuel rail mounting intrusions in the intake runners for even more gains. I can't figure how some places say they increase plenum volume though. I might take a look at the TB mouting flange tomorrow as well.
I have to finish the top shell tomorrow but this is what it looks like with most of that stuff taken off.
Now on to the middle/bottom shells. I kept these together because it looked like the intake was taken apart already and put back together using RTV. I destroyed the top seal taking the top portion off and it is a PITA to get out that RTV so I didn't want to do that again if I didn't have to. The bell mouth of the runner has a nice casting line all the way around.
There is also a good size "hump" right there as well.
I took off the casting line first, it is all around the circumference of the port entry.
Then I blended the hump into the entry..
There was also a small imperfection where the bottom shell meets the middle just under the hump towards the outside wall of the intake. If you look hard you can see that I blended that area as well. I moved on to the head port entry and the infamous "step".
So I sanded that dowm and blended the circumference of the port where the bottom and middle shells meet just before the head port. I didn't port where the intake meets the head at all since I am running stock LS6 heads right now.
Then I sanded the whole runner from bell mouth to head entrance.
This took me 6 hours to do. I starting rushing a little and caught myself, went in the house, logged onto Youtube, and listened to Conway Twitty sing "Slow Hand"... lol. After that I took it easy. I still need to finish up the top shell and go over everything with some emery cloth. I don't know if this is how it is supposed to go but WTF, it was free..minus the dremel and misc/ stuff. I could of used my air tool but I feel like that would have burned right through the intake even with the sanding rolls. Anyway, I know I'm a bit long winded but maybe this will help someone. I'd like to do back to back dyno but I changed my headers so I can't. If there is someone local to Baltimore, I would be willing to meet you at a dyno to swap your FAST90 for my ported one just to see the gains.
Larry
Edit: I could defintely see that you could run (fabricate) an aftermarket fuel rail setup and space it upwards using the normal intake bolts for mounting. If you did that you could epoxy/JB Weld/Splash Zone the crossover intrusuons and fuel rail mounting intrusions in the intake runners for even more gains. I can't figure how some places say they increase plenum volume though. I might take a look at the TB mouting flange tomorrow as well.
Last edited by VIPRETR2; Jul 10, 2008 at 03:56 PM.
Thanks guys, I mainly wanted to put this out there for other people thinking about doing it. It seems like it would be very hard to screw this up if you only use sanding rolls and a variable speed dremel. Just keep it slow and work lightly. I have to give props out to these guys who came before me, these threads helped a ton in getting me motivated and semi-knowledgable,
dragonz28
https://ls1tech.com/forums/generation-iii-external-engine/461568-ported-painted-fast-90-pics.html
and
SSwt00SS
https://ls1tech.com/forums/showthrea...t=fast+porting
Although looking at SSwt00SS Mamo ported intake, it *looks* like only the port exit step at the head has been removed. All the casting marks are still on the top shell and the "humps" in the bell mouth entry on the bottom/middle shell are untouched. Maybe they don't make a difference in overall flow but I took them out anyway. I think I might sand the exterior and paint it while I have it off the car as well.
Larry
Trending Topics
LS1 Tech Stories
The Best V8 Stories One Small Block at Time

Gas Monkey Built a 6-Wheel Ferrari Testarossa With a Corvette LT4 Engine
Verdad Gallardo
7 Most Reliable High-Performance Engines GM Has Ever Built
Verdad Gallardo
Amazing '71 Camaro Restomod Is Modern Muscle Car Under the Skin
Verdad Gallardo
6 Common C5 Corvette Failures and What's Involved In Repairing Them
Pouria Savadkouei
Retro Modern Bandit Pontiac Trans AM Comes With Burt Reynolds' Autograph
Verdad Gallardo
Top 10 Greatest Cadillac V Series Performance Models Ever, Ranked
Pouria Savadkouei
Top 10 Most Powerful Chevy Trucks Ever Made!

Hennessey's New Supercharged Silverado ZR2 Has 700 HP
Verdad Gallardo
Coachbuilt N2A Anteros Is an LS2-Powered C6 Corvette In Italian Clothes
Verdad Gallardo

Sorry guys, I messed up with my Photobucket. I'll make it up to you with these extry pics
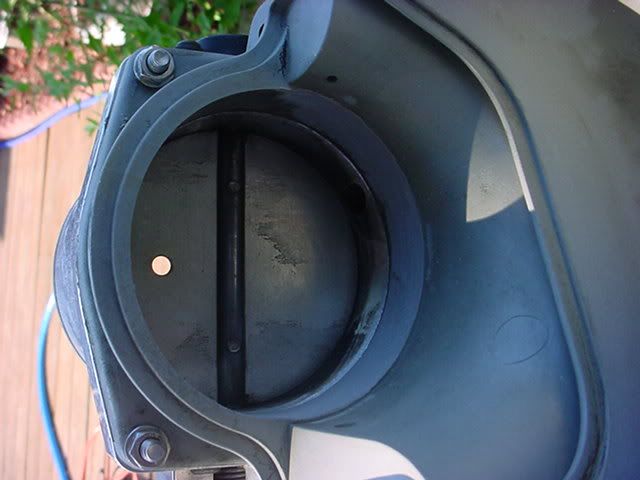
Lil work around the TB to eliminate some overlap of the flange.
Some clearance on the rear bolt hole ribs for a map sensor bolt down/spacer
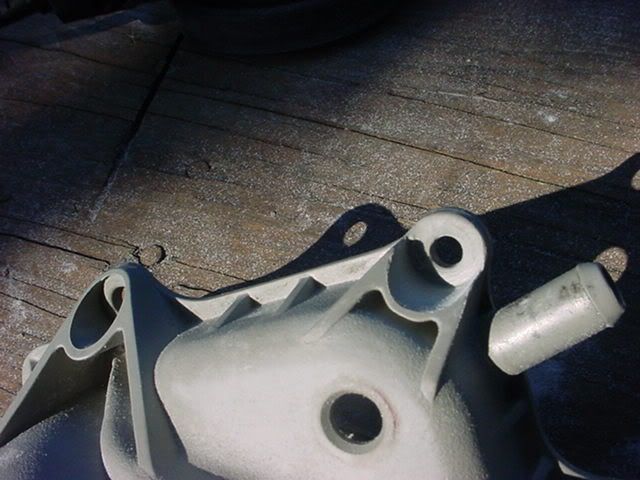
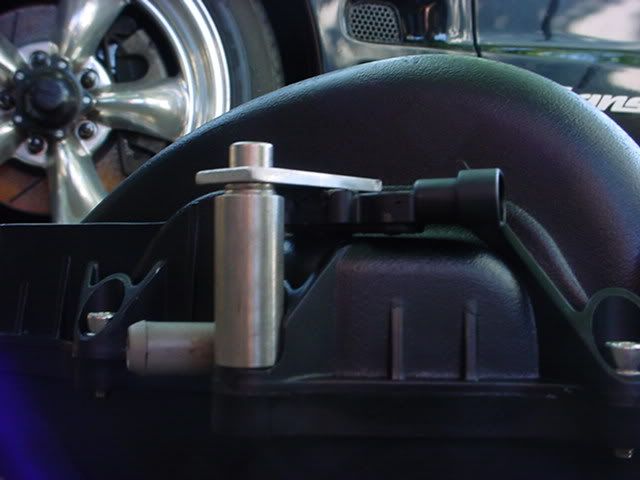
Pic of the finished spacer
I don't plan on cracking this open again so I sealed it with RTV instead of waiting for a new gasket.
After it was bolted together some of the ports, not all, had a mismatch on one or both side of the port between the upper and lower shells
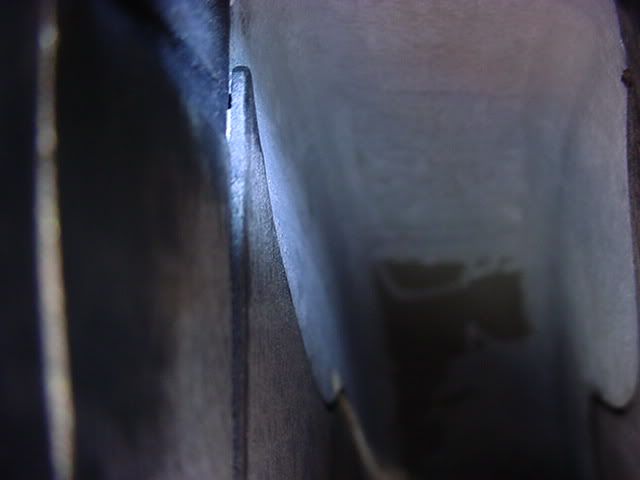
I took care of these with a long extension and sanding rolls
I also did some "sooper secret" **** but here is the final product along with new fuel rails, stainless hardware, and paint.
I hope I can be forgiven for my photo faux pas.
Larry
I also want to thank redtail2426 for posting this up as well, it was a great help.
https://ls1tech.com/forums/showthrea...ight=fast+port
Lil work around the TB to eliminate some overlap of the flange.
Some clearance on the rear bolt hole ribs for a map sensor bolt down/spacer
Pic of the finished spacer
I don't plan on cracking this open again so I sealed it with RTV instead of waiting for a new gasket.
After it was bolted together some of the ports, not all, had a mismatch on one or both side of the port between the upper and lower shells
I took care of these with a long extension and sanding rolls
I also did some "sooper secret" **** but here is the final product along with new fuel rails, stainless hardware, and paint.
I hope I can be forgiven for my photo faux pas.
Larry
I also want to thank redtail2426 for posting this up as well, it was a great help.
https://ls1tech.com/forums/showthrea...ight=fast+port
Last edited by VIPRETR2; Jul 10, 2008 at 04:17 PM.


Looks good. I've been working on mine for the past week and a half every now and then. I'll post up some pics too. Not sure if it's going to pick up much but I figured I would give it a try anyways.
Larry
Thanks so much for fixing the pictures. Awesome work on the porting. It's hard to believe that a $900 intake would have the ridges and steps that this thing has. You would think all it would need is a little port matching and it's good to go. 