

PRC Heads and LSR cam swap (Build Page)
 04-01-2011, 02:50 PM
#21
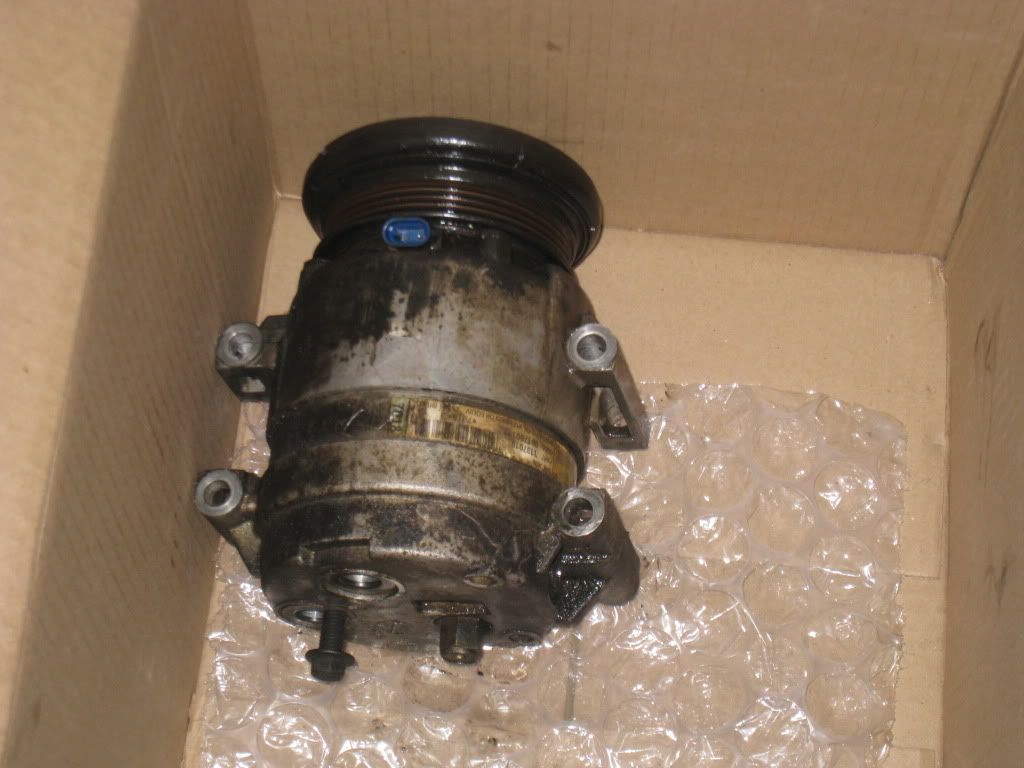
yea i did some parts gathering, i also just pulled out my A/C cause it wasn't really blowing that cold anyway, and would take like 15 min to get any kind of cold in the first place. i can always put it back in if i want to and re-charge it myself for like 20 bucks or so, and it was just ridiculously in the way of my pulling my motor mounts. more pics to come.
 04-02-2011, 10:37 AM
#22
so this stuff was don't on Thursday night, which was a strenuous night. pulling the motor mounts took me a ridiculous amount of time to pull these damn things out, and had to clearance the drivers side clamshell a little to get it back in there!
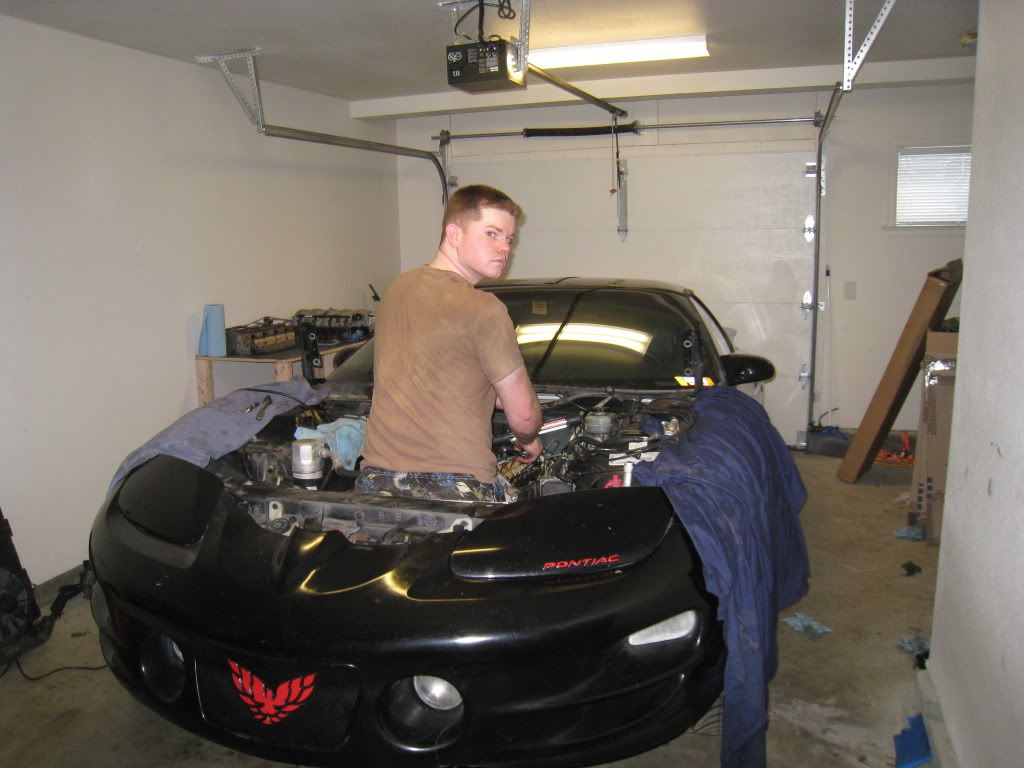
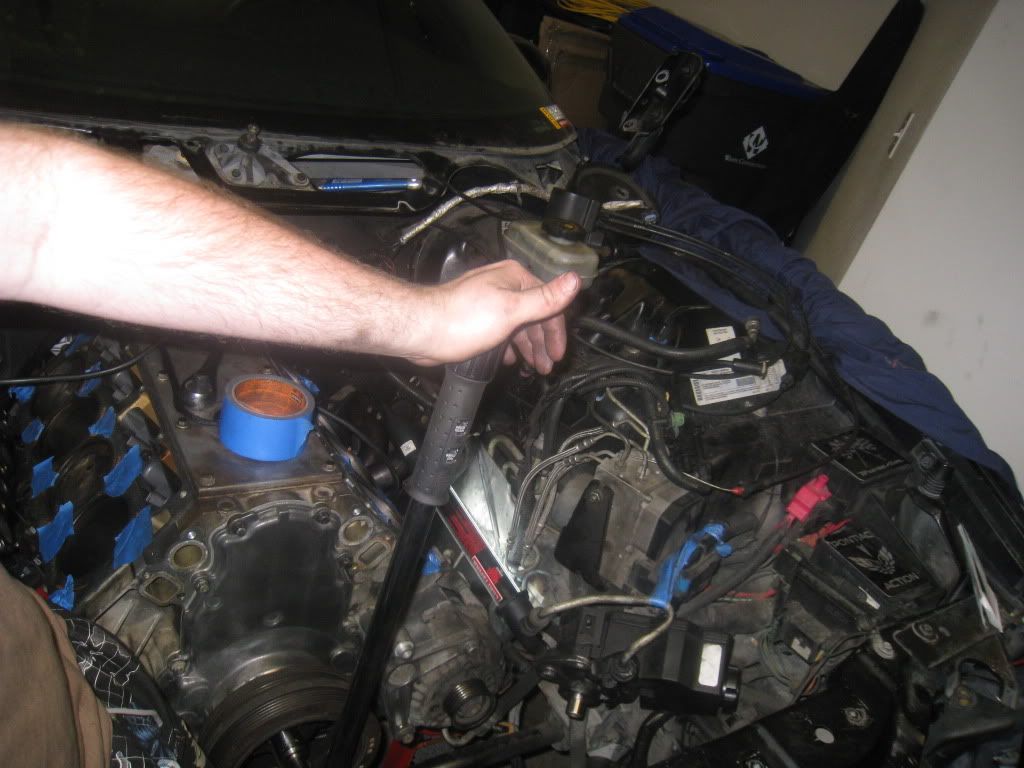
my wife walks in and takes my picture causes she thought it was cute that i could fit in the engine bay, oh well, i think it looks awsome, a person that fits in an F-body engine bay!
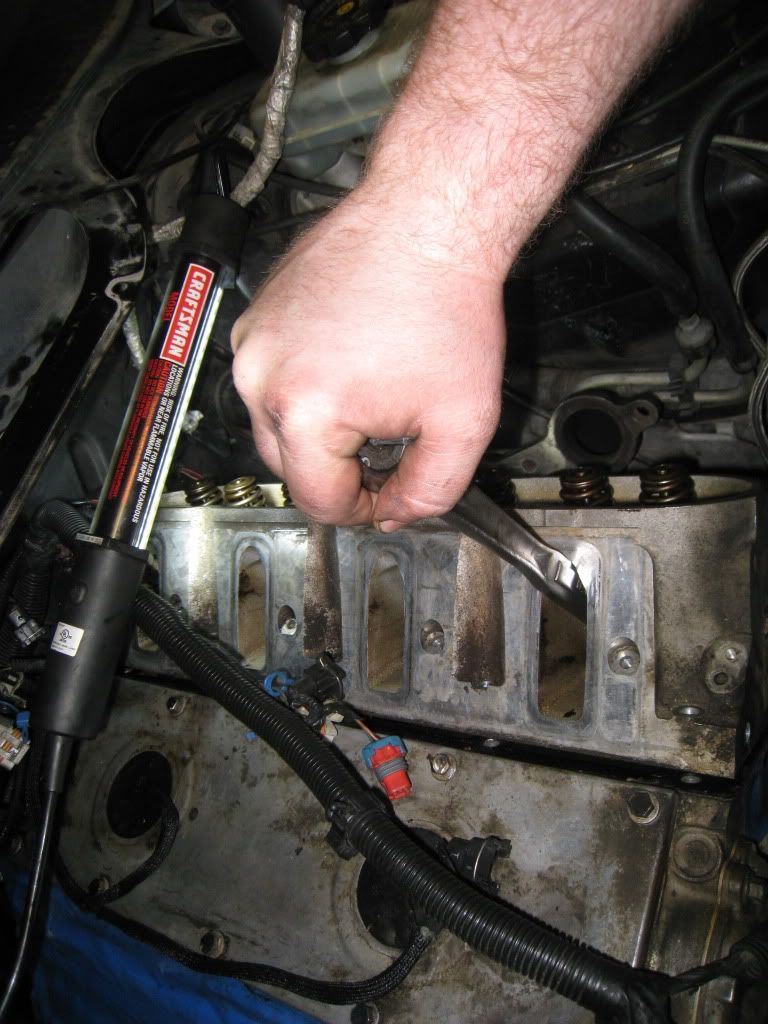
removing the drivers side head was a little more frustrating then the passenger side head. i stripped a rocker bolt and am looking for a new one. i also broke one of the ground straps that are attached to the drivers side head in the back. no biggie but just annoying. i taped it off and will be making a new wire to fit the bolt in the back of the new head. broken wire will be showed in a later picture
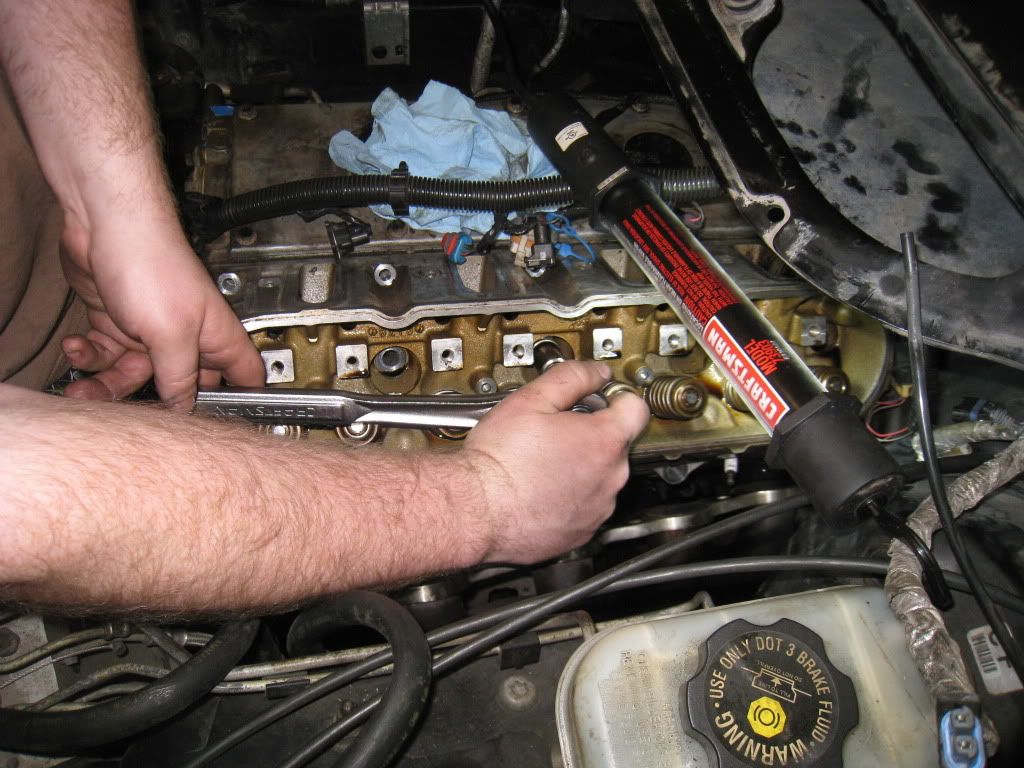
removing the head, just needed a little tug.
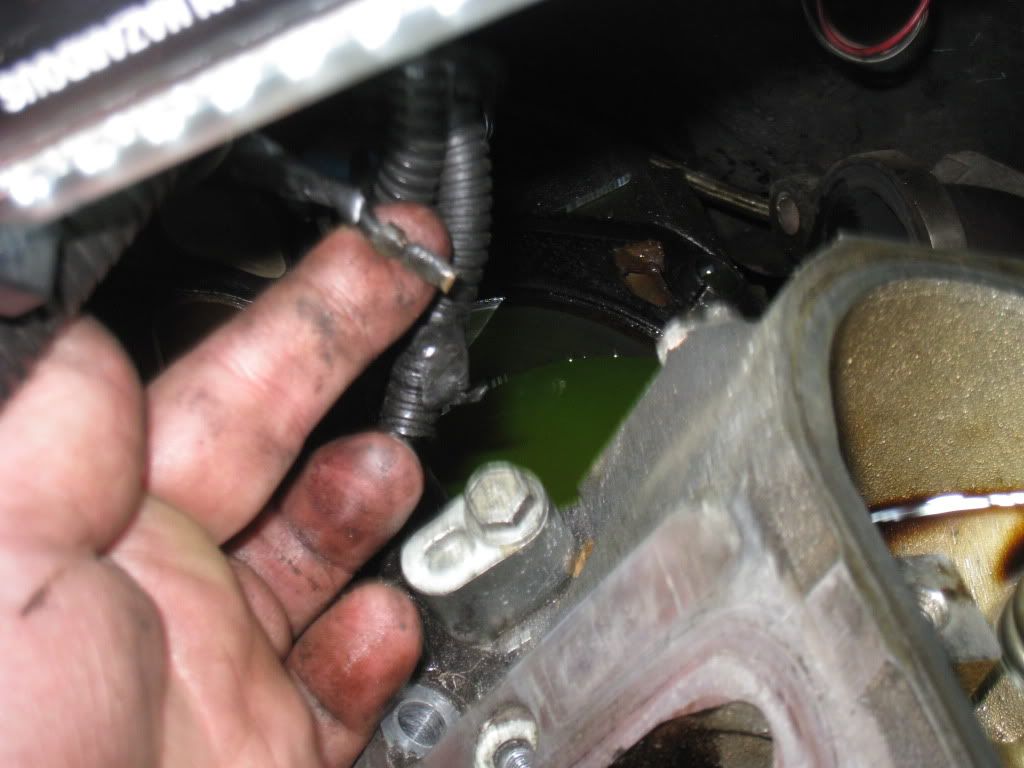
here is the broken wire from the back of the drivers side head. there were 3 wires back there grounded to the head, two on the lower bolt and one on the top bolt, i broke the one on the top bolt cause it was so damn short that i didnt see it till it broke. oh well, 6 inch wire, a splice, and all fixed!
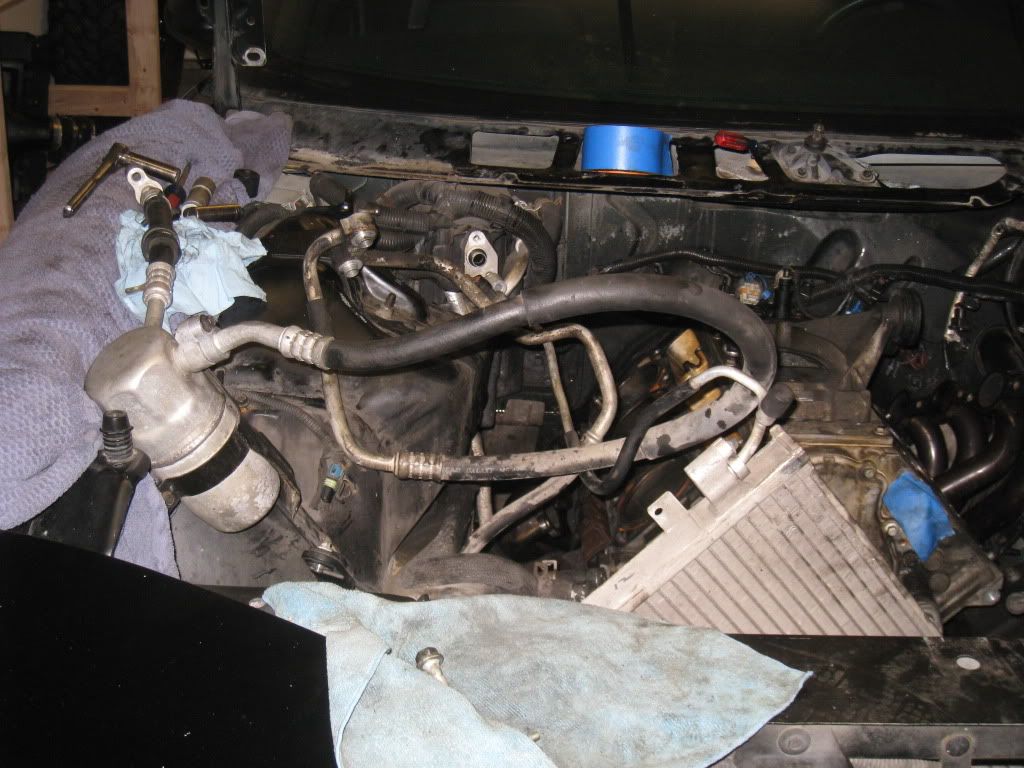
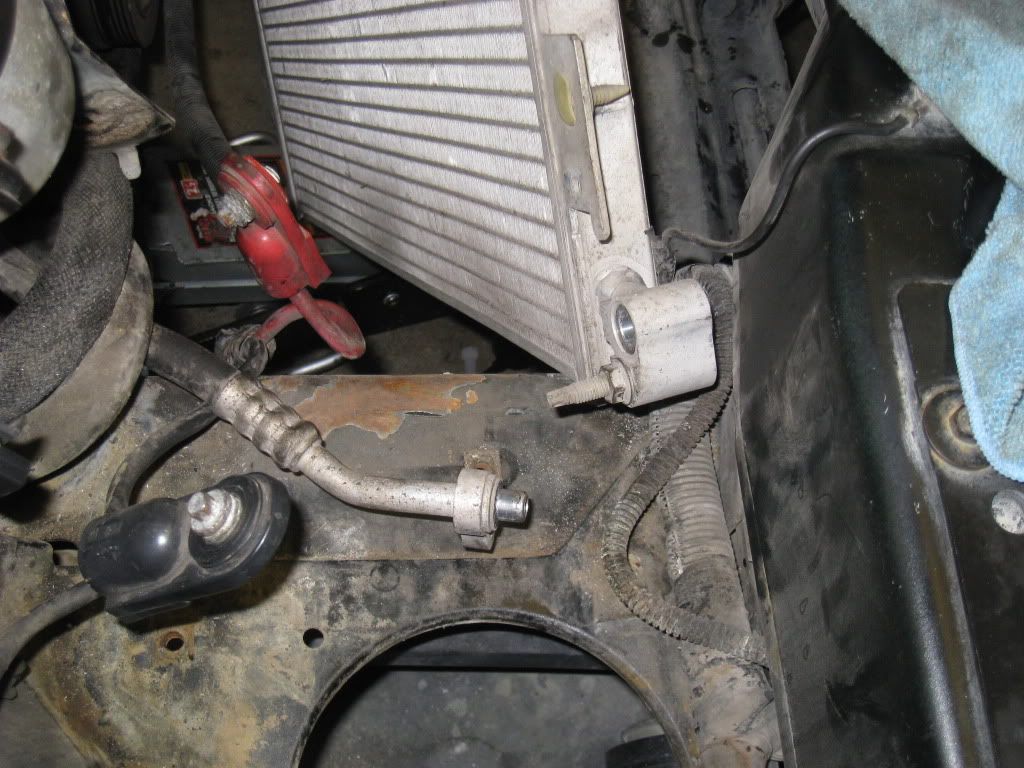
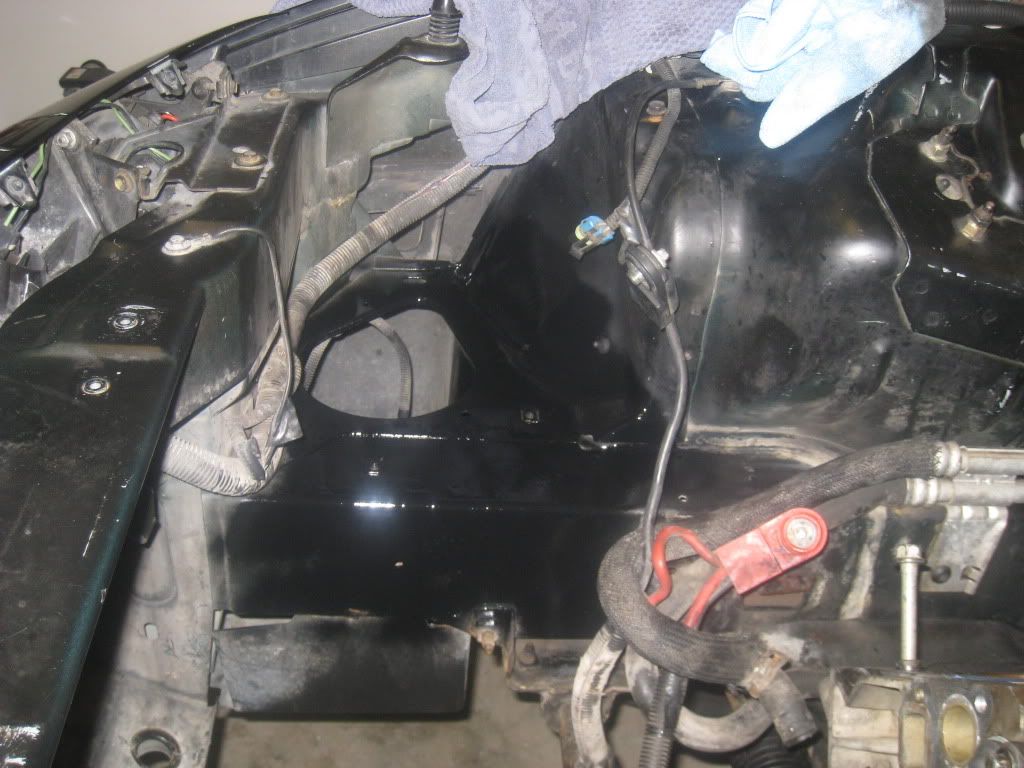
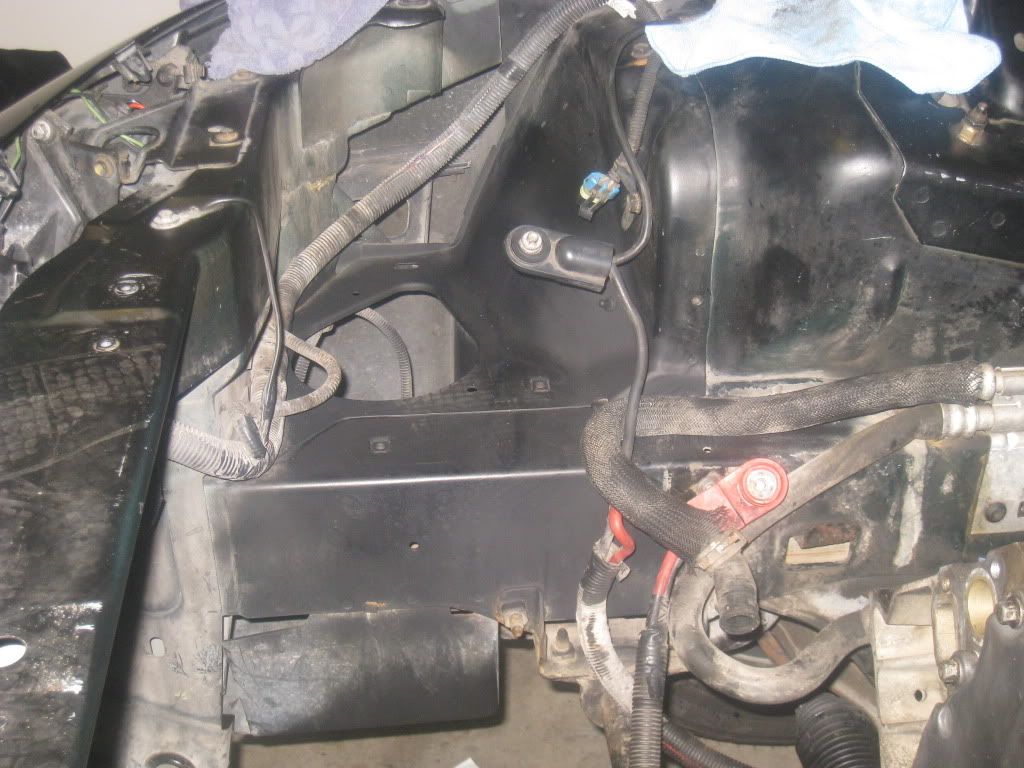
so i was debating if i should remove my A/C or not, and i finally decided to ditch the bitch!! it was in my way and was pissing me off trying to install/remove my motor mounts so i just pulled it out! it wasn't really blowing cold any more anyway, so it was either time to fix, or time to pull it, so i pulled it. now i didn't permanently remove it, i am gonna leave the airbox/heater box intact for now, just in case i decide to re-install it later. that is just in case, probably not but i want to keep my options open
my wife walks in and takes my picture causes she thought it was cute that i could fit in the engine bay, oh well, i think it looks awsome, a person that fits in an F-body engine bay!
removing the drivers side head was a little more frustrating then the passenger side head. i stripped a rocker bolt and am looking for a new one. i also broke one of the ground straps that are attached to the drivers side head in the back. no biggie but just annoying. i taped it off and will be making a new wire to fit the bolt in the back of the new head. broken wire will be showed in a later picture
removing the head, just needed a little tug.
here is the broken wire from the back of the drivers side head. there were 3 wires back there grounded to the head, two on the lower bolt and one on the top bolt, i broke the one on the top bolt cause it was so damn short that i didnt see it till it broke. oh well, 6 inch wire, a splice, and all fixed!
so i was debating if i should remove my A/C or not, and i finally decided to ditch the bitch!! it was in my way and was pissing me off trying to install/remove my motor mounts so i just pulled it out! it wasn't really blowing cold any more anyway, so it was either time to fix, or time to pull it, so i pulled it. now i didn't permanently remove it, i am gonna leave the airbox/heater box intact for now, just in case i decide to re-install it later. that is just in case, probably not but i want to keep my options open
04-02-2011, 10:52 AM
#23
ok so on Friday i didn't even get the mounts removed, it was just a bunch of pain and suffering for my hands and forehead. today i got the mounts out, re-built and re-installed. also cot the cam, oil pump, timing chain and sprockets, and the oil all changed out. it was a good productive day, unlike Thursday!
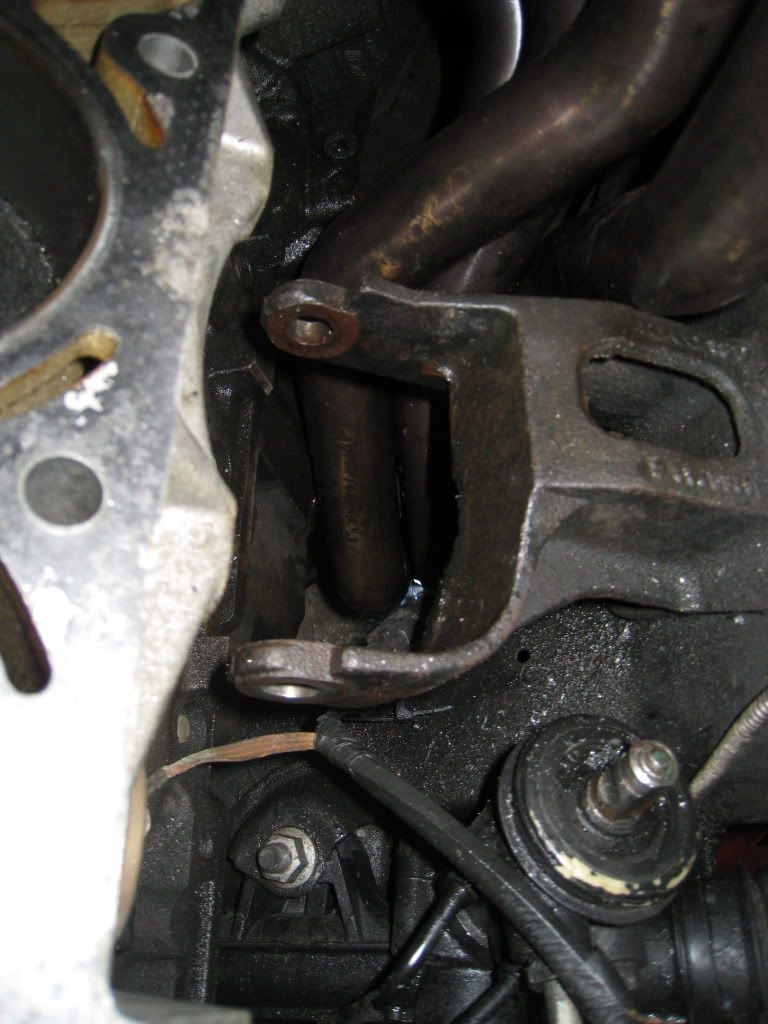
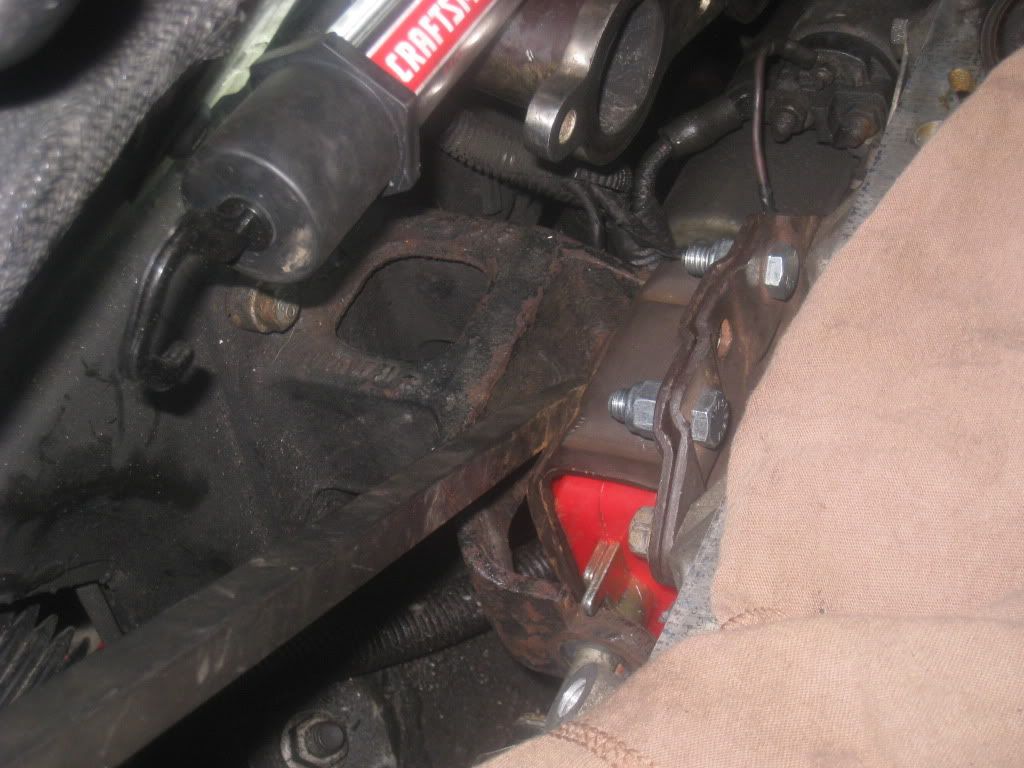
here is the drivers side mount removed
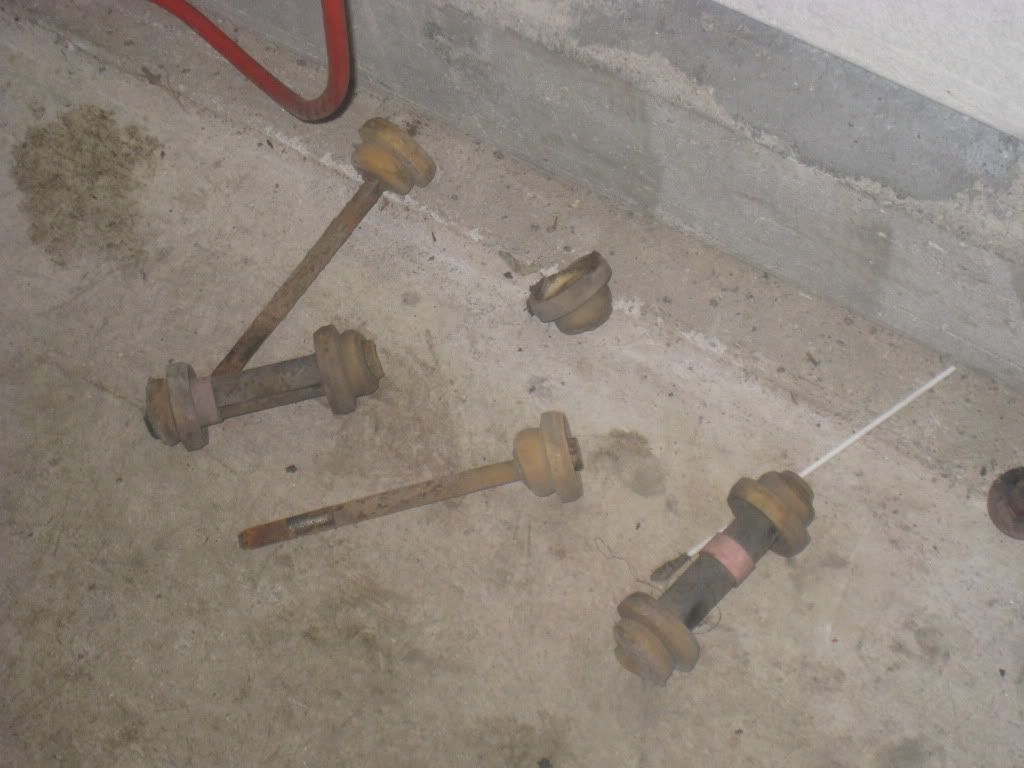
here is one of the old mounts, this one was in the best condition, it was able to be moved back and forth at least 1 inch in its case these things were ready to give at any time, good thing i changed them
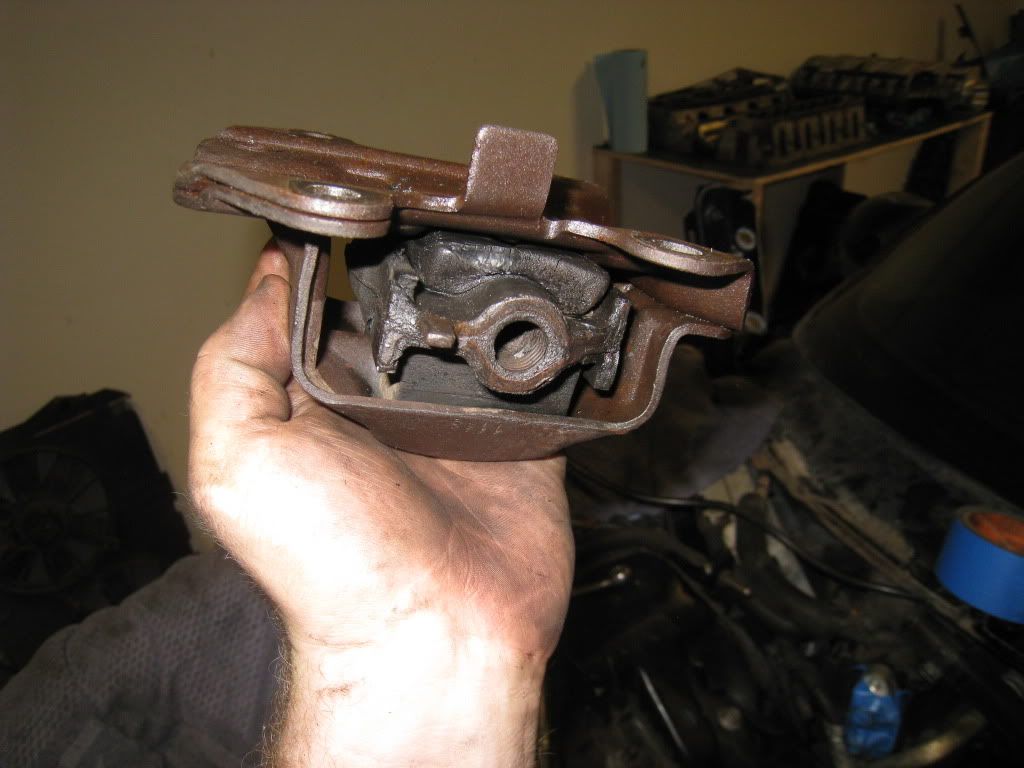
both mounts removed
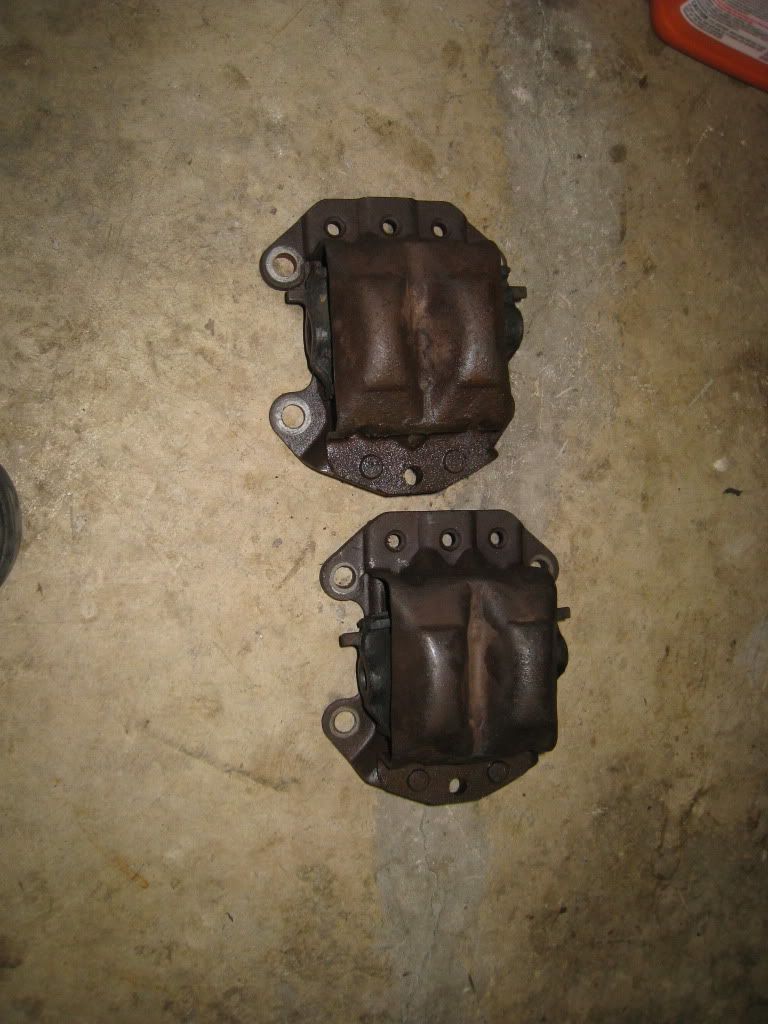
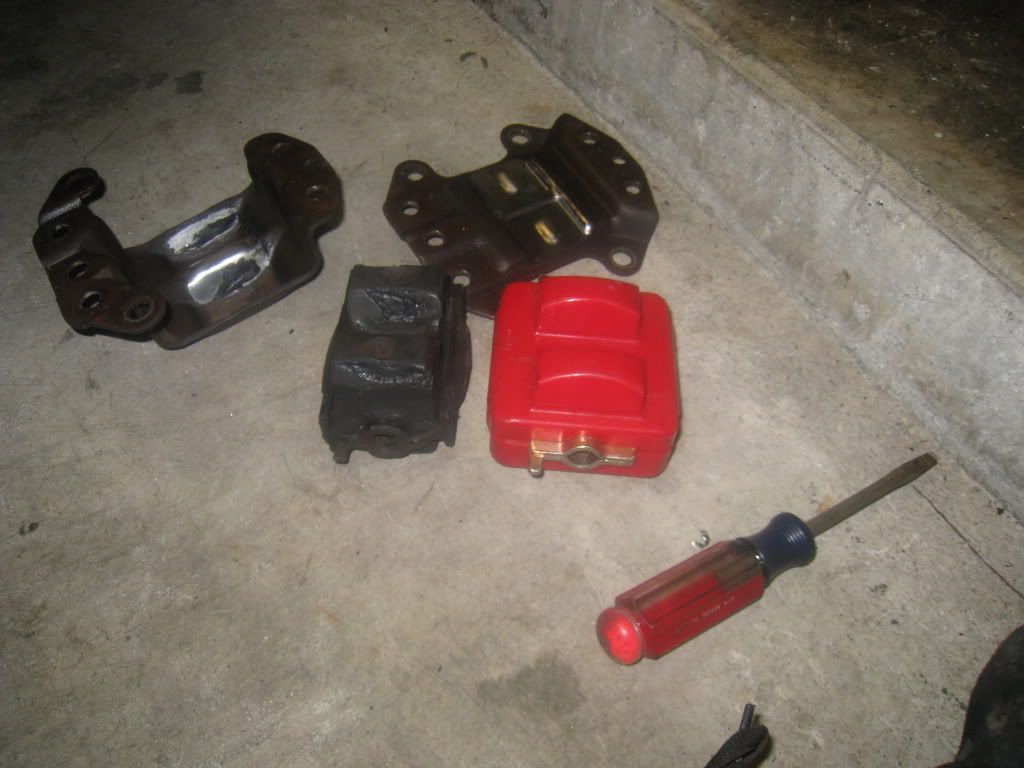
old mounts next to new mounts. the poly ones are almost bigger then the clam shells them self!
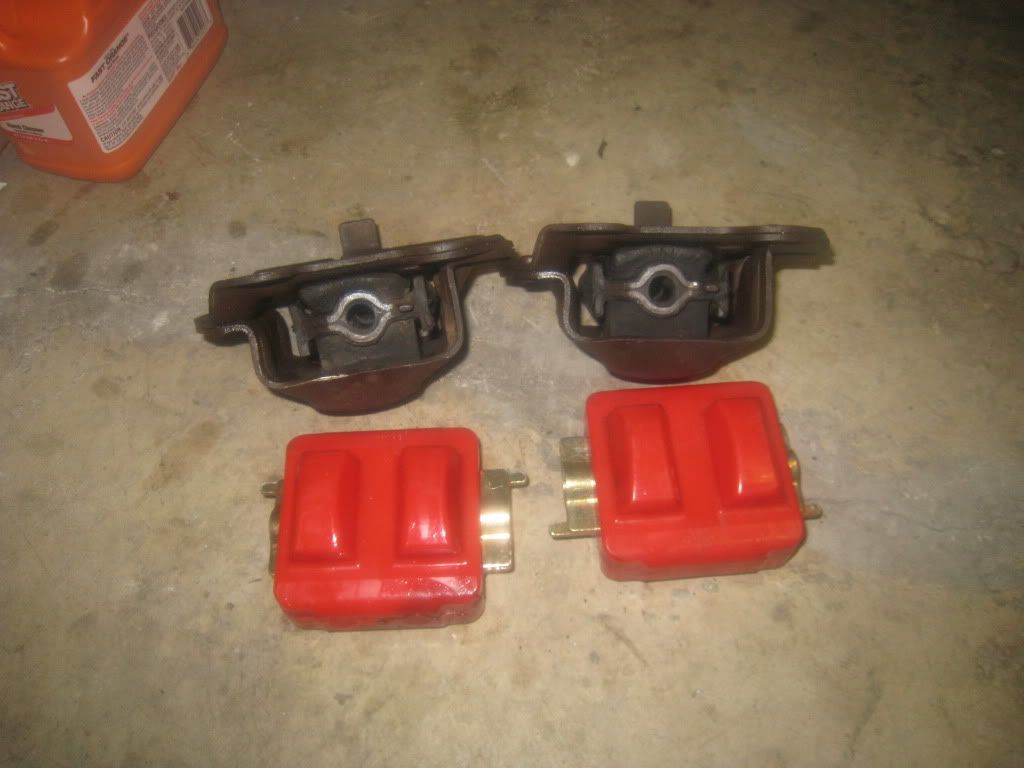
here is the rubber removed from its mount after a whole lot of cursing and drilling of the old clam shell. look at this thing, what the hell was GM thinking when they put these pathetic things under a LS1!!!
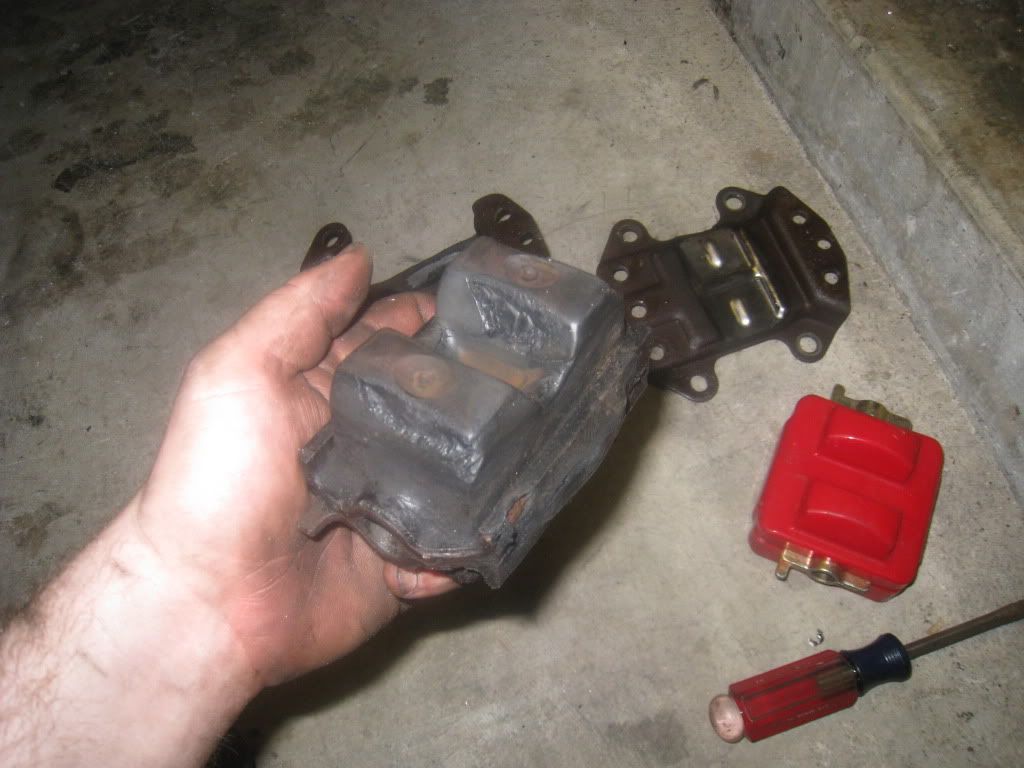
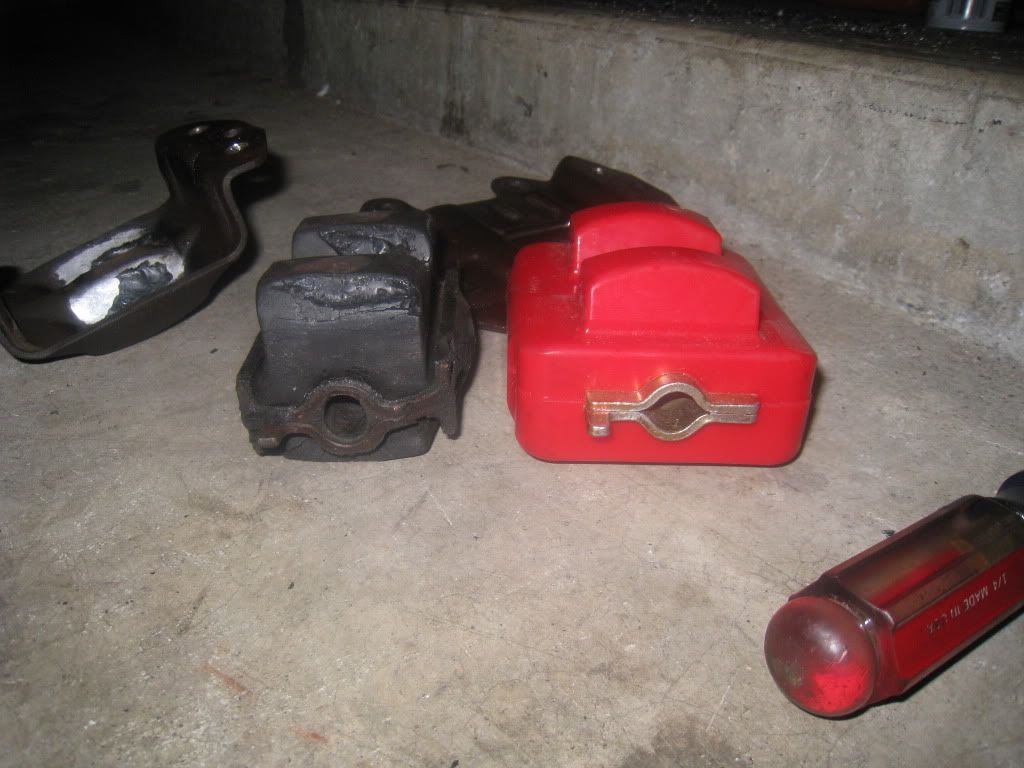
here the crap rubber is next to the new poly mounts. no comments needed
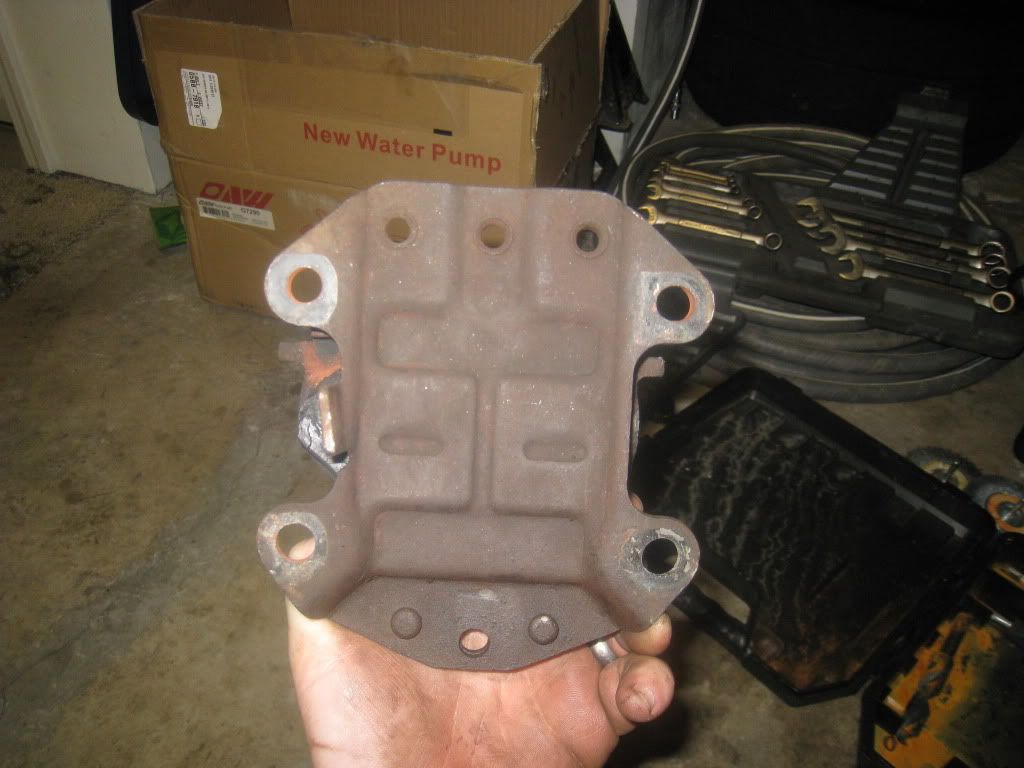
here is what the clamshell looks like before it is drilled out. stupid GM, they really did not want these things coming out
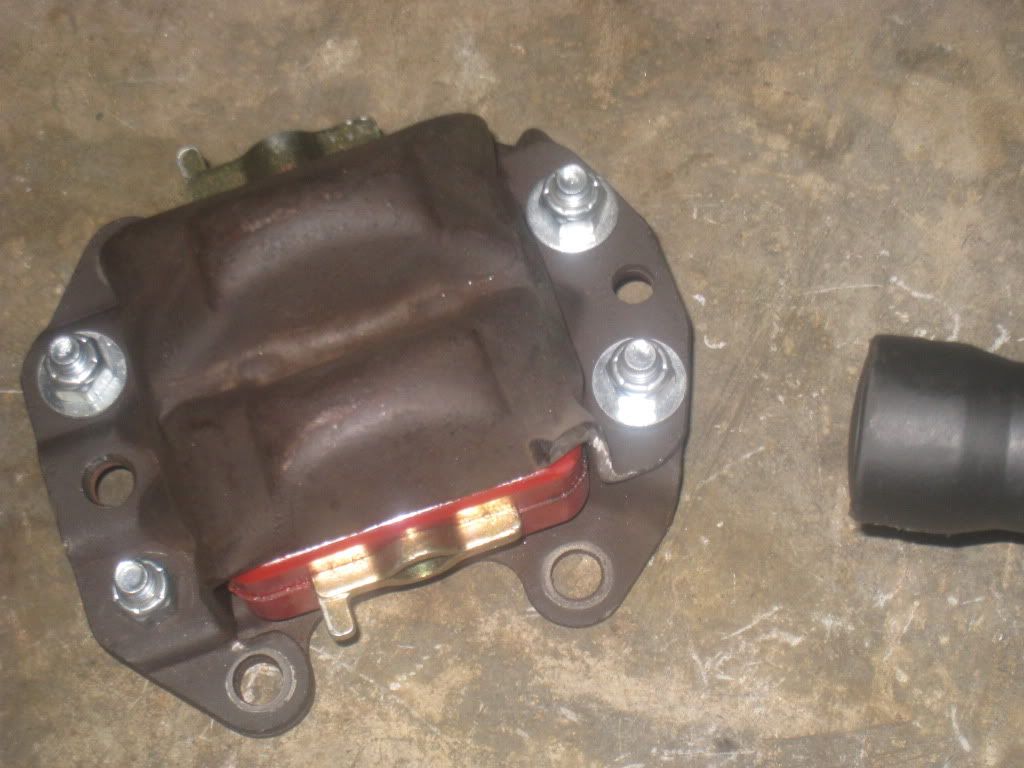
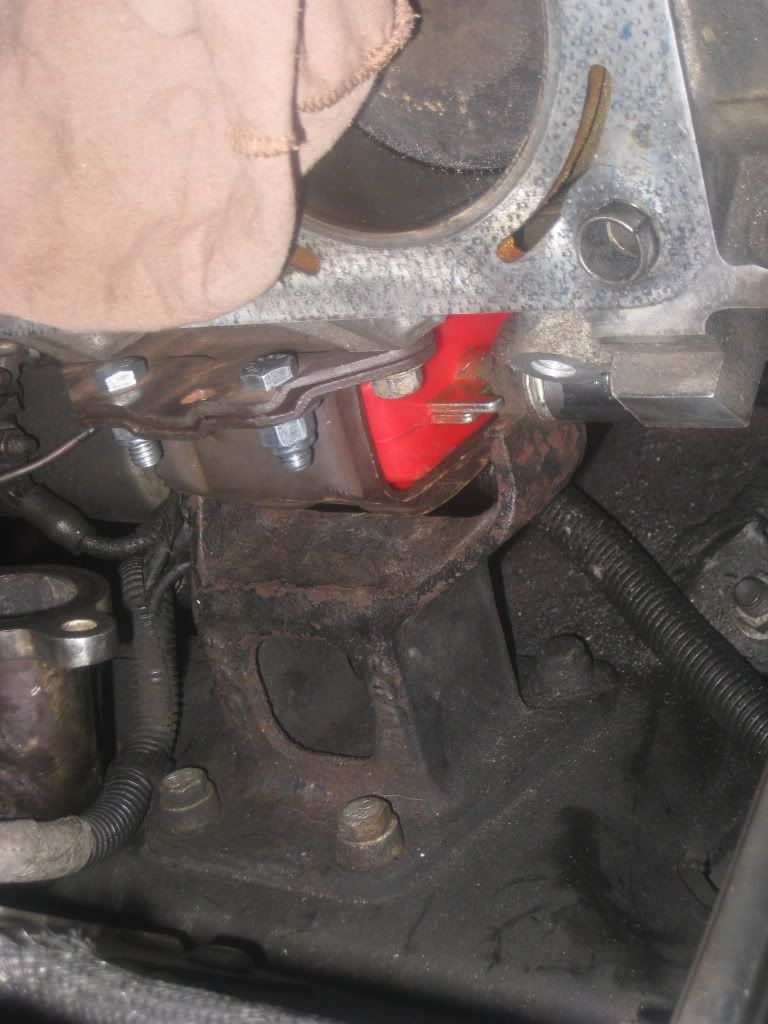
here is it after it was drilled, replaced with poly mount and all put back together
here is the passanger side installed (this took me about 2 hours to re-install both mounts), and i hope i never have to do this ever again!
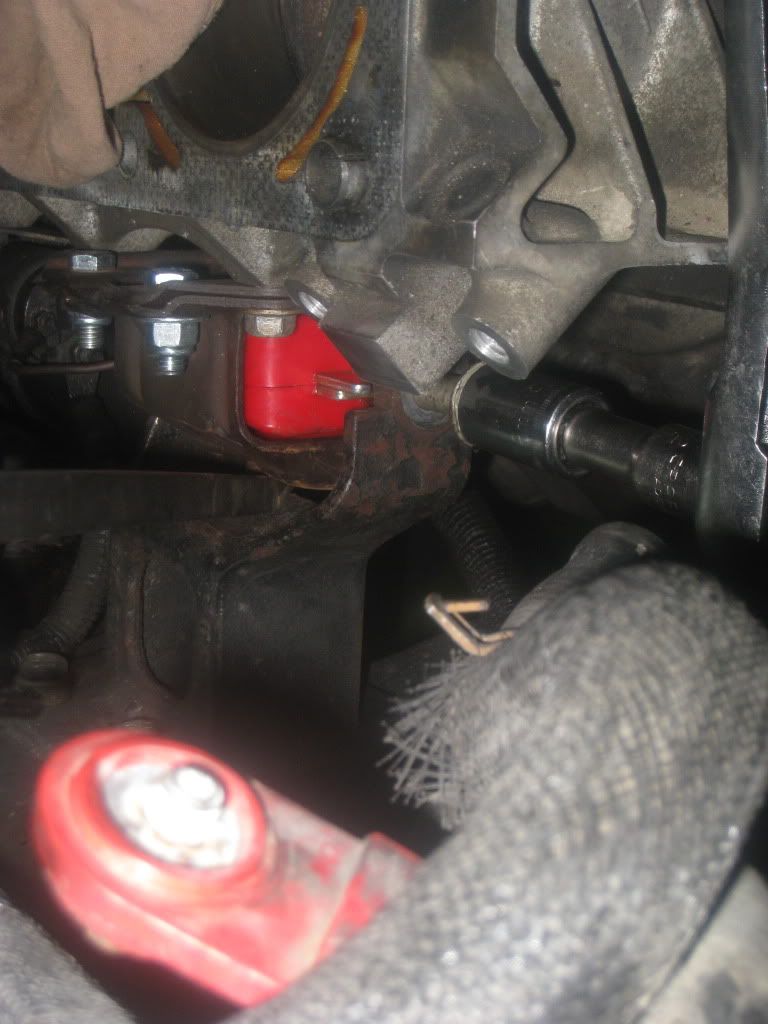
here is the drivers side all tucked in and away. good times
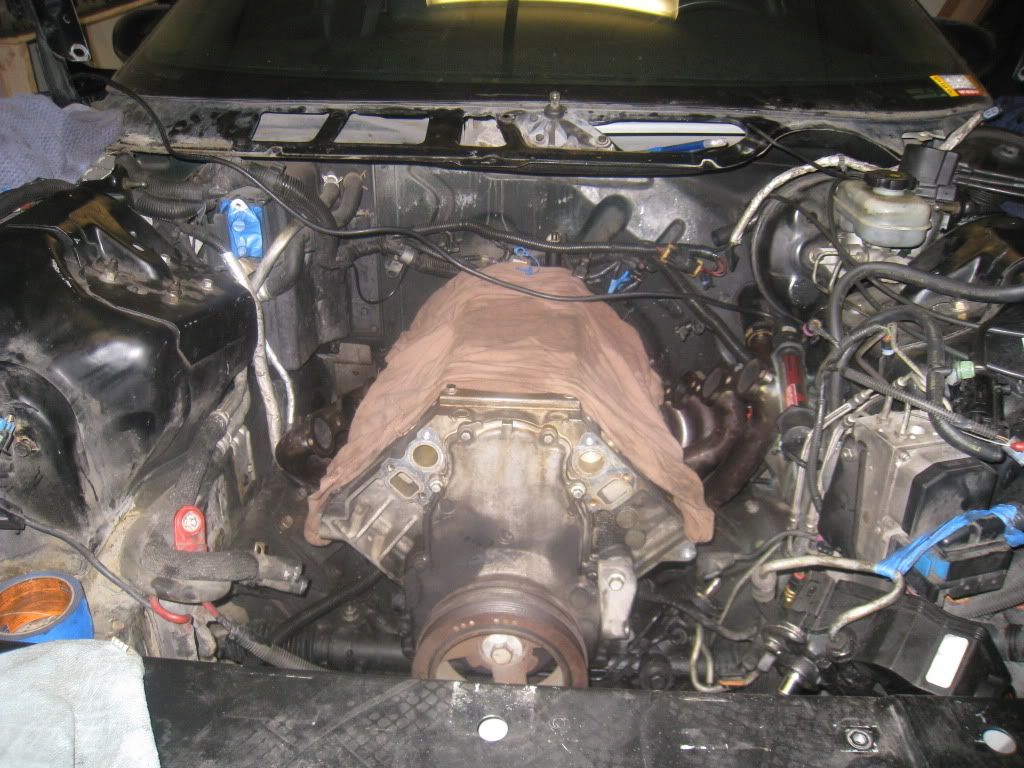
and here is the end product of where the motor finally sits. a little higher then before and about 1/2 and inch toward the front of the motor.
here is the drivers side mount removed
here is one of the old mounts, this one was in the best condition, it was able to be moved back and forth at least 1 inch in its case
these things were ready to give at any time, good thing i changed themboth mounts removed
old mounts next to new mounts. the poly ones are almost bigger then the clam shells them self!
here is the rubber removed from its mount after a whole lot of cursing and drilling of the old clam shell. look at this thing, what the hell was GM thinking when they put these pathetic things under a LS1!!!
here the crap rubber is next to the new poly mounts. no comments needed
here is what the clamshell looks like before it is drilled out. stupid GM, they really did not want these things coming out
here is it after it was drilled, replaced with poly mount and all put back together
here is the passanger side installed (this took me about 2 hours to re-install both mounts), and i hope i never have to do this ever again!
here is the drivers side all tucked in and away. good times
and here is the end product of where the motor finally sits. a little higher then before and about 1/2 and inch toward the front of the motor.
04-02-2011, 11:30 AM
#24
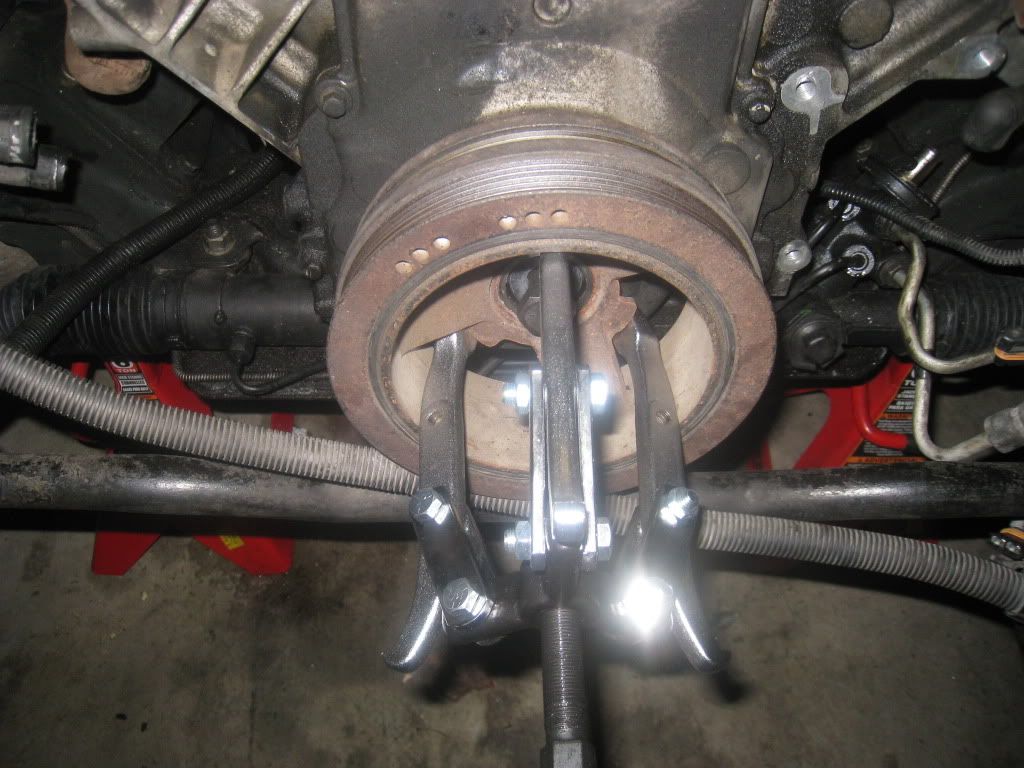
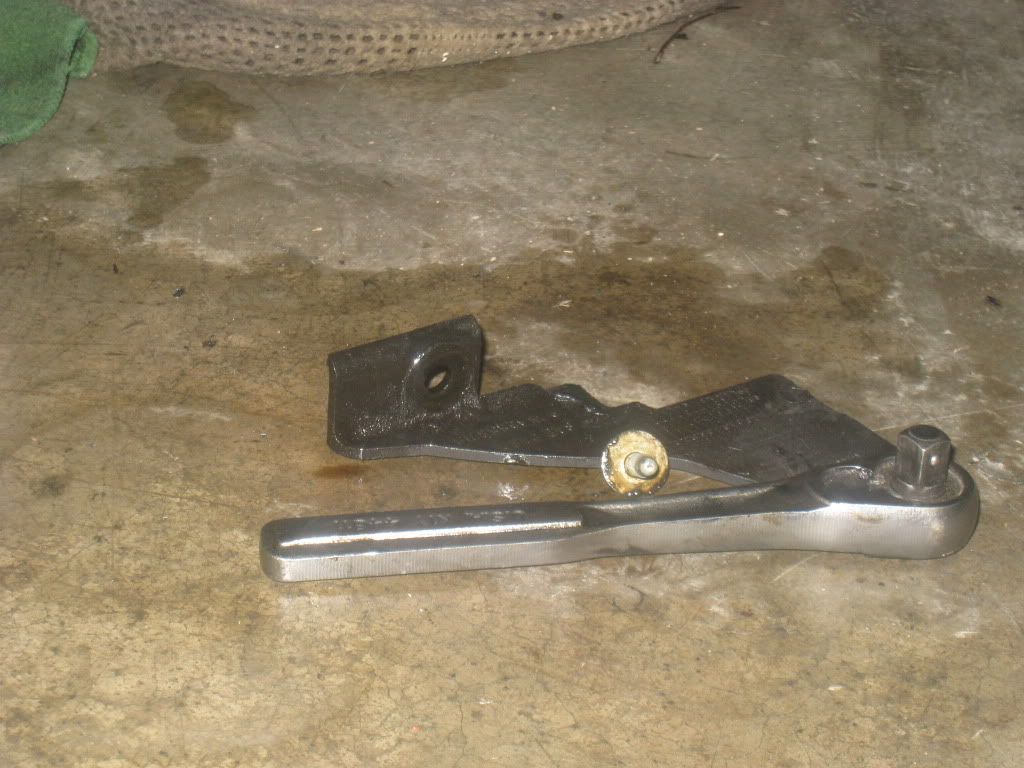
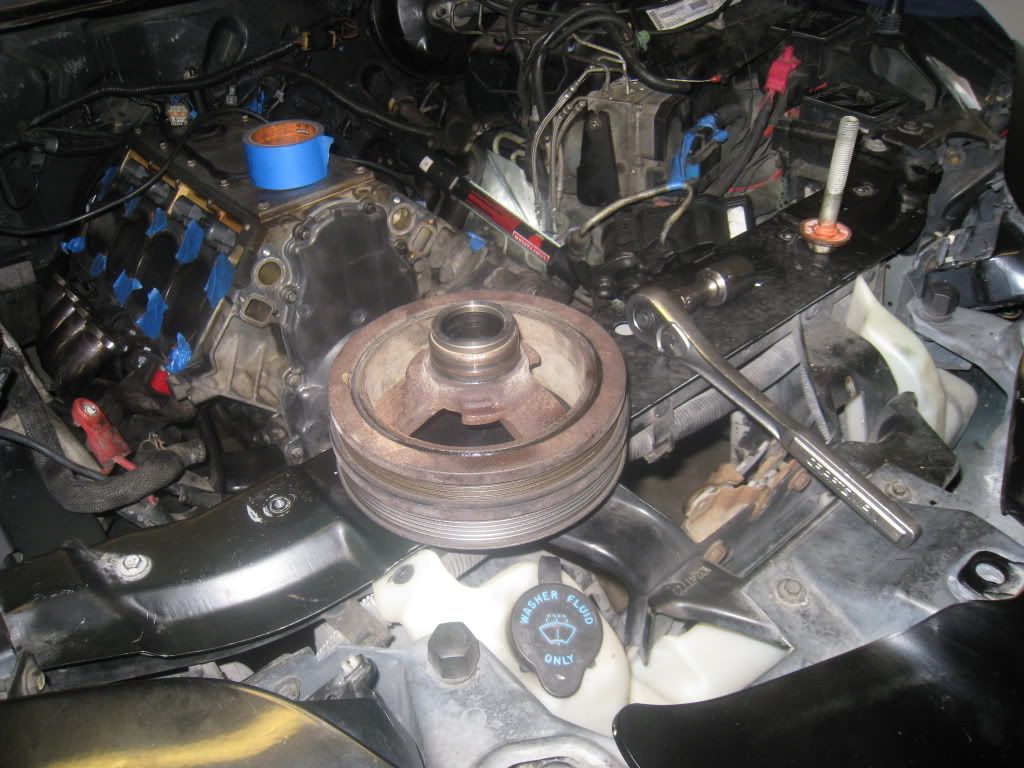
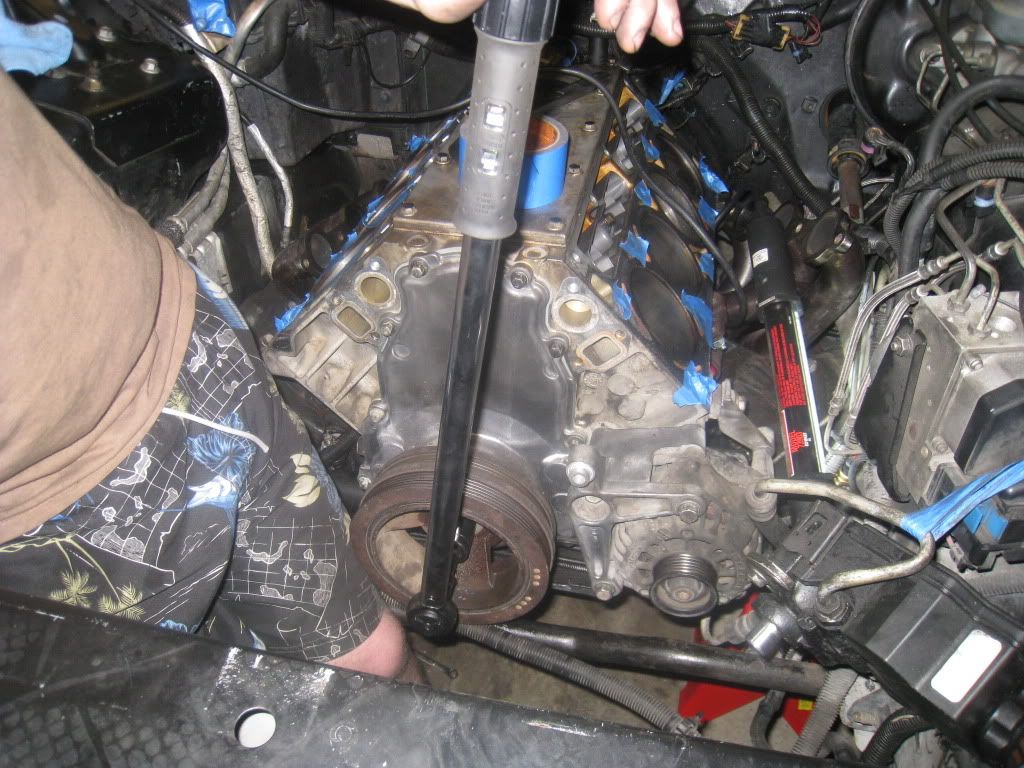
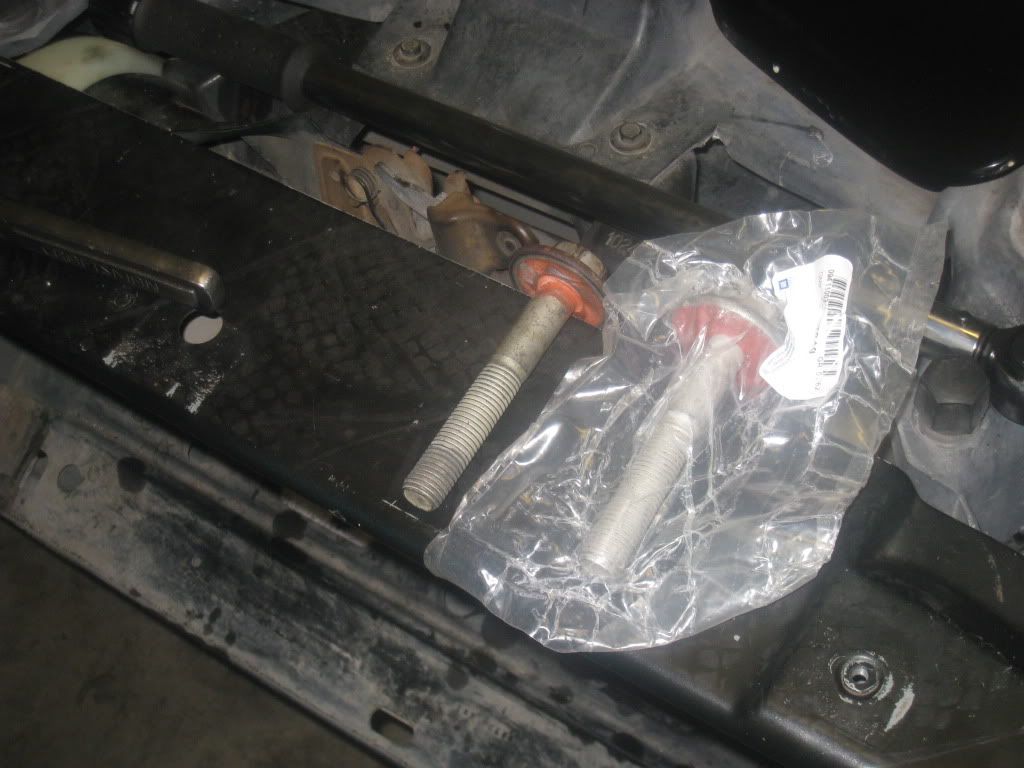
ok so here i got the pulley puller installed, there are little lips on the crank pulley so it makes it quite easy. i opted for the longer crank pulley bolt, cause i didnt want to damage my crank. i took a drill bit and drilled a small hole in the head of the bolt to center the pulley on the bolt.
crank pulley removed, mine came off really easy. i had a harder time with the crank bolt then taking the crank pulley off.
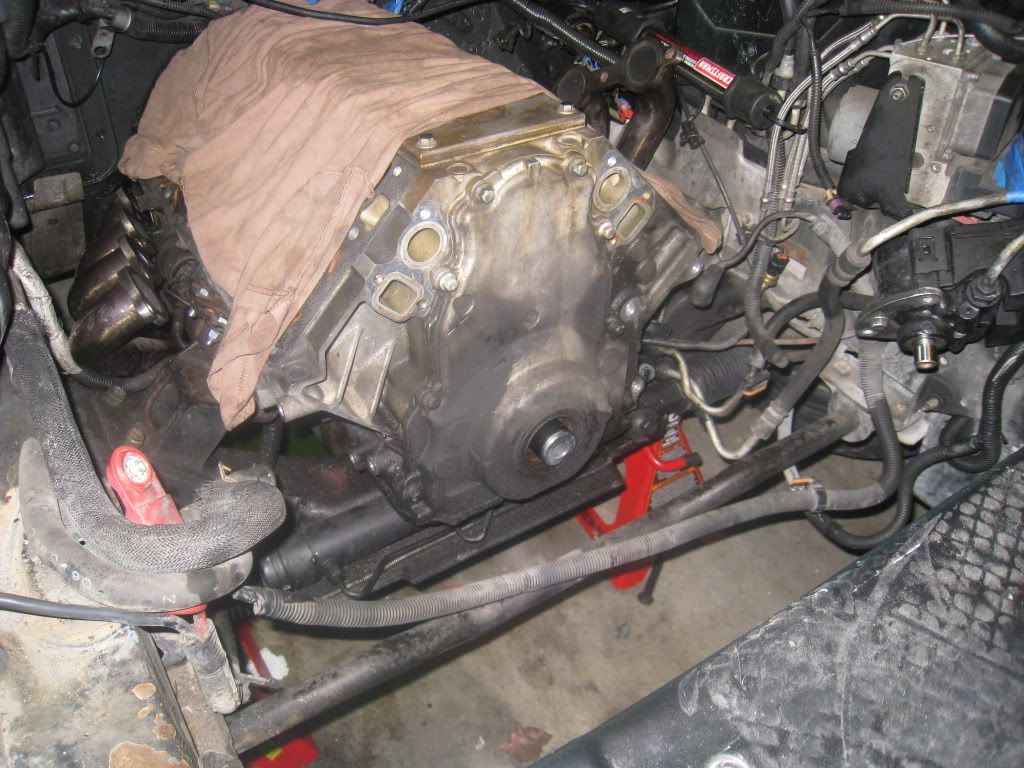
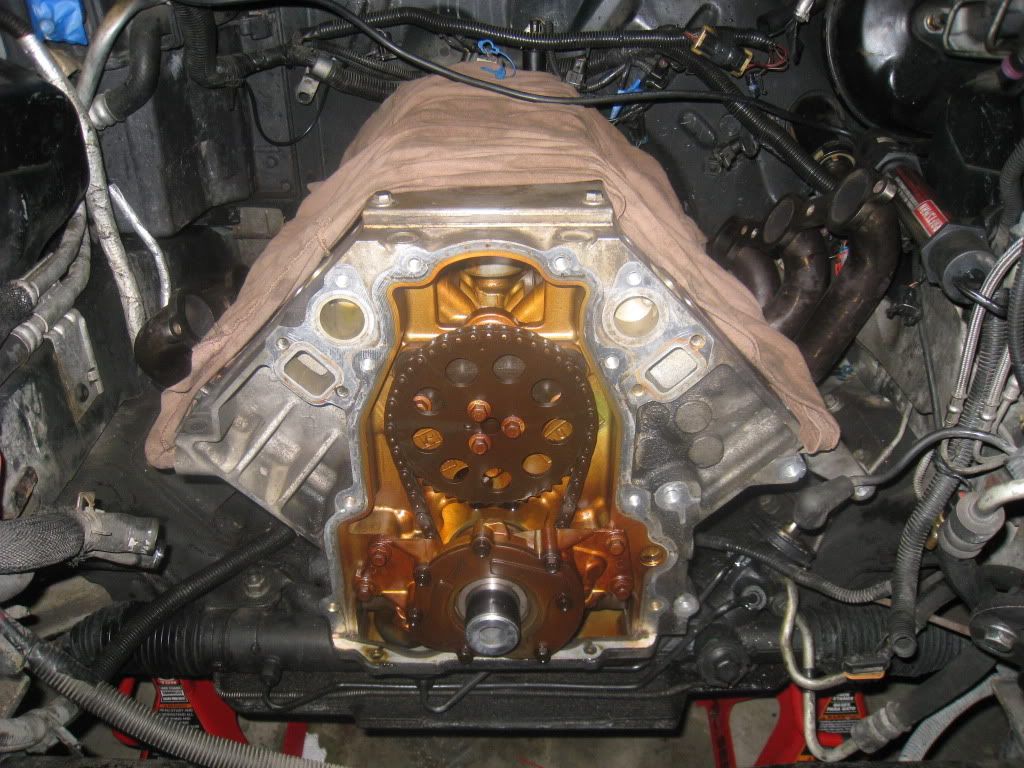
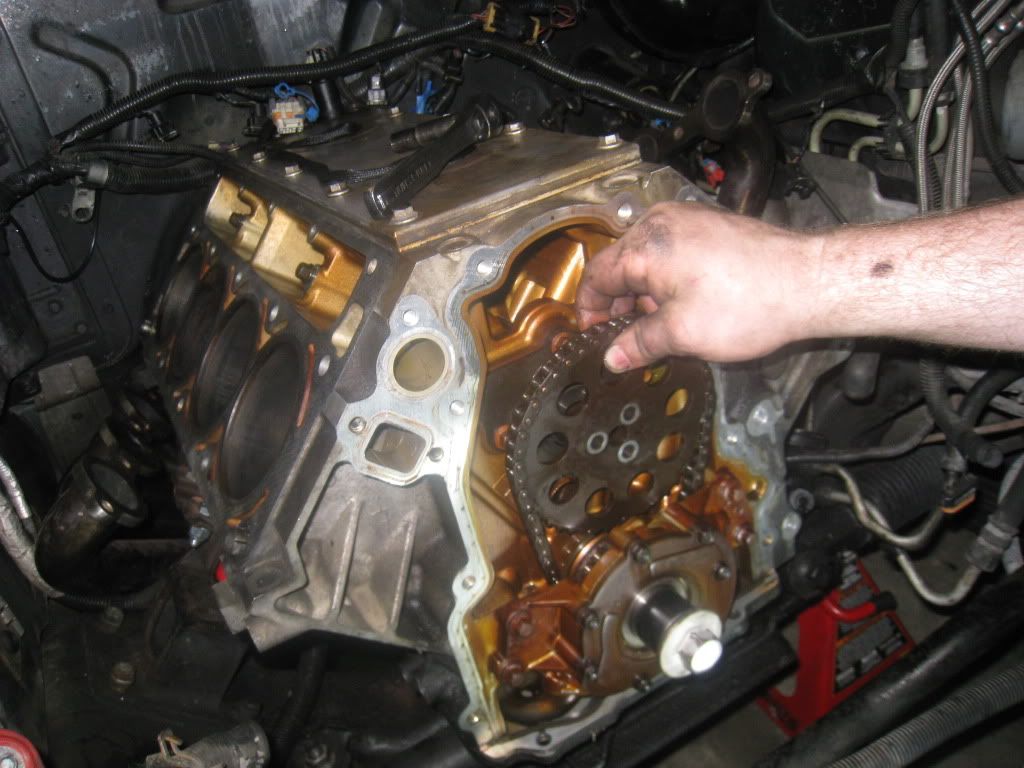
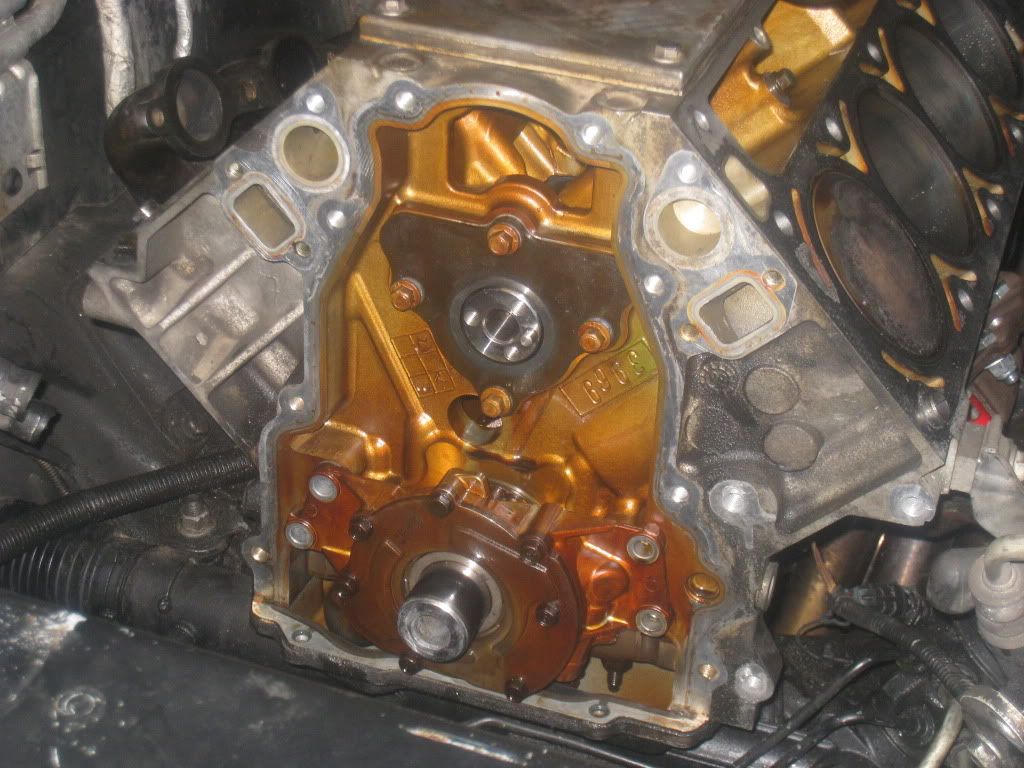
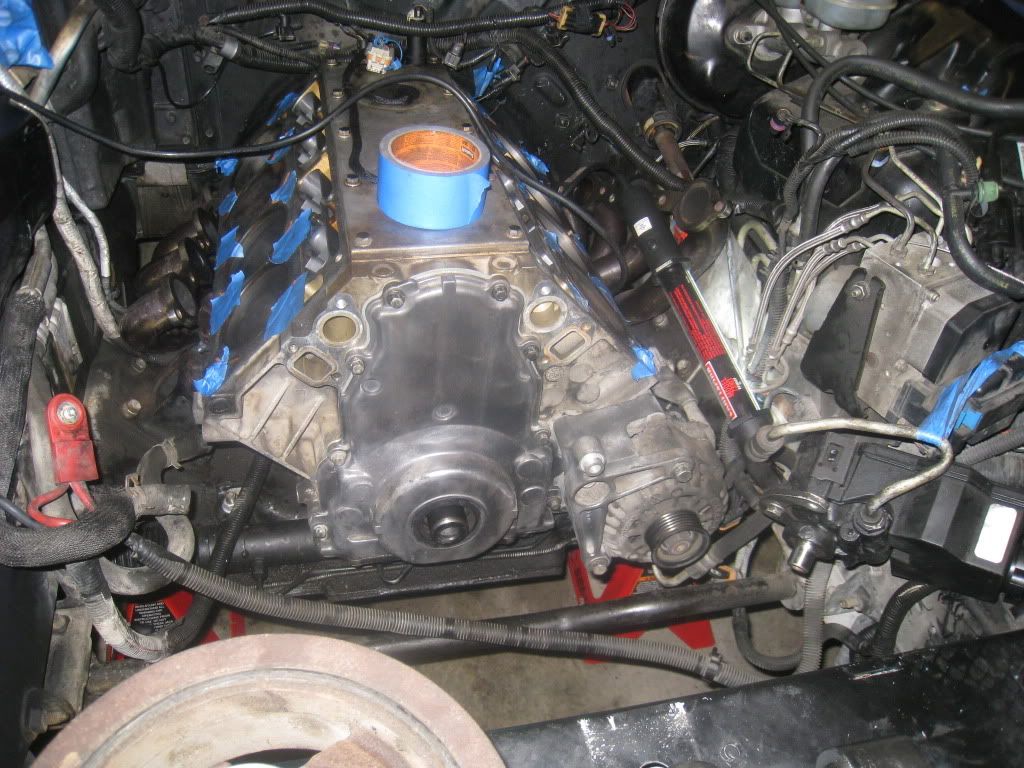
the timing chain cover came off really easy, after removing the 8 bolts around the cover and the 2 from the oil pan.
nice and clean inside, this is how i like it. now all this stuff is coming out and gonna be replaced....you should see my box full of parts.
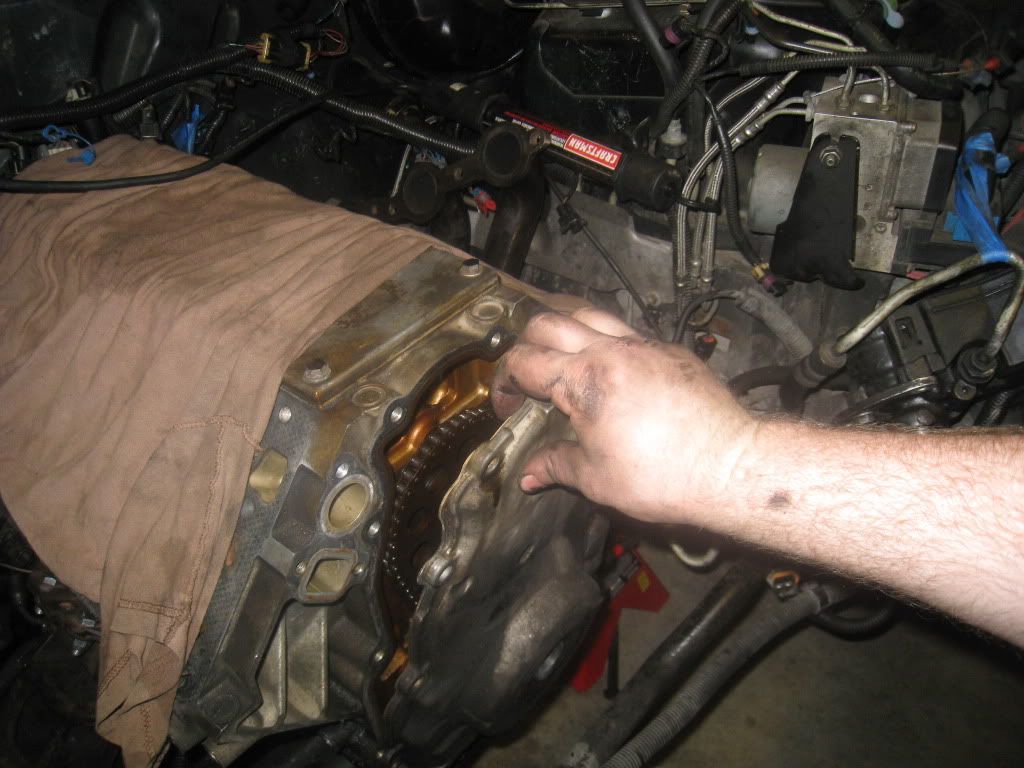
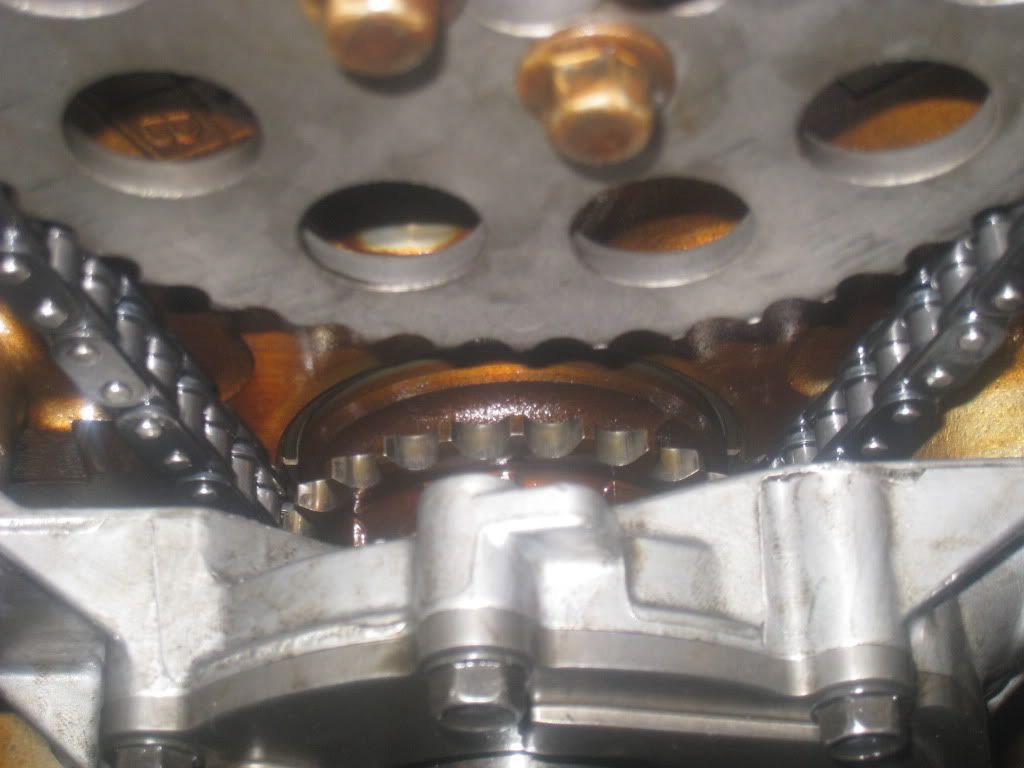
i had alot of play in my timing chain, about 1 inch of freeplay, more then double then that of the stock chain tolerance.
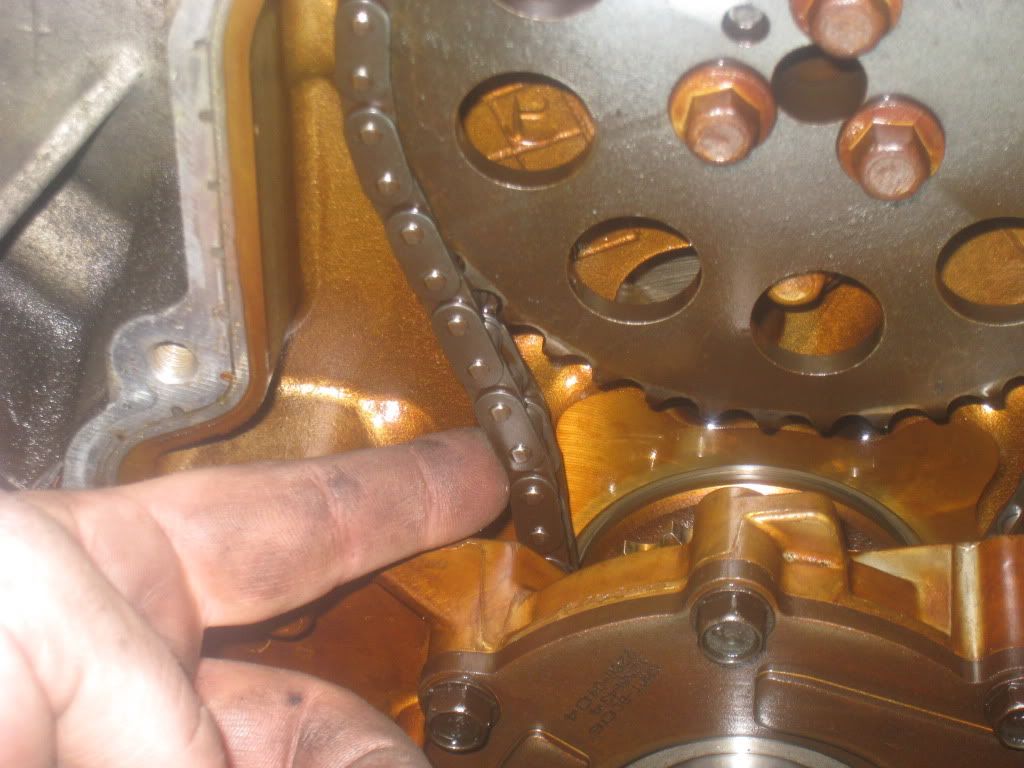
here is the pic of the extra play it shouldnt have, good thing i got new sprockets and timing chain

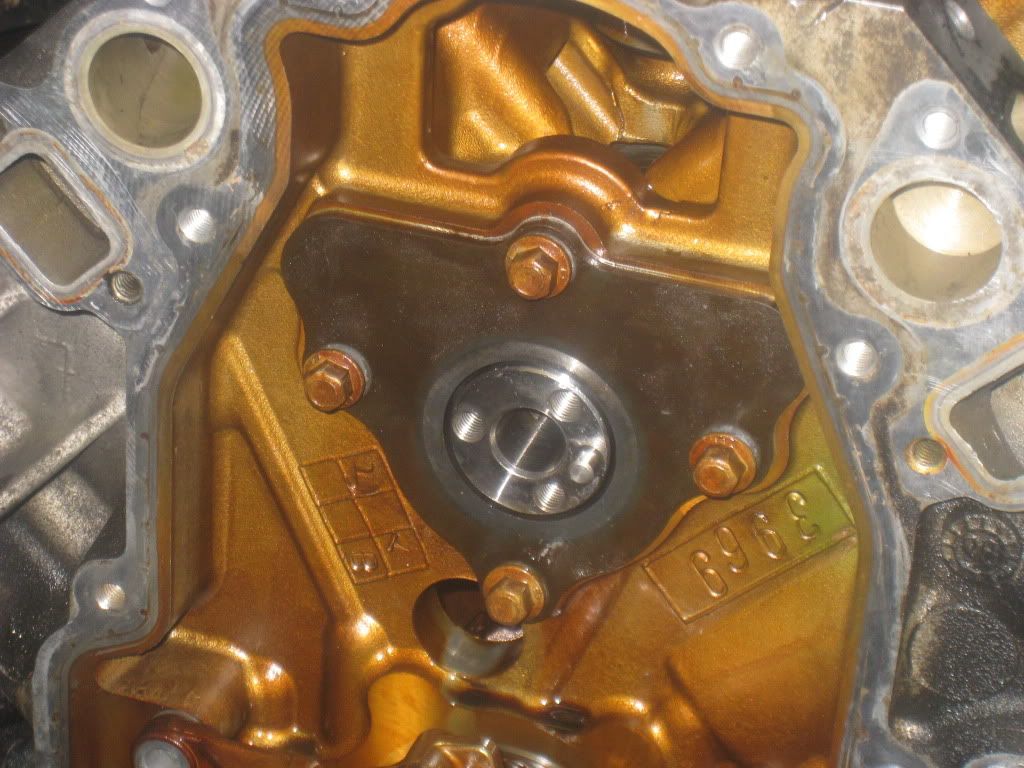
old timing chain gear removed, this will not be re-used but replace with a stock replacement, will be equipped with an LS2 timing chain (now the stock replacement from GM for the LS1 chain)
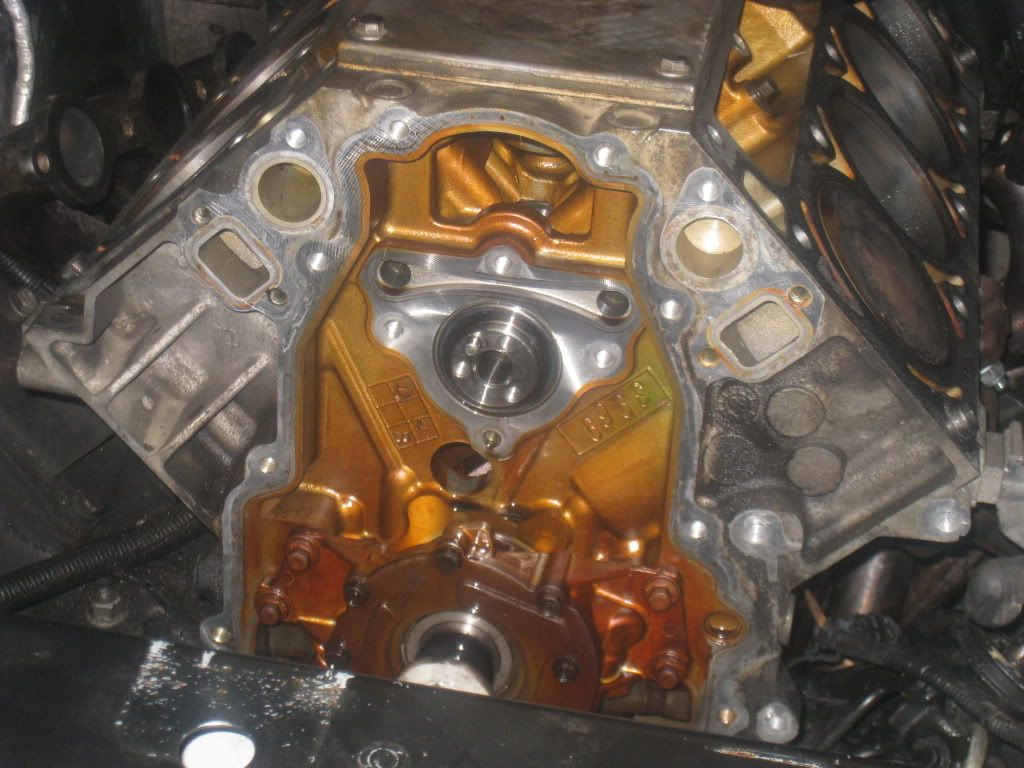
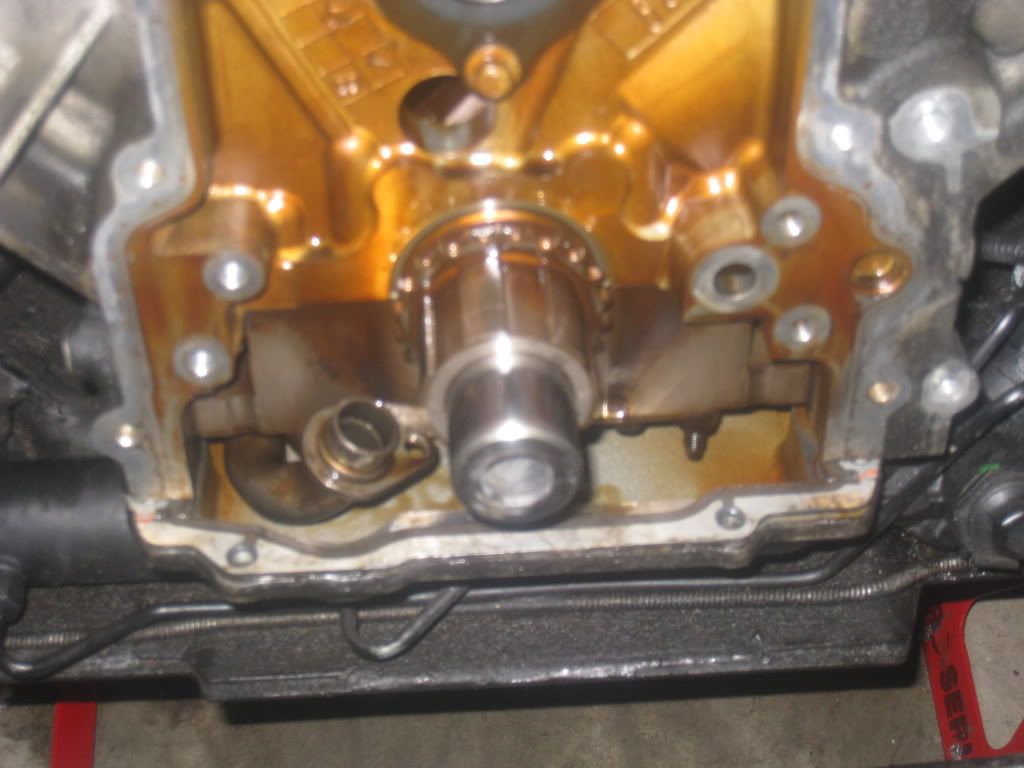
cam retainer plate removed. this was the easiest part to remove on the whole motor!!!
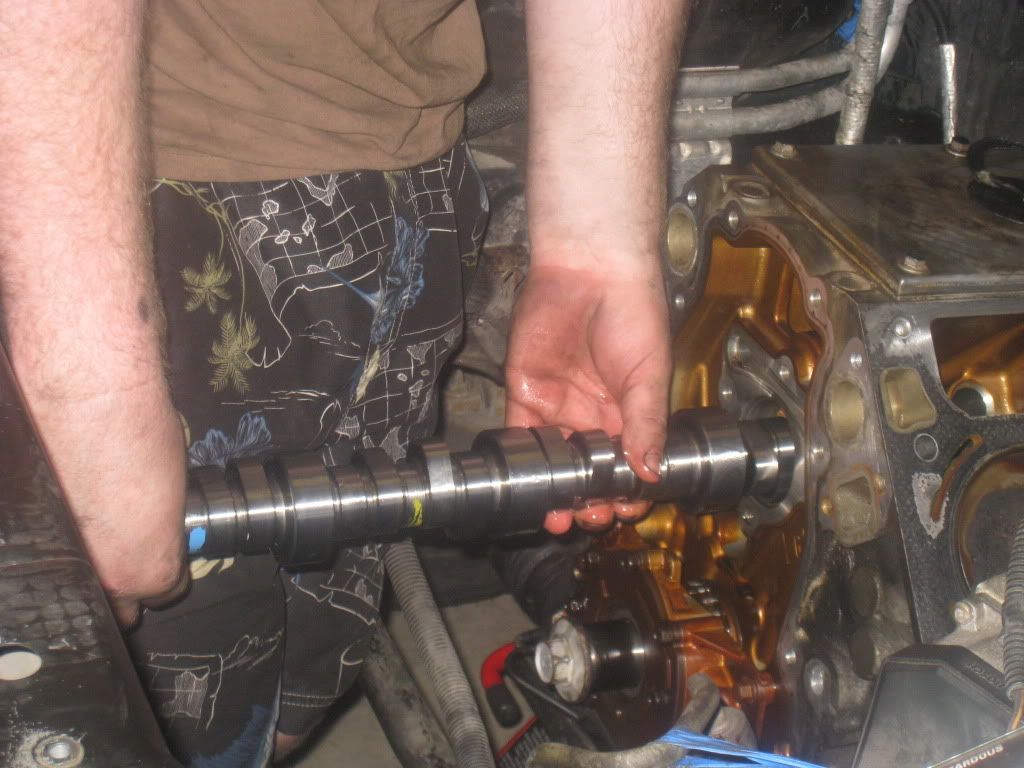
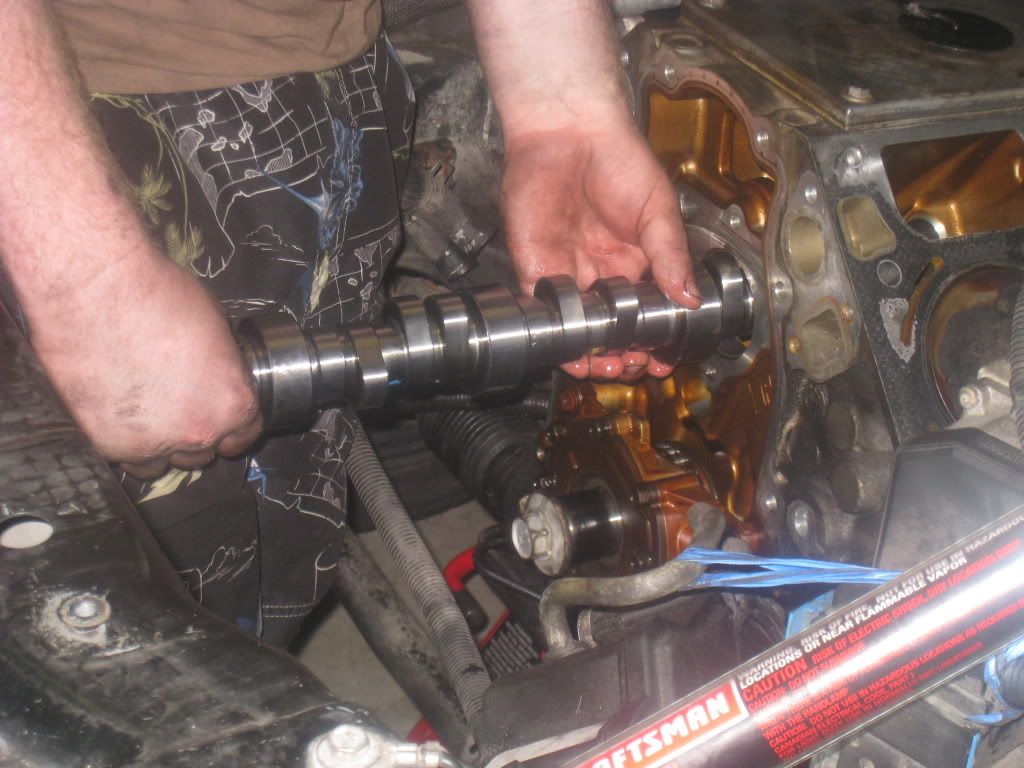
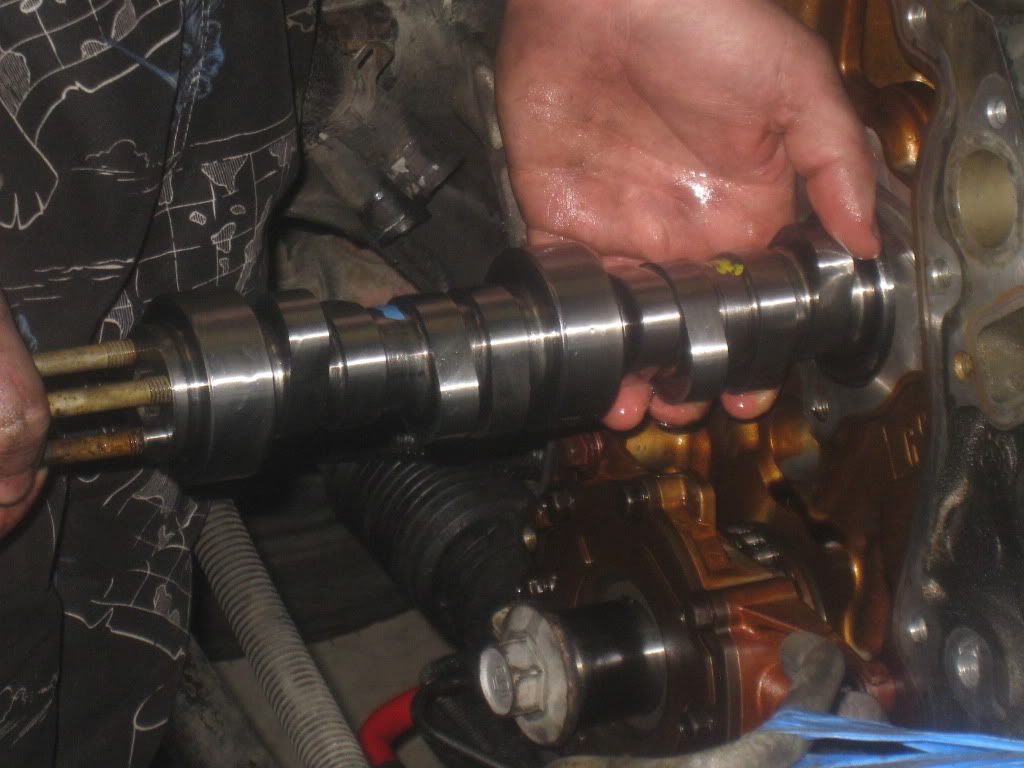
i used my water pump bolts to remove the cam so i would have a little more grip on the cam when removing/installing the cam
cam being removed. my cam came out really easy using the turn and pull slowly method. i am happy i didn't have any issues with a cam being removed.
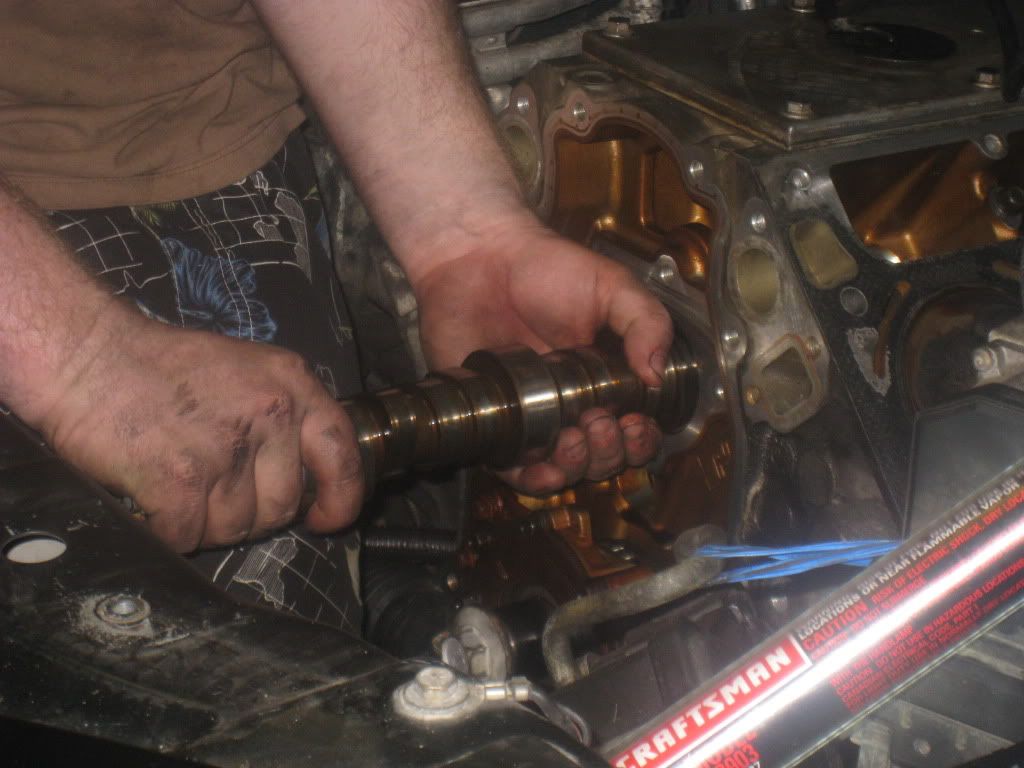
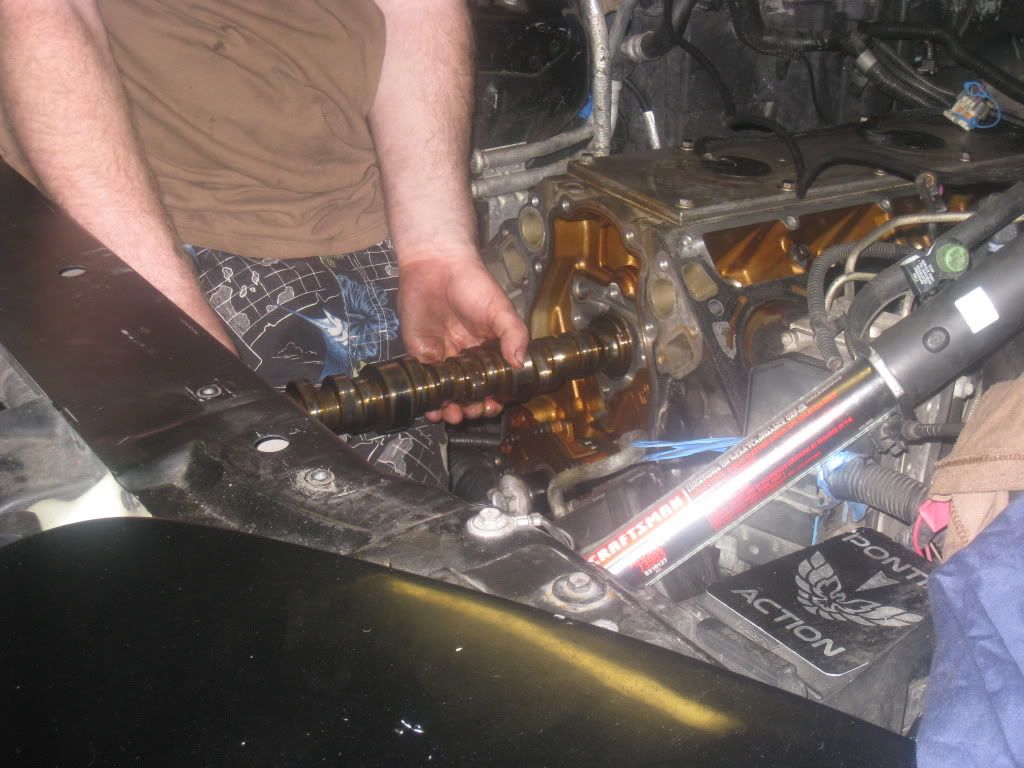
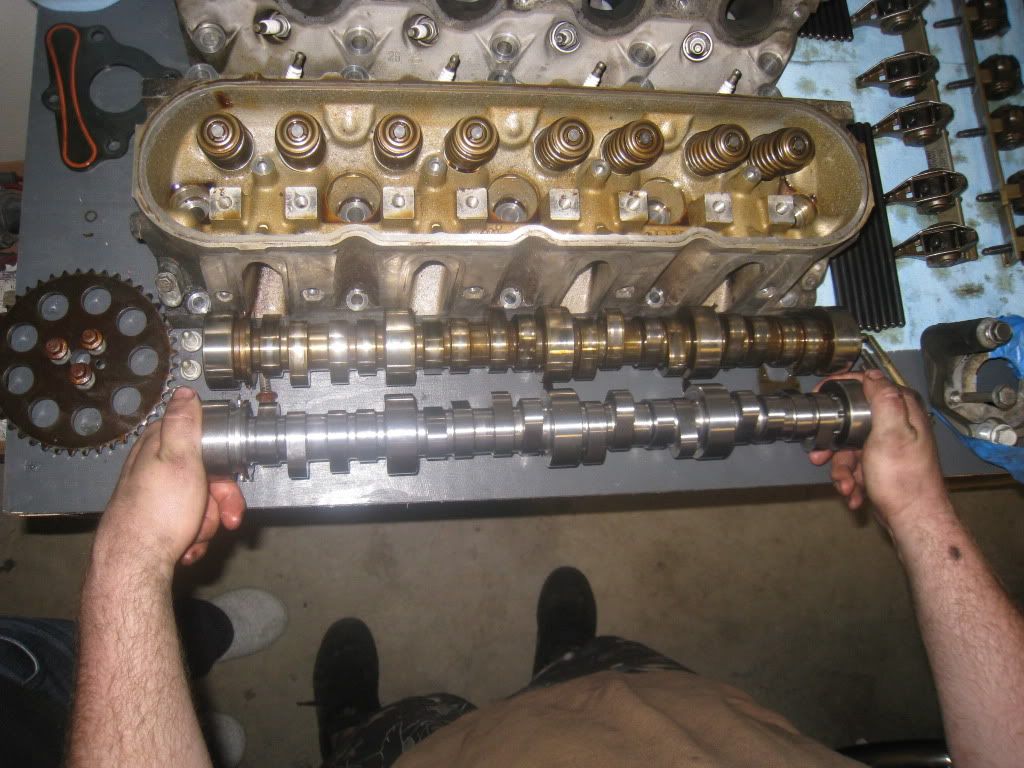
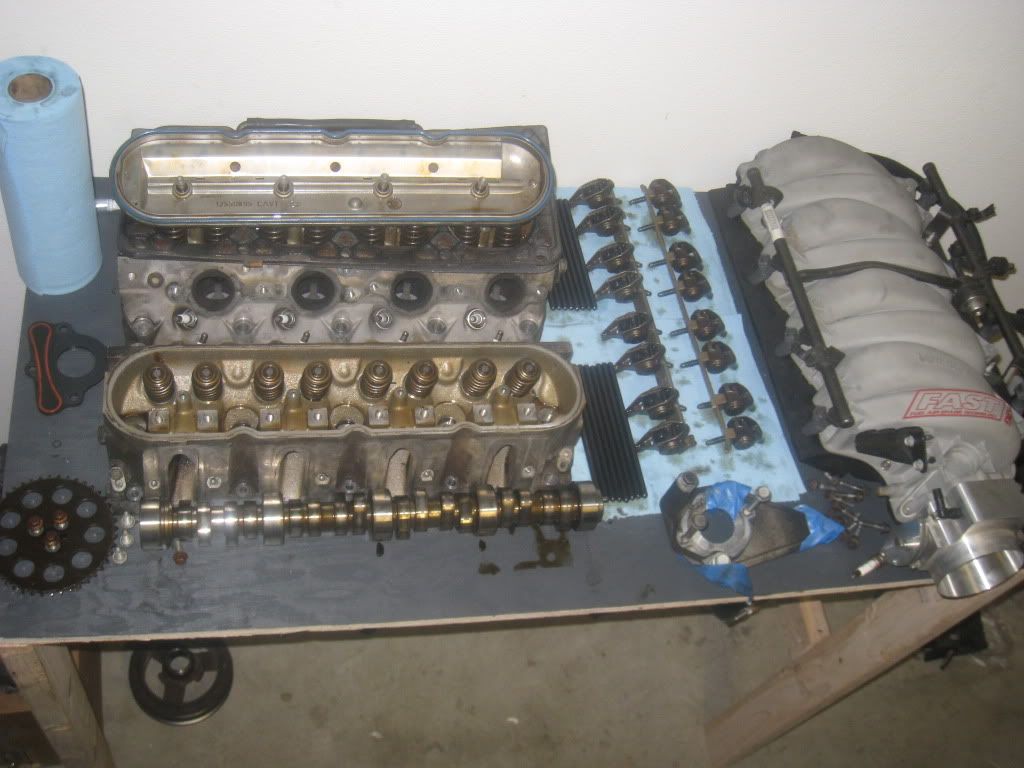
here is my old cam next to the new one. it is so pretty, cant wait to get it in the motor and fire it up!
crank pulley removed, mine came off really easy. i had a harder time with the crank bolt then taking the crank pulley off.
the timing chain cover came off really easy, after removing the 8 bolts around the cover and the 2 from the oil pan.
nice and clean inside, this is how i like it. now all this stuff is coming out and gonna be replaced....you should see my box full of parts.
i had alot of play in my timing chain, about 1 inch of freeplay, more then double then that of the stock chain tolerance.
here is the pic of the extra play it shouldnt have, good thing i got new sprockets and timing chain
old timing chain gear removed, this will not be re-used but replace with a stock replacement, will be equipped with an LS2 timing chain (now the stock replacement from GM for the LS1 chain)
cam retainer plate removed. this was the easiest part to remove on the whole motor!!!
i used my water pump bolts to remove the cam so i would have a little more grip on the cam when removing/installing the cam
cam being removed. my cam came out really easy using the turn and pull slowly method. i am happy i didn't have any issues with a cam being removed.
here is my old cam next to the new one. it is so pretty, cant wait to get it in the motor and fire it up!
04-02-2011, 12:04 PM
#25
the cam install went great. i had no problems at all. it went into the motor really easy and was alot easier to install then it was to remove.
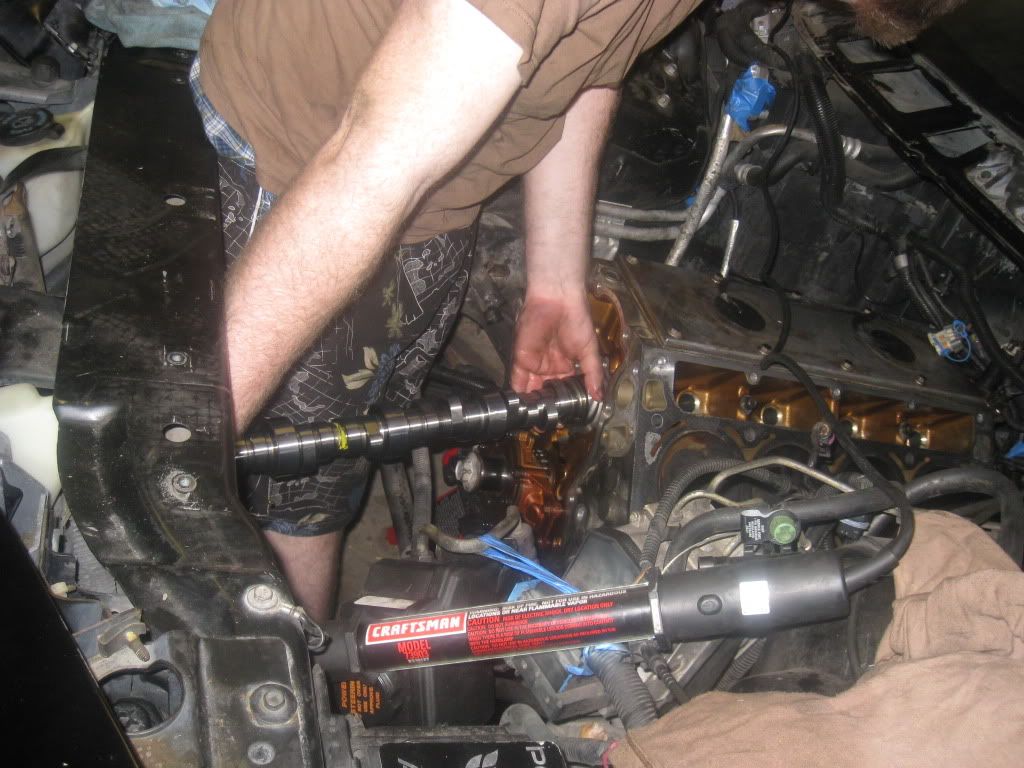
new cam installed and seated in its new home. it will be very happy there!
here is my old pile of parts, the intake will be re-used after it is ported on the intake runners and cleaned out.
cam retainer plate installed. easy day.
this is a little piece of the trasmission spash shield that needs to be remove to access the last oil pan bolt on the drivers side. it is just made of plastic and it held in by one 10mm bolt. easy day
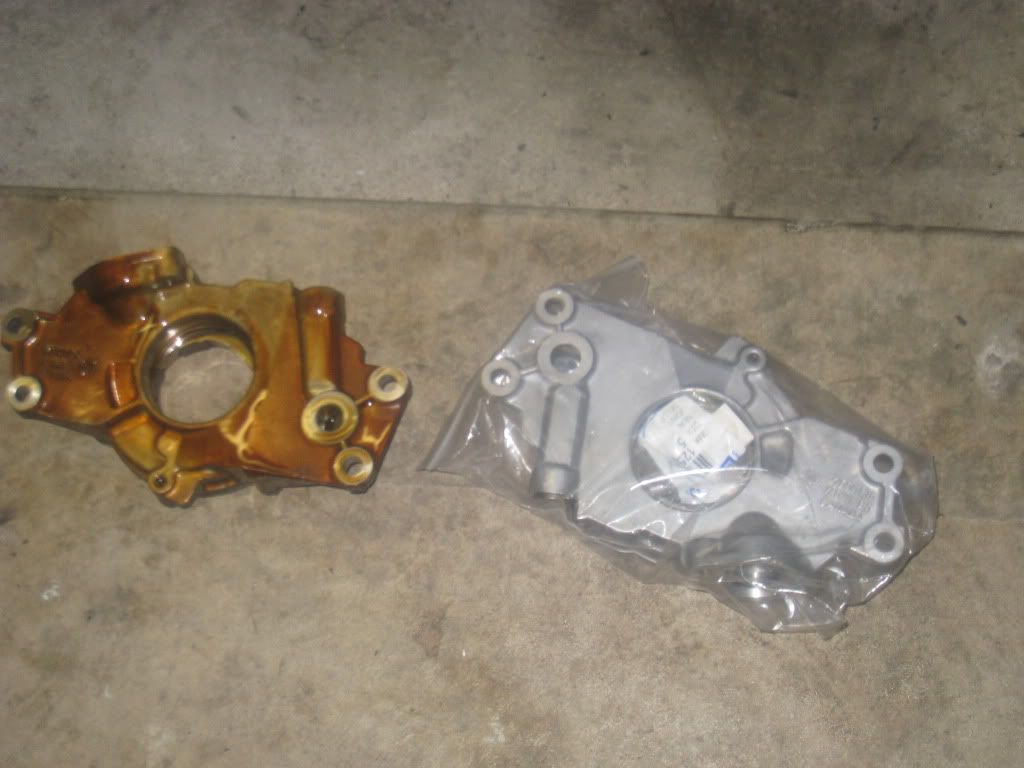
oil pump removed, after the oil pan was dropped.
old LS1 oil pump next to new TSP ported and shimmed LS6 oil pump
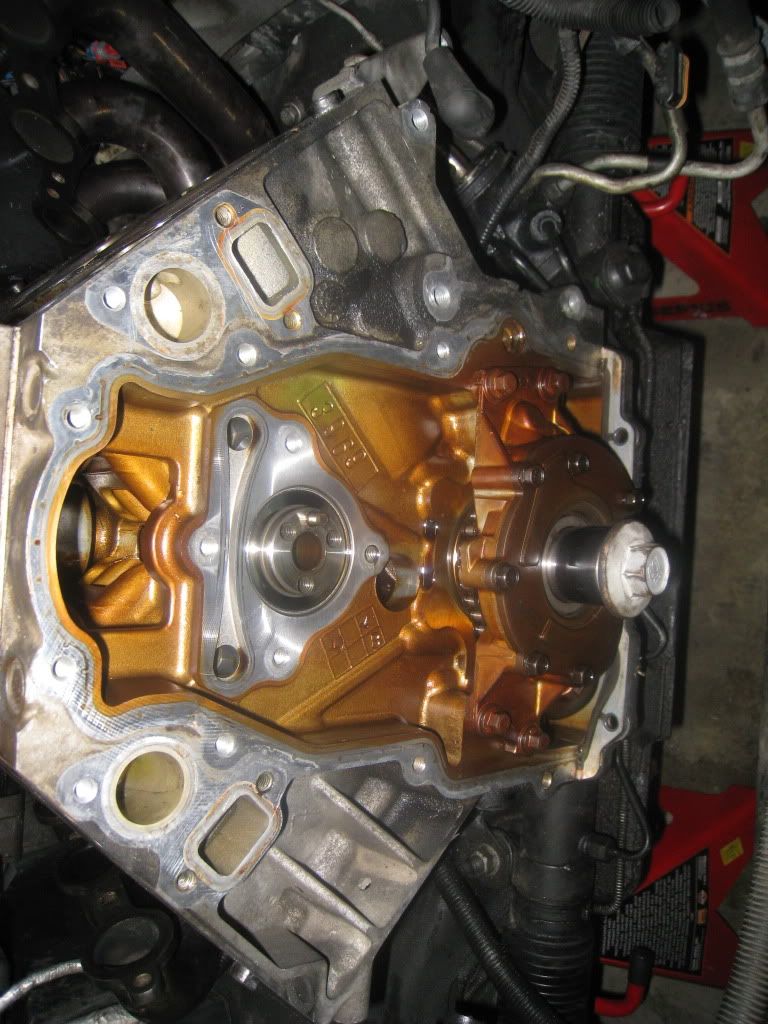
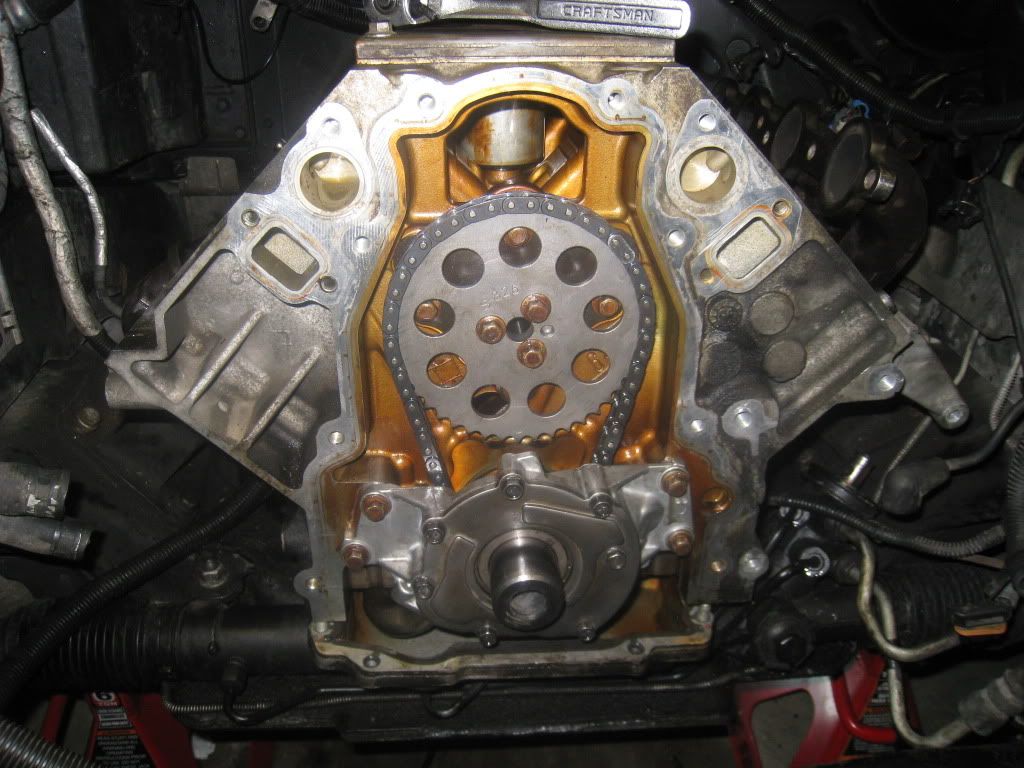
timing chain installed and lined up with crank gear. looks good to me considering i checked one tooth to the right and one to the left looked completely off.
everything installed and lined up. now i called it a night right here, will install oil pan today and and clean up timing cover, install new seal, and clean up the the rest of the engine, getting it ready for the head install.
new cam installed and seated in its new home. it will be very happy there!
here is my old pile of parts, the intake will be re-used after it is ported on the intake runners and cleaned out.
cam retainer plate installed. easy day.
this is a little piece of the trasmission spash shield that needs to be remove to access the last oil pan bolt on the drivers side. it is just made of plastic and it held in by one 10mm bolt. easy day
oil pump removed, after the oil pan was dropped.
old LS1 oil pump next to new TSP ported and shimmed LS6 oil pump
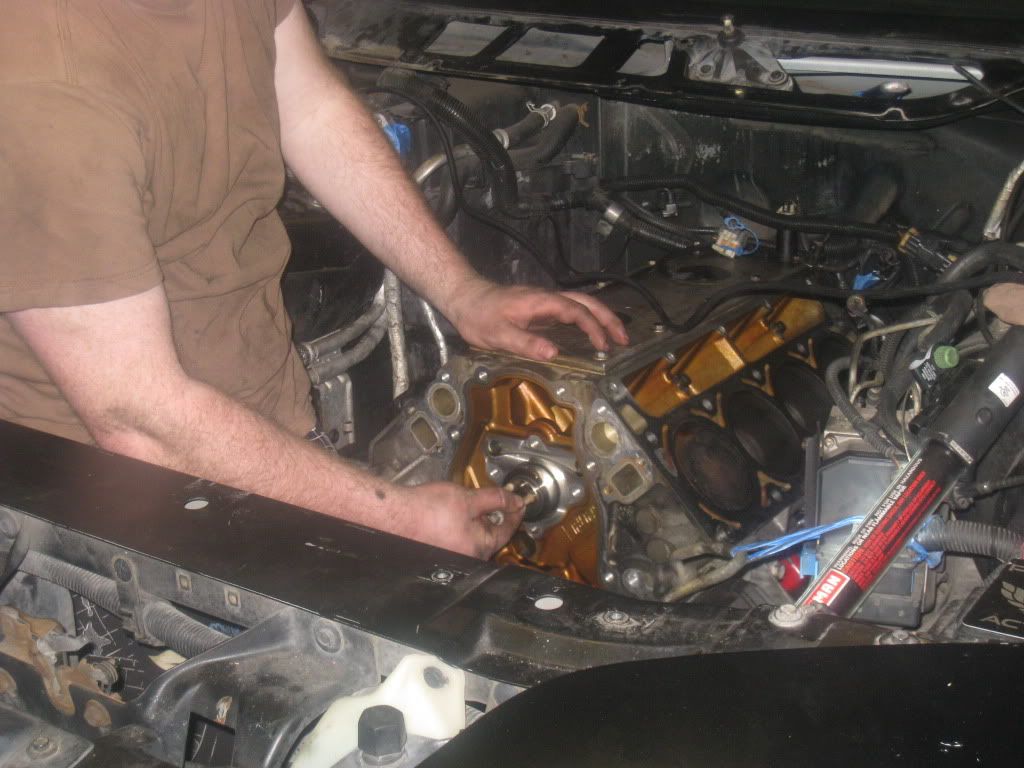
timing chain installed and lined up with crank gear. looks good to me considering i checked one tooth to the right and one to the left looked completely off.
everything installed and lined up. now i called it a night right here, will install oil pan today and and clean up timing cover, install new seal, and clean up the the rest of the engine, getting it ready for the head install.
04-03-2011, 07:36 AM
#27
so last night was a good night for progress got some of the boring stuff done while waiting for a new rocker arm (bearing failed on one of the stock ones) so i got some of the clean up stuff and engine dress up by cleaning up all the brackets and painting the previous rust spot
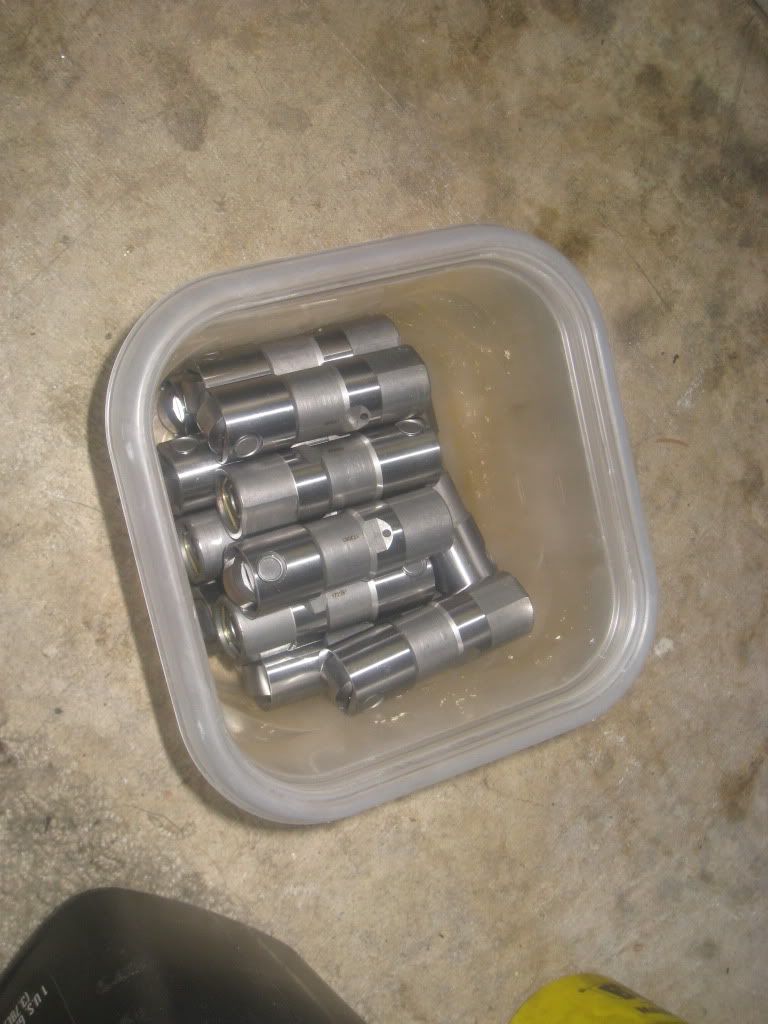
here i am preparing my lifters to be soaked in oil for 24 hours. wife was mad when she saw that i used the tuperware to soak my lifters in oil ...oh well, got the job done
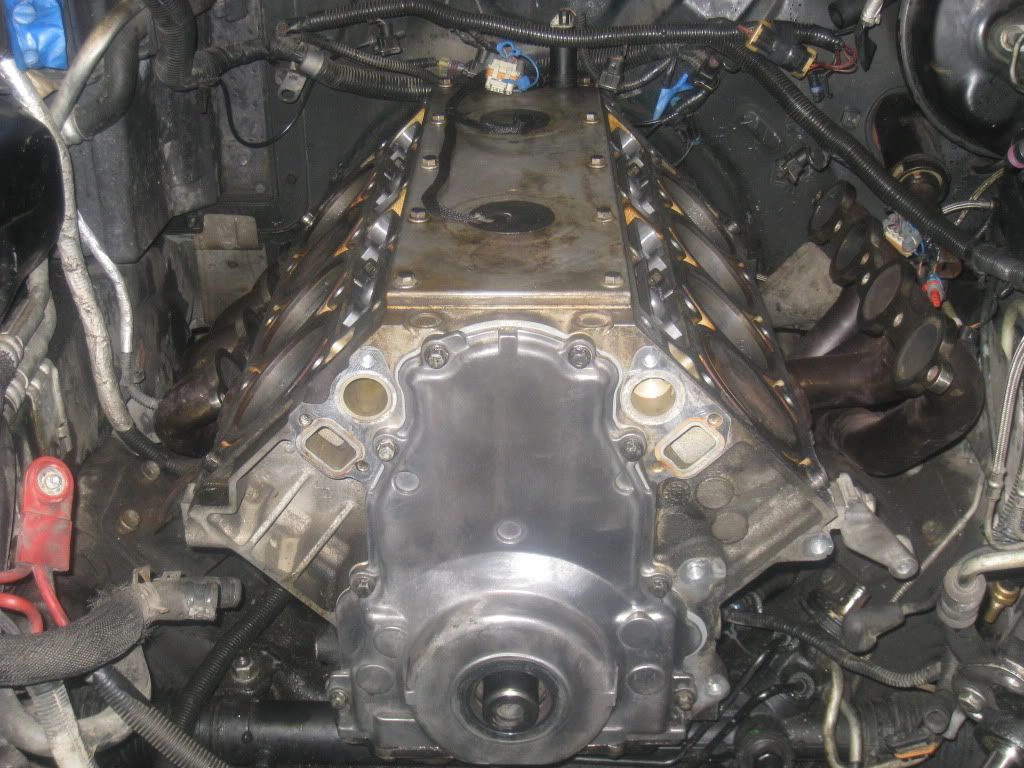
well got the timing cover all cleaned up with a soft bristle cleaning wheel, looks much better then before.
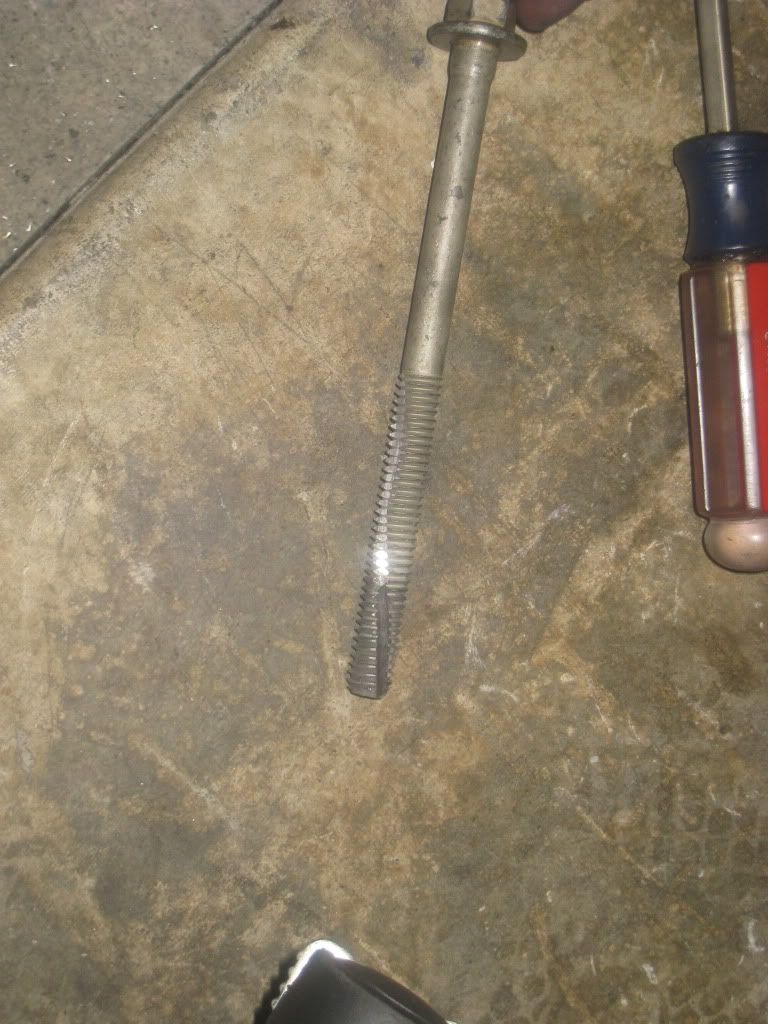
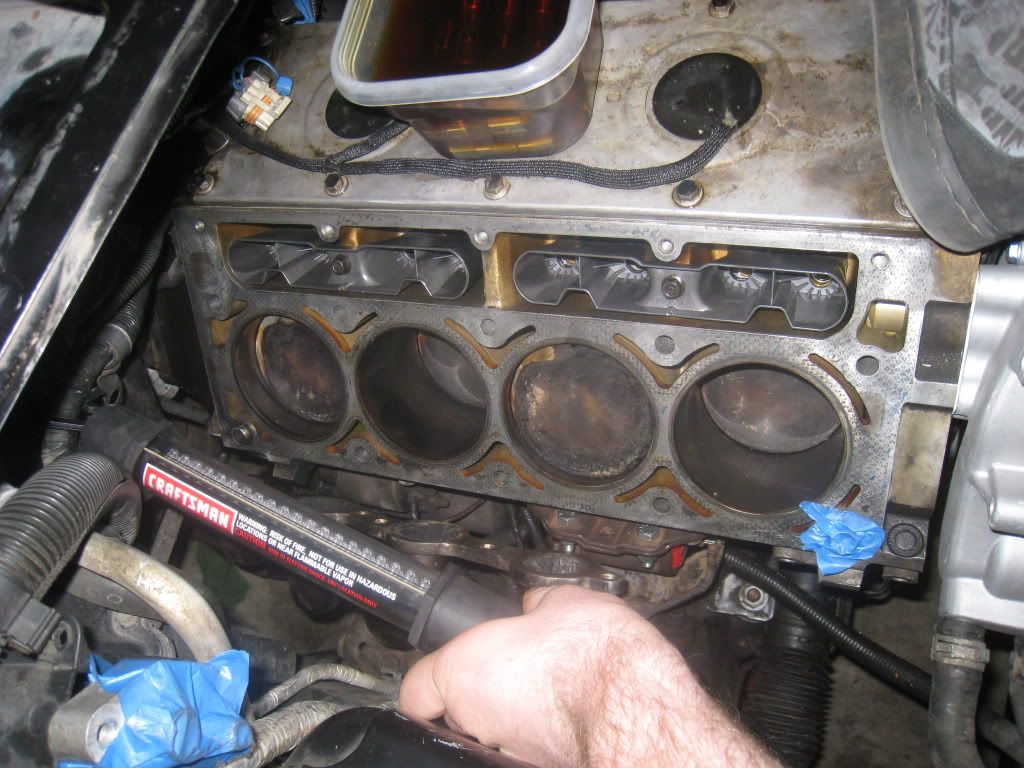
now it is time for some head prep to get the block ready to recieve the new cylinder heads i took a stock head bolt, a grinder, and a steady hand to grind the grove in the bolt i made mine diagonal for better cleaning and cut my bolt on both sides.
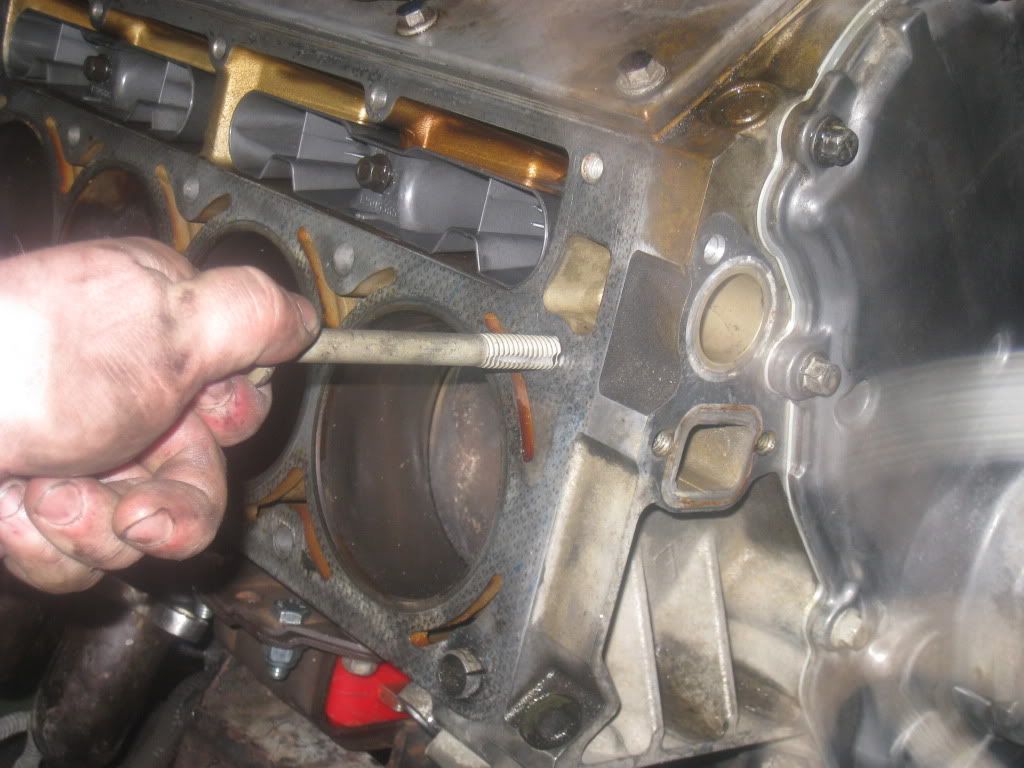
after blowing out the bolt holes with my compressor (had some cleaning to do after this method...radiator fluid shower anyone?) then it was time to chase the bolt holes with this. after doing the middle row. i started on the bottom row to only have the bolt come back wet and dirty. so now it was time for some deep cleaning
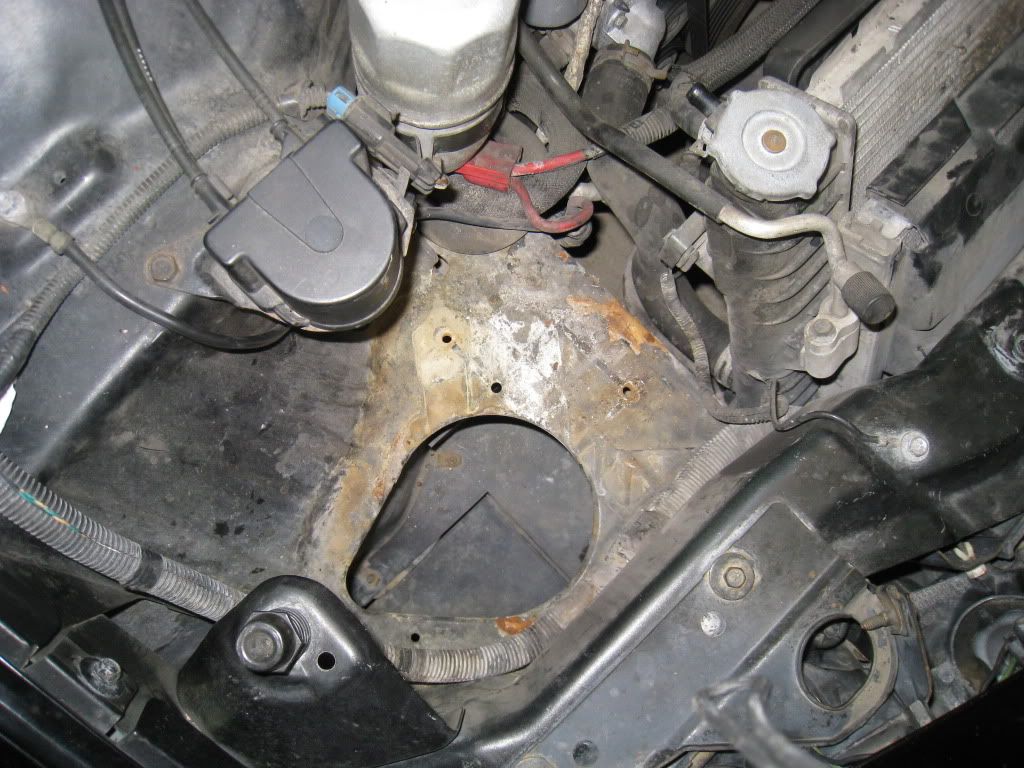
so i didnt have the things i needed for cleaning the bottom of the bolt holes yet (sent the wife to the store) so i cleaned, sanded and primed up the old rust spot where the old over flow hose was leaking on to my frame. it looks all shiny now but it dries flat. it still needs paint but looks a whole lot better then before
ok and my mystery cleaner tool arrives....TAD-AH!!!!! it is just a box of 100 mouth swabs from the pharmacy that cost me 3 bucks! these things work ******* awsome. you can reach the bottom of the head bolt holes and ensure getting all that crap out of there way better then a spun up paper towel.
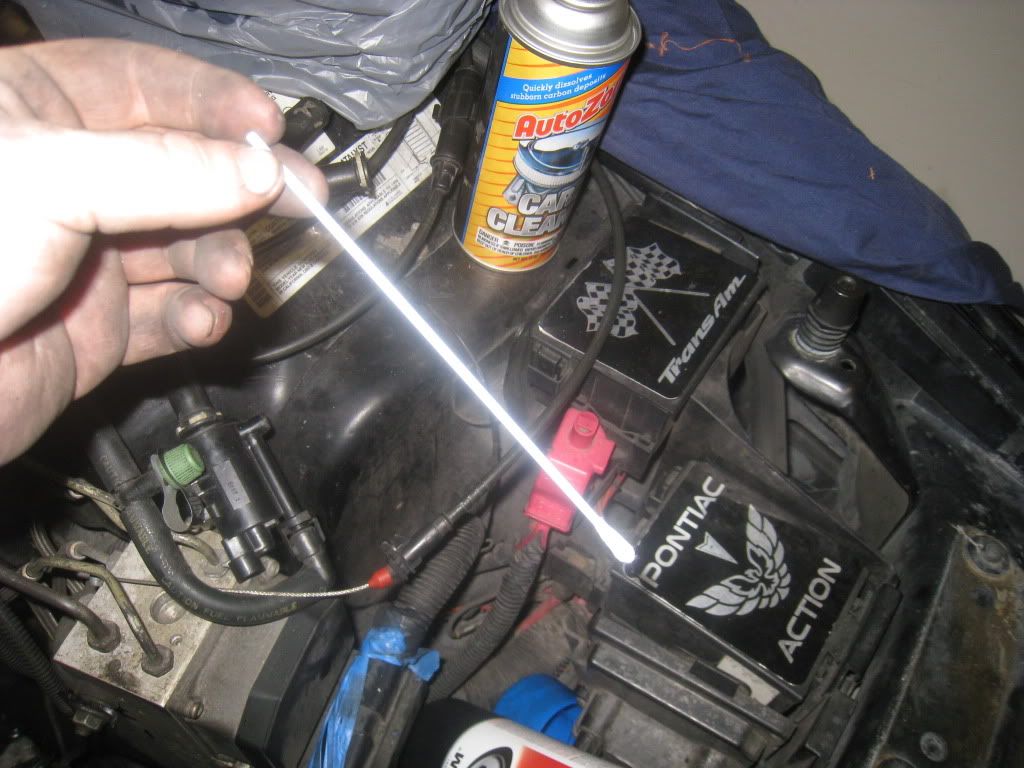
this is how much it stuck out of the hole after inserted all the way down, about 2" stuck out. this gave me plenty of room to move around and and get all that crap out of the holes
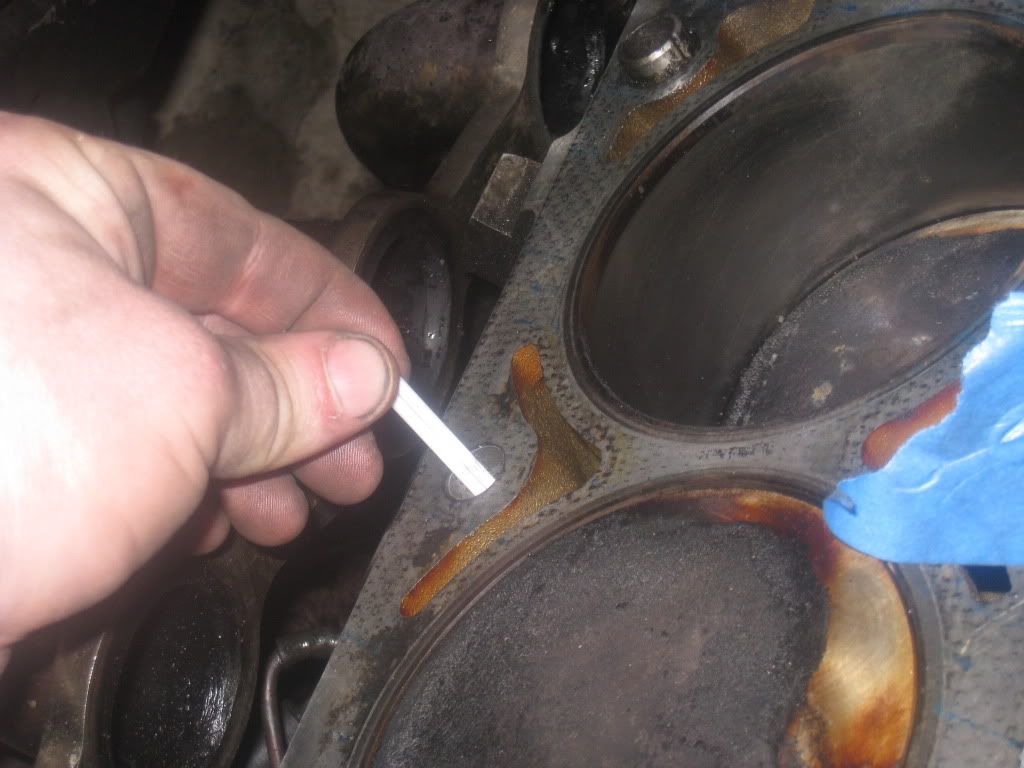
this is what i got on the first pass, this was after i cleaned this bolt hole with the LS1 how to method, and after blowing the holes out with a comprsser. some of the stuff was real gunky down there so the cu-tip ends worked really well. i went through on average of about 10 per hole and as much as 17 per hole, but in the end they all came out clean and i am confident the holes are clean and dry! one more bolt chase after the holes are dry and they are taped up so no more stuff can get inside the holes when working on the other ones.
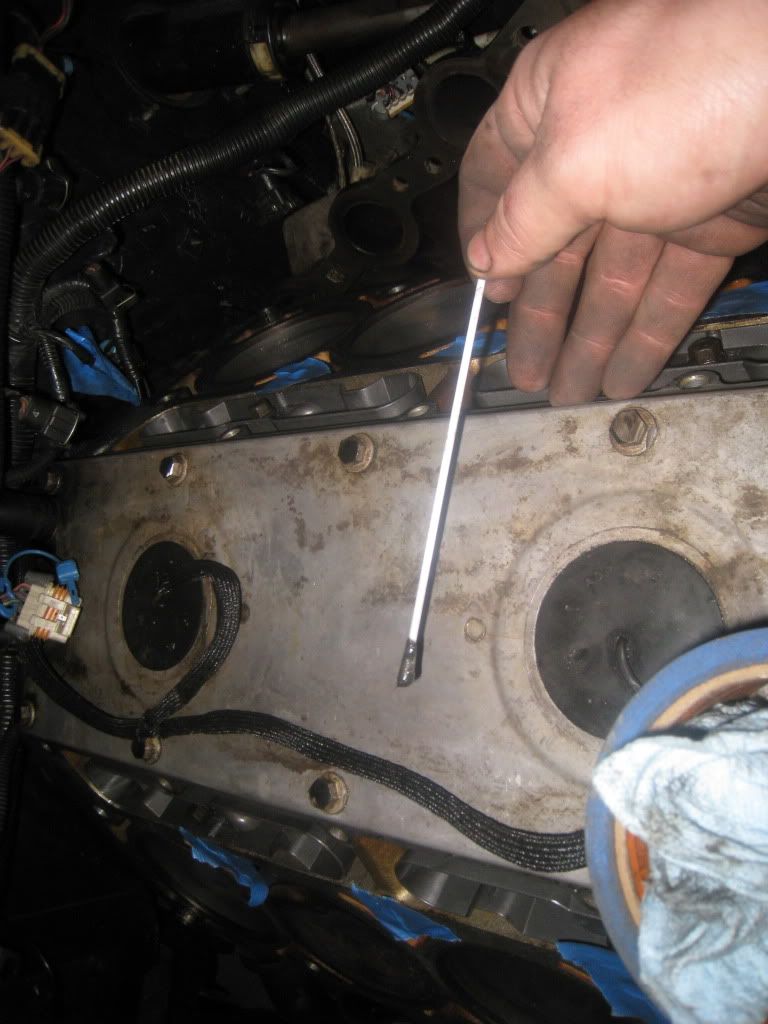
all bolt holes cleaned up and ready for the heads install. installed alternator bracket and alternator, getting ready for crank pulley install
crank pulley ready for install, i had a longer crank bolt so i used it to start the first 1/2" of the install, then used the old crank bolt to install it the rest of the way all the way to 240 ftlbs
so here i installed onld crank bolt and torqued that bitch down good.... 240 ft lbs to be exact
removed old bolt and ready to install new crank pulley bolt, it is so pretty
new bolt installed, torquing down new bolt to 240 ft lbs as well

here is the spot under the battery that was a little rusted due to radiator fluid slow leak to the frame rail, all better and primered
here is what the spot used to look like, before sanding and preping for paint
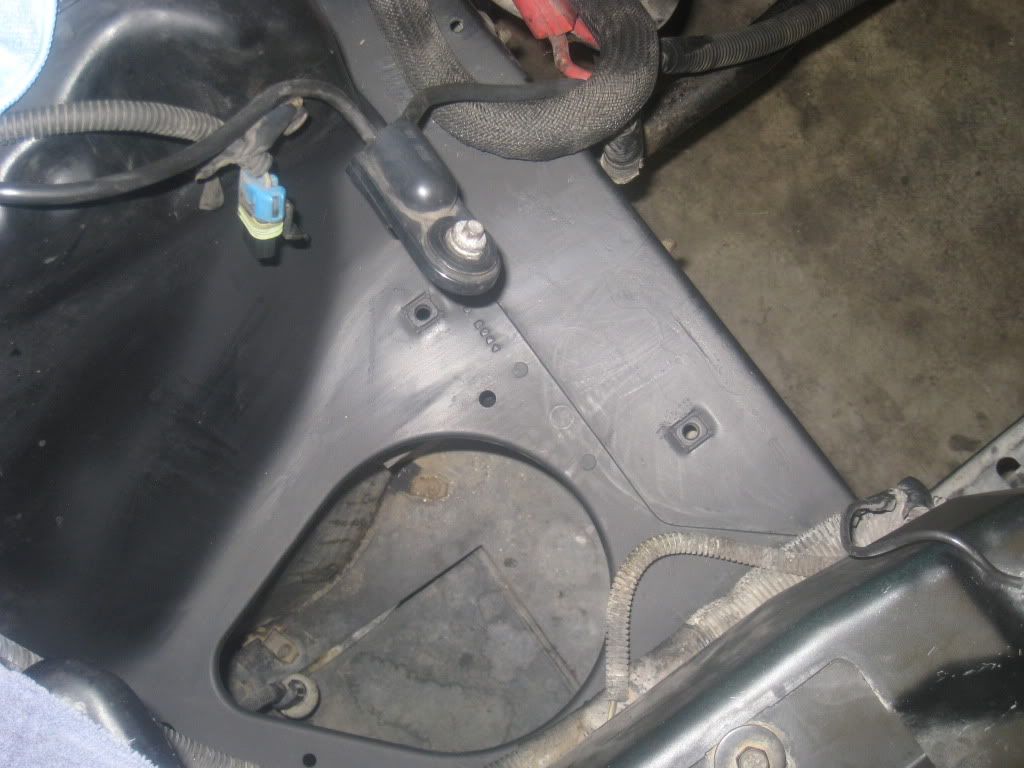
and here it is again with primer only. going to sand again, prime one more time then a coat of paint will be sprayed over it to match the rest of the engine bay
now the head bolt hole cleaning took quite a while and then the wife wanted some attention so i had to take her to dinner. so i called it a day right here.picked up some copper spray for the head gasket for the cylinder head install tomorrow!! still need to repair the ground strap that i broke off the drivers side head, but that is only a wire splice away. progress is being made, and i hope to get both heads on tomorrow and if all goes well the rest of the accessories for the motor!
here i am preparing my lifters to be soaked in oil for 24 hours. wife was mad when she saw that i used the tuperware to soak my lifters in oil
...oh well, got the job donewell got the timing cover all cleaned up with a soft bristle cleaning wheel, looks much better then before.
now it is time for some head prep to get the block ready to recieve the new cylinder heads
i took a stock head bolt, a grinder, and a steady hand to grind the grove in the bolt i made mine diagonal for better cleaning and cut my bolt on both sides.after blowing out the bolt holes with my compressor (had some cleaning to do after this method...radiator fluid shower anyone?) then it was time to chase the bolt holes with this. after doing the middle row. i started on the bottom row to only have the bolt come back wet and dirty. so now it was time for some deep cleaning
so i didnt have the things i needed for cleaning the bottom of the bolt holes yet (sent the wife to the store) so i cleaned, sanded and primed up the old rust spot where the old over flow hose was leaking on to my frame. it looks all shiny now but it dries flat. it still needs paint but looks a whole lot better then before
ok and my mystery cleaner tool arrives....TAD-AH!!!!! it is just a box of 100 mouth swabs from the pharmacy that cost me 3 bucks! these things work ******* awsome. you can reach the bottom of the head bolt holes and ensure getting all that crap out of there way better then a spun up paper towel.
this is how much it stuck out of the hole after inserted all the way down, about 2" stuck out. this gave me plenty of room to move around and and get all that crap out of the holes
this is what i got on the first pass, this was after i cleaned this bolt hole with the LS1 how to method, and after blowing the holes out with a comprsser. some of the stuff was real gunky down there so the cu-tip ends worked really well. i went through on average of about 10 per hole and as much as 17 per hole, but in the end they all came out clean and i am confident the holes are clean and dry! one more bolt chase after the holes are dry and they are taped up so no more stuff can get inside the holes when working on the other ones.
all bolt holes cleaned up and ready for the heads install. installed alternator bracket and alternator, getting ready for crank pulley install
crank pulley ready for install, i had a longer crank bolt so i used it to start the first 1/2" of the install, then used the old crank bolt to install it the rest of the way all the way to 240 ftlbs
so here i installed onld crank bolt and torqued that bitch down good.... 240 ft lbs to be exact
removed old bolt and ready to install new crank pulley bolt, it is so pretty
new bolt installed, torquing down new bolt to 240 ft lbs as well
here is the spot under the battery that was a little rusted due to radiator fluid slow leak to the frame rail, all better and primered
here is what the spot used to look like, before sanding and preping for paint
and here it is again with primer only. going to sand again, prime one more time then a coat of paint will be sprayed over it to match the rest of the engine bay
now the head bolt hole cleaning took quite a while and then the wife wanted some attention so i had to take her to dinner. so i called it a day right here.picked up some copper spray for the head gasket for the cylinder head install tomorrow!! still need to repair the ground strap that i broke off the drivers side head, but that is only a wire splice away. progress is being made, and i hope to get both heads on tomorrow and if all goes well the rest of the accessories for the motor!
04-03-2011, 06:49 PM
#29
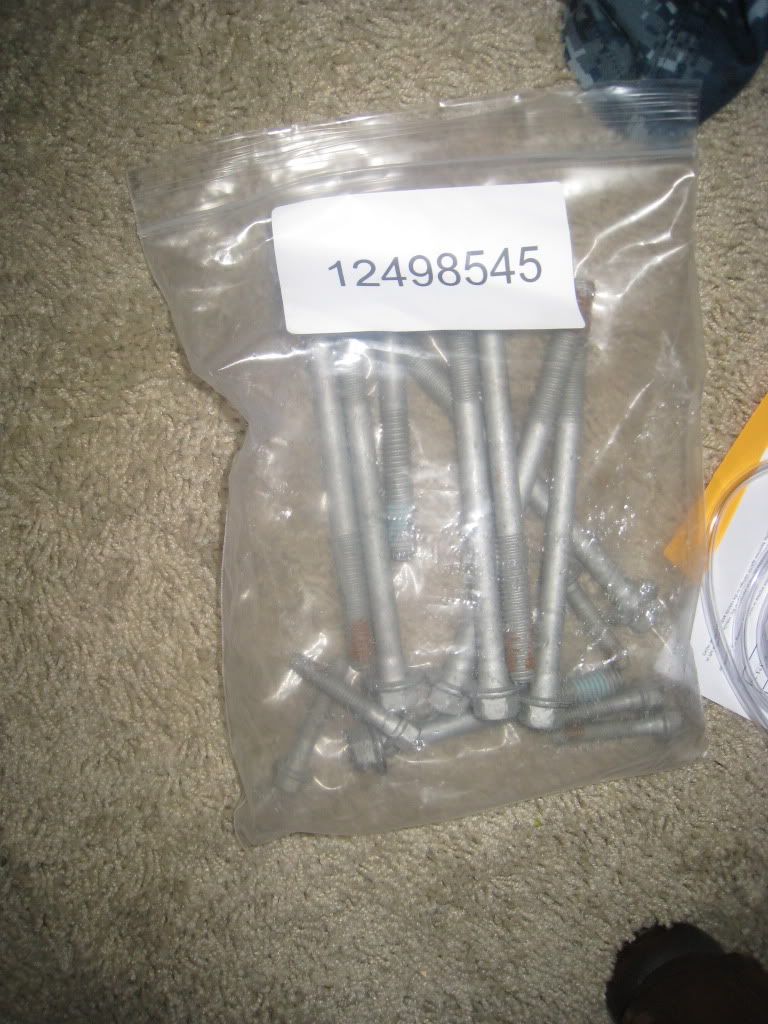
well as i went to go get the new GM head bolts out of my basic heads and cam package i received form Texas speed last month....THEY WEREN'T THERE!!! there was no head bolts of any kind, even though i ordered them and it says so on my order page, and invoice. i am sure it was just a mix up but it is very frustrating. so i am gonna have to do other stuff today, and i emailed Matt@texas speed so he should get back to me tomorrow. i am sure that he will fix the mix up and just send me some bolts.
till then, i will occupy my time with other things, more pics to come as i have other stuff other then the heads that i can install, the heads are just one of the major things i needed to do. oh well, stuff happens, no biggie.
till then, i will occupy my time with other things, more pics to come as i have other stuff other then the heads that i can install, the heads are just one of the major things i needed to do. oh well, stuff happens, no biggie.
04-03-2011, 07:02 PM
#30
TECH Enthusiast
Join Date: May 2004
Location: St. Louis, MO
Posts: 735
Likes: 0
Received 0 Likes
on
0 Posts

Most people don't do it...but you're supposed to torque the new balancer bolt to 37ft/lbs. Then do 140 degrees. Not 240ft/lbs on the new one. The 140 degrees is over 300 ft/lbs
04-04-2011, 01:24 PM
#32
TECH Enthusiast
Join Date: Jun 2010
Location: Illinois
Posts: 611
Likes: 0
Received 0 Likes
on
0 Posts
awesome write up man, i hope to be doing this at the end of summer! do you think it would have been easier to pull out the front cradle instead of doing all the work inside the car?
04-04-2011, 11:00 PM
#34
TECH Enthusiast
Join Date: Jun 2010
Location: Illinois
Posts: 611
Likes: 0
Received 0 Likes
on
0 Posts
good info I'll definitely keep that in mind when I go to do this. I might do a 427 lsx build and switch to a tubular k member if I'm gonna do all the work. Just takes time and...money 
04-05-2011, 07:58 PM
#35
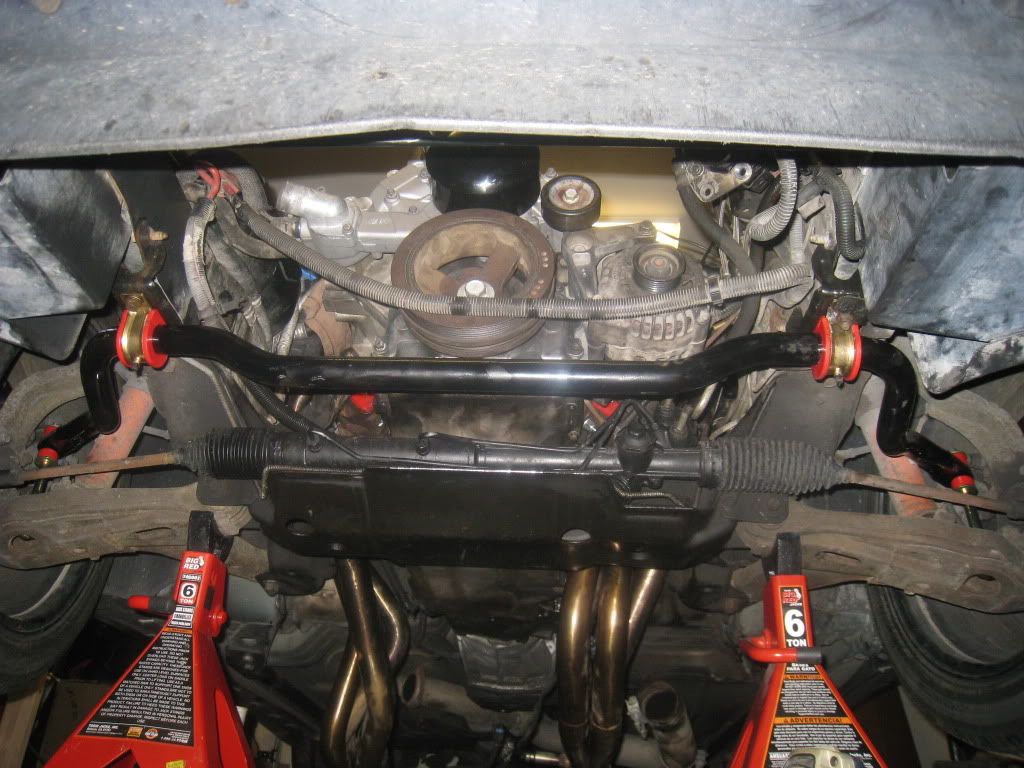
so since my head bolts are not gonna arrive till friday, i have other things i can do. first i started with the front sway bar. i will probably re-install the cooling system and drop the car off of the jack stands, and set the collectors of the long tubes on pads or something.
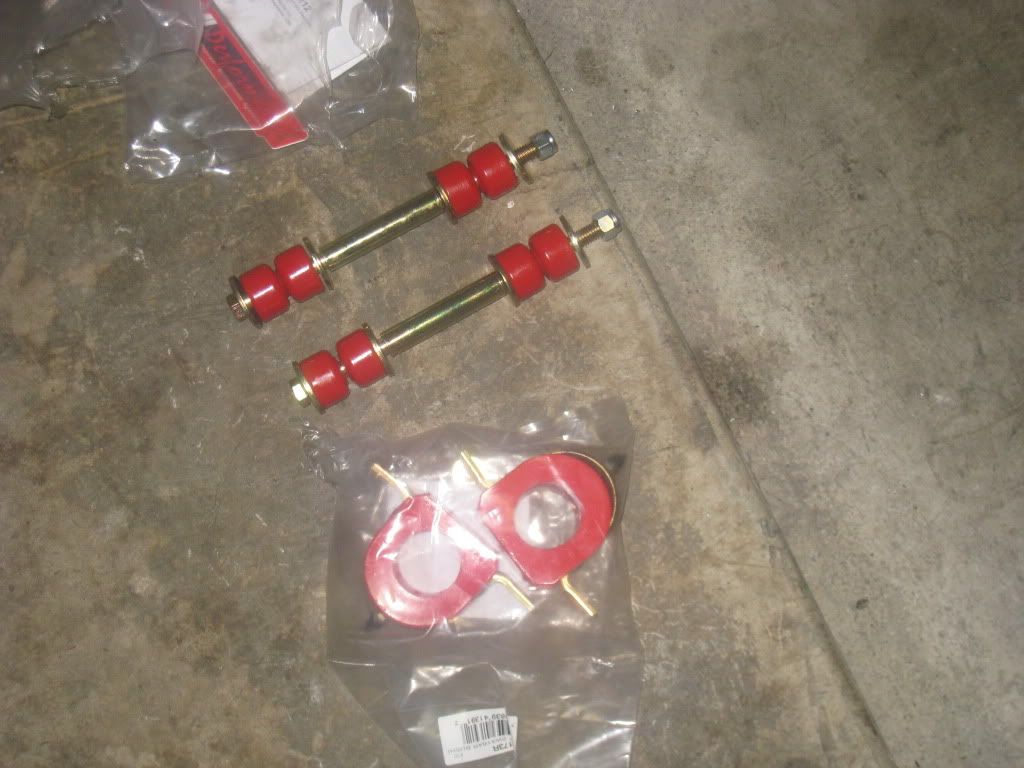
here is my new sway bar mounts.
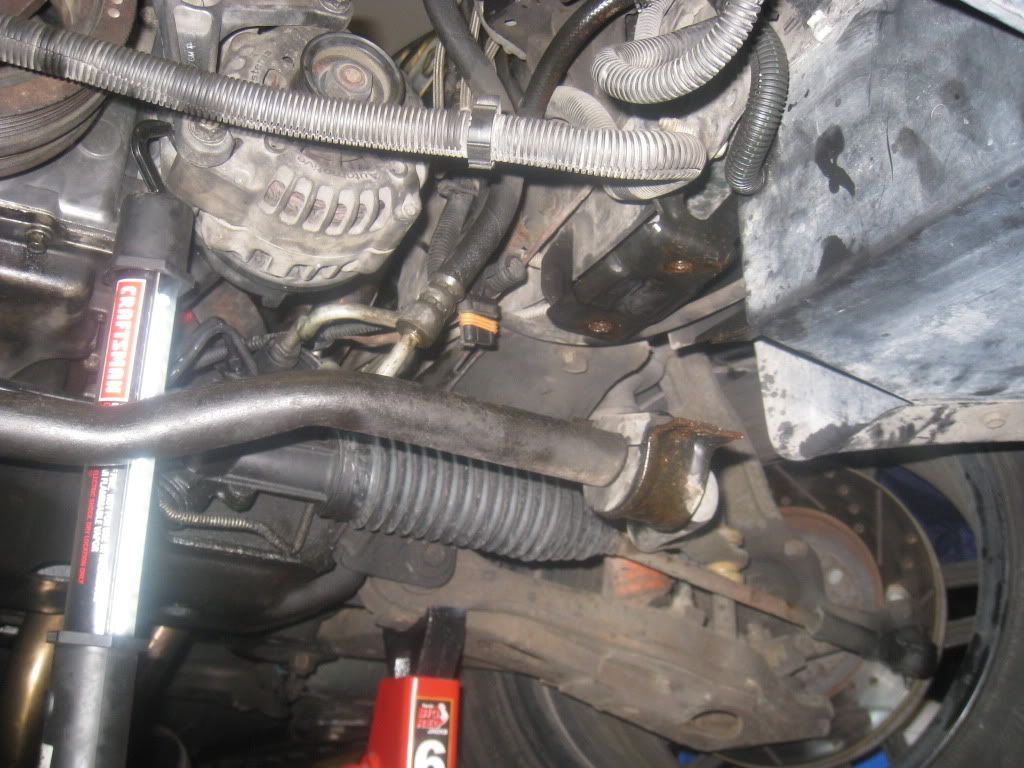
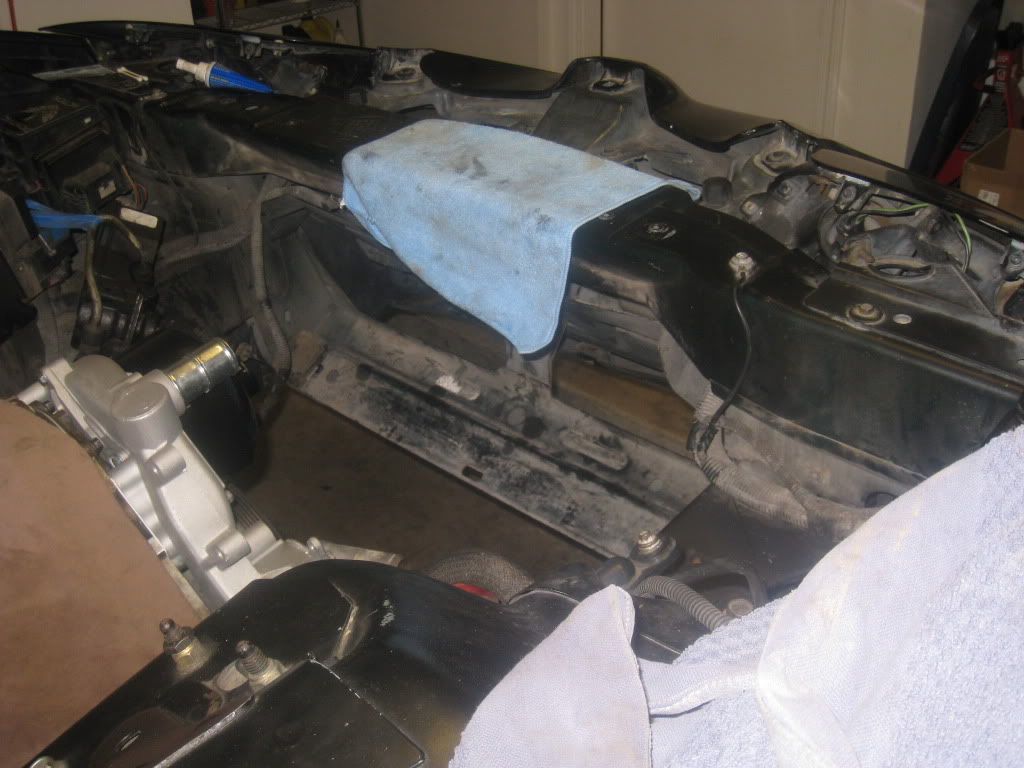
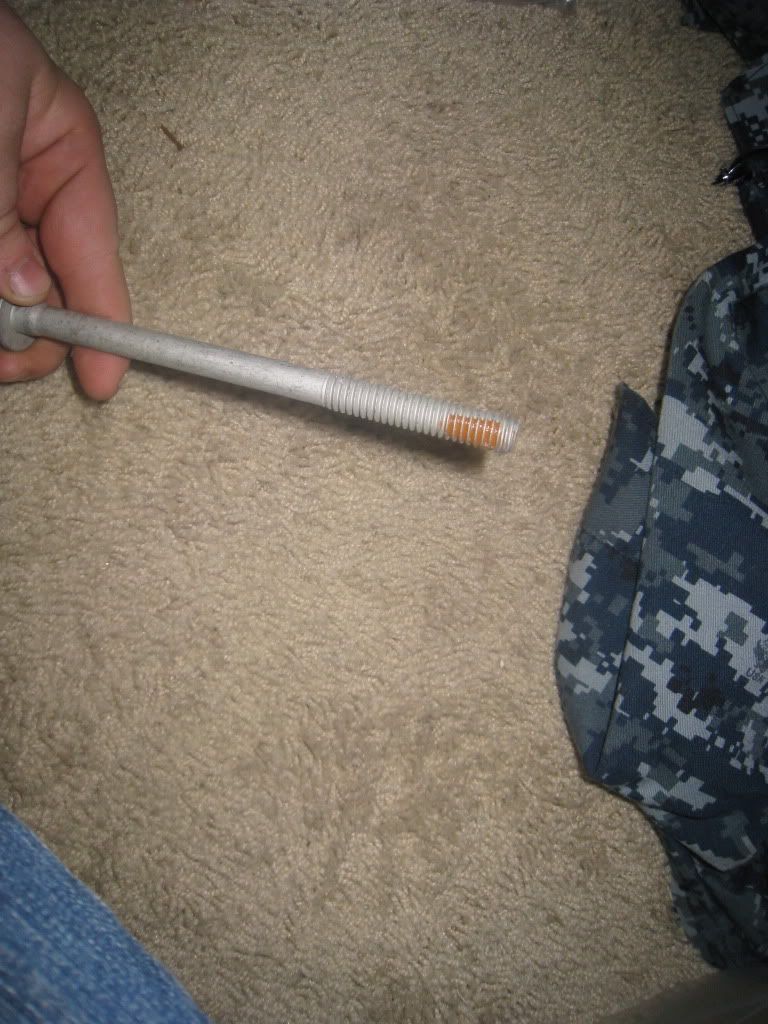
stock sway bar being removed, these bolts were a bitch to remove!
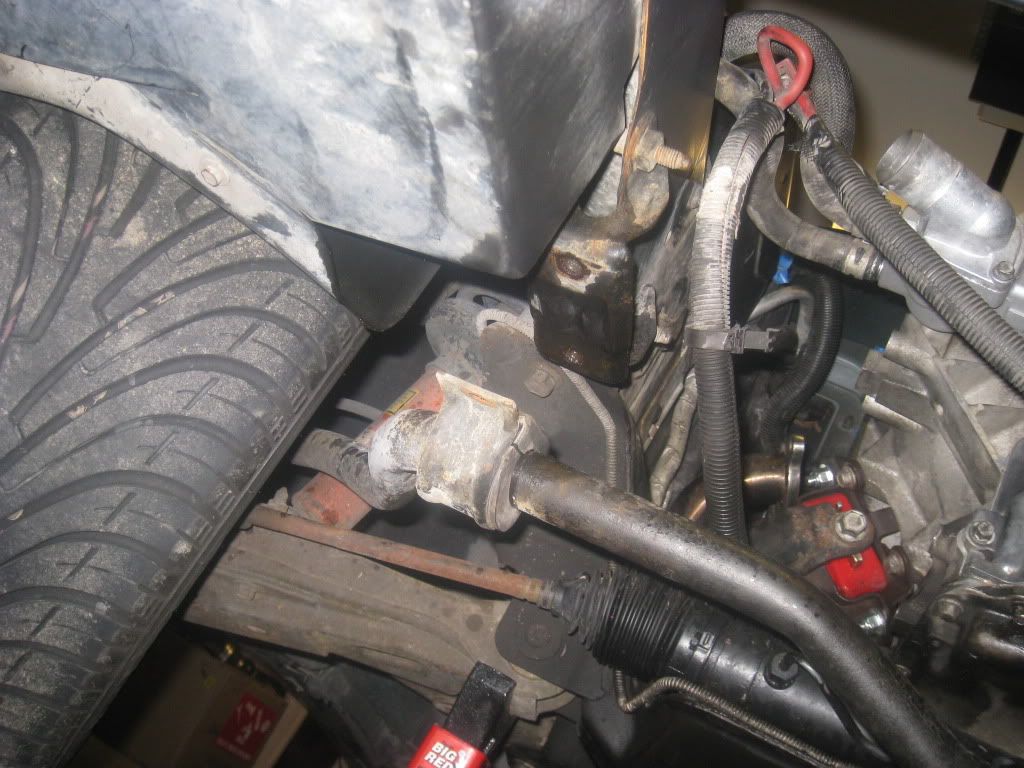
broke the sway bar bolt off trying to remove it...what a load or crap. i would be pretty pissed off if i didnt have new bolts
so instead of even trying to take the drivers side off, i just cut it off and was over with it.
stock vs aftermarket 35mm solid chromoly sway bar. the new sway bar weighs more then double the stock sway bar.
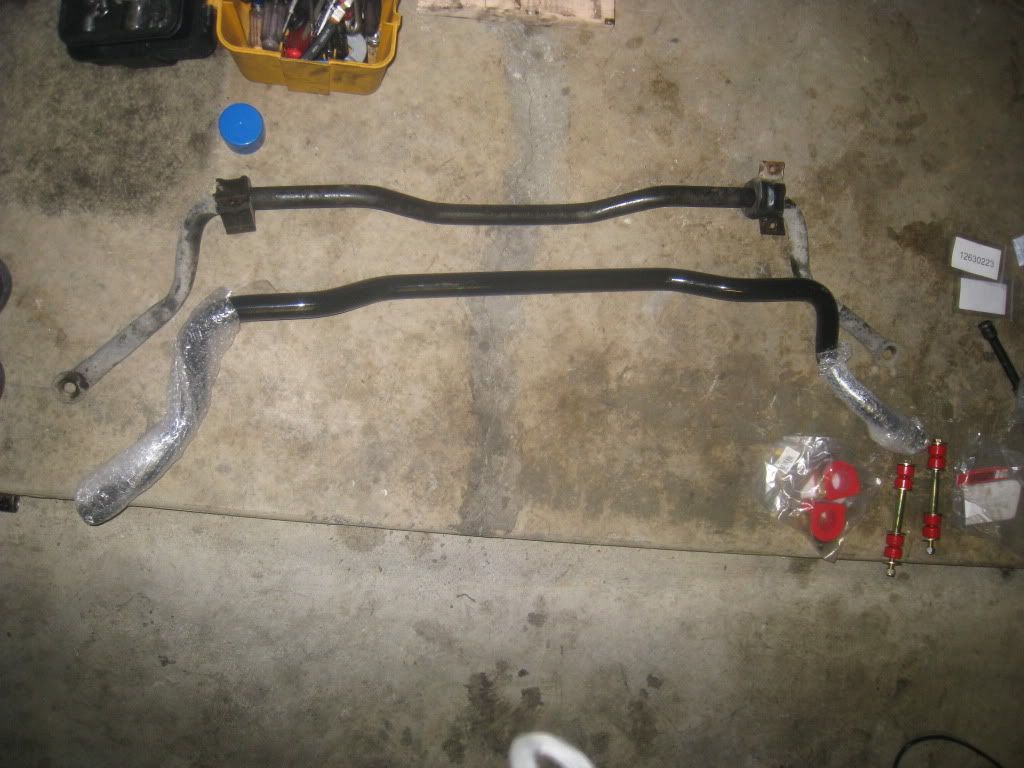
middle sections compared, 32mm vs 35mm
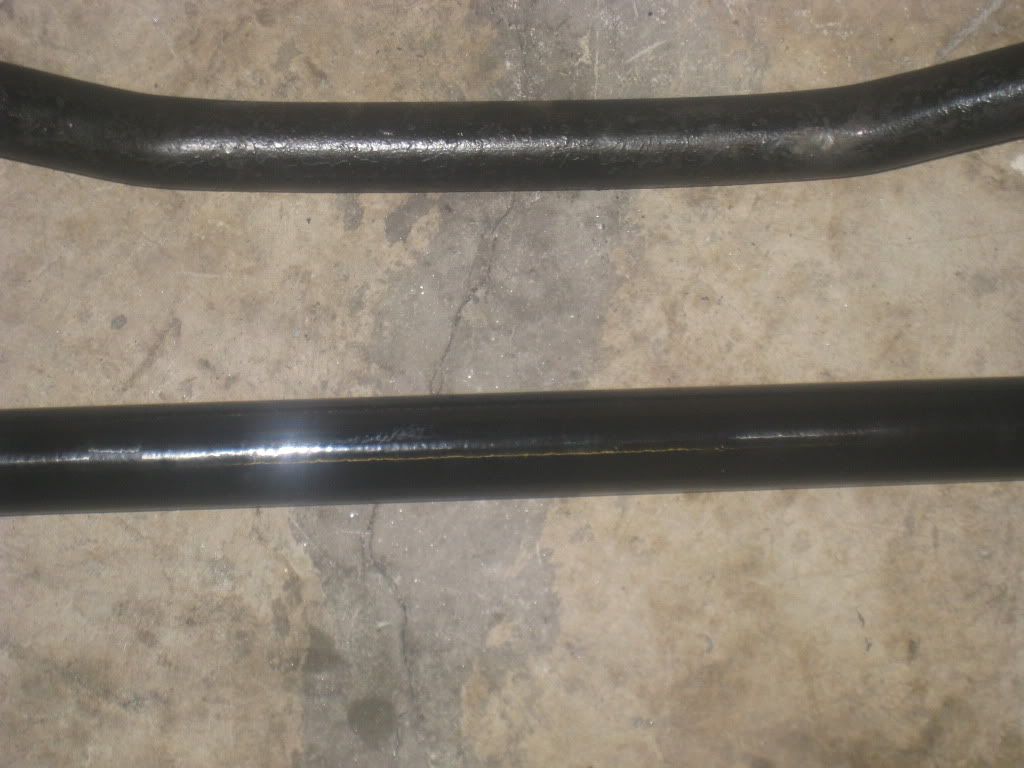
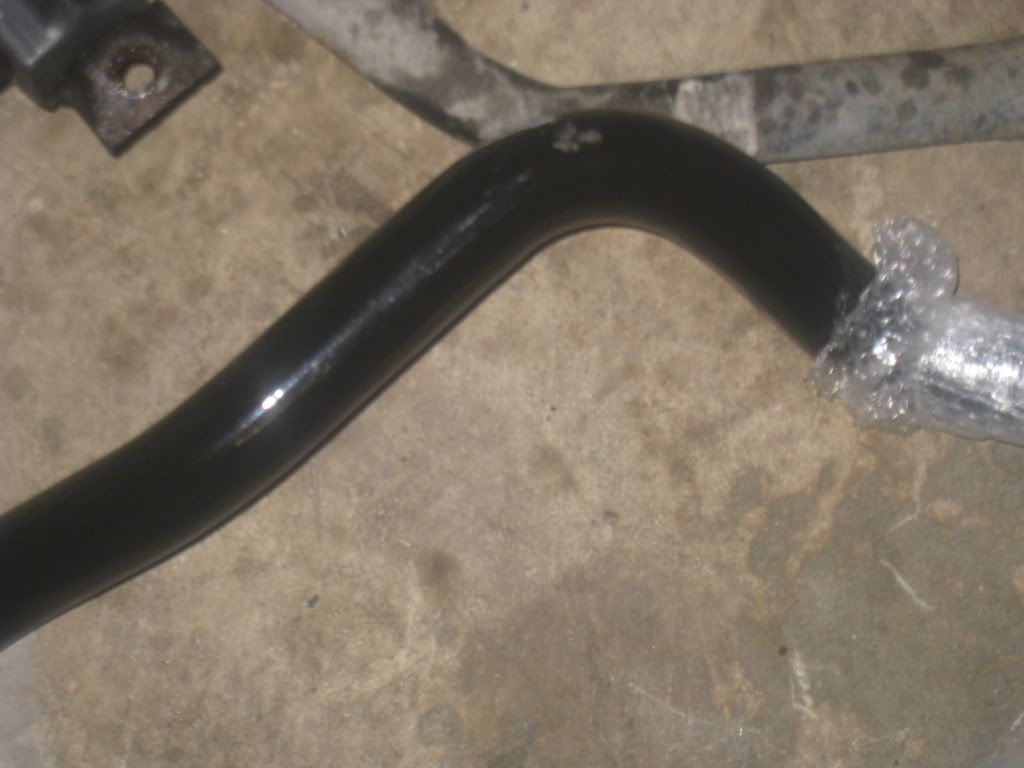
the stock one gets smalller at the curves, down to about 28mm, that is sad!
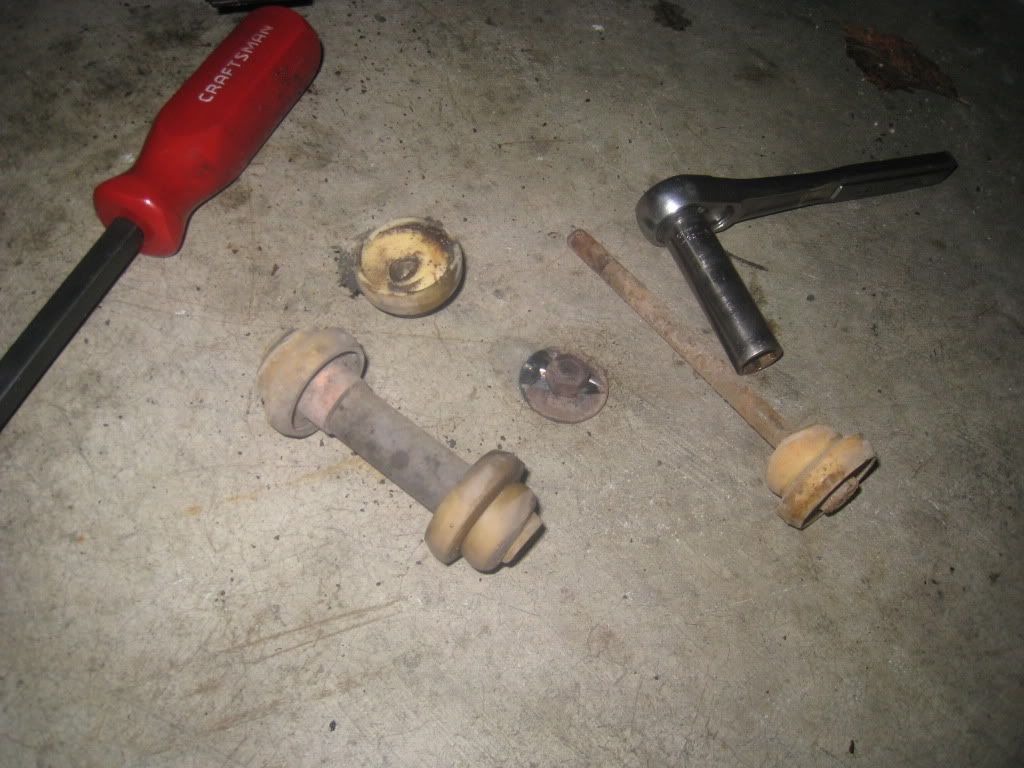
here is the sway bar link ends compared...no contest!

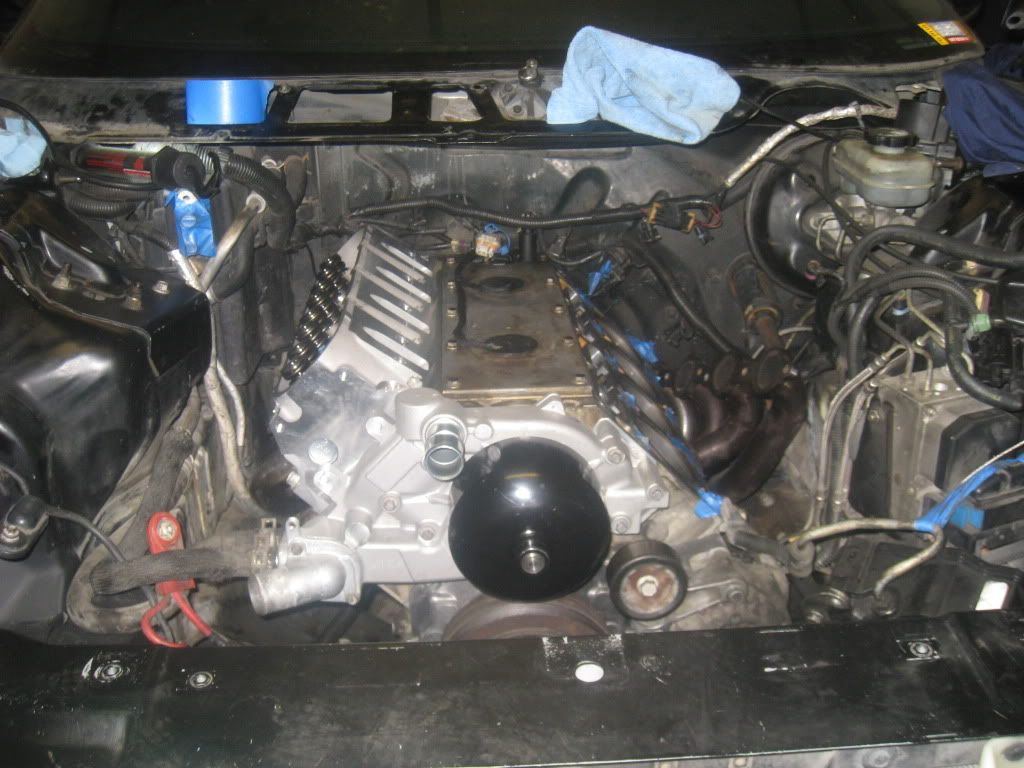
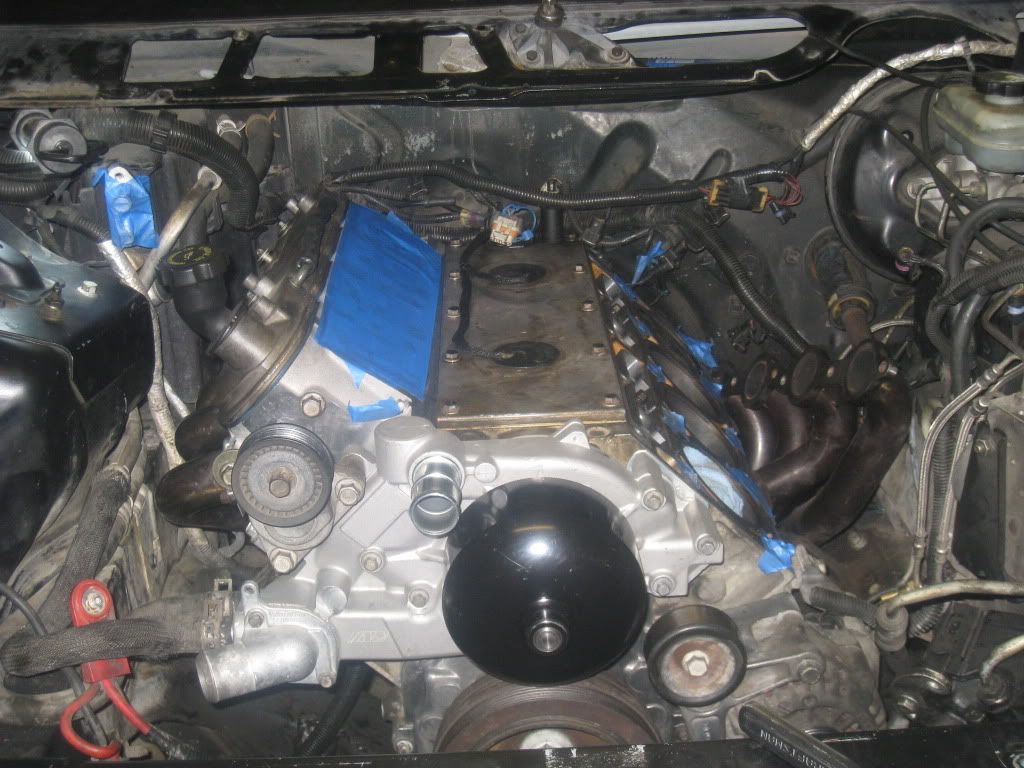
motor shot with new water pump installed...DAMN THIS BITCH IS HUGE!!!!!!
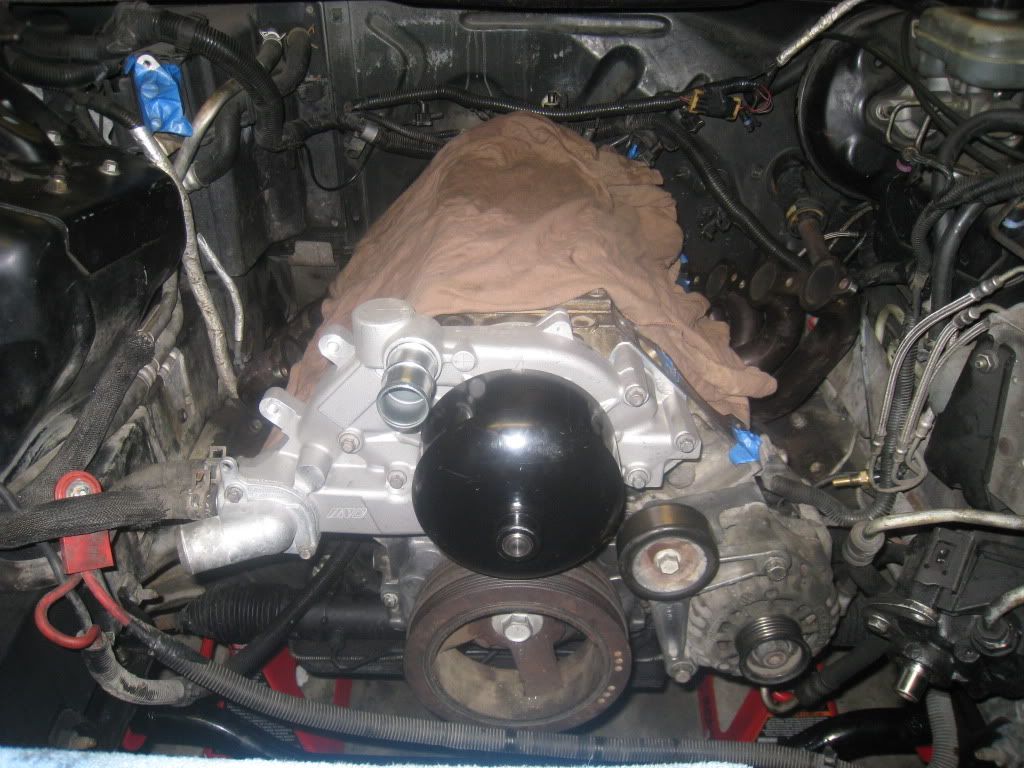
radiator still missing, since i have no head bolts, i will probobly re-install all the cooling system so it is ready to put the intake on and fire it up sooner rather then later.
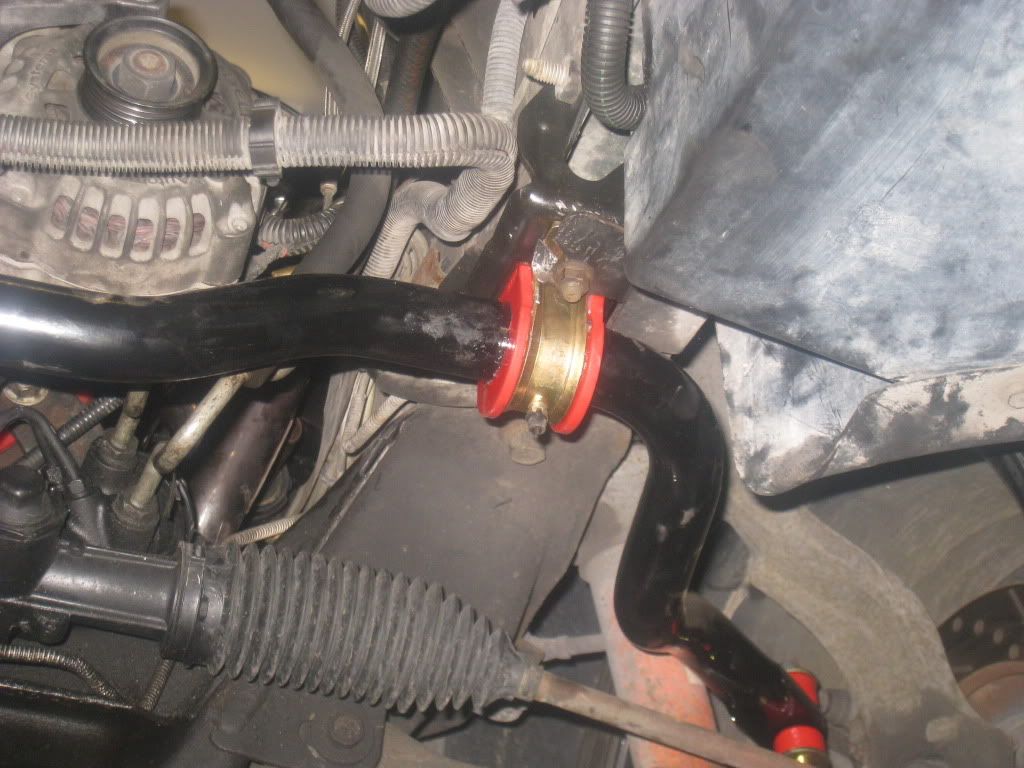
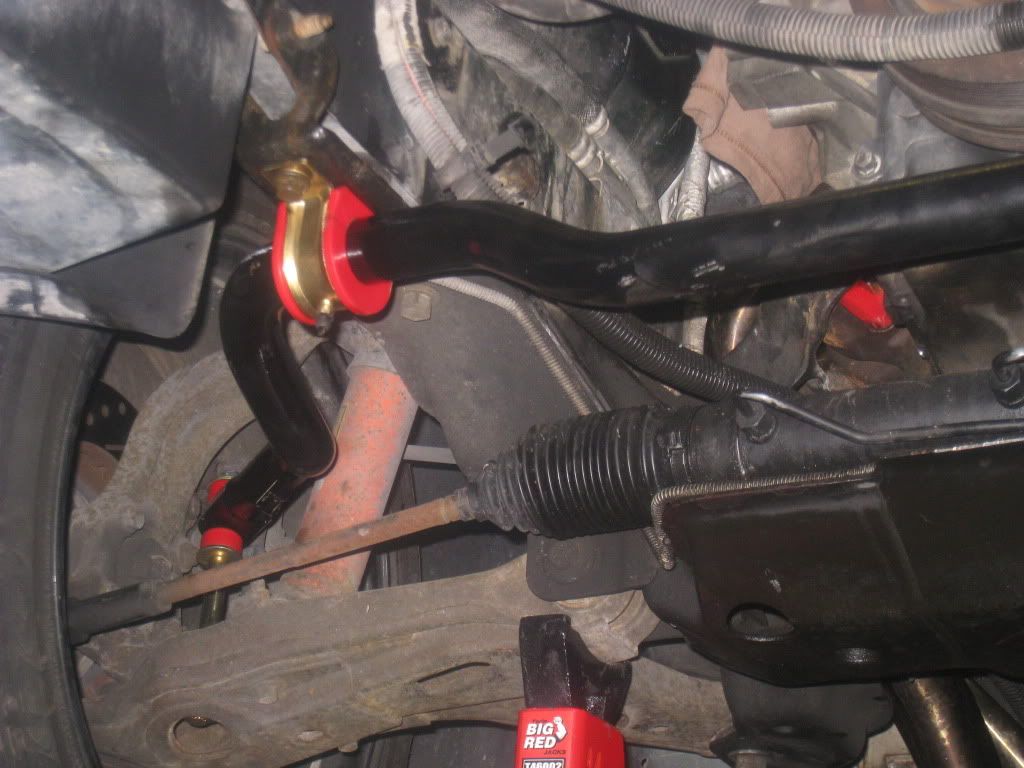
new sway bar installed, this thing looks good. grease-able links...nice!
here is my new sway bar mounts.
stock sway bar being removed, these bolts were a bitch to remove!
broke the sway bar bolt off trying to remove it...what a load or crap. i would be pretty pissed off if i didnt have new bolts
so instead of even trying to take the drivers side off, i just cut it off and was over with it.
stock vs aftermarket 35mm solid chromoly sway bar. the new sway bar weighs more then double the stock sway bar.
middle sections compared, 32mm vs 35mm
the stock one gets smalller at the curves, down to about 28mm, that is sad!
here is the sway bar link ends compared...no contest!
motor shot with new water pump installed...DAMN THIS BITCH IS HUGE!!!!!!
radiator still missing, since i have no head bolts, i will probobly re-install all the cooling system so it is ready to put the intake on and fire it up sooner rather then later.
new sway bar installed, this thing looks good. grease-able links...nice!
04-05-2011, 08:00 PM
#36
so that is it for now, i am gonna look at all the parts i have, sure i could install the lifters but what is the point. i will just let them soak till friday, that will make it a whole week of soaking, it should be nice and quiet when i fire this new build up. will probobly do the cooling system next, and then do the power window fix.
04-08-2011, 02:26 PM
#38
so guess what came in today.....HEAD BOLTS!!!!!!!!!!!!!!!!!!!!!

so today i am gonna re clean the surface and prep it, ensure all the bolt holes are still clean, my question is, how do i check the piston to valve clearance, cause i have a 227/235 cam, and 62cc 5.3 heads, i shouldn't have a problem, but i just want to make sure. also if i do the clay method, what clay do i use, and do u use my old head bolts to test it, or my new ones?
so today i am gonna re clean the surface and prep it, ensure all the bolt holes are still clean, my question is, how do i check the piston to valve clearance, cause i have a 227/235 cam, and 62cc 5.3 heads, i shouldn't have a problem, but i just want to make sure. also if i do the clay method, what clay do i use, and do u use my old head bolts to test it, or my new ones?
04-10-2011, 12:57 AM
#39
ok, so i finally got my head bolts in yesterday, and i got on that thing like a rocket. i installed the heads and intake, valve covers, rockers, and the coil packs in about 5 hours. now i just need to put the cooling system in and it will be ready to fire up! here are the pics:
New LS7 lifter installed, slid in nicely, after being soaked for 6 days strait these things should pump up quickly.

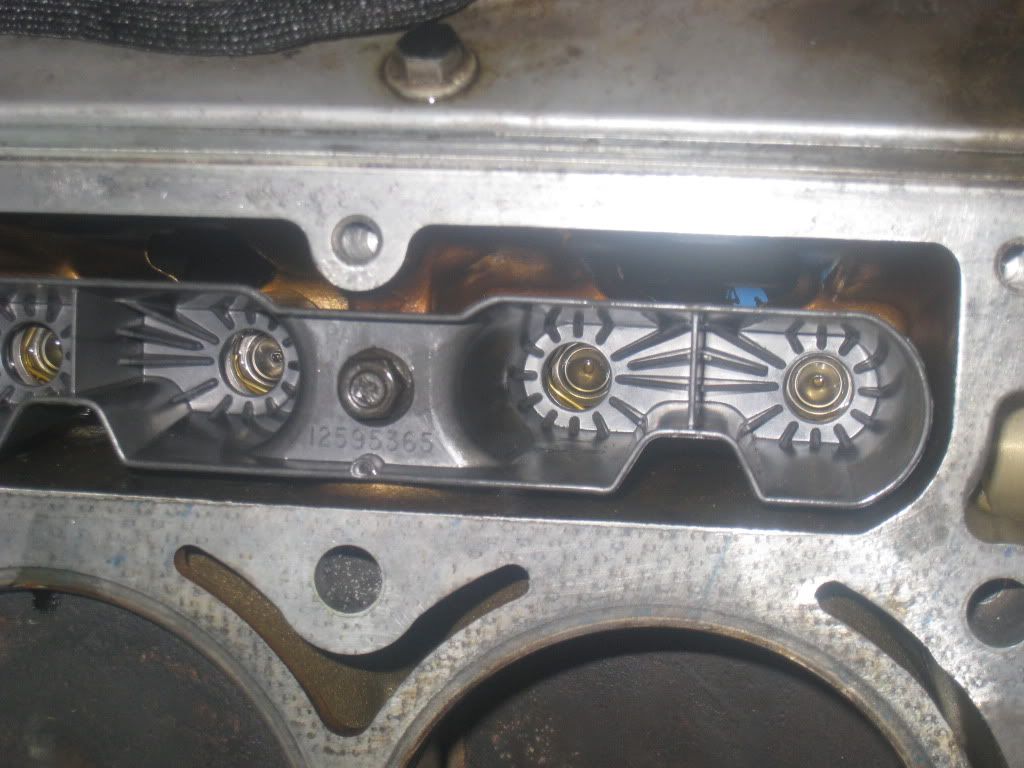
Installed the new LS2 lifter trays, supposedly these are stronger, i just wanted a replacement cause mine had over 140,000 miles on them.
these lifter trays were torqued down to 106 inch lb's
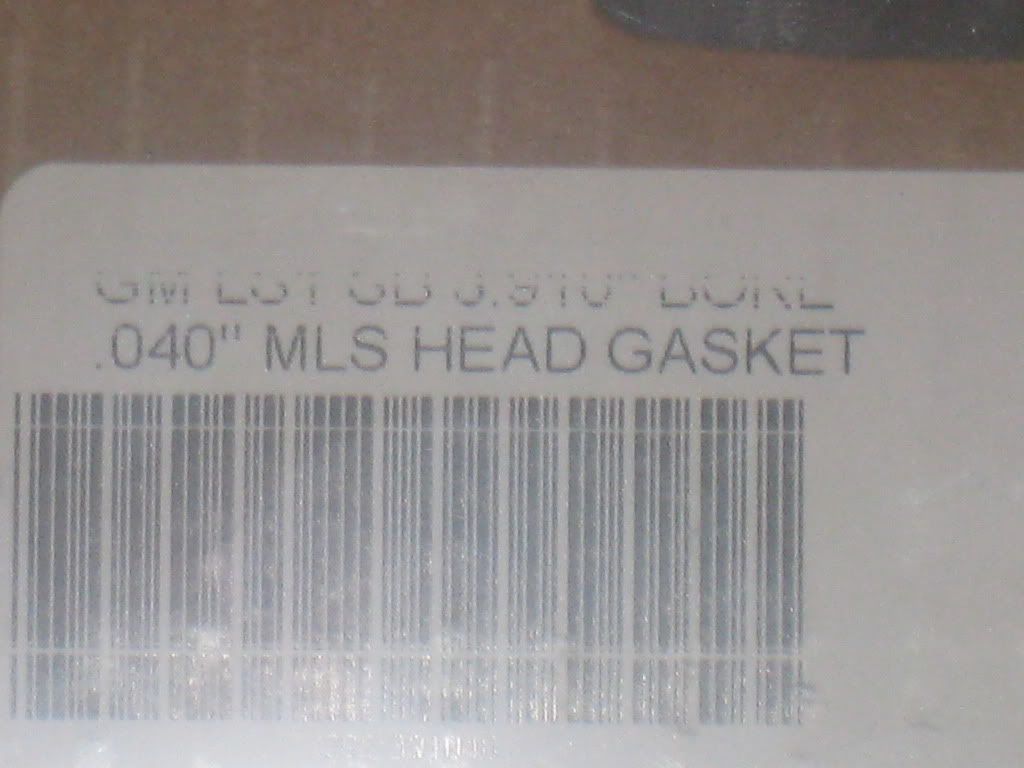
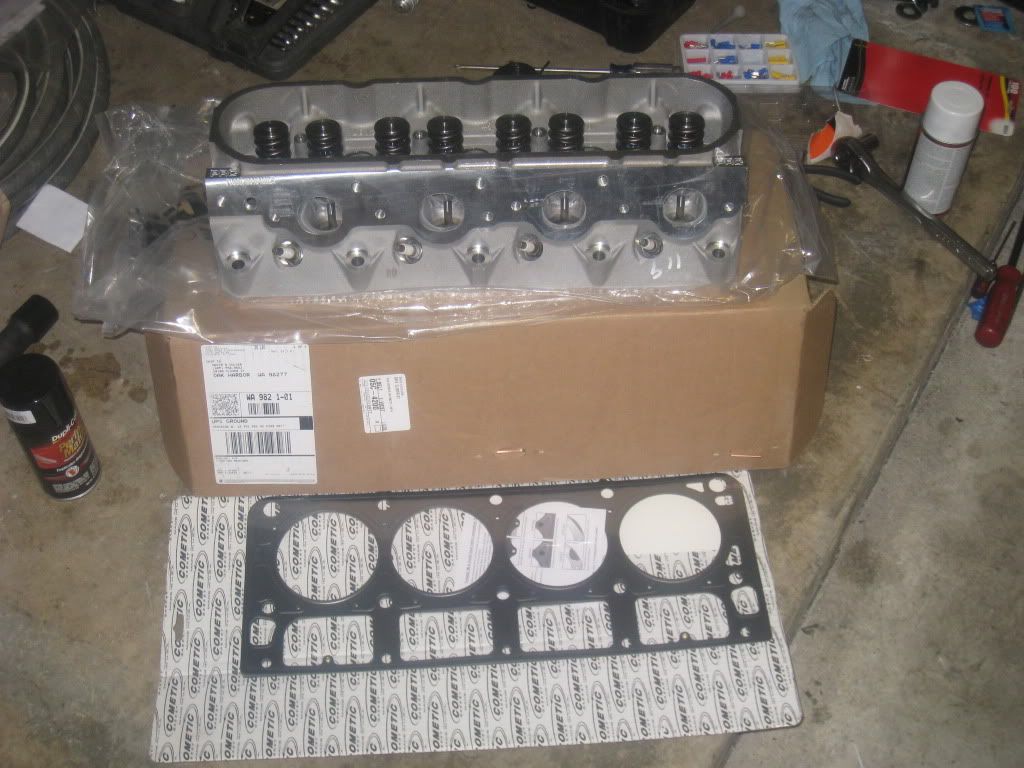
Here are my head gaskets, i went for the best. these are Cometic MLS .040 head gaskets (compressed thickness)
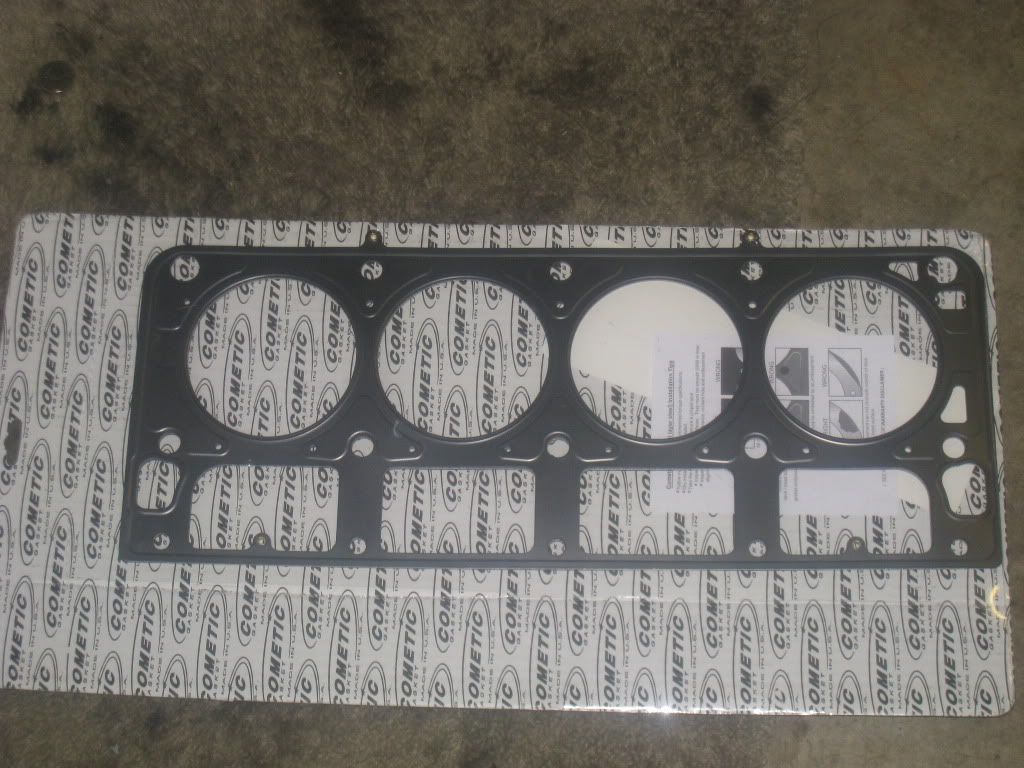
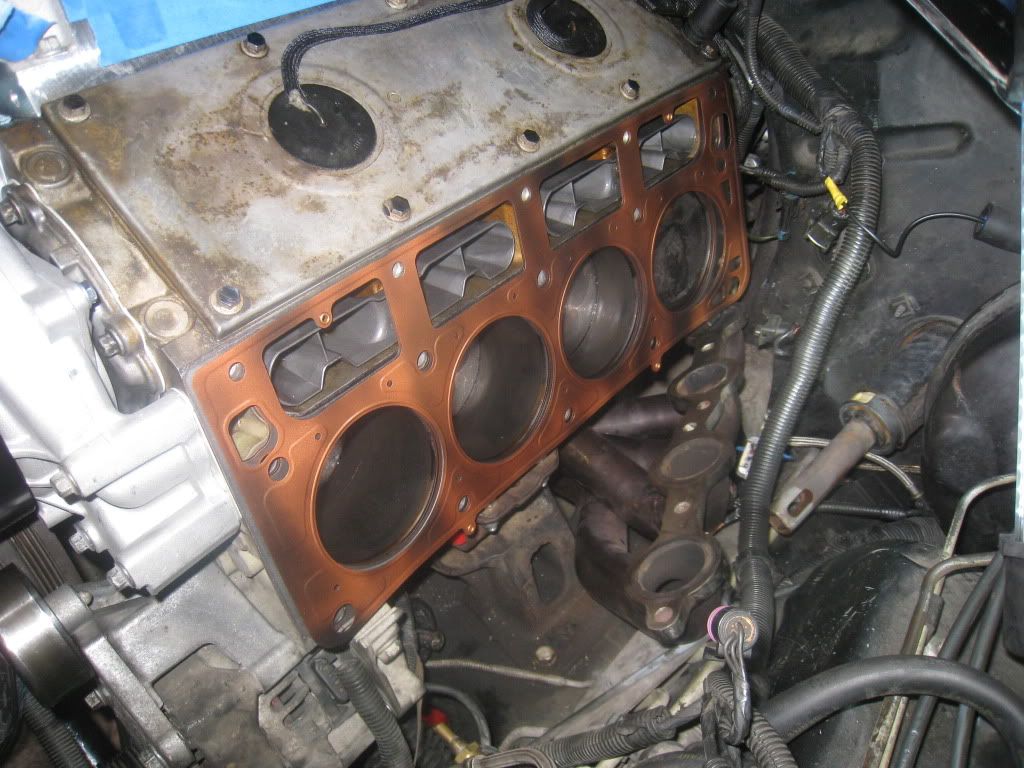
Installed for test fit, they were then removed again to be sprayed with the copper spray, then re-installed and the head dropped on them.
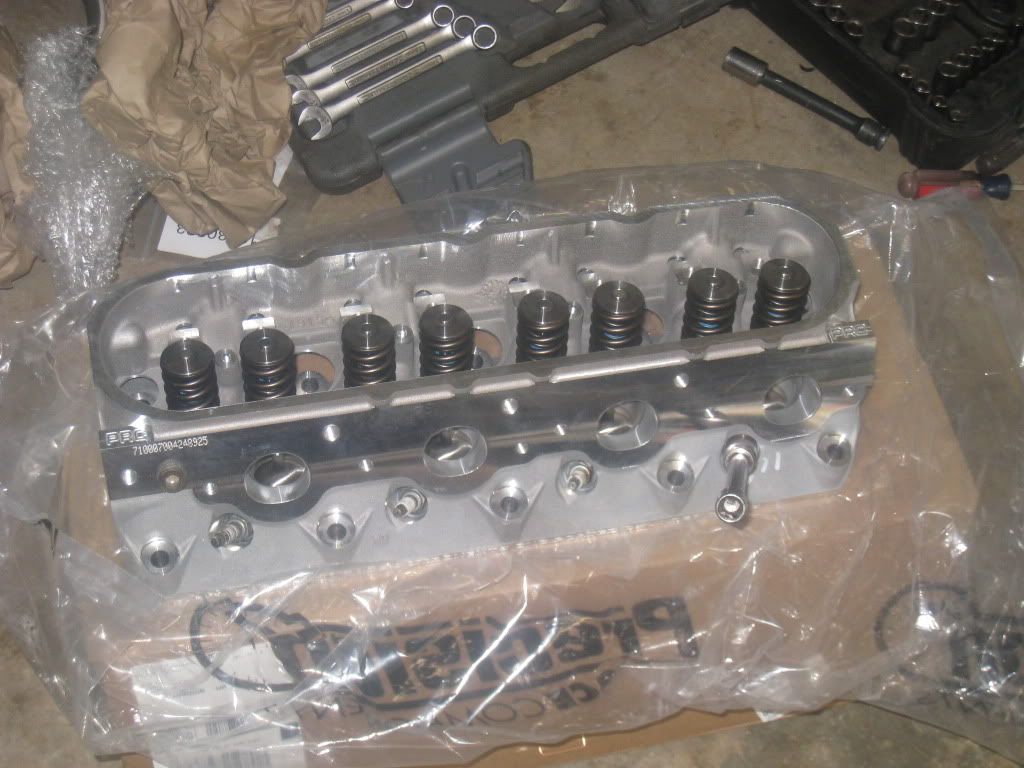
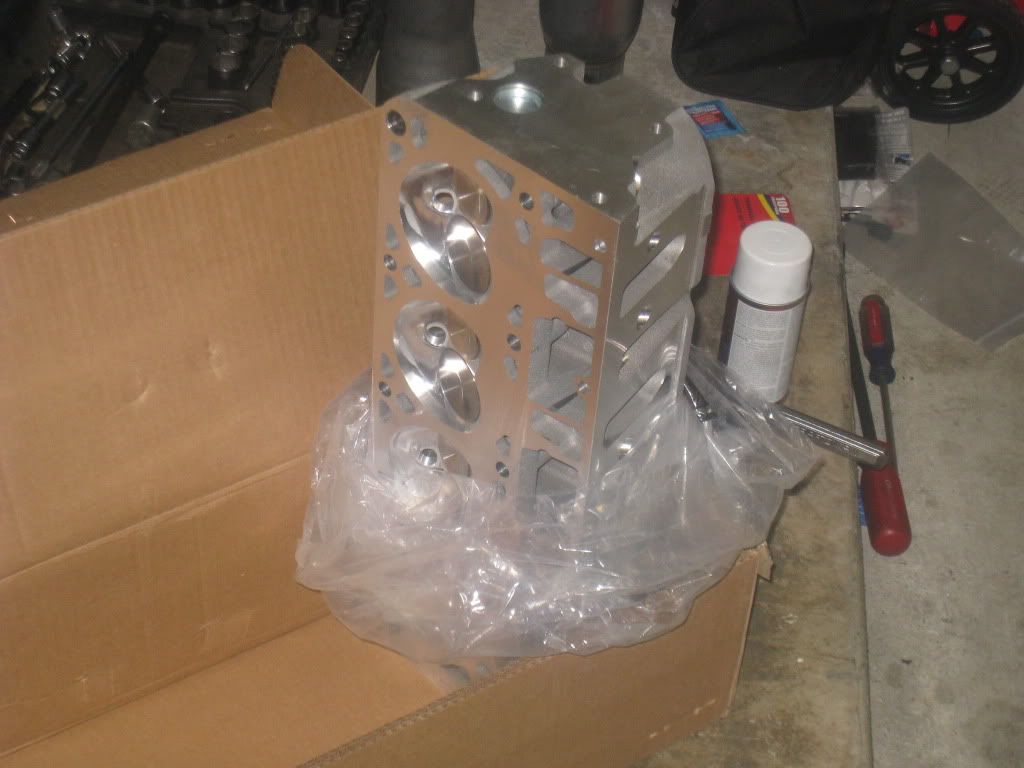
here is a shot of these pretty PRC 220cc 5.3 stage 2.5 heads from Texas Speed. Matt hooked me up with these for a great price, and matched them to my cam with sunk valve seats and 62cc chamber for a final 11.1:1 compression ratio. look forward to firing this thing up!
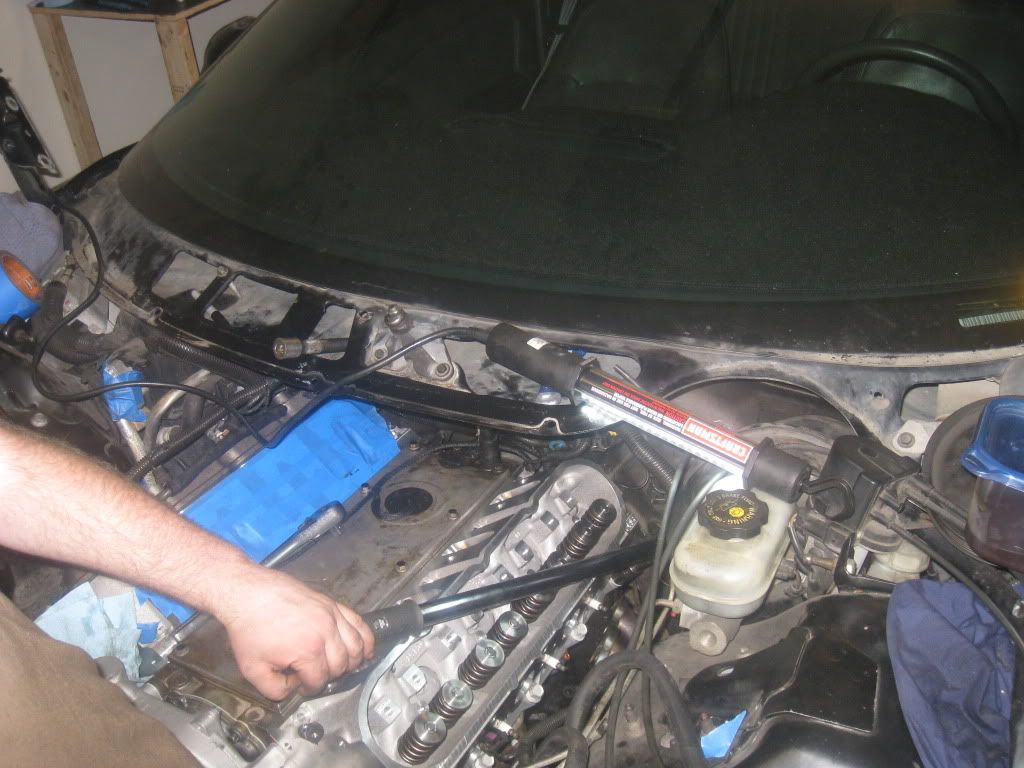
here there are getting torqued all down nice and tight. i used the LS1 how to method of 90* + another 90* and 50* on the short bolts.
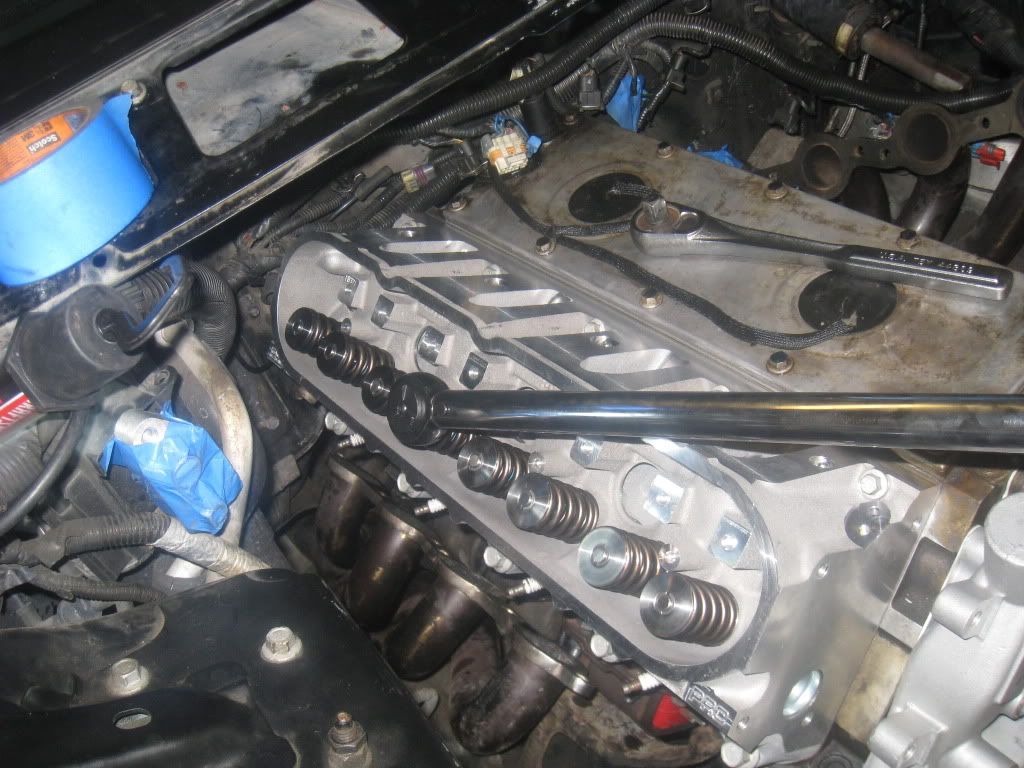
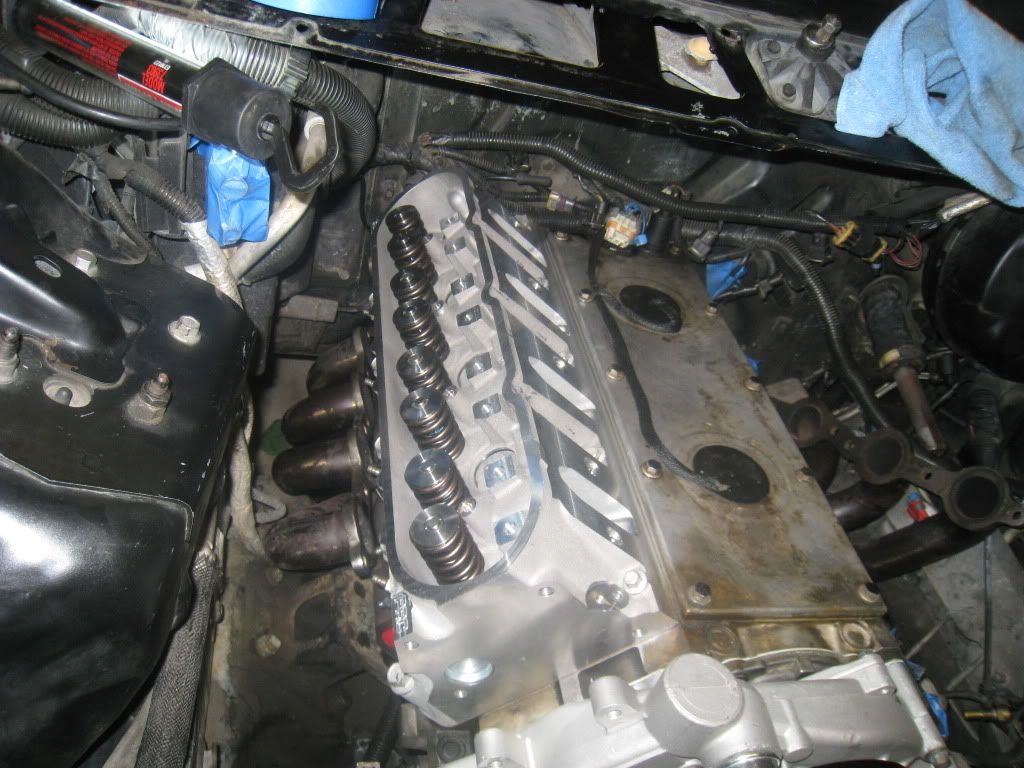
heads all bolted up. nice and shiny (cant say that for the rest of the engine, but hey, most of it will be covered)
Long-tube headers re-installed, exhaust hooked back up and bolts all torqued to spec.
New LS7 lifter installed, slid in nicely, after being soaked for 6 days strait these things should pump up quickly.
Installed the new LS2 lifter trays, supposedly these are stronger, i just wanted a replacement cause mine had over 140,000 miles on them.
these lifter trays were torqued down to 106 inch lb's
Here are my head gaskets, i went for the best. these are Cometic MLS .040 head gaskets (compressed thickness)
Installed for test fit, they were then removed again to be sprayed with the copper spray, then re-installed and the head dropped on them.
here is a shot of these pretty PRC 220cc 5.3 stage 2.5 heads from Texas Speed. Matt hooked me up with these for a great price, and matched them to my cam with sunk valve seats and 62cc chamber for a final 11.1:1 compression ratio. look forward to firing this thing up!
here there are getting torqued all down nice and tight. i used the LS1 how to method of 90* + another 90* and 50* on the short bolts.
heads all bolted up. nice and shiny (cant say that for the rest of the engine, but hey, most of it will be covered)
Long-tube headers re-installed, exhaust hooked back up and bolts all torqued to spec.
04-10-2011, 01:05 AM
#40
Rockers all installed, 7.400 pushrods installed and valve cover installed for cover (will be removed later for proper torque specs)
Heads pulled out for the passanger side, look how nice this thing is
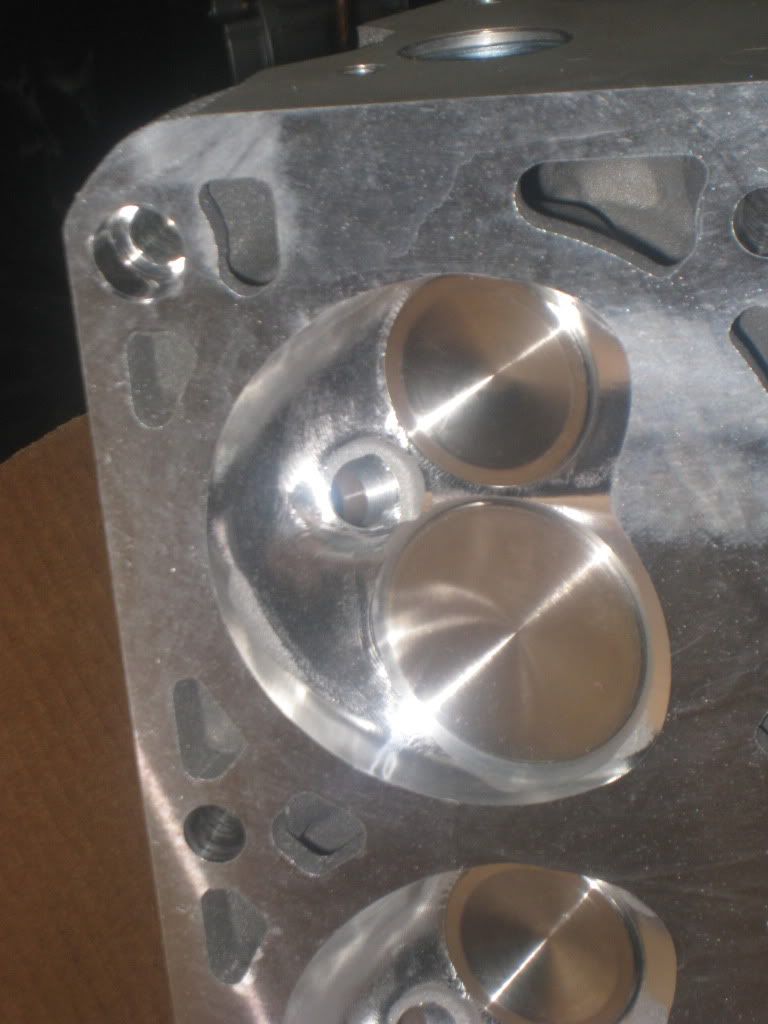
combustion cambers
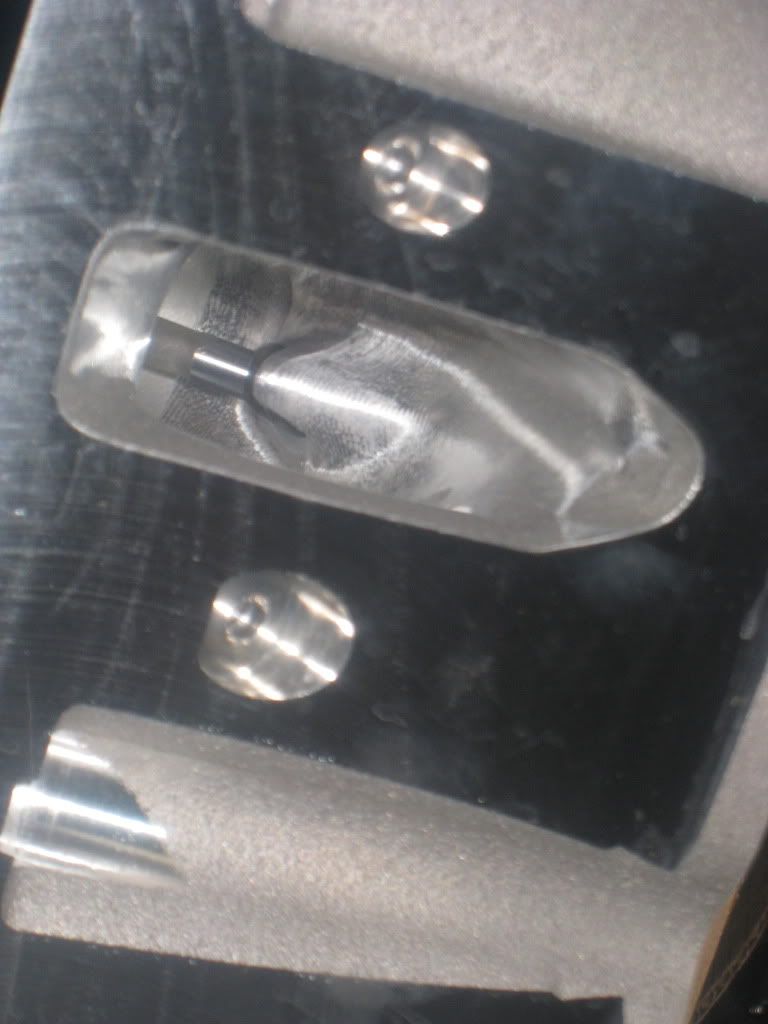
Intake runners
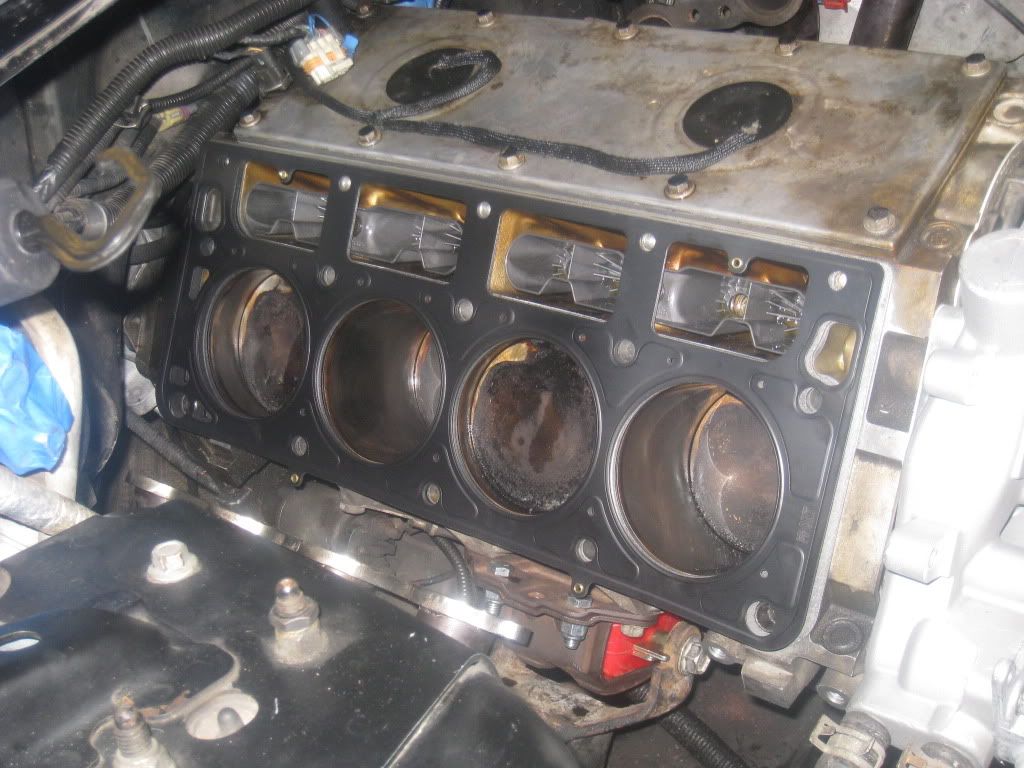
Head Gasket with the head, ready to be copper sprayed and installed. spark plugs and coolant sensor installed
Lifters and trays installed
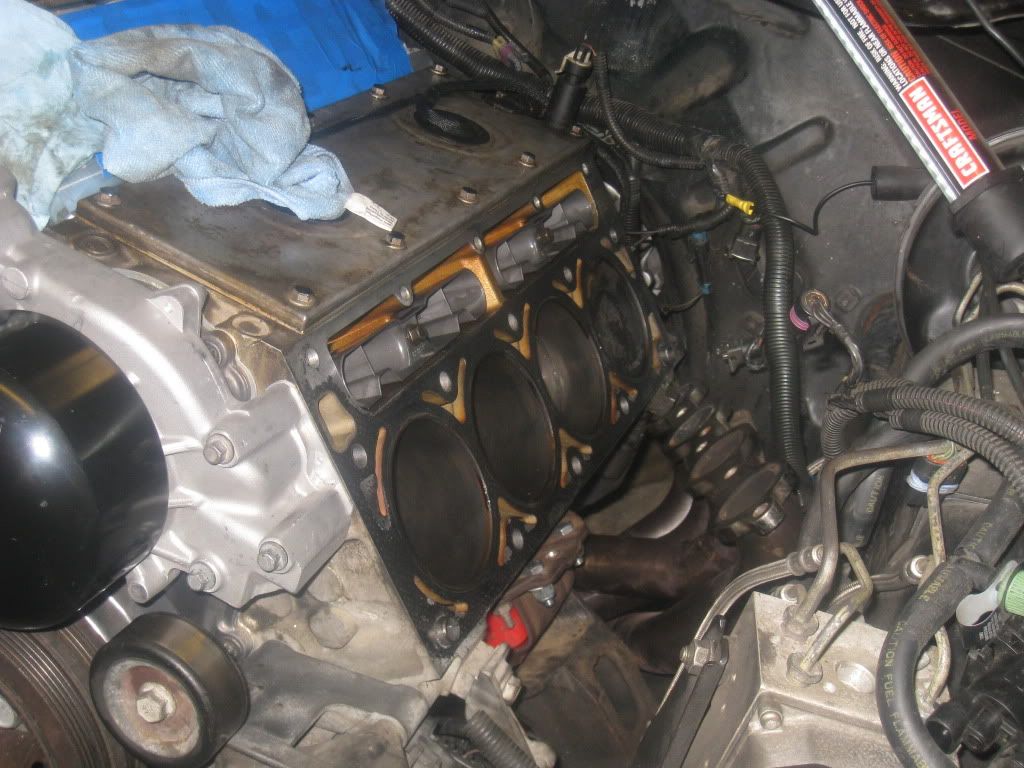
head gasket sprayed and installed.
Head installed and being torqued to spec
Heads pulled out for the passanger side, look how nice this thing is
combustion cambers
Intake runners
Head Gasket with the head, ready to be copper sprayed and installed. spark plugs and coolant sensor installed
Lifters and trays installed
head gasket sprayed and installed.
Head installed and being torqued to spec