

Clearancing / spacing the windage tray for 4" stroker

Thread Starter
TECH Fanatic

Joined: Jun 2011
Posts: 1,343
Likes: 8
From: Katy, TX
For 4" stroke applications, its common knowledge on this site to use 2 washers on each main stud under the windage tray to give clearance for the connecting rod bolts.
Another option is to buy a windage tray (aftermarket or GM) that is made for the stroker application.
Here is my write up for solving this issue with a factory LM7 windage tray (GM P/N 12558268) and ARP main studs. This is part of my 383 build which can be viewed here:
https://ls1tech.com/forums/generatio...lots-pics.html
The washers used for this are 3/8" SS cut washers from Home Depot (P/N 436873). Dimensions of the washers are 0.408" ID x 0.821" OD x 0.057" THK. The nuts used here are generic 10mm, also from Home Depot. I plan to use blue loctite on the final assembly.
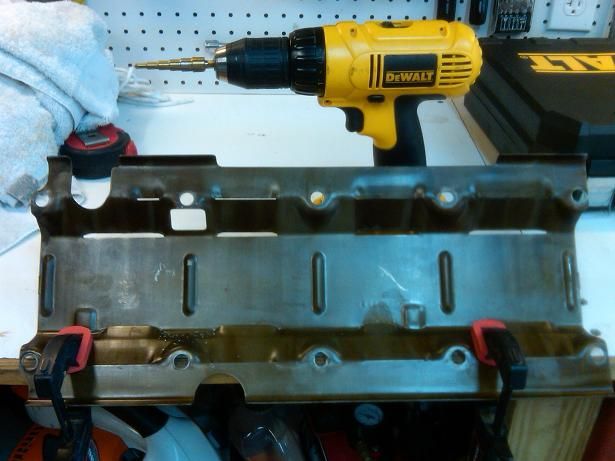
The first thing is to drill out 3 of the bolt holes in the tray that do not fit the 10mm studs. I used a step drill bit at 7/16".
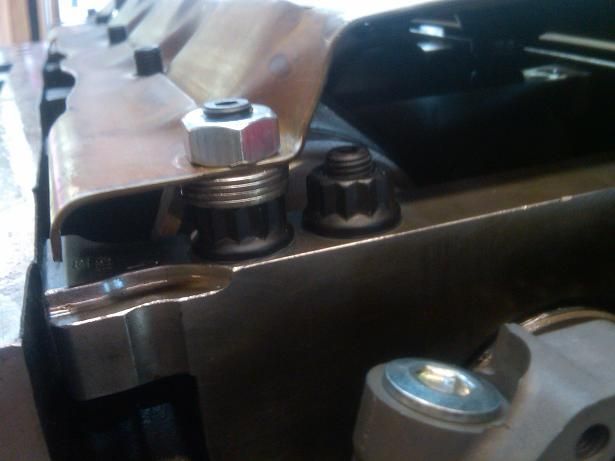
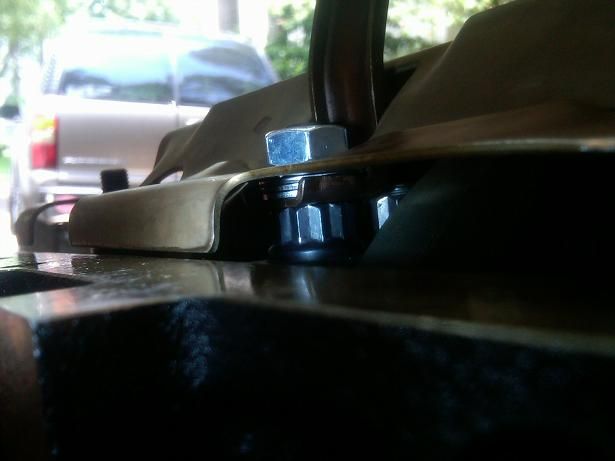
For spacing the tray, I tried the 2 washer method however I was not satisfied with the amount of clearance (my washers are only 0.057" thick, maybe this is why). I opted for 4 washers per stud, which results in ~0.075" minimum clearance as shown below.
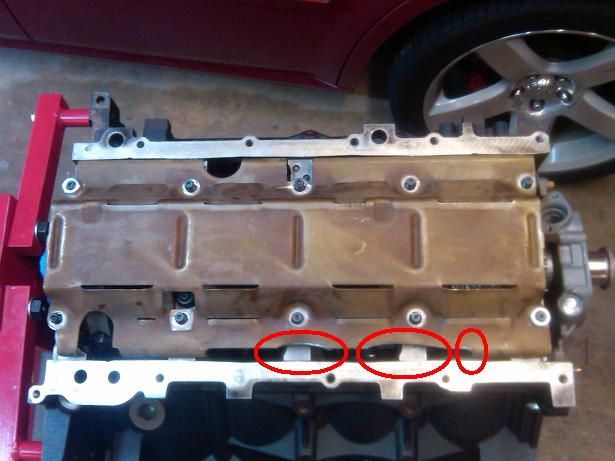
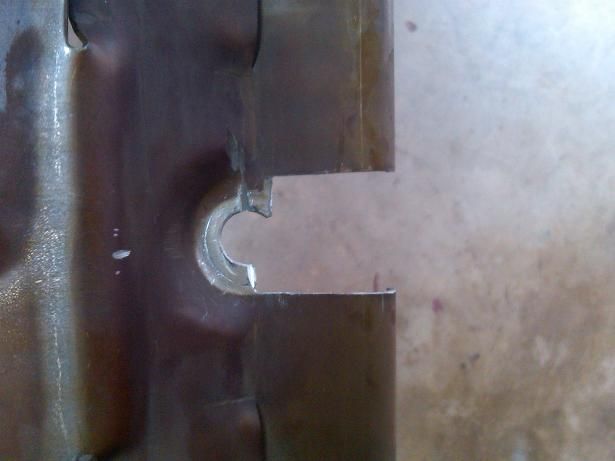
I did a test-fit with the oil pan (without gasket), and there was some interference with the tray. Light clearancing with an angle grinder was required as shown below.
The next issue is of course the pickup tube. My goal was to keep the pickup tube in its original position to ensure no problems at the pickup-oilpan end, or the alignment of the oring to the oil pump at the other end. Here is how I did it.
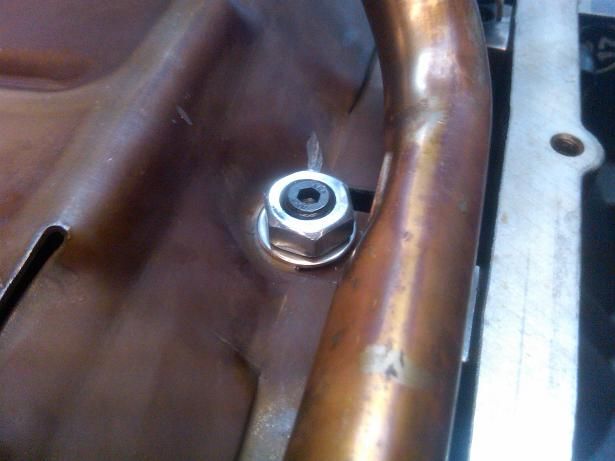
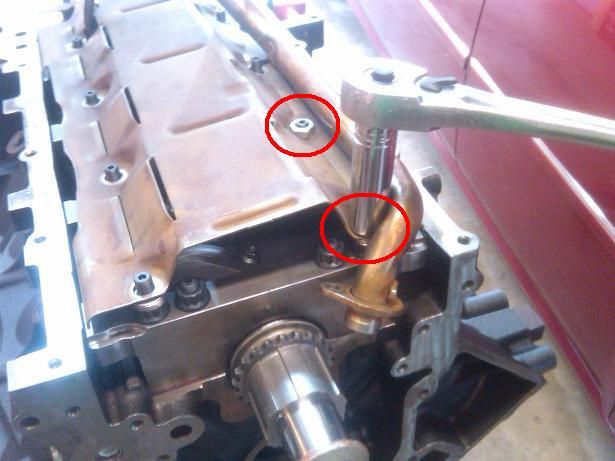
The pickup end support bracket was placed under the windage tray, with 3 washers on top as shown:
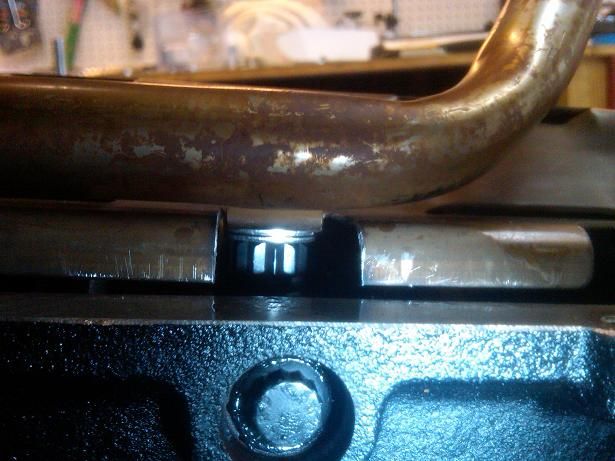
The tray was cut to allow the midpoint support bracket to rest under the tray as shown (2 washers under the bracket):
The tricky part now is to assemble the tray, tube, and oil pump body in the correct sequence to avoid clashing together. After a few attempts, success.
The first step is to assemble the tube/tray/washers as shown (before the oil pump is installed) and tighten only the 2 nuts shown below. This requires pulling the tube to the right side slightly so the socket will fit.
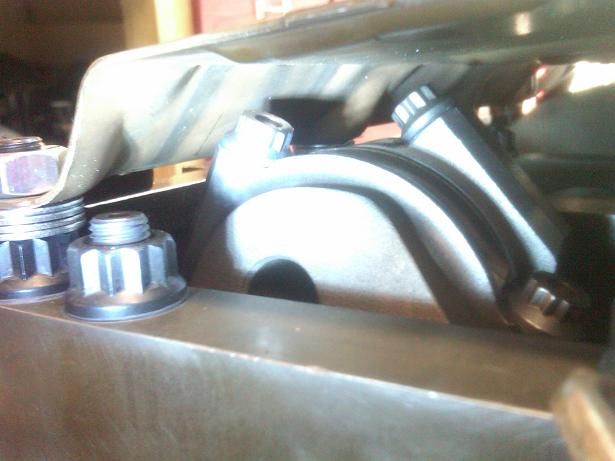
Then install the oil pump body housing/oring and align to the timing gear accordingly. Then tighten down the remaining windage tray nuts.
For checking the pickup-oilpan clearance, I used painters tape and orange playdough. The result was .25" clearance without the pan gasket.

This process took about 1.5 hours.
Hope this helps anyone searching for this issue
Another option is to buy a windage tray (aftermarket or GM) that is made for the stroker application.
Here is my write up for solving this issue with a factory LM7 windage tray (GM P/N 12558268) and ARP main studs. This is part of my 383 build which can be viewed here:
https://ls1tech.com/forums/generatio...lots-pics.html
The washers used for this are 3/8" SS cut washers from Home Depot (P/N 436873). Dimensions of the washers are 0.408" ID x 0.821" OD x 0.057" THK. The nuts used here are generic 10mm, also from Home Depot. I plan to use blue loctite on the final assembly.
The first thing is to drill out 3 of the bolt holes in the tray that do not fit the 10mm studs. I used a step drill bit at 7/16".
For spacing the tray, I tried the 2 washer method however I was not satisfied with the amount of clearance (my washers are only 0.057" thick, maybe this is why). I opted for 4 washers per stud, which results in ~0.075" minimum clearance as shown below.
I did a test-fit with the oil pan (without gasket), and there was some interference with the tray. Light clearancing with an angle grinder was required as shown below.
The next issue is of course the pickup tube. My goal was to keep the pickup tube in its original position to ensure no problems at the pickup-oilpan end, or the alignment of the oring to the oil pump at the other end. Here is how I did it.
The pickup end support bracket was placed under the windage tray, with 3 washers on top as shown:
The tray was cut to allow the midpoint support bracket to rest under the tray as shown (2 washers under the bracket):
The tricky part now is to assemble the tray, tube, and oil pump body in the correct sequence to avoid clashing together. After a few attempts, success.
The first step is to assemble the tube/tray/washers as shown (before the oil pump is installed) and tighten only the 2 nuts shown below. This requires pulling the tube to the right side slightly so the socket will fit.
Then install the oil pump body housing/oring and align to the timing gear accordingly. Then tighten down the remaining windage tray nuts.
For checking the pickup-oilpan clearance, I used painters tape and orange playdough. The result was .25" clearance without the pan gasket.
This process took about 1.5 hours.
Hope this helps anyone searching for this issue


