


ATI Super Damper Install Q
Thread Starter
Joined: Aug 2004
Posts: 11,258
Likes: 146
From: Pace, FL
So, I was going to pop on the ATI damper this morning before dropping the engine back in... and I've hit a snag. It came with three 2" 5/16" bolts and six 1" 3/8" countersunk T40 bolts (as needed).
The problem is I'm not sure I have the right hub for the A/C...
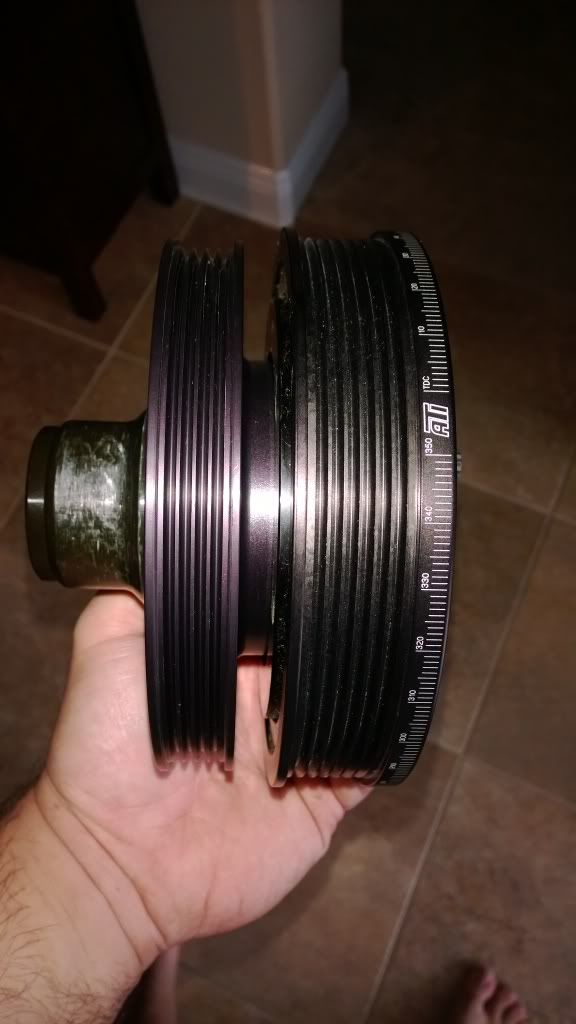
The A/C pulley can go on one of two ways. If you flip it around so that it's flush with the serpentine pulley, the bolts aren't long enough to go through the hub, serpentine pulley, and A/C pulley. So, that leads me to believe it has to go the other way (which would be flush if not for the hub). When I test fit this second way, the A/C pulley nestles nicely inside the serpentine hub with a decent amount of space in between (if no hub is installed). But when you put the hub in between, it's much thicker than the natural space produced by the two flush pullies, and that creates a pretty large gap between the outside of pullies. I can't find what I did with my stock balancer, but I seem to recall my stock balancer didn't have this gap between the serpentine and A/C pulley. Maybe I'm wrong there? If so, everything would be okay...
Note that I have not torqued everything down yet, because if it's the wrong hub, I don't want to have to unseat everything. So maybe some of this goes away, but I'm not sure the gap will go away totally?
Do I have the wrong hub? Seems like it's too thick. Or should there be a sizeable gap between the A/C and serpentine pullies?
See pics, below.
Pulley assembled so bolts can be threaded (and you can see how the lip on the center flange is designed to mate up with the serpentine pulley - but the hub now takes up all the space):
Notice how the center section and outer flange sit in this configuration:
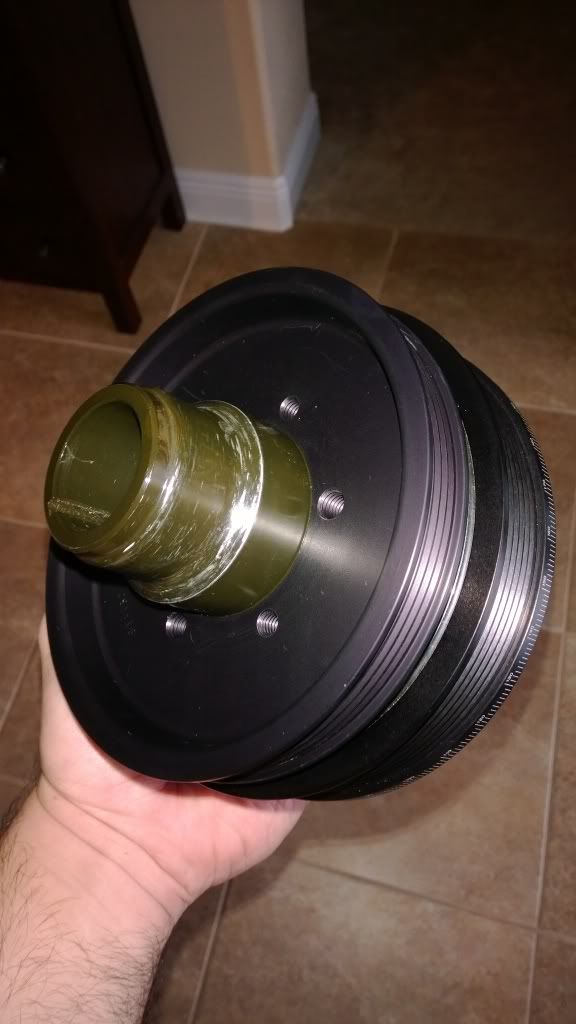
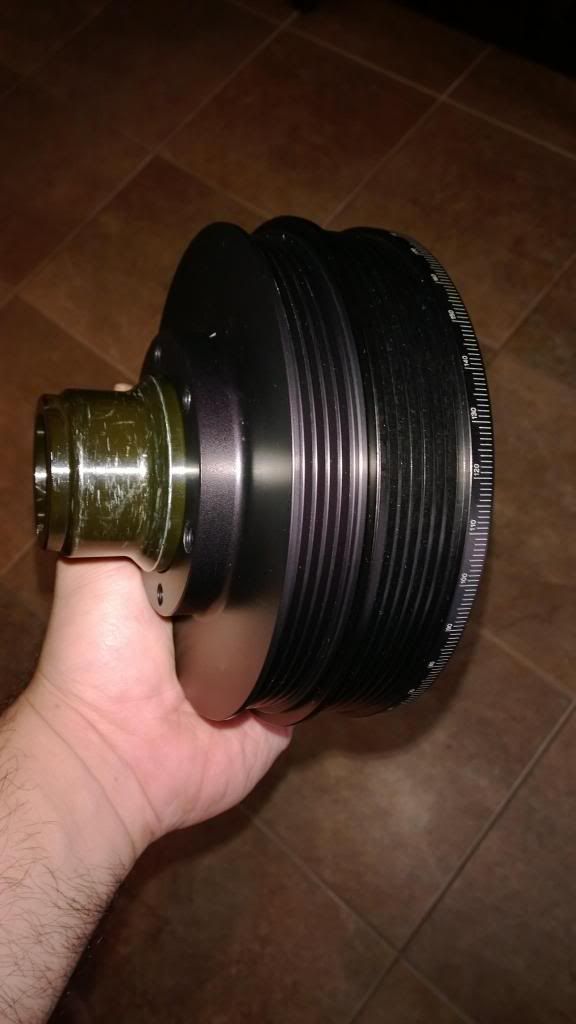
Pulley assembled so it's flush (notice the way the orientation of the pulley center section and outer flange are different that above) Note: this pushes the bolt holes so far away that the 2" bolt cannot be threaded:
The problem is I'm not sure I have the right hub for the A/C...
The A/C pulley can go on one of two ways. If you flip it around so that it's flush with the serpentine pulley, the bolts aren't long enough to go through the hub, serpentine pulley, and A/C pulley. So, that leads me to believe it has to go the other way (which would be flush if not for the hub). When I test fit this second way, the A/C pulley nestles nicely inside the serpentine hub with a decent amount of space in between (if no hub is installed). But when you put the hub in between, it's much thicker than the natural space produced by the two flush pullies, and that creates a pretty large gap between the outside of pullies. I can't find what I did with my stock balancer, but I seem to recall my stock balancer didn't have this gap between the serpentine and A/C pulley. Maybe I'm wrong there? If so, everything would be okay...
Note that I have not torqued everything down yet, because if it's the wrong hub, I don't want to have to unseat everything. So maybe some of this goes away, but I'm not sure the gap will go away totally?
Do I have the wrong hub? Seems like it's too thick. Or should there be a sizeable gap between the A/C and serpentine pullies?
See pics, below.
Pulley assembled so bolts can be threaded (and you can see how the lip on the center flange is designed to mate up with the serpentine pulley - but the hub now takes up all the space):
Notice how the center section and outer flange sit in this configuration:
Pulley assembled so it's flush (notice the way the orientation of the pulley center section and outer flange are different that above) Note: this pushes the bolt holes so far away that the 2" bolt cannot be threaded:
Thread Starter
Joined: Aug 2004
Posts: 11,258
Likes: 146
From: Pace, FL
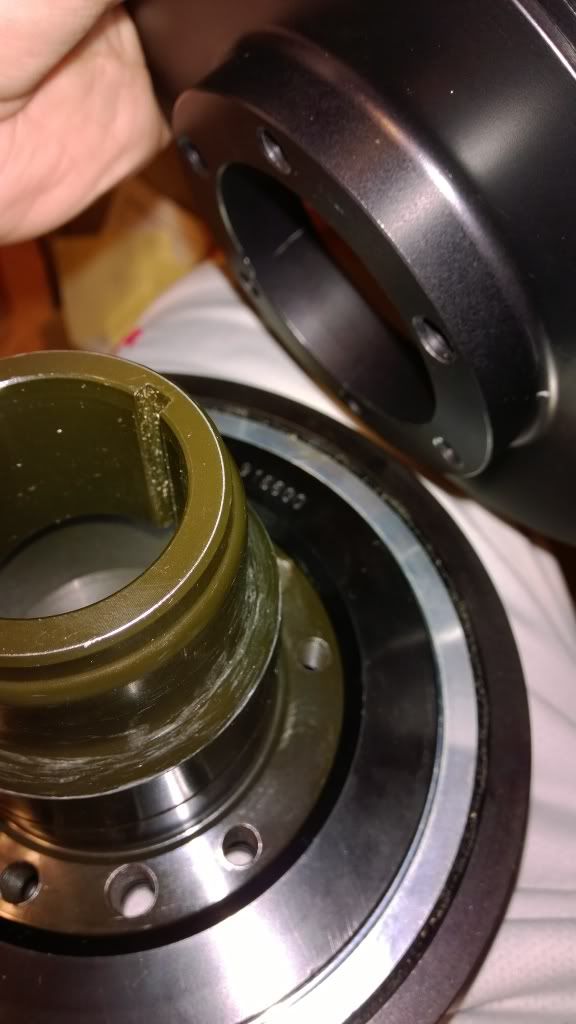
I don't see how torquing it could suck them together. The serpentine sits on the hub and the a/c bolts behind it as shown here (the hub would have to compress for the gap to go away, because you can see how the hub is almost flush with the serpentine pulley and you can see how much flange the a/c pulley has):
Thread Starter
Joined: Aug 2004
Posts: 11,258
Likes: 146
From: Pace, FL
Part numbers are correct per the ATI website. And the Serpentine pulley can only go one way due to the offset of the bolt holes with the hub...
I'll try to torque it down and see. Getting my caliper in there and looking at the pulley depth... it looks pretty close. A lot closer than the assembled version shows. Maybe torquing down will get rid of any slack... it might be an interference fit that requires the torque to draw it flush?
I'll try to torque it down and see. Getting my caliper in there and looking at the pulley depth... it looks pretty close. A lot closer than the assembled version shows. Maybe torquing down will get rid of any slack... it might be an interference fit that requires the torque to draw it flush?
Last edited by JakeFusion; Dec 7, 2013 at 10:48 AM.
Once you put the long bolts through and torque it to the ac pulley if will compress..
I was thinking the same thing on mine but if you play with it log enough it can only work one way..
I was thinking the same thing on mine but if you play with it log enough it can only work one way..
Thread Starter
Joined: Aug 2004
Posts: 11,258
Likes: 146
From: Pace, FL
Not yet. I was out looking for a T40 PLUS. The online instructions differ from those in the box and the online instructions say do no use the T40 or you will damage the bolts. Since Plus is a bit bigger, the T40 I have is loose in the hole... but it's 16ft/lbs...
Did you guys use a T40 Plus? Sears and Lowes didn't have.
Did you guys use a T40 Plus? Sears and Lowes didn't have.
Trending Topics
honestly dont remember what torx i used since its been a while. but that is the right assembly and iirc mine sucked together when it when in and the pulleys should almost be flush against eachother
LS1 Tech Stories
The Best V8 Stories One Small Block at Time

6 Common C5 Corvette Failures and What's Involved In Repairing Them
Pouria Savadkouei
Retro Modern Bandit Pontiac Trans AM Comes With Burt Reynolds' Autograph
Verdad Gallardo
Top 10 Greatest Cadillac V Series Performance Models Ever, Ranked
Pouria Savadkouei
Top 10 Most Powerful Chevy Trucks Ever Made!

Hennessey's New Supercharged Silverado ZR2 Has 700 HP
Verdad Gallardo
Coachbuilt N2A Anteros Is an LS2-Powered C6 Corvette In Italian Clothes
Verdad Gallardo
Awesome K5 Blazer Restomod Comes With C7 Corvette Power
Verdad Gallardo
10 Camaros You Should Never Buy

10 LS Engine Myths That Refuse to Die
Verdad Gallardo Jake, the instructions I have say to place the a/c pulley on before installing the hub into the damper. And yes T40 is what is used. Get the bolts started and pick two bolts across from eachother and go back and forth slowly drawing the damper and hub into place.
Last edited by poltergeist 02; Dec 7, 2013 at 12:35 PM.
Thread Starter
Joined: Aug 2004
Posts: 11,258
Likes: 146
From: Pace, FL
I just did the t40. It drew it on. I am going to final torque spec once installed. But I have the balancer assembly assembled and will use the Hawks tool to install after lunch.
I just loosened one of mine up and retorqued it with a brand new t-40 to check for you. It worked just fine. Be sure to use a brand new bit when doing this and keep the torque wrench as straight as possible to avoid rounding out the bolts.
That's not a high torque to worry about stripping
I work at Toyota and some cam gears use bolts that recquire torx plus, the difference is the torx plus isnt beveled at the tip like a regular torx, I didnt feel like buying an overpriced torx so I just cut the tip off a regular torx, basically the same thing
You can use a standard torx on a torx plus bolt, but not the other way around.
But if you go slow, using a regular t40 to torque a t40 plus at 16 ft lbs won't strip the head..