

370 Build for my BMW
 06-07-2015, 05:25 PM
#21


well, after nearly a week of nonstop wrenching, the car is up and running, motor sounds normal.
I do have to hand it to Murphy, though...as I let the car idle in the driveway, coolant began spewing out from the nipple on the overflow tank - it just snapped on its own. So, off to the store tomorrow to buy a new tank, and then drop the car off for tuning.
I do have to hand it to Murphy, though...as I let the car idle in the driveway, coolant began spewing out from the nipple on the overflow tank - it just snapped on its own. So, off to the store tomorrow to buy a new tank, and then drop the car off for tuning.
 06-09-2015, 10:52 AM
#22
Cylinder Head Cleaning and Reassembly
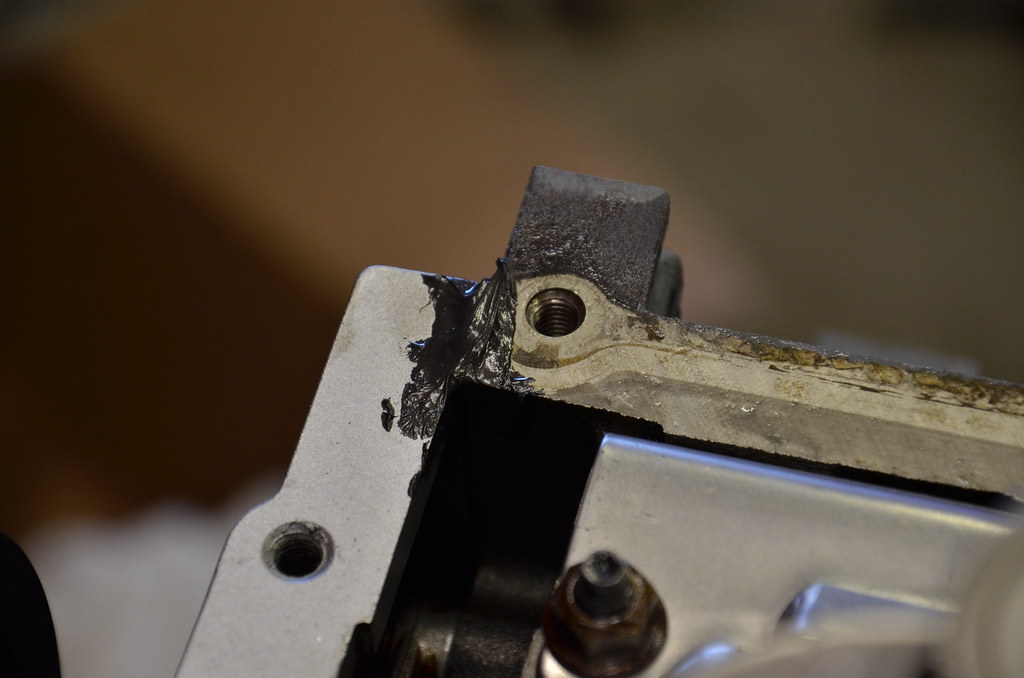
Since one of my 317 heads was trashed from the bent/broken valve in the initial mishap, I decided to go down a different route with heads and grab a used set of 241s locally - they were very clean, low mileage, and the price was right. Although they don't technically flow as well as 317s, I was willing to give them a try since I did not have to mill them to bring up compression.
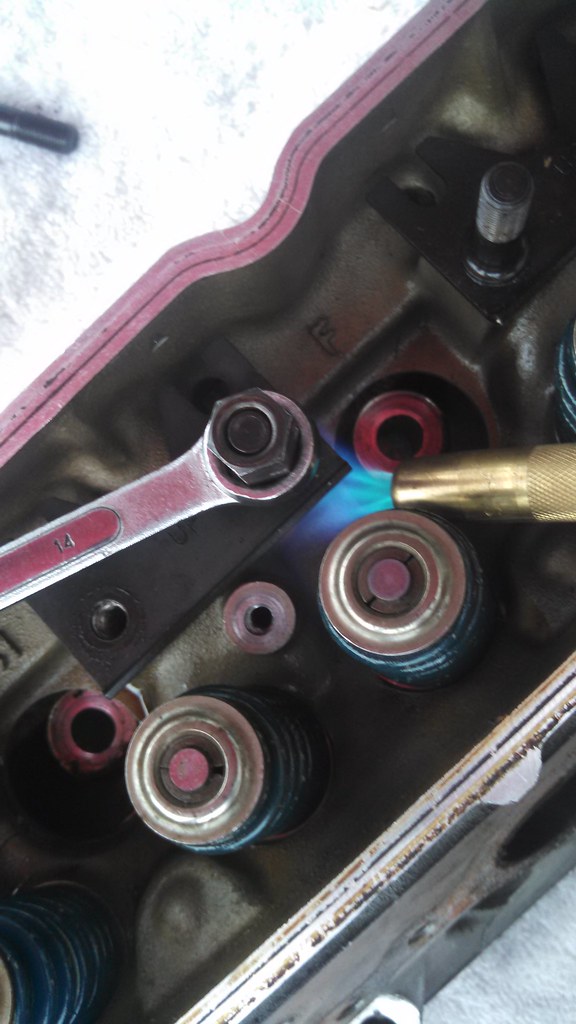
The heads came assembled with stock springs and valves, but the previous owner had installed a set of stud-style rocker mounts (with loctite), so I spent an evening with a handheld MAP torch coaxing them out.
 IMG_20150530_200448_163 by Norbert Ogiba, on Flickr
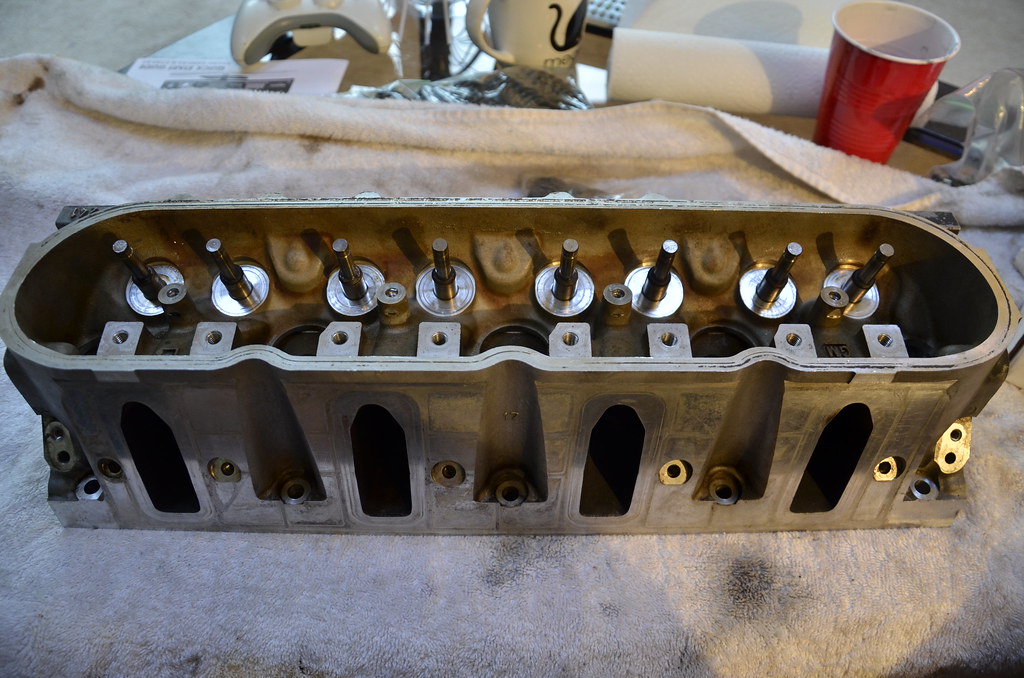
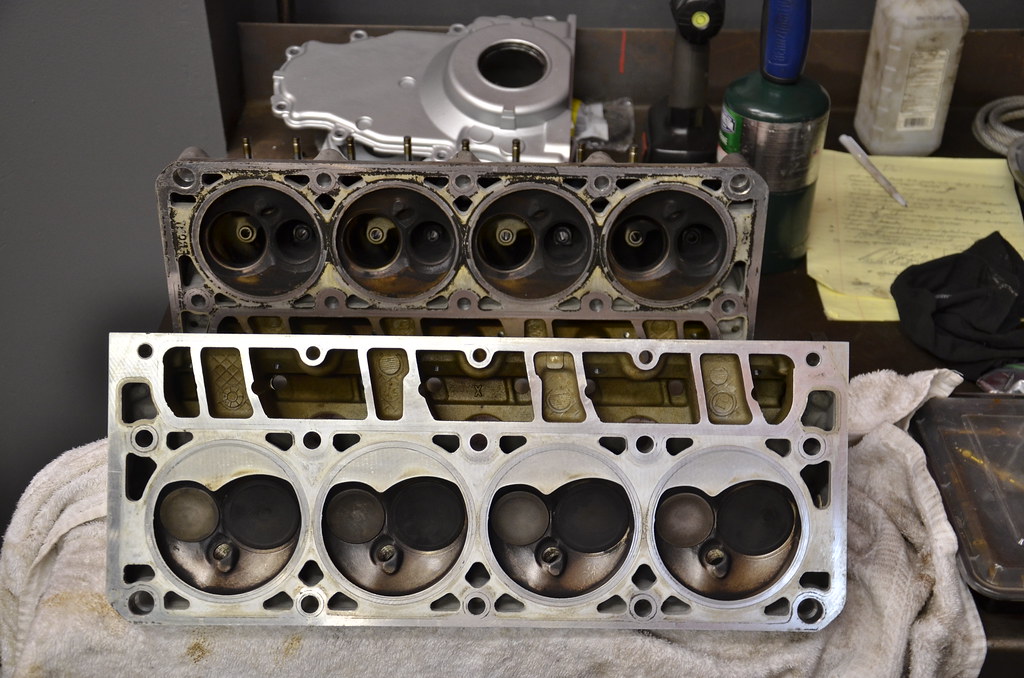
Before pictures - heads were removed from a 2002 Pontiac Trans Am with 50,000 miles.
 _DSC3835 by Norbert Ogiba, on Flickr
 _DSC3836 by Norbert Ogiba, on Flickr
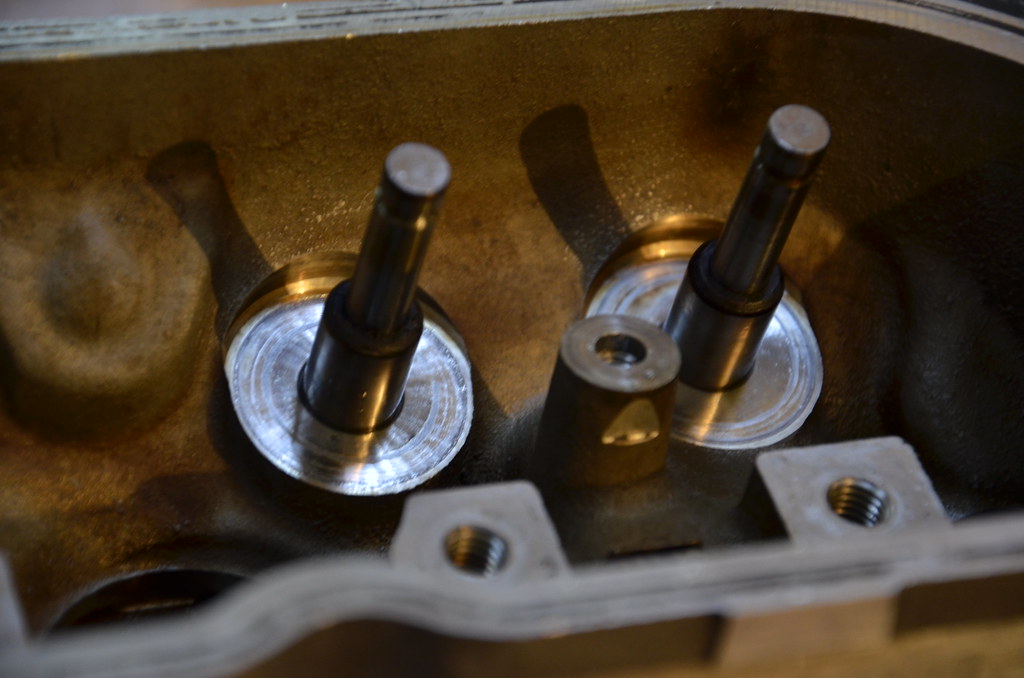
I cleaned all surfaces with a rag and isopropyl alcohol to remove grease and dirt, and then ran a plastic scraping tool over all surfaces to remove the last of the old gasket material. They came out looking very nice.
Bare valve seat base
 _DSC3838 by Norbert Ogiba, on Flickr
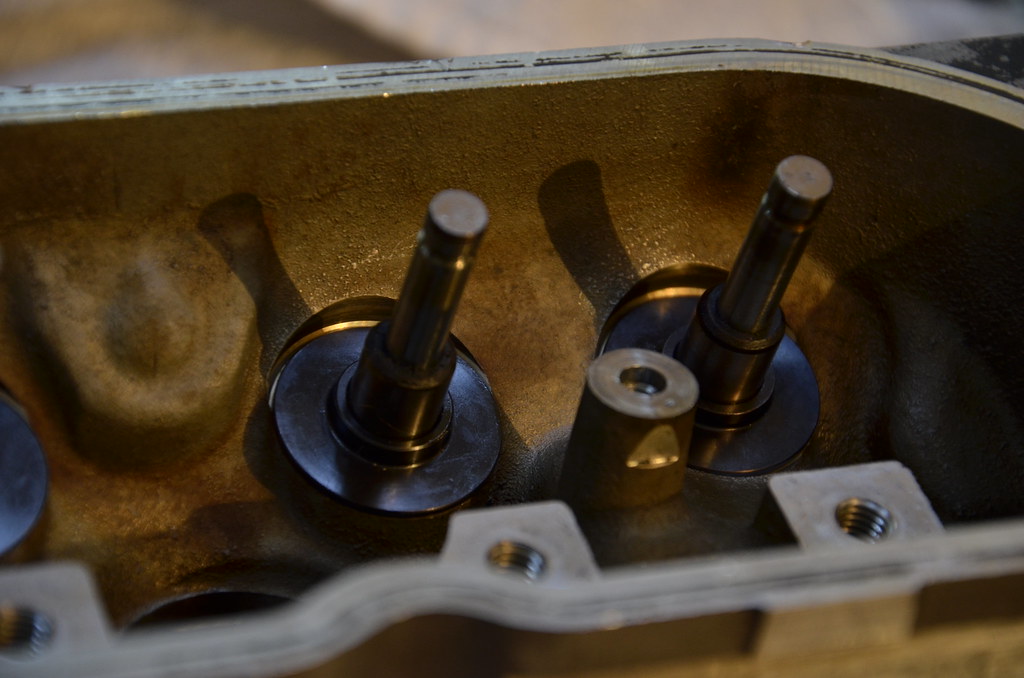
Seats installed
 _DSC3839 by Norbert Ogiba, on Flickr
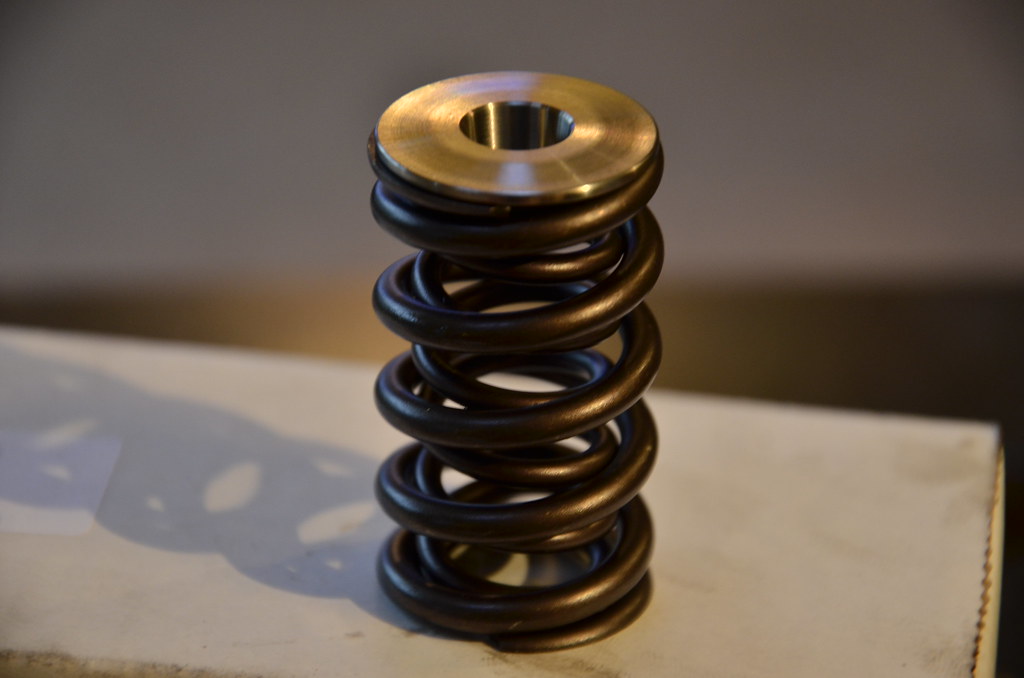
Brand new PRC dual valve springs with Titanium valve retainers.
 _DSC3841 by Norbert Ogiba, on Flickr
Installed using my homemade spring compressor.
 _DSC3842 by Norbert Ogiba, on Flickr
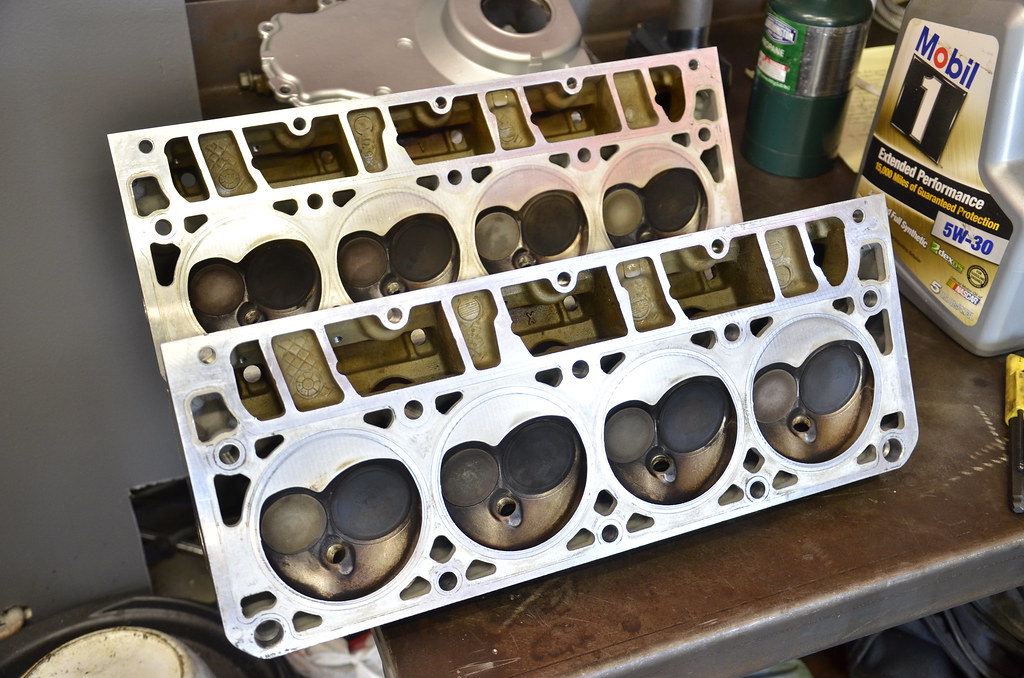
Before and after cleaning service on the heads, all done by hand. I actually really enjoyed this part.
 _DSC3844 by Norbert Ogiba, on Flickr
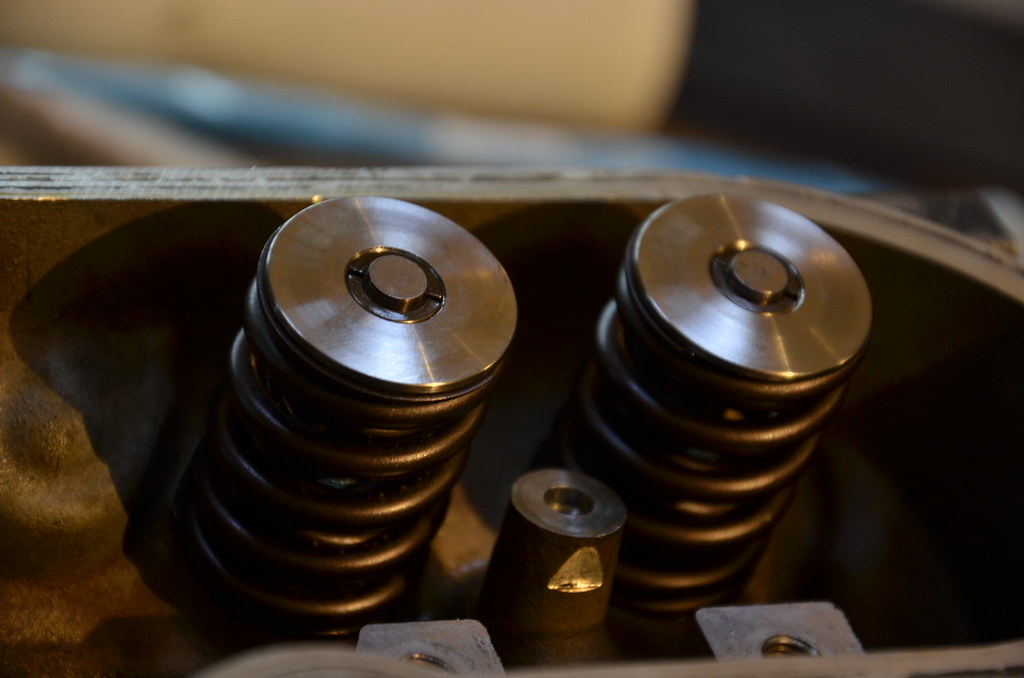
The heads came out really nicely in the end. Of course I installed all new GM OEM valve seats and seals in addition to the dual springs and Ti retainers. The factory valve locks were in good shape and were reused.
 _DSC3850 by Norbert Ogiba, on Flickr
Since one of my 317 heads was trashed from the bent/broken valve in the initial mishap, I decided to go down a different route with heads and grab a used set of 241s locally - they were very clean, low mileage, and the price was right. Although they don't technically flow as well as 317s, I was willing to give them a try since I did not have to mill them to bring up compression.
The heads came assembled with stock springs and valves, but the previous owner had installed a set of stud-style rocker mounts (with loctite), so I spent an evening with a handheld MAP torch coaxing them out.
IMG_20150530_200448_163 by Norbert Ogiba, on FlickrBefore pictures - heads were removed from a 2002 Pontiac Trans Am with 50,000 miles.
_DSC3835 by Norbert Ogiba, on Flickr_DSC3836 by Norbert Ogiba, on FlickrI cleaned all surfaces with a rag and isopropyl alcohol to remove grease and dirt, and then ran a plastic scraping tool over all surfaces to remove the last of the old gasket material. They came out looking very nice.
Bare valve seat base
_DSC3838 by Norbert Ogiba, on FlickrSeats installed
_DSC3839 by Norbert Ogiba, on FlickrBrand new PRC dual valve springs with Titanium valve retainers.
_DSC3841 by Norbert Ogiba, on FlickrInstalled using my homemade spring compressor.
_DSC3842 by Norbert Ogiba, on FlickrBefore and after cleaning service on the heads, all done by hand. I actually really enjoyed this part.
_DSC3844 by Norbert Ogiba, on FlickrThe heads came out really nicely in the end. Of course I installed all new GM OEM valve seats and seals in addition to the dual springs and Ti retainers. The factory valve locks were in good shape and were reused.
_DSC3850 by Norbert Ogiba, on Flickr
06-09-2015, 11:16 AM
#23
Engine block cleanup and paint
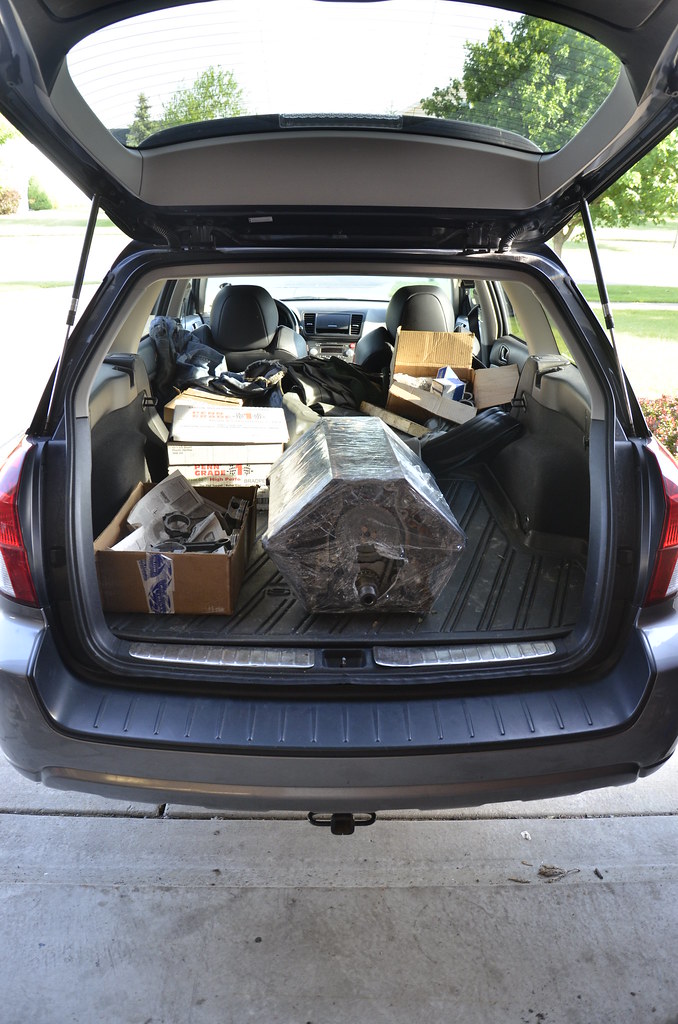
Bottom end came back from the machine shop on Tuesday June 2nd, so I jumped right in.
 _DSC3854 by Norbert Ogiba, on Flickr
 _DSC3855 by Norbert Ogiba, on Flickr
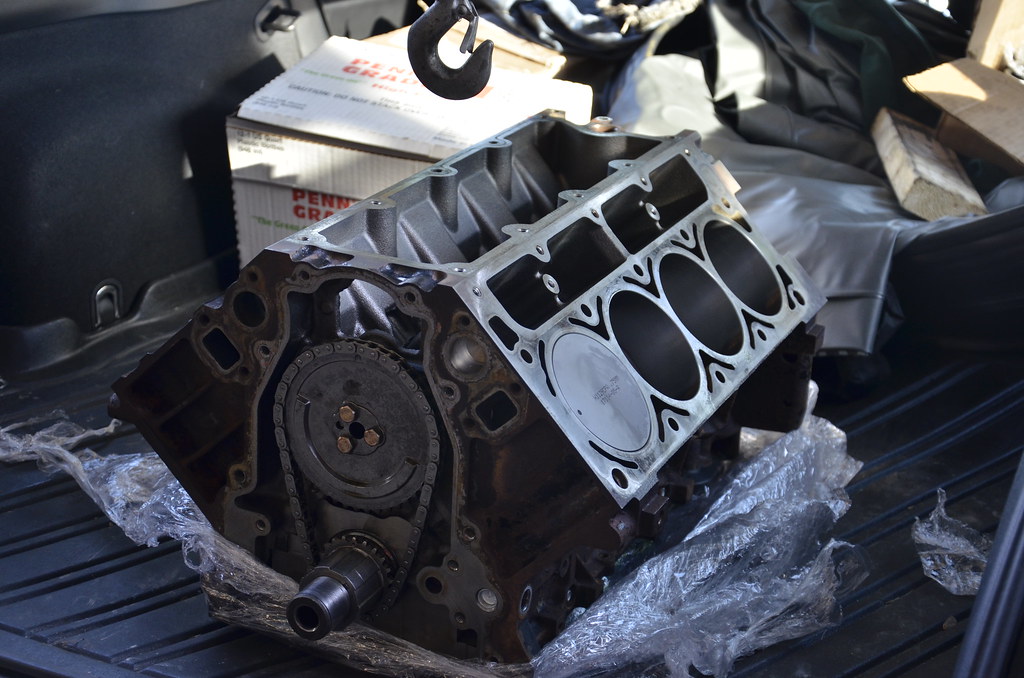
Unwrapping the goodies
 _DSC3856 by Norbert Ogiba, on Flickr
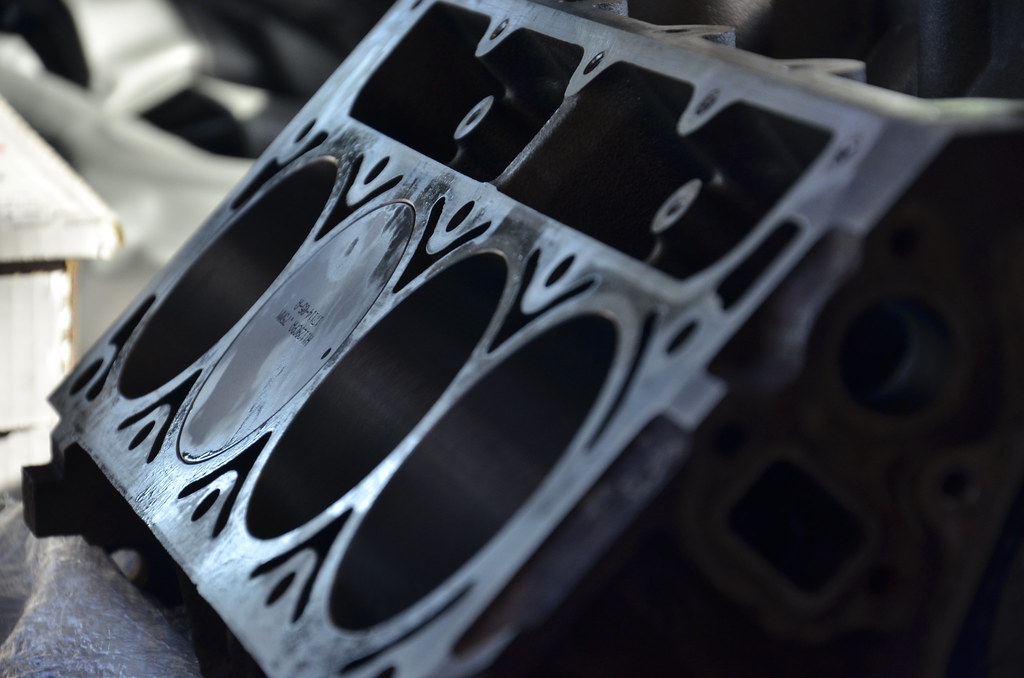
Flat-top piston goodness. My builder oiled the motor lightly to prevent flash corrosion on deck surfaces
 _DSC3857 by Norbert Ogiba, on Flickr
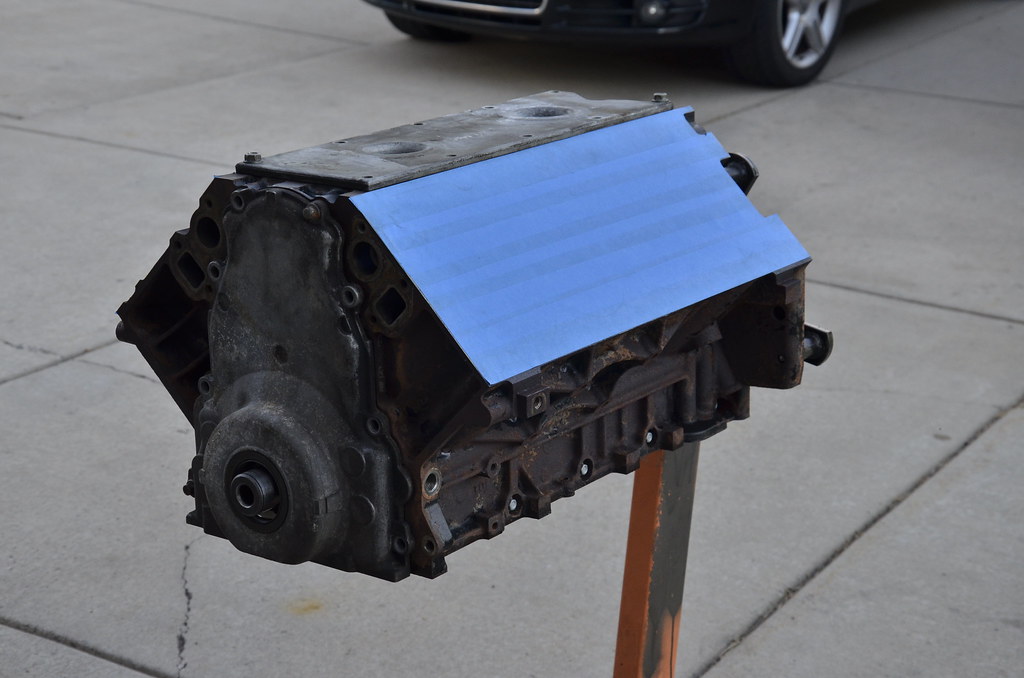
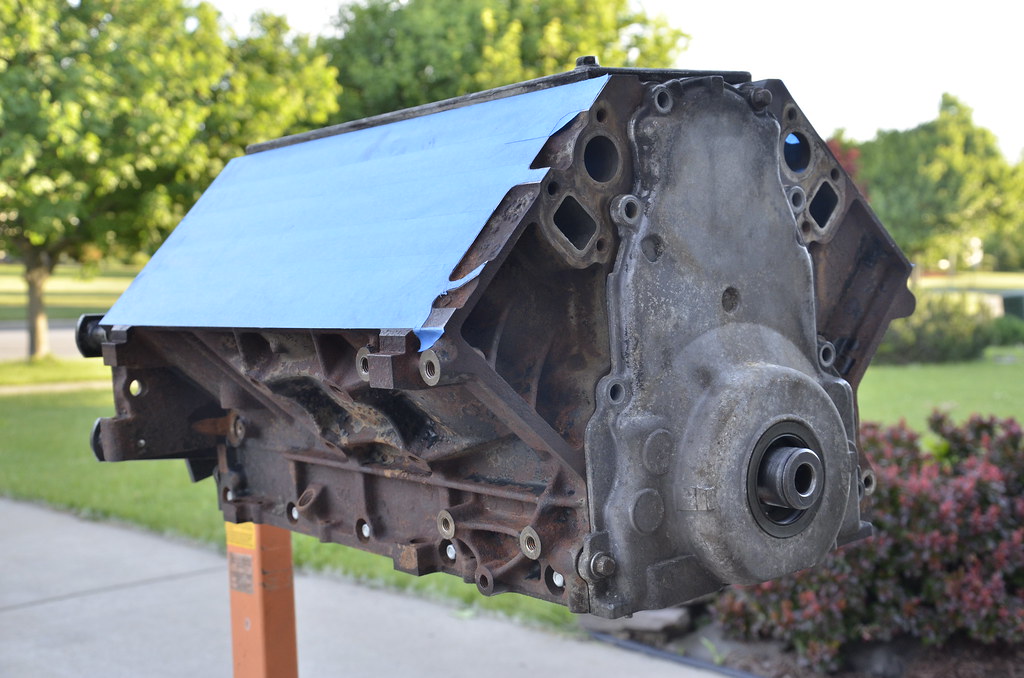
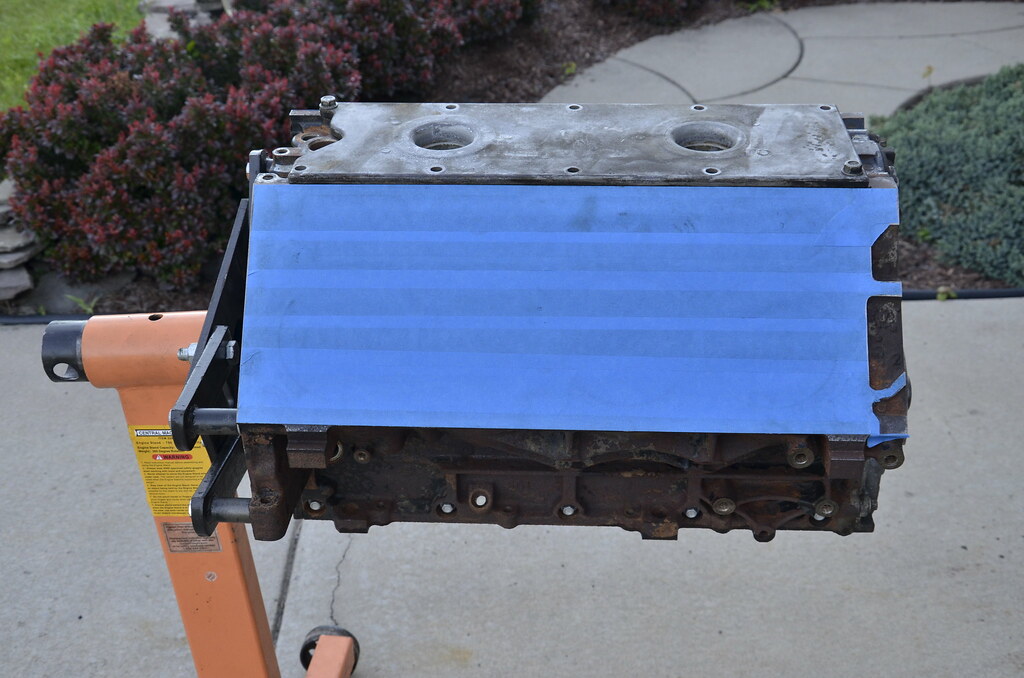
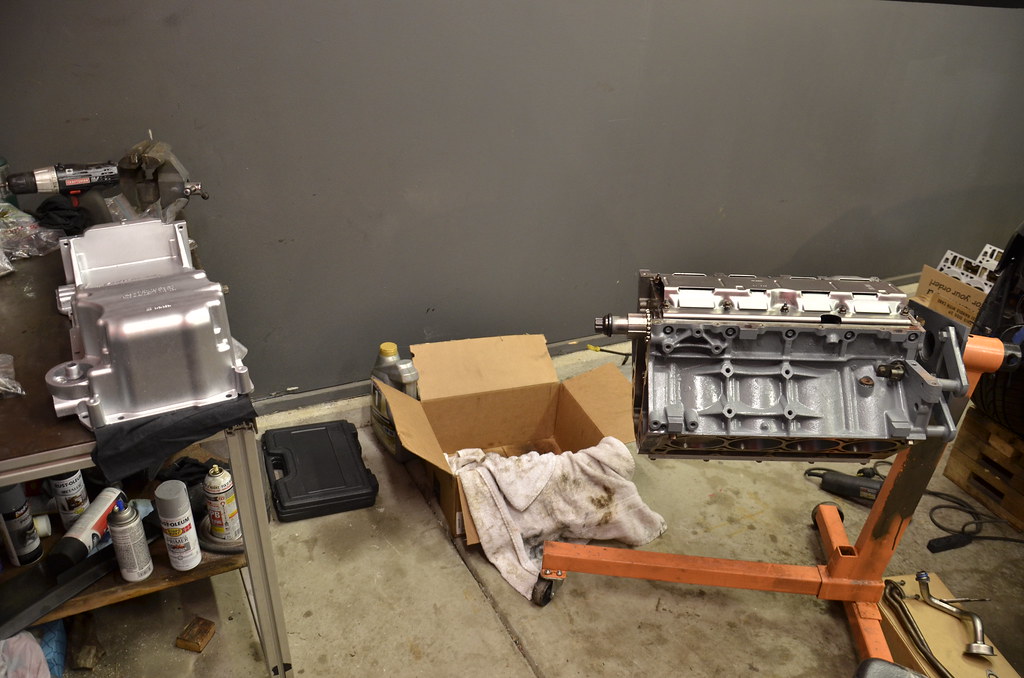
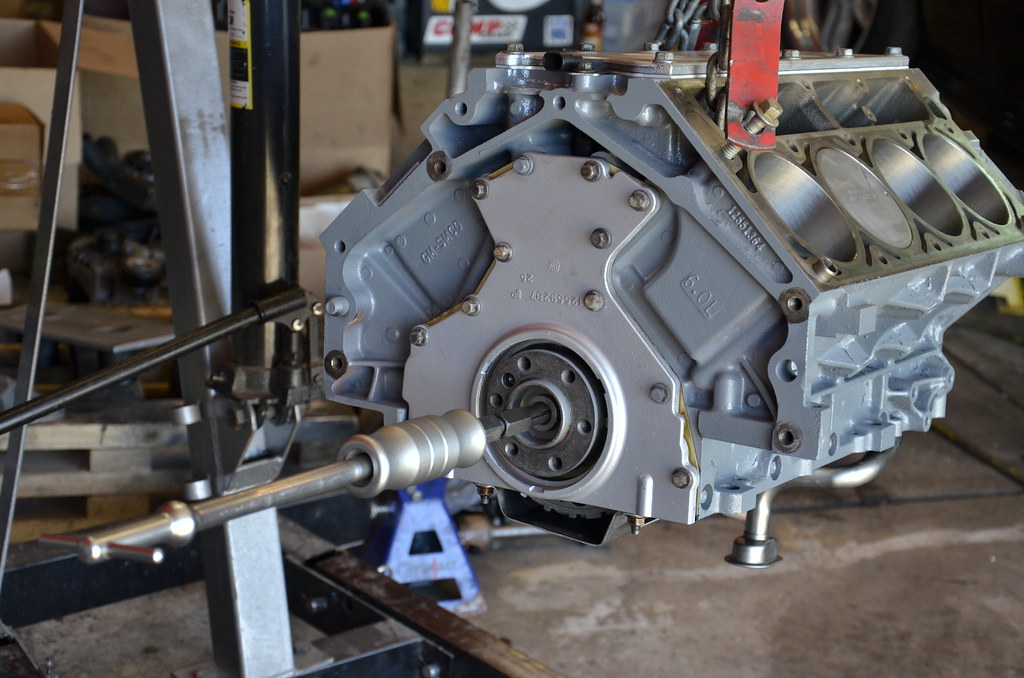
Up on the stand, degreased, taped, and ready for paint
 _DSC3858 by Norbert Ogiba, on Flickr
I had a set of nasty looking front and rear covers laying around, so rather than tape off those areas, I just snugged them up with 2 bolts to keep the paint out of the internals.
 _DSC3859 by Norbert Ogiba, on Flickr
 _DSC3860 by Norbert Ogiba, on Flickr
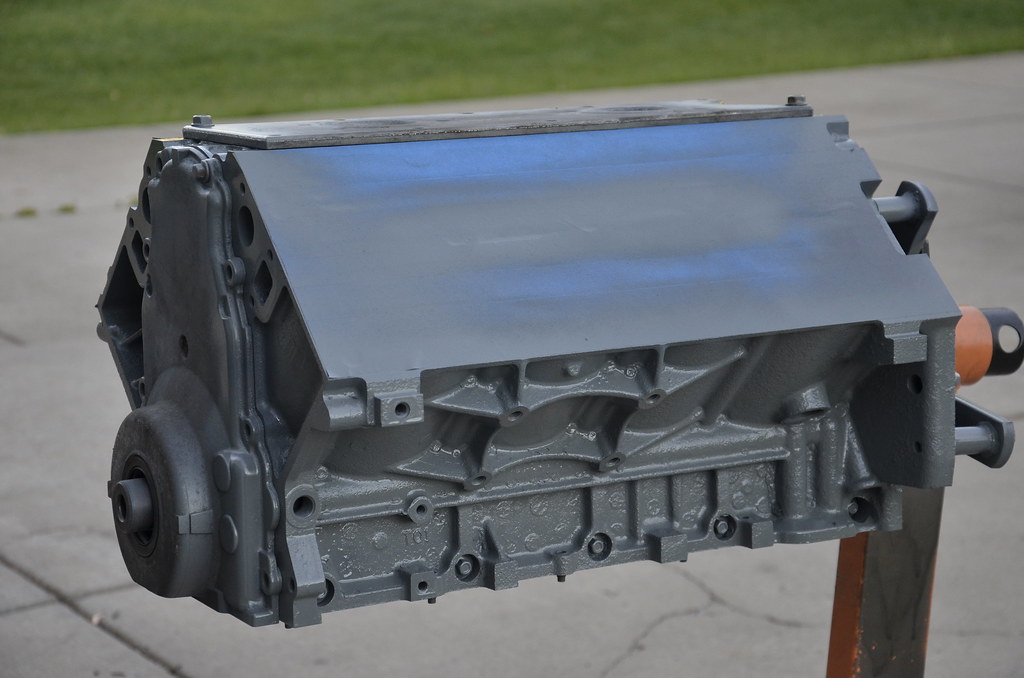
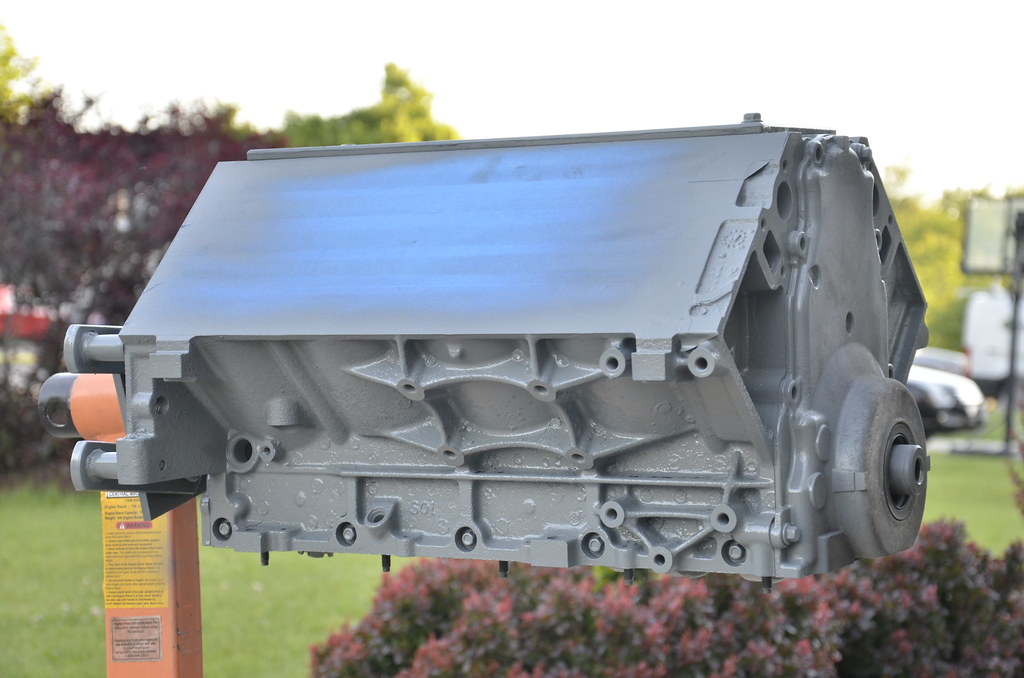
I chose a high high engine primer to start with, followed by medium gray high heat engine enamel. The idea was a nice "clean" color that would make leaks easy to spot, and not draw too much attention. I was going to go with an aluminum alloy silver, but since this is an iron block, it wouldn't have looked "right" on the porous iron texture.
 _DSC3861 by Norbert Ogiba, on Flickr
.
Certainly won't win any concourse awards but I like how it came out.
 _DSC3862 by Norbert Ogiba, on Flickr
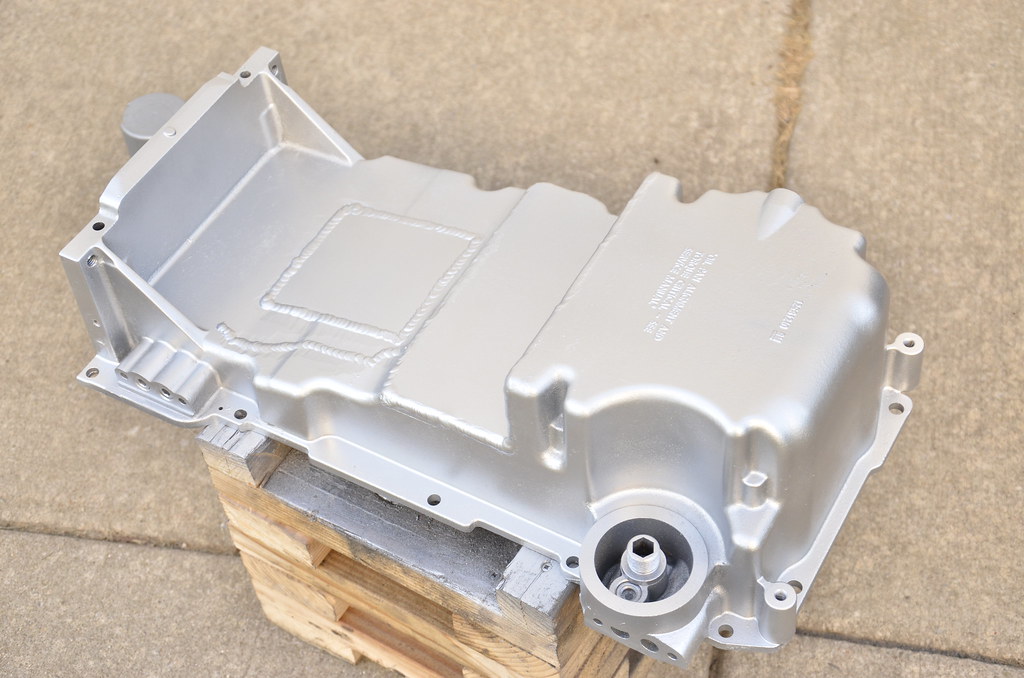
Oil pan was welded up by a local shop and got a fresh coat of silver aluminum color paint.
 _DSC3863 by Norbert Ogiba, on Flickr
Bottom end came back from the machine shop on Tuesday June 2nd, so I jumped right in.
_DSC3854 by Norbert Ogiba, on Flickr_DSC3855 by Norbert Ogiba, on FlickrUnwrapping the goodies
_DSC3856 by Norbert Ogiba, on FlickrFlat-top piston goodness. My builder oiled the motor lightly to prevent flash corrosion on deck surfaces
_DSC3857 by Norbert Ogiba, on FlickrUp on the stand, degreased, taped, and ready for paint
_DSC3858 by Norbert Ogiba, on FlickrI had a set of nasty looking front and rear covers laying around, so rather than tape off those areas, I just snugged them up with 2 bolts to keep the paint out of the internals.
_DSC3859 by Norbert Ogiba, on Flickr_DSC3860 by Norbert Ogiba, on FlickrI chose a high high engine primer to start with, followed by medium gray high heat engine enamel. The idea was a nice "clean" color that would make leaks easy to spot, and not draw too much attention. I was going to go with an aluminum alloy silver, but since this is an iron block, it wouldn't have looked "right" on the porous iron texture.
_DSC3861 by Norbert Ogiba, on Flickr.
Certainly won't win any concourse awards but I like how it came out.
_DSC3862 by Norbert Ogiba, on FlickrOil pan was welded up by a local shop and got a fresh coat of silver aluminum color paint.
_DSC3863 by Norbert Ogiba, on Flickr
06-09-2015, 11:56 AM
#24
Bottom End Assembly
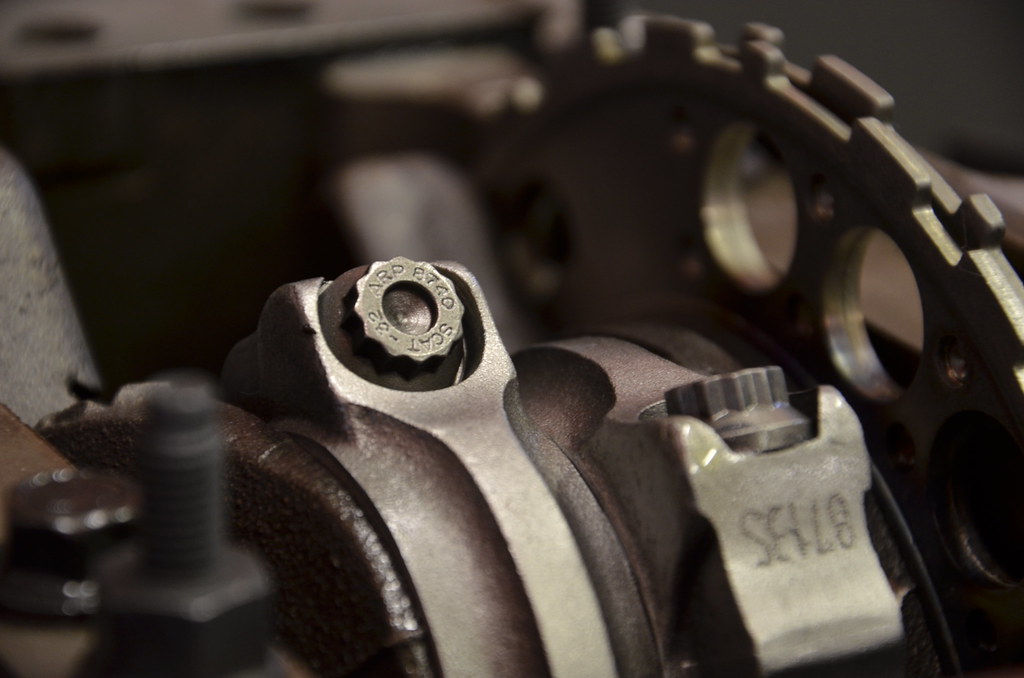
Scat I Beam Forged Rods, ARP hardware
 _DSC3868 by Norbert Ogiba, on Flickr
 _DSC3870 by Norbert Ogiba, on Flickr
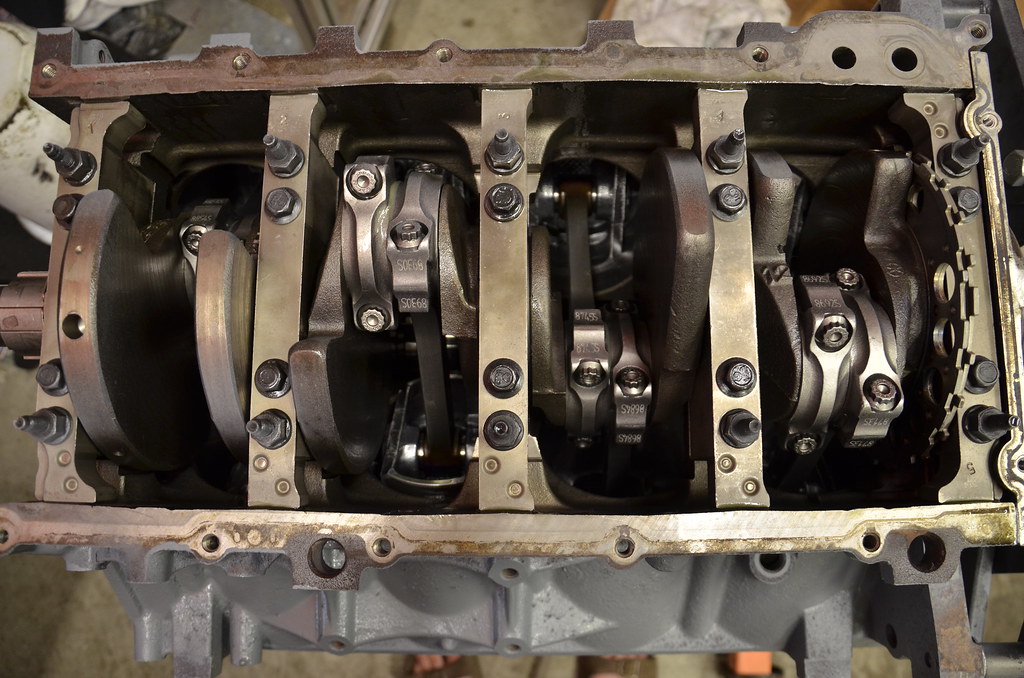
The stock crank was in good shape, so it was reused - rod journals were within clearance and were just polished, but the mains needed to be ground .010 with appropriate size Clevite "P" bearings installed.
 _DSC3872 by Norbert Ogiba, on Flickr
 _DSC3873 by Norbert Ogiba, on Flickr
 _DSC3874 by Norbert Ogiba, on Flickr
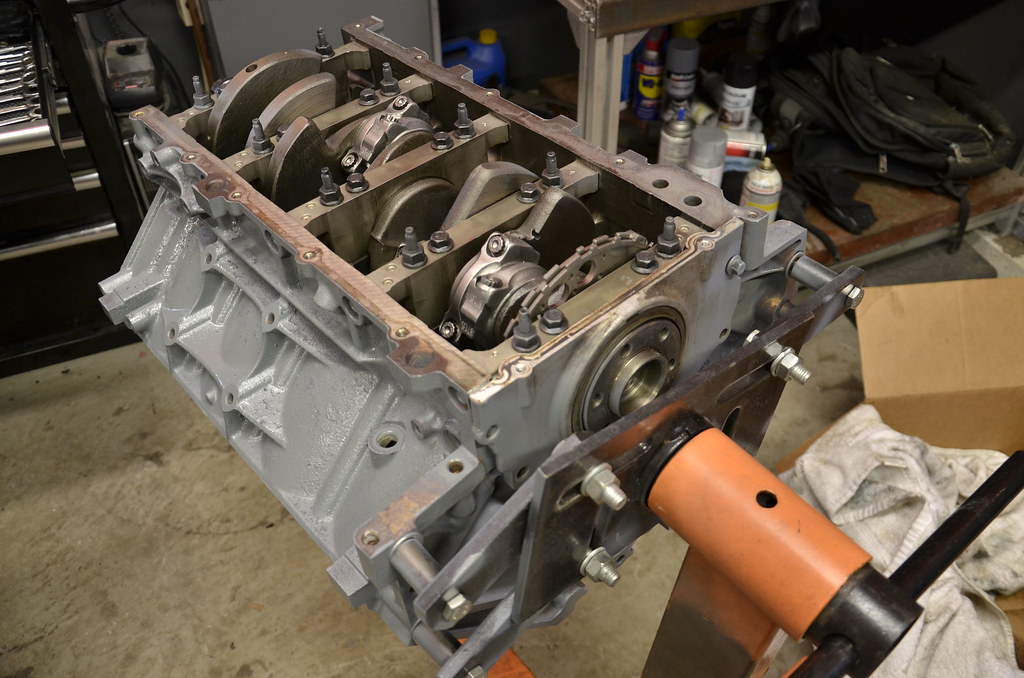
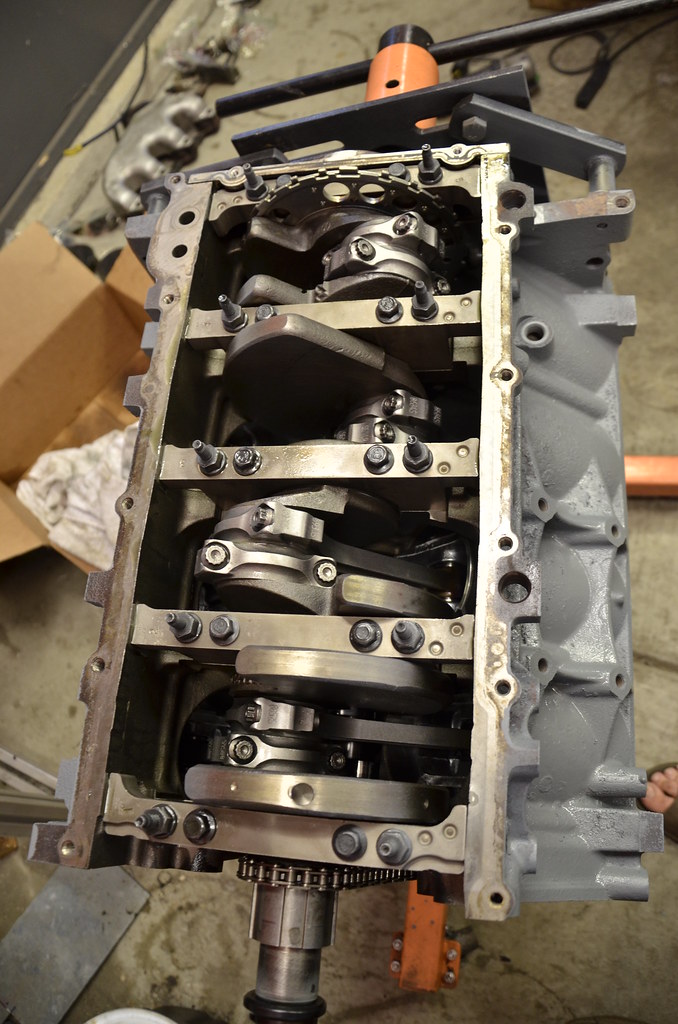
Ready for the oil pan.
 _DSC3875 by Norbert Ogiba, on Flickr
A new oil galley barbell plug was installed as the old one's o-ring had grown brittle and dry.
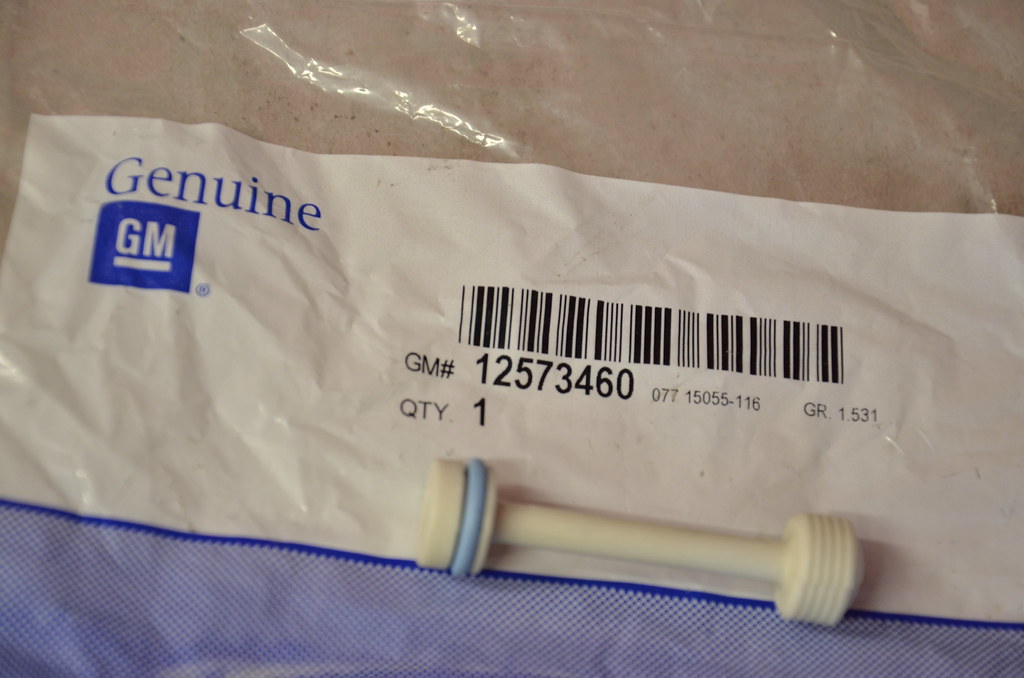 _DSC3876 by Norbert Ogiba, on Flickr
A new OEM GM LS2 timing chain replaced the weaker factory Gen 3 chain.
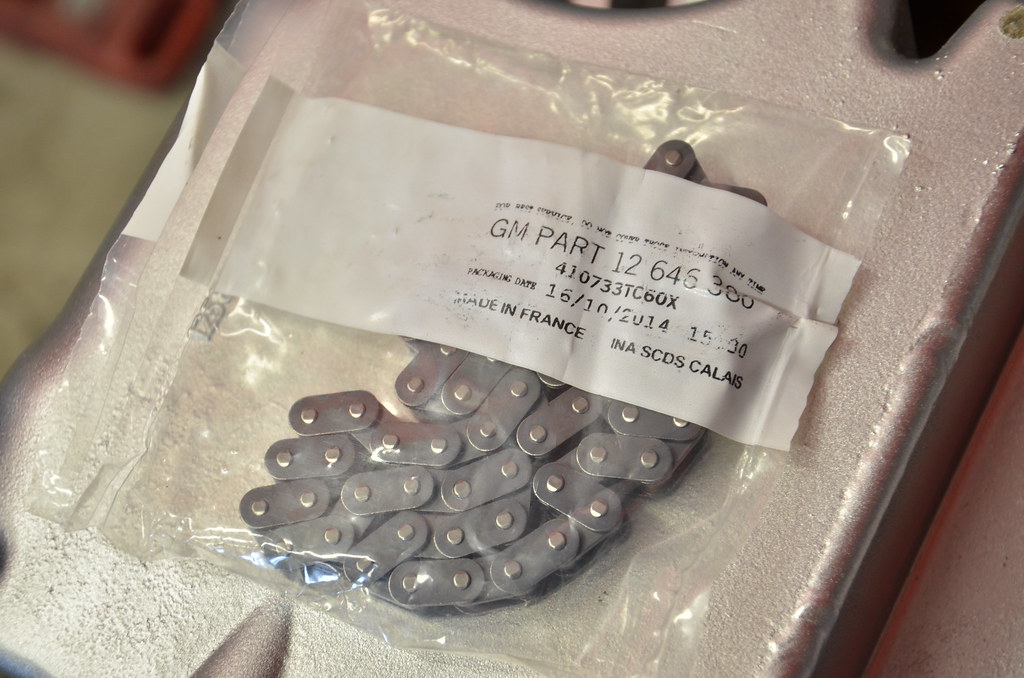 _DSC3877 by Norbert Ogiba, on Flickr
I have to find the pictures, but I also disassembled the stock oil pump and scrubbed every component. Nothing special to report besides the typical oil staining and deposits. The pressure relief spring was not stuck, but I still cleaned the spring bore to make sure it moved perfectly.
Oil pump was installed over new timing set followed by front and rear covers, which each received a new main seal. Oil control tray, was installed followed by the pickup tube (don't pinch that o-ring!). Lastly the balancer was pressed on using my homemade tool (M16x2 threaded rod, washers, nuts, thrust bearing)
 _DSC3881 by Norbert Ogiba, on Flickr
Pilot bearing was replaced with a new OEM unit
 _DSC3880 by Norbert Ogiba, on Flickr
Dab of RTV at the corners of the front and rear covers seals them against the oil pain
 _DSC3882 by Norbert Ogiba, on Flickr
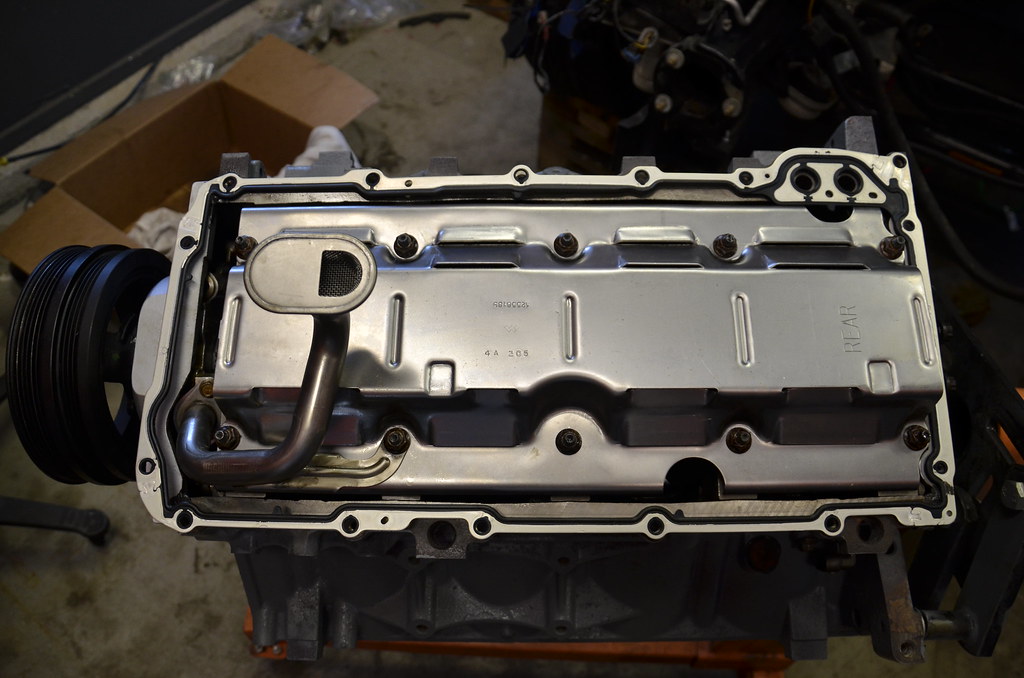
I removed the windage tray, internal pan oil tubes, and pickup tube, and cleaned them with warm soapy water to make sure no foreign material was hiding in there. Cleaned them up and blew out with compressed air to make them like new.
 _DSC3883 by Norbert Ogiba, on Flickr
Oil pan on, aligned, and torqued.
 _DSC3884 by Norbert Ogiba, on Flickr
Scat I Beam Forged Rods, ARP hardware
_DSC3868 by Norbert Ogiba, on Flickr_DSC3870 by Norbert Ogiba, on FlickrThe stock crank was in good shape, so it was reused - rod journals were within clearance and were just polished, but the mains needed to be ground .010 with appropriate size Clevite "P" bearings installed.
_DSC3872 by Norbert Ogiba, on Flickr_DSC3873 by Norbert Ogiba, on Flickr_DSC3874 by Norbert Ogiba, on FlickrReady for the oil pan.
_DSC3875 by Norbert Ogiba, on FlickrA new oil galley barbell plug was installed as the old one's o-ring had grown brittle and dry.
_DSC3876 by Norbert Ogiba, on FlickrA new OEM GM LS2 timing chain replaced the weaker factory Gen 3 chain.
_DSC3877 by Norbert Ogiba, on FlickrI have to find the pictures, but I also disassembled the stock oil pump and scrubbed every component. Nothing special to report besides the typical oil staining and deposits. The pressure relief spring was not stuck, but I still cleaned the spring bore to make sure it moved perfectly.
Oil pump was installed over new timing set followed by front and rear covers, which each received a new main seal. Oil control tray, was installed followed by the pickup tube (don't pinch that o-ring!). Lastly the balancer was pressed on using my homemade tool (M16x2 threaded rod, washers, nuts, thrust bearing)
_DSC3881 by Norbert Ogiba, on FlickrPilot bearing was replaced with a new OEM unit
_DSC3880 by Norbert Ogiba, on FlickrDab of RTV at the corners of the front and rear covers seals them against the oil pain
_DSC3882 by Norbert Ogiba, on FlickrI removed the windage tray, internal pan oil tubes, and pickup tube, and cleaned them with warm soapy water to make sure no foreign material was hiding in there. Cleaned them up and blew out with compressed air to make them like new.
_DSC3883 by Norbert Ogiba, on FlickrOil pan on, aligned, and torqued.
_DSC3884 by Norbert Ogiba, on Flickr  06-14-2015, 06:48 PM
#26
Looks like ill be choosing another type of cam and springs. I dont have the money like op to get back up and running like that if something in the engine goes south. Best me for to do it right the first time. Have to shop around for a better cam and springs. Sure had my mind set on that 228r.
06-16-2015, 12:10 AM
#28
So you took out a loan or borrowed from a friend to get back up that quick? If that were to happen to me, my car would be down for a year and a half. Not saying you're rich or anything. Do are you positive if I buy the dual springs, what happened to you won't happen to me?
06-16-2015, 08:30 AM
#29
This is the internet, there are never any guarantees. However, with a dual spring, at least you have the smaller spring to hold the valve up temporarily - the idea is that the driver will notice the miss and shut down the engine before damage is done.
06-16-2015, 08:32 AM
#30
Top End Assembly
I flipped her over on the stand and went to town.
Brand new OEM LS7 lifters got an oil bath for 2 weeks prior to assembly.
 _DSC3885 by Norbert Ogiba, on Flickr
Pre-assemble into lifter trays, which were scrubbed clean and blown out with compressed air prior to use
 _DSC3887 by Norbert Ogiba, on Flickr
Cylinder head dowels installed, headgaskets laid in place. I chose an OEM MLS LS3 6.2 headgasket to match the .030" overbore.
 _DSC3889 by Norbert Ogiba, on Flickr
 _DSC3890 by Norbert Ogiba, on Flickr
 _DSC3891 by Norbert Ogiba, on Flickr
 _DSC3892 by Norbert Ogiba, on Flickr
Ready for a fresh head (love this shot)
 _DSC3893 by Norbert Ogiba, on Flickr
Get her down into place, making sure not to snag the surface with the corner of a dowel.
 _DSC3894 by Norbert Ogiba, on Flickr
ARP head bolts (varying length design) were torqued in sequence and in 3 stages to the appropriate spec using the required thread lube on the threads, washers, and under the head of the bolts.
 _DSC3895 by Norbert Ogiba, on Flickr
Once both heads were on, they got new plugs:
 _DSC3896 by Norbert Ogiba, on Flickr
Since I was in a time crunch to get the car done, the rest went together fairly quickly, so I will let the pictures tell the story.
I flipped her over on the stand and went to town.
Brand new OEM LS7 lifters got an oil bath for 2 weeks prior to assembly.
_DSC3885 by Norbert Ogiba, on FlickrPre-assemble into lifter trays, which were scrubbed clean and blown out with compressed air prior to use
_DSC3887 by Norbert Ogiba, on FlickrCylinder head dowels installed, headgaskets laid in place. I chose an OEM MLS LS3 6.2 headgasket to match the .030" overbore.
_DSC3889 by Norbert Ogiba, on Flickr_DSC3890 by Norbert Ogiba, on Flickr_DSC3891 by Norbert Ogiba, on Flickr_DSC3892 by Norbert Ogiba, on FlickrReady for a fresh head (love this shot)
_DSC3893 by Norbert Ogiba, on FlickrGet her down into place, making sure not to snag the surface with the corner of a dowel.
_DSC3894 by Norbert Ogiba, on FlickrARP head bolts (varying length design) were torqued in sequence and in 3 stages to the appropriate spec using the required thread lube on the threads, washers, and under the head of the bolts.
_DSC3895 by Norbert Ogiba, on FlickrOnce both heads were on, they got new plugs:
_DSC3896 by Norbert Ogiba, on FlickrSince I was in a time crunch to get the car done, the rest went together fairly quickly, so I will let the pictures tell the story.
06-16-2015, 09:00 AM
#31
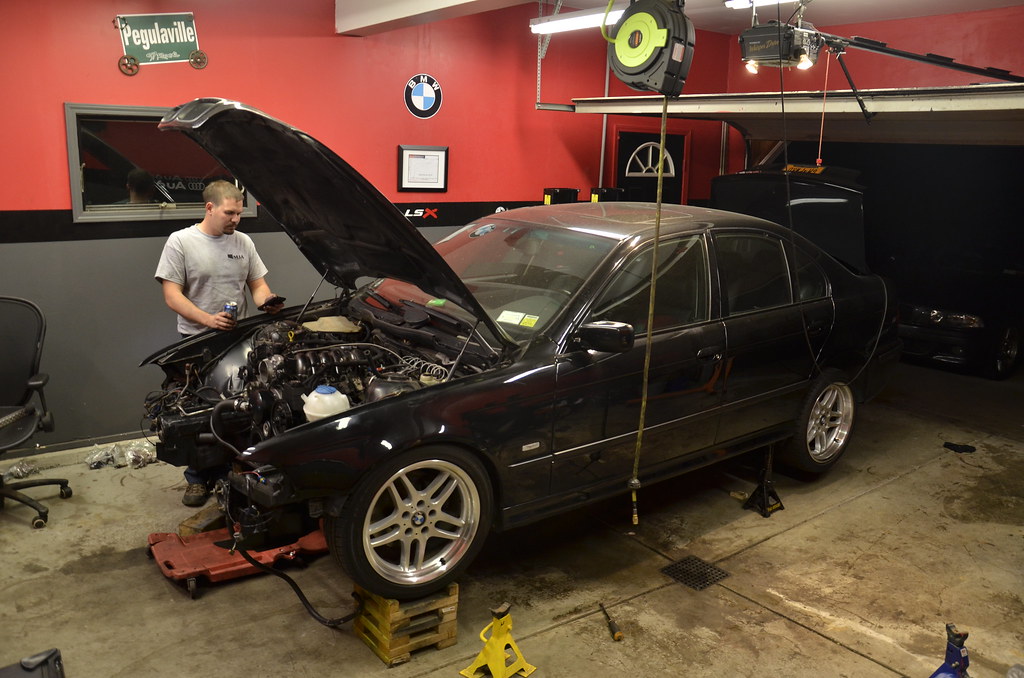
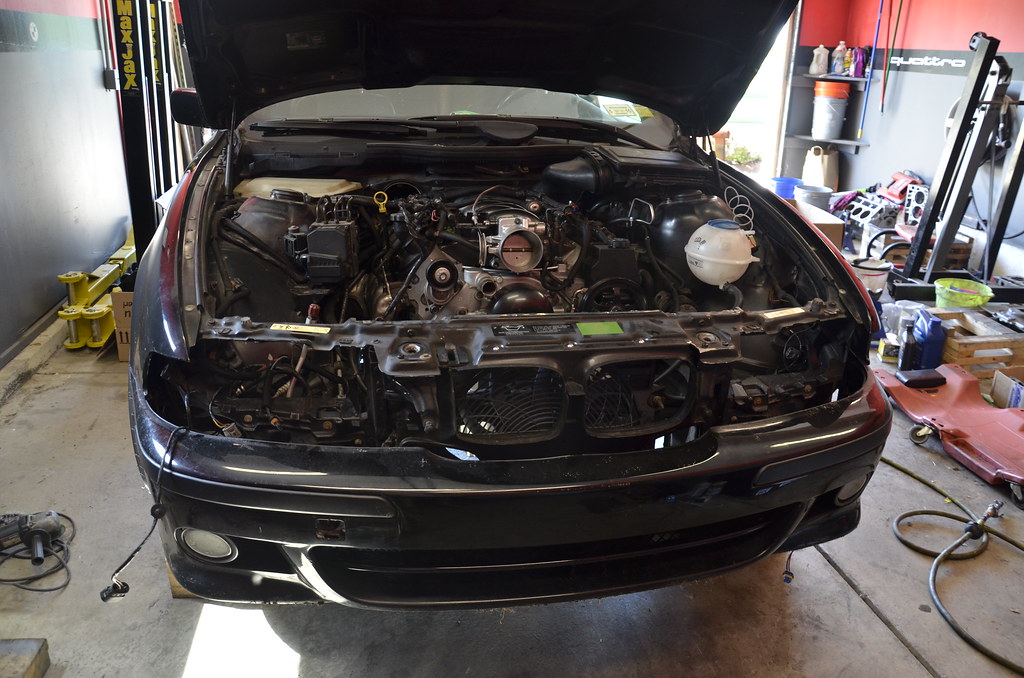
Engine/Trans Assembly and Installation into car
Bolted on a bunch of crap like the front accessories, starter, manifolds, coolant sensors, etc. Cleaned the pressure plate and flywheel with isopropyl alcohol to remove any fingerprints or grease, installed both with ARP hardware, torqued to spec. Joining these two bastards was super fun on my own!
 _DSC3923 by Norbert Ogiba, on Flickr
 _DSC3924 by Norbert Ogiba, on Flickr
 _DSC3925 by Norbert Ogiba, on Flickr
 _DSC3926 by Norbert Ogiba, on Flickr
and, in ya go
 _DSC3927 by Norbert Ogiba, on Flickr
Workspace = filthy
 _DSC3928 by Norbert Ogiba, on Flickr
Finally got it in (without removing the driveshaft no less)
_DSC3928 by Norbert Ogiba, on Flickr
Technician117 doing what he does best
 _DSC3929 by Norbert Ogiba, on Flickr
 _DSC3930 by Norbert Ogiba, on Flickr
 _DSC3931 by Norbert Ogiba, on Flickr
Reconnecting vacuum lines and wiring
 _DSC3932 by Norbert Ogiba, on Flickr
Final reassembly
 _DSC3933 by Norbert Ogiba, on Flickr
Interior back together
 _DSC3937 by Norbert Ogiba, on Flickr
Done!
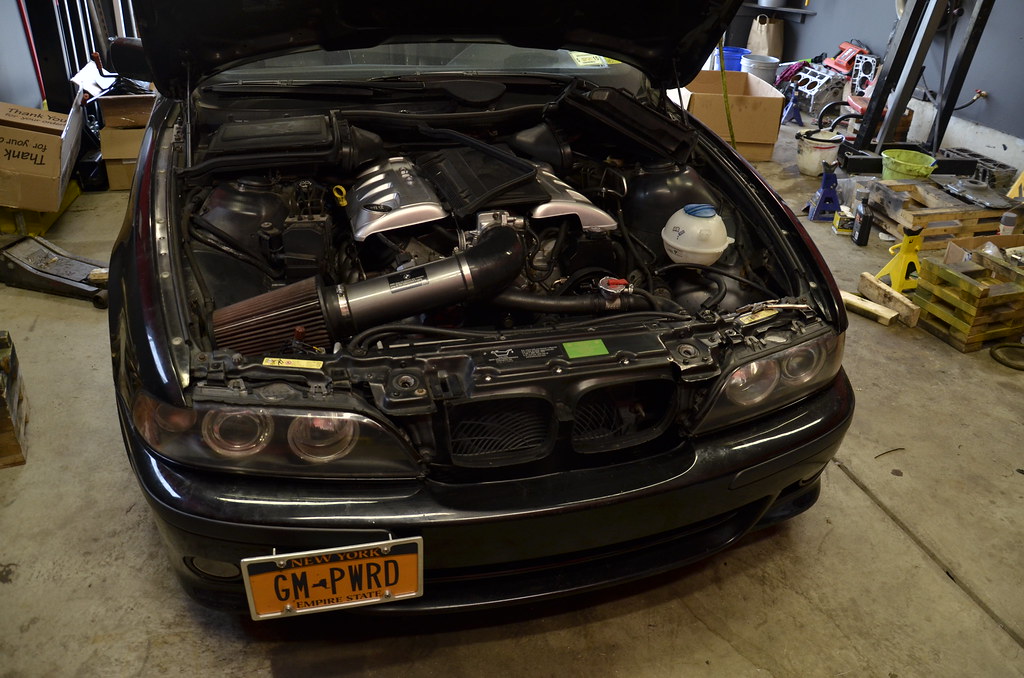 _DSC3934 by Norbert Ogiba, on Flickr
Fired it up and let it idle while checking oil pressure, coolant temps, and general leaks. Some minor things but no deal breakers. The biggest "oh crap" moments were a minor miss due to a loose plug wire, and a leak from the OPSU (replaced with an appropriate plug). As I walked out to hop in and take it for the maiden voyage, it started puking coolant out of the overflow bottle, where a nipple had cracked and broken on a nearly new tank
 _DSC3935 by Norbert Ogiba, on Flickr
 _DSC3936 by Norbert Ogiba, on Flickr
Naturally only one store had one in stock locally and they had closed for the day, so it pushed back my schedule by another day. However, I tossed a new one in, and took the car to be tuned.
Mileage at the time of engine rebuild for future reference.
 _DSC3939 by Norbert Ogiba, on Flickr
Met my goal and made it out to Columbus, OH for Timmayfest - got it strapped down on the dyno (very high heat and humidity).
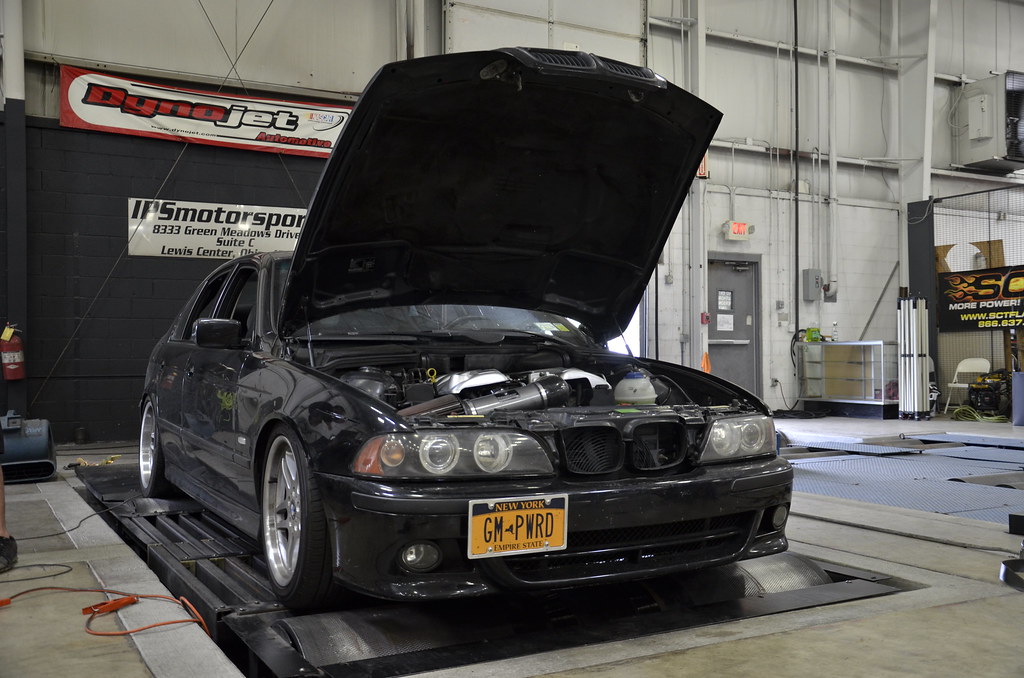 _DSC3970 by Norbert Ogiba, on Flickr
Fairly disappointed at the numbers - 360whp and 349 lbft. The only change was a more restrictive exhaust in the form of cats, a resonator, and slightly smaller diameter piping. Last year I made 427whp/400lbft on a local dyno. Go figure.
 _DSC3971 by Norbert Ogiba, on Flickr
Had to make a stop on the way home:
 _DSC4064 by Norbert Ogiba, on Flickr
Bolted on a bunch of crap like the front accessories, starter, manifolds, coolant sensors, etc. Cleaned the pressure plate and flywheel with isopropyl alcohol to remove any fingerprints or grease, installed both with ARP hardware, torqued to spec. Joining these two bastards was super fun on my own!
_DSC3923 by Norbert Ogiba, on Flickr_DSC3924 by Norbert Ogiba, on Flickr_DSC3925 by Norbert Ogiba, on Flickr_DSC3926 by Norbert Ogiba, on Flickrand, in ya go
_DSC3927 by Norbert Ogiba, on FlickrWorkspace = filthy
_DSC3928 by Norbert Ogiba, on FlickrFinally got it in (without removing the driveshaft no less)
_DSC3928 by Norbert Ogiba, on FlickrTechnician117 doing what he does best
_DSC3929 by Norbert Ogiba, on Flickr_DSC3930 by Norbert Ogiba, on Flickr_DSC3931 by Norbert Ogiba, on FlickrReconnecting vacuum lines and wiring
_DSC3932 by Norbert Ogiba, on FlickrFinal reassembly
_DSC3933 by Norbert Ogiba, on FlickrInterior back together
_DSC3937 by Norbert Ogiba, on FlickrDone!
_DSC3934 by Norbert Ogiba, on FlickrFired it up and let it idle while checking oil pressure, coolant temps, and general leaks. Some minor things but no deal breakers. The biggest "oh crap" moments were a minor miss due to a loose plug wire, and a leak from the OPSU (replaced with an appropriate plug). As I walked out to hop in and take it for the maiden voyage, it started puking coolant out of the overflow bottle, where a nipple had cracked and broken on a nearly new tank
_DSC3935 by Norbert Ogiba, on Flickr_DSC3936 by Norbert Ogiba, on FlickrNaturally only one store had one in stock locally and they had closed for the day, so it pushed back my schedule by another day. However, I tossed a new one in, and took the car to be tuned.
Mileage at the time of engine rebuild for future reference.
_DSC3939 by Norbert Ogiba, on FlickrMet my goal and made it out to Columbus, OH for Timmayfest - got it strapped down on the dyno (very high heat and humidity).
_DSC3970 by Norbert Ogiba, on FlickrFairly disappointed at the numbers - 360whp and 349 lbft. The only change was a more restrictive exhaust in the form of cats, a resonator, and slightly smaller diameter piping. Last year I made 427whp/400lbft on a local dyno. Go figure.
_DSC3971 by Norbert Ogiba, on FlickrHad to make a stop on the way home:
_DSC4064 by Norbert Ogiba, on Flickr
06-16-2015, 06:30 PM
#32
Oh ok. Ill order some duals then. Would love to do the same swap in an e46. Your build is super clean
06-21-2015, 12:09 AM
#34
I really don't like to receive another person's project. I love to learn do I do most things myself. If you do the wiring , I may pay you to make me a harness when I start my e46 build. You're still using the stock gauge? Dme still working beside gm ecu?
