Flycutting question
Originally Posted by Irocss85
damn, too bad I was too busy to get on here lately. but your supposed to cut the back side of the cutter down. just like if you were cutting a valve job. but with a bench grinder.
The exhaust cutter didn't even hit the seats, it bound up on the chamber walls.
I ground the backside down until it sat better in the head...but after claying, it turns out I didn't even need to cut for the exhaust valve clearance anyways.
No worries, it's done and turned out just fine.

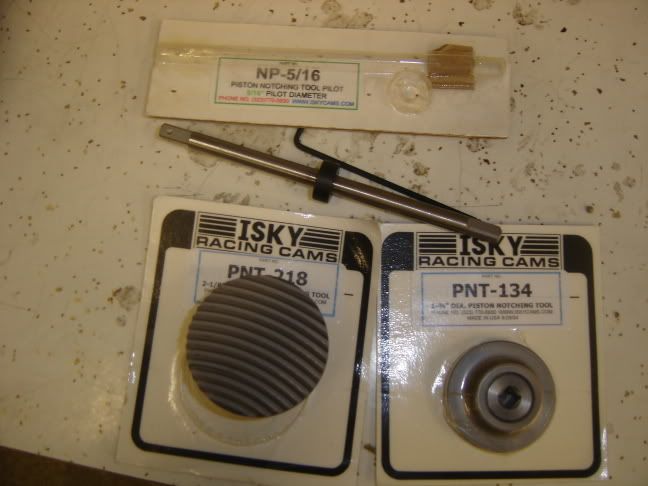
The LG motorsports tool is an ISKY cutting tool. I rented it also at one point.
Only did the intake side on my car. Not hard to use... just need to take your time and not let debris fly into the engine.
Thimble- depending upon your mileage... you may want to have Harlan Sharp rebuild your stock rockers. Good insurance.
-Mark
Only did the intake side on my car. Not hard to use... just need to take your time and not let debris fly into the engine.
Thimble- depending upon your mileage... you may want to have Harlan Sharp rebuild your stock rockers. Good insurance.
-Mark
Originally Posted by quick346
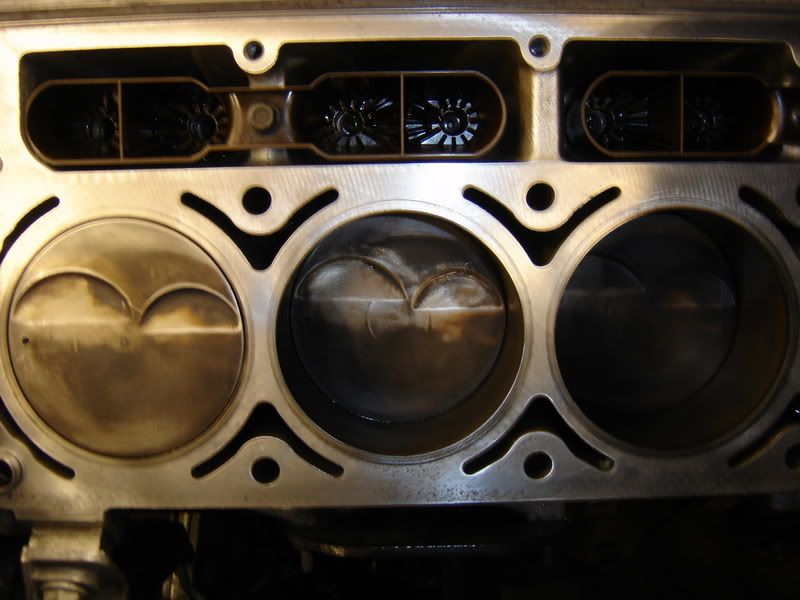
holy rough deck surface batman. Is it just me or is waterbugs surface job a bit extreme? damn I hope that seals.
Scotchbrite here as well, followed with the 3M pad they sale at the auto store.. Its been good to go with no leaking and 100 shot for a year now!
Originally Posted by waterbug1999
It's not as bad as it looks.
Scotchbrite here as well, followed with the 3M pad they sale at the auto store.. Its been good to go with no leaking and 100 shot for a year now!
Scotchbrite here as well, followed with the 3M pad they sale at the auto store.. Its been good to go with no leaking and 100 shot for a year now!
LS1 Tech Stories
The Best V8 Stories One Small Block at Time

6 Common C5 Corvette Failures and What's Involved In Repairing Them
Pouria Savadkouei
Retro Modern Bandit Pontiac Trans AM Comes With Burt Reynolds' Autograph
Verdad Gallardo
Top 10 Greatest Cadillac V Series Performance Models Ever, Ranked
Pouria Savadkouei
Top 10 Most Powerful Chevy Trucks Ever Made!

Hennessey's New Supercharged Silverado ZR2 Has 700 HP
Verdad Gallardo
Coachbuilt N2A Anteros Is an LS2-Powered C6 Corvette In Italian Clothes
Verdad Gallardo
Awesome K5 Blazer Restomod Comes With C7 Corvette Power
Verdad Gallardo
10 Camaros You Should Never Buy

10 LS Engine Myths That Refuse to Die
Verdad Gallardo The 3M soft bristle round pad you put in a drill. Its made out of some rubberish kind of material.. I dont know the name of it just saw a guy use it before on this site and it works pretty well.

Hey how hard do you have to push down on your angled cutter to cutt the Eyebrow? Is it pretty slow going? And also, how do you end up getting all of the debris out of the cylinder's?
Lane
Lane
Throw some duct tape over the cylinde that you are doing. Put the old gasket on, slap the cutting head on, cut some piston off, pull the cutting head, vacum up all the debris inside the old gasket and above the tape, measure, and repeat.
Originally Posted by crazylane
Hey how hard do you have to push down on your angled cutter to cutt the Eyebrow? Is it pretty slow going? And also, how do you end up getting all of the debris out of the cylinder's?
Lane
Lane
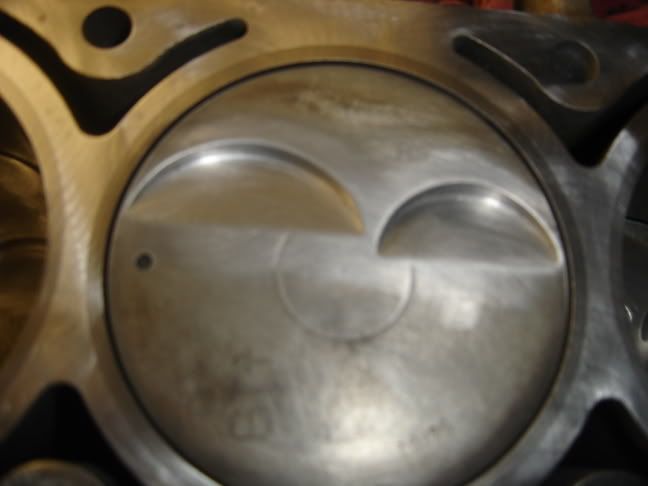
The only notable thing I noticed about cutting...is when you first start the cut, since you're cutting in at an angle, the tool tends to dig in and bind up...hard...to the point you cannot turn it anymore. Although it's probably not best for the life of the tool, I found by starting the initial cut by running the tool backwards (ccw) by hand for the first few turns it helped get by that problem, once the tool was "in" and began cutting a flat surface, it then turned smoothly.
As for chip removal, I used a small shop vac with a tip that tapered down to about a pencil-sized opening. After each cut, I pulled the head off, and vac'd out the chips (which is more like dust), and checked the depth. After doing a couple cyls, you learn to gauge the depth of cut easily just by looking at the width of the eyebrow.
It really is pretty easy. Just take your time on the first cut, get a feel for the tool and the rate of material removal, and although still a little tedious with the on/off action of the head, you'll find it goes pretty quickly.
Just be very meticulous in cleanup and spin the motor over several times, cleaning/wiping out each cyl when the piston is down, and make absolutely sure you got all the chips out.


I've got a question. Can you take a junked cylinder head and cut off like two and a half cylinders so it's easier to put on and off? All you really need at one time is the one cylinder bore, so having the other three just makes it more difficult to pull and re-install the head, especially those of us with head studs and f-bodies.
Originally Posted by The Alchemist
I've got a question. Can you take a junked cylinder head and cut off like two and a half cylinders so it's easier to put on and off? All you really need at one time is the one cylinder bore, so having the other three just makes it more difficult to pull and re-install the head, especially those of us with head studs and f-bodies.
I'm not sure if all the head boltholes in the head are large enough to accommodate these. If they are, then no problem...if not, you'd just have to bore out the other lower bolthole in the "single cyl head" you created until it slid over the roll pin.

Originally Posted by Thimble
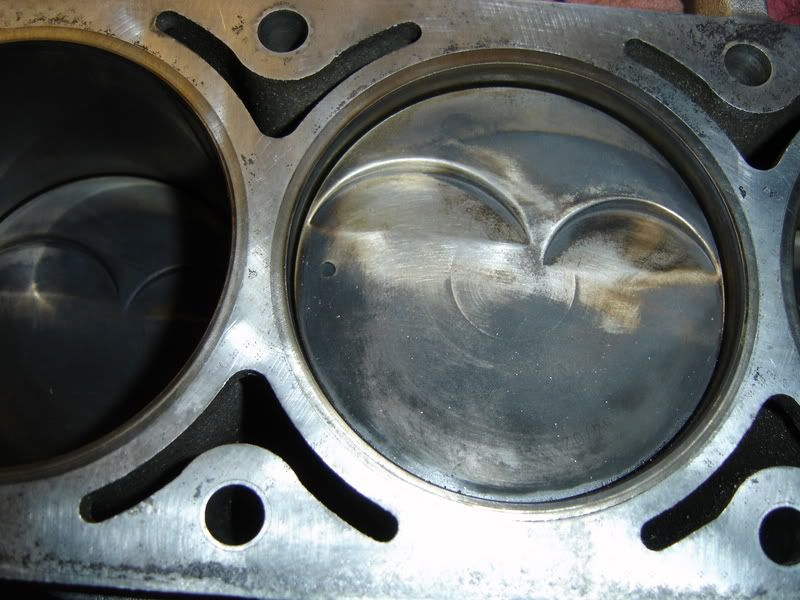
I ended up cutting with the piston about 1/8" down in the bore...since that's about how much the cutter extended out of the head chamber.
I set up the cutter in the head, placed the head on the block, then slowly rotated the engine until the piston just about touched the cutter, then cut. It worked out just fine. When I clayed the heads, the valve dropped slightly below, but still well within in the notch. I cut the notch .100" deep, clayed, and ended up with about .095" valve clearance (clay thickness).
I did not have to notch for the exhaust valve, had a ton of clearance there.


Finished this up Monday morning, car is running extremely well and strong with no issues. The power difference of the heads and added compression is amazing...a nigh and day difference from cam-only.
I set up the cutter in the head, placed the head on the block, then slowly rotated the engine until the piston just about touched the cutter, then cut. It worked out just fine. When I clayed the heads, the valve dropped slightly below, but still well within in the notch. I cut the notch .100" deep, clayed, and ended up with about .095" valve clearance (clay thickness).
I did not have to notch for the exhaust valve, had a ton of clearance there.
Finished this up Monday morning, car is running extremely well and strong with no issues. The power difference of the heads and added compression is amazing...a nigh and day difference from cam-only.

Originally Posted by waterbug1999
The 3M soft bristle round pad you put in a drill. Its made out of some rubberish kind of material.. I dont know the name of it just saw a guy use it before on this site and it works pretty well.
I use them in my body shop all the time.
On a side note, I wet sanded my deck surface on the block with 1000 grit for an ultra fine finish for sealing. And used copper gasket spray on the cometic .040" gaskets.
Also for some of you wondering. I fly cut mine to .145". I know that's a ton. But I've had no problems. And I can fit any cam size I want with a 58cc head and a .040" gasket. Just thought I would throw that out there for you guys.
Originally Posted by JRracing
It's a 3M rolock scotch disc. They come in all sorts of sizes and color. The color indicates the coarseness of it from fine to course.
I use them in my body shop all the time.
On a side note, I wet sanded my deck surface on the block with 1000 grit for an ultra fine finish for sealing. And used copper gasket spray on the cometic .040" gaskets.
Also for some of you wondering. I fly cut mine to .145". I know that's a ton. But I've had no problems. And I can fit any cam size I want with a 58cc head and a .040" gasket. Just thought I would throw that out there for you guys.
Originally Posted by JRracing
Also for some of you wondering. I fly cut mine to .145".
I kept referring to your pics, then looking at my cuts, then measuring, then comparing again, measuring again, and finally thinking...damn, he cut his deep.