


My LS2 build detailed with pics

Thread Starter
9 Second Club
iTrader: (23)
Joined: Oct 2002
Posts: 1,150
Likes: 1
From: Mastic Long Island N.Y.
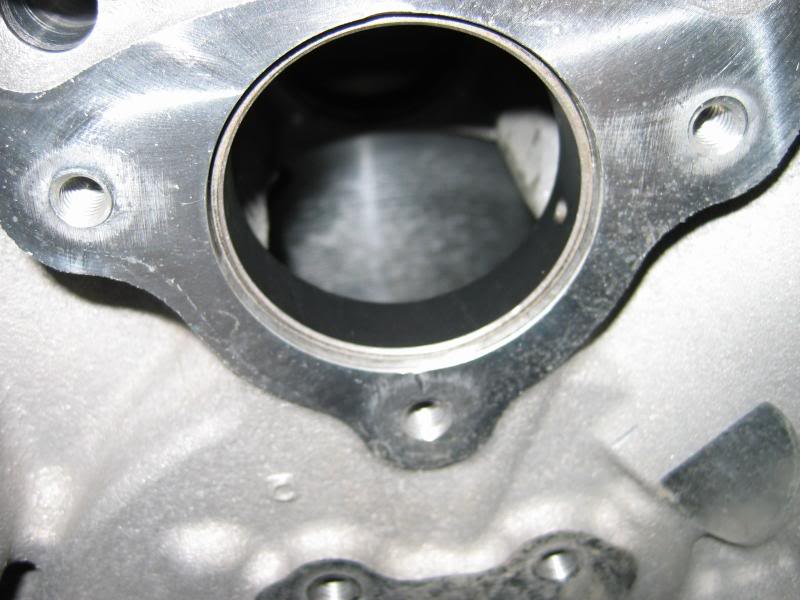
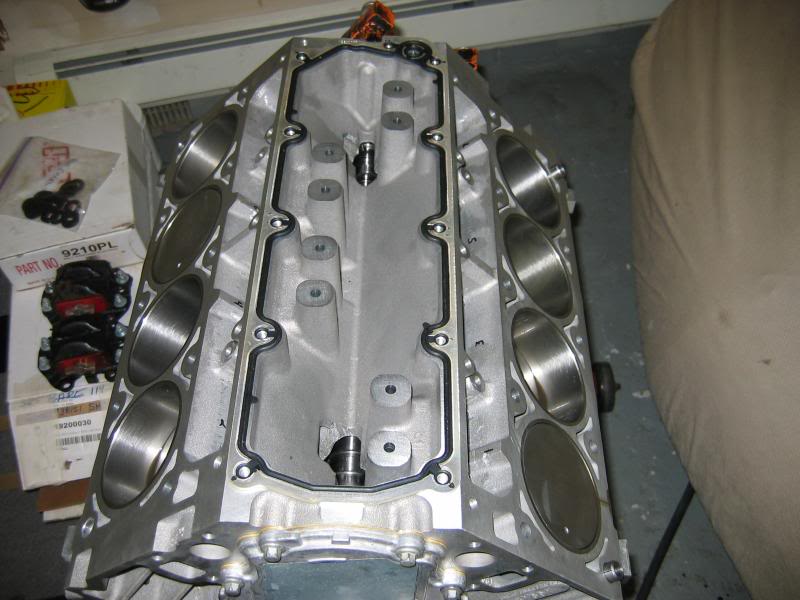
A couple of guys have done this and I enjoyed reading them so I figured why not. It took me a few hours to complie this thread together. 8 months worth of time here but I hope some of you guys enjoy the read. It starts with a phone call from a close friend that tells me he can get me an LS2 longblock cheap. A 2005 Vette had come in with a spun rod bearing and it was being replaced. My other buddy wanted the LS6 heads off of it so we split the tab. After selling the brand new GTO oilpan,baffle and pickup that came with it I paid literally less than 200 dollars for the shortblock. We get the motor I pull the heads and am looking basically at this.
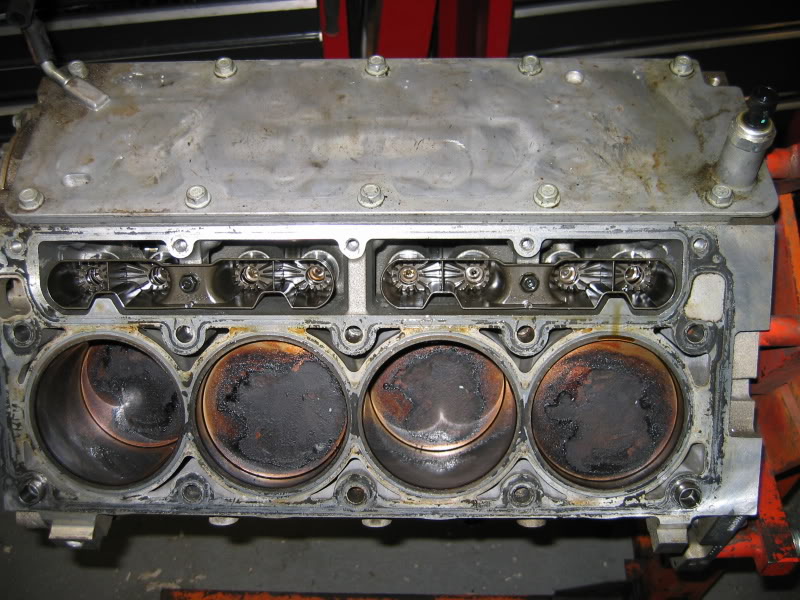
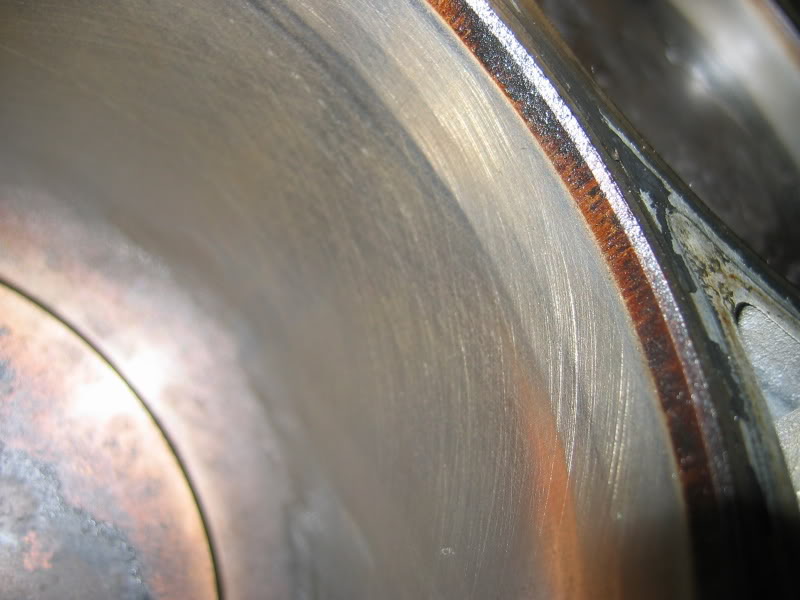
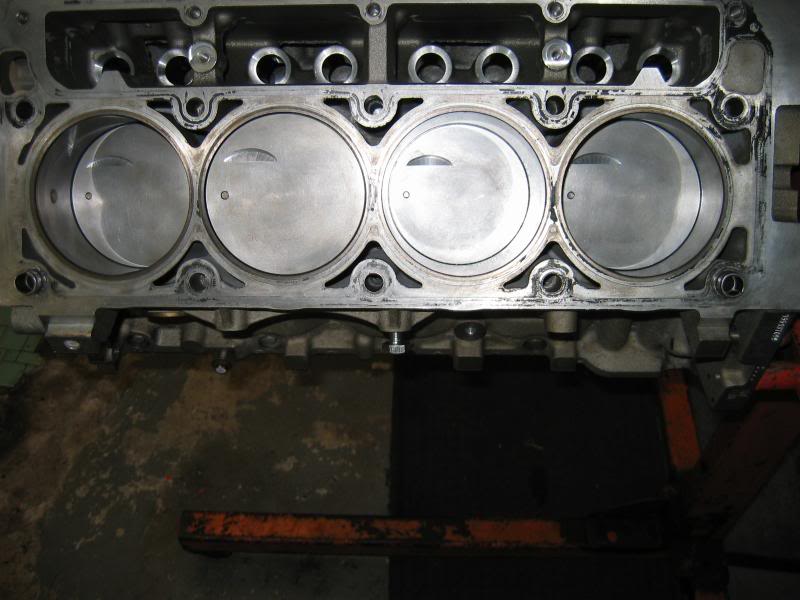
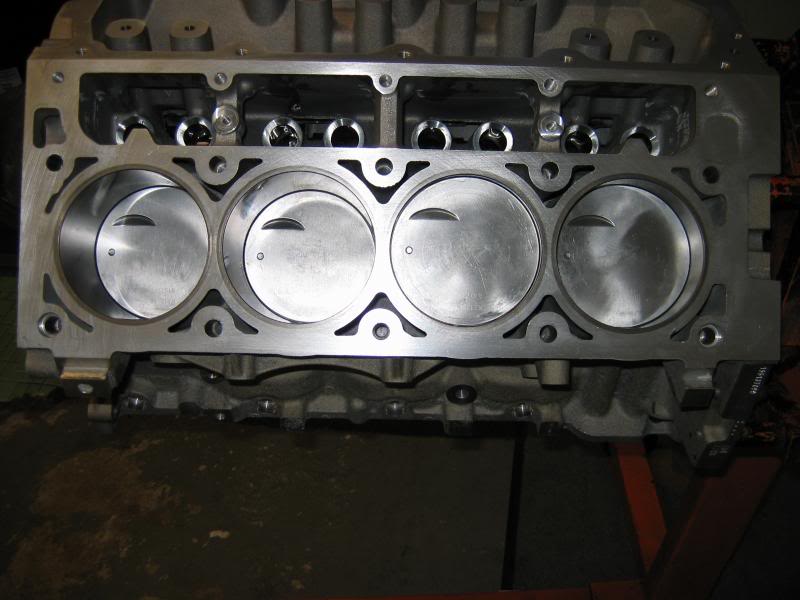
The motor had 12K miles on it and the cylinders were in GREAT shape
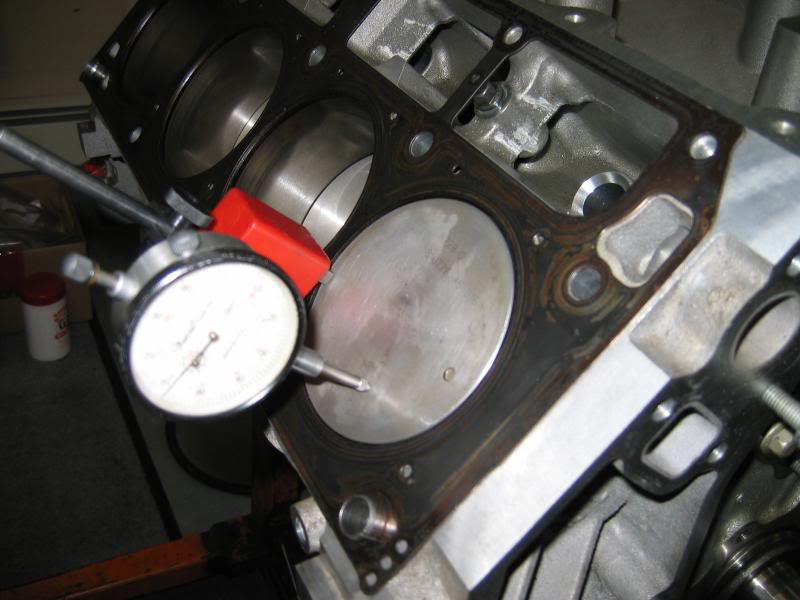
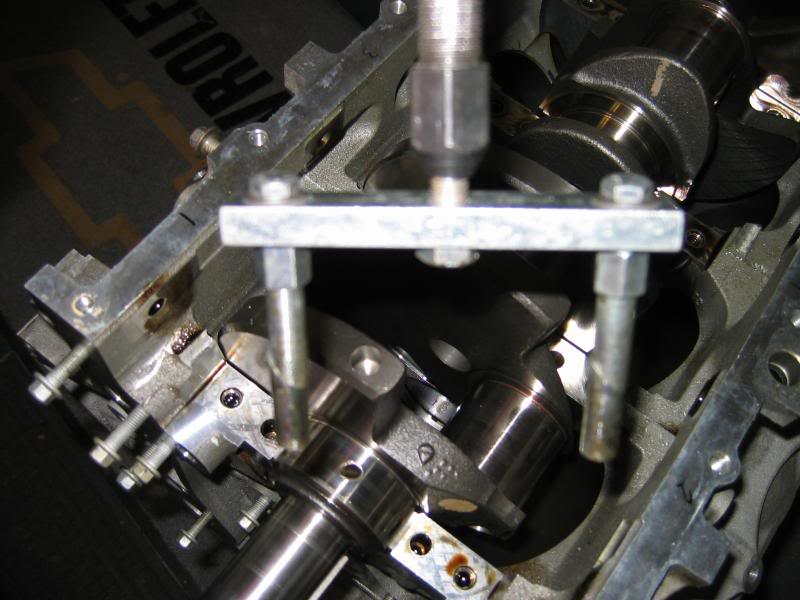
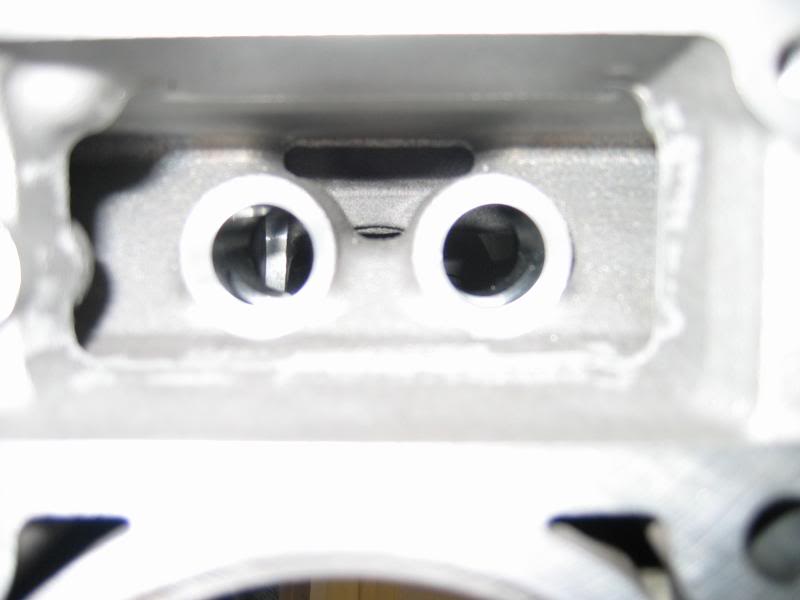
I cleaned the tops of all the pistons in preparation of flycutting them.At this point I call LG motorsports and speak with their tech dept and was lucky enough to get one of the mechanics on the phone. For this build I was reusing my heads and camshaft from my LS1. It's a G5X4 camshaft. I find out from him what I needed for valve clearance. They gave me a nice EASY way to assure proper PTV clearance with their camshafts. Intake valve drop is the figuring method they gave me. Bring the Piston to TDC place the head on with the valve and no valve spring or a test spring snug it with a head gasket. With a dial indicator on the valvestem tip measure the distance from the valve on the seat down until piston contact is made. I used this method for this camshaft in the LS1 and turned the motor to 7200 rpm's without issue. Some quick pics on the flycutting portion
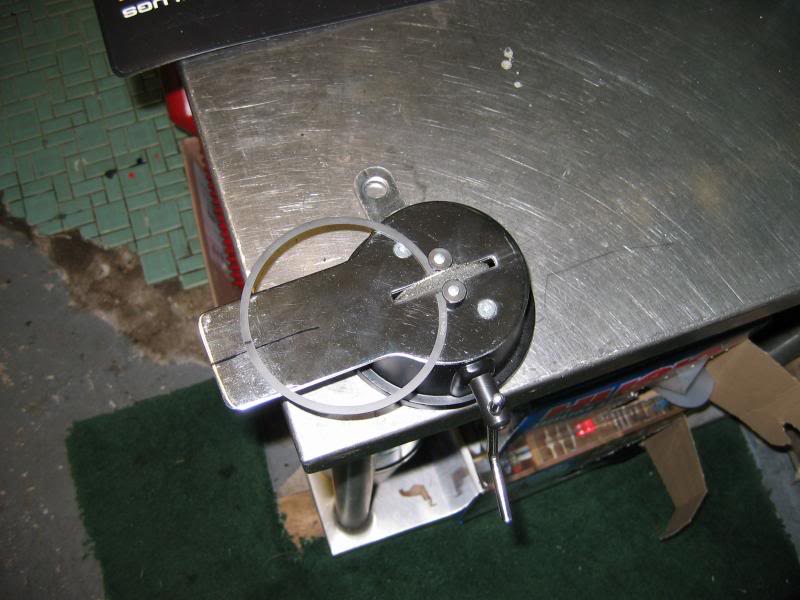
insuring TDC has been achieved
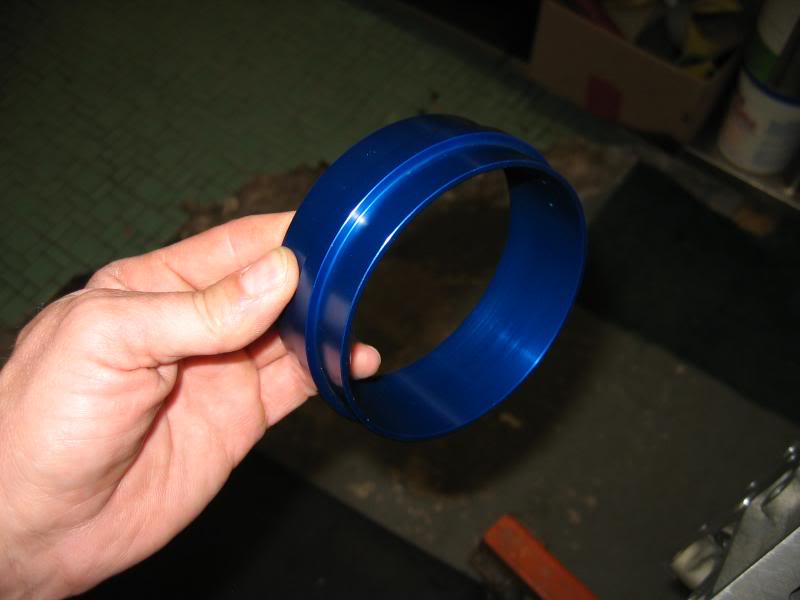
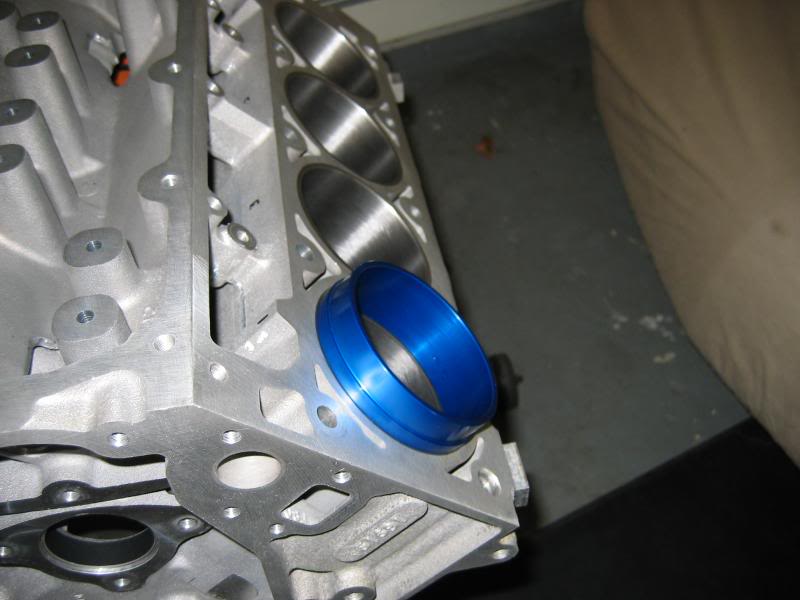
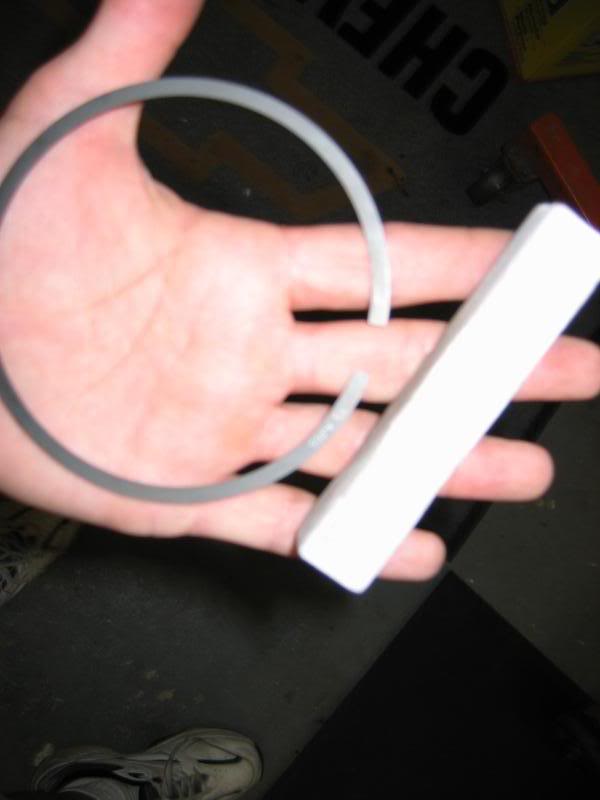
Here is the flycutting tool from Lindy it is valve diameter specific. It will cut the stock piston like butter and provides plenty of radial clearance as well. It sits in the head just like a valve and has a set collar to achieve the desired relief depth. My figures told me 60 thousandths would give me more than enough breathing room to achieve a safe valve drop figure.
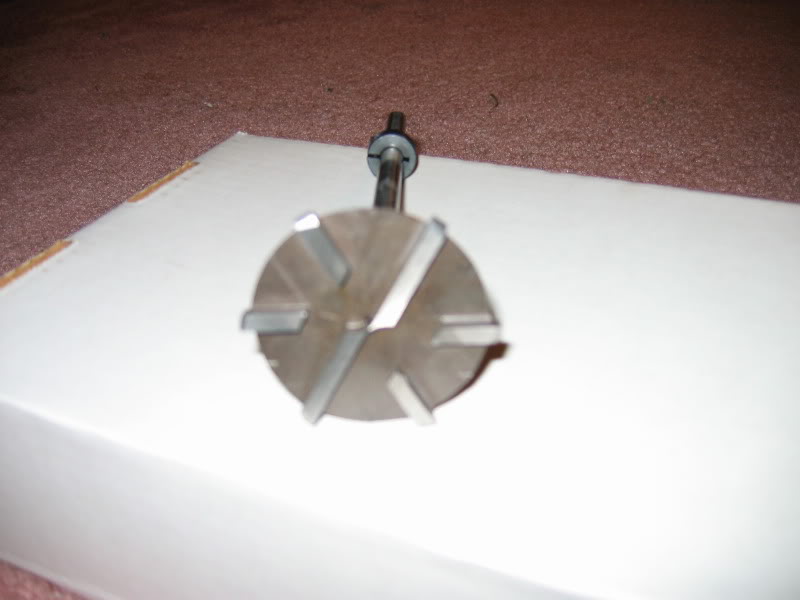
here I have the drill fixed to the tool this takes time but is worth it.
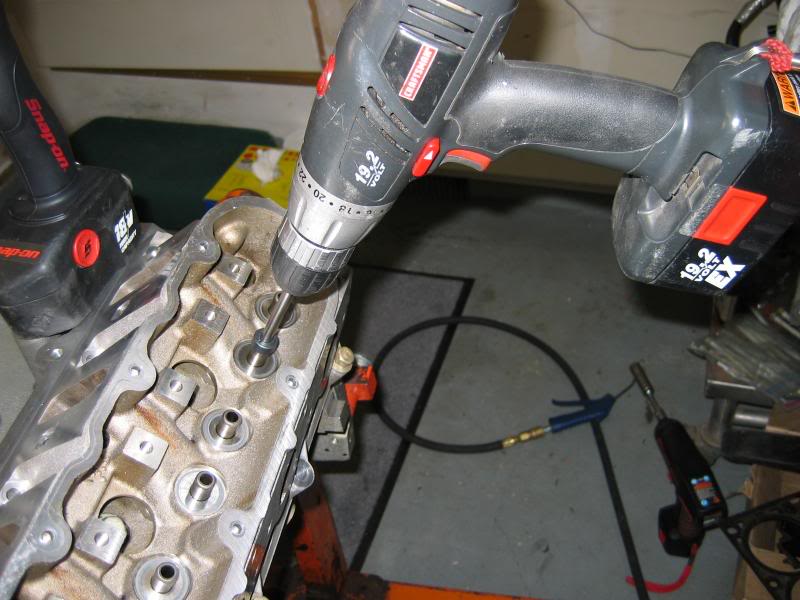
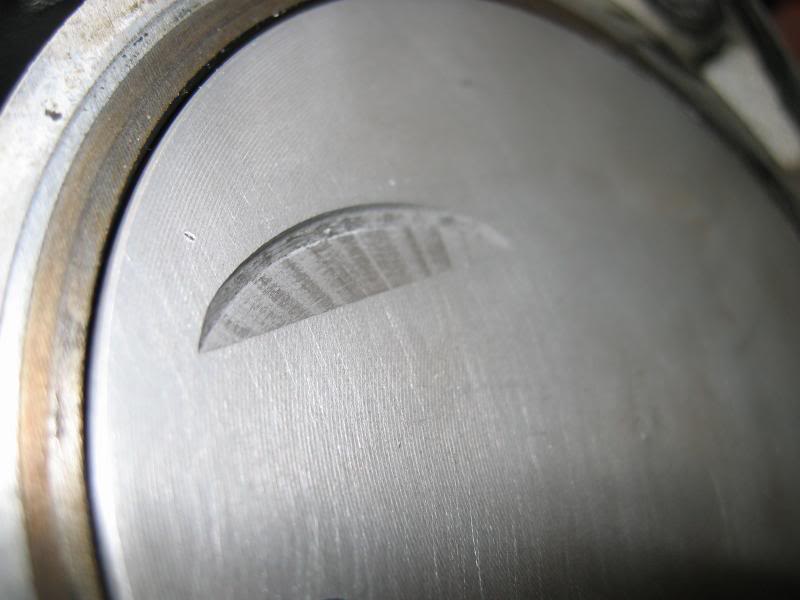
The cuts come out clean and every cut was within 2 thousandths depth of each other after I was done.
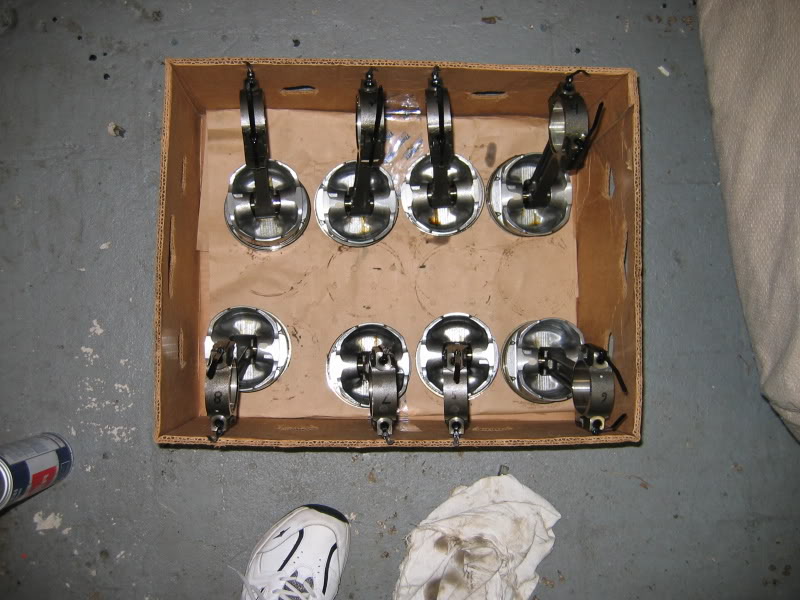
So after the flycutting is done I get to disassembling the rotater marking each piston and rod carefully so everything returns to it's original home.
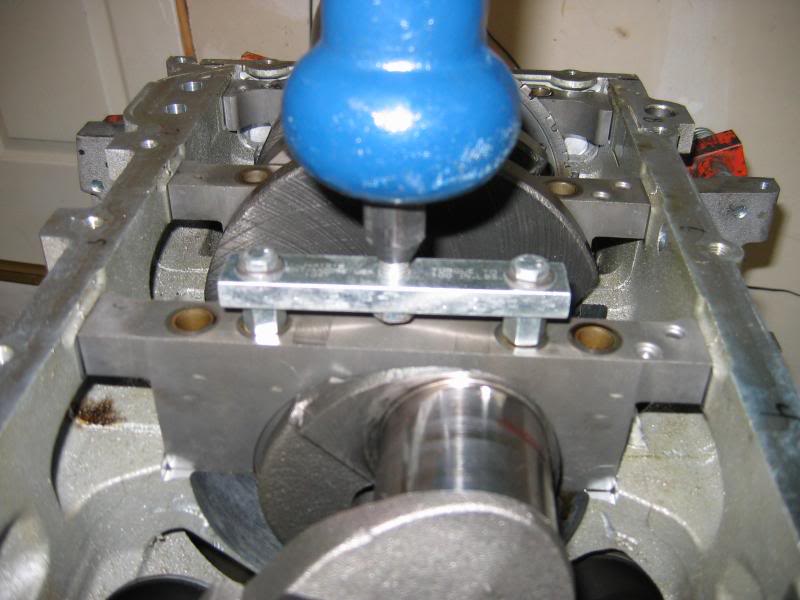
I used the Kent more tool to get the maincaps free of the block.
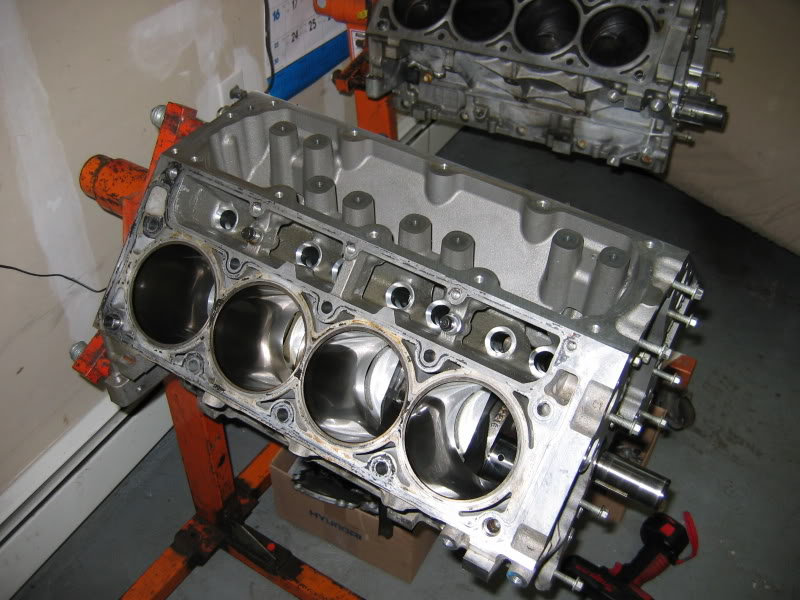
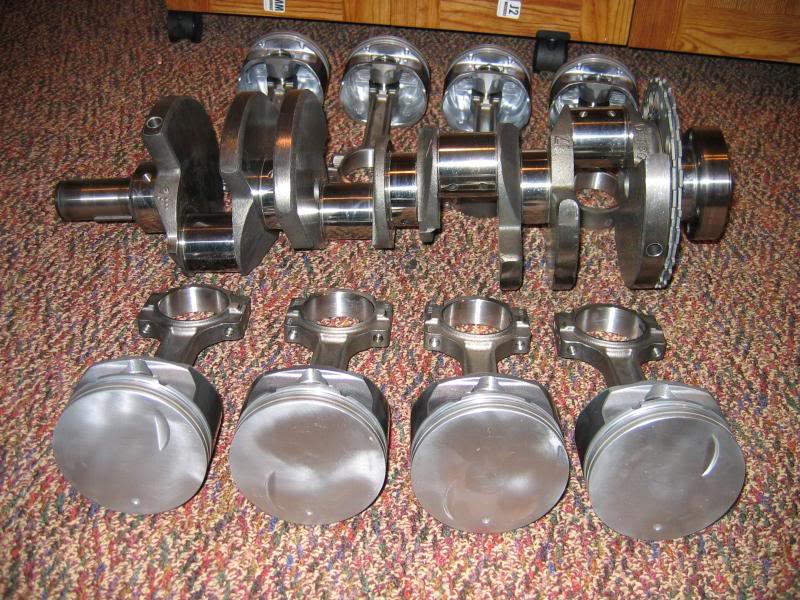
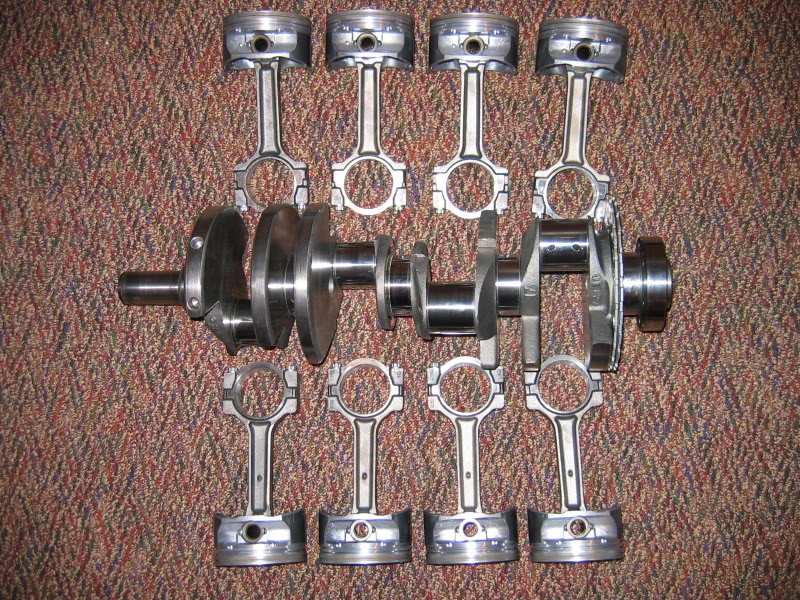
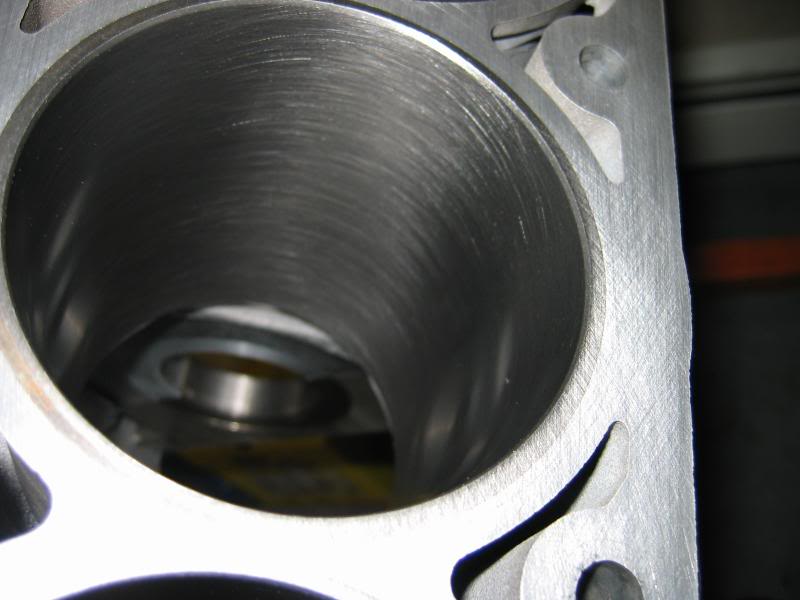
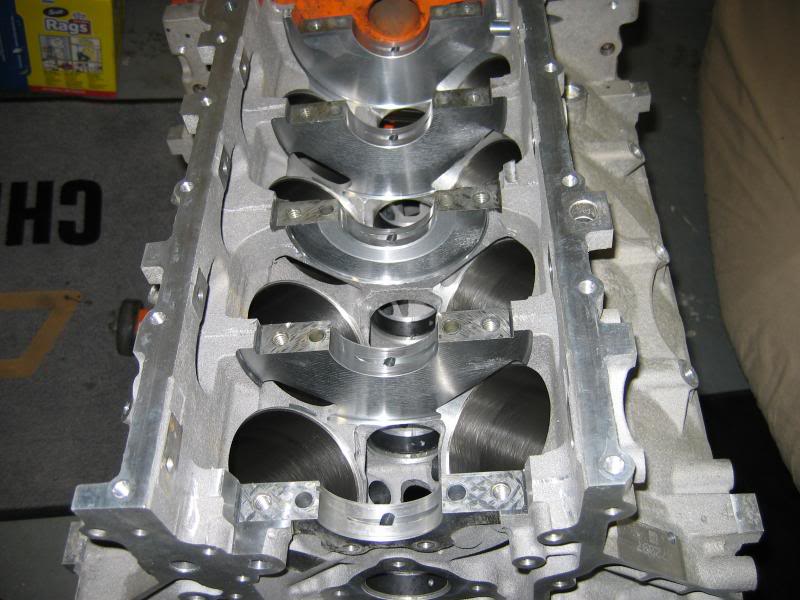
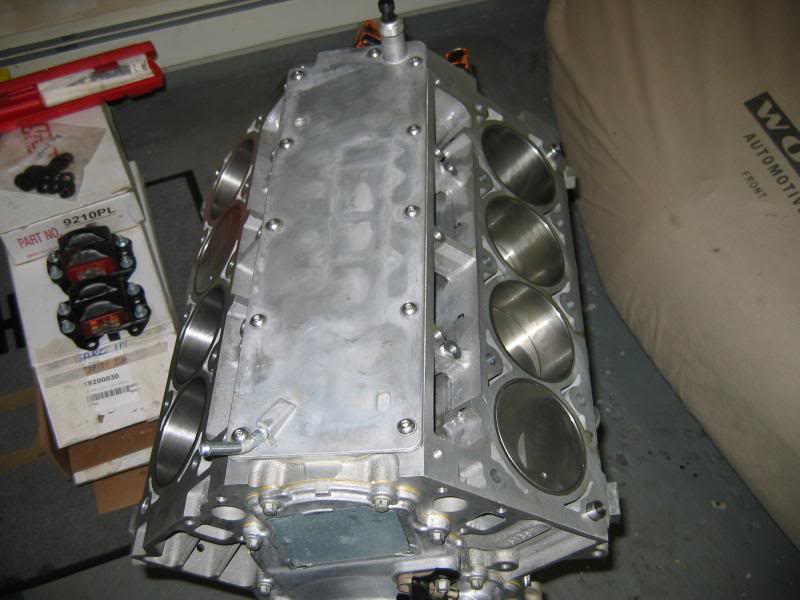
I send the block, piston and rods (with the Katech bolts I would be using),crank and heads to a good friend that works at a local machine shop that builds race engines. He first checks the rods to ensure none are out of spec. I was expecting to need to replace the spun bearing rod but they were all fine. In fact the one rod from the spun bearing was tighter than the other 7 and he thought that�s what may have caused the issue. He put it on a hone and got it where it needed to be. I should mention I had all the GM specs on an LS2 printed up and he had them for reference. I had the cylinders ran thru with a ball hone to provide a fresh surface for proper ring seating. New coated cam bearings. He boiled the block and cleaned the surfaces/checked deck. Polished the crank and piston pins ( LS2 floating wrist pins are nice) and balanced the rotating assembly. He checked all my main and rod clearances as well I did not have the mains honed as I was reusing the original main bolts. Here it is back from him after about a week.

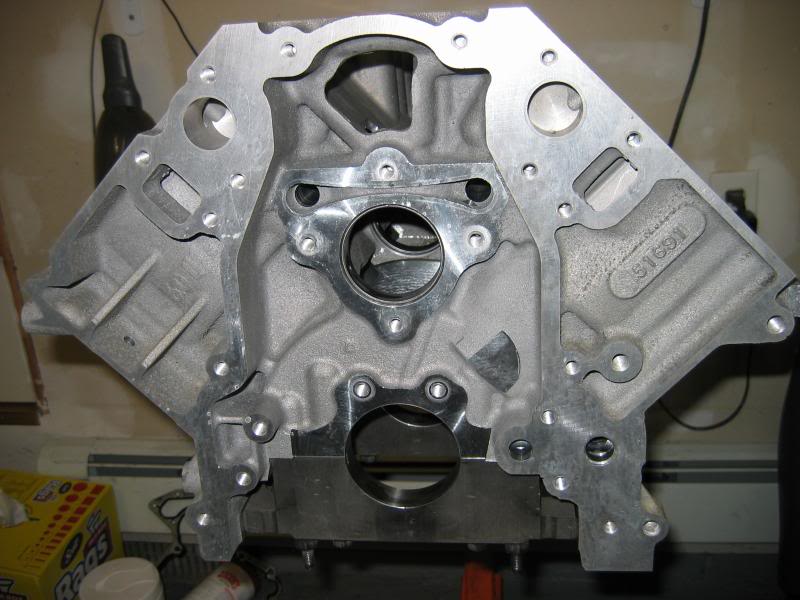
New Cam bearings
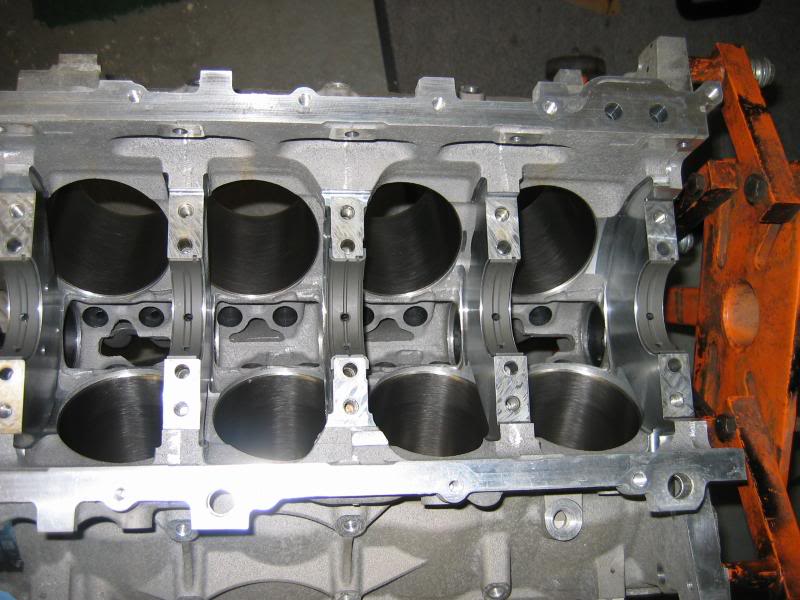
Fresh cylinders prepped using exactly the ball hone type and grit recommended by Ed at Total Seal
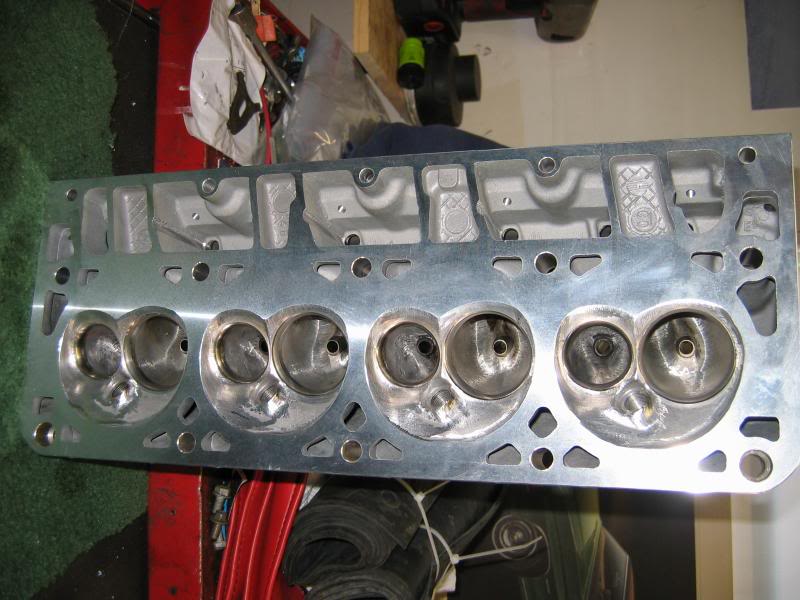
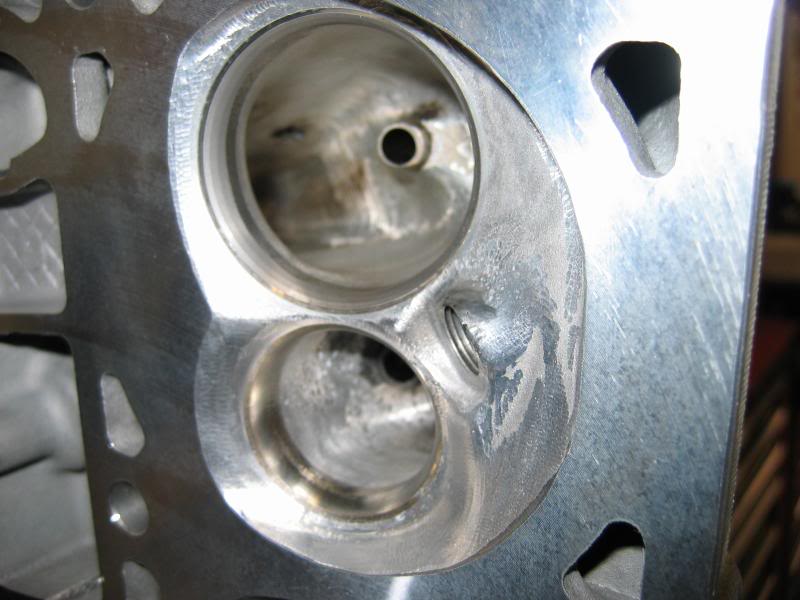
I had the heads milled the bare minimum to provide a clean surface for the MLS gaskets to work with. They are hand ported 5.3 liter heads done by Absolute Speed. He did some good work back in the day. Unfortunatley he made bad bussiness decisions and went under. I run a 1.575 exhuast and 2.08 intake REV valves. The combustion chambers are just about 60cc's. I had the combustion chambers optimizing around the valves to take advantage of the new 4 inch bore. The 2.08 valve should now be able to move more air.
The motor had 12K miles on it and the cylinders were in GREAT shape
I cleaned the tops of all the pistons in preparation of flycutting them.At this point I call LG motorsports and speak with their tech dept and was lucky enough to get one of the mechanics on the phone. For this build I was reusing my heads and camshaft from my LS1. It's a G5X4 camshaft. I find out from him what I needed for valve clearance. They gave me a nice EASY way to assure proper PTV clearance with their camshafts. Intake valve drop is the figuring method they gave me. Bring the Piston to TDC place the head on with the valve and no valve spring or a test spring snug it with a head gasket. With a dial indicator on the valvestem tip measure the distance from the valve on the seat down until piston contact is made. I used this method for this camshaft in the LS1 and turned the motor to 7200 rpm's without issue. Some quick pics on the flycutting portion
insuring TDC has been achieved
Here is the flycutting tool from Lindy it is valve diameter specific. It will cut the stock piston like butter and provides plenty of radial clearance as well. It sits in the head just like a valve and has a set collar to achieve the desired relief depth. My figures told me 60 thousandths would give me more than enough breathing room to achieve a safe valve drop figure.
here I have the drill fixed to the tool this takes time but is worth it.
The cuts come out clean and every cut was within 2 thousandths depth of each other after I was done.
So after the flycutting is done I get to disassembling the rotater marking each piston and rod carefully so everything returns to it's original home.
I used the Kent more tool to get the maincaps free of the block.
I send the block, piston and rods (with the Katech bolts I would be using),crank and heads to a good friend that works at a local machine shop that builds race engines. He first checks the rods to ensure none are out of spec. I was expecting to need to replace the spun bearing rod but they were all fine. In fact the one rod from the spun bearing was tighter than the other 7 and he thought that�s what may have caused the issue. He put it on a hone and got it where it needed to be. I should mention I had all the GM specs on an LS2 printed up and he had them for reference. I had the cylinders ran thru with a ball hone to provide a fresh surface for proper ring seating. New coated cam bearings. He boiled the block and cleaned the surfaces/checked deck. Polished the crank and piston pins ( LS2 floating wrist pins are nice) and balanced the rotating assembly. He checked all my main and rod clearances as well I did not have the mains honed as I was reusing the original main bolts. Here it is back from him after about a week.
New Cam bearings
Fresh cylinders prepped using exactly the ball hone type and grit recommended by Ed at Total Seal
I had the heads milled the bare minimum to provide a clean surface for the MLS gaskets to work with. They are hand ported 5.3 liter heads done by Absolute Speed. He did some good work back in the day. Unfortunatley he made bad bussiness decisions and went under. I run a 1.575 exhuast and 2.08 intake REV valves. The combustion chambers are just about 60cc's. I had the combustion chambers optimizing around the valves to take advantage of the new 4 inch bore. The 2.08 valve should now be able to move more air.
Thread Starter
9 Second Club
iTrader: (23)
Joined: Oct 2002
Posts: 1,150
Likes: 1
From: Mastic Long Island N.Y.

Now I need to file fit the rings. My buddy estimated ring weight for balancing that was done prior. I was leary of this but after the filing was done he was 1 gram heavy on his estimation when I had them weighed (I lost sleep over that). I spoke with Ed at total Seal on a couple of occasions he is a great guy to deal with and helped with relentless questions from me. Here are some pics of the file fitting process (long and tedious). Here is the ring squaring tool
Here is the ring filer I used I borrowed it from a friend
The stone I used for the deburring
I never plan on spraying this setup so I set ring gaps at 18 top / 20 2nd ring / and the oil rings needed no attention as they came within the specs I was given. I'll tell you I needed to order an extra 2nd ring as I filed all the steel top rings and went to file the 1st of the 2nd rings and they cut like melted butter compared to the tops. Blew the 1st one out to like 28 thous LOL. After that there was some real easy filing going on. Every ring gets labeled for the particular hole is is file fit to I finished the filing process had all my bearings back from the coater (I had a teflon coating applied) and I was ready to reassemble my shortblock.
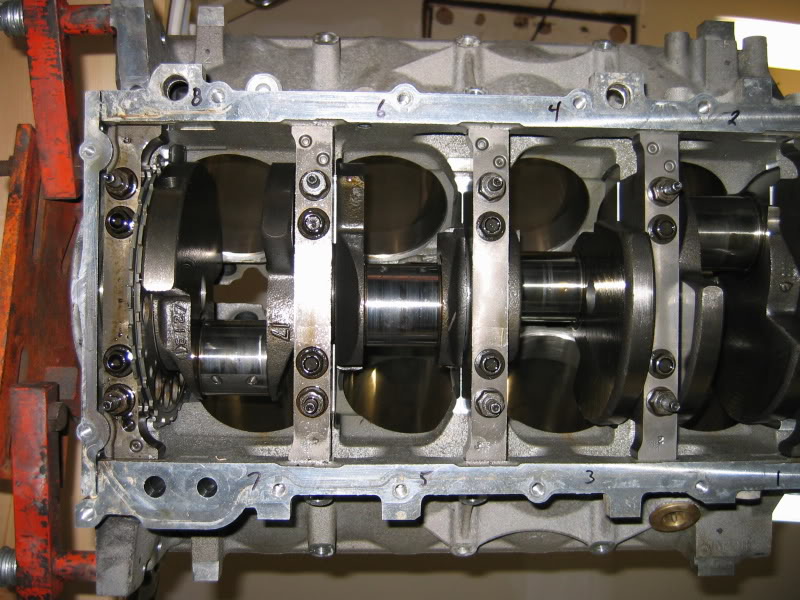
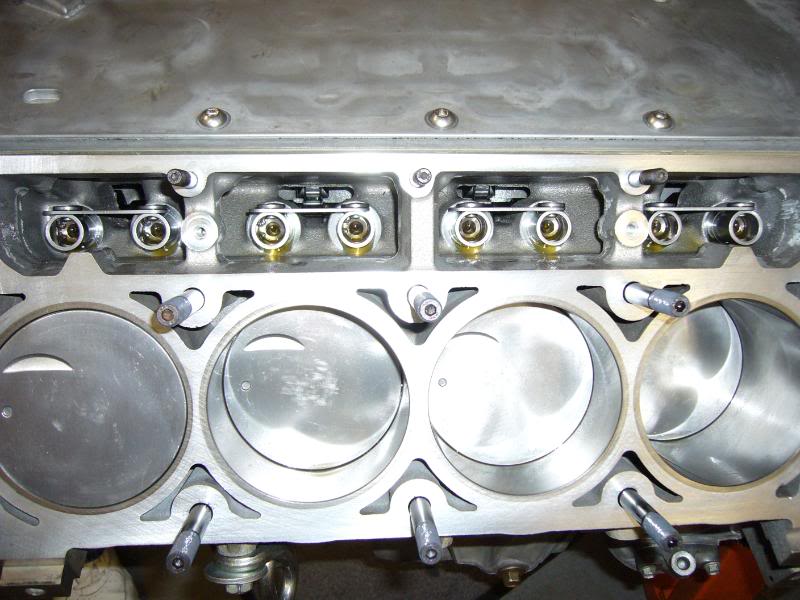
I layed the main bearing in and before laying the crank in I installed the camshaft into the block. Without the crank in the way it's nice and easy to get your hand in there and walk the cam into the block without beating the bearings up.
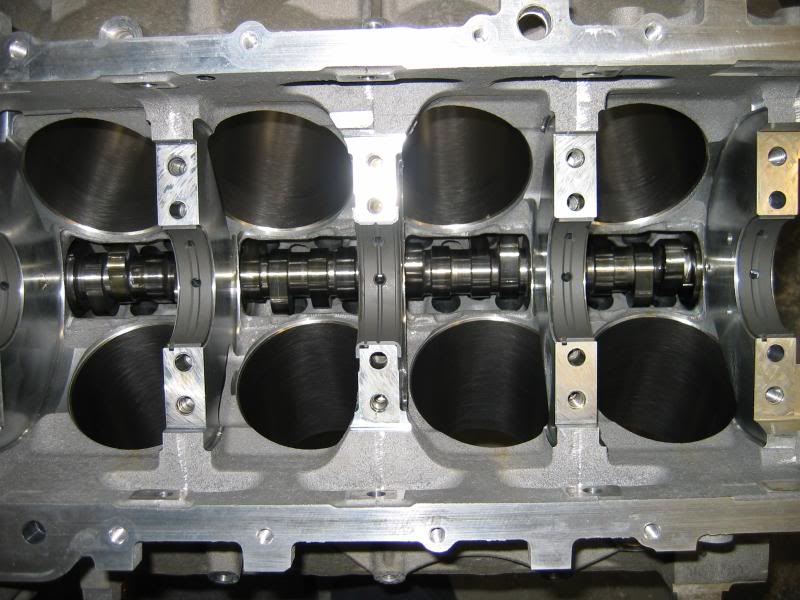
In with the crankshaft
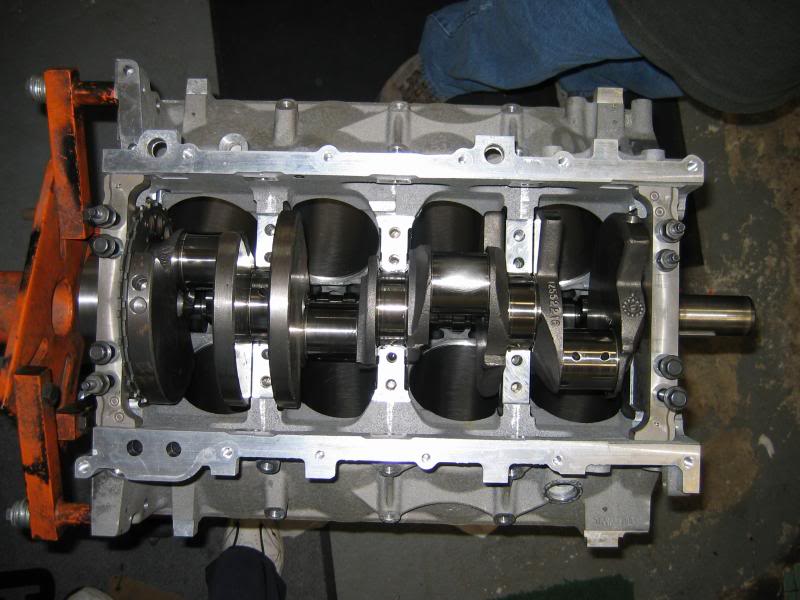
Maincaps go on get torqued and she glides like it's on air

The rings go on the pistons then along with the rods go into the block the Katech rodbolts get torqued and the shortblock is basically assembled. Yeah now we are getting somewhere.
I installed the windage tray and was ready for the pump/pickup
I chose to use a Melling 10296 oil pump and bought the BRP pickup tube girdle as well
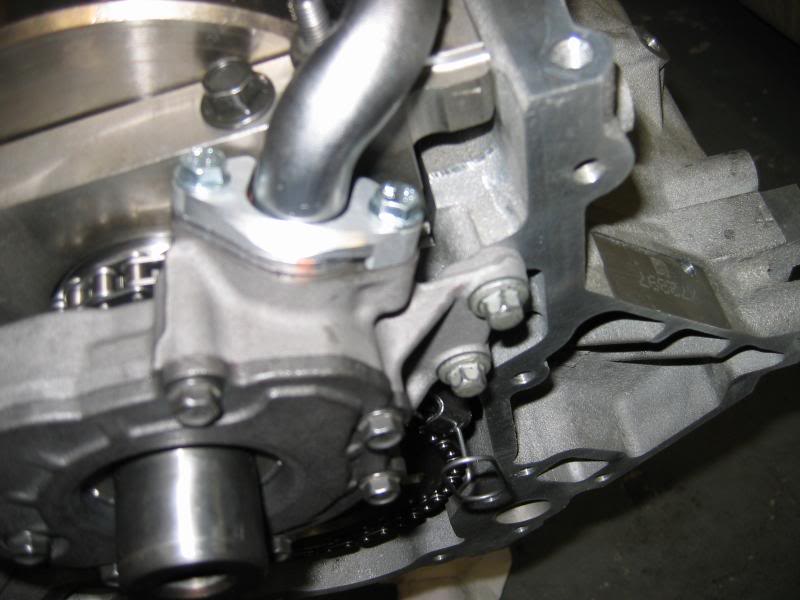
I used a Katech C5R timing chain and in this pic originally was going to use an LS3 chain tensioner until I was informed that there were several issues arising with failures. The tensioners were coming apart so I just reused the stock LS2 timing chain tensioner block.
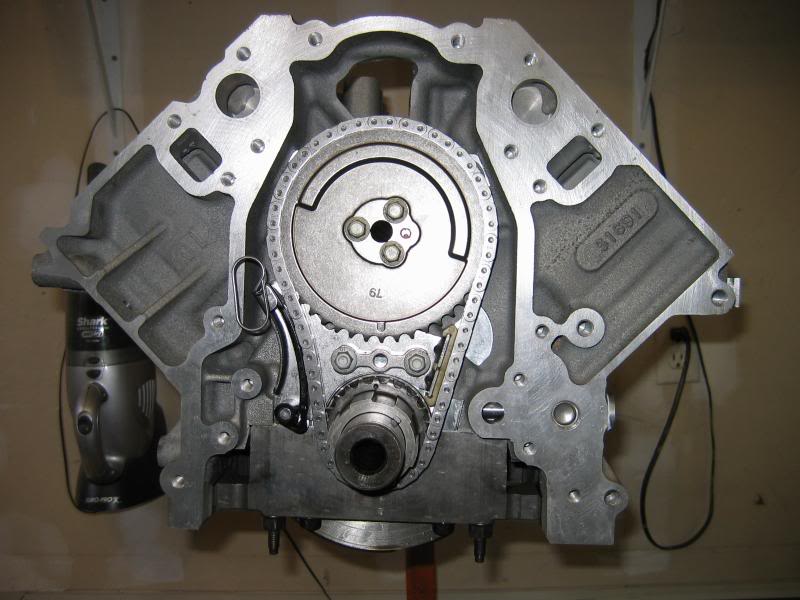
Front cover goes on

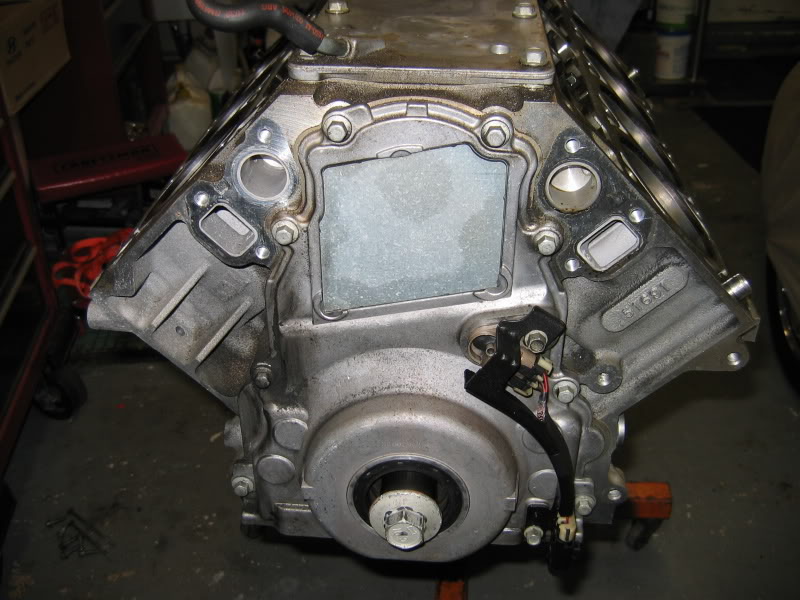
I replaced the barbell behind the rear cover installed a new rear seal and installed the rear cover (no pics of that sorry).
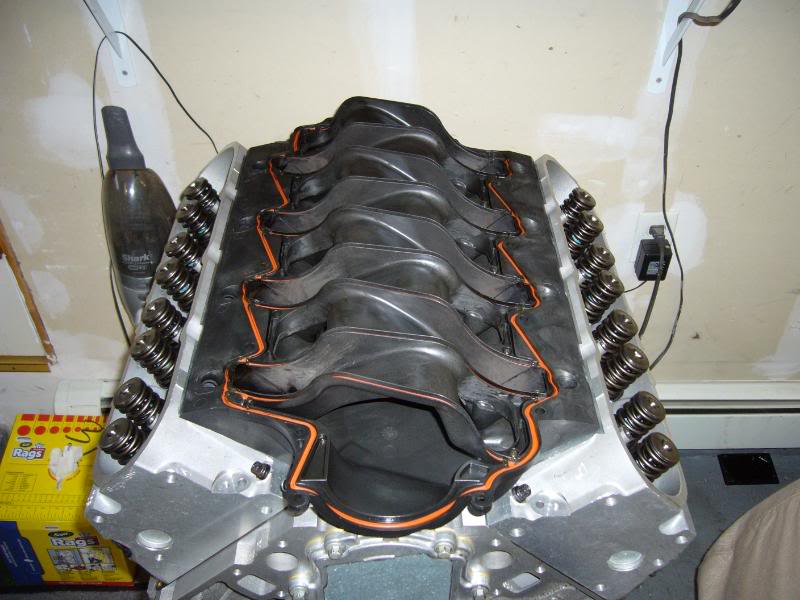
I installed the oilpan and valley cover next and it's lookin like a motor
Thread Starter
9 Second Club
iTrader: (23)
Joined: Oct 2002
Posts: 1,150
Likes: 1
From: Mastic Long Island N.Y.
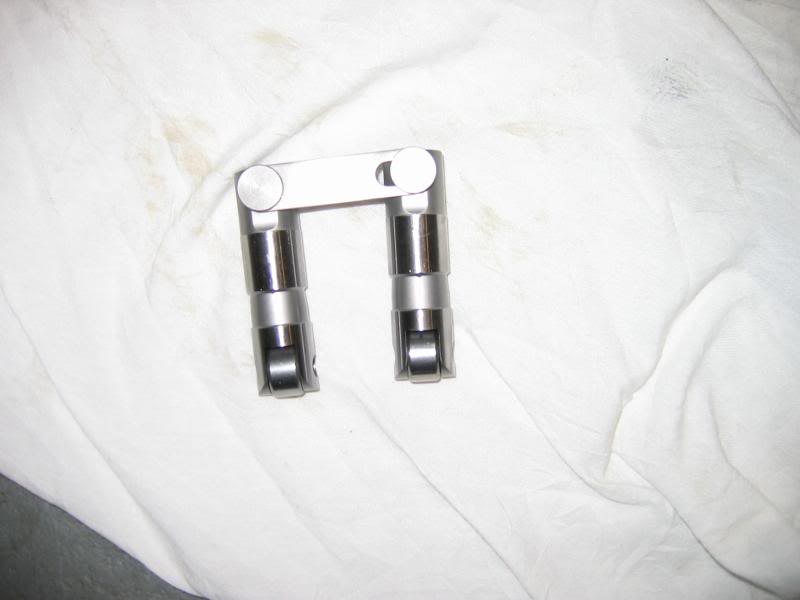
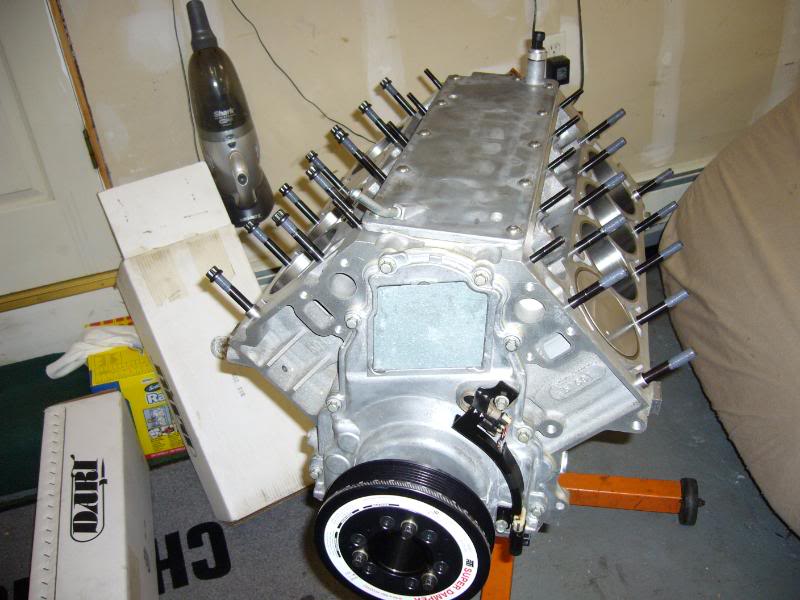
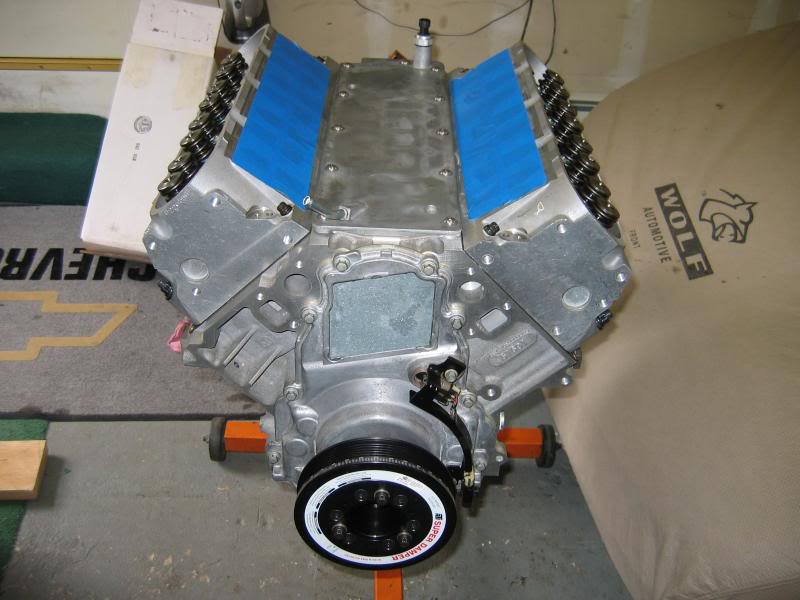
I spent a couple of bucks on the valvetrain. I am using the Morel linkbar style lifters. These I bought from Chris at CC Performance parts great vendor.
I used a set of Comp 921's and a custom ordered set of 11/32 Manton heat treated pushrods.
There is a fine art to setting up the LS valve train. There is an endless amount of configuring that needs to be done to get things setup properly to insure a stable valve train at high rpm. I have done A LOT of reading right here and learned a lot as well.
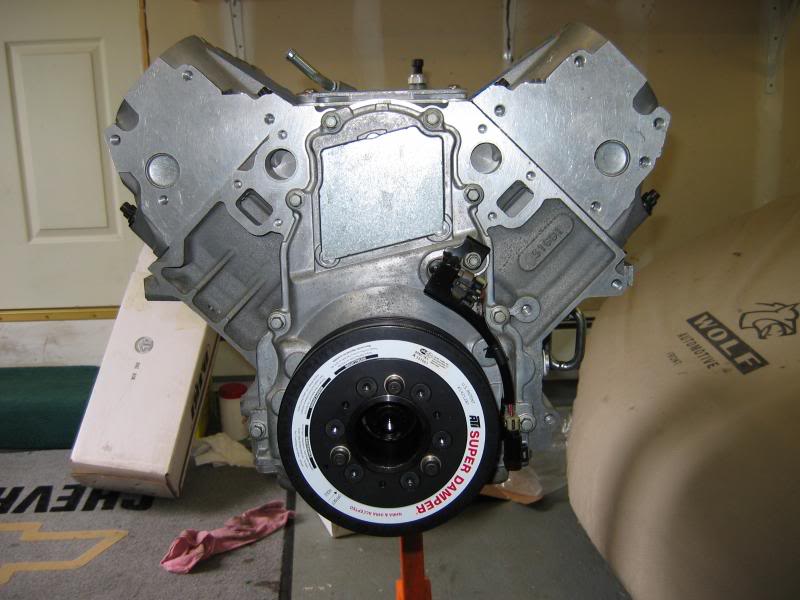
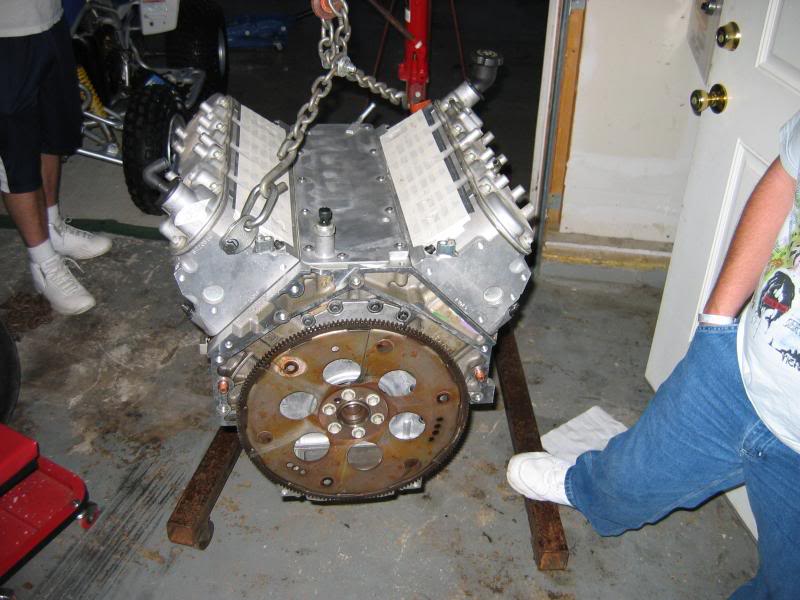
Next I installed the ATI 917277 balancer and I had a close friend give me a screaming deal on a set of ARP head studs
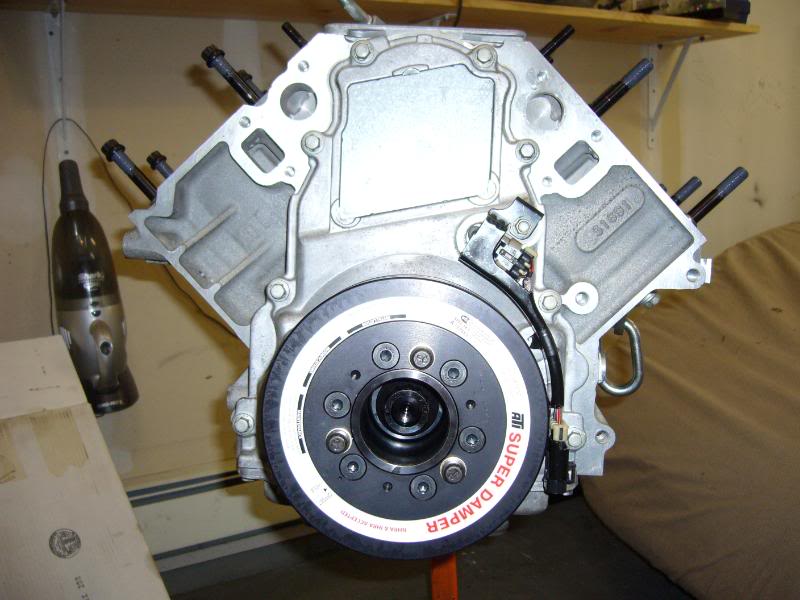

It was time to put the heads on and she is really looking like an LS motor now!
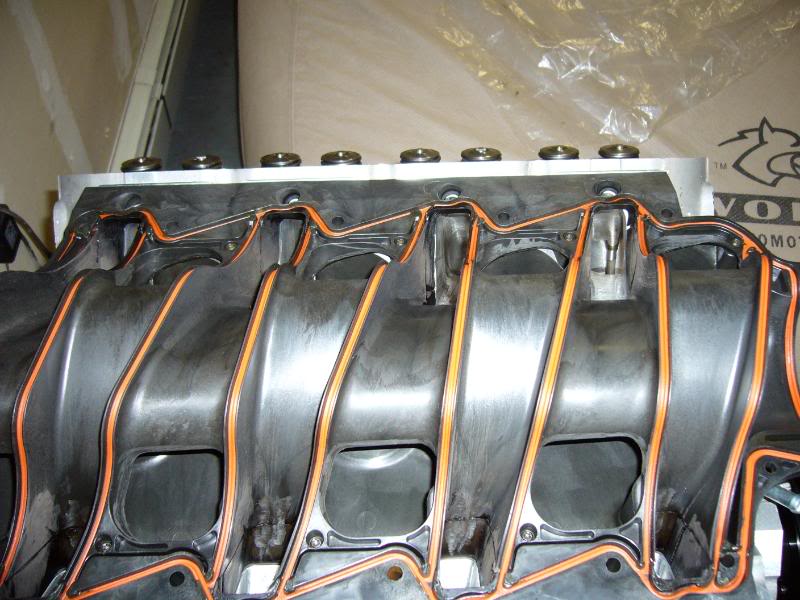
I removed the cover of my FAST intake to check intake runner opening to intake port alignment. I found that the intake can be shifted slightly from front to back. Doing so puts the port alignment off a lil bit and results in a slight shoulder being exposed and what I thought would disrupt airflow. I made sure before I tightened the intake bolts I pulled the intake so it was seated forward giving the smoothest alignment.
I am using a Nick Williams 90mm throttle body with this intake.
For fuel I bought a Racetronix fuel pump and hotwire kit and bought a set of injectors from FIC another great vendor to deal with. I am using the stock fuelrails.
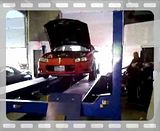
With the motor complete it was time to drop it back into the car

I threw a set of old valvecovers on so my painted ones did not get beat up during install
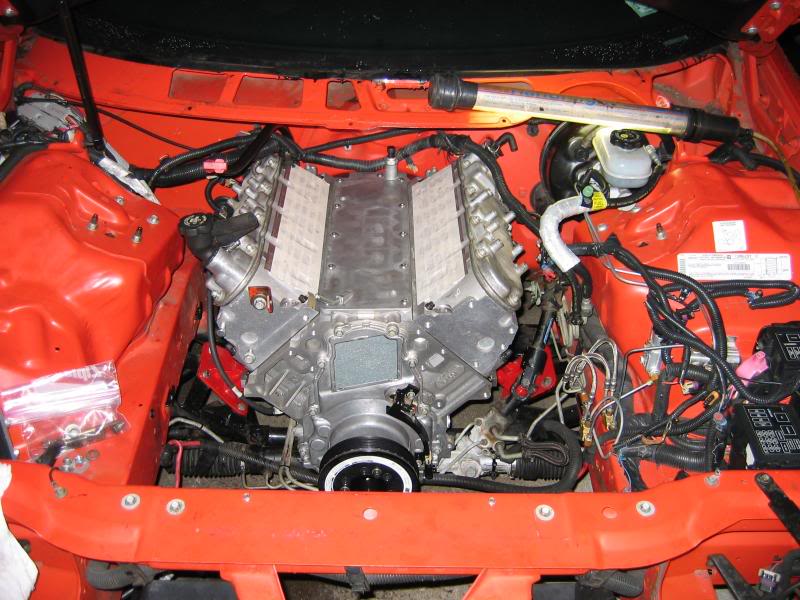
The new home

Exhuast I bought a set of ARH 1 7/8 headers and Y pipe truly a work of art and fitment is perfect. Excellent company to deal with and they are in my opinion the best headers on the market today.
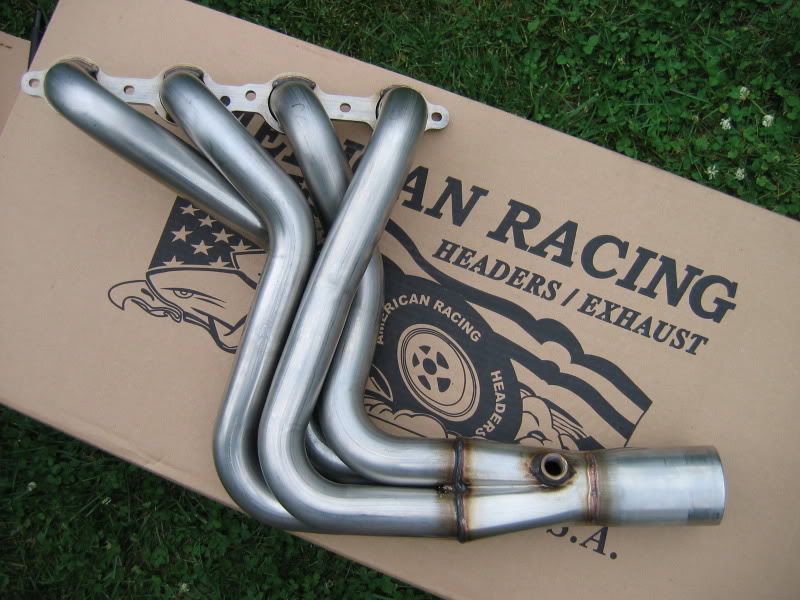
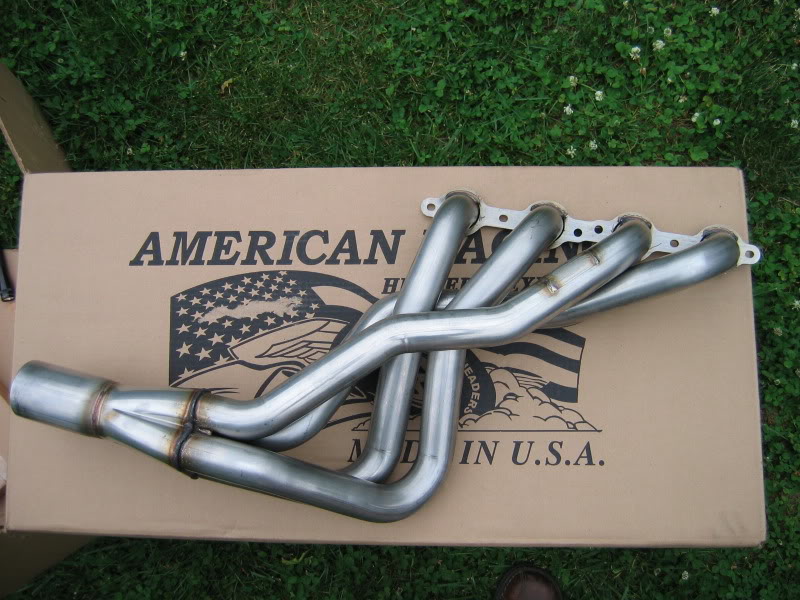
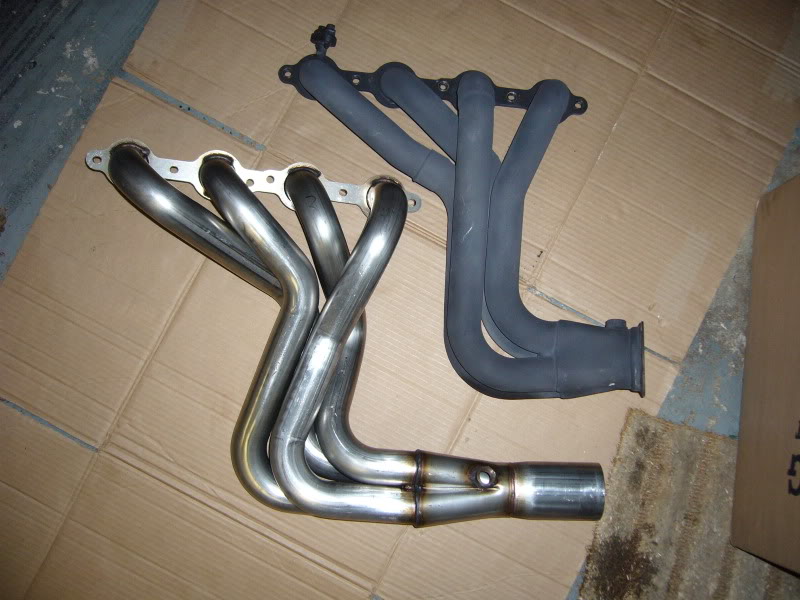
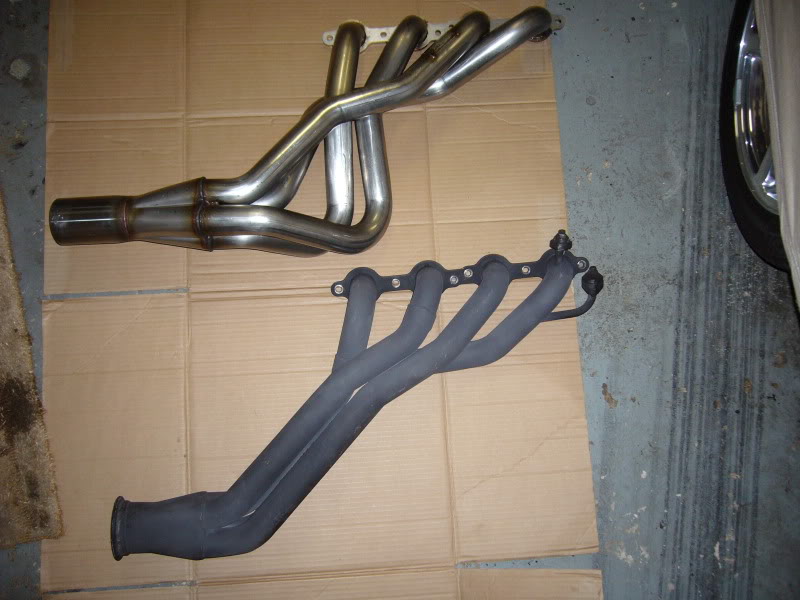
This is them next to the 1 3/4 FLP's I had been running for many years
It is a single 4 inch exhuast after the Y pipe and sounds wicked thru these ARH's. I think that just about covers the build itself I may have left some things out. This was a long painstaking process that did save me some money. I have an idea a newfound respect for what enginebuilders go thru and in reality this build just scratches the surface. Compared to some builds I have seen this is a welfare project LOL.
I had the car tuned locally here on Long Island by Kaltech tuning. They did a great job and I am very happy with the Speed Density Tune that was done there. If your in the area and need a tune done he doea great work. This was done on a Mustang dyno. My car 2 weeks before it ran the times in my signature made 405 SAE HP on a dynojet. Yesterday it made 451 RWHP on a Mustang dyno that typically reads about 15 less than a dynojet. I'd think it's a safe bet to think this would pull in the mid 460's on a jet and that nets me just about 60 rearwheel horsepower. Not bad thru a Performabuilt 4L60E with a Circle D 5K stall and a Moser 12 bolt. I will say this fall should bring me some numbers at the track that should firmly seat me up a couple of notches LOL. Here is a quick vid of a pull taken with my cell phone the quality is not that bad for a cell phone anyway. The converter is wickedly effecient as the HP curve carries FLAT all the way to 7K I wish I could post the chart up. From 5800 to 7K there is only a few hp variation so it's putting power down hard.
I'd like to say thanks you to some of the board members here who helped me along the way.
405HPZO6
Vettenuts
JOSEPH
JPH
there is one more I cant remember his name LOL but a big thank you for all the technical help you provided for me and provide this board with everyday.
I used a set of Comp 921's and a custom ordered set of 11/32 Manton heat treated pushrods.
There is a fine art to setting up the LS valve train. There is an endless amount of configuring that needs to be done to get things setup properly to insure a stable valve train at high rpm. I have done A LOT of reading right here and learned a lot as well.
Next I installed the ATI 917277 balancer and I had a close friend give me a screaming deal on a set of ARP head studs
It was time to put the heads on and she is really looking like an LS motor now!
I removed the cover of my FAST intake to check intake runner opening to intake port alignment. I found that the intake can be shifted slightly from front to back. Doing so puts the port alignment off a lil bit and results in a slight shoulder being exposed and what I thought would disrupt airflow. I made sure before I tightened the intake bolts I pulled the intake so it was seated forward giving the smoothest alignment.
I am using a Nick Williams 90mm throttle body with this intake.
For fuel I bought a Racetronix fuel pump and hotwire kit and bought a set of injectors from FIC another great vendor to deal with. I am using the stock fuelrails.
With the motor complete it was time to drop it back into the car
I threw a set of old valvecovers on so my painted ones did not get beat up during install
The new home
Exhuast I bought a set of ARH 1 7/8 headers and Y pipe truly a work of art and fitment is perfect. Excellent company to deal with and they are in my opinion the best headers on the market today.
This is them next to the 1 3/4 FLP's I had been running for many years
It is a single 4 inch exhuast after the Y pipe and sounds wicked thru these ARH's. I think that just about covers the build itself I may have left some things out. This was a long painstaking process that did save me some money. I have an idea a newfound respect for what enginebuilders go thru and in reality this build just scratches the surface. Compared to some builds I have seen this is a welfare project LOL.
I had the car tuned locally here on Long Island by Kaltech tuning. They did a great job and I am very happy with the Speed Density Tune that was done there. If your in the area and need a tune done he doea great work. This was done on a Mustang dyno. My car 2 weeks before it ran the times in my signature made 405 SAE HP on a dynojet. Yesterday it made 451 RWHP on a Mustang dyno that typically reads about 15 less than a dynojet. I'd think it's a safe bet to think this would pull in the mid 460's on a jet and that nets me just about 60 rearwheel horsepower. Not bad thru a Performabuilt 4L60E with a Circle D 5K stall and a Moser 12 bolt. I will say this fall should bring me some numbers at the track that should firmly seat me up a couple of notches LOL. Here is a quick vid of a pull taken with my cell phone the quality is not that bad for a cell phone anyway. The converter is wickedly effecient as the HP curve carries FLAT all the way to 7K I wish I could post the chart up. From 5800 to 7K there is only a few hp variation so it's putting power down hard.
I'd like to say thanks you to some of the board members here who helped me along the way.
405HPZO6
Vettenuts
JOSEPH
JPH
there is one more I cant remember his name LOL but a big thank you for all the technical help you provided for me and provide this board with everyday.
Last edited by JFM-jr; Sep 2, 2009 at 06:31 PM.
Trending Topics
LS1 Tech Stories
The Best V8 Stories One Small Block at Time

Gas Monkey Built a 6-Wheel Ferrari Testarossa With a Corvette LT4 Engine
Verdad Gallardo
7 Most Reliable High-Performance Engines GM Has Ever Built
Verdad Gallardo
Amazing '71 Camaro Restomod Is Modern Muscle Car Under the Skin
Verdad Gallardo
6 Common C5 Corvette Failures and What's Involved In Repairing Them
Pouria Savadkouei
Retro Modern Bandit Pontiac Trans AM Comes With Burt Reynolds' Autograph
Verdad Gallardo
Top 10 Greatest Cadillac V Series Performance Models Ever, Ranked
Pouria Savadkouei
Top 10 Most Powerful Chevy Trucks Ever Made!

Hennessey's New Supercharged Silverado ZR2 Has 700 HP
Verdad Gallardo
Coachbuilt N2A Anteros Is an LS2-Powered C6 Corvette In Italian Clothes
Verdad Gallardo


What grit stone did you use? Your cylinders look a bit more coarse than mine ended up being....Oh and great build thread...I just assembled my first shortblock by myself about a week ago and I'm nervous about it starting up if you know what I mean...Also my crank didn't spin like "it was on air" ..The assembly lube was kinda sticky so I think that's what it was...but with all the pistons installed I can still turn everything over fairly easily...
Oh and do you have a pic of the LS2 Oil Pressure Sensor? Or did you use the older style so your connector would work?
Oh and do you have a pic of the LS2 Oil Pressure Sensor? Or did you use the older style so your connector would work?
Last edited by Petraszewsky; Sep 4, 2009 at 09:57 PM.


 I wish I could be there to see you run bro...
 Thanks for putting together such an informative thread. I've been dreading having to go through and assemble my new engine. It has me terrified that after 27 months of not having it running I am going to destroy or mess something up.