


C5 build thread
this is my current build taking place i am copying from another forum here.
Well bout time for a build thread.. I will be talking/doing this build thread in 3 phases.
1. The current build
2. The Maximizing the NA portion of the build and fixing any issues
3. The Nitrous part of the build
Im sure I will forget some **** etc…. but the bulk will be there.
First off I would like to give several people some some recognition.
First and foremost ….CBI, Country Folk, Ol boah, Android bicentennial man Chad Barton a much OVER DUE THANKS!!!!!!!!!!!!!! For helping me on this build and helping me build an awesome setup.
2. Josh Boooooomer for an awesome tune with no issues… car Cold starts and works excellent!
3. Bennnies from PURRRRRRRRR – for hooking me up on parts and going the extra mile on ****!
Phase 1
(fyi – this build has to be sometype of record as we finished it in 1 week lol)
Build Details
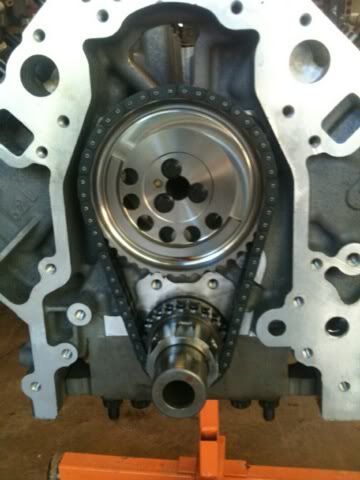
418ci Ls3 – 4.080 bore
Diamond gas ported nitrous pistons
Eagle 6.125 H-beam
Eagle 4” crank
LS7R Cam
Morel Link Bar lifters
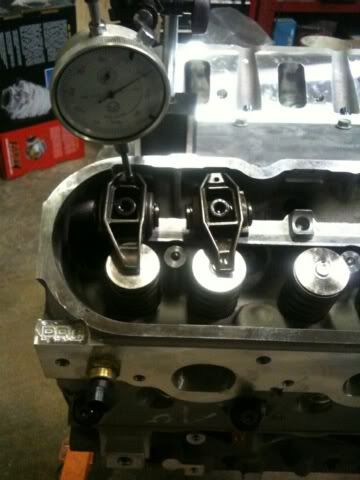
PRC CNC ported and milled LS3 heads
Comp .675 Max lift springs
Fast 102
NW ls3 102 TB
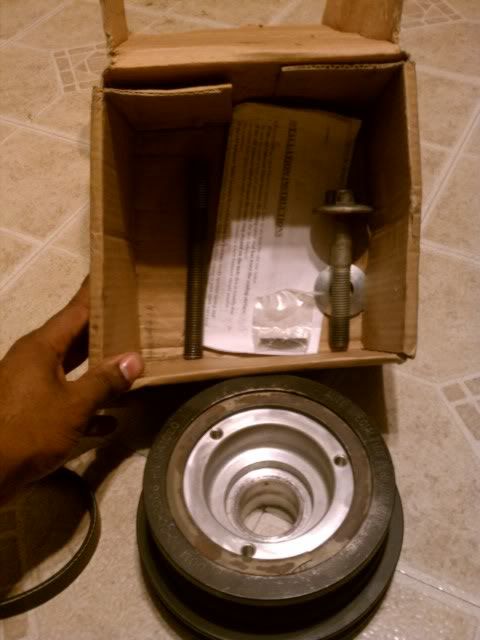
ASP 25% UD pulley
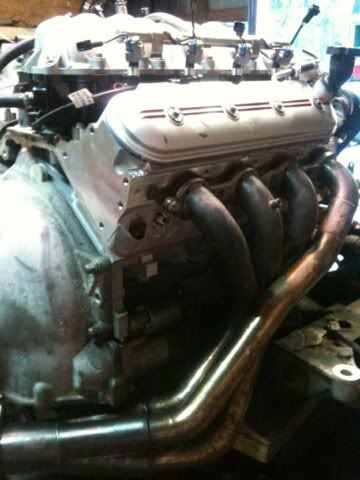
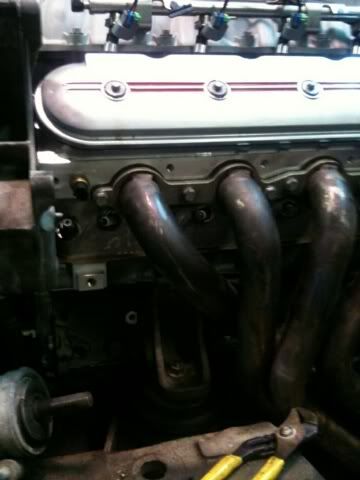
Kooks 1 � headers (the exhaust ports on the heads are bigger than these primaries)
Titanium z06 exhaust (bypass mod)
Centerforce DFX (biggest POS)
85mm Maf

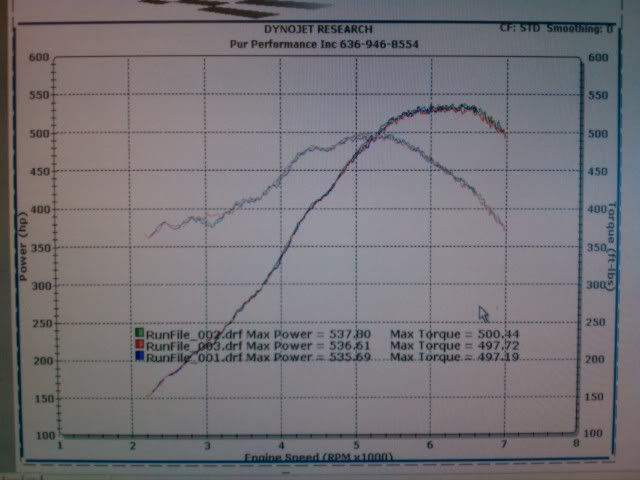
The car was dynoed with 200 miles on the setup so wasn’t quite broken in yet.. we will recover this in phase 2
I will Begin Phase 2 tommorow with explaining the issues and the fixes
Well bout time for a build thread.. I will be talking/doing this build thread in 3 phases.
1. The current build
2. The Maximizing the NA portion of the build and fixing any issues
3. The Nitrous part of the build
Im sure I will forget some **** etc…. but the bulk will be there.
First off I would like to give several people some some recognition.
First and foremost ….CBI, Country Folk, Ol boah, Android bicentennial man Chad Barton a much OVER DUE THANKS!!!!!!!!!!!!!! For helping me on this build and helping me build an awesome setup.
2. Josh Boooooomer for an awesome tune with no issues… car Cold starts and works excellent!
3. Bennnies from PURRRRRRRRR – for hooking me up on parts and going the extra mile on ****!
Phase 1
(fyi – this build has to be sometype of record as we finished it in 1 week lol)
Build Details
418ci Ls3 – 4.080 bore
Diamond gas ported nitrous pistons
Eagle 6.125 H-beam
Eagle 4” crank
LS7R Cam
Morel Link Bar lifters
PRC CNC ported and milled LS3 heads
Comp .675 Max lift springs
Fast 102
NW ls3 102 TB
ASP 25% UD pulley
Kooks 1 � headers (the exhaust ports on the heads are bigger than these primaries)
Titanium z06 exhaust (bypass mod)
Centerforce DFX (biggest POS)
85mm Maf
The car was dynoed with 200 miles on the setup so wasn’t quite broken in yet.. we will recover this in phase 2
I will Begin Phase 2 tommorow with explaining the issues and the fixes
PHASE2:
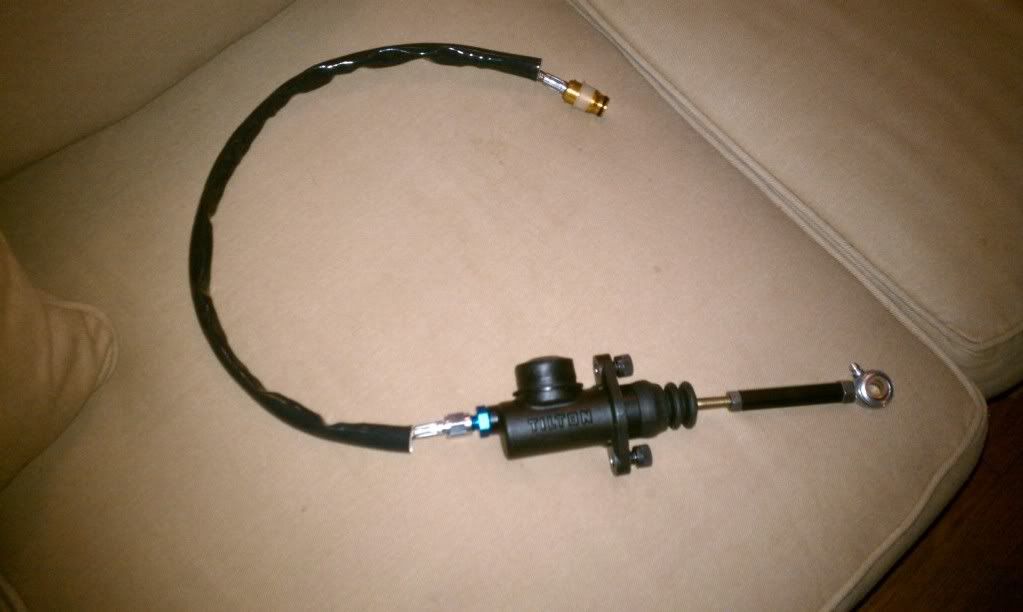
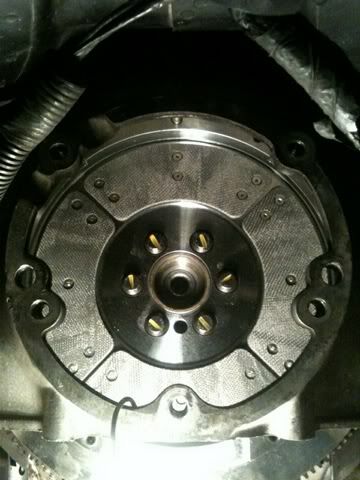
Since I Purchased the car it had 1 3/4 kook’s header and a brand new Centerforce DFX. We opted to just roll with what we had and take the build in stages. 2 huge problems arose with this decision. First off the 1 � primaries are smaller than the exhaust ports on the heads themselves Making for a huge restriction especially on an NA setup. Secondly, the clutch…. Sigh…. Has to be the biggest frustration and annoyance I have with the car. It would not let me shift above 4500rpm among other things (seems to be a known issue that the centrifugal weight system tended to bend the fingers on the PP during high RPM driving. I had purchased a Tick performance Master Cylinder to fight this issue to no avail. Regardless the purpose of Phase (2) is fix the current issues and to increase the power of the NA setup to reach our goal.
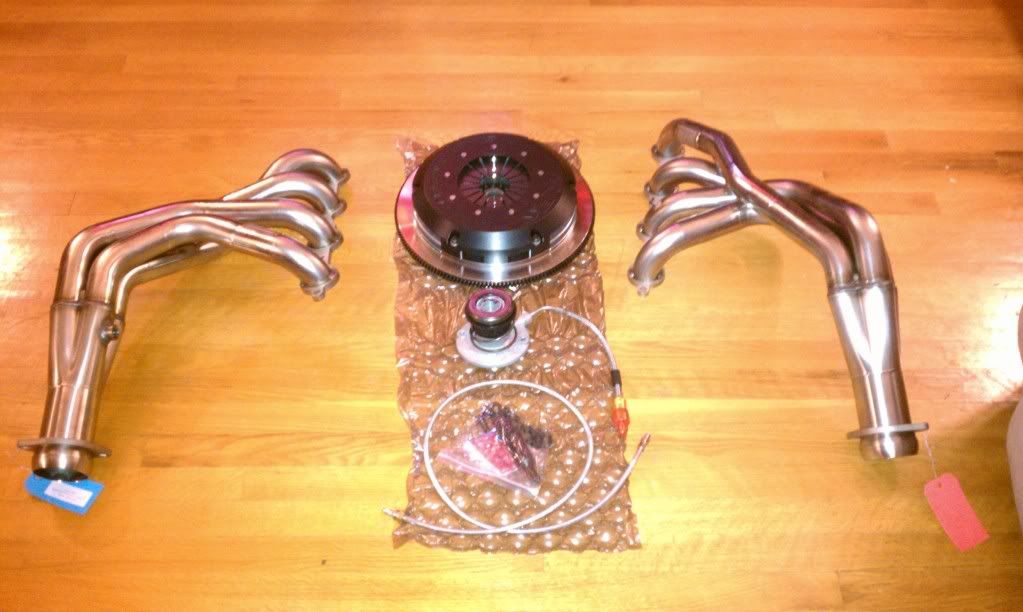
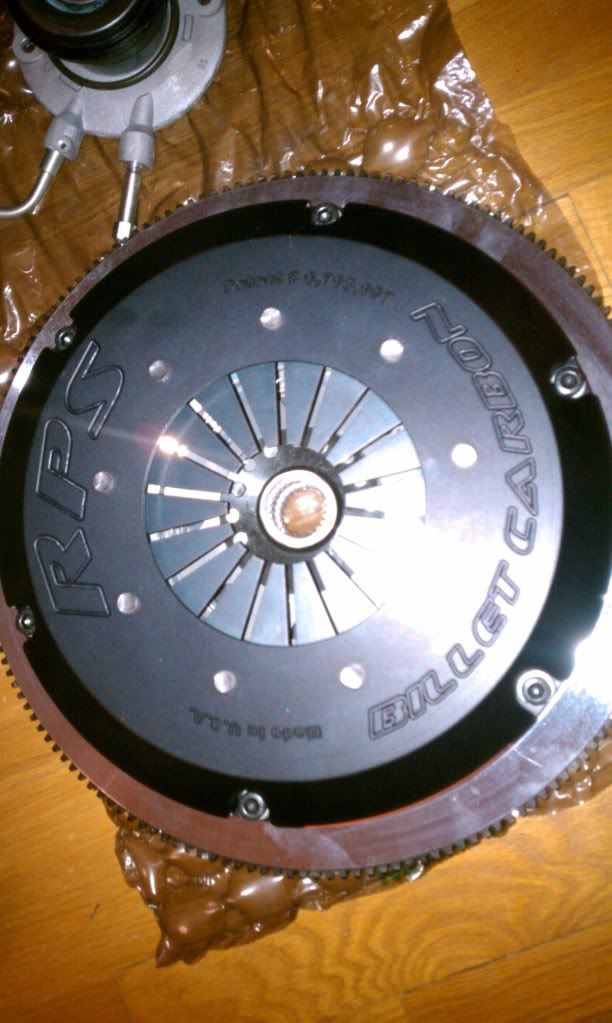
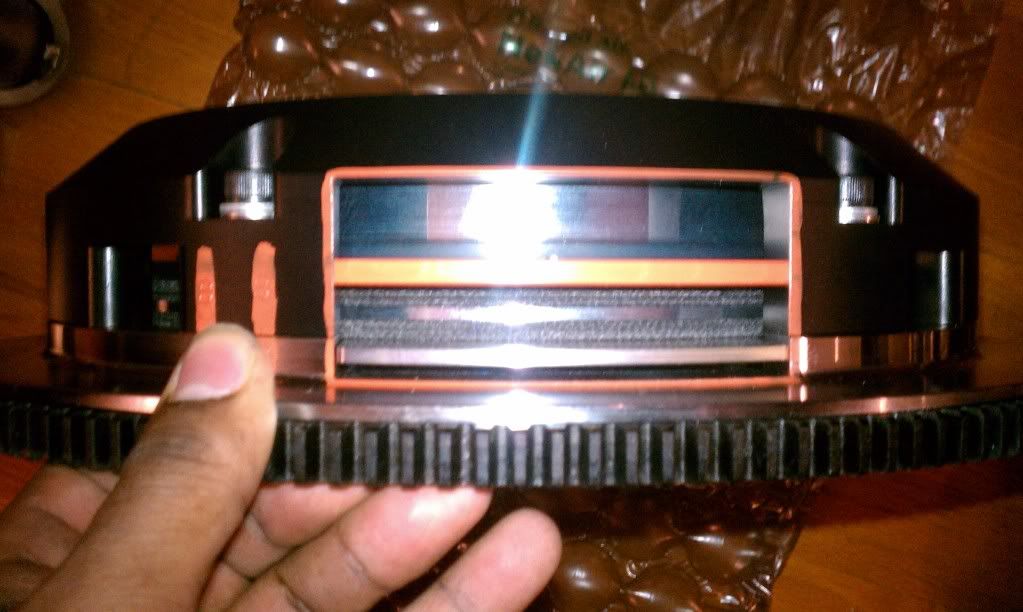
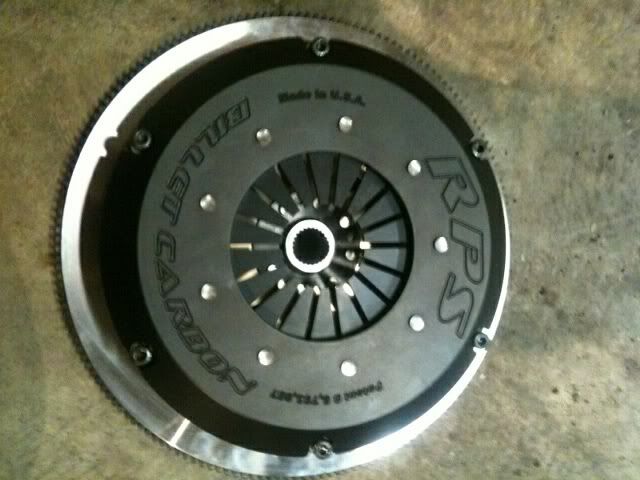
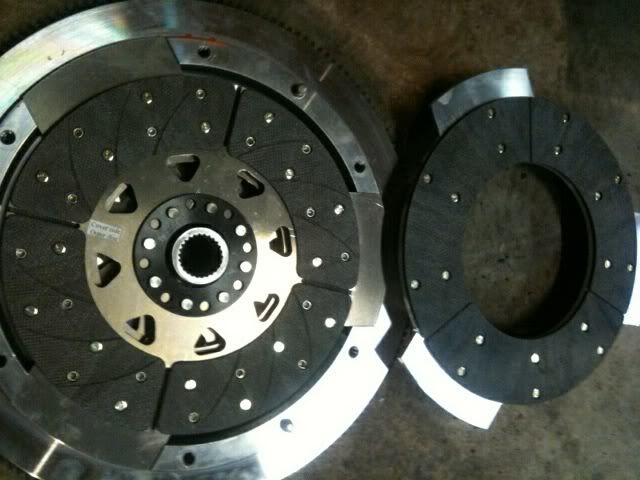
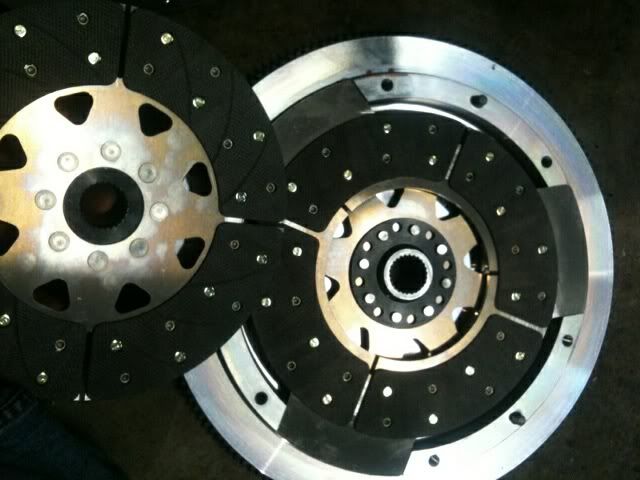
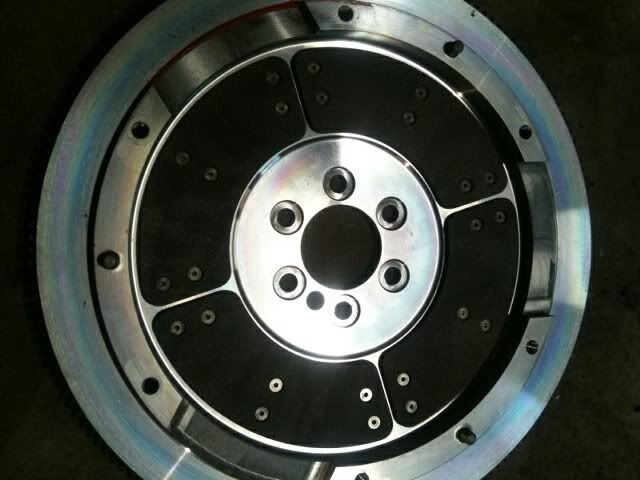
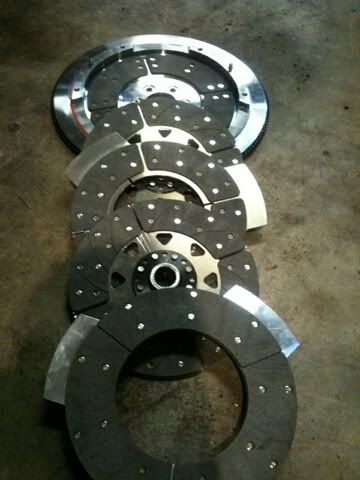
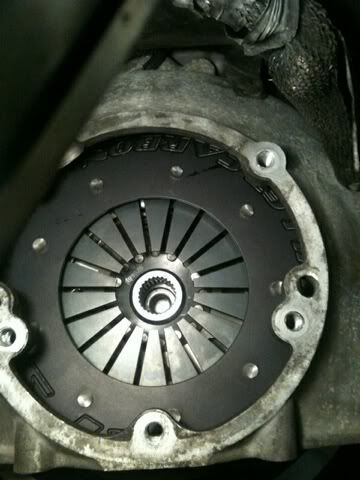
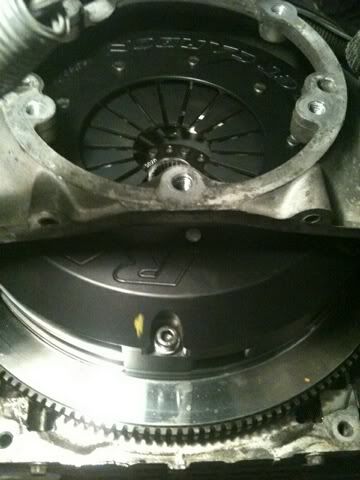
The Fixes- I have already purchased and installed the Tick Master Cylinder. Now….. In Comes The RPS BC2 after giving it a good look over as I was trying to choose between the Mcleud RXt and RPS BC2 CBI and I recited the motto to this build and the overall idea we have practiced throughout it. “ RELIABILITY COST MONEY, SO WE BUY THE BEST **** WE CAN AND DEW WURK SON!”
Now for the Headers we opted to Go to 1 7/8 KOOKs headers as well as Porting and massaging out the 102 Fast as there is soooo much to be had in a high HP NA build from a good port job and big headers LET THAT BITCH BREATHE. Lol.. I will be posting results after these babies go on this week!
Since I Purchased the car it had 1 3/4 kook’s header and a brand new Centerforce DFX. We opted to just roll with what we had and take the build in stages. 2 huge problems arose with this decision. First off the 1 � primaries are smaller than the exhaust ports on the heads themselves Making for a huge restriction especially on an NA setup. Secondly, the clutch…. Sigh…. Has to be the biggest frustration and annoyance I have with the car. It would not let me shift above 4500rpm among other things (seems to be a known issue that the centrifugal weight system tended to bend the fingers on the PP during high RPM driving. I had purchased a Tick performance Master Cylinder to fight this issue to no avail. Regardless the purpose of Phase (2) is fix the current issues and to increase the power of the NA setup to reach our goal.
The Fixes- I have already purchased and installed the Tick Master Cylinder. Now….. In Comes The RPS BC2 after giving it a good look over as I was trying to choose between the Mcleud RXt and RPS BC2 CBI and I recited the motto to this build and the overall idea we have practiced throughout it. “ RELIABILITY COST MONEY, SO WE BUY THE BEST **** WE CAN AND DEW WURK SON!”
Now for the Headers we opted to Go to 1 7/8 KOOKs headers as well as Porting and massaging out the 102 Fast as there is soooo much to be had in a high HP NA build from a good port job and big headers LET THAT BITCH BREATHE. Lol.. I will be posting results after these babies go on this week!
Ok so Phase 2 is done
With the addition of the new intake and extremely light clutch the car is an absolute monster. throttle tip in and response is just crazy it is a rev machine. the clutch itself is amazing feel great when shifting and you have an awesome feel for clutch disengagement and contact point. i will be going back to the dyno end of week to see where i stand before the spray.
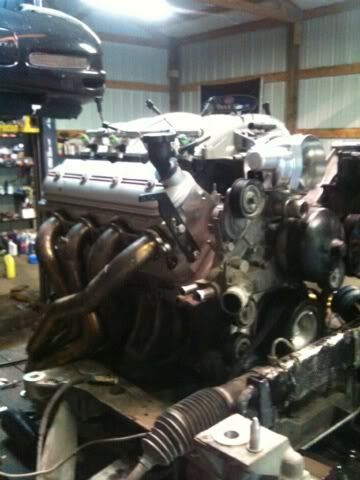
Phase 3 is all mounted up and ready to be wired.
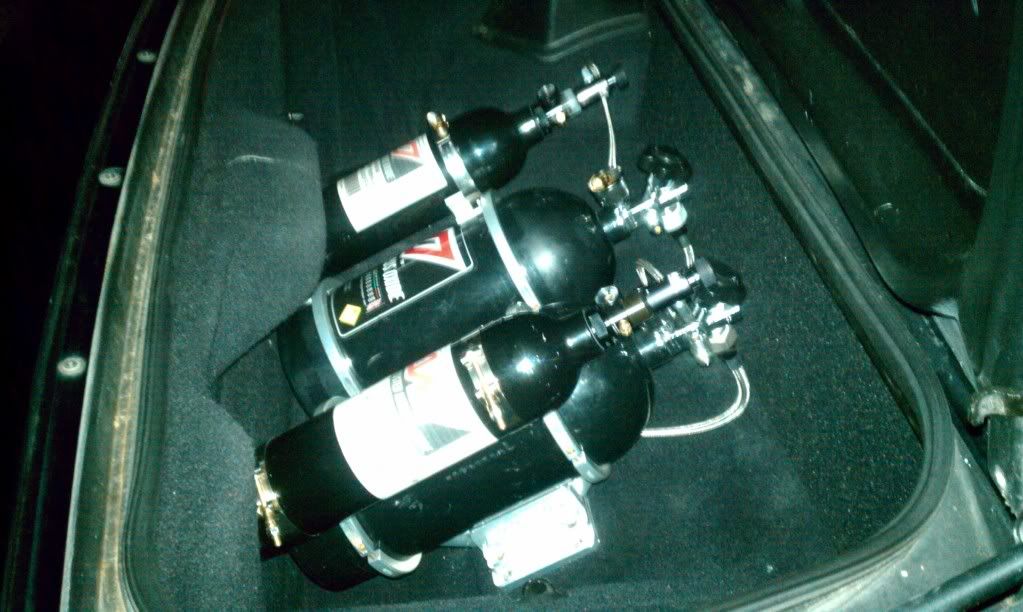
we went ahead and decided on a plate kit and will probably be adding a DP kit as a second stage to the system. the system consist of a 102mm plate kit and 2x 10lbs nitrous bottles and 2x Comp 4500psi Nano System along with a -6 to the front and a Fuel Standalone unit. this setup will be good for plenty of juice to both systems.
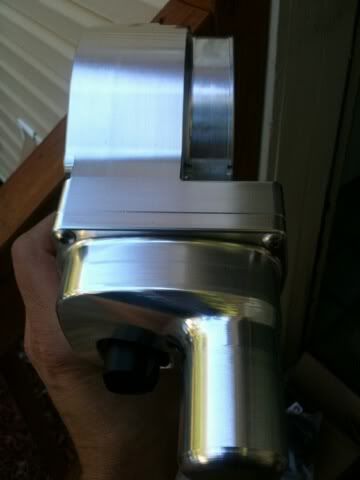
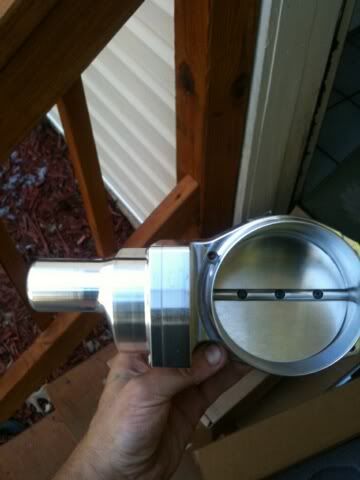
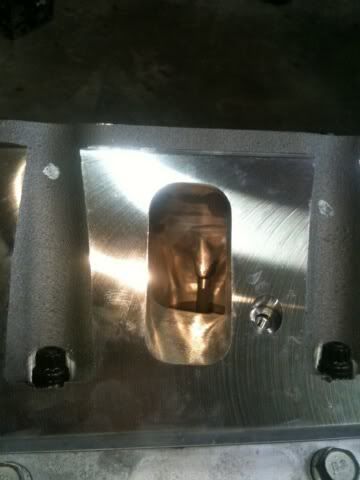
Feast your eyes below at the completed Fast porting it will def be awesome!
The RPS BC2 being installed.
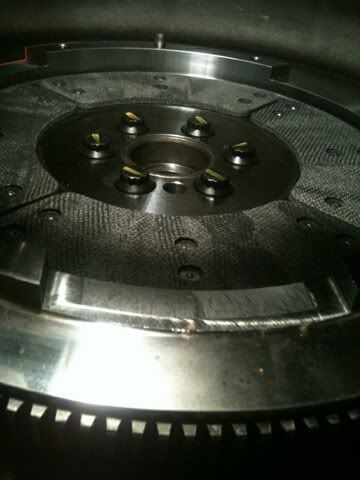
Phase 3 pics
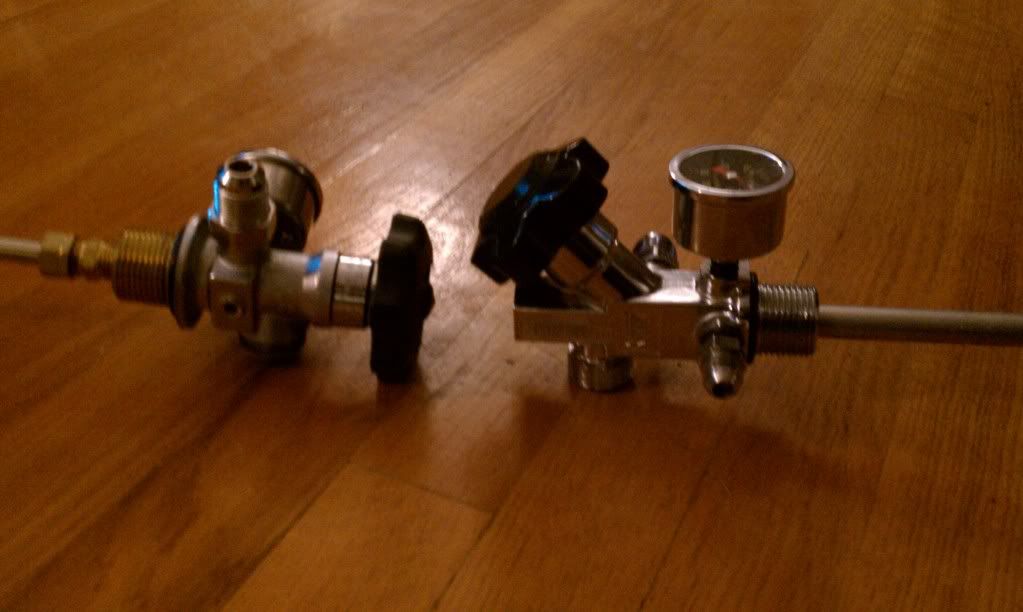
how many bottles ya need lol

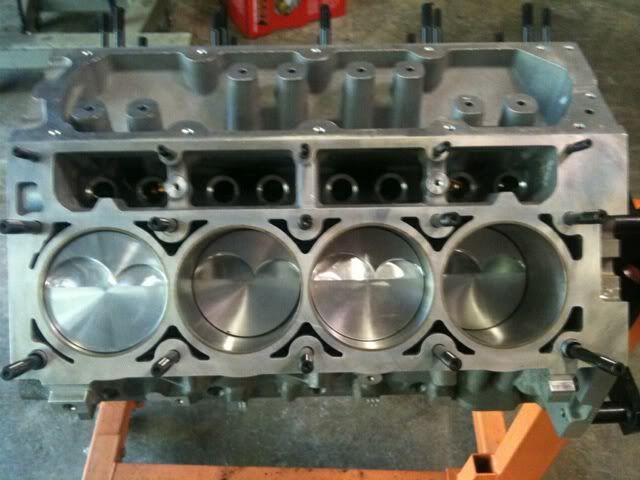
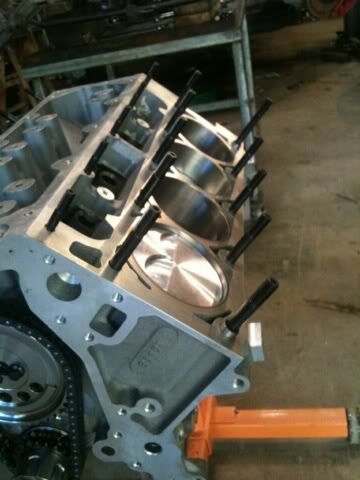
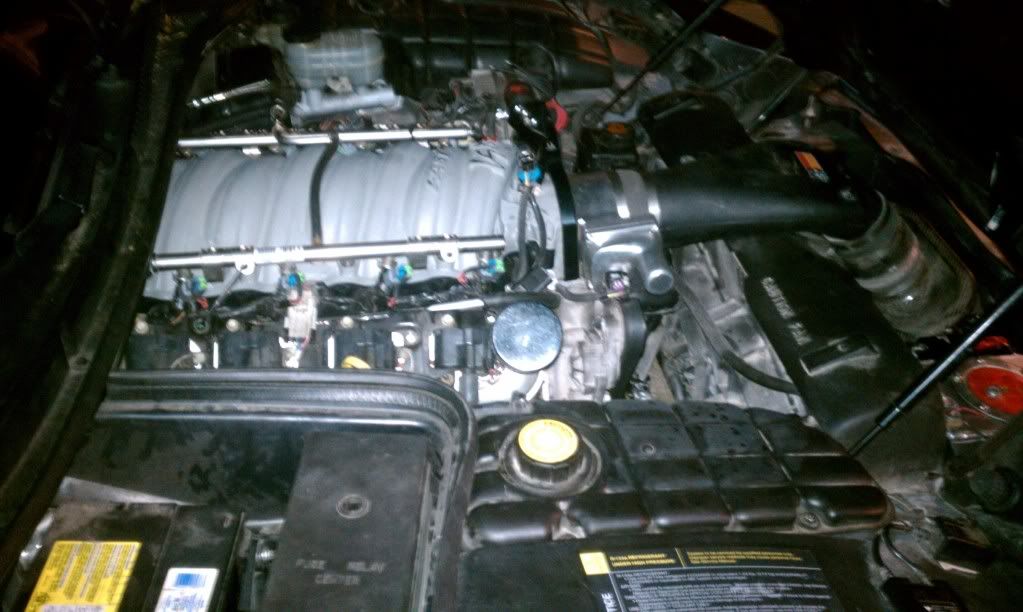
engine
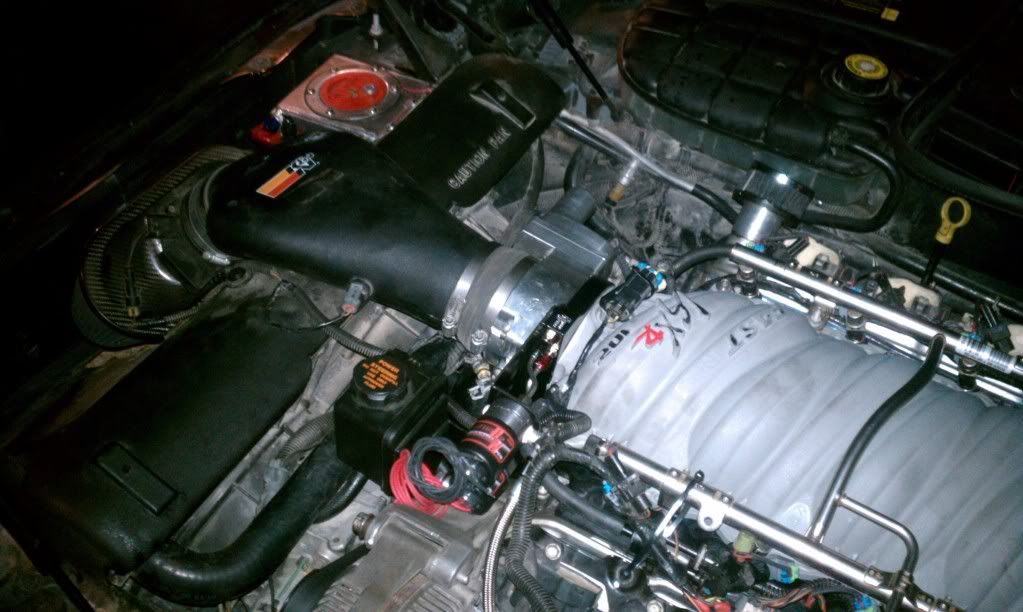
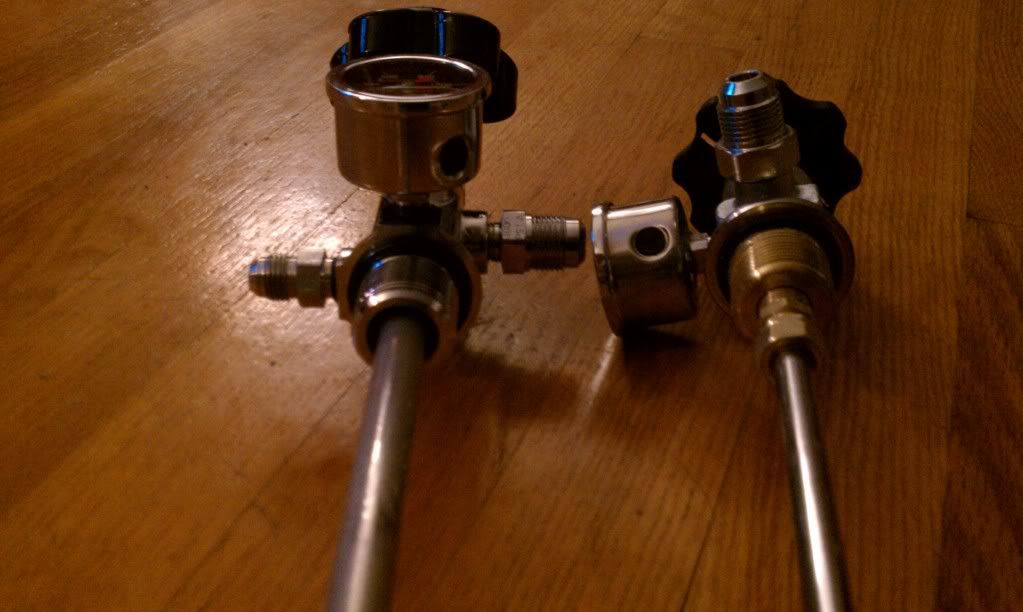
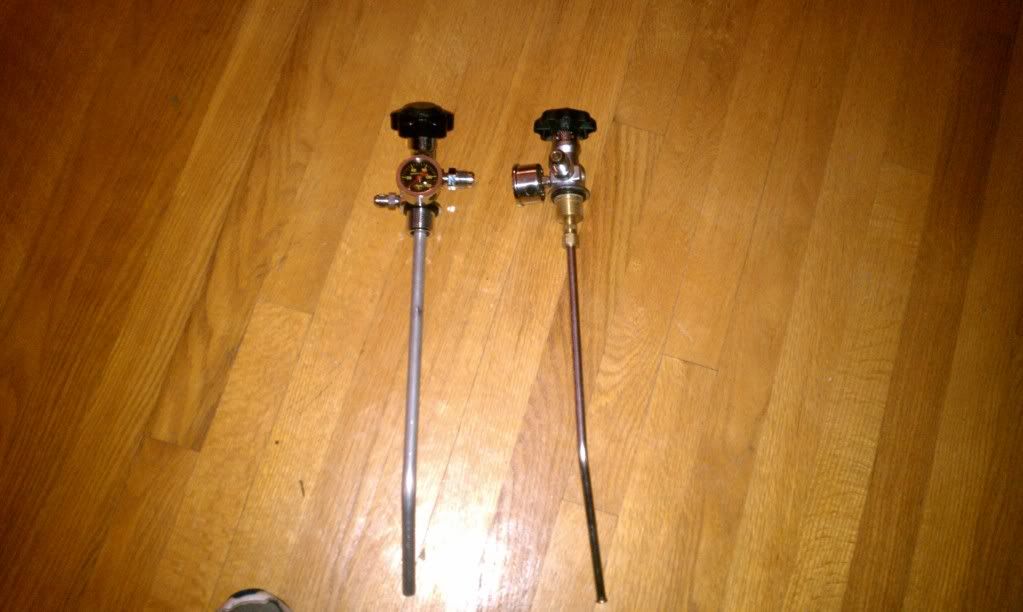
new nitrous valves which not only flow alot more but also allows to monitor bottle pressure without having to open the bottle. it also has 3 ports (nano, nitrous out, blow down) and a guage.

With the addition of the new intake and extremely light clutch the car is an absolute monster. throttle tip in and response is just crazy it is a rev machine. the clutch itself is amazing feel great when shifting and you have an awesome feel for clutch disengagement and contact point. i will be going back to the dyno end of week to see where i stand before the spray.
Phase 3 is all mounted up and ready to be wired.
we went ahead and decided on a plate kit and will probably be adding a DP kit as a second stage to the system. the system consist of a 102mm plate kit and 2x 10lbs nitrous bottles and 2x Comp 4500psi Nano System along with a -6 to the front and a Fuel Standalone unit. this setup will be good for plenty of juice to both systems.
Feast your eyes below at the completed Fast porting it will def be awesome!
The RPS BC2 being installed.
Phase 3 pics
how many bottles ya need lol
engine
new nitrous valves which not only flow alot more but also allows to monitor bottle pressure without having to open the bottle. it also has 3 ports (nano, nitrous out, blow down) and a guage.
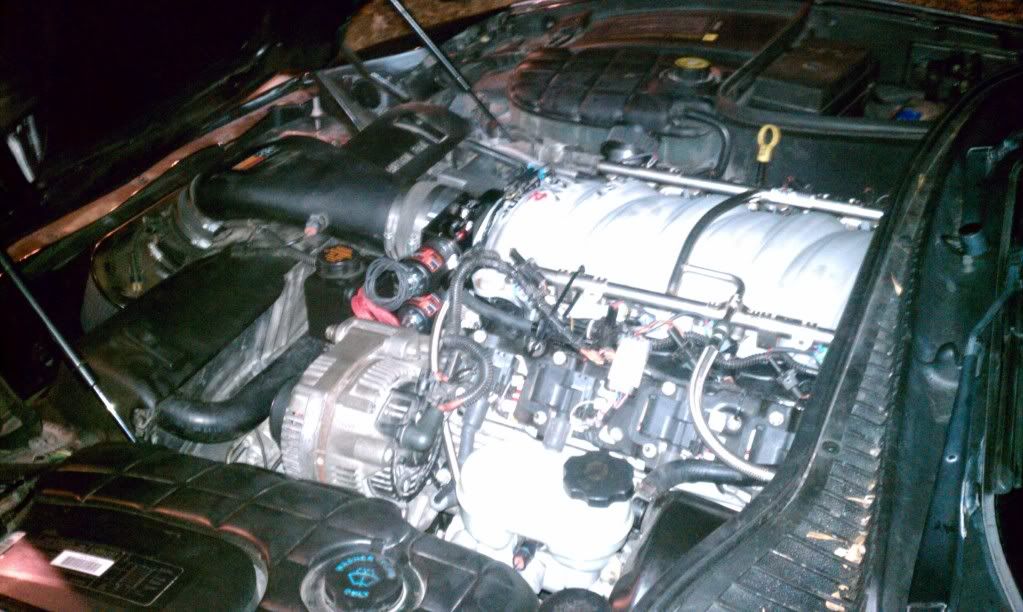
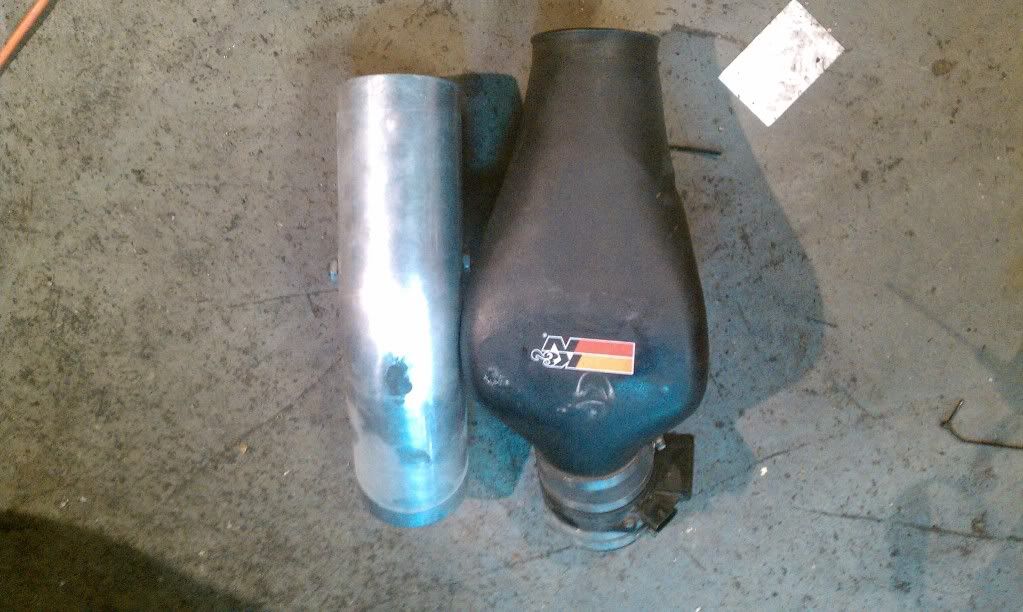
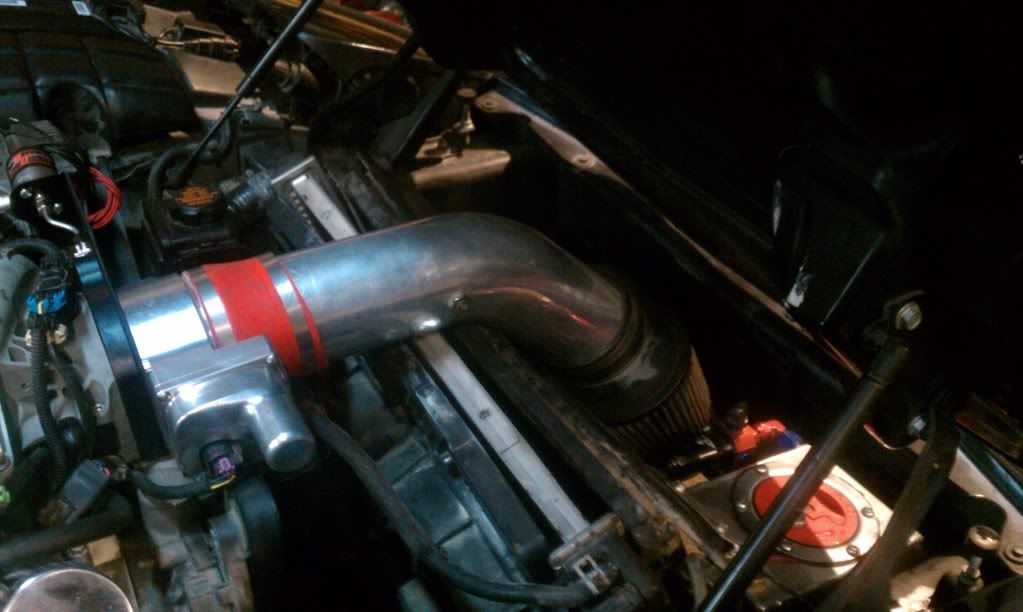
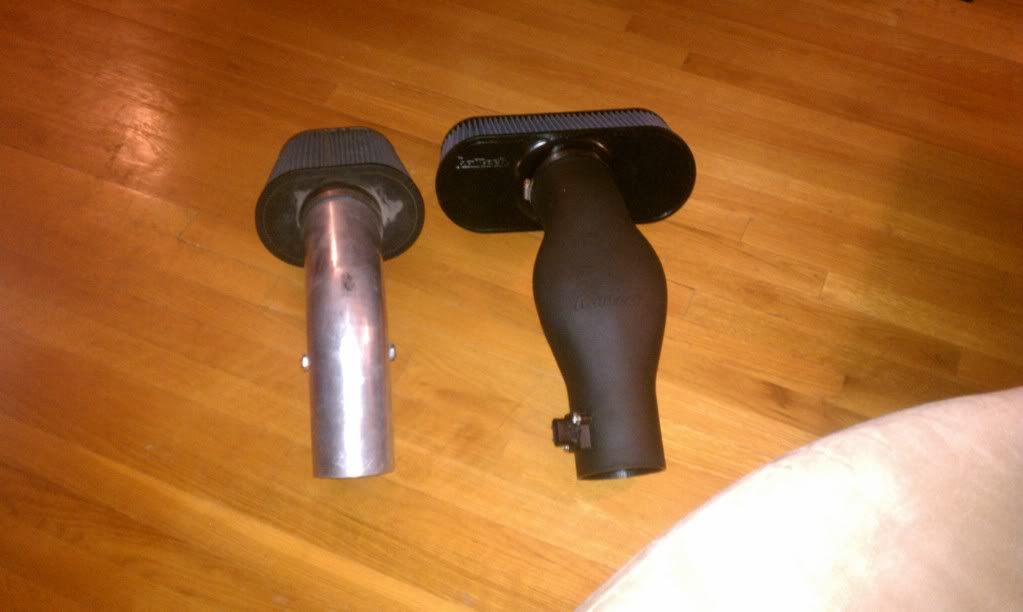
In an effort to squeeze every last bit of na power out of the setup we have came to the conclusion that the current intake on the car will just not due. you can monitor or somewhat see if u have an intake side restriction by looking at the kpa during a full pull and seeing if it lumps over etc... and at what point during the rpm band. the current intake track consist of a hogged out fat 102 and 102 tb to only be restricted by a k&n intake and 85mm maf. we will be swapping these components in favor of a true 4in pipe from the TB all the way to the filter itself and doing away with the maf and converting to full SD mode. If we cant get good driveability out of it i will purcharse a ls7 card style maf that can adapt to any size pipe and give better resolution. to be able to use a 4" pipe in a c5 you have 2 optons either by a cowl hood with enough clearance or drop the radiator and lean it back some. we opted for option 2 as i have done it on the my red c5 and it was rather painless quick and easy to do as well as cost effective. If everything goes well over the weekend we will be paying a visit to the dyno to see what we can muster up.
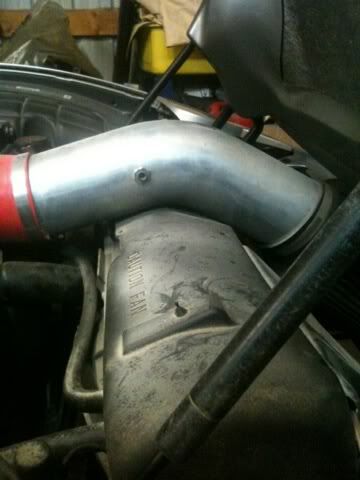
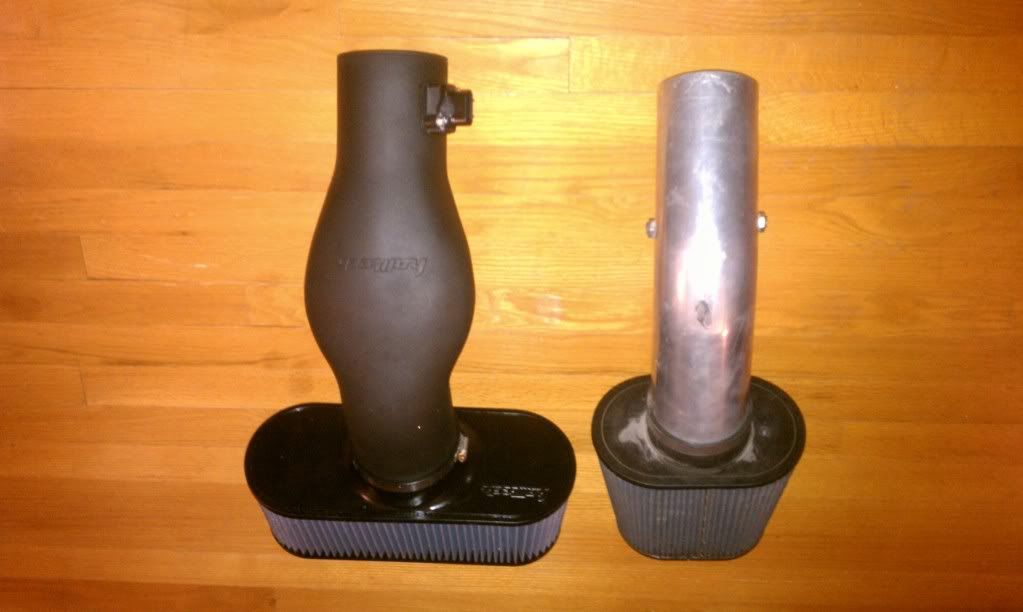
here is my current intake setup

here is what we plan to do
here is my current intake setup
here is what we plan to do
Last edited by dasorcha21; Dec 16, 2010 at 11:37 AM.
So more updates almost there... cant wait!
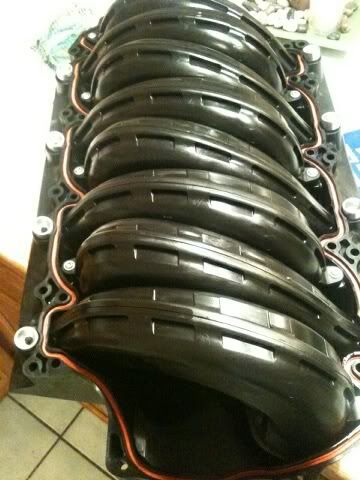
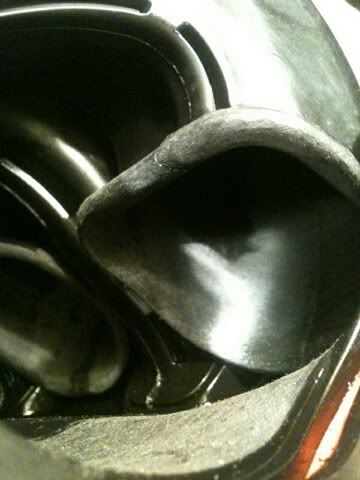
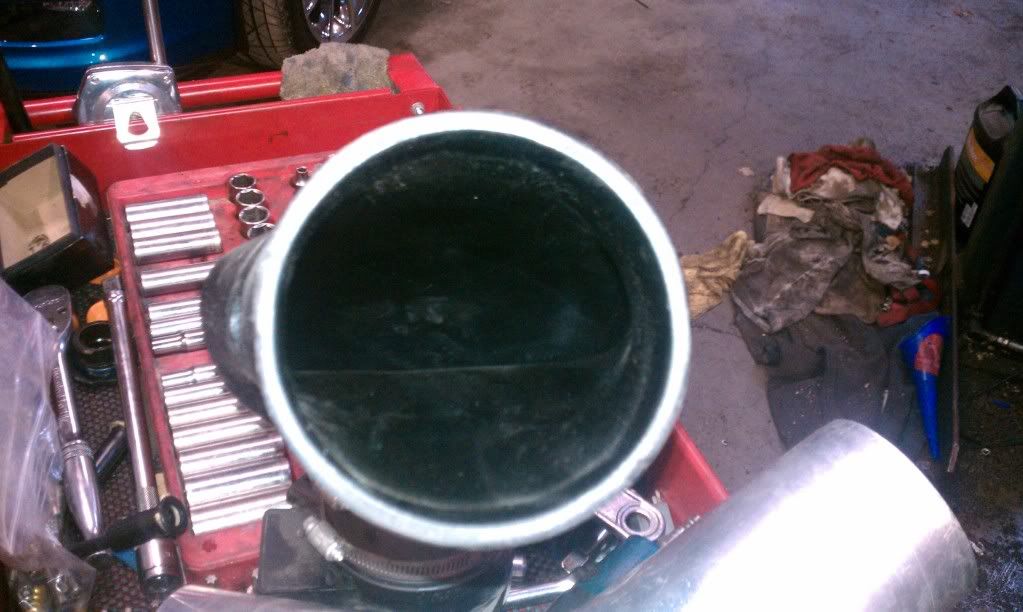
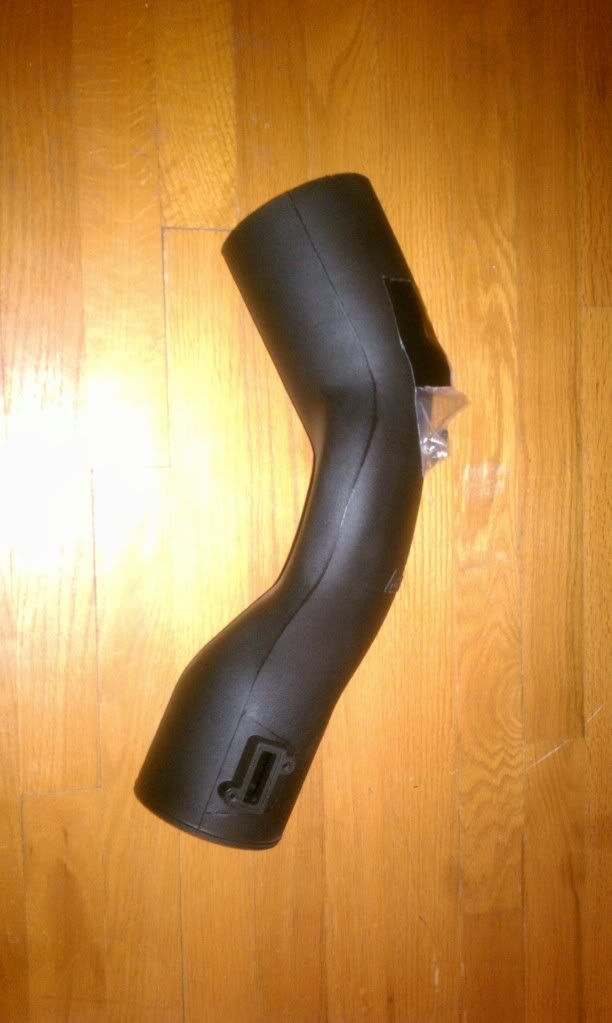
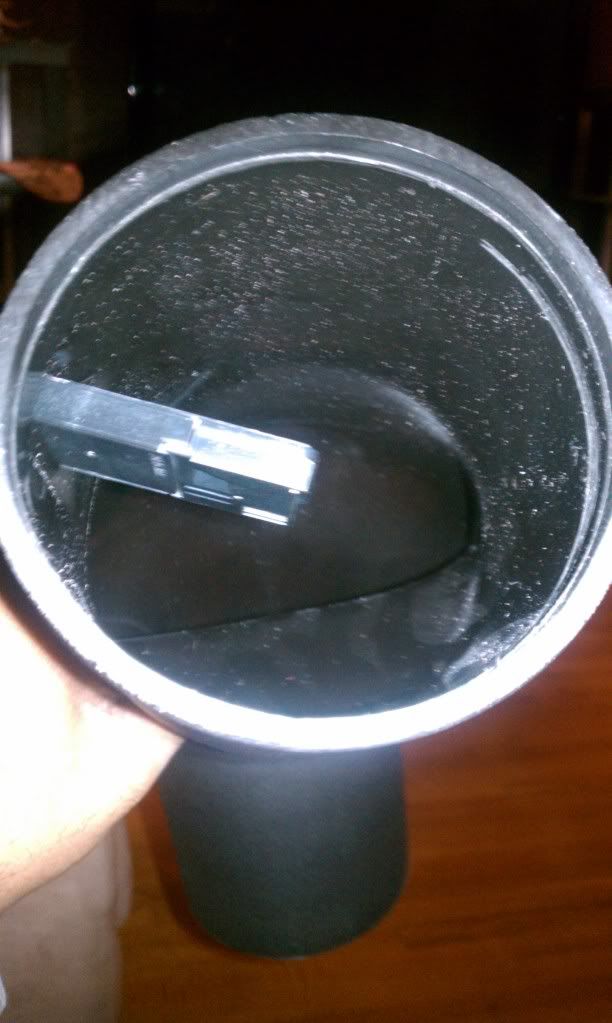
So i was able to swap out the intake out rather easily. I took a couple of pictures to show the differences of the intake path and the inside flow path of both.
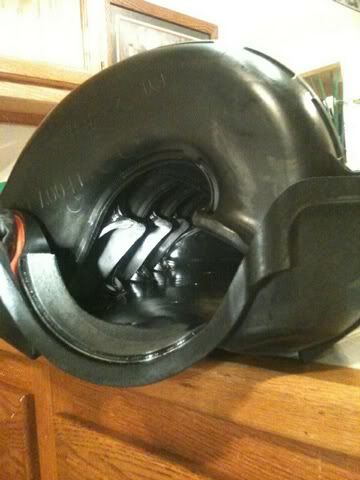
This first picture really shows how bad the first intake was as it was not smooth and had a few humps going from big to small and back to big. These inconsistencies cause air turbulence further hindering performance. also keep in mind this intakes ID was well below 3"
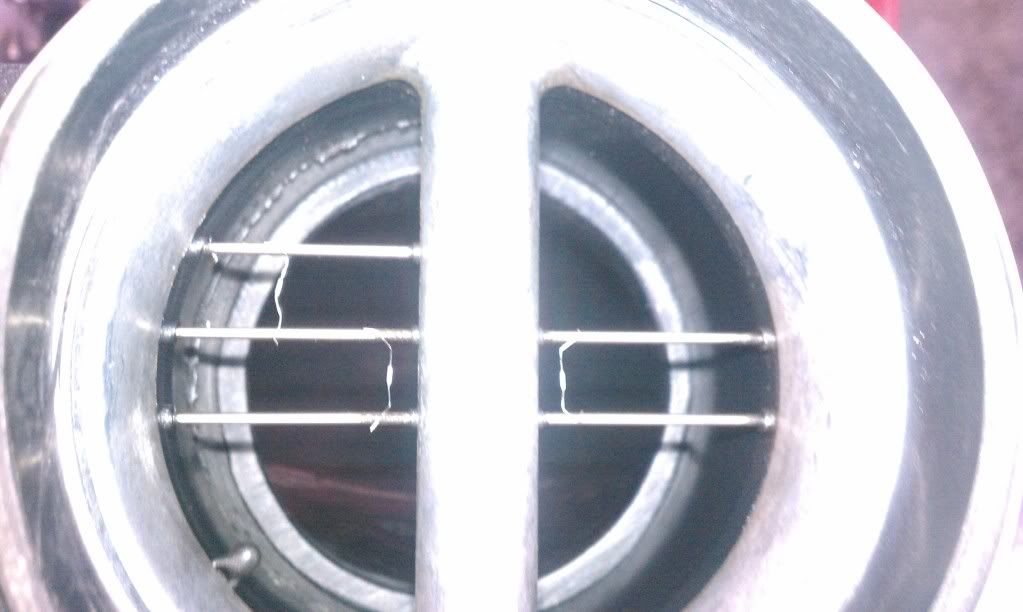
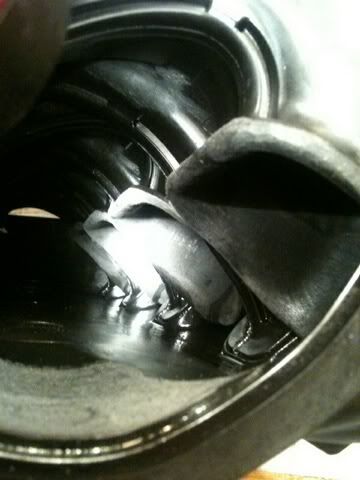
Also comes the fact that the intake dam near flattens like a pancake further reducing potential flow.
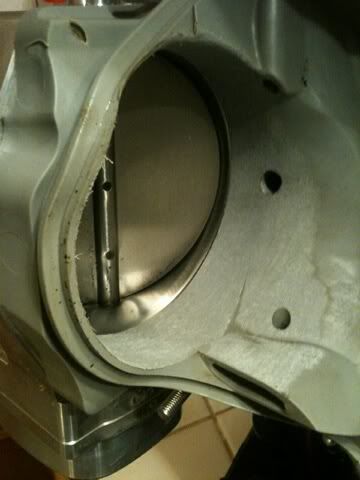
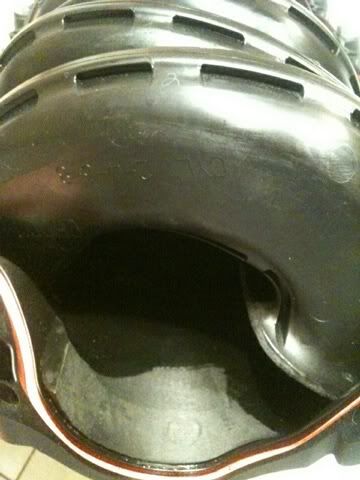
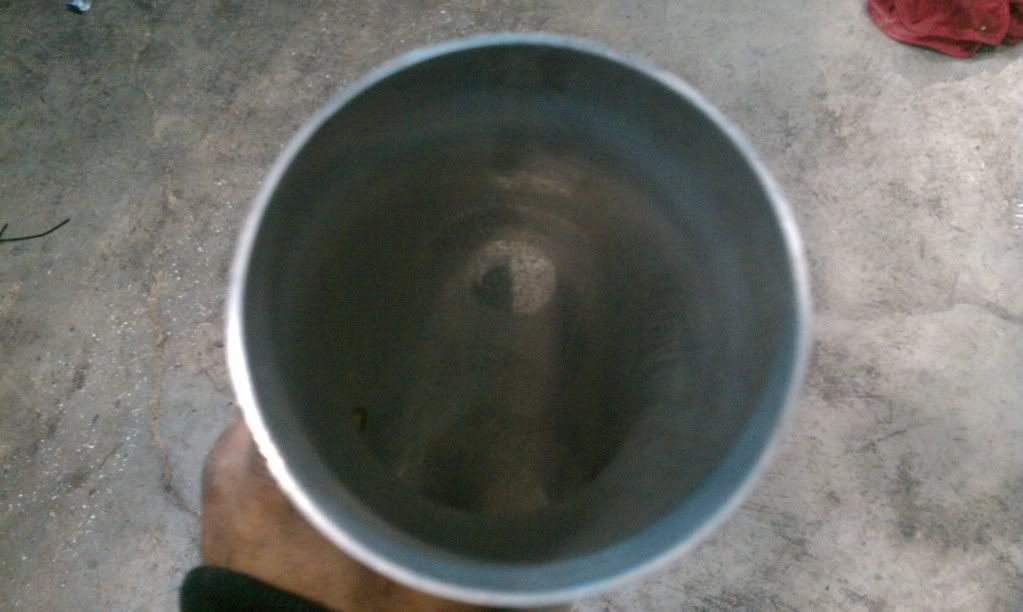
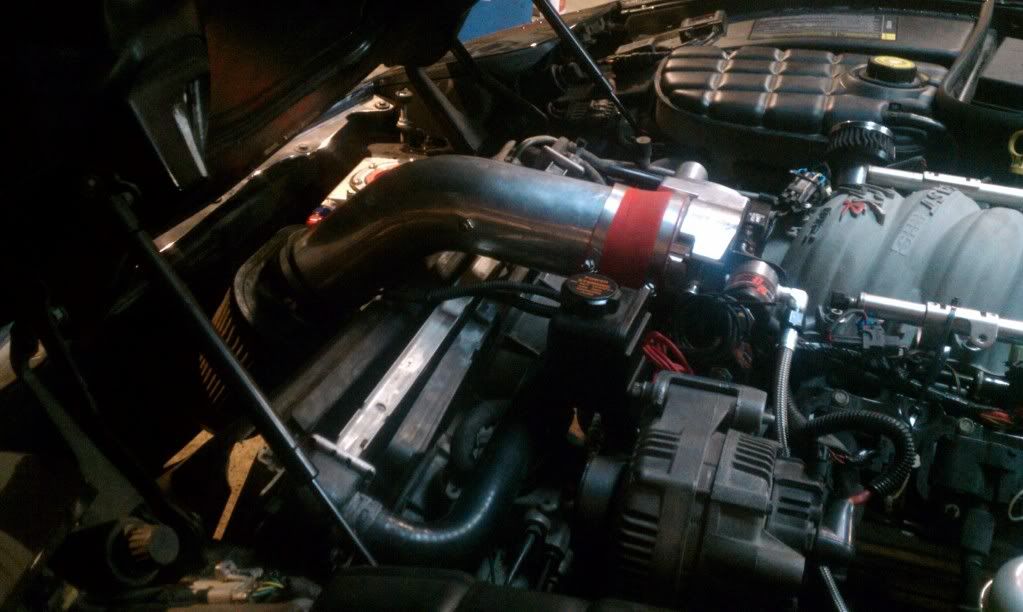
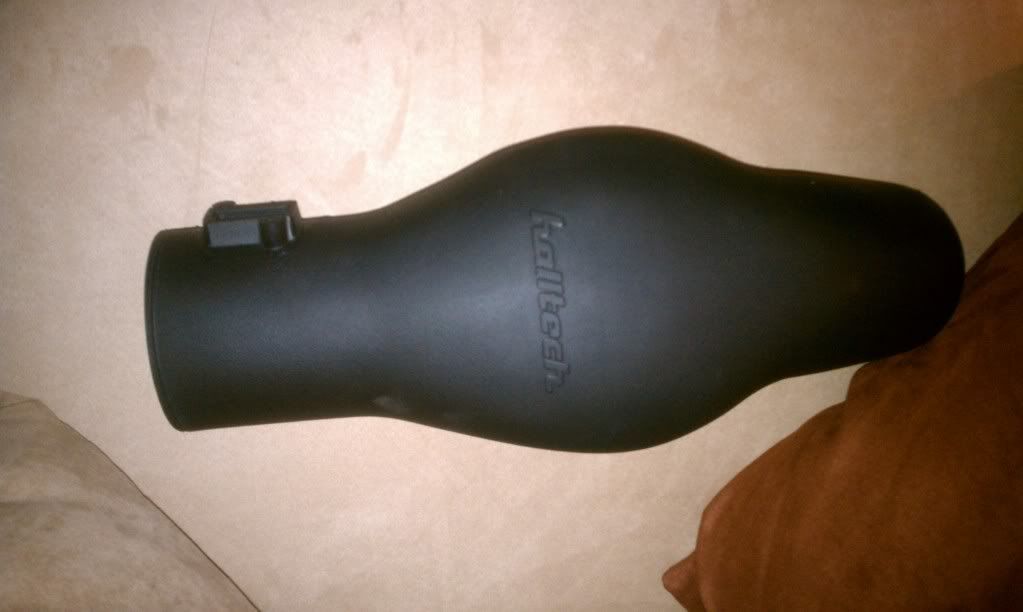
In comes the new CBI intake it is 4" from the TB all the way to the Air filter
please notice there is just a small bend and the pipe maintains the same diameter throughout the whole path.
And here are the final results of the intake project
(please keep in mind i will be getting everything under the hood either powder coated black/painted black( ie. fast)
made a quick spin and the a/f is reading a bit on the lean side now which def shows were getting a good amount of air in there now.
we are very excited for monday for the final tune and dyno to see were we land.
So i was able to swap out the intake out rather easily. I took a couple of pictures to show the differences of the intake path and the inside flow path of both.
This first picture really shows how bad the first intake was as it was not smooth and had a few humps going from big to small and back to big. These inconsistencies cause air turbulence further hindering performance. also keep in mind this intakes ID was well below 3"
Also comes the fact that the intake dam near flattens like a pancake further reducing potential flow.
In comes the new CBI intake it is 4" from the TB all the way to the Air filter
please notice there is just a small bend and the pipe maintains the same diameter throughout the whole path.
And here are the final results of the intake project
(please keep in mind i will be getting everything under the hood either powder coated black/painted black( ie. fast)
made a quick spin and the a/f is reading a bit on the lean side now which def shows were getting a good amount of air in there now.
we are very excited for monday for the final tune and dyno to see were we land.
And so this is where we are currently at in the build.
We did some tuning tonight on the car and it absolutely did not like going to SD so after much deliberation we have decided were going to change the intake setup again and not look back as its the baddest one currently out.
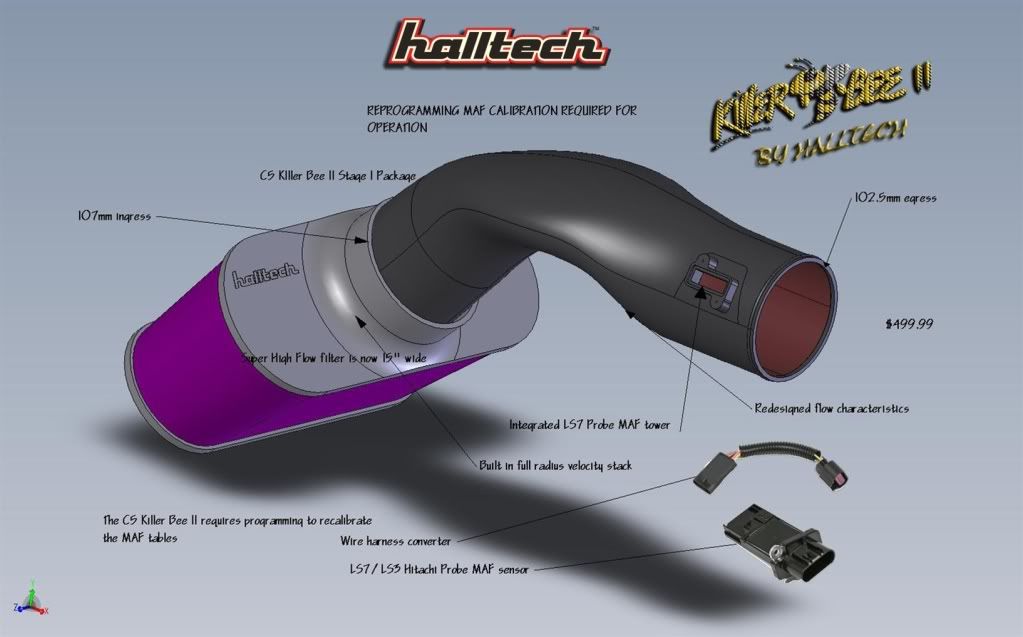
We opted to go with the new Halltech Killer Bee II
-it sports the biggest K&N Filter specifically made for halltech
- inlet is 107mm and has a built in velocity stack
- outlet is 102.5 (which maches up perfectly with out 102 TB
- comes with conversion harness and Ls7 MAF card style
Below is a pic of it and all its components as we would have to purchase the maf harness etc.. it just makes more sense to buy the whole package and keep it moving.
We did some tuning tonight on the car and it absolutely did not like going to SD so after much deliberation we have decided were going to change the intake setup again and not look back as its the baddest one currently out.
We opted to go with the new Halltech Killer Bee II
-it sports the biggest K&N Filter specifically made for halltech
- inlet is 107mm and has a built in velocity stack
- outlet is 102.5 (which maches up perfectly with out 102 TB
- comes with conversion harness and Ls7 MAF card style
Below is a pic of it and all its components as we would have to purchase the maf harness etc.. it just makes more sense to buy the whole package and keep it moving.
Trending Topics
Great thread Scorch! Can't wait to see dyno results from the 2nd phase.
I have some time on my hands this winter and am seriously thinking of upgrading the intake tract on my 416. What you are doing seems like it might work on mine too. (strictly N/A, no juice).
Just off the top of your head, what are the specs of your cam?
Thanks,,,,,,
Jimbo
I have some time on my hands this winter and am seriously thinking of upgrading the intake tract on my 416. What you are doing seems like it might work on mine too. (strictly N/A, no juice).
Just off the top of your head, what are the specs of your cam?
Thanks,,,,,,
Jimbo
LS1 Tech Stories
The Best V8 Stories One Small Block at Time

Gas Monkey Built a 6-Wheel Ferrari Testarossa With a Corvette LT4 Engine
Verdad Gallardo
7 Most Reliable High-Performance Engines GM Has Ever Built
Verdad Gallardo
Amazing '71 Camaro Restomod Is Modern Muscle Car Under the Skin
Verdad Gallardo
6 Common C5 Corvette Failures and What's Involved In Repairing Them
Pouria Savadkouei
Retro Modern Bandit Pontiac Trans AM Comes With Burt Reynolds' Autograph
Verdad Gallardo
Top 10 Greatest Cadillac V Series Performance Models Ever, Ranked
Pouria Savadkouei
Top 10 Most Powerful Chevy Trucks Ever Made!

Hennessey's New Supercharged Silverado ZR2 Has 700 HP
Verdad Gallardo
Coachbuilt N2A Anteros Is an LS2-Powered C6 Corvette In Italian Clothes
Verdad GallardoGreat thread Scorch! Can't wait to see dyno results from the 2nd phase.
I have some time on my hands this winter and am seriously thinking of upgrading the intake tract on my 416. What you are doing seems like it might work on mine too. (strictly N/A, no juice).
Just off the top of your head, what are the specs of your cam?
Thanks,,,,,,
Jimbo
I have some time on my hands this winter and am seriously thinking of upgrading the intake tract on my 416. What you are doing seems like it might work on mine too. (strictly N/A, no juice).
Just off the top of your head, what are the specs of your cam?
Thanks,,,,,,
Jimbo
Some Updates
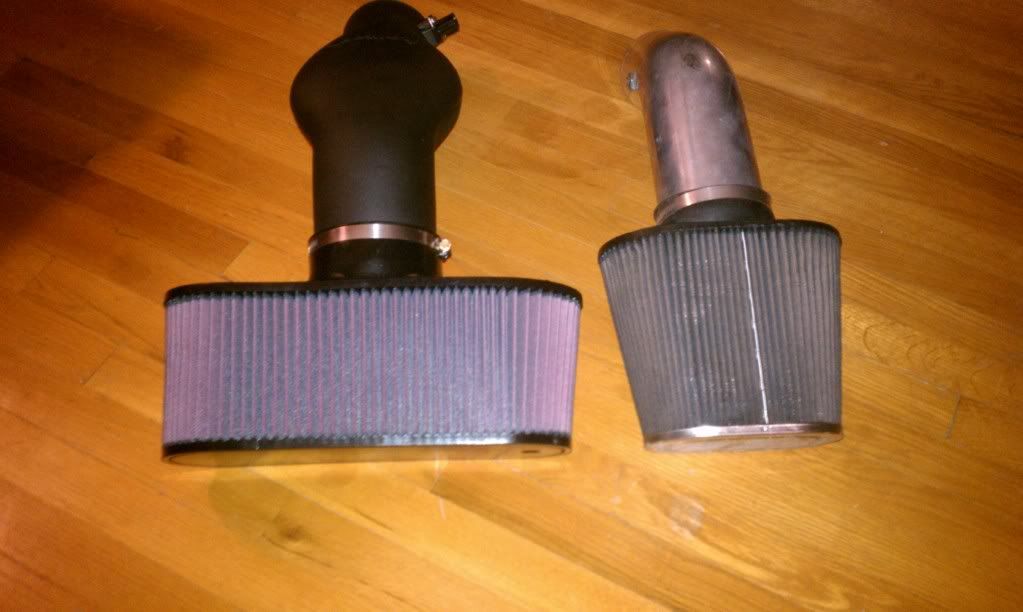
Well the intake finally came in and i am very very impressed. its huge even compared to the aluminum one that was just on the car. The filter is the biggest difference though the thing spans the length of the whole intake and it sits perfectly in the front of the car.. i will take pics of it once i put it in, but it basically sits very low on the front fascia infront of the radiator and right above the air dam which will really provide some good fresh air once the car gets moving....
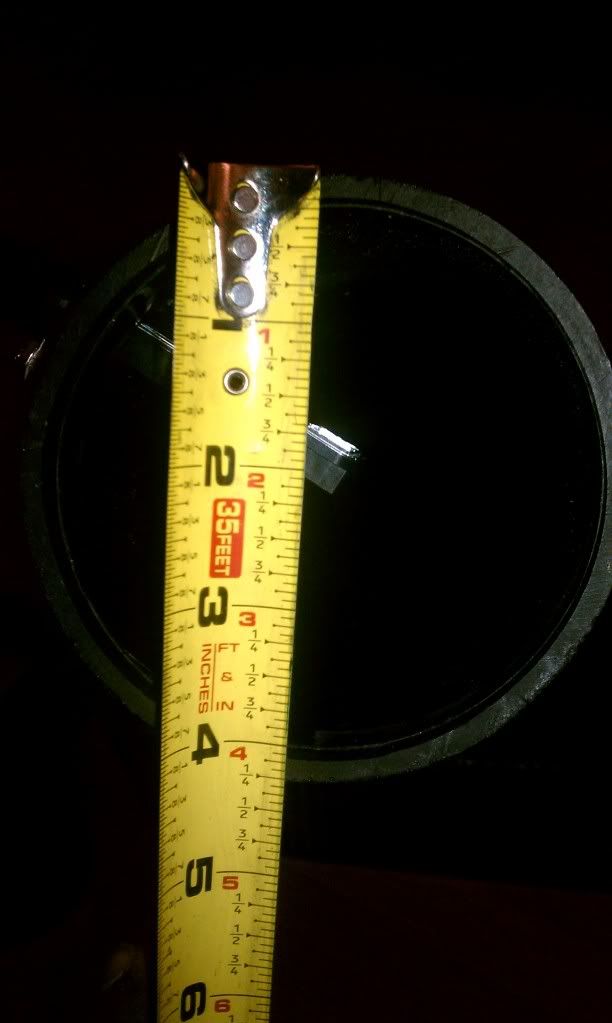
heres a comparison of the outlet sizes of each intake
aluminum
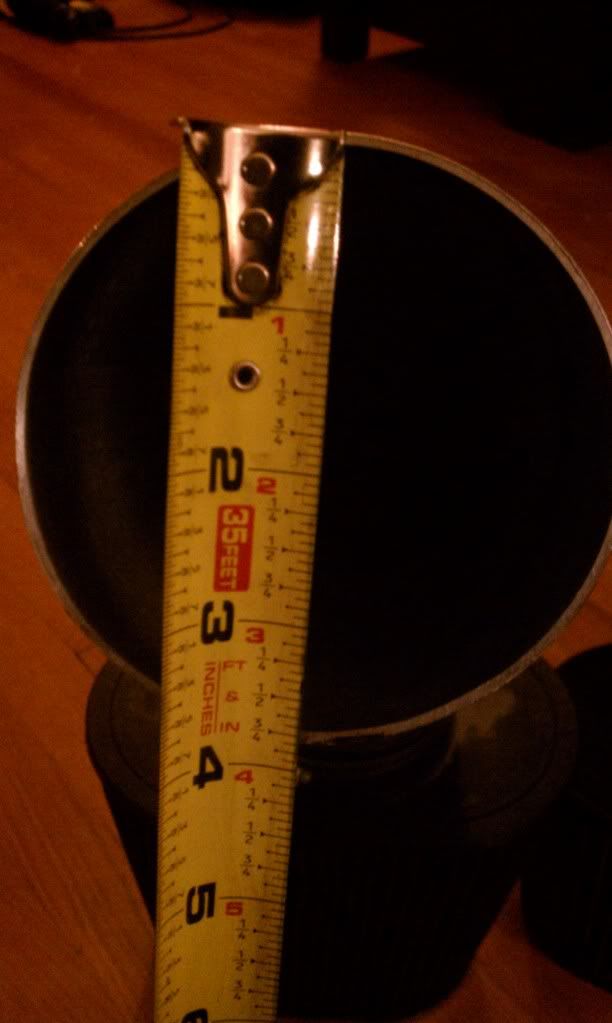
halltech
Well the intake finally came in and i am very very impressed. its huge even compared to the aluminum one that was just on the car. The filter is the biggest difference though the thing spans the length of the whole intake and it sits perfectly in the front of the car.. i will take pics of it once i put it in, but it basically sits very low on the front fascia infront of the radiator and right above the air dam which will really provide some good fresh air once the car gets moving....
heres a comparison of the outlet sizes of each intake
aluminum
halltech


That has a frightening sound on the dyno. 
I suspect small children & there mothers will be running for cover.
Can't wait for the new dyno results.
I will be installing the same TB & Halltech intake this week, did you have tuning kinks you would be willing to share with the 102 TB?
I suspect small children & there mothers will be running for cover.
Can't wait for the new dyno results.
I will be installing the same TB & Halltech intake this week, did you have tuning kinks you would be willing to share with the 102 TB?
2nd. the throttle transition since the addition of this clutch and other little changes makes it rev stupid fast which makes it a bit harder for the 99 computer to keep up since it doesnt have as much resolution.
3rd. I opted to go to this intake as it came with the Ls7 maf (which offers awesome resolution without adding to restriction and the fact that it is a proven and tested intake among other benefits it offers.
That has a frightening sound on the dyno.
I suspect small children & there mothers will be running for cover.
Can't wait for the new dyno results.
I will be installing the same TB & Halltech intake this week, did you have tuning kinks you would be willing to share with the 102 TB?
I suspect small children & there mothers will be running for cover.
Can't wait for the new dyno results.
I will be installing the same TB & Halltech intake this week, did you have tuning kinks you would be willing to share with the 102 TB?
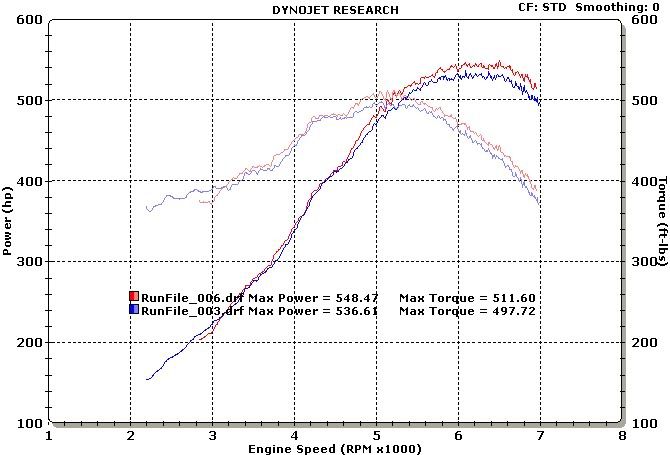
well got some good results got 2 more tricks up my sleeve to reach my goal  then i will be satisfied
here is The Video and dyno sheet
http://www.youtube.com/watch?v=8roLyaYFuG8
then i will be satisfied here is The Video and dyno sheet
http://www.youtube.com/watch?v=8roLyaYFuG8

I did a SD tune and made almost 600 rwhp through an A4 with a 4" pipe and got around 99-100 kpa on the dyno, driving down the road at WOT we got 101 kpa, there is a pic of my 4" induction around post #74 and then a cold startup driveoff video around post #105.
https://ls1tech.com/forums/dynamomet...eo-9s-n-4.html
https://ls1tech.com/forums/dynamomet...eo-9s-n-4.html


Yup.. it has been shown that the stock ti exhaust leaves alot of power to be had on the table in expense of no resonance etc... regardless i believe making that change along with a EWP will put me exactly at were i want to be im being a bit greedy but im hoping for somewhere round 560-575hp . even at 560 i would be very happy as this motor wasnt built for all out NA power if you looked over the specs. the rings are gapped for a 300 shot, cam lsa was chosen for the juice etc.. so i would be very happy anywhere in that circu highlighted above.