Project LS-FR33 [Warning: PICS!]
#102
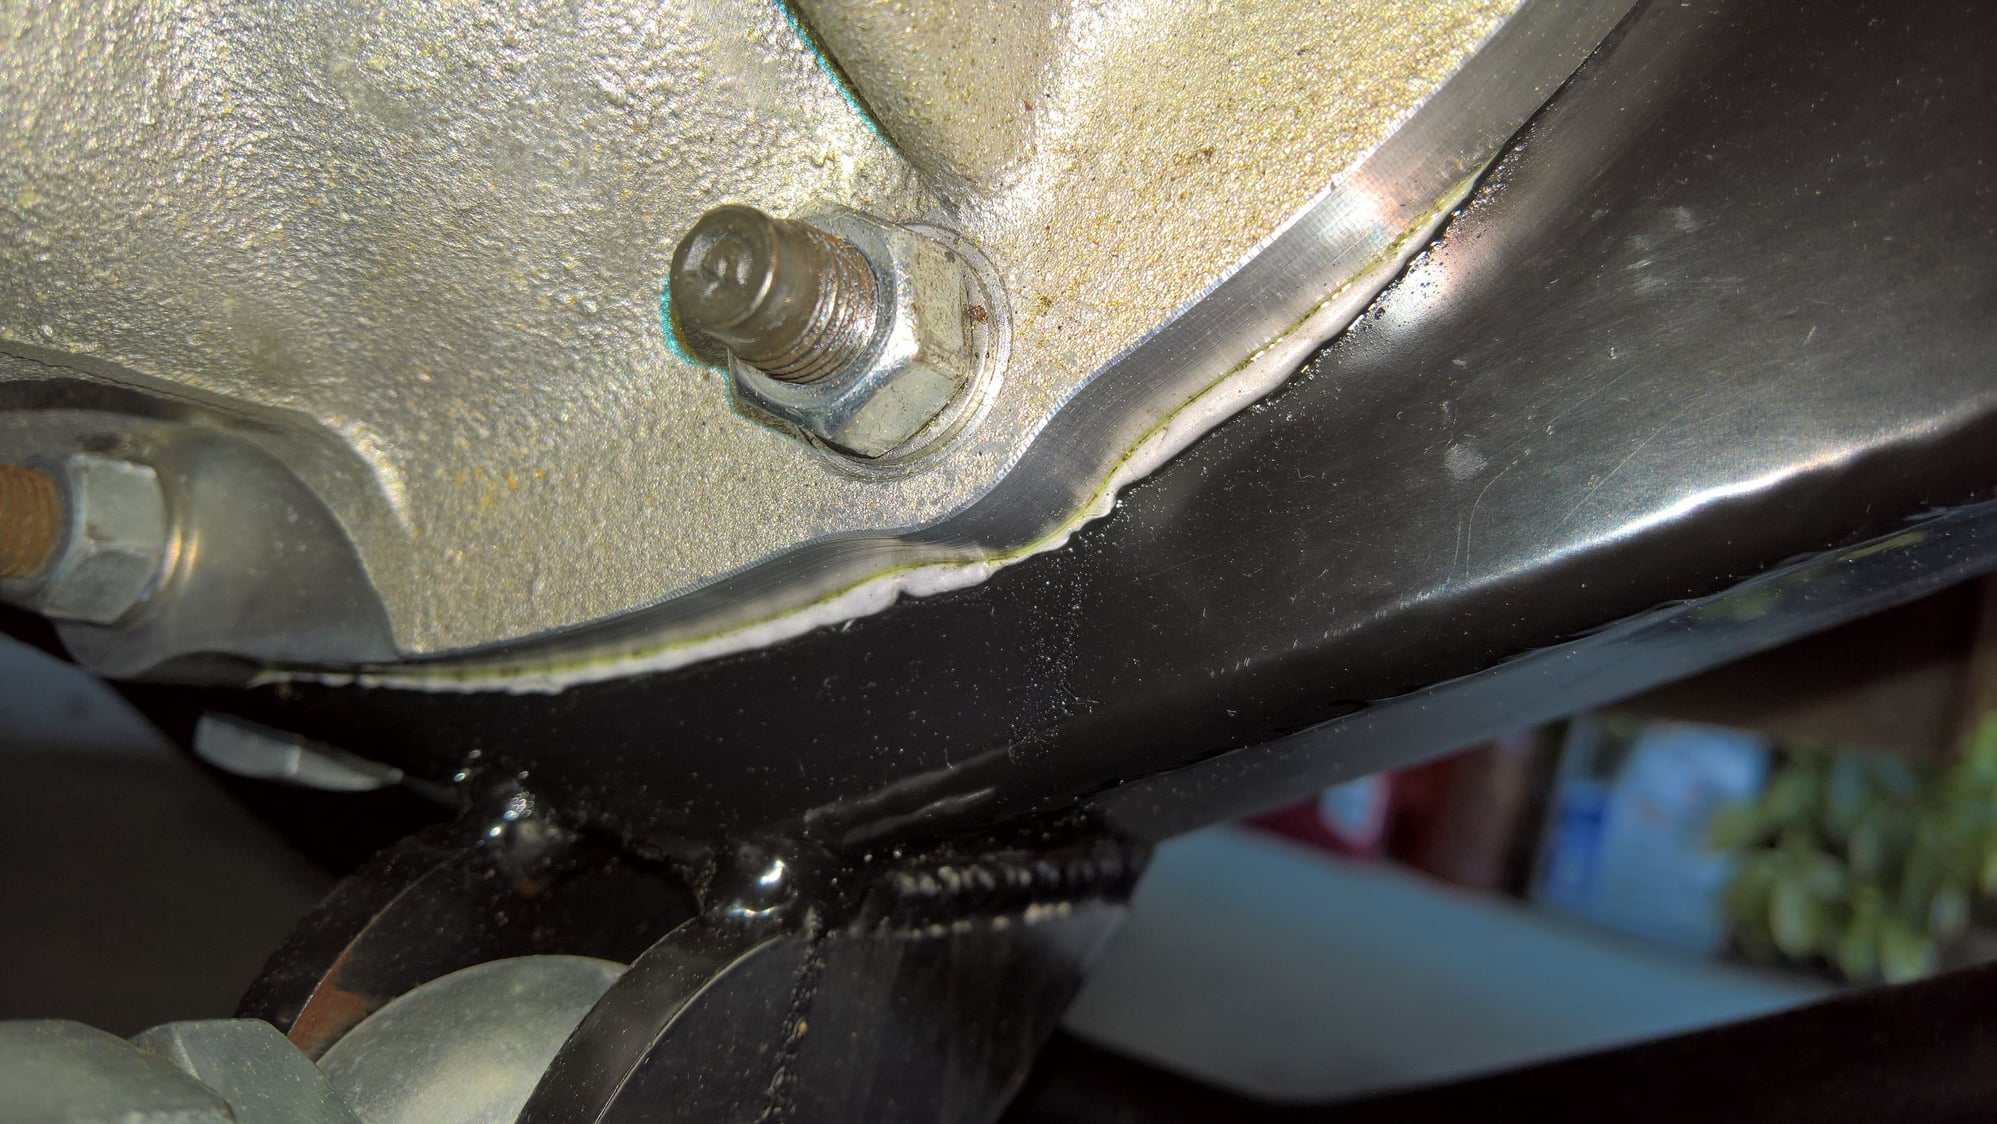
As mentioned earlier, the rear diff has been leaking even before the car has been driven or had a driveshaft in it. Looks like MWC did not do a good job with the Ultra Gray. This means I am going to have to disassemble the rear end when I do the 500 mile fluid change.
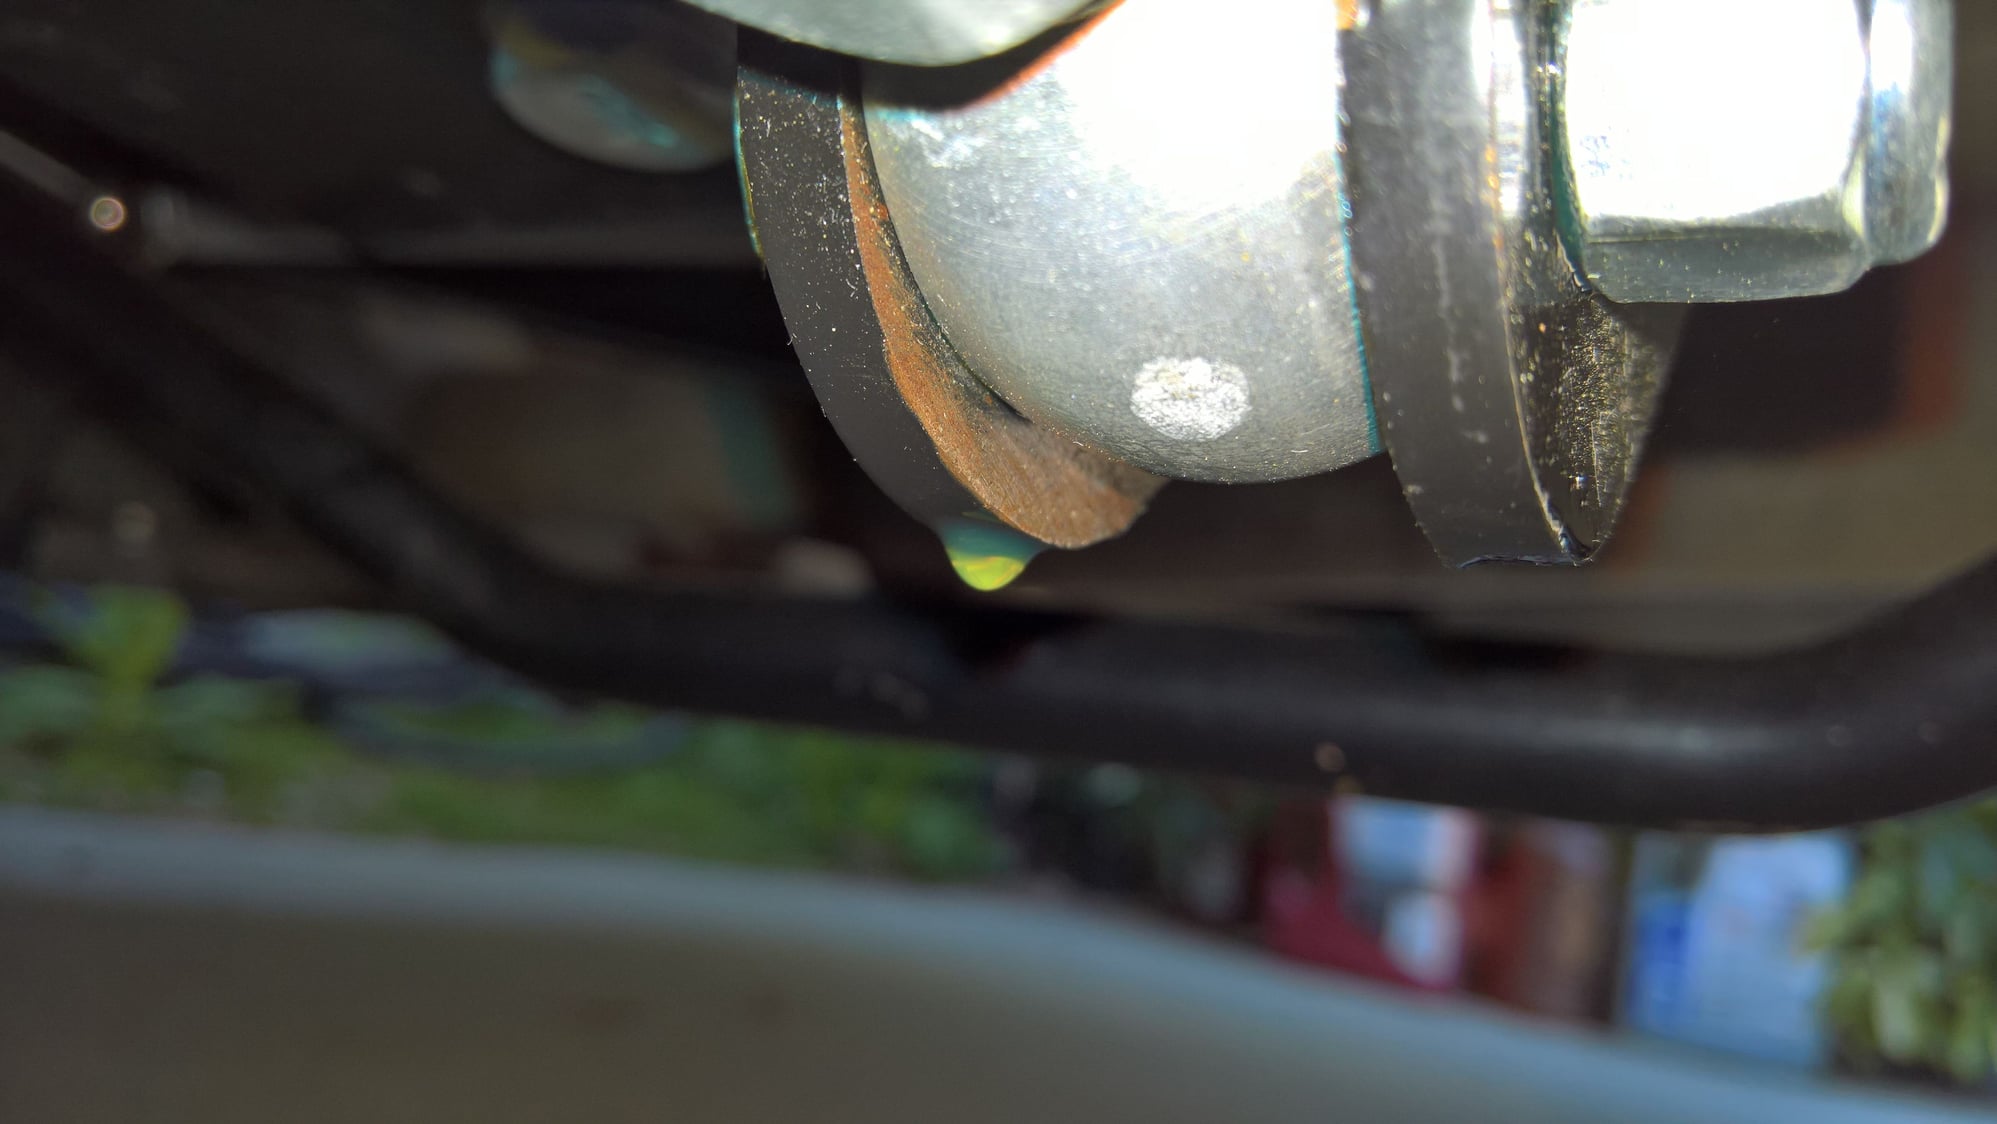
As mentioned earlier, the rear diff has been leaking even before the car has been driven or had a driveshaft in it. Looks like MWC did not do a good job with the Ultra Gray. This means I am going to have to disassemble the rear end when I do the 500 mile fluid change.
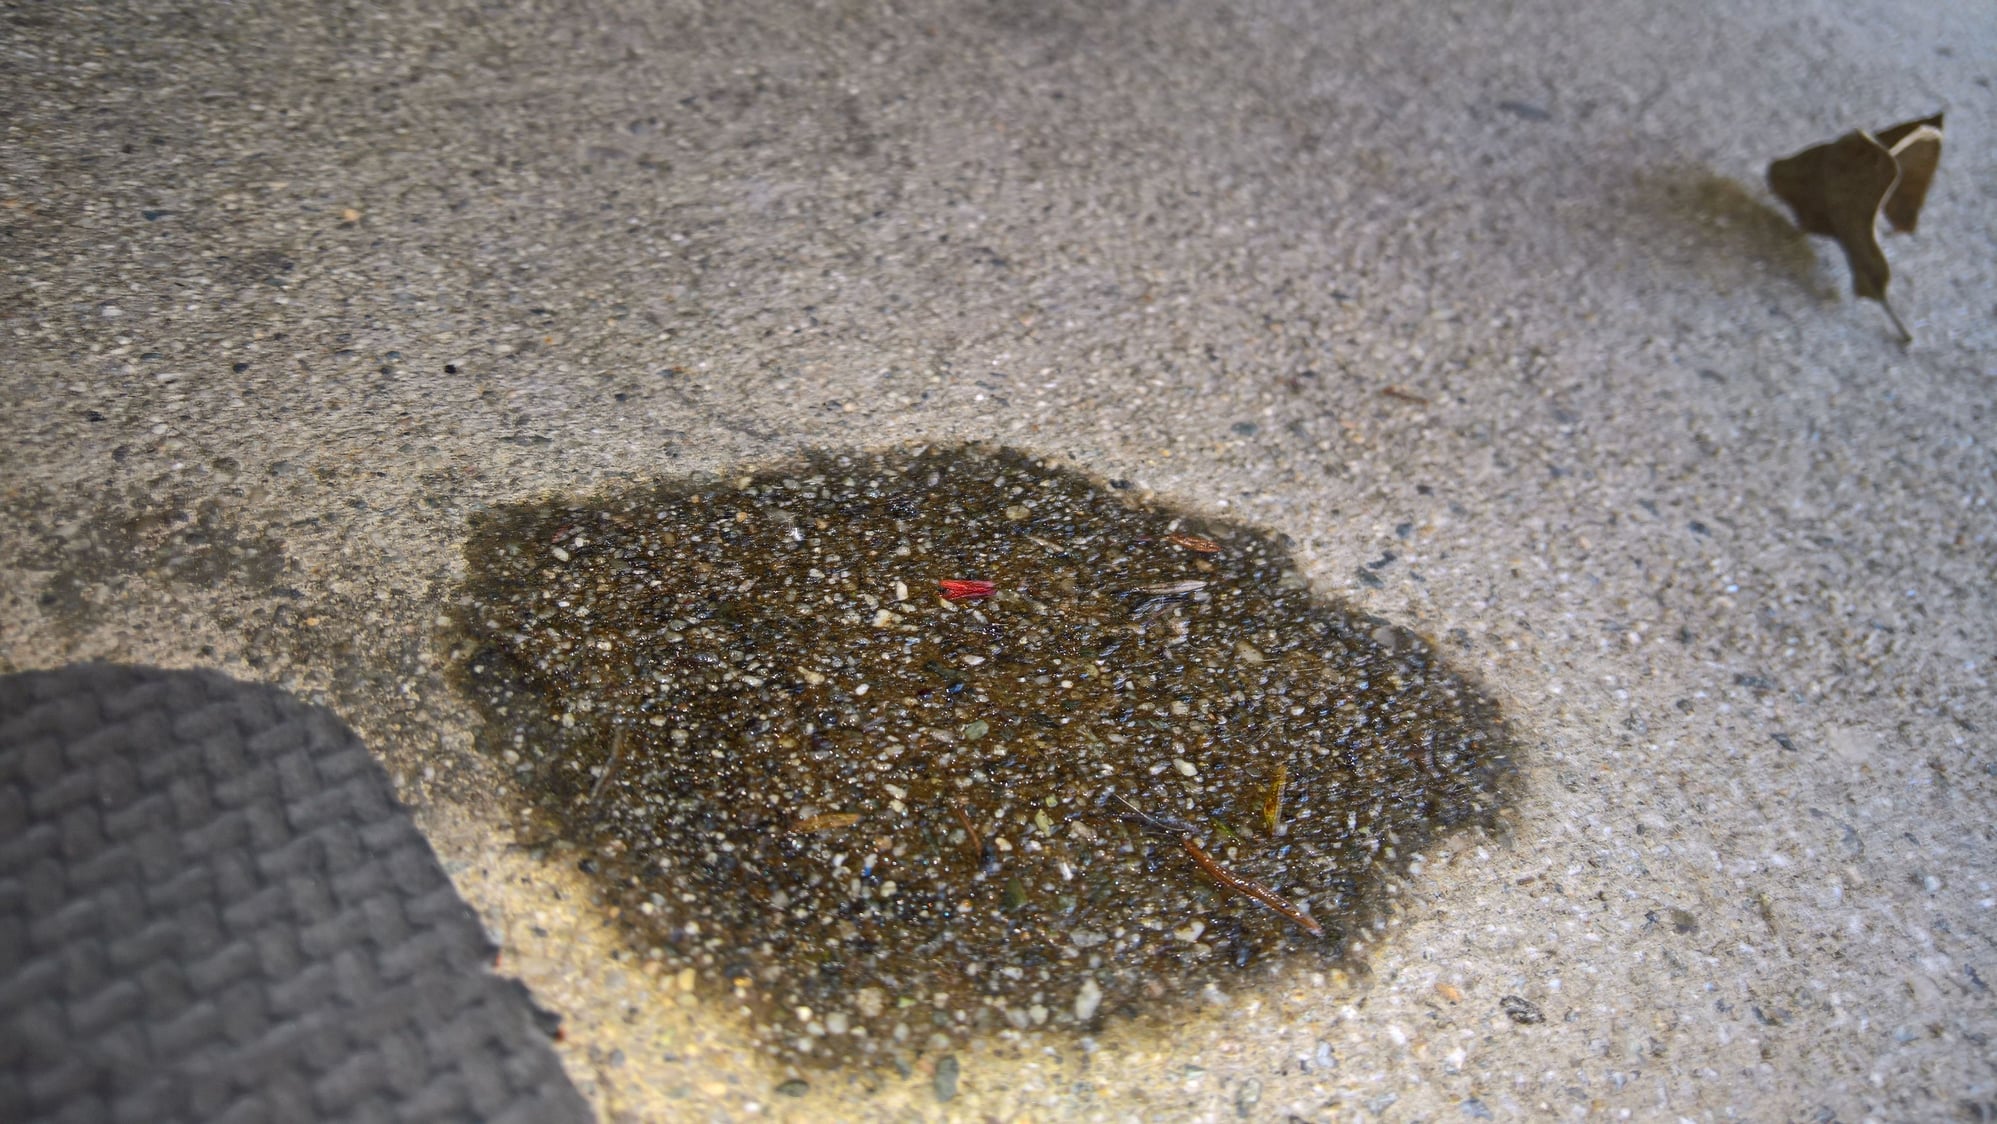
As mentioned earlier, the rear diff has been leaking even before the car has been driven or had a driveshaft in it. Looks like MWC did not do a good job with the Ultra Gray. This means I am going to have to disassemble the rear end when I do the 500 mile fluid change.
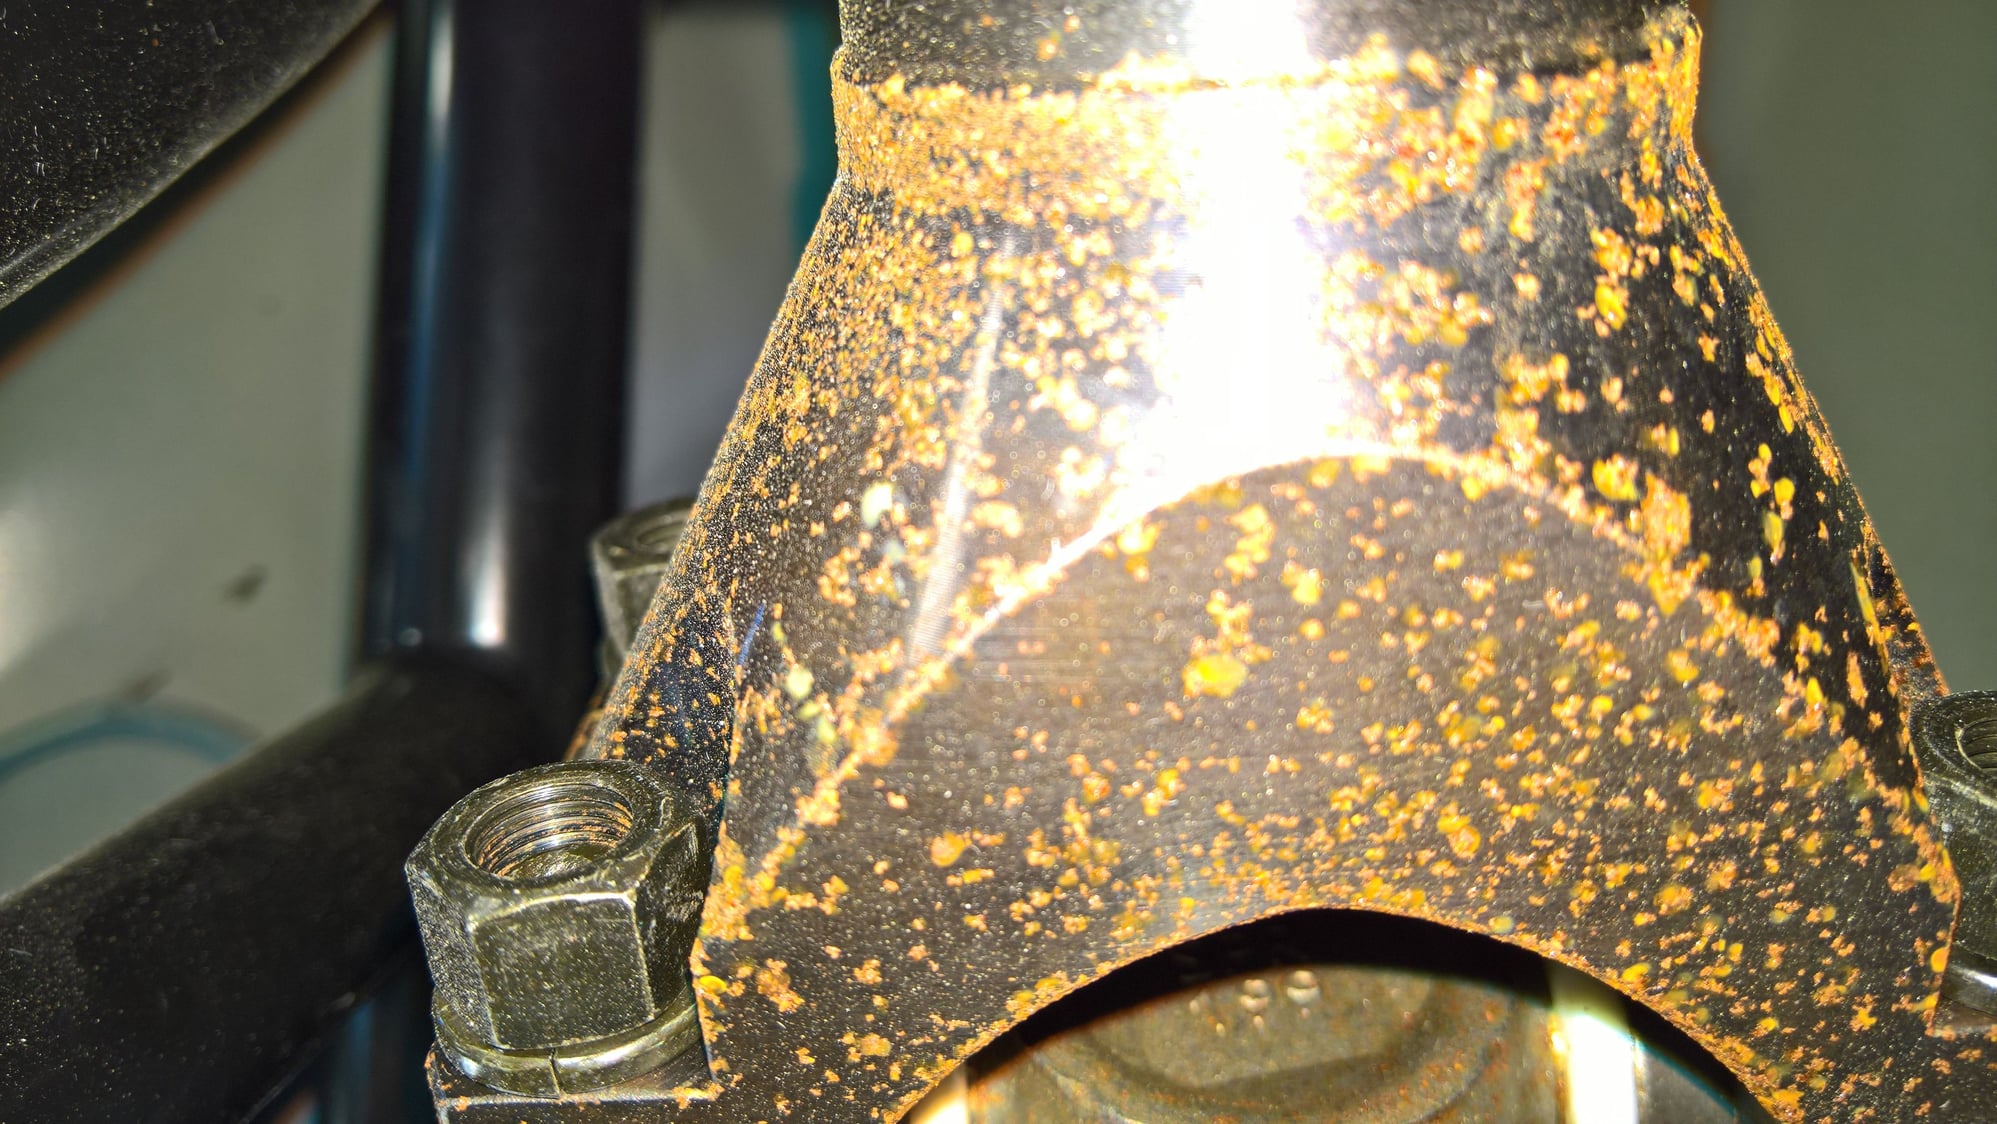
I was not very confident with the thread engagement on the rear U-joint U-bolts, so I removed the lock washers and installed the nuts with red Locktite instead.
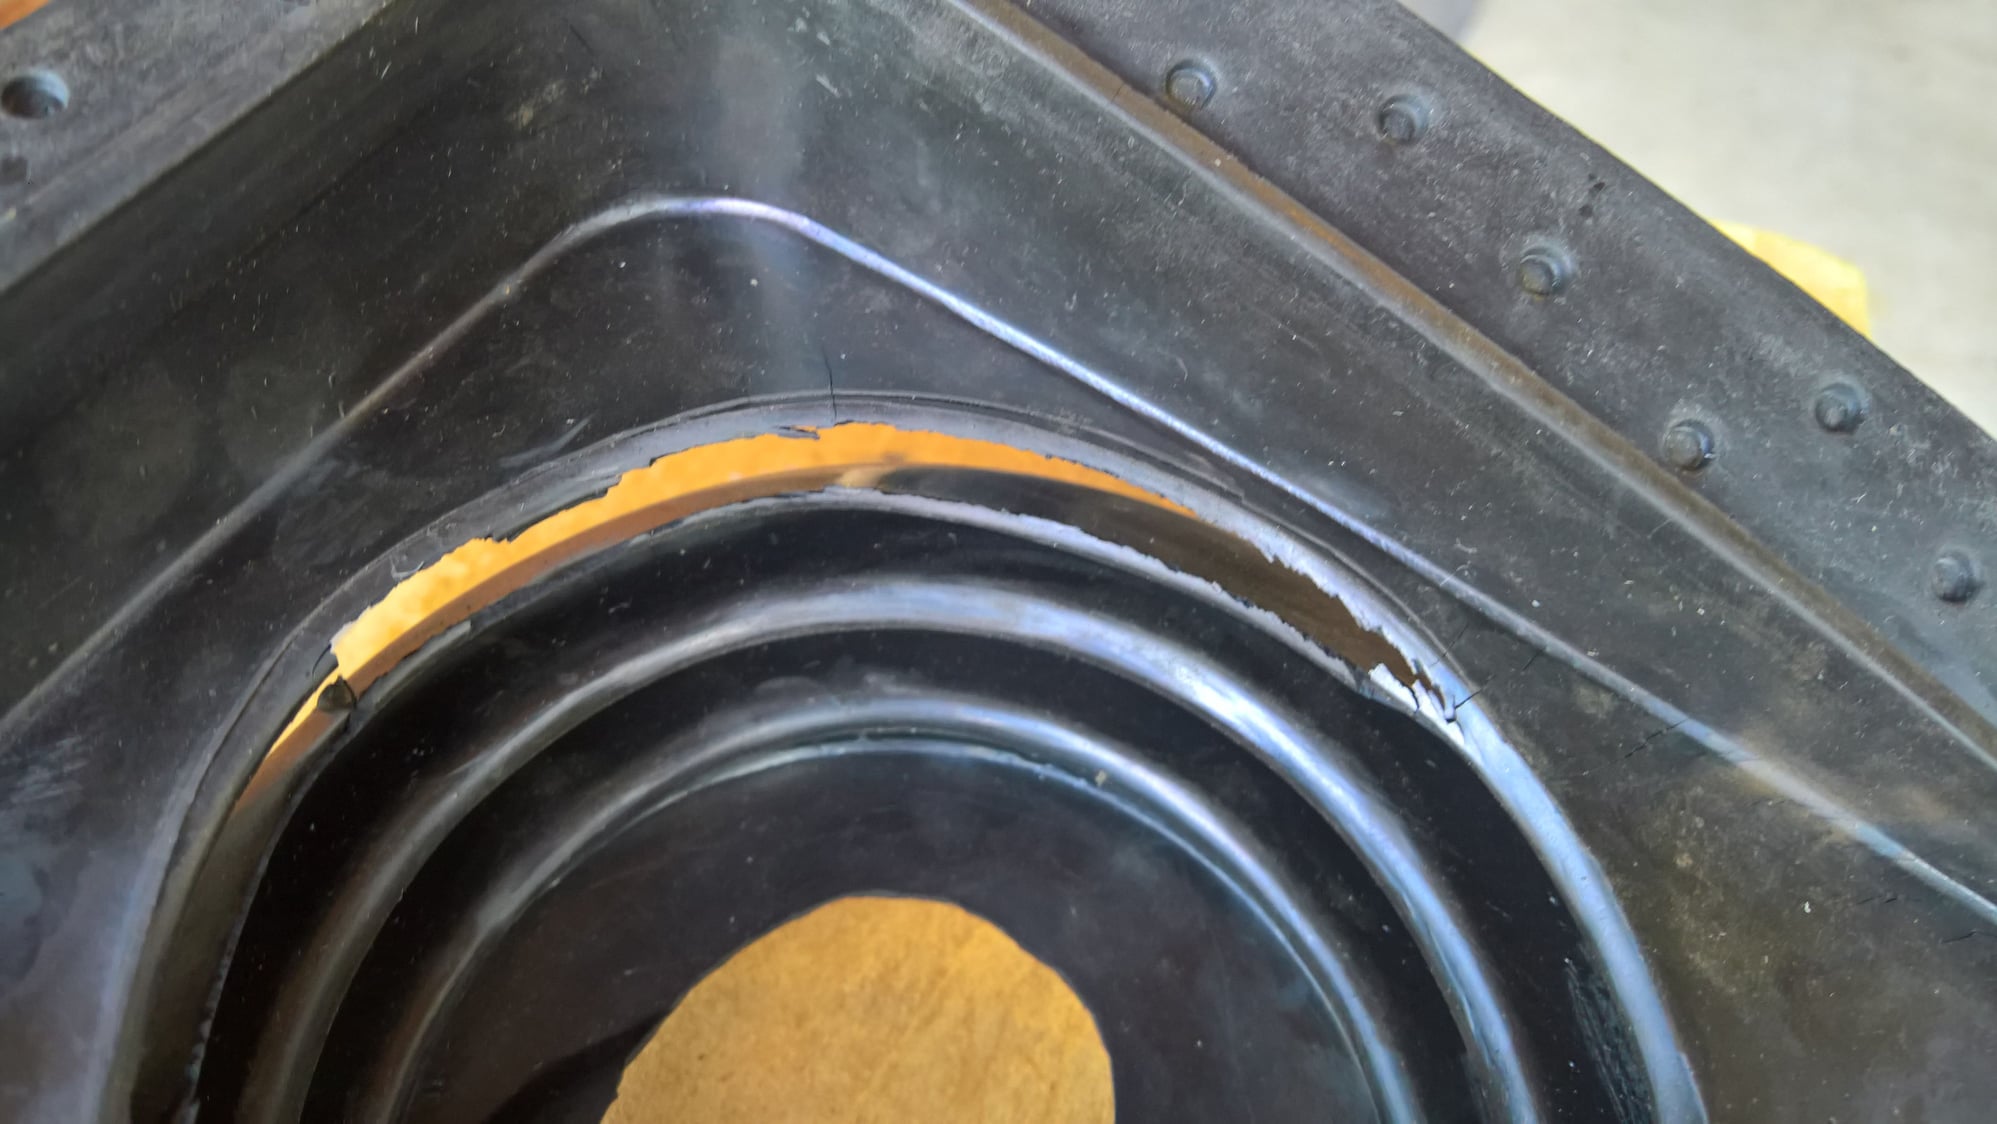
When I pulled the transmission, I discovered that the brand new reproduction #6 lower shift boot from Hawks had completely disintegrated.
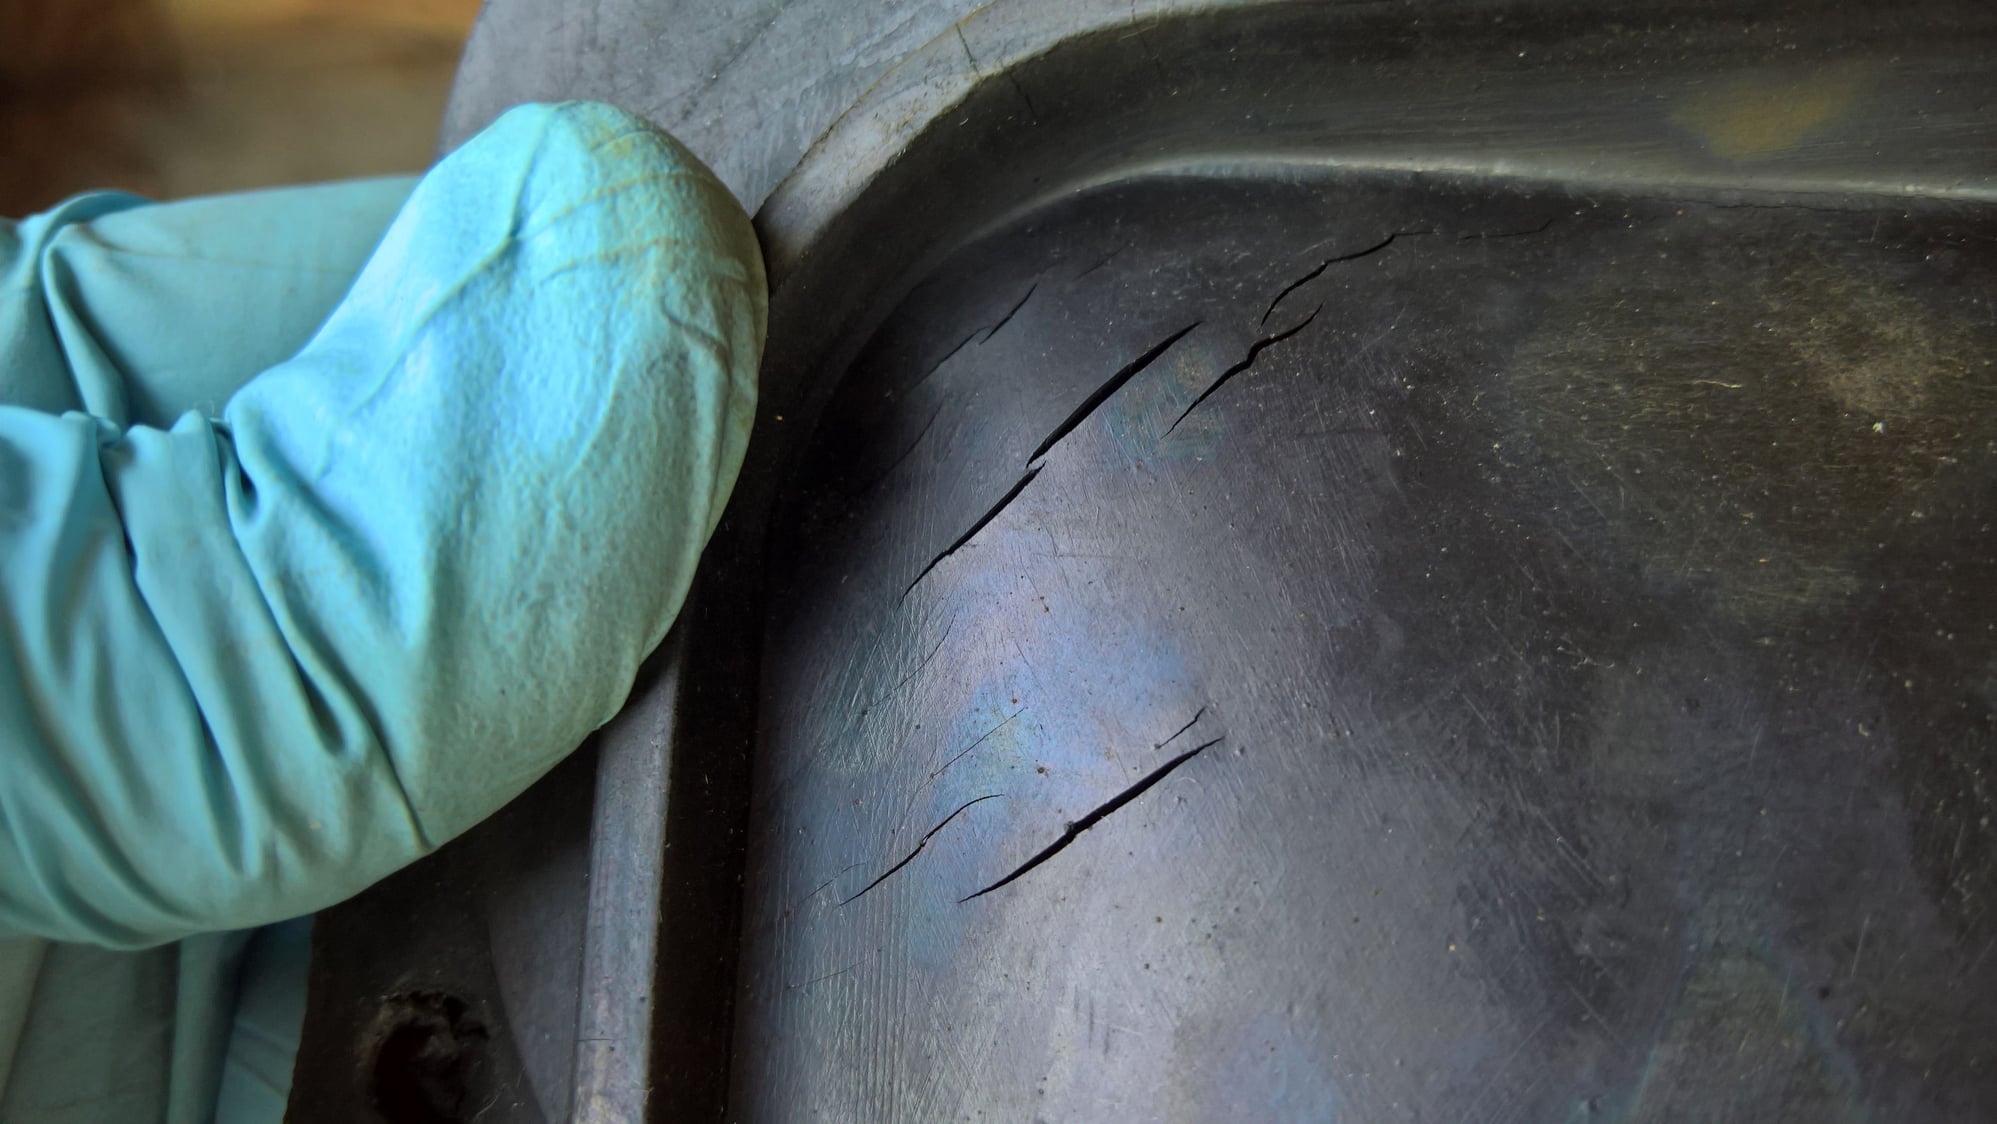
When I pulled the transmission, I discovered that the brand new reproduction #6 lower shift boot from Hawks had completely disintegrated.
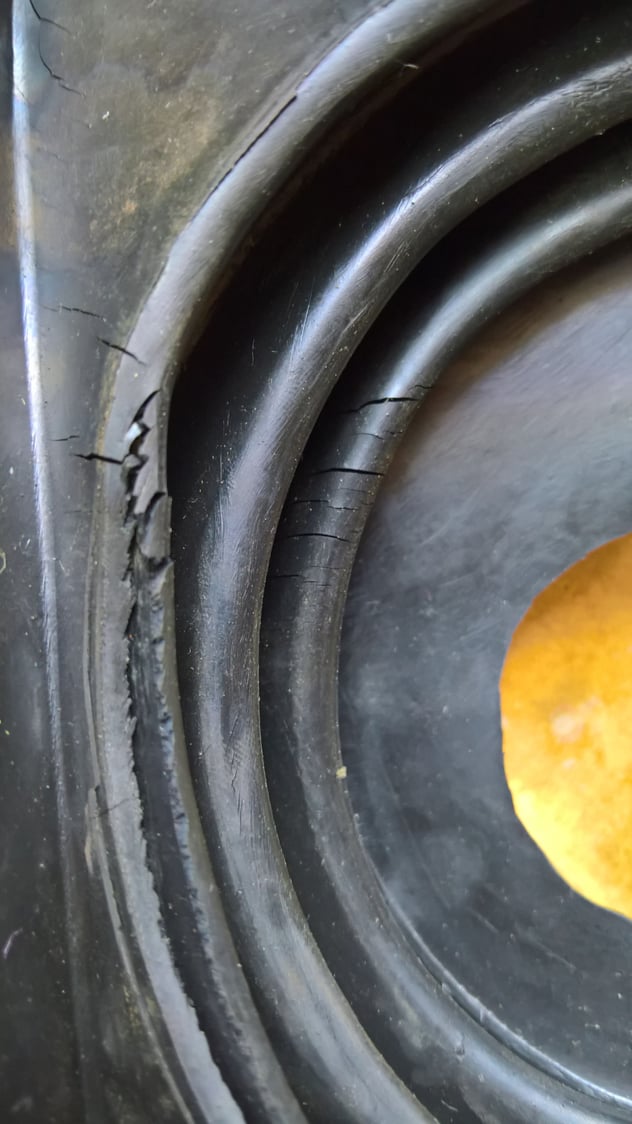
When I pulled the transmission, I discovered that the brand new reproduction #6 lower shift boot from Hawks had completely disintegrated.
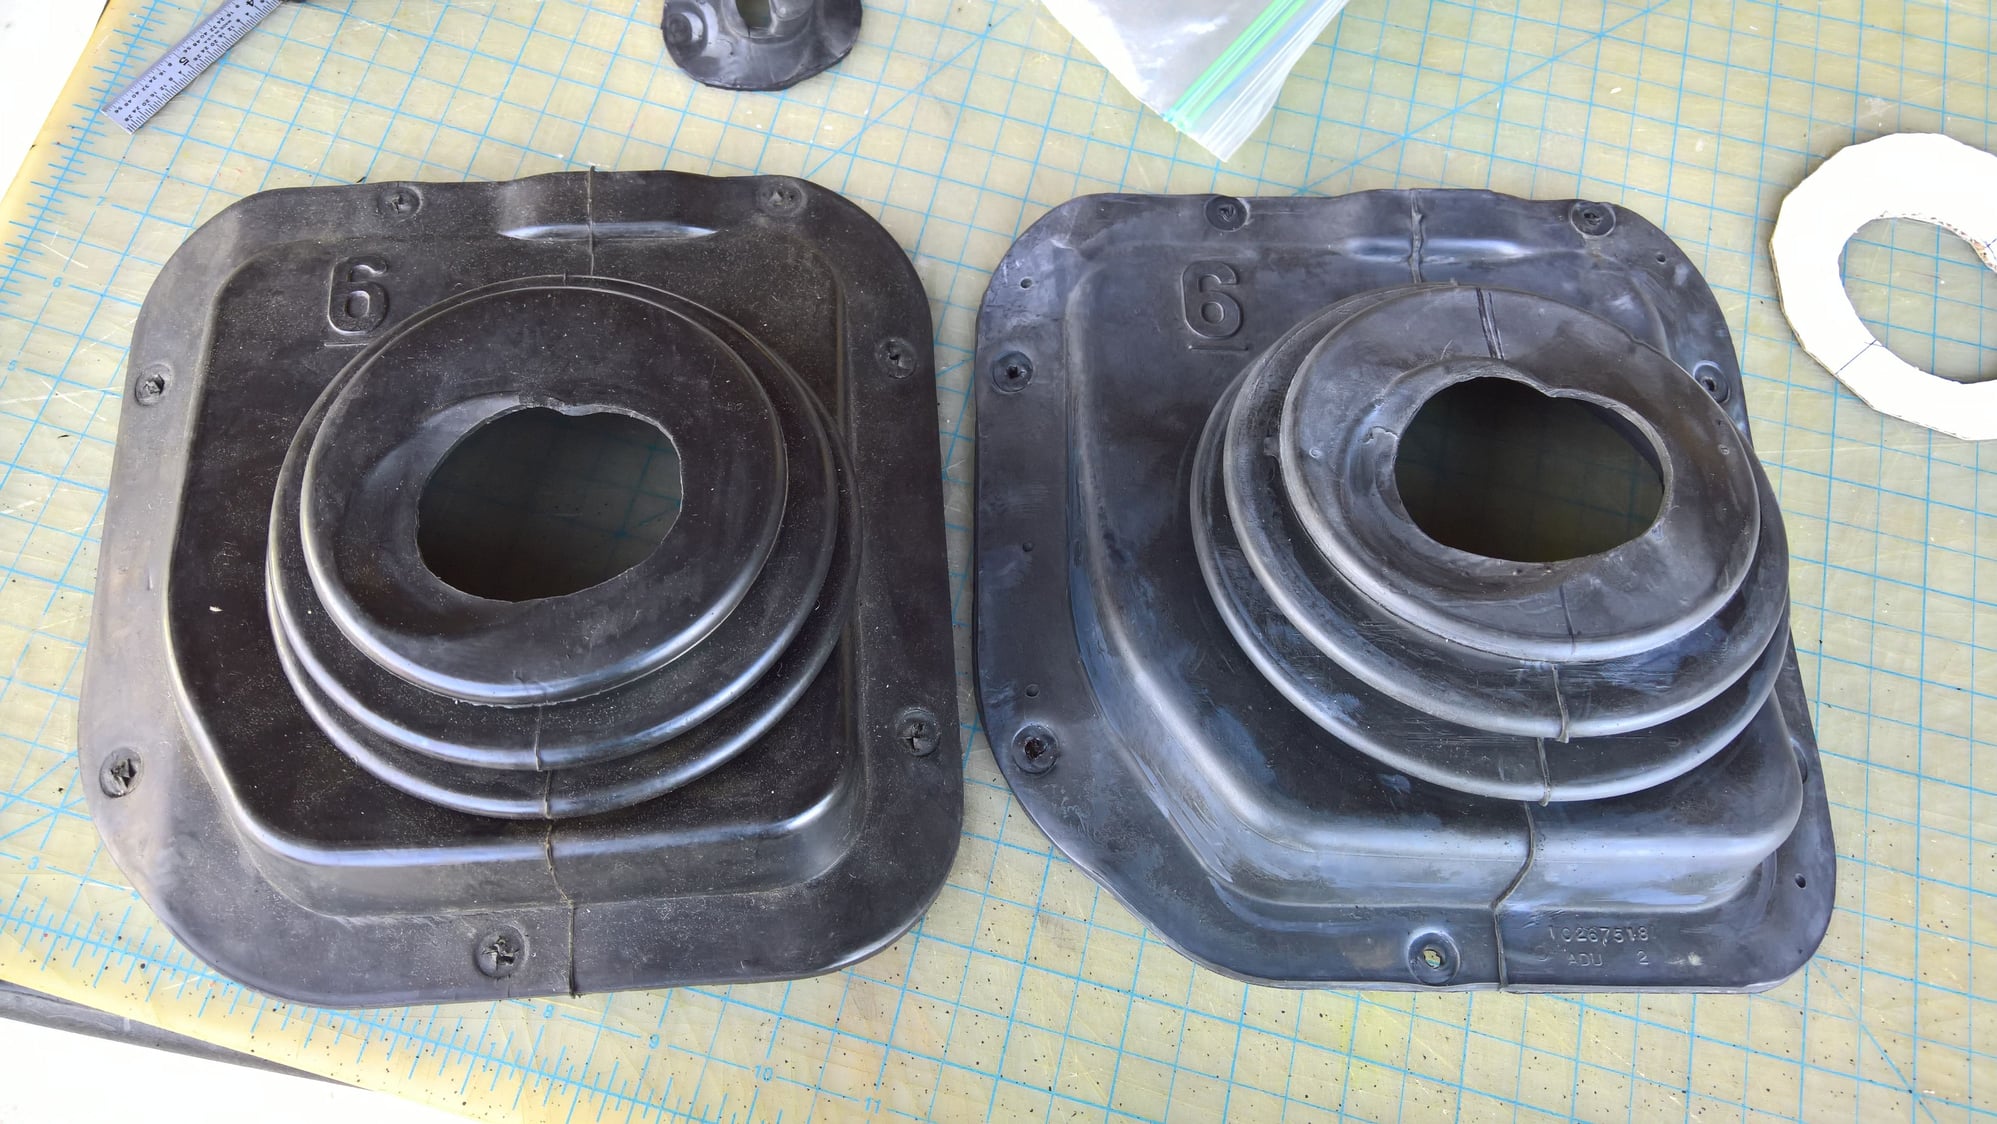
I bought a good condition, used OEM boot (right) and cut the center out to match the torn reproduction garbage.
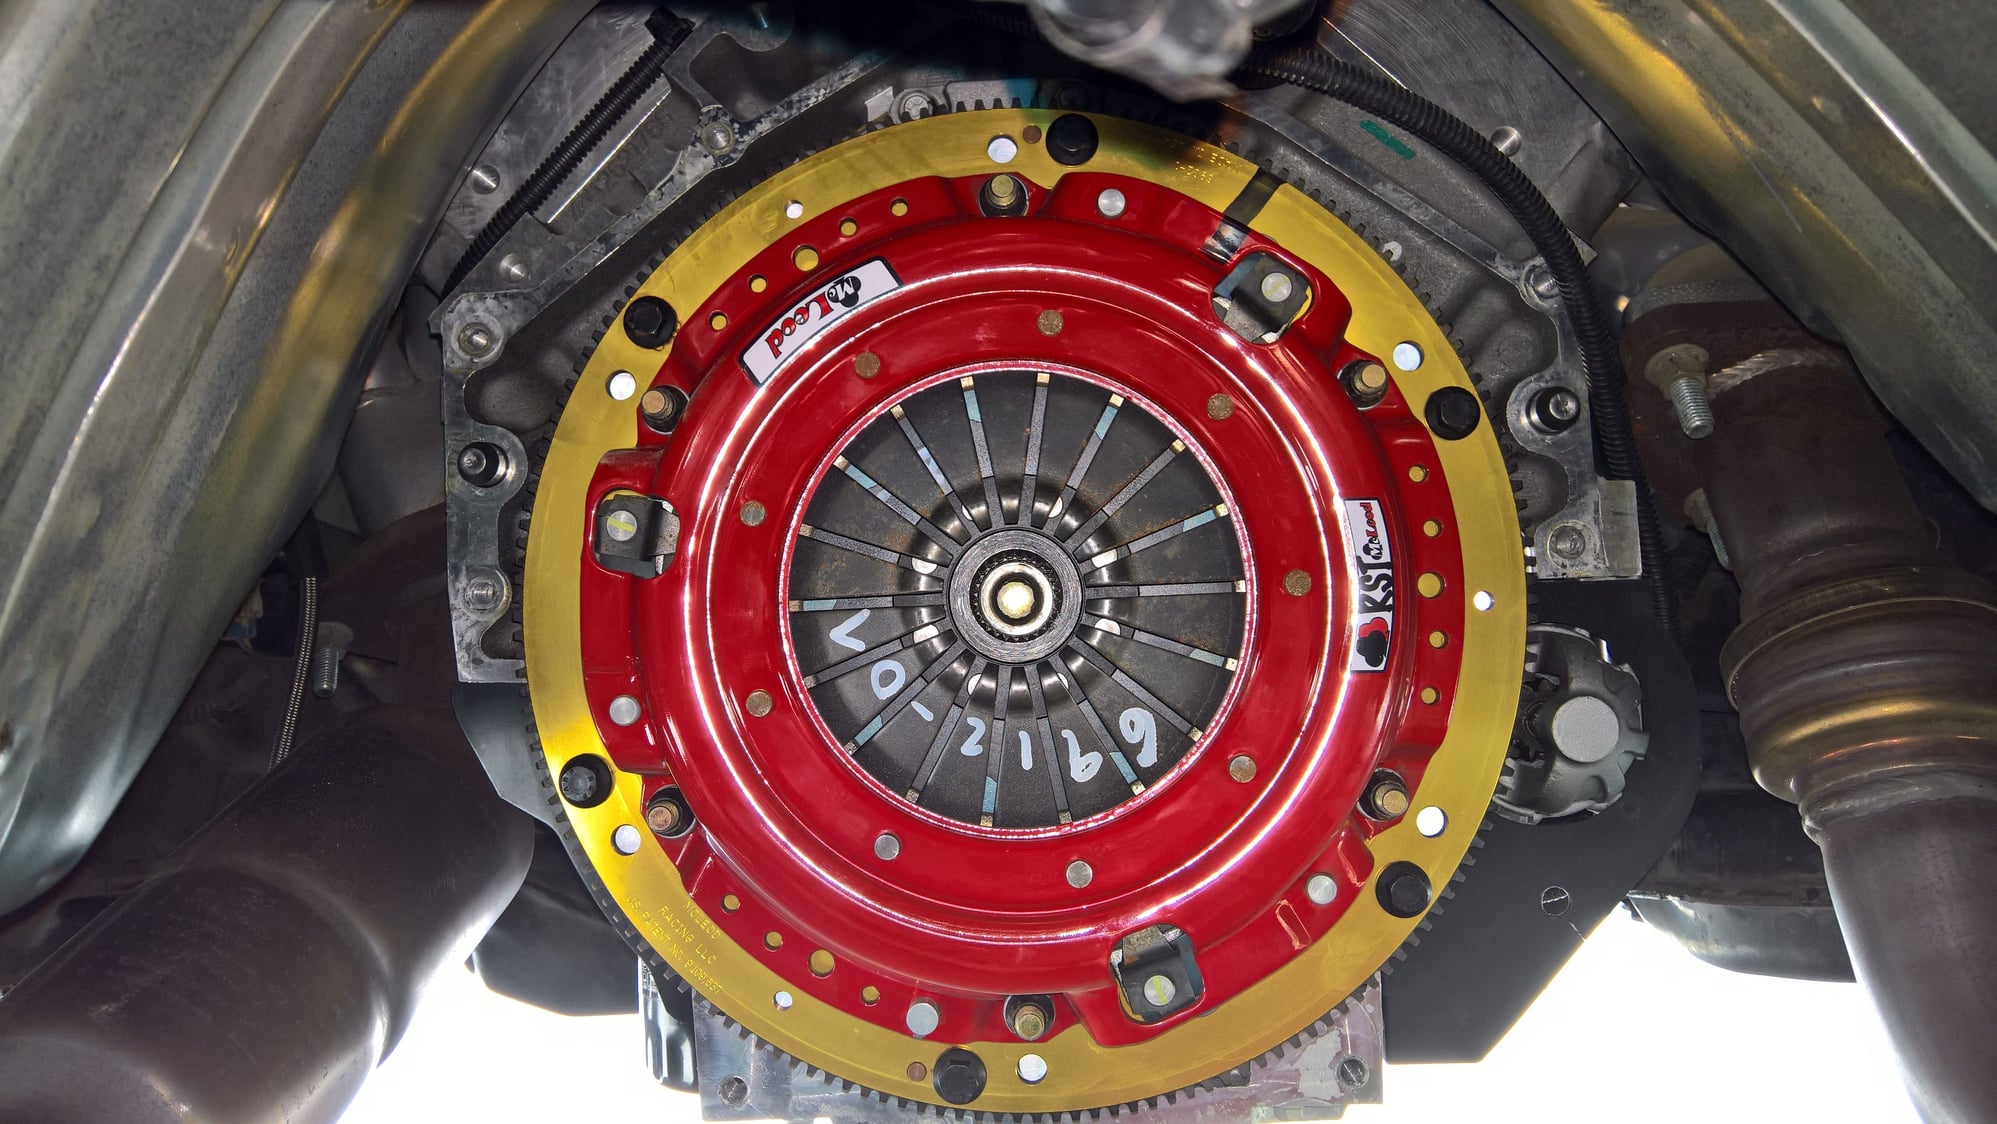
Clutch looks okay so far.
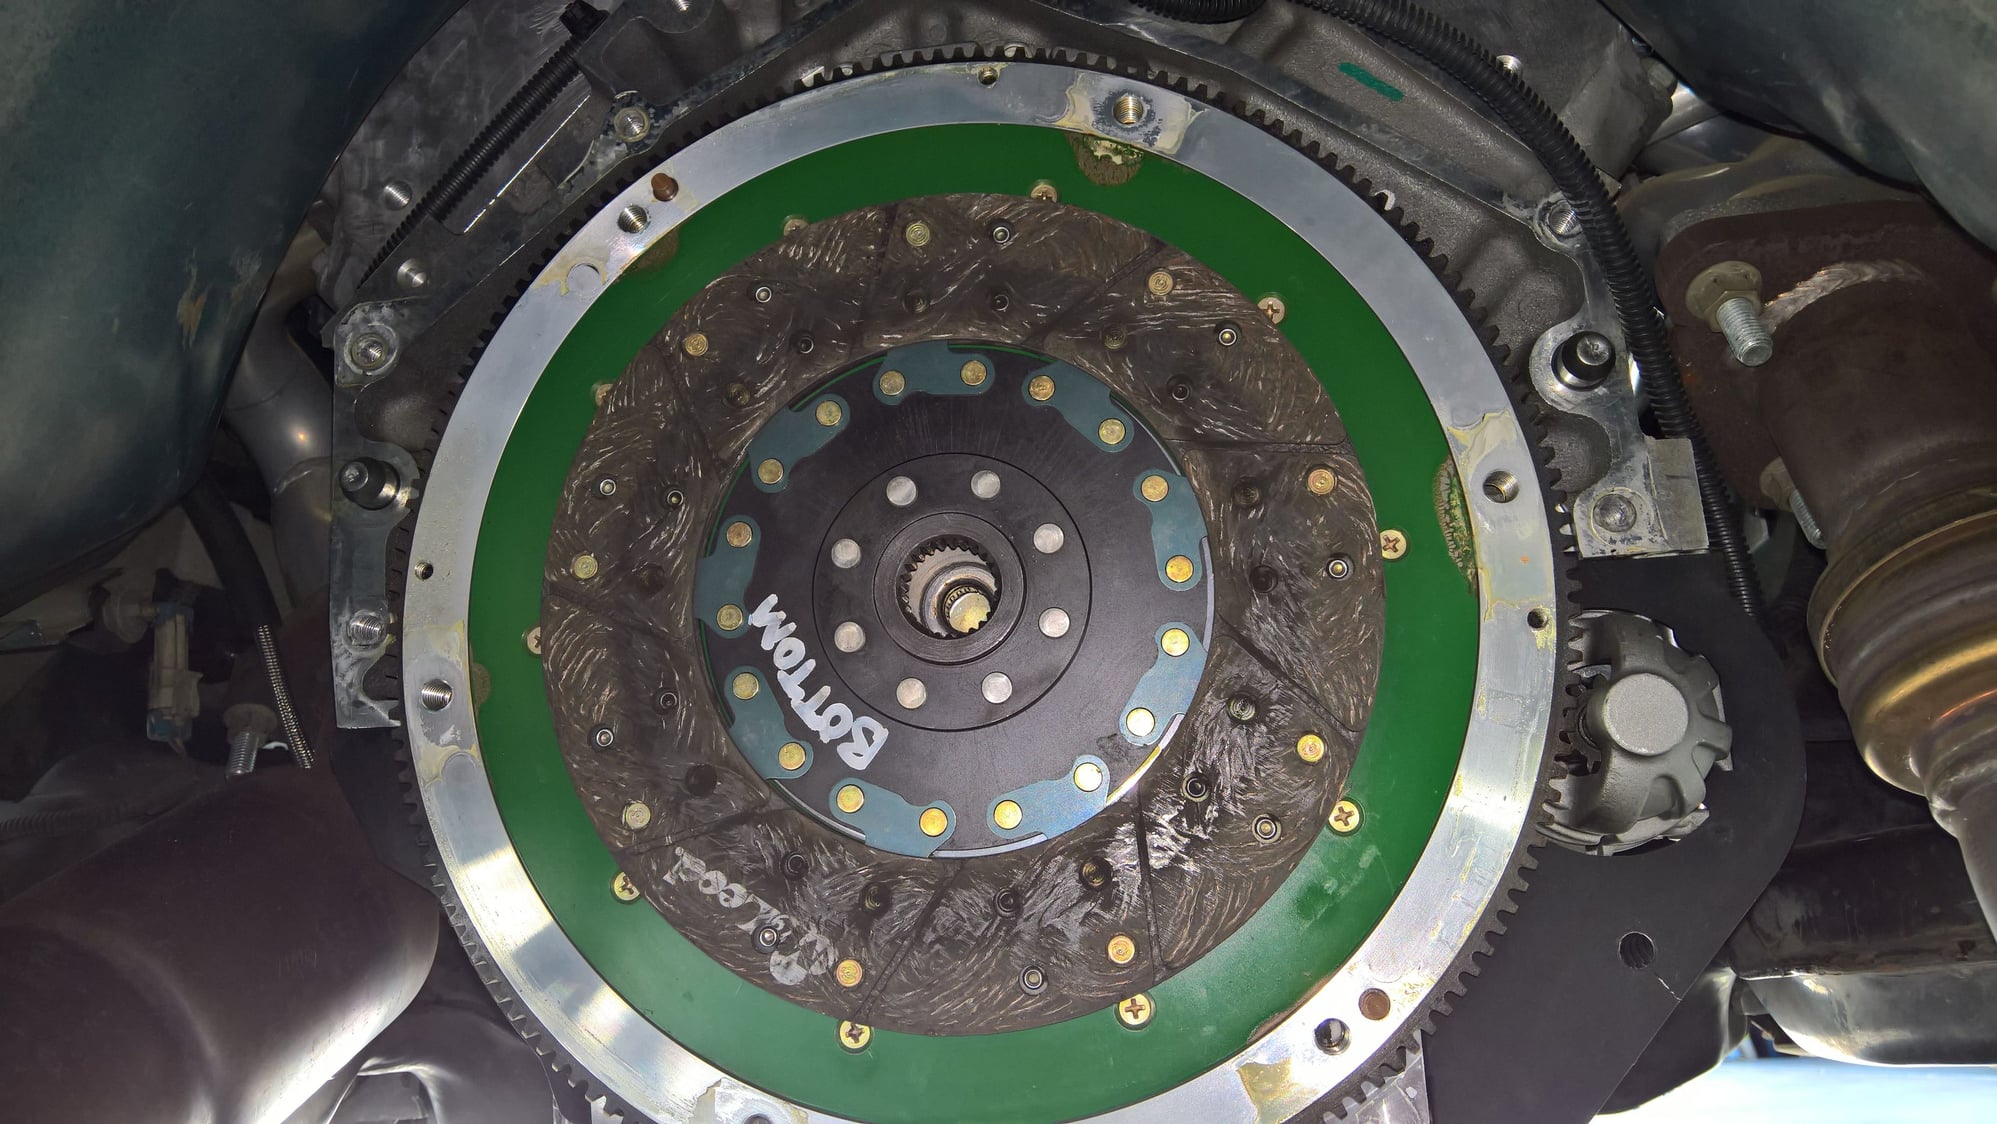
What's wrong here? Answer: How is that clutch disk floating in mid-air without falling?! I had to pop it off the flywheel using a flathead screwdriver.
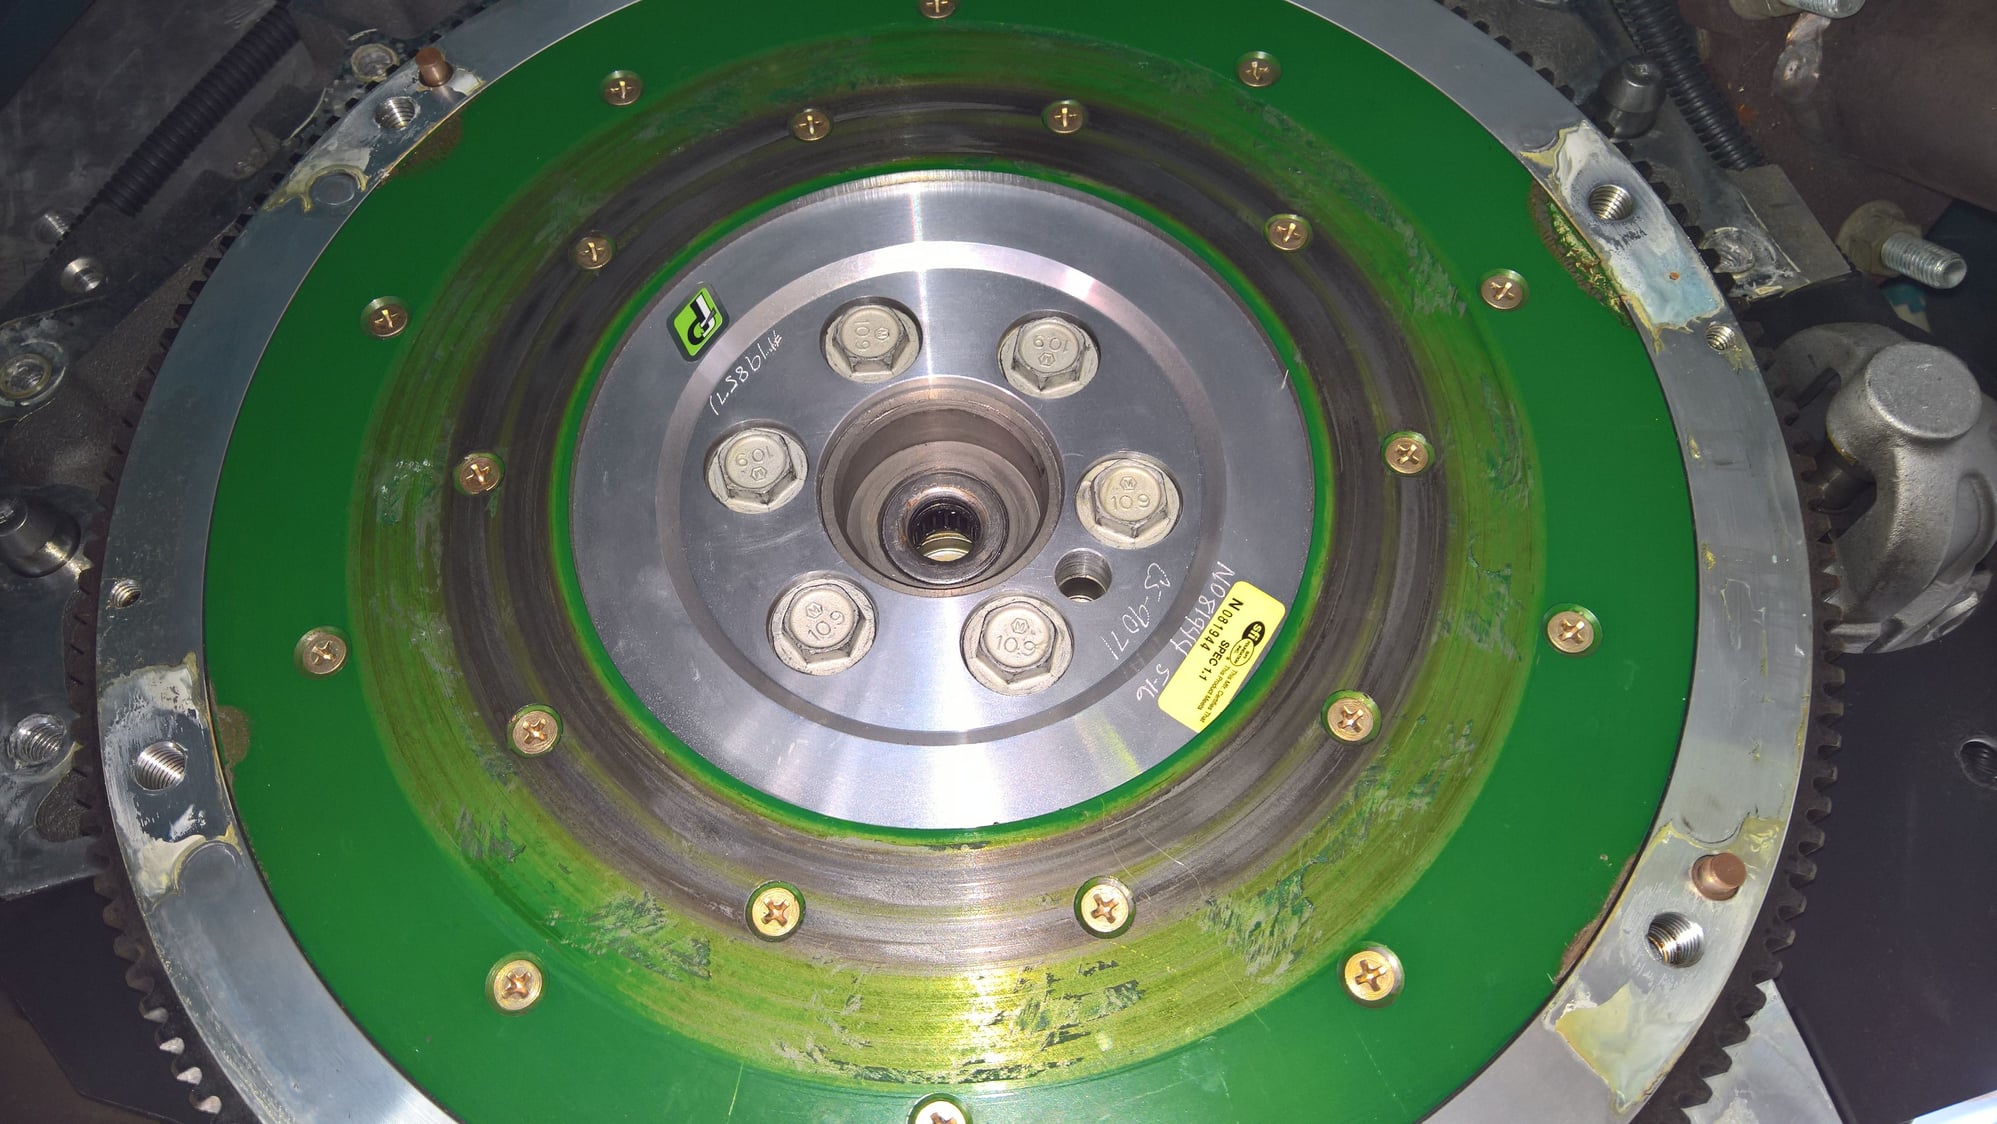
It turns out that the green protective coating, which Fidanza tells you will wear off normally, it actually melted to the clutch disk. This explains why I could not shift into gear with the engine running. The two were fused together.
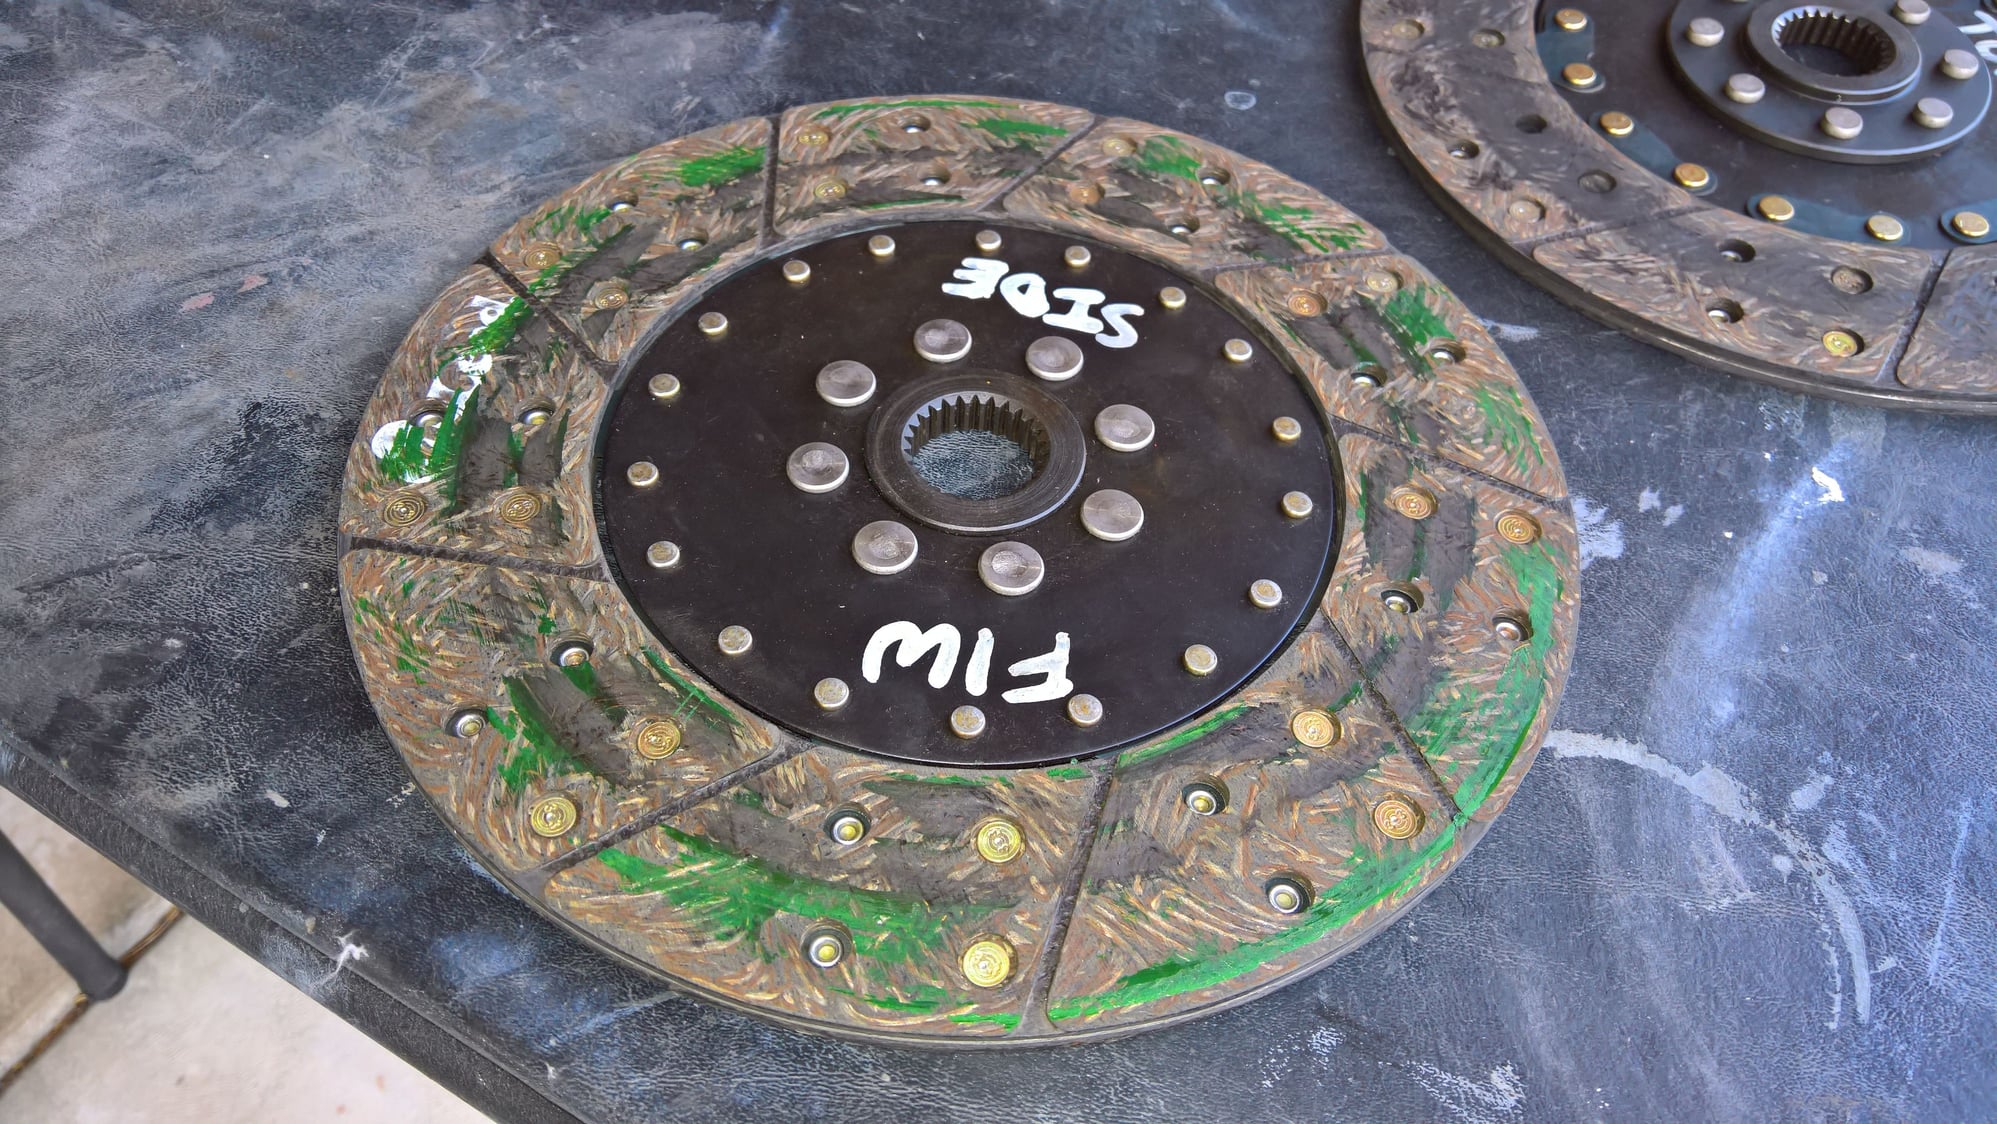
It turns out that the green protective coating, which Fidanza tells you will wear off normally, it actually melted to the clutch disk. This explains why I could not shift into gear with the engine running. The two were fused together.
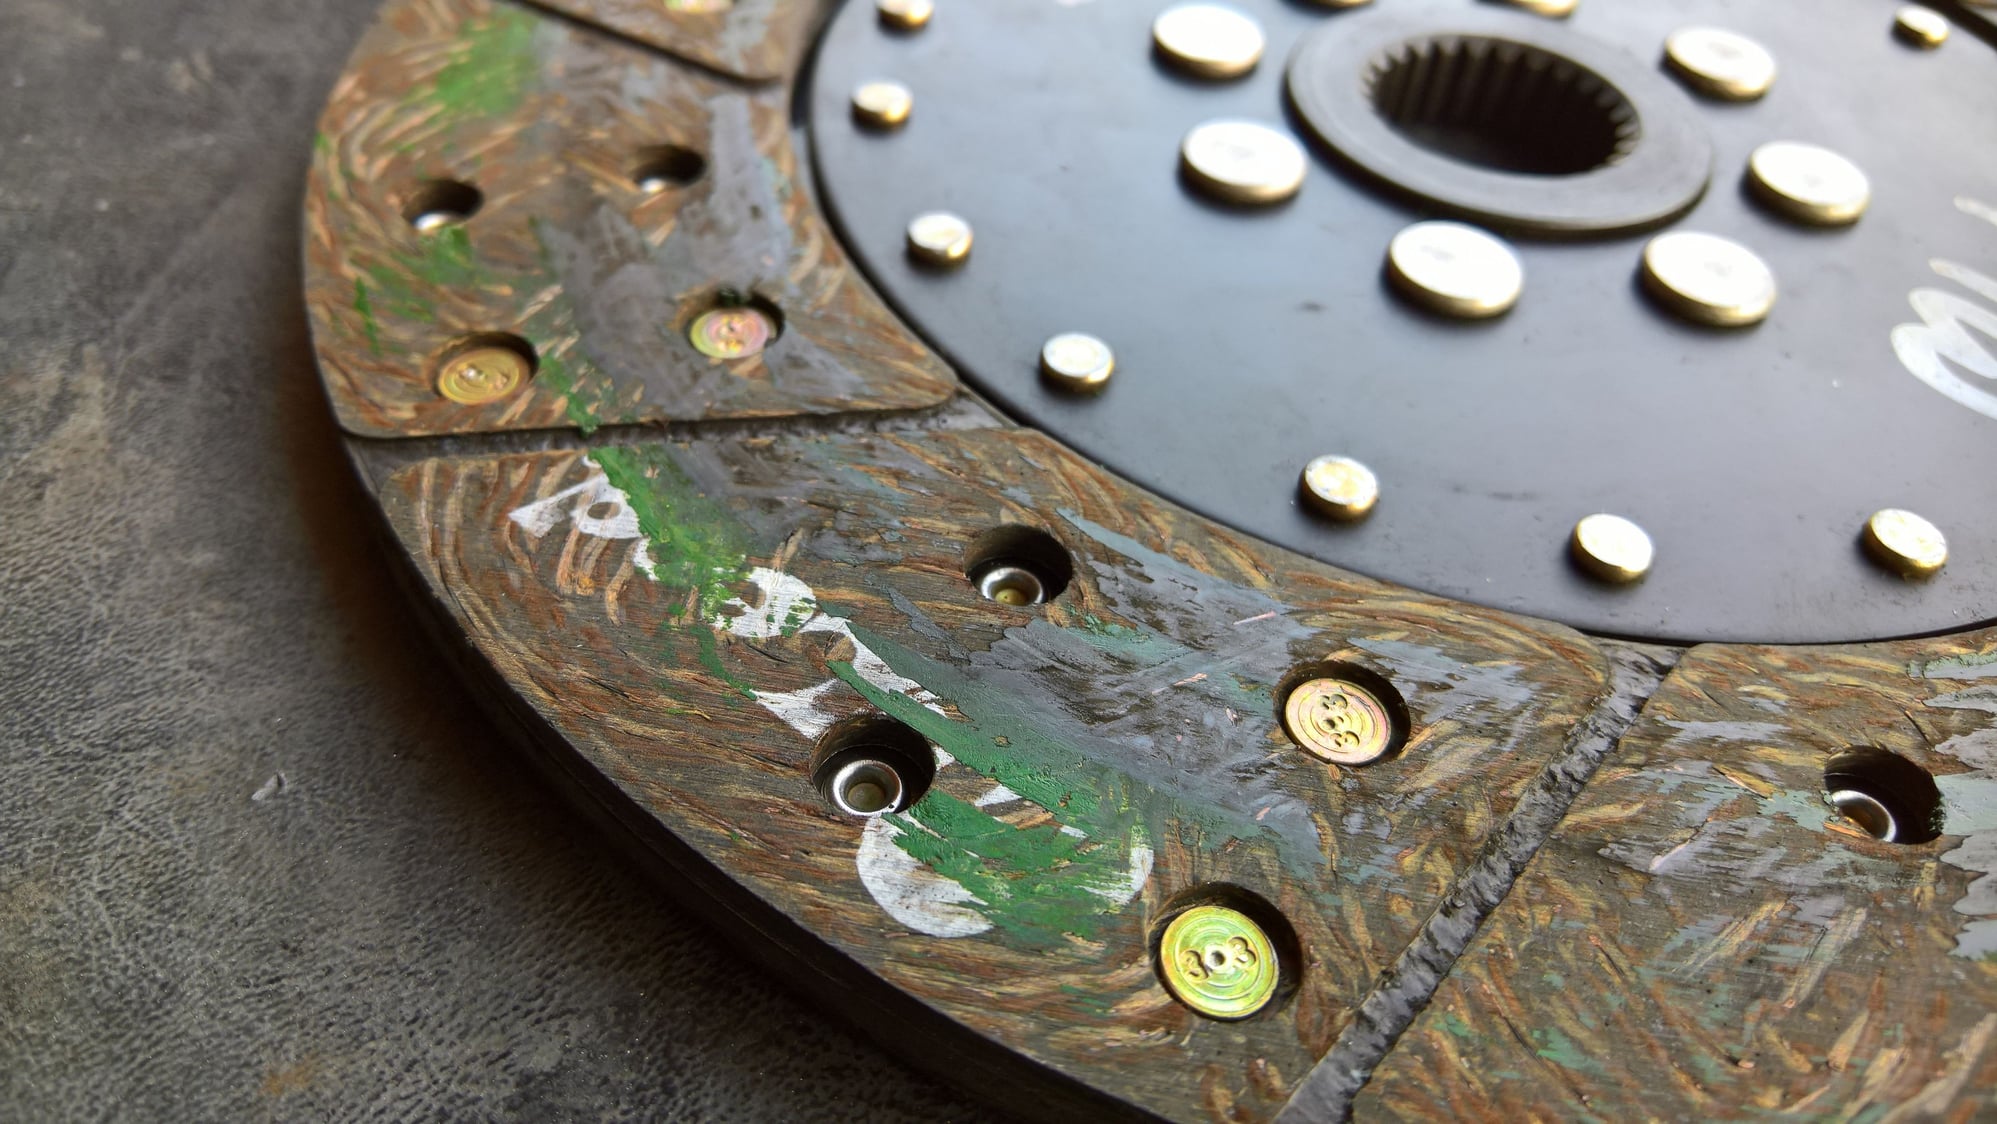
It turns out that the green protective coating, which Fidanza tells you will wear off normally, it actually melted to the clutch disk. This explains why I could not shift into gear with the engine running. The two were fused together.
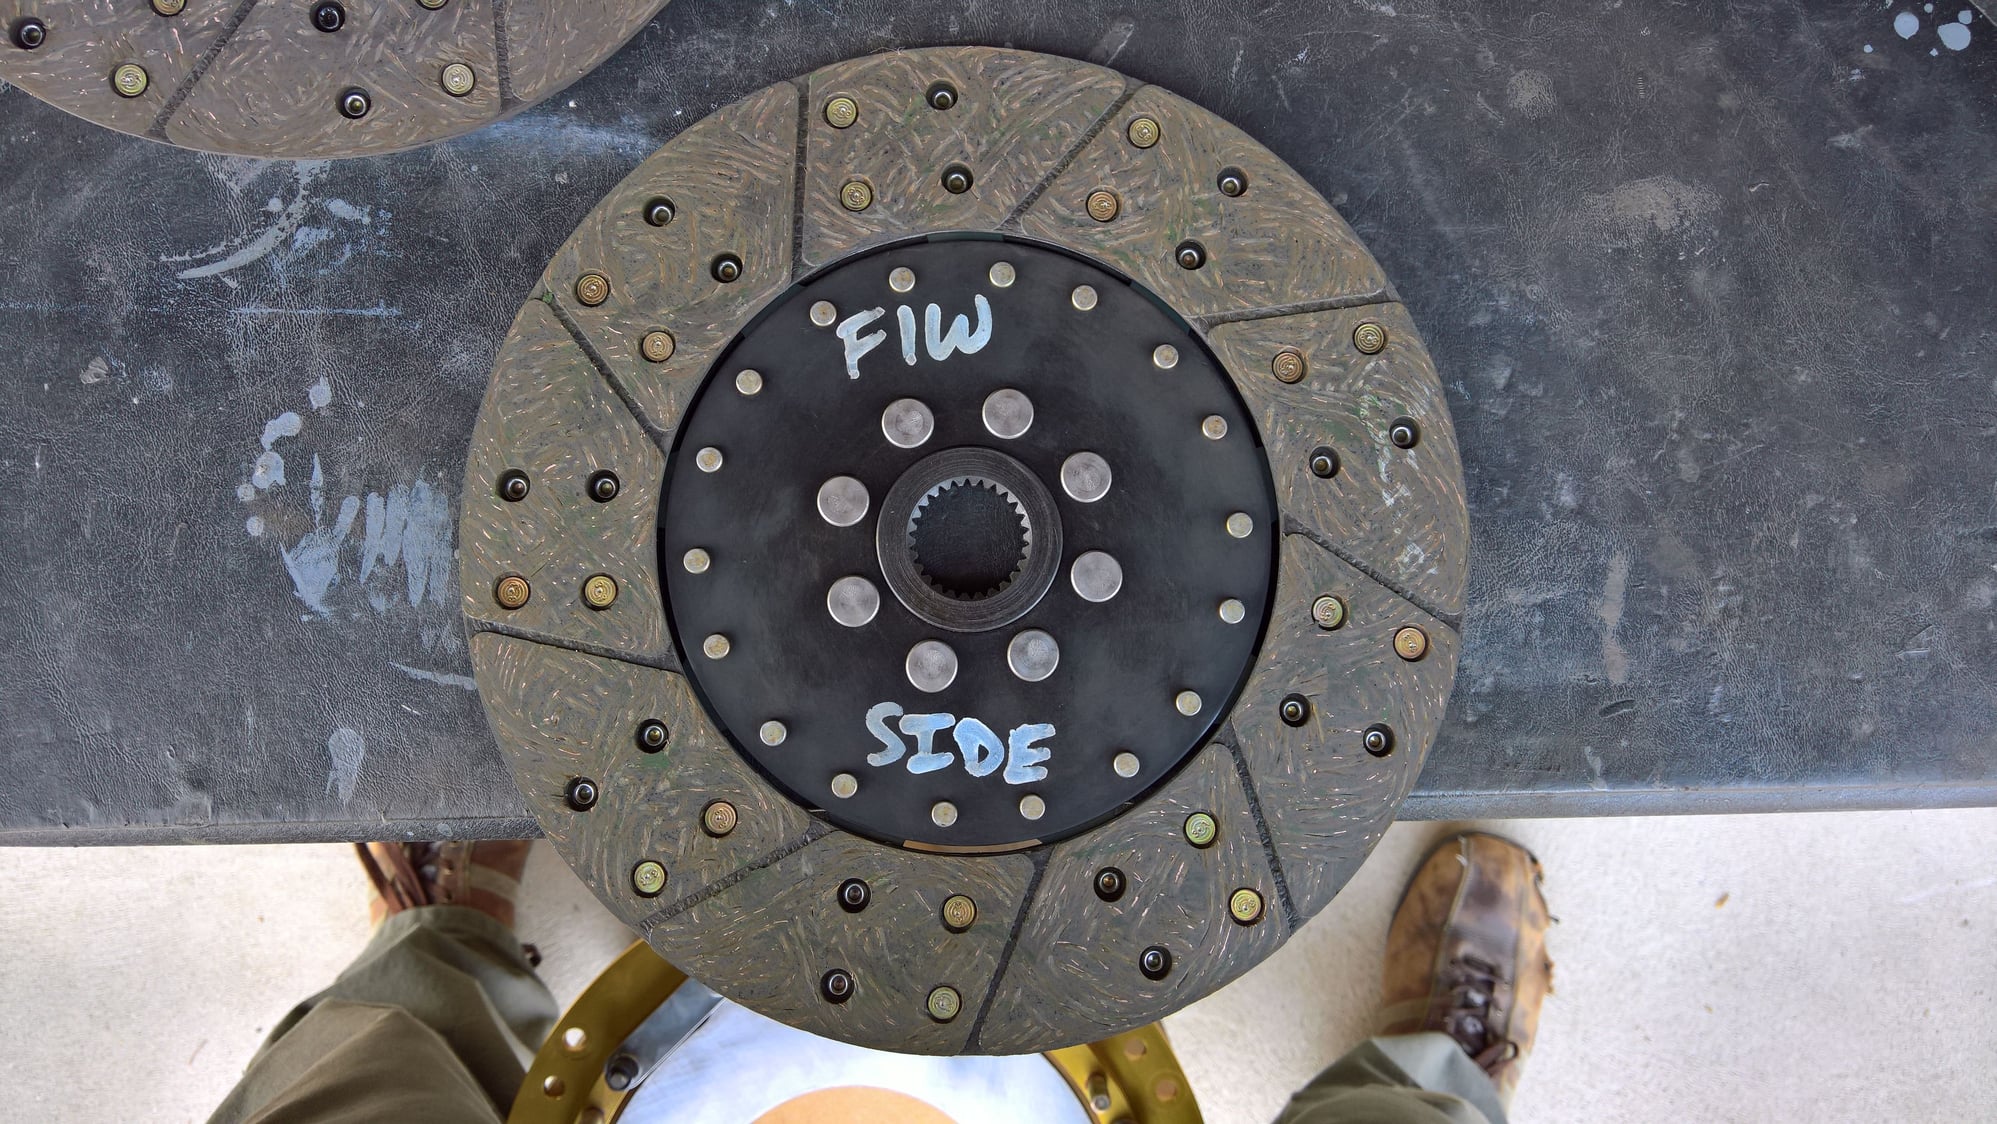
I sanded all the green coating off the clutch face.
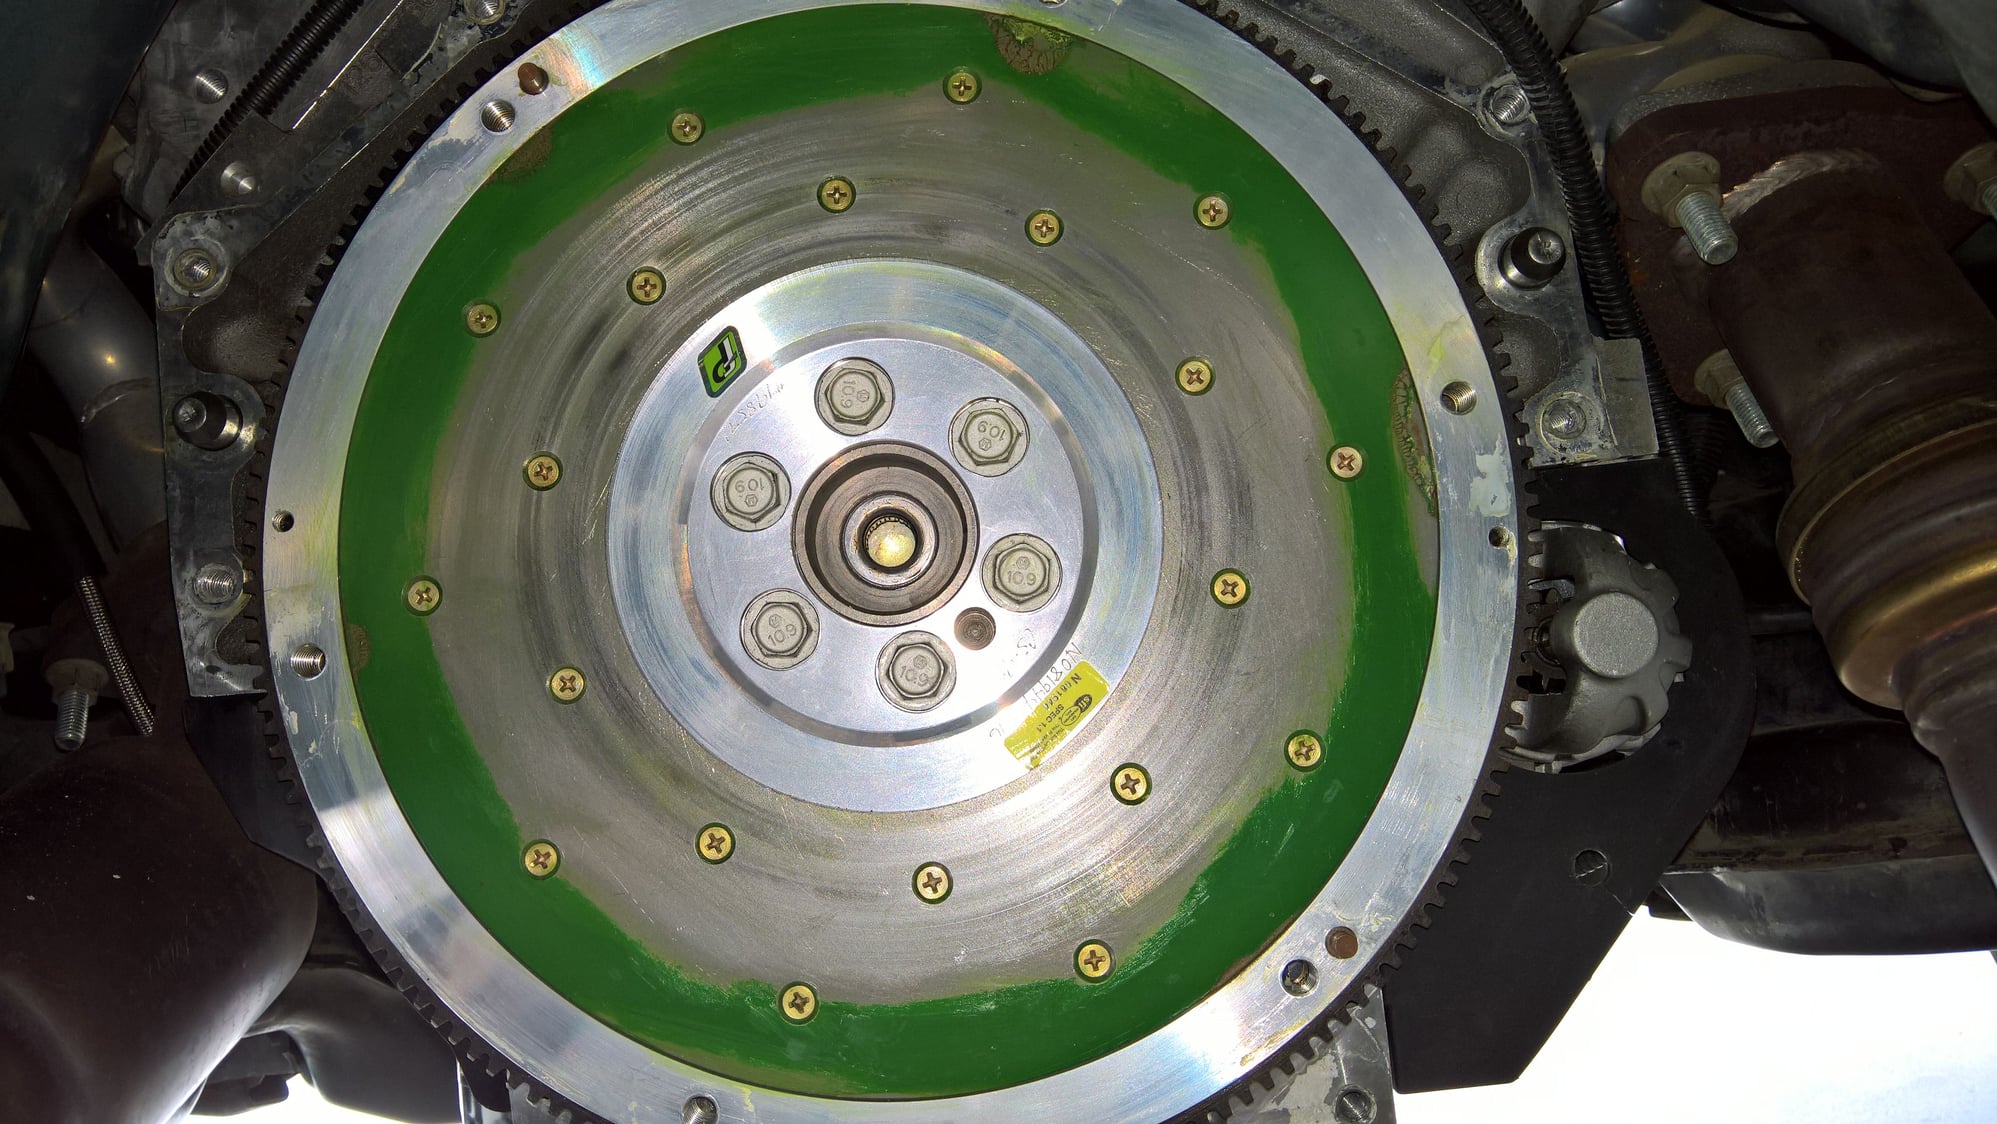
And used acetone to wipe off the contact surface of the flywheel.
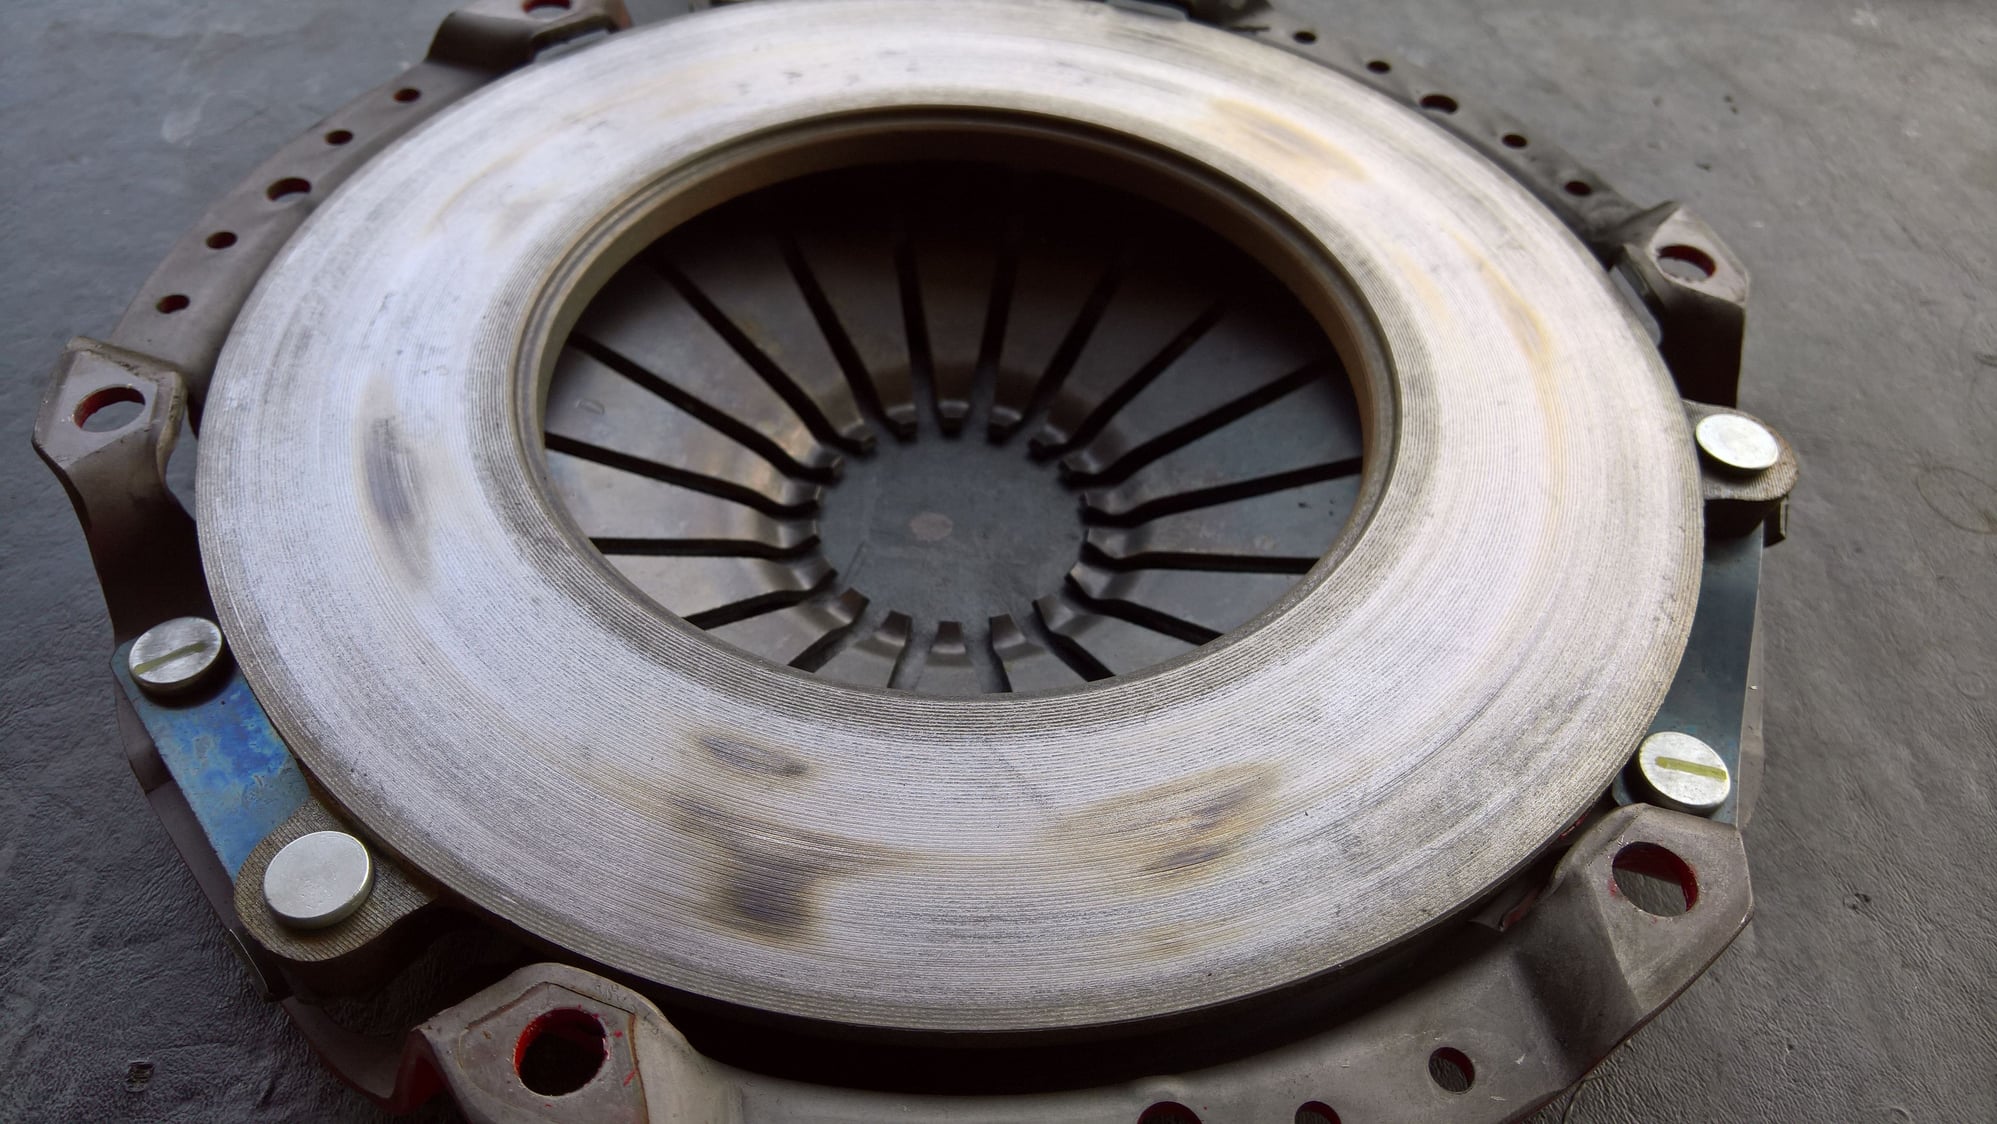
The floater plate and pressure plate got a few hot spots in attempting to get things working while also adjusting the clutch pedal.
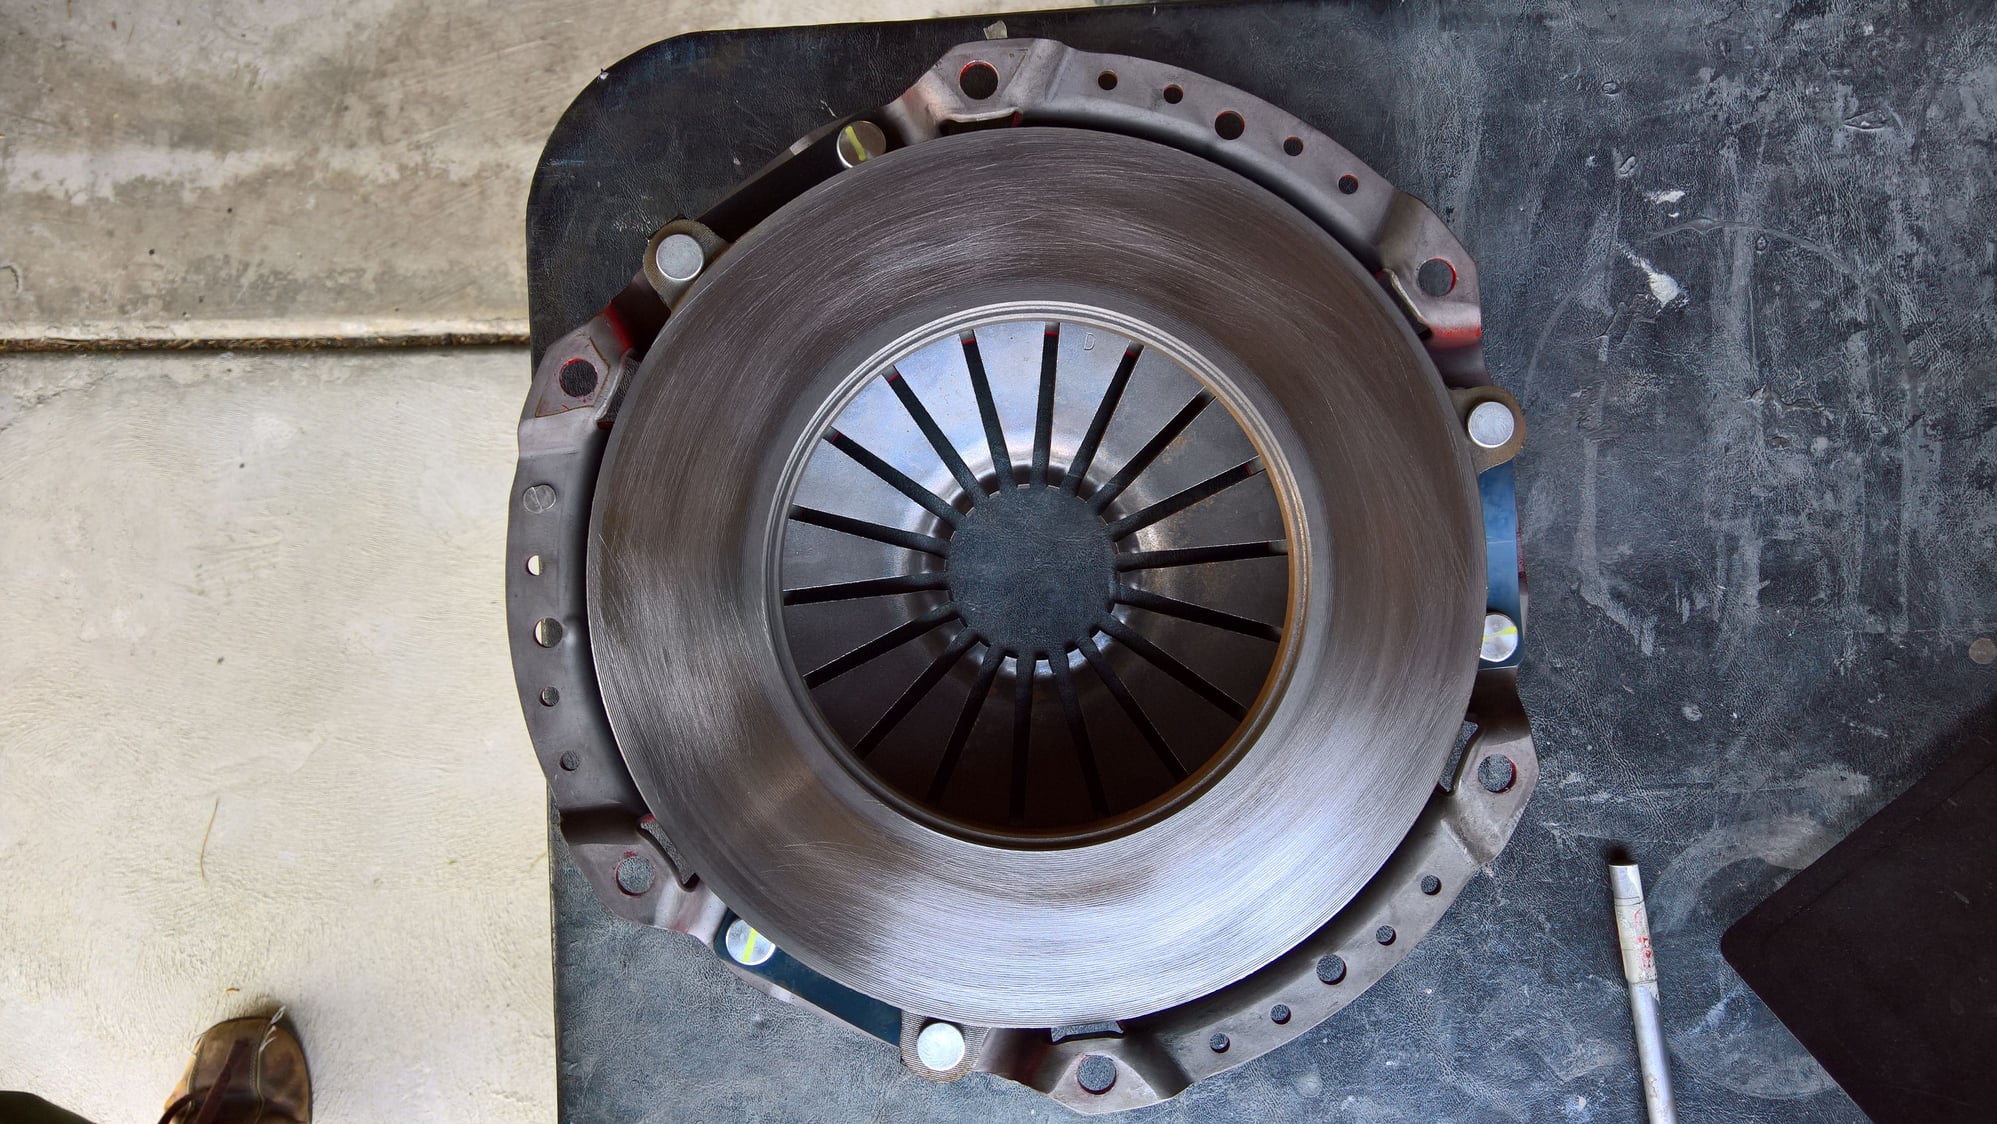
So I did some hand resurfacing with sand paper to give things a fresh shot at bedding properly.
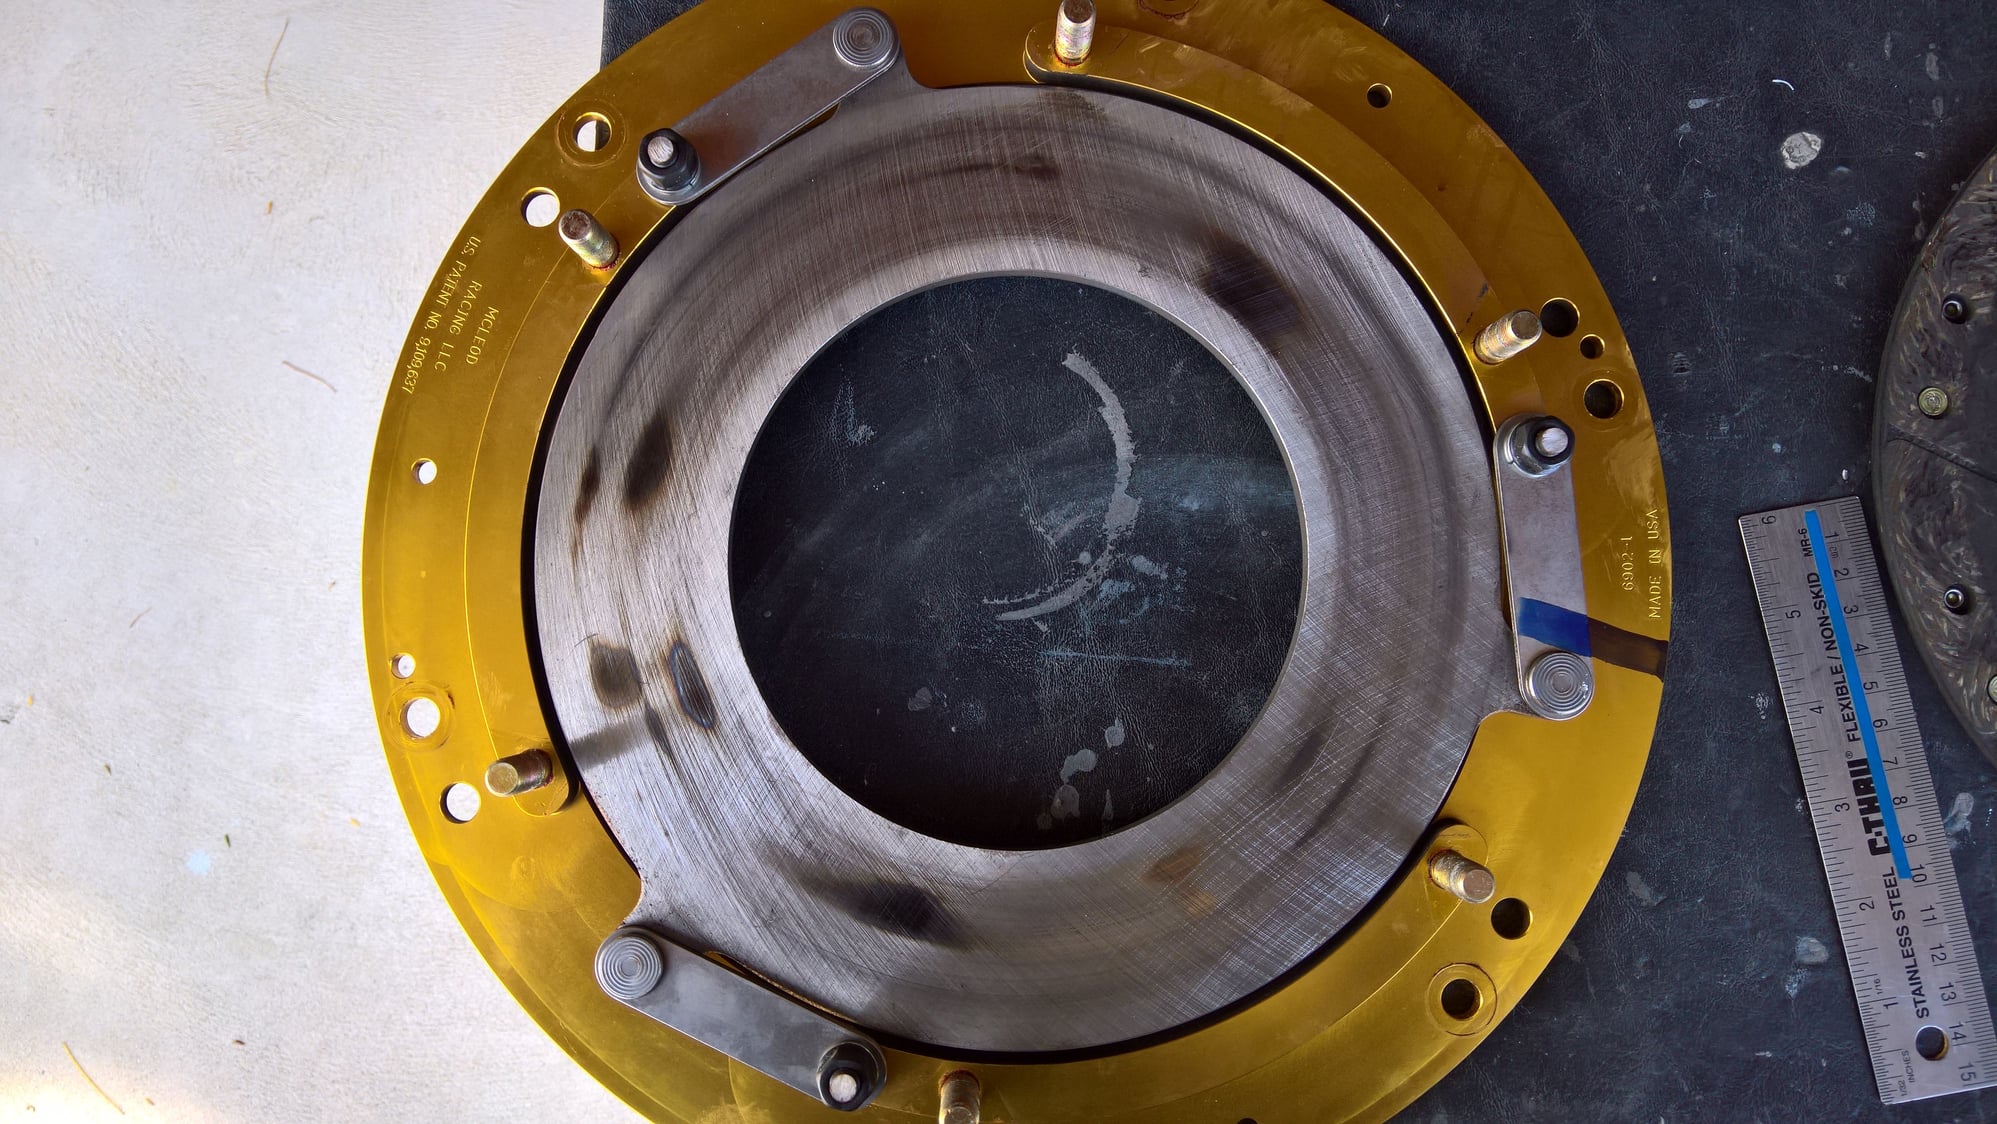
The floater plate and pressure plate got a few hot spots in attempting to get things working while also adjusting the clutch pedal.
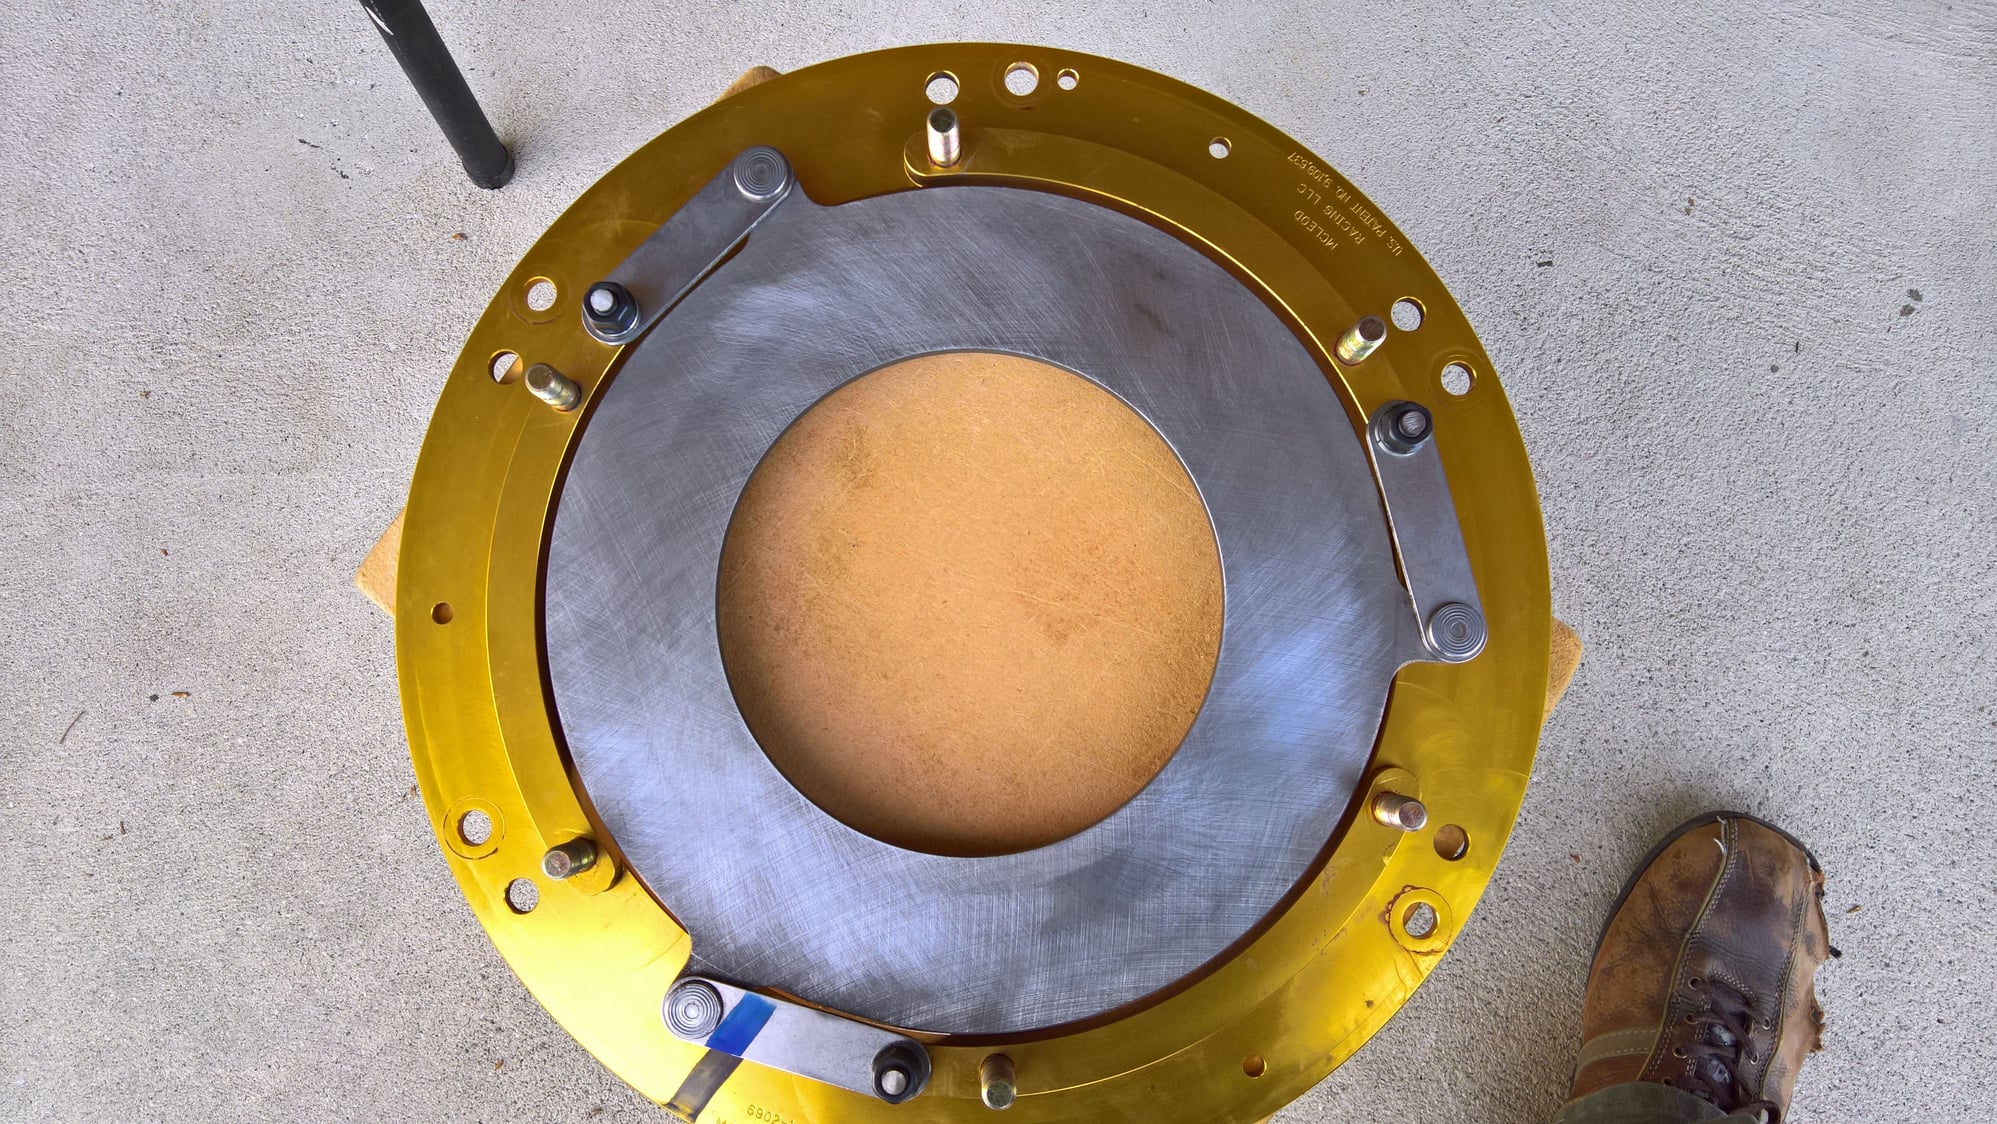
So I did some hand resurfacing with sand paper to give things a fresh shot at bedding properly.
#103
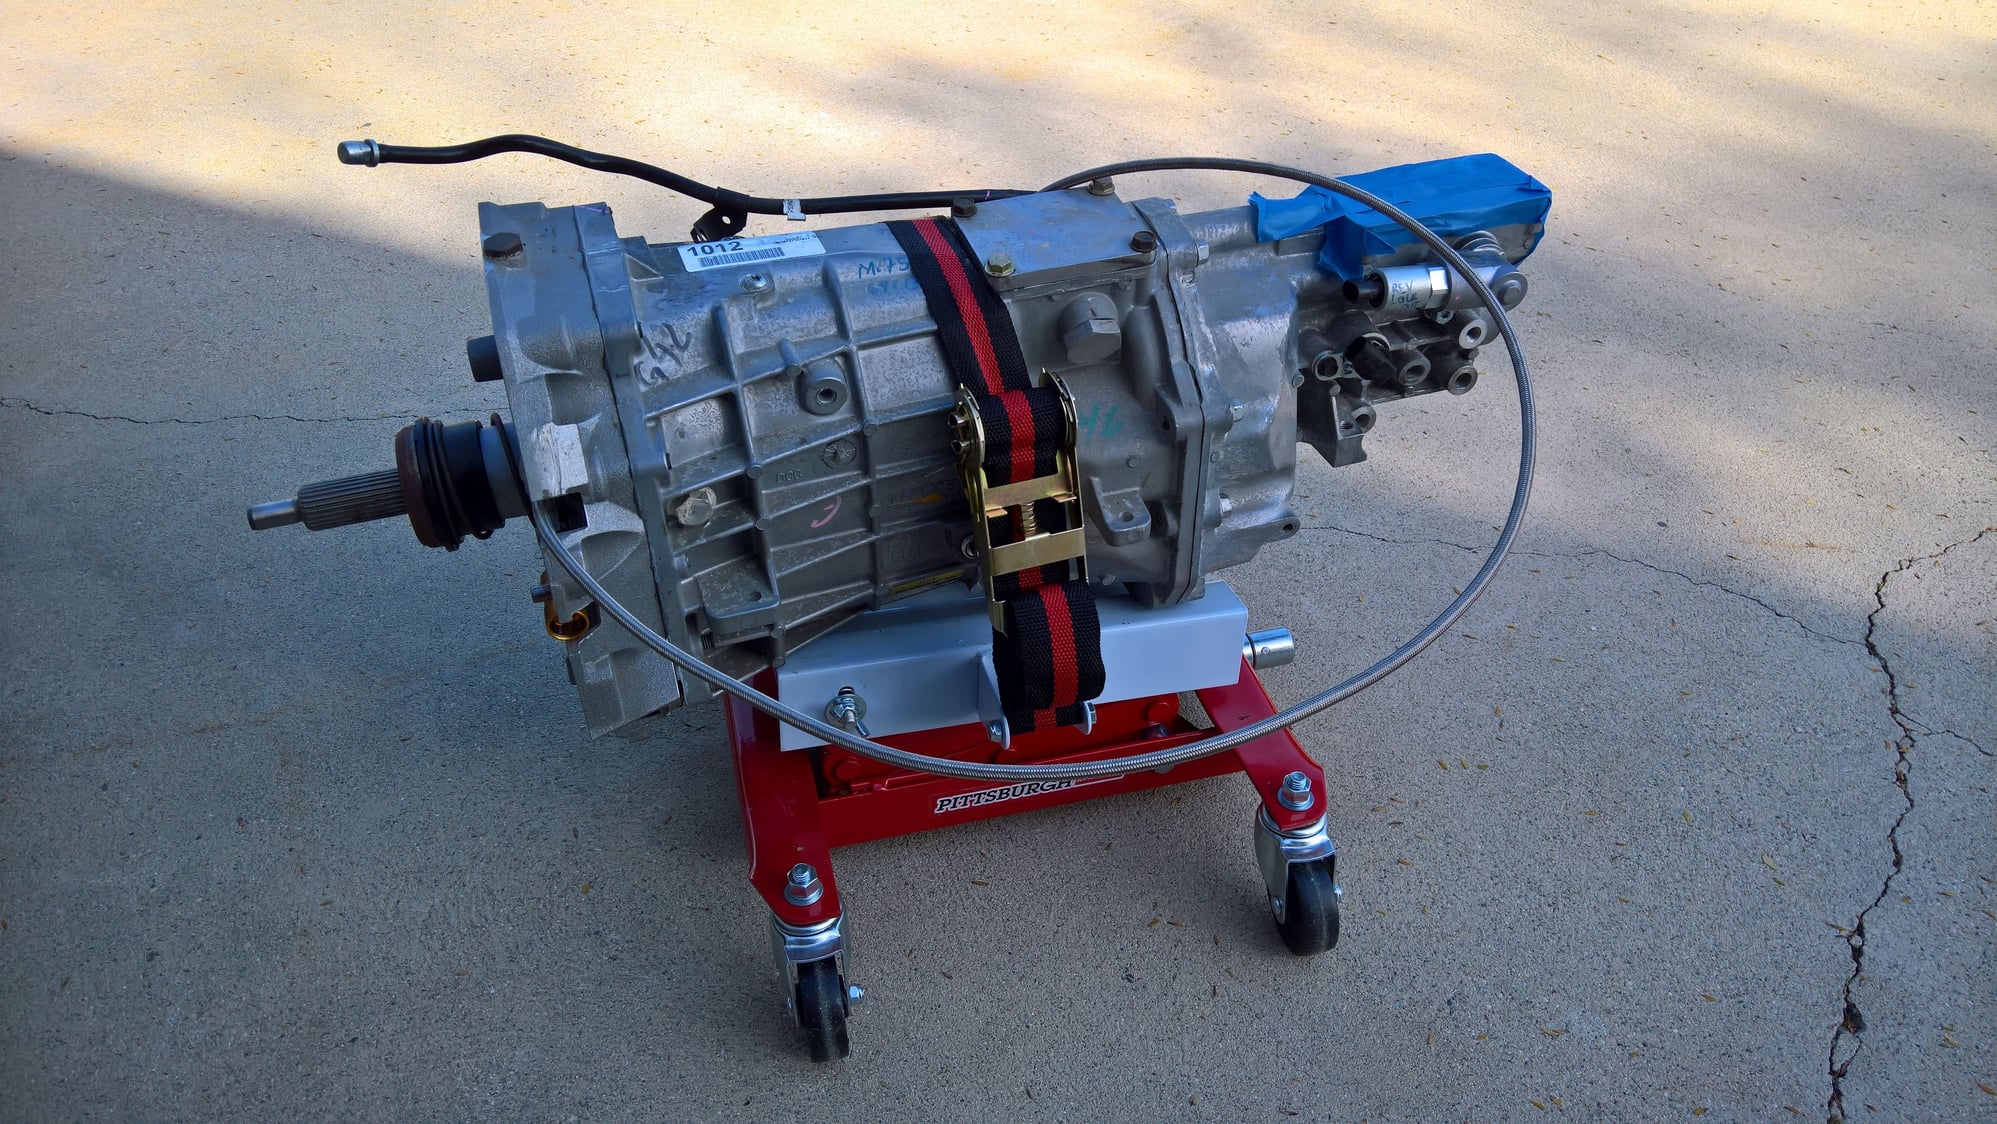
Time to put things back together. I bought this Harbor Freight trans jack to assist in lifting and aligning things for the reinstall. It was terrible and I returned it after I got the trans back in.
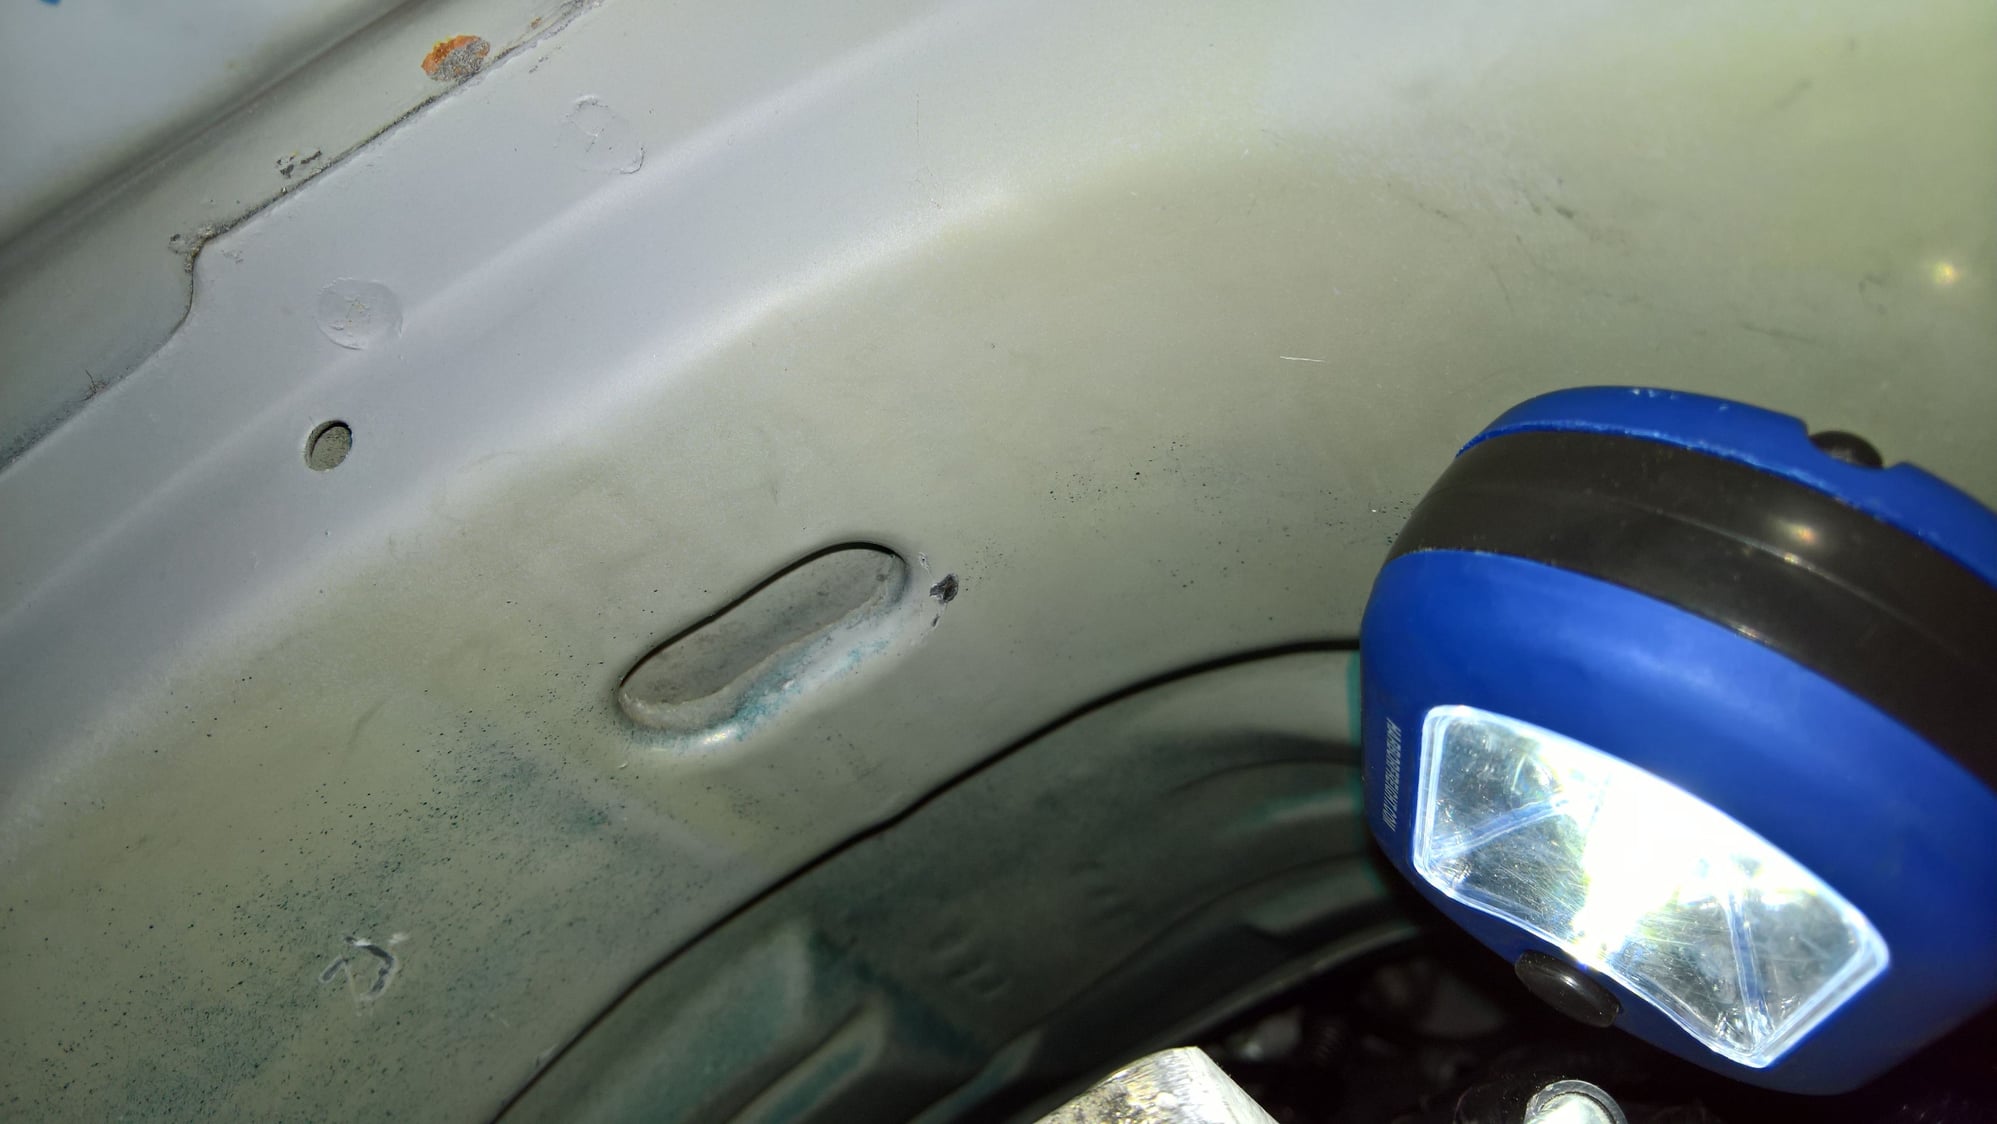
After putting the trans back in, I noticed that the two rear bolts on the shifter block-off plate had been hitting the center tunnel at the brace. No bueno.
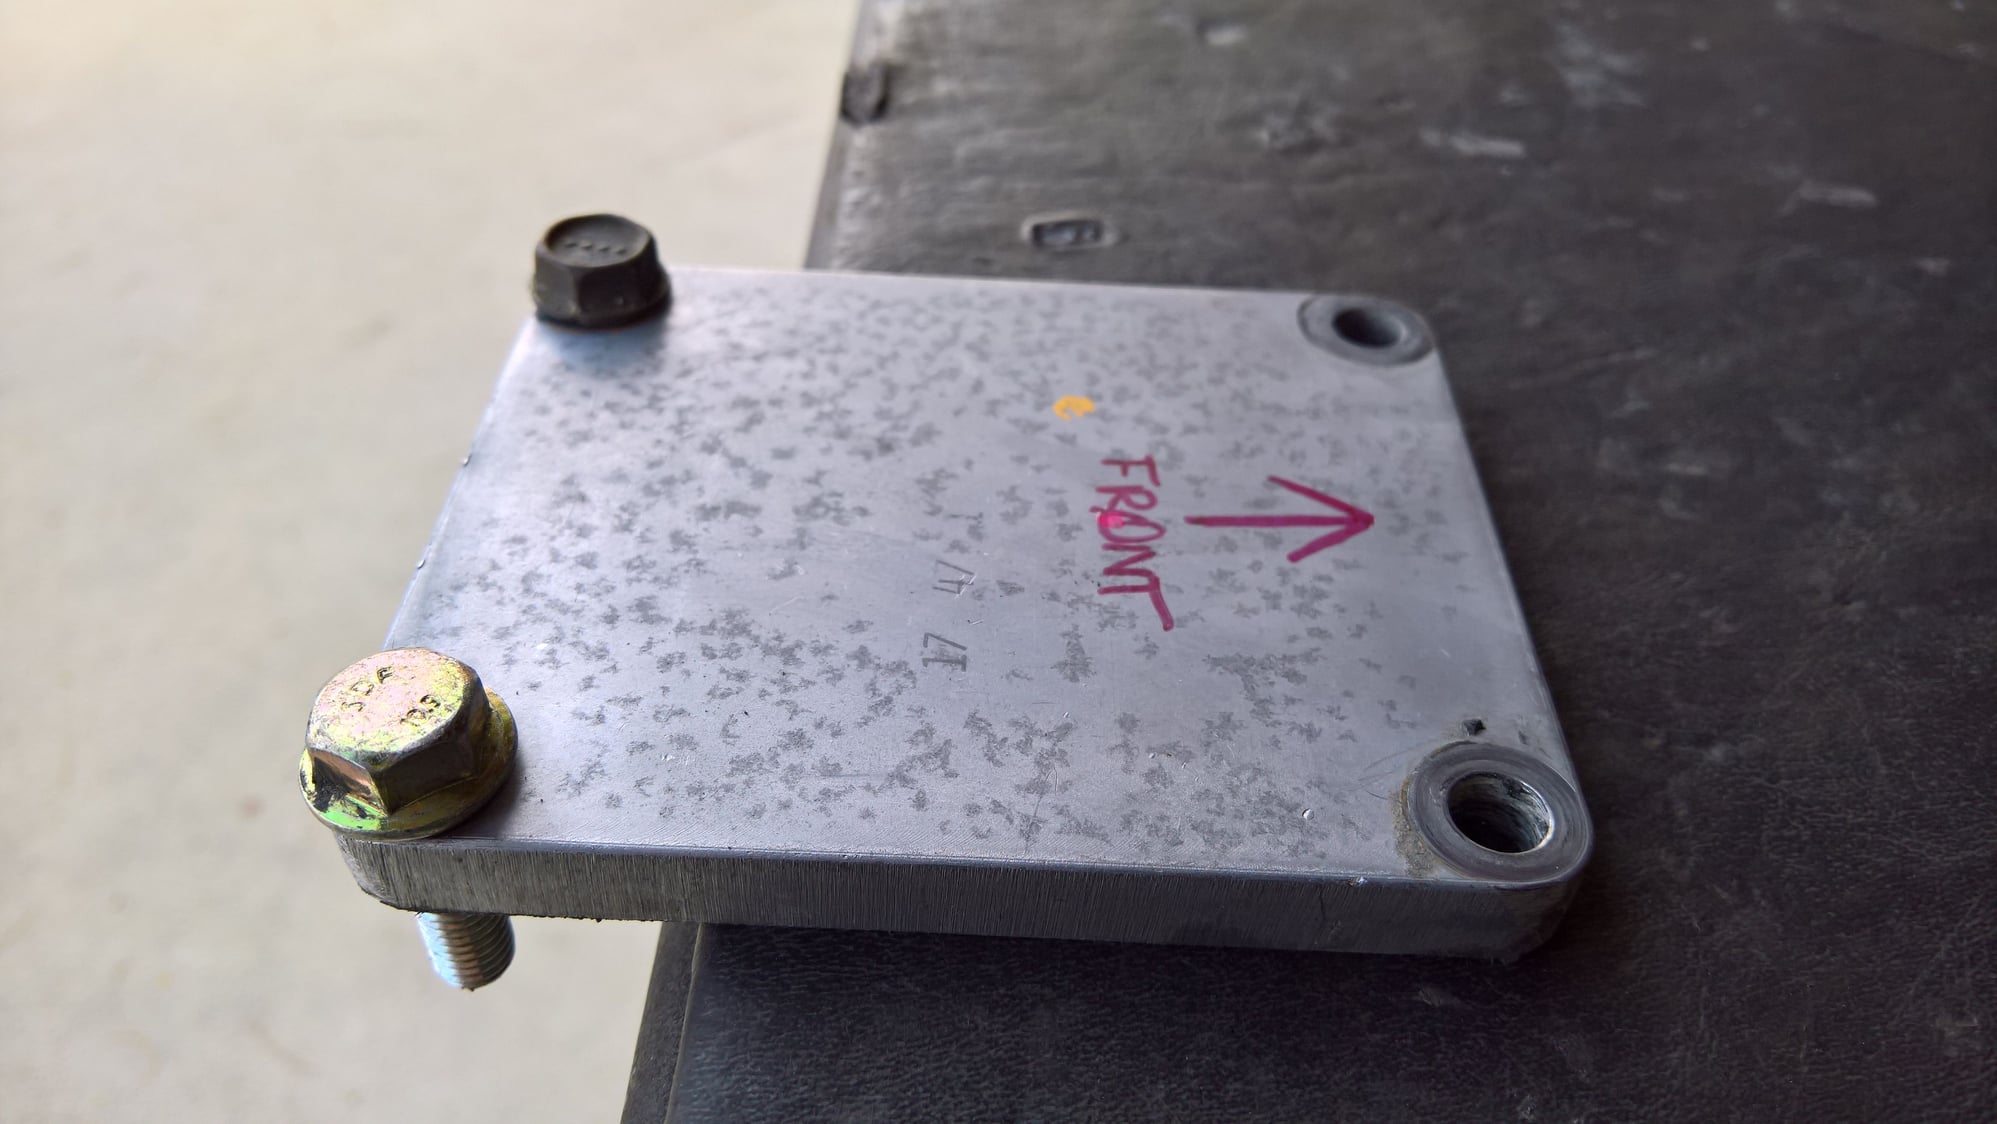
After putting the trans back in, I noticed that the two rear bolts on the shifter block-off plate had been hitting the center tunnel at the brace. No bueno.
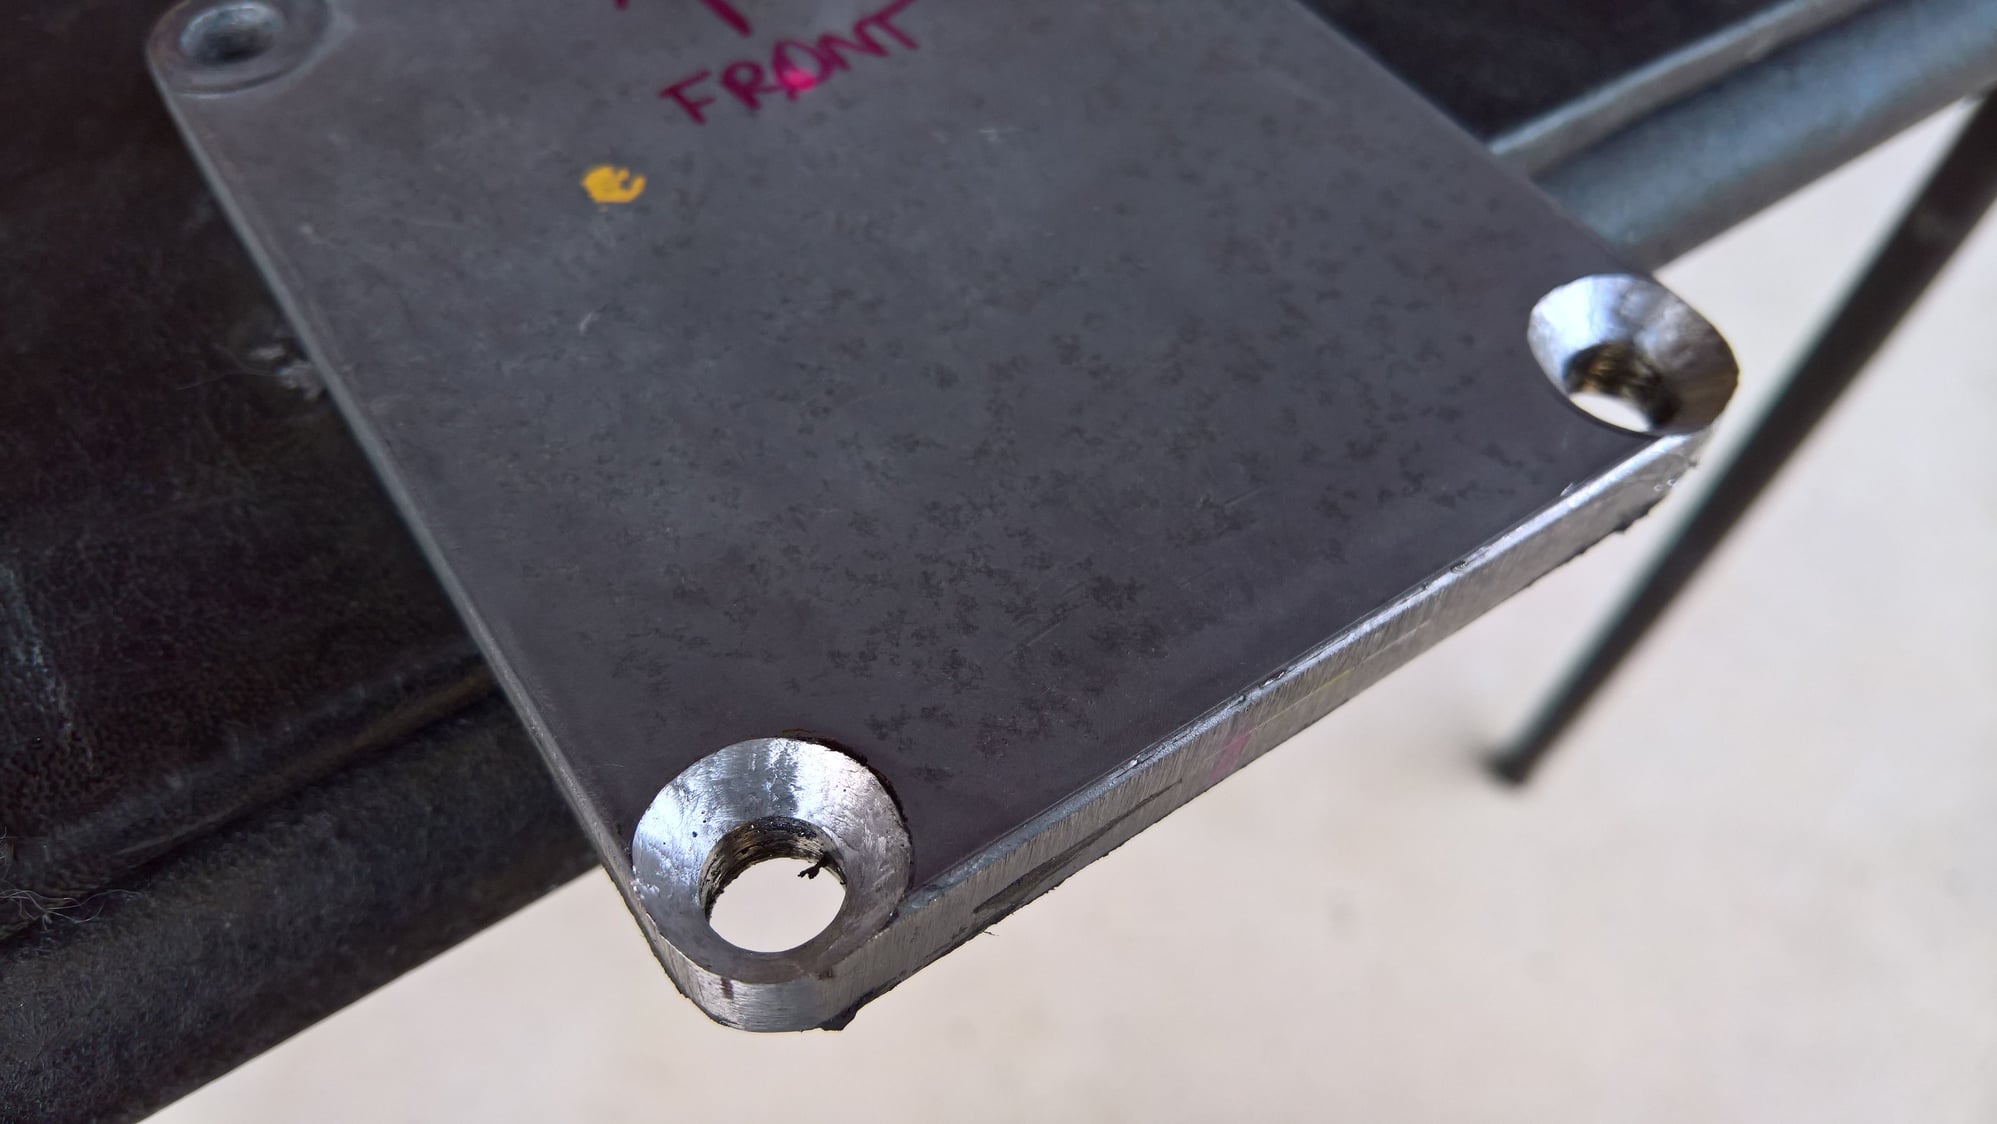
So I somehow managed to get the plate off WITH the trans in the car, and countersunk these holes.
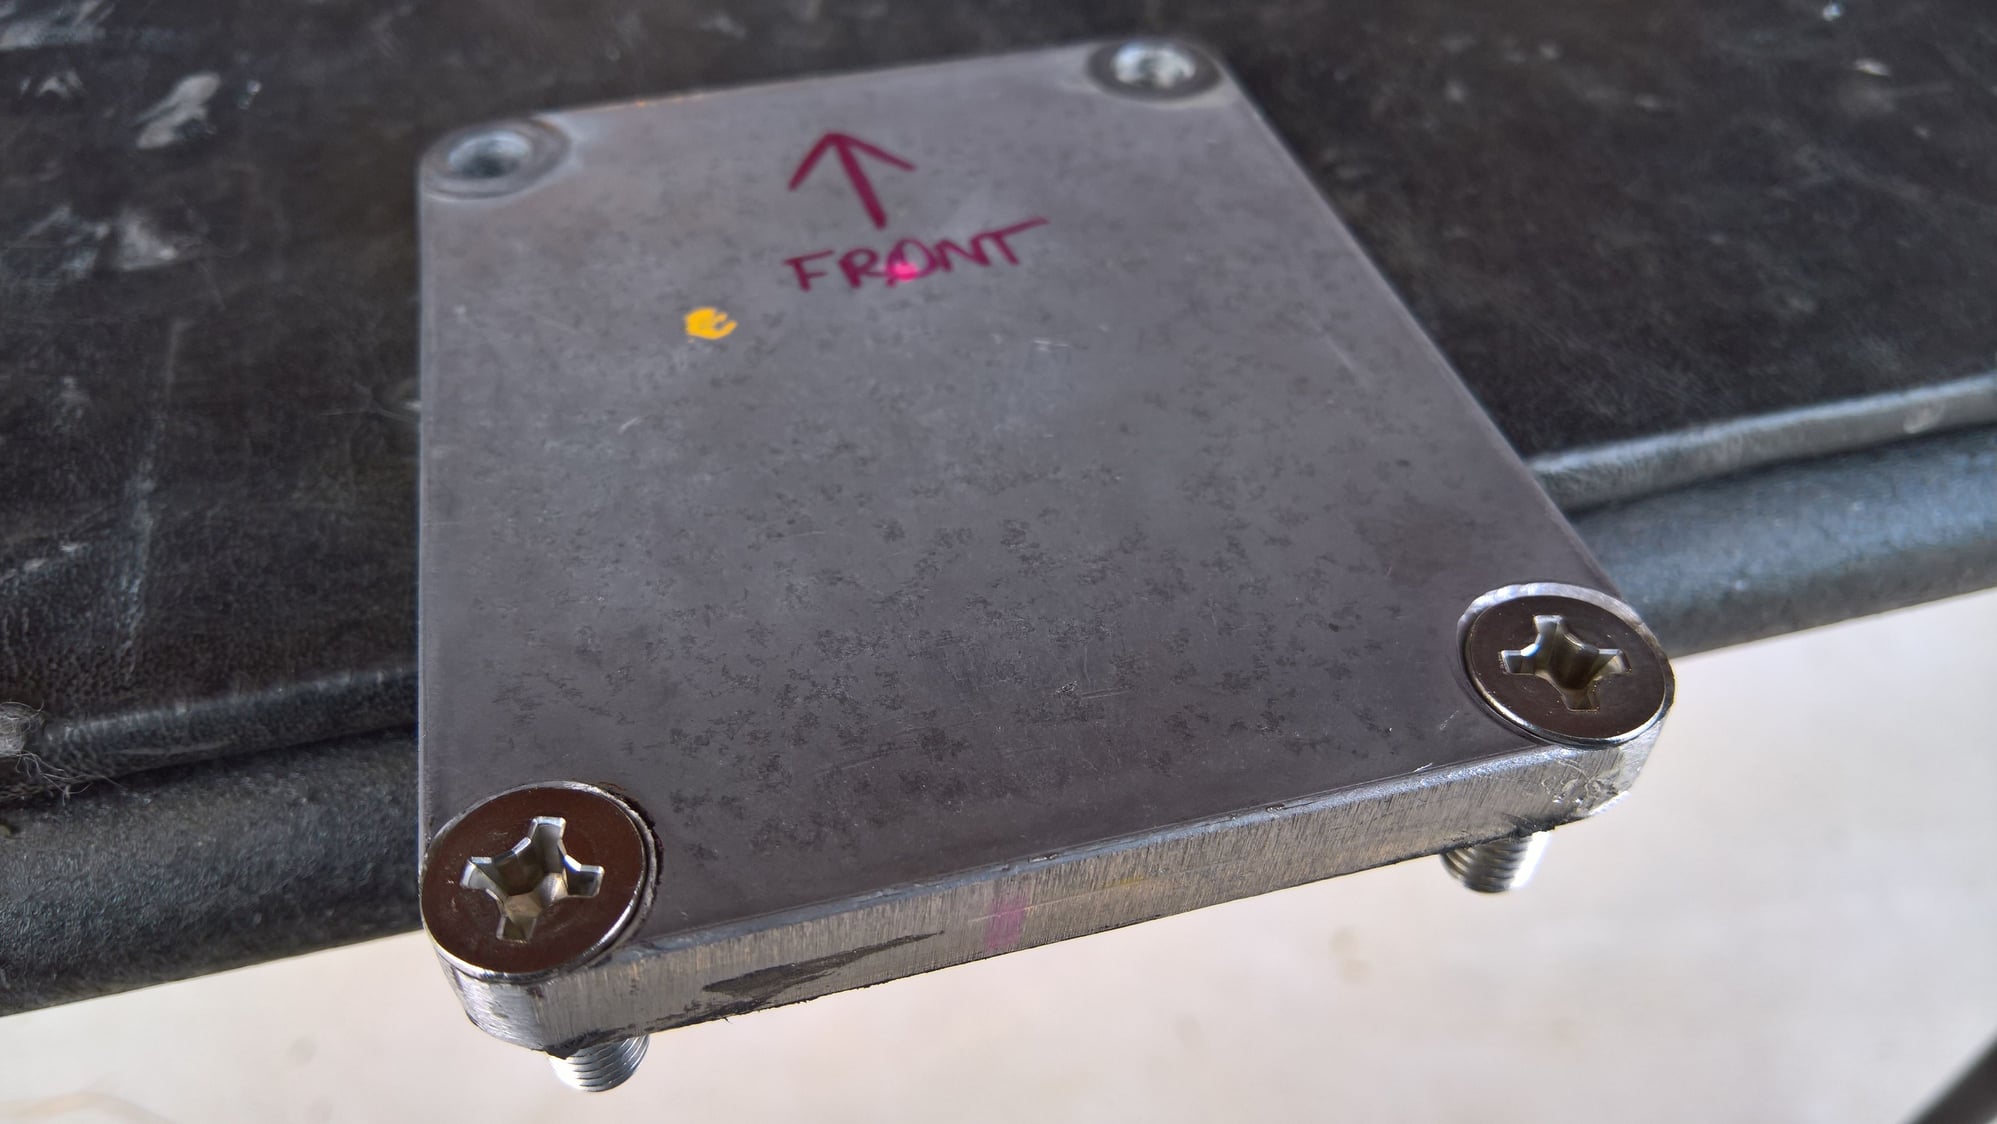
So I somehow managed to get the plate off WITH the trans in the car, and countersunk these holes.
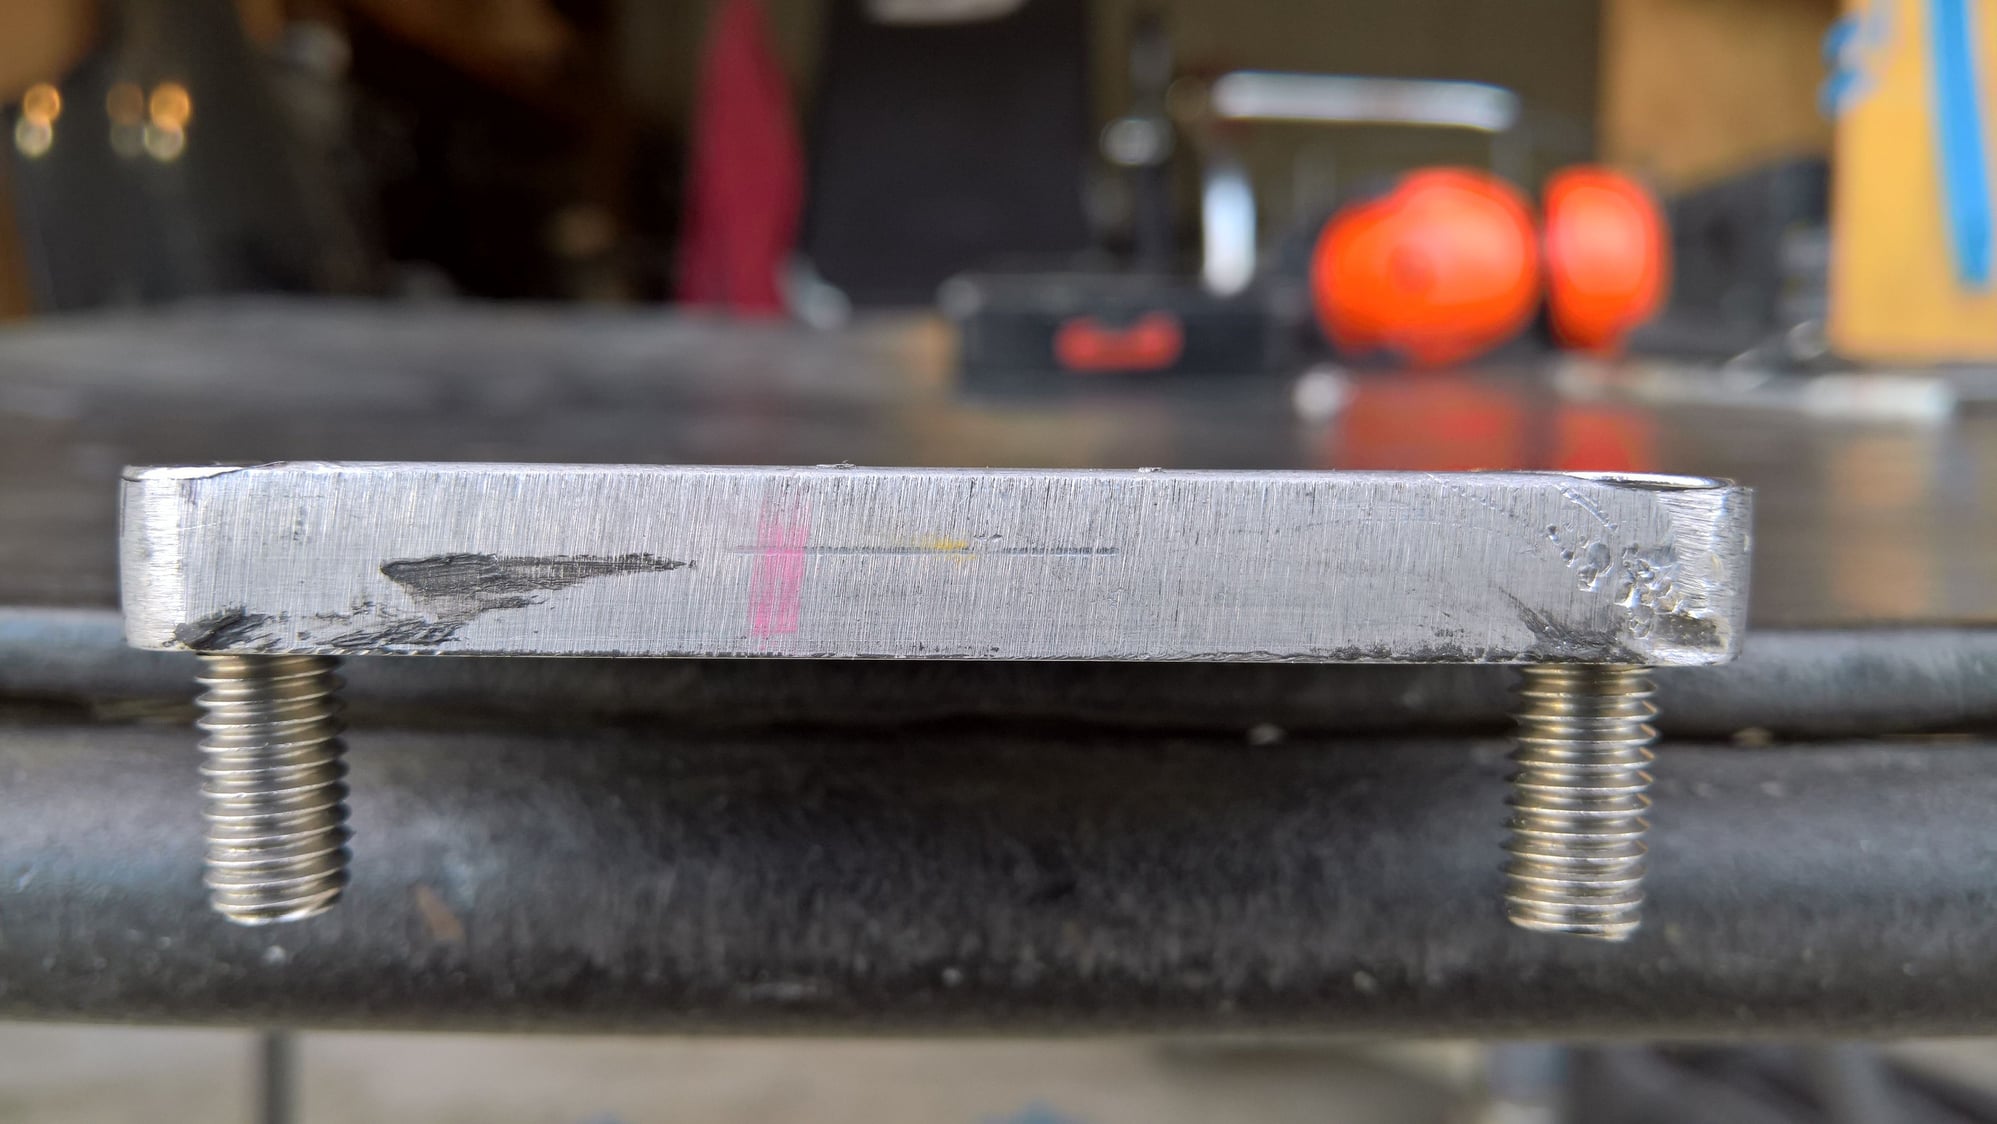
So I somehow managed to get the plate off WITH the trans in the car, and countersunk these holes.
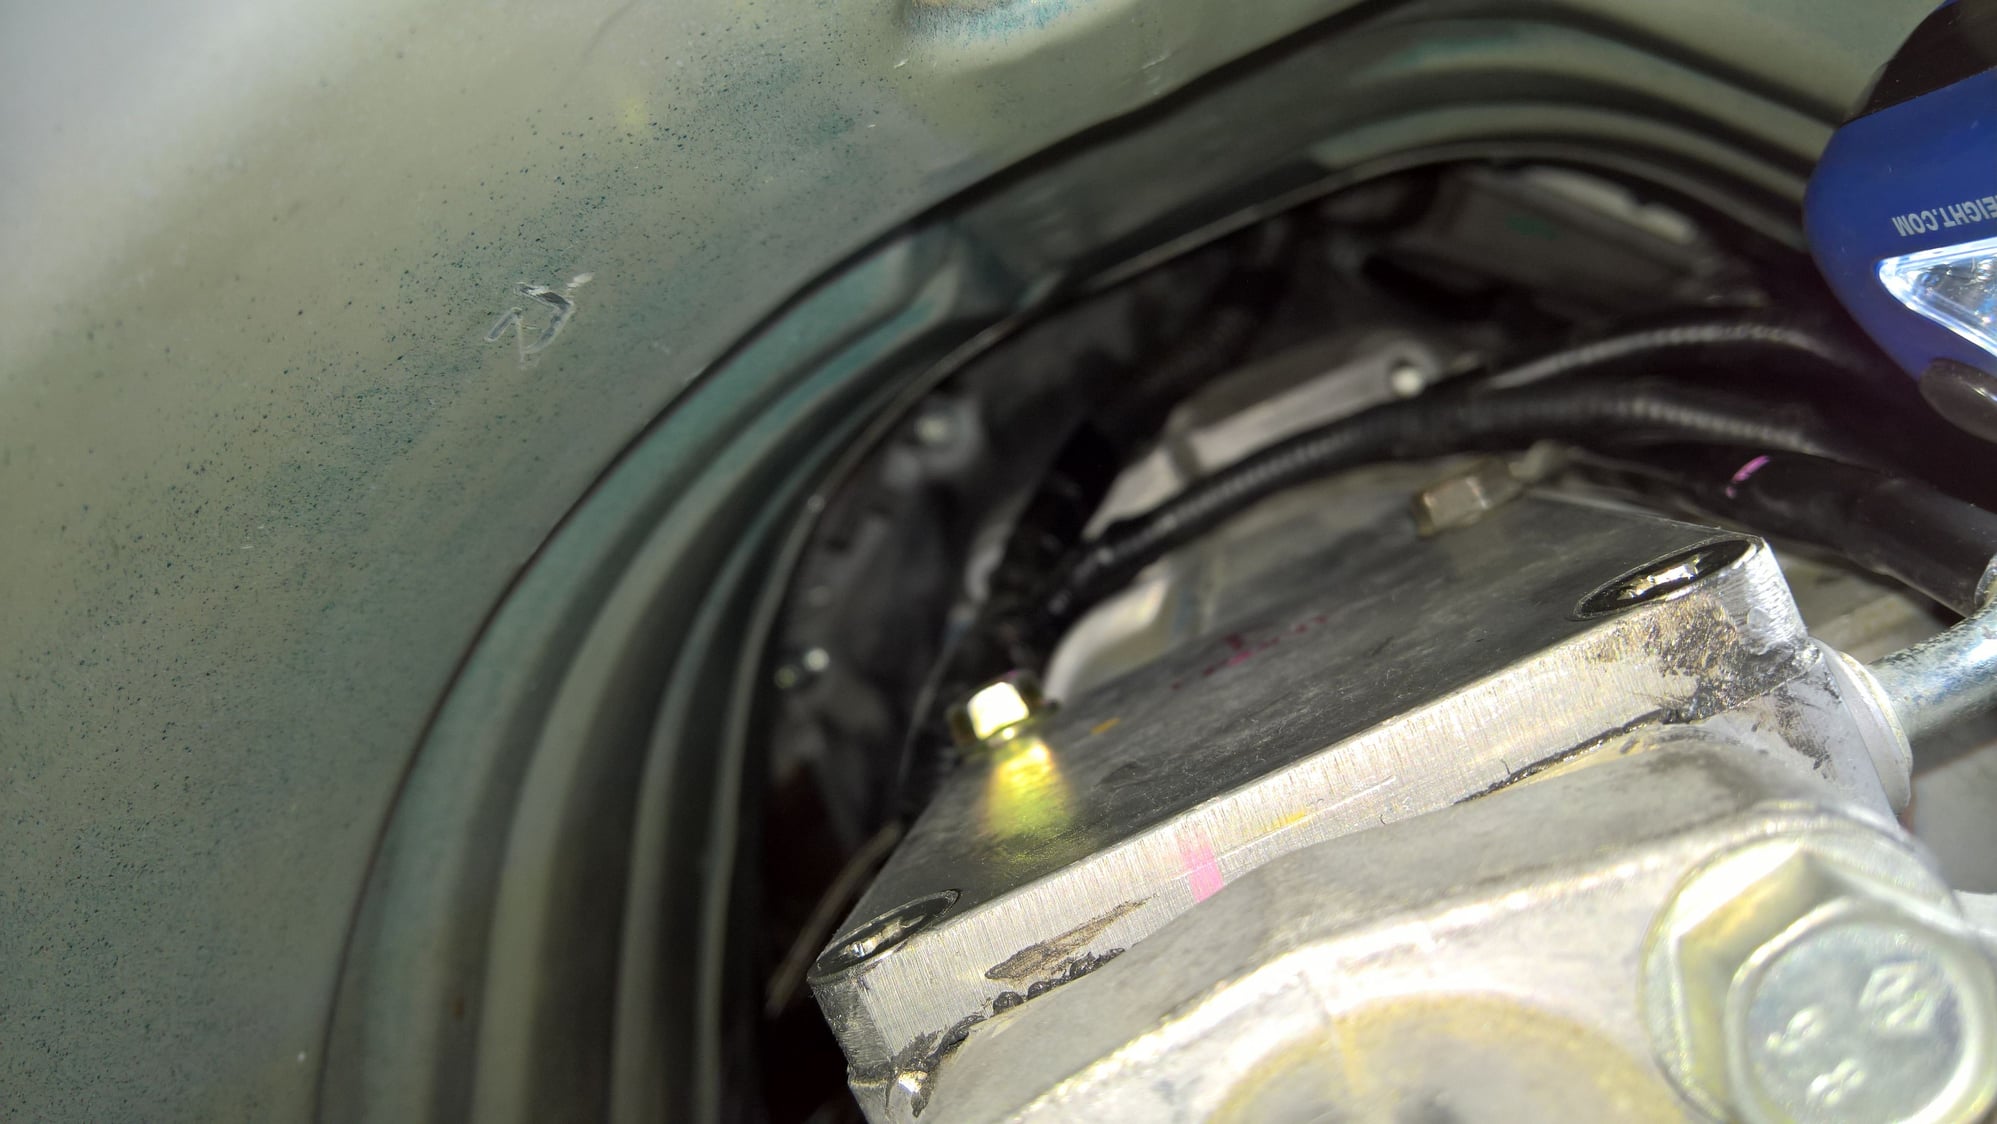
So I somehow managed to get the plate off WITH the trans in the car, and countersunk these holes.
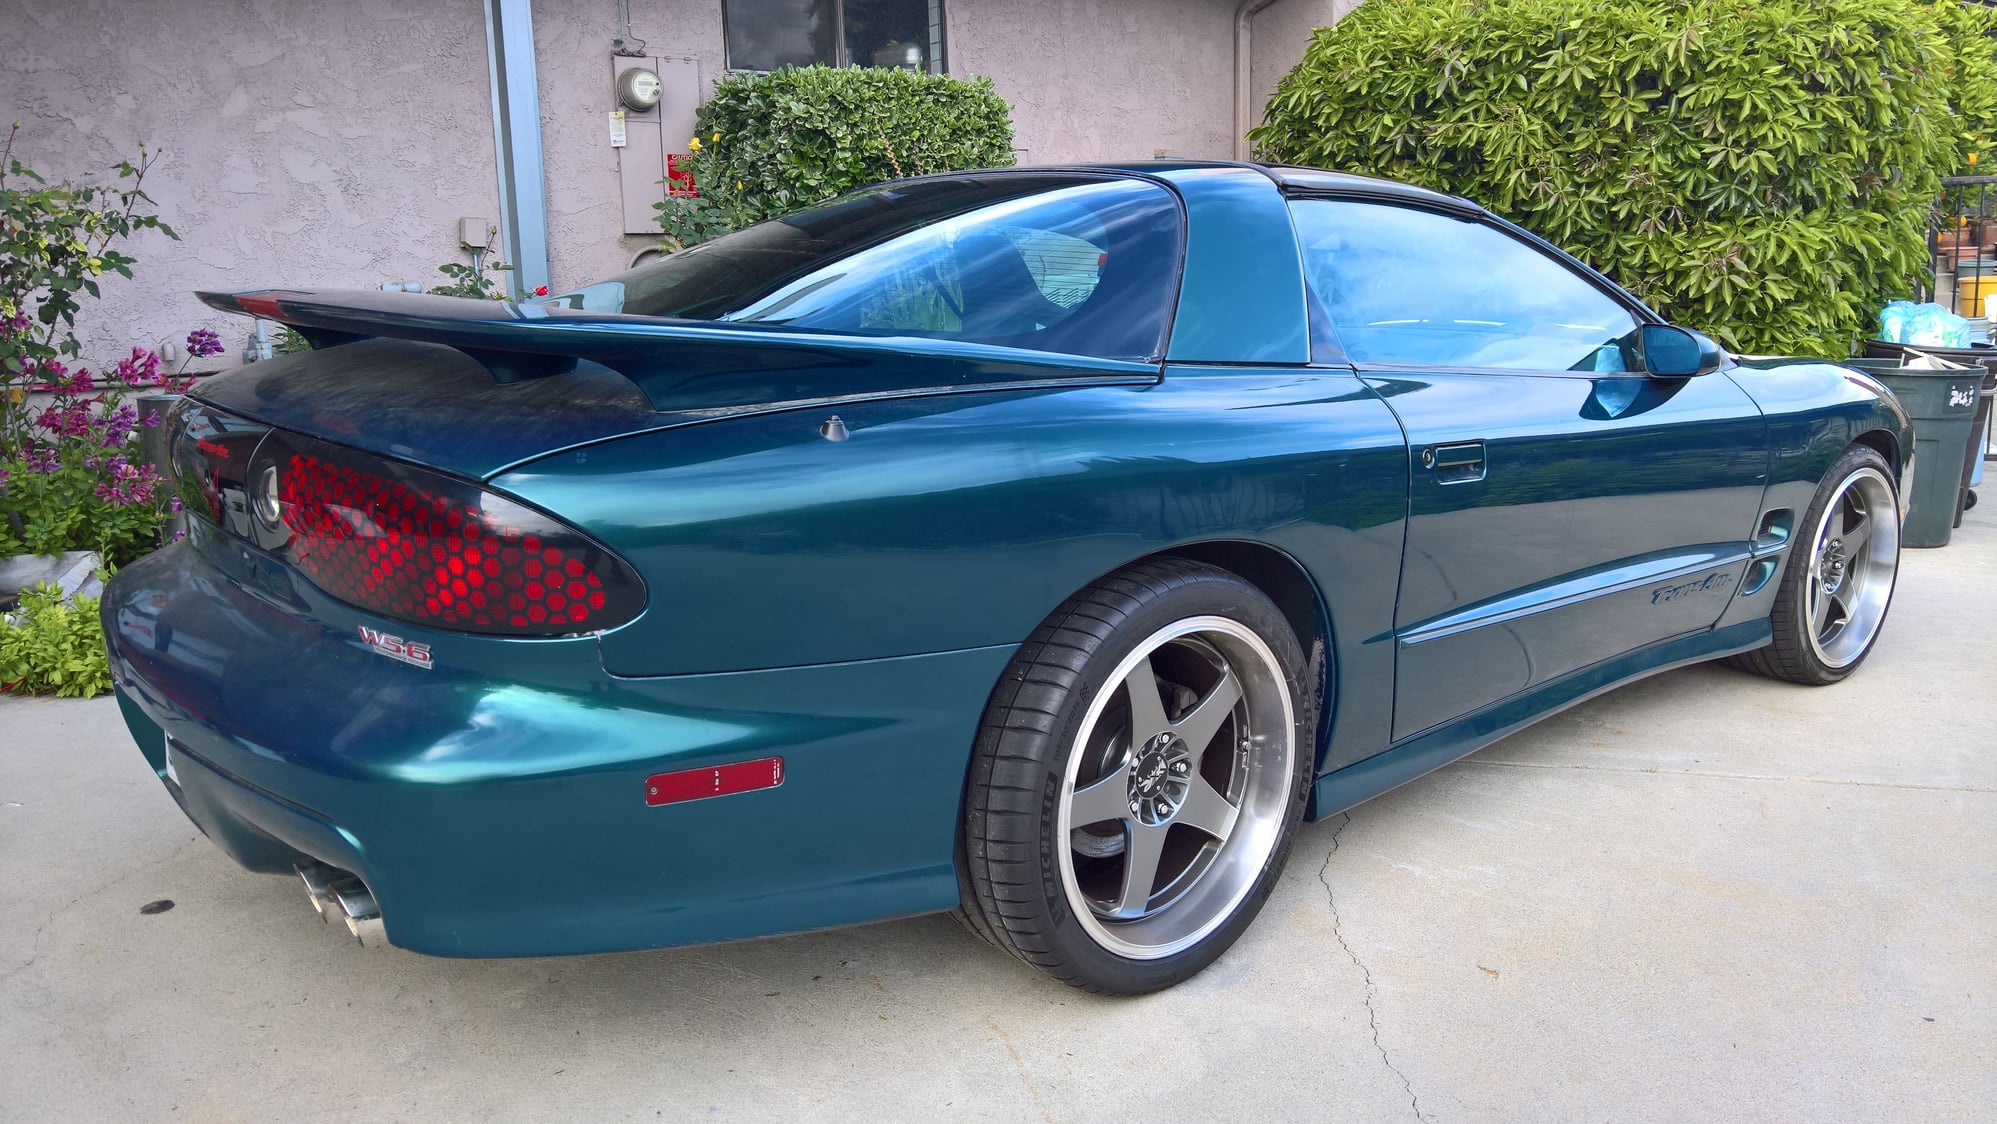
Somehow, with the car on the ground, the ride height is now pretty normal. It sits really high if you lift it by the axle, so I was not expecting this. I want it a little lower in the rear, but this amount of suspension travel is probably better for daily driving. Looks like I won't have to cut the springs after all.
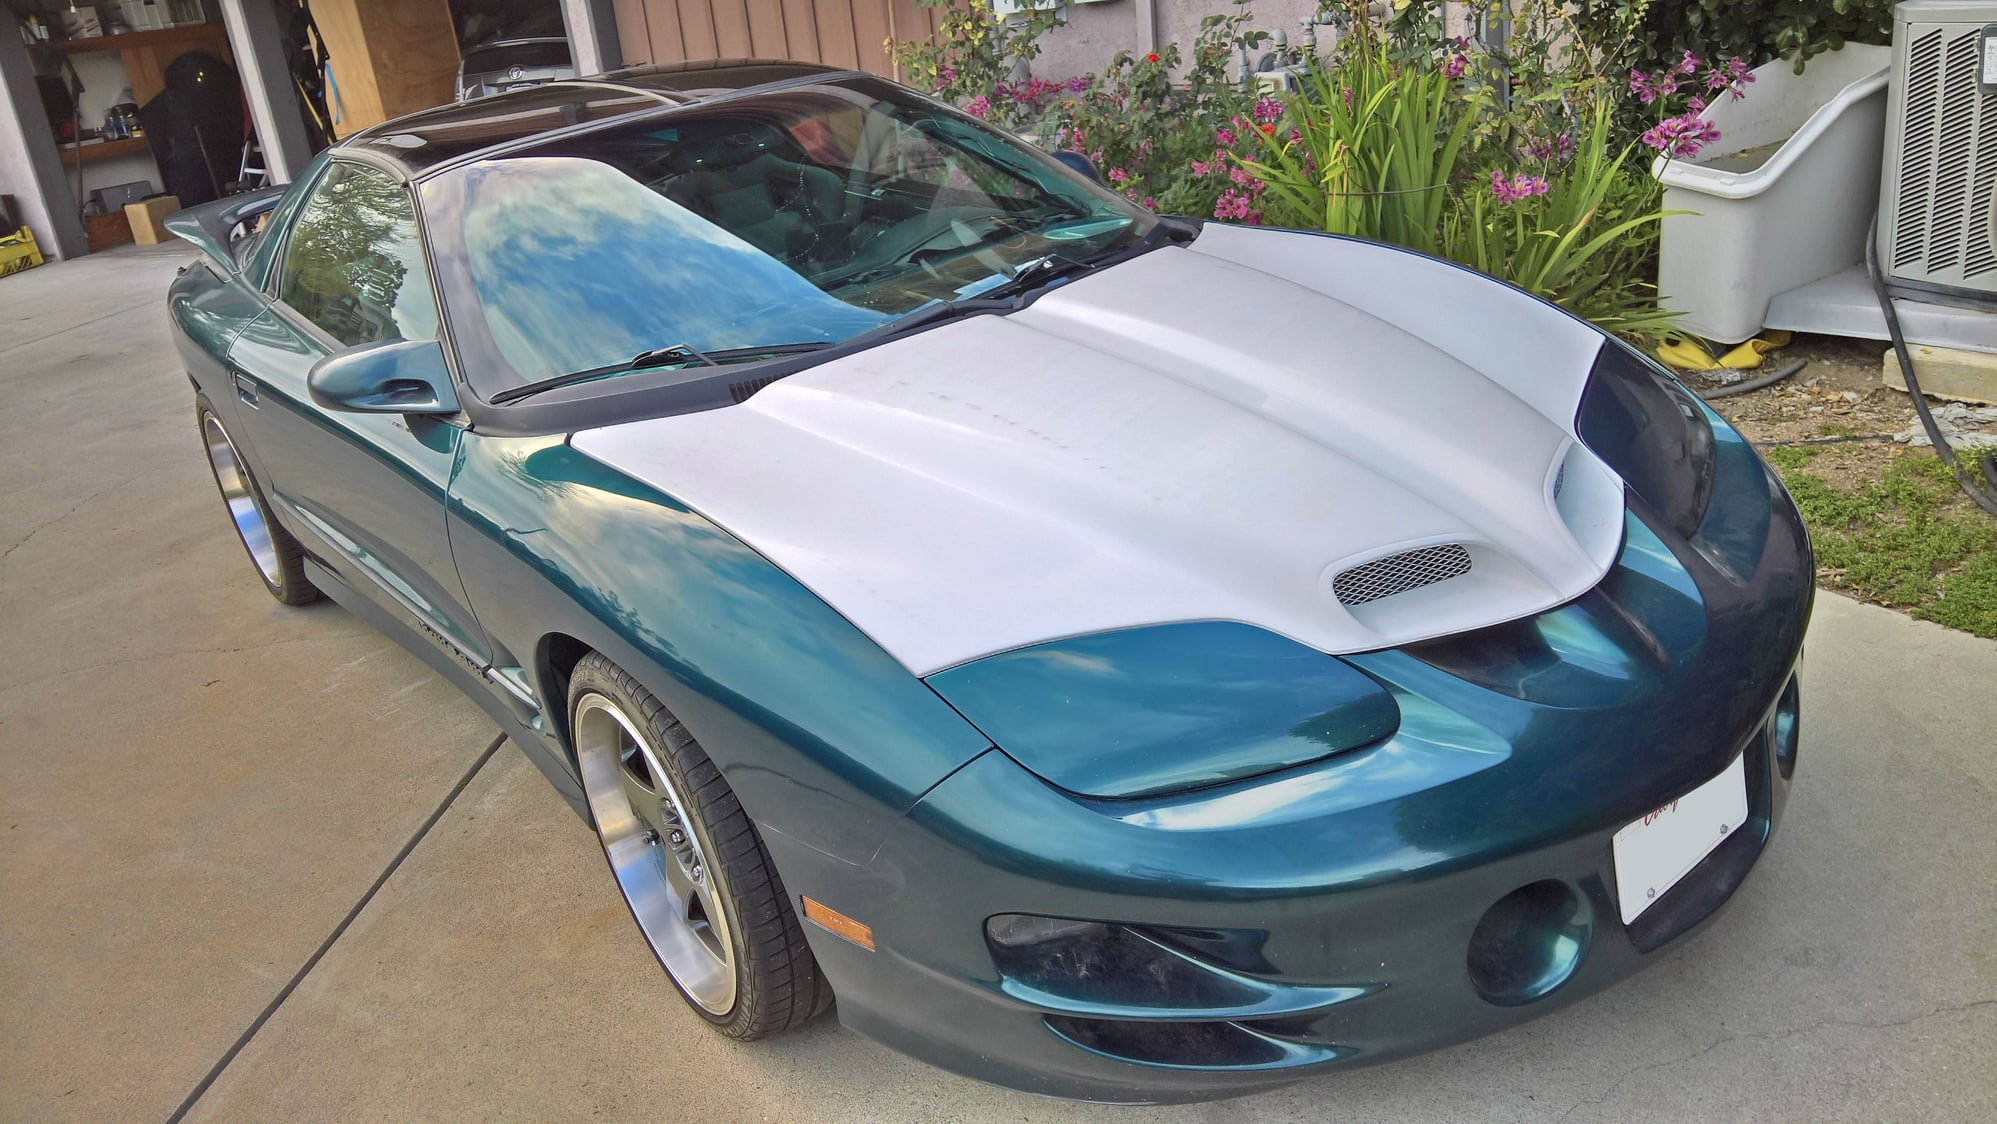
Looking ready for a drive.
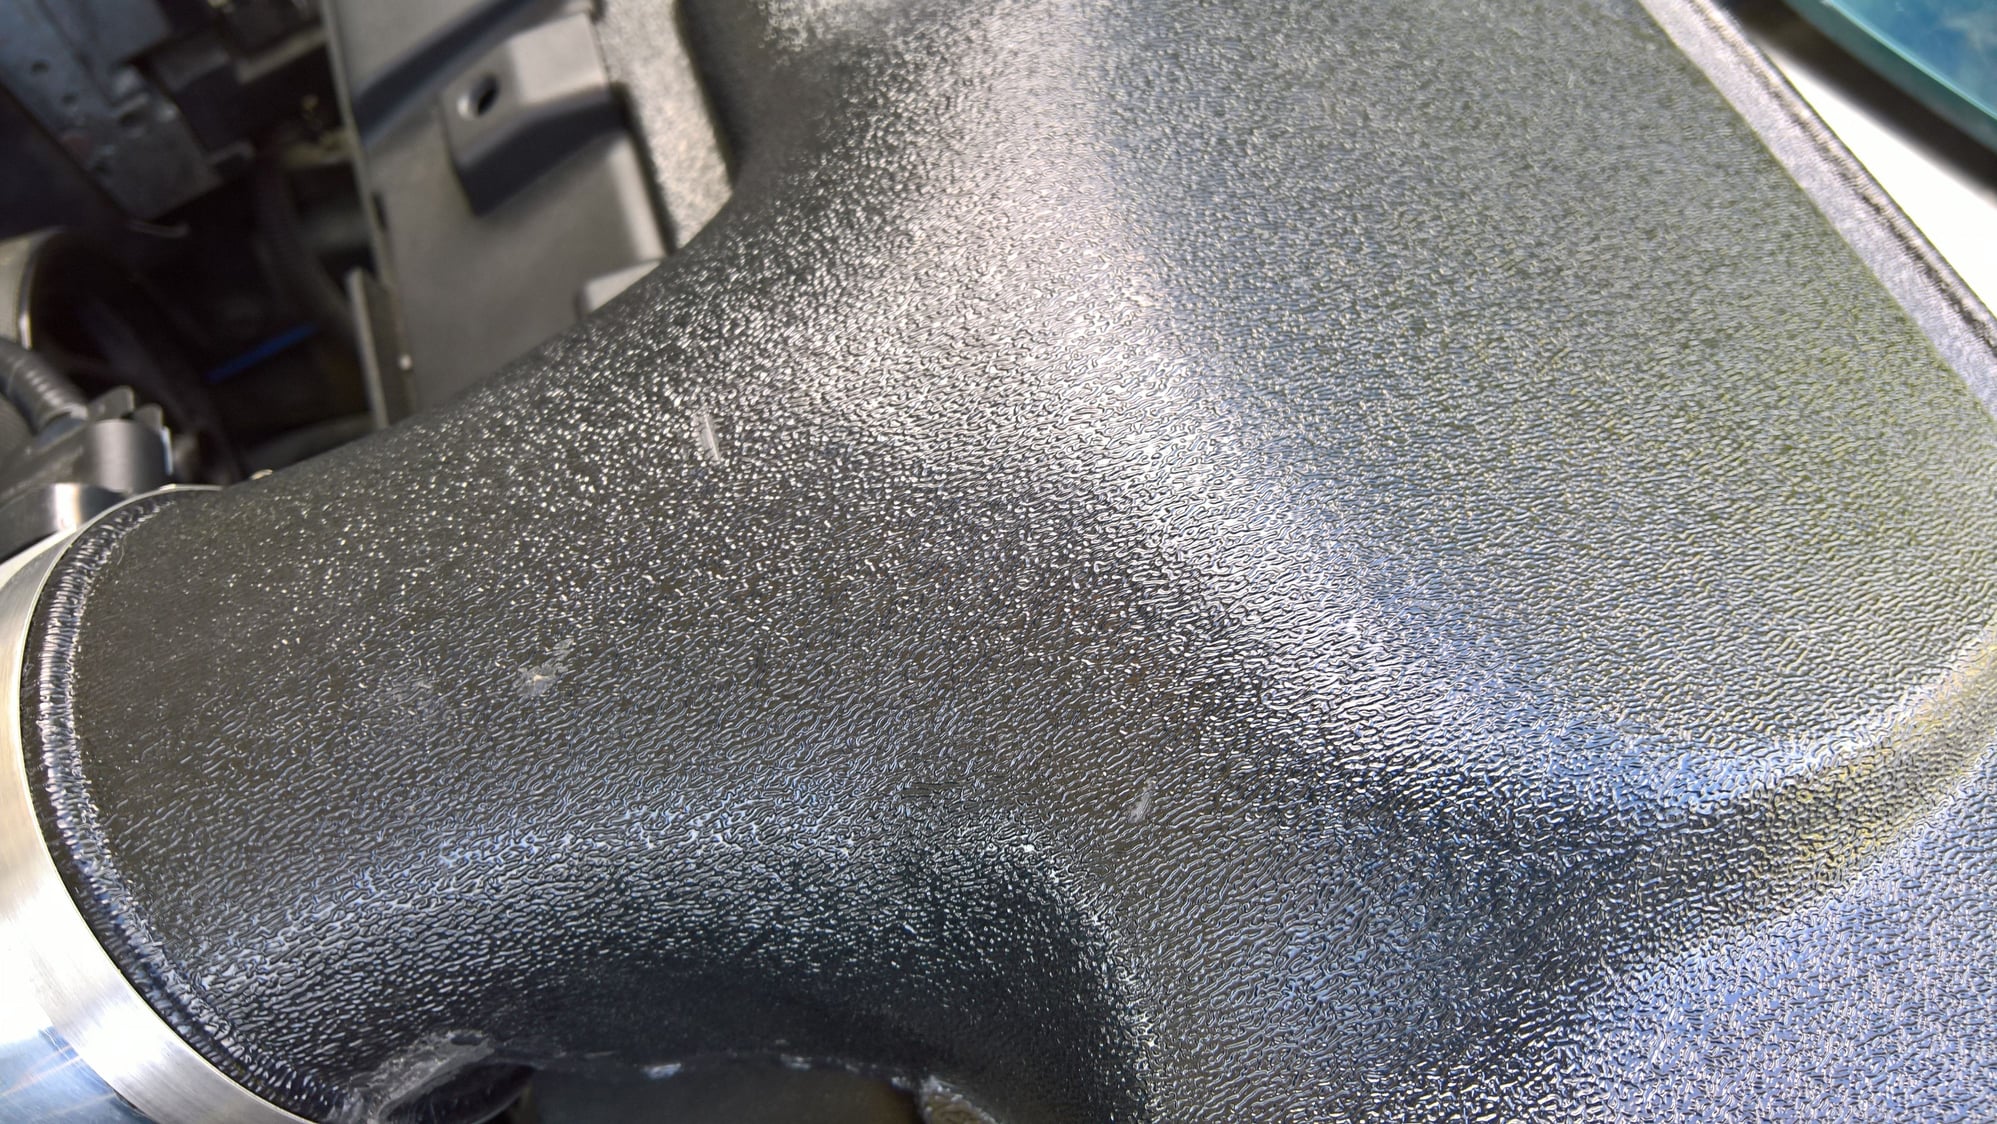
The hood rubs on the air box a little in two spots, so some more grinding is in order.
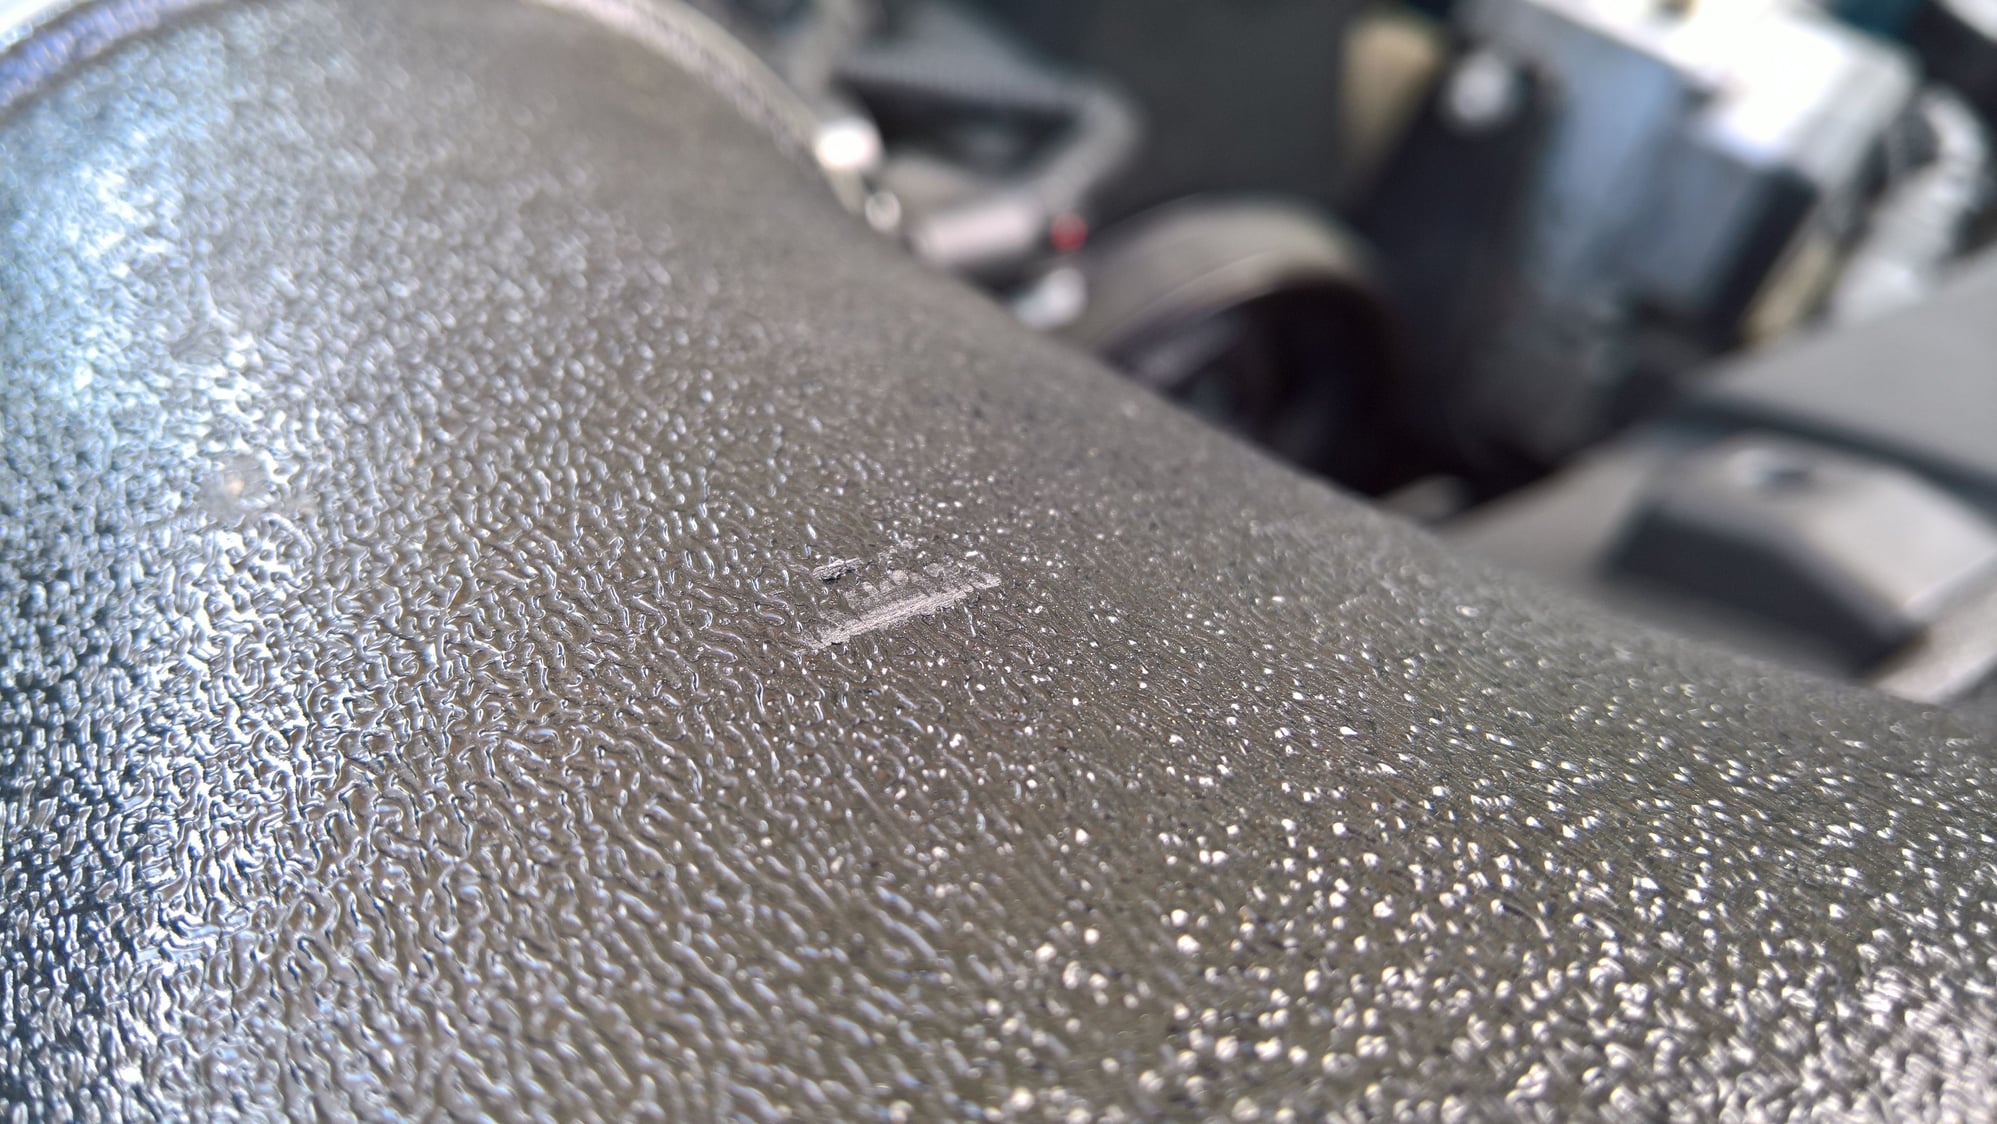
The hood rubs on the air box a little in two spots, so some more grinding is in order.
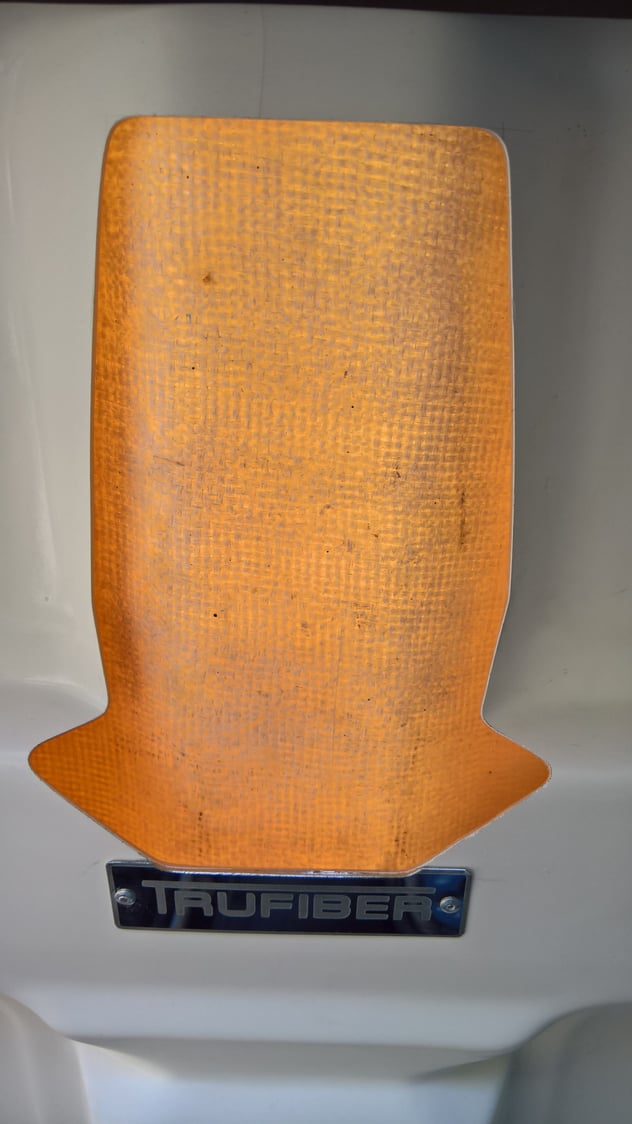
I lowered the hole into the aluminum logo plate and made the two sides <> point out farther at the tips.
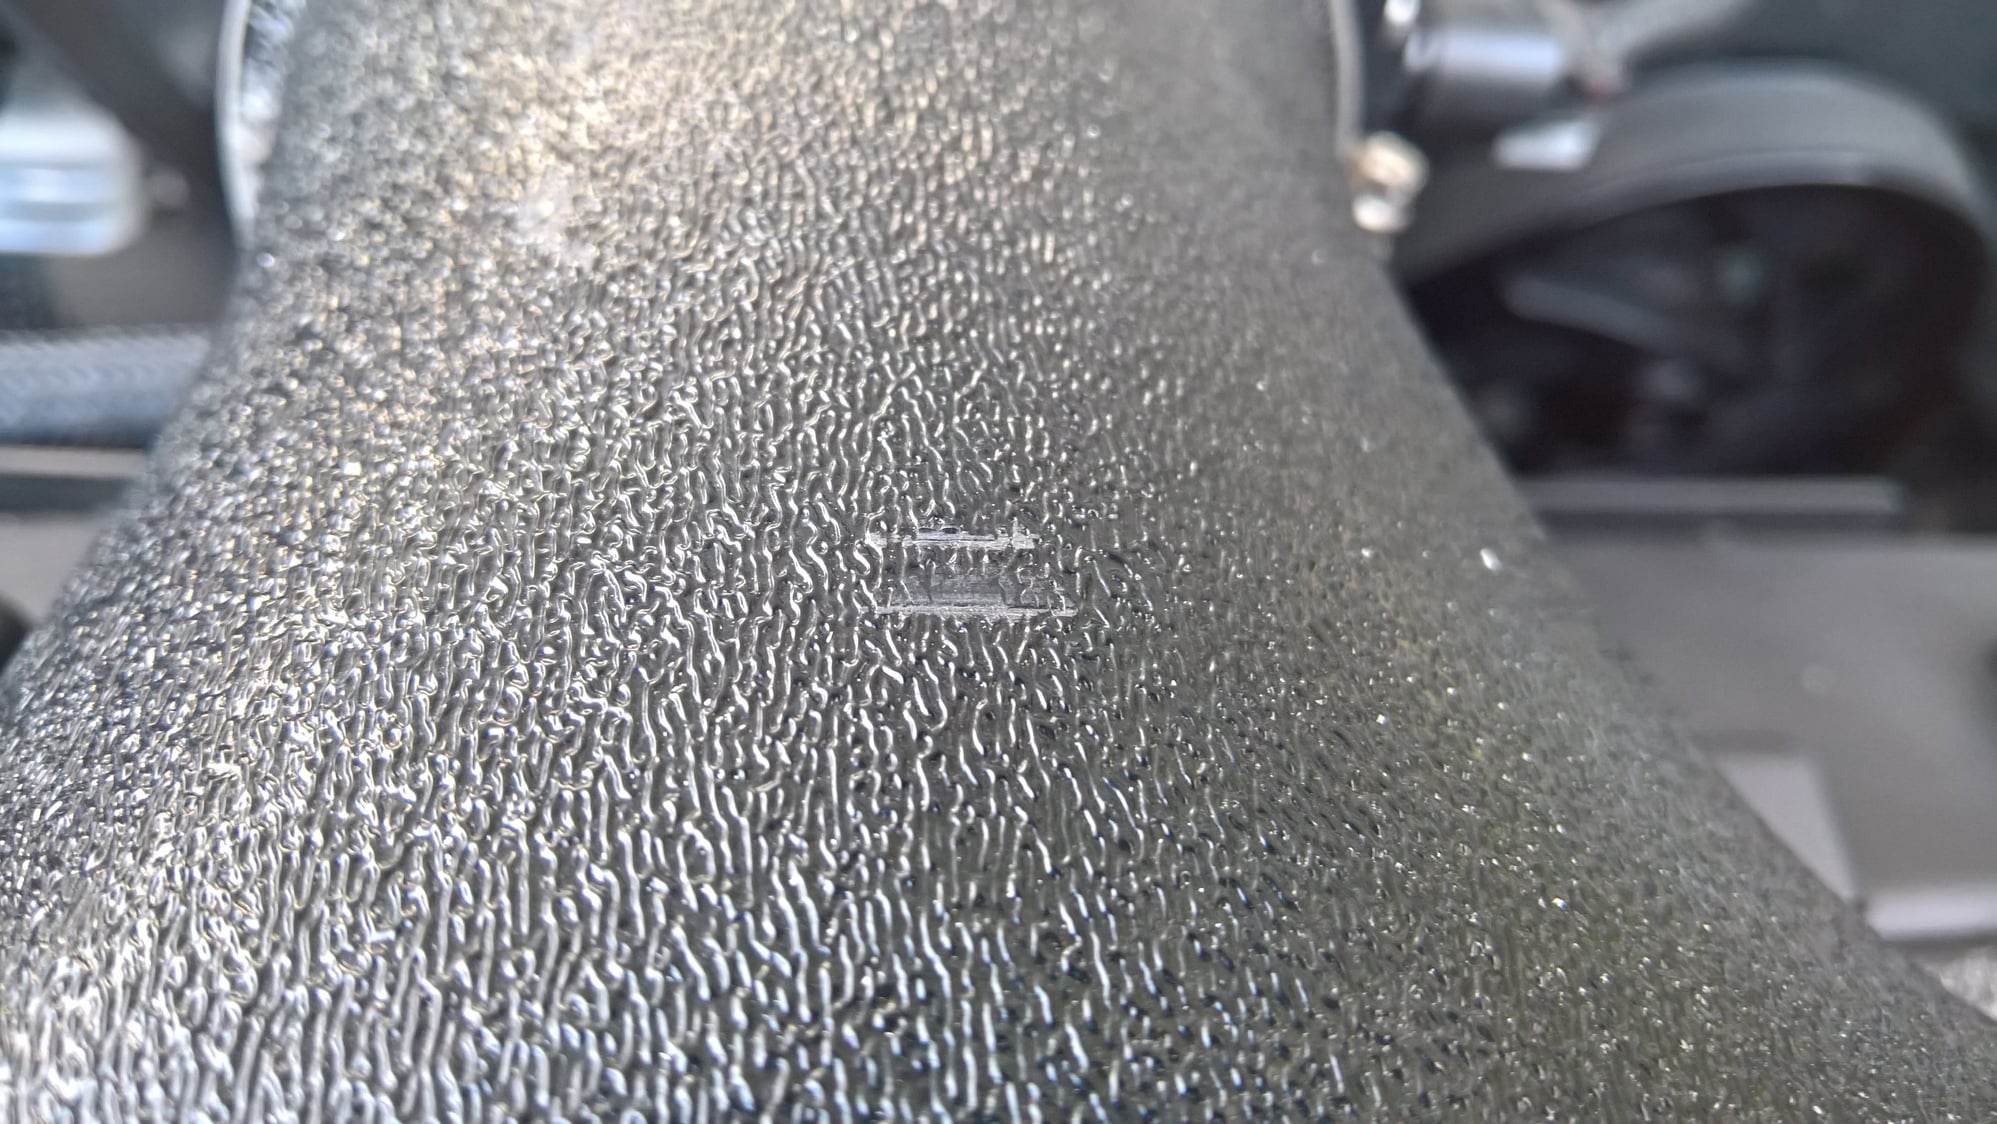
The hood still was rubbing on the airbox at the bottom. You can see the old and new marks here.
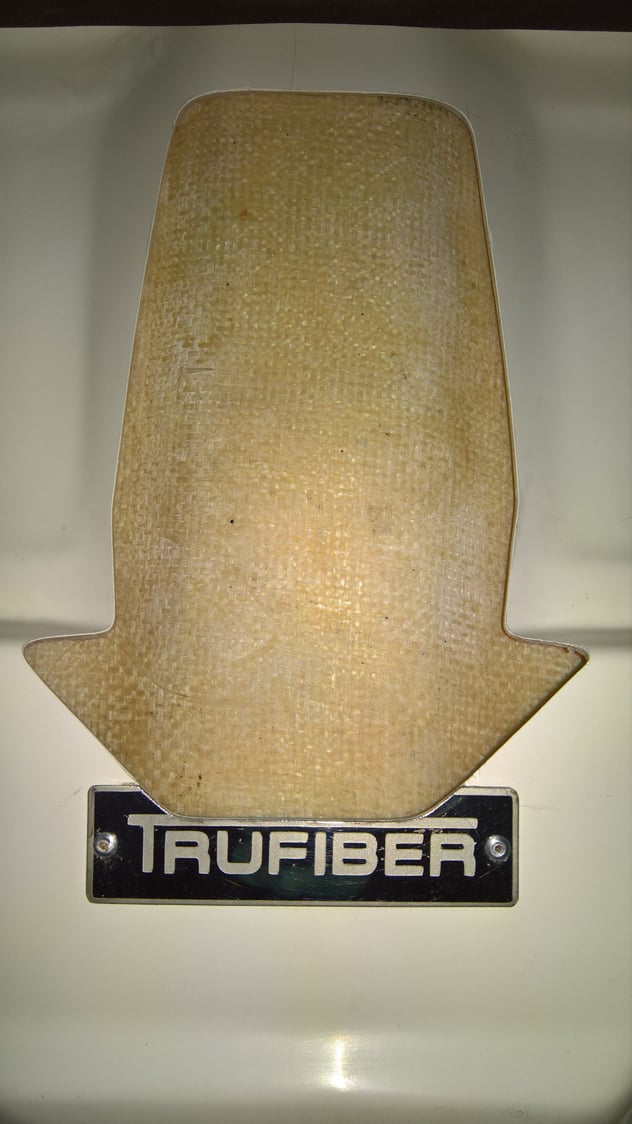
So I cut deeper still into the metal plate. No more rubbing now.
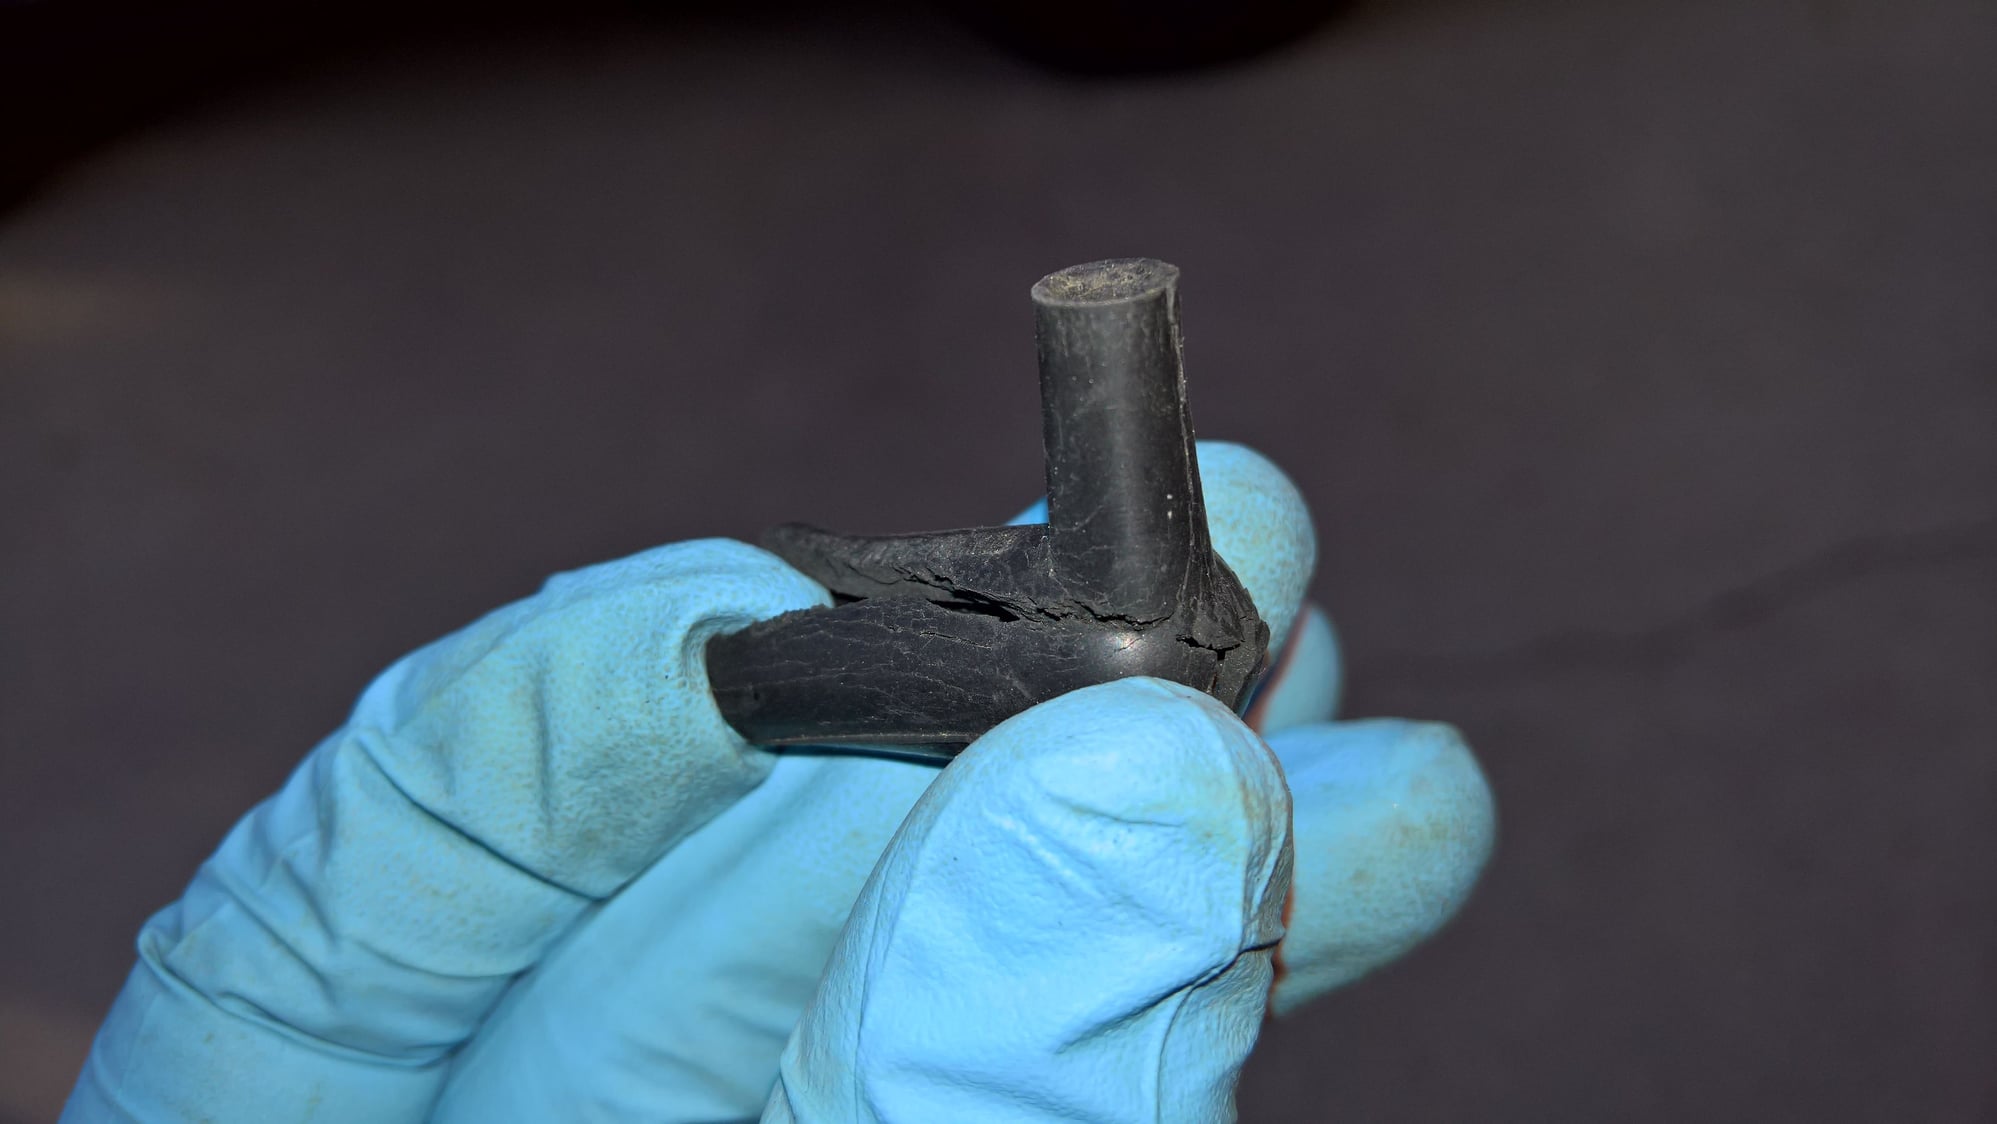
The upper vents would not work in the car. I had put all new vacuum lines and a new vacuum canister, so this should not be. I feared that something was stuck after sitting for so long. I reached behind the intake, only to find another bit of rubber that had failed. This brand new Dorman vacuum elbow had sat in the car, without the car ever running, and cracked in half.
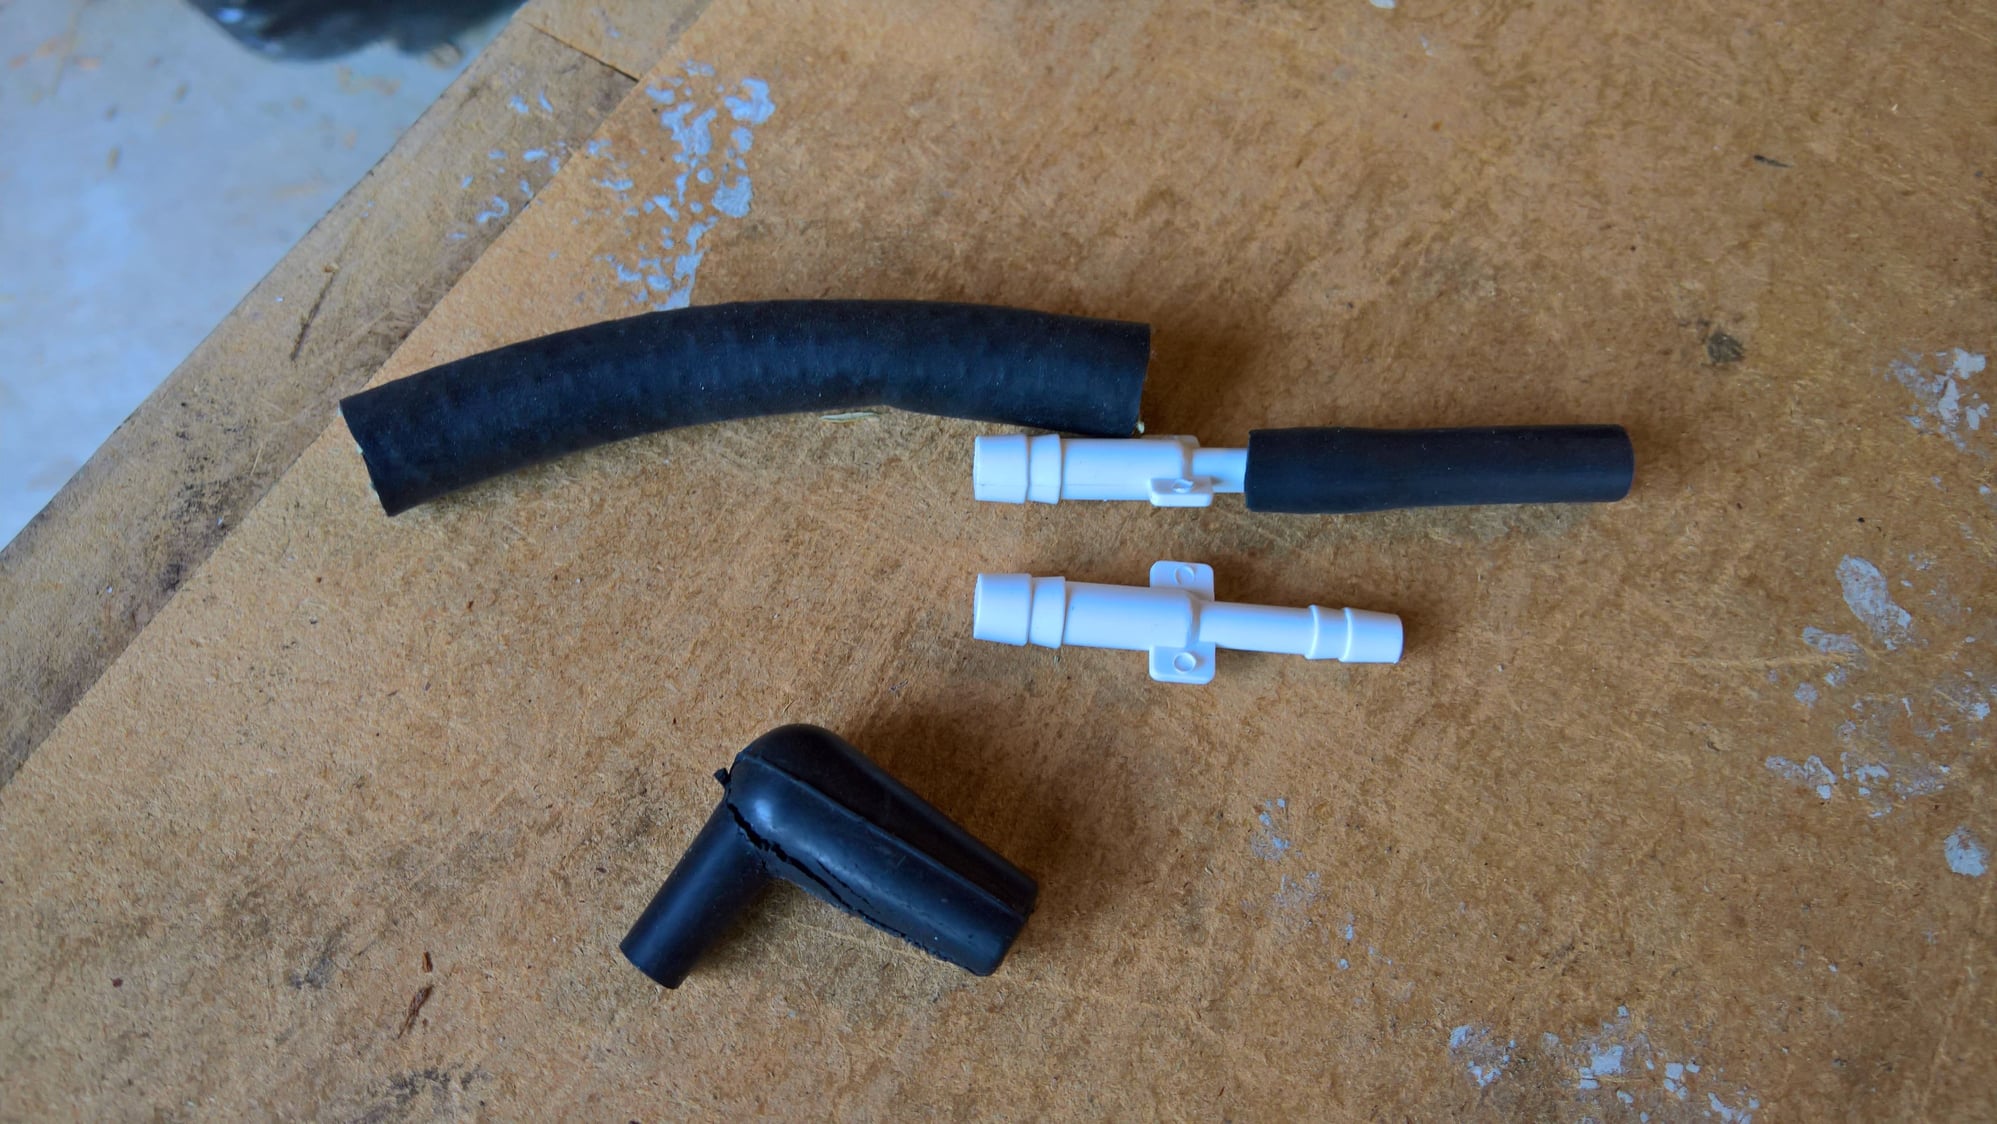
I replaced it with an adapter fitting and some proper automotive hoses which should withstand plenty of abuse.
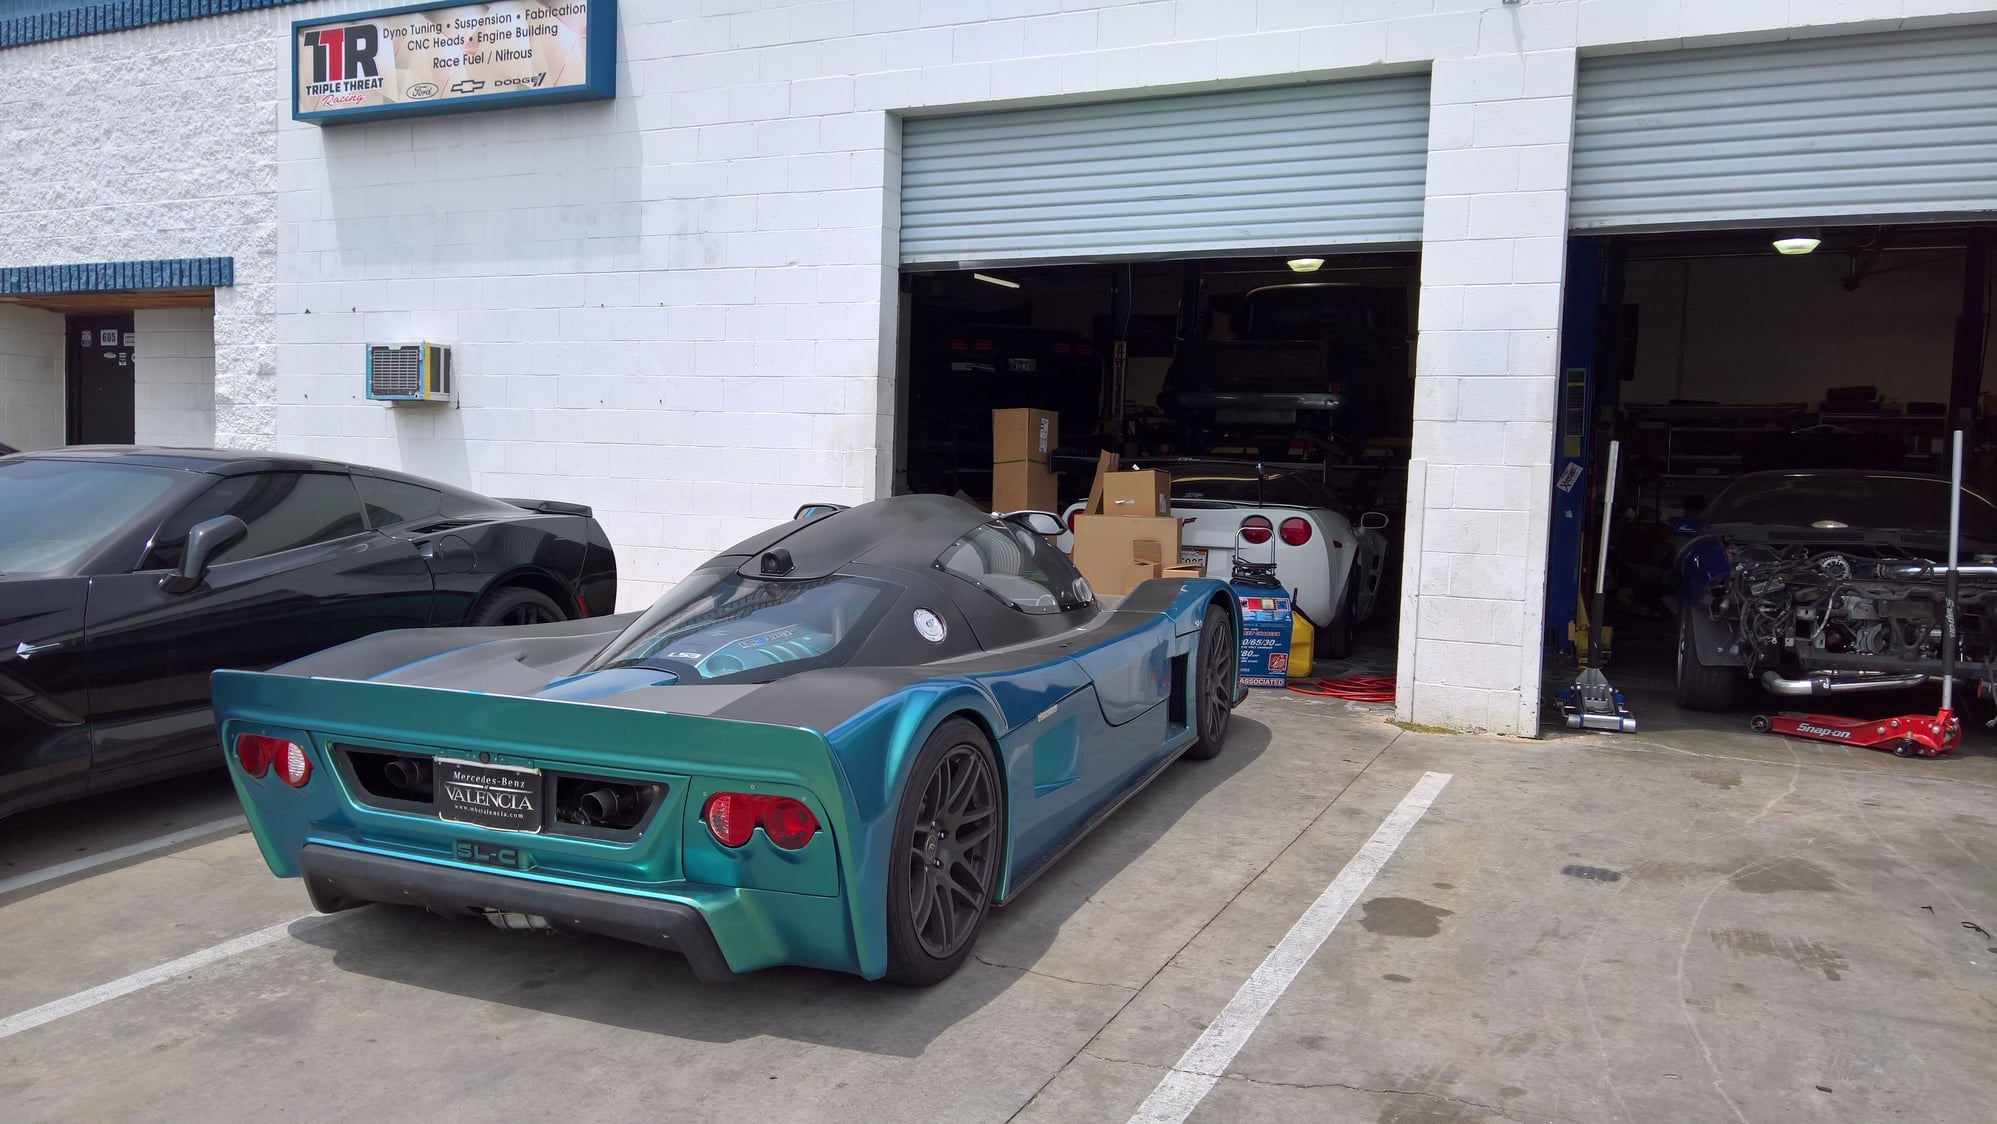
Off to the tuning shop, Paragon Engines, for a base tune. This used to be RPM Motors, and is still run by Auston Licon. He discovered a wiring issue with the MAF adapter harness I installed, and repinned it at the connector. We also made an effort to get the fuel gauge reading correctly with the tank/pump swap. And of course, get the car running safely for the 500 mile break in. He noted that driving up there with the injectors tuned for an LS1, but running with the bigger LS3 injectors wasn't the best, but everything seems to have survived okay.
Last edited by eb110americana; 06-28-2019 at 12:47 AM.
#104
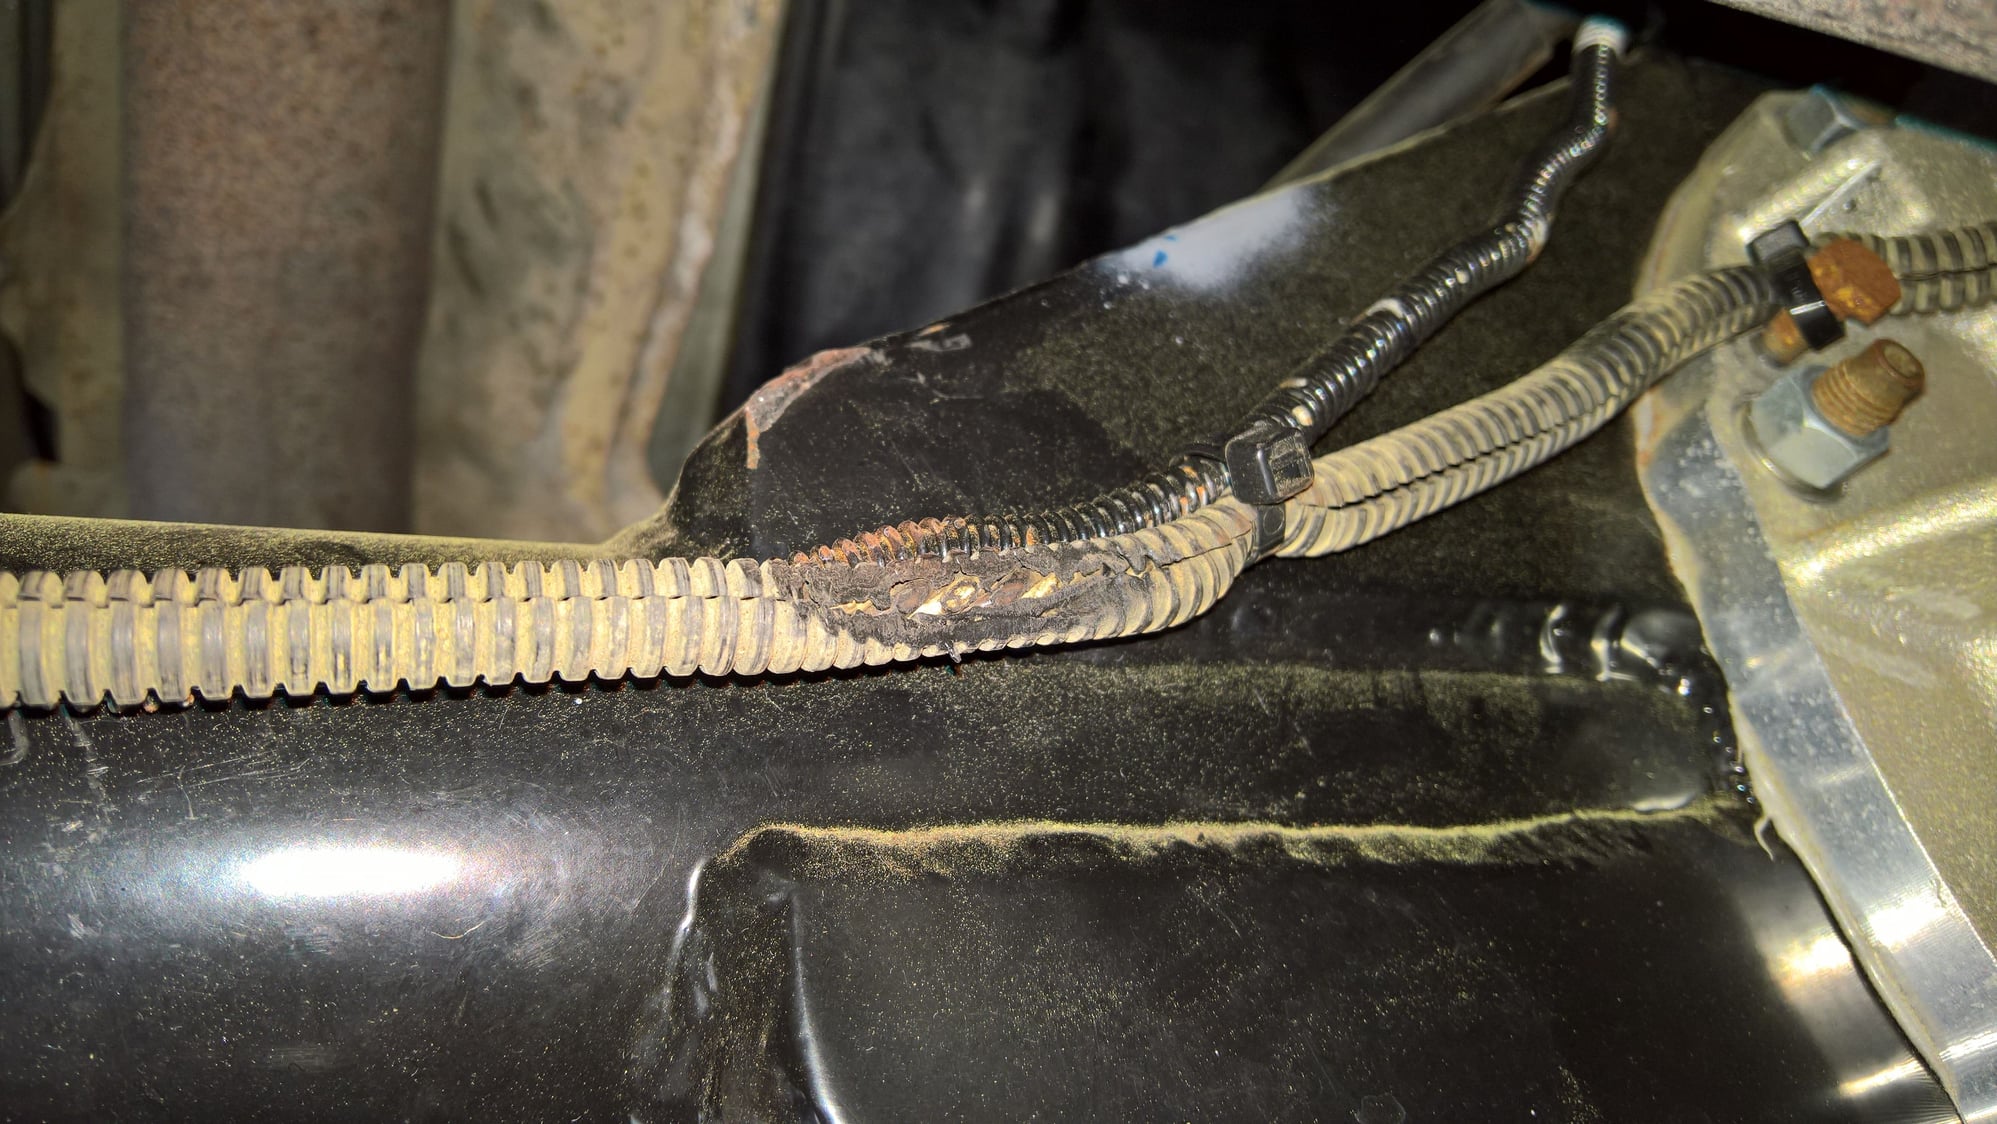
Some interaction between the right rear ABS wheelspeed sensor wiring and the exhaust. Luckily the wires just barely touched, so they're okay. Before this pic, it was running over the top of the brake line, so I rotated it beneath. I also shifted the exhaust forward a bit, and added some spacing to the rear bump stops, for a different issue.
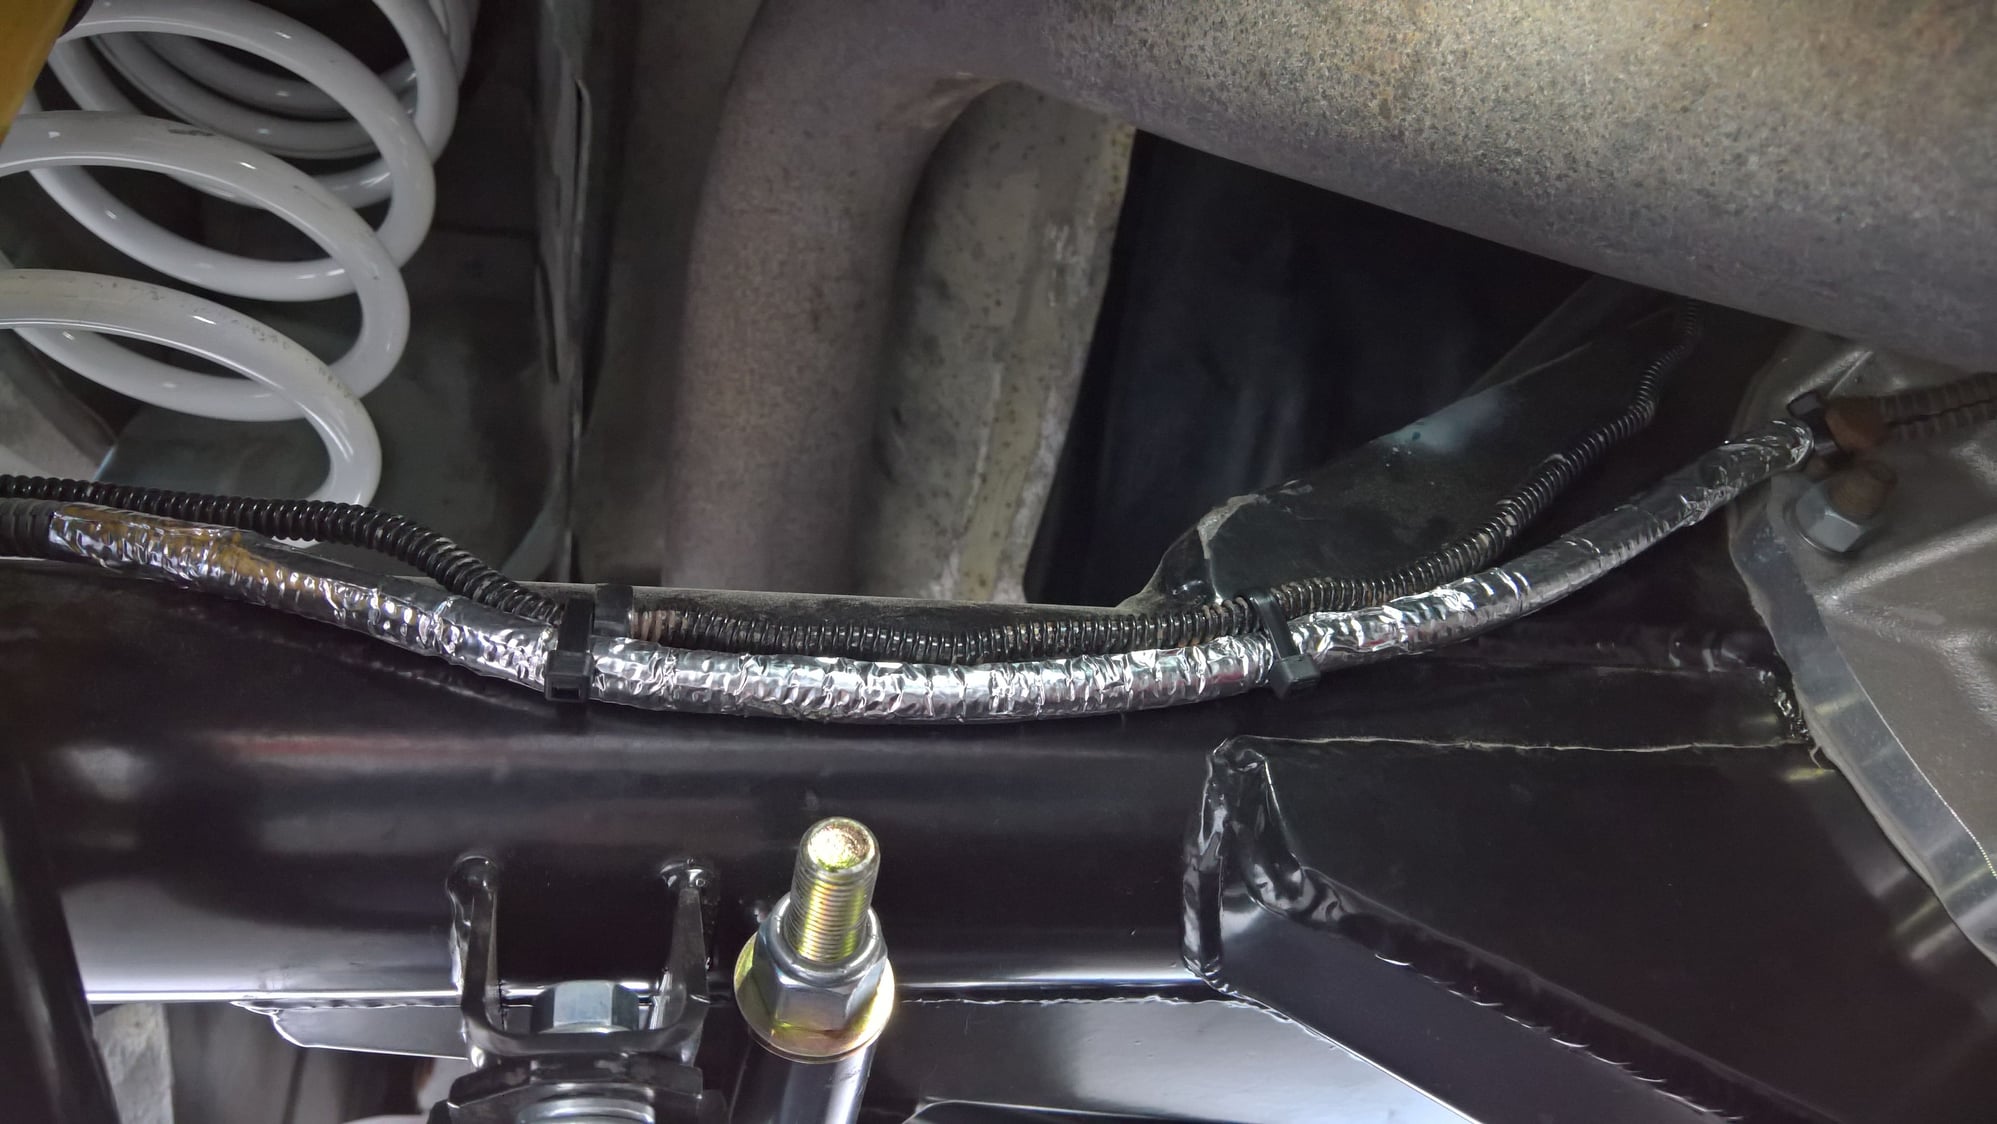
I replaced the melted stuff with high-temp split loom and wrapped it in metal duct tape for good measure.
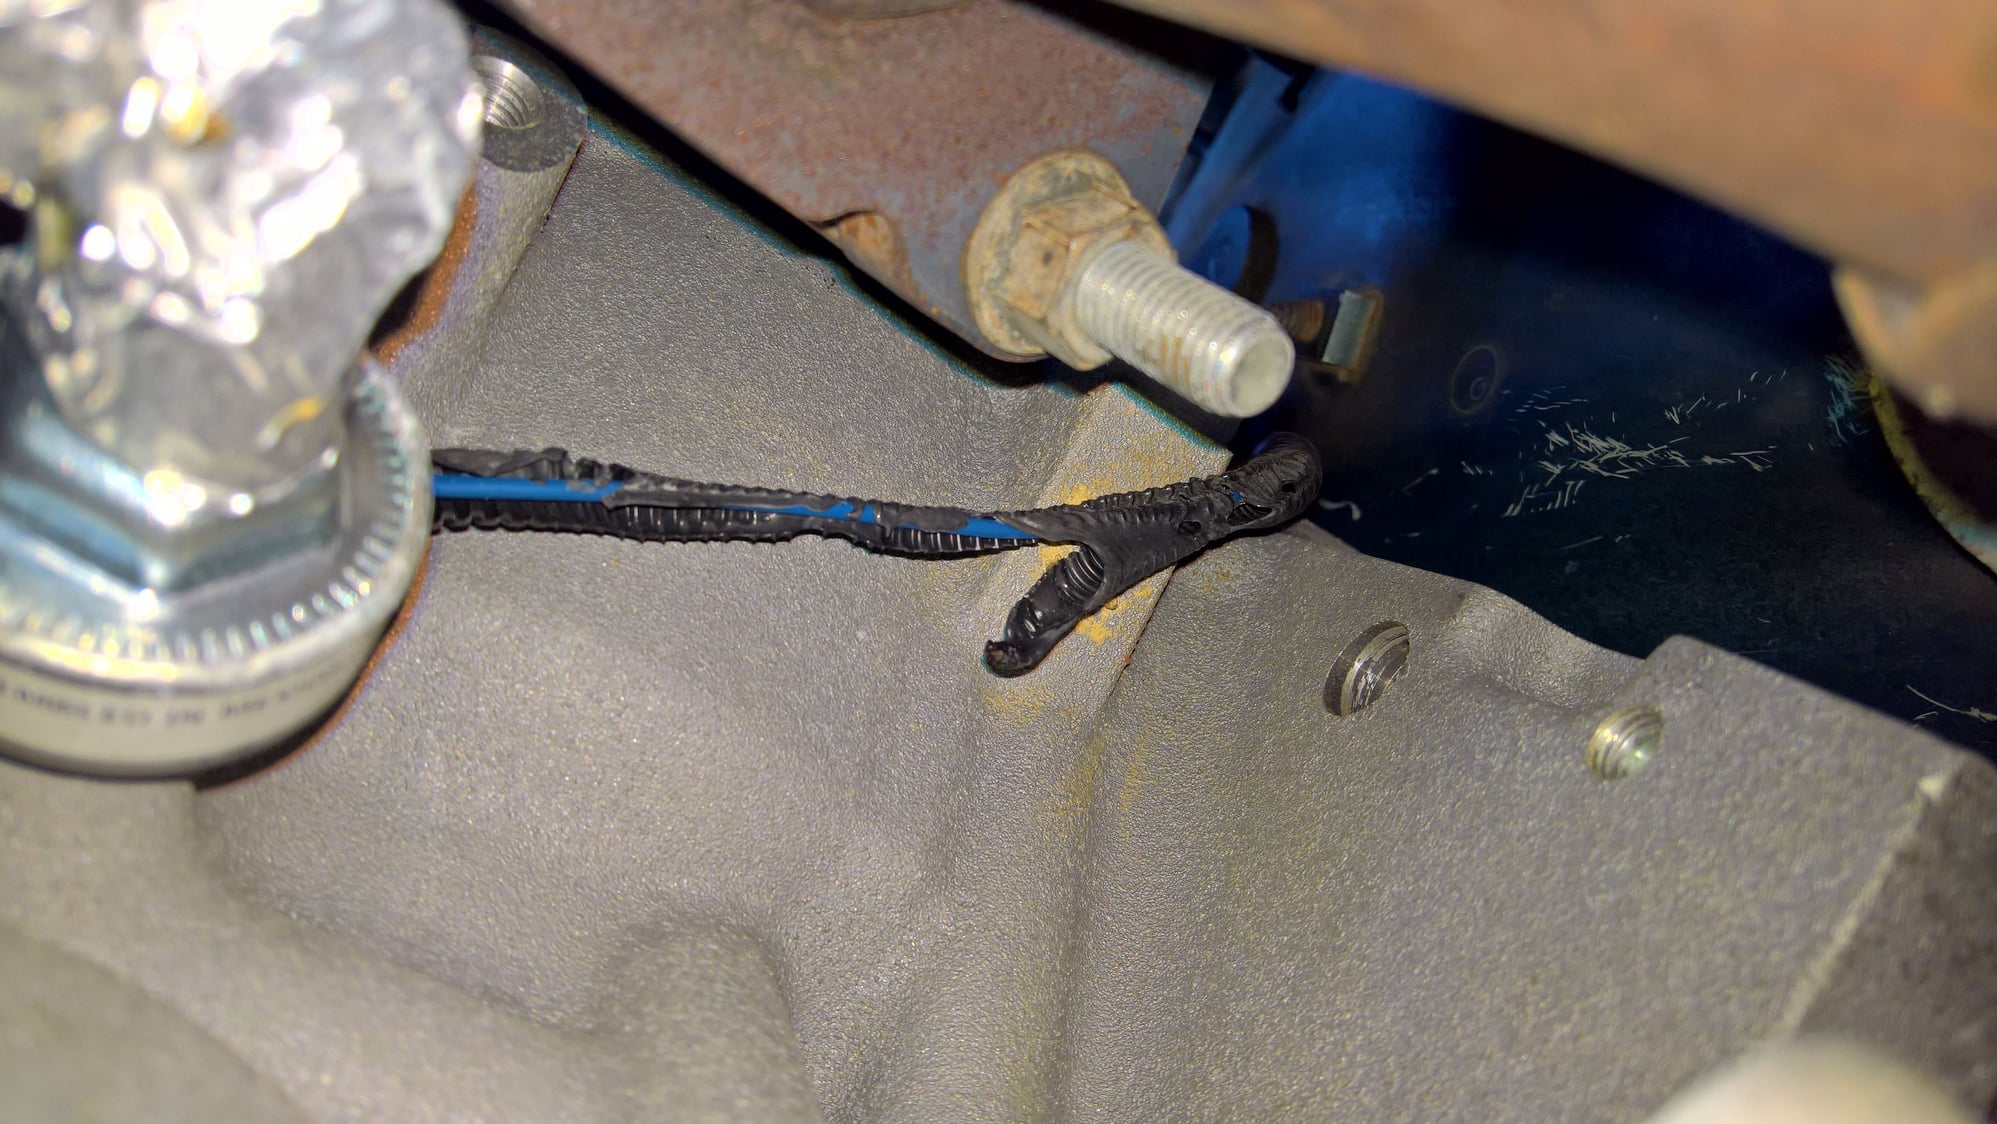
The cheap split loom around the knock sensor extension harness melted even though it was no where near touching the exhaust. The wire itself is fine though.
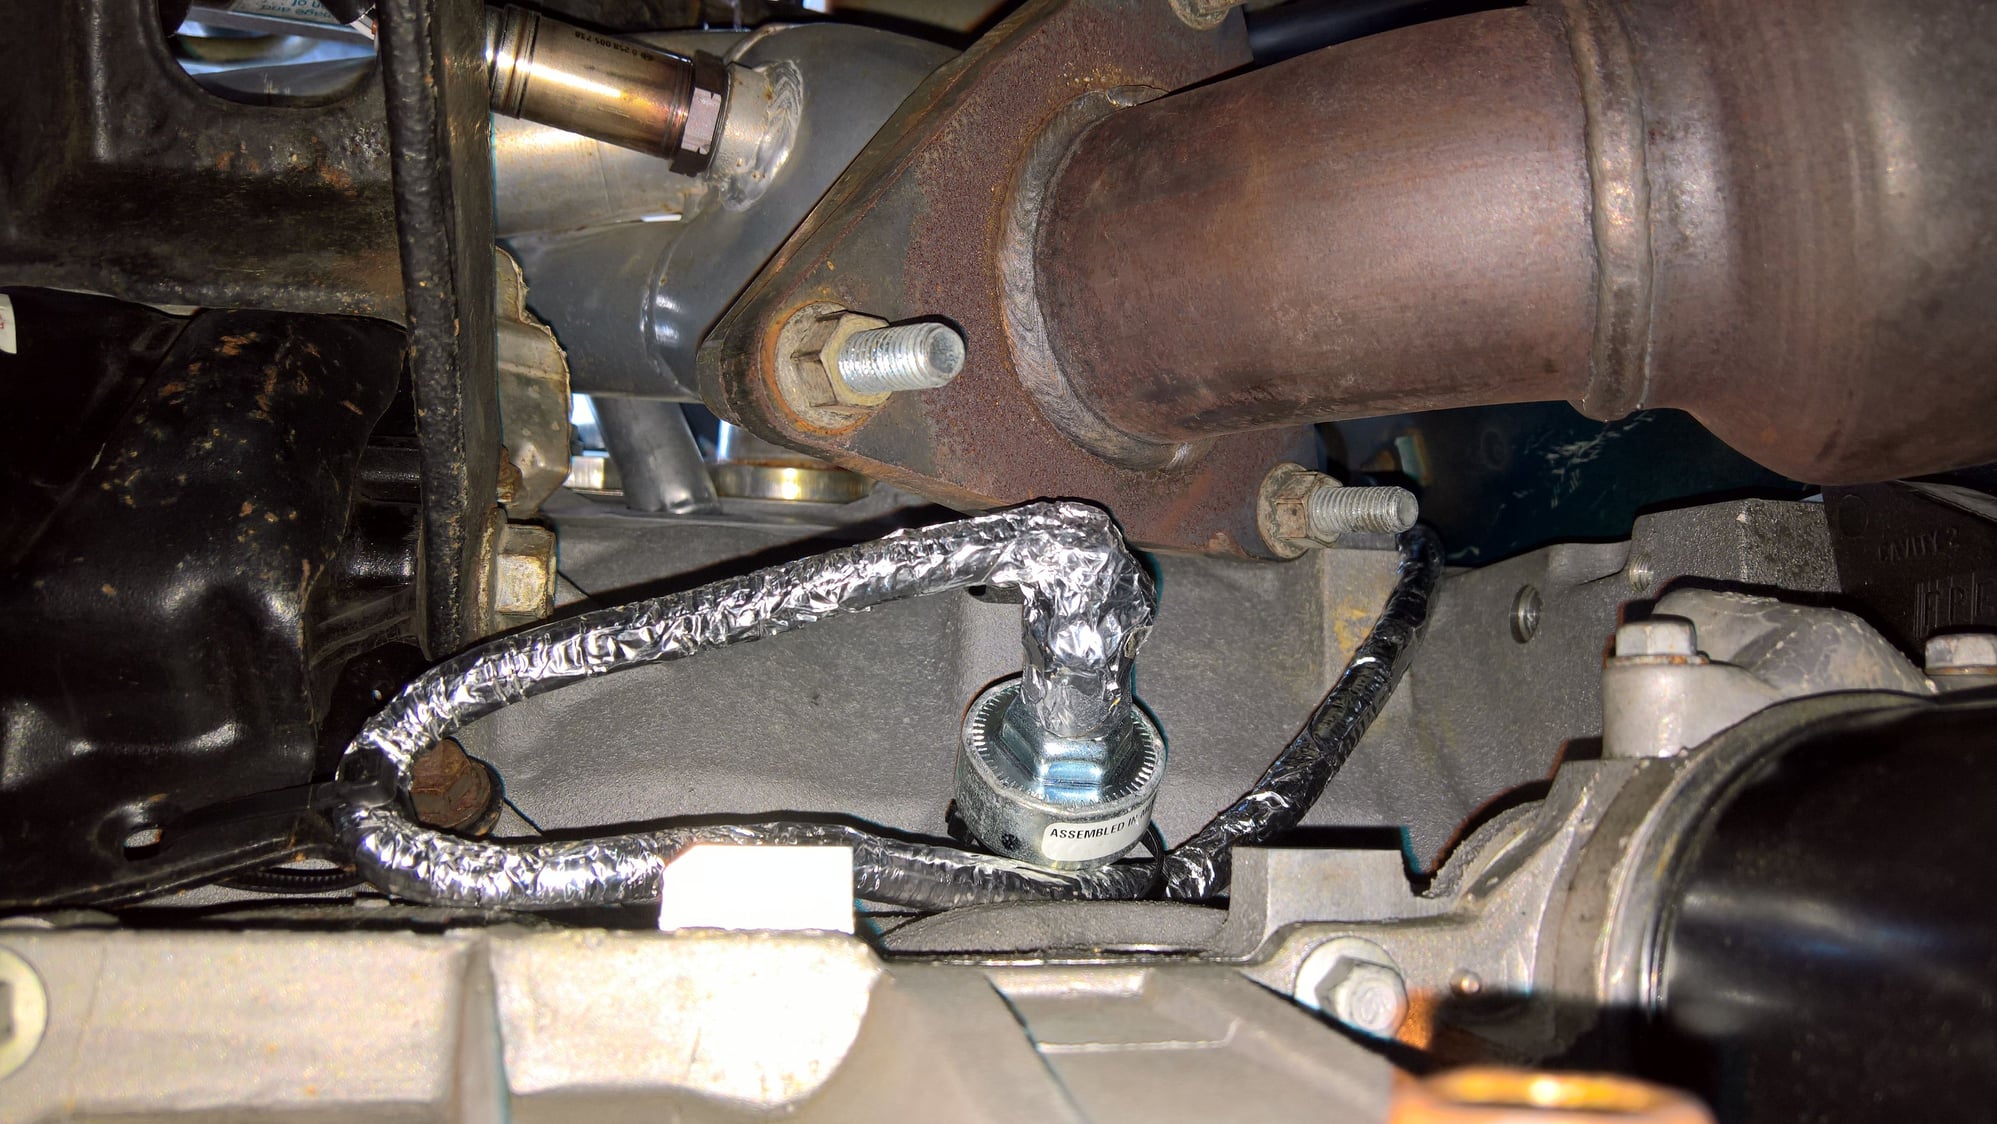
I replaced the melted stuff with high-temp split loom and wrapped it in metal duct tape for good measure.
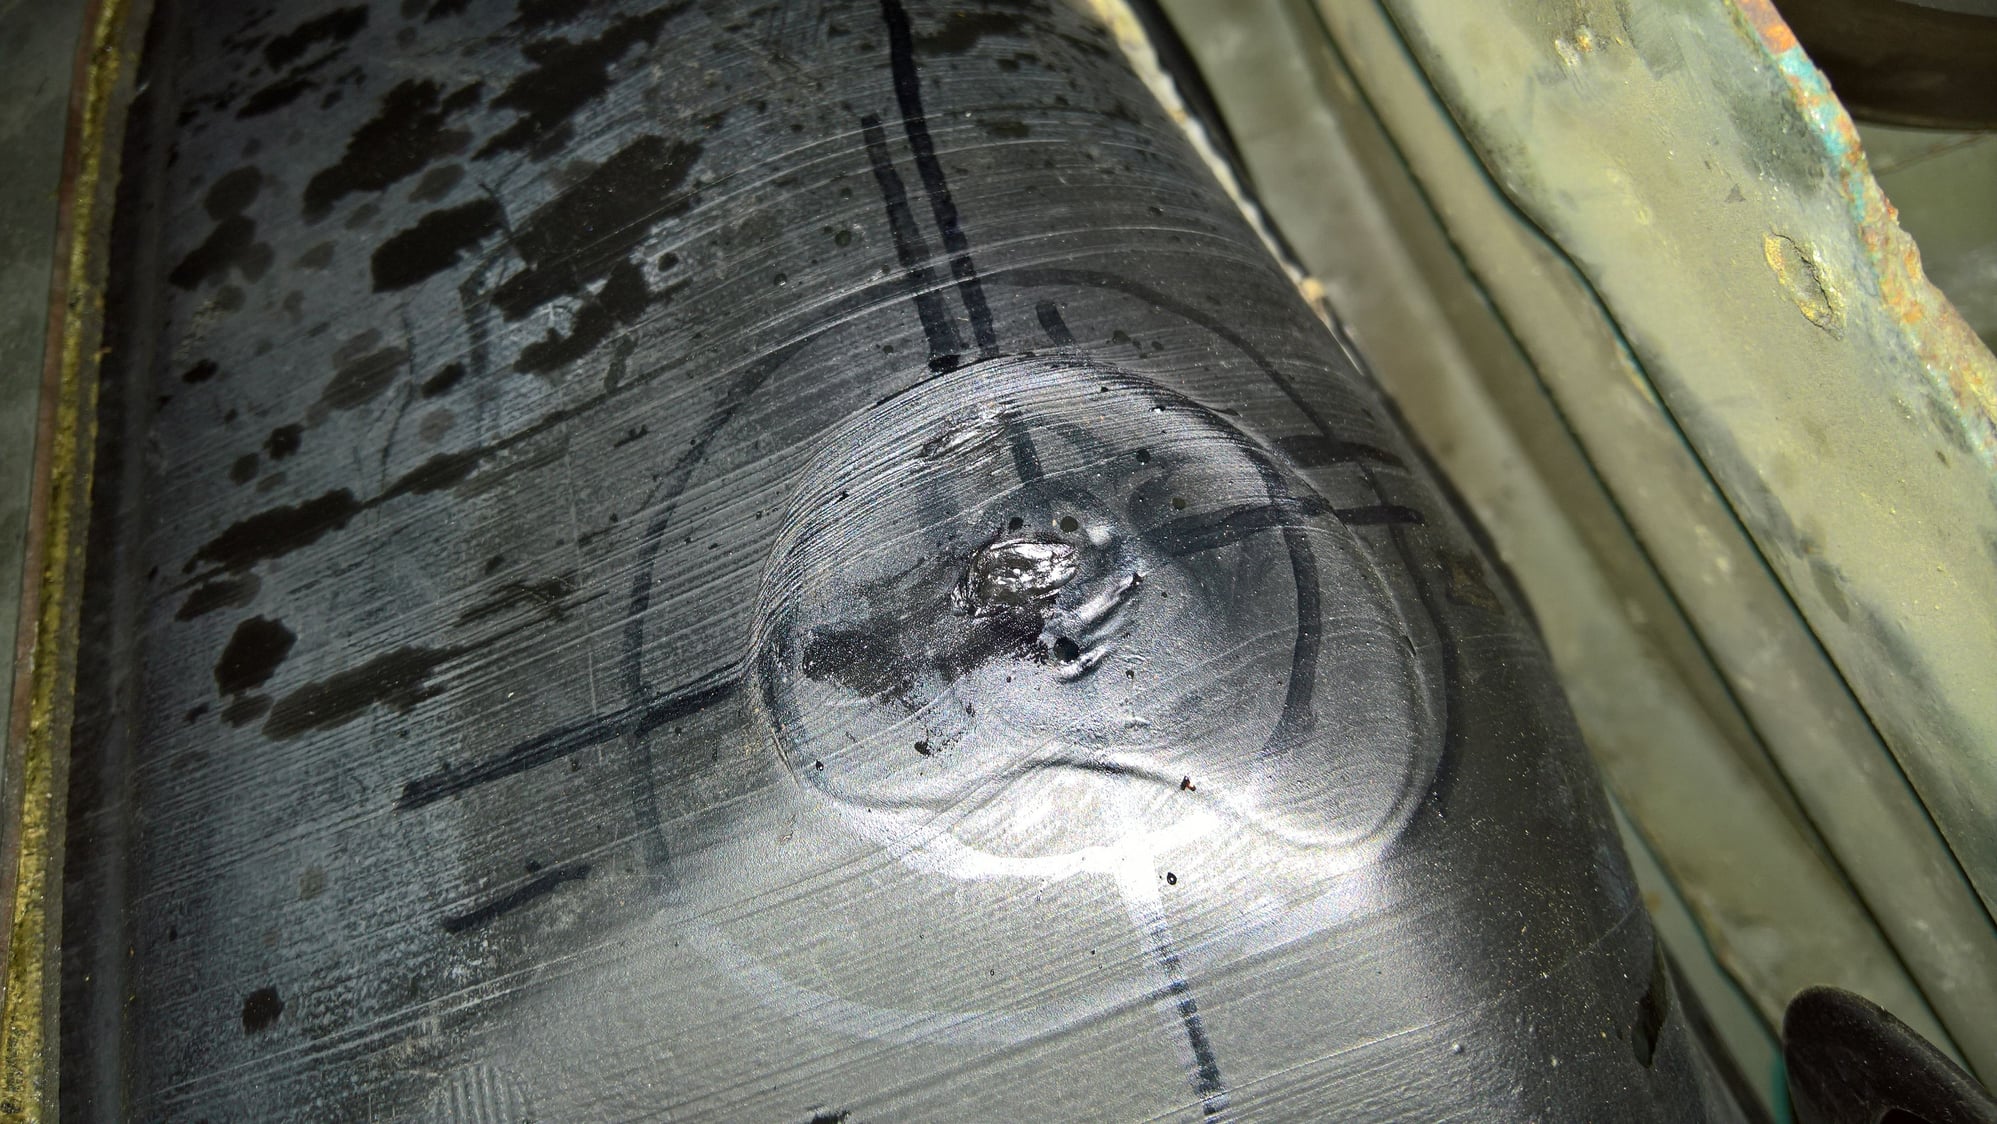
Even after all of the trimming I did before, the MWC watts link still hits the gas tank. Also pictured, the spray from the axle breather.
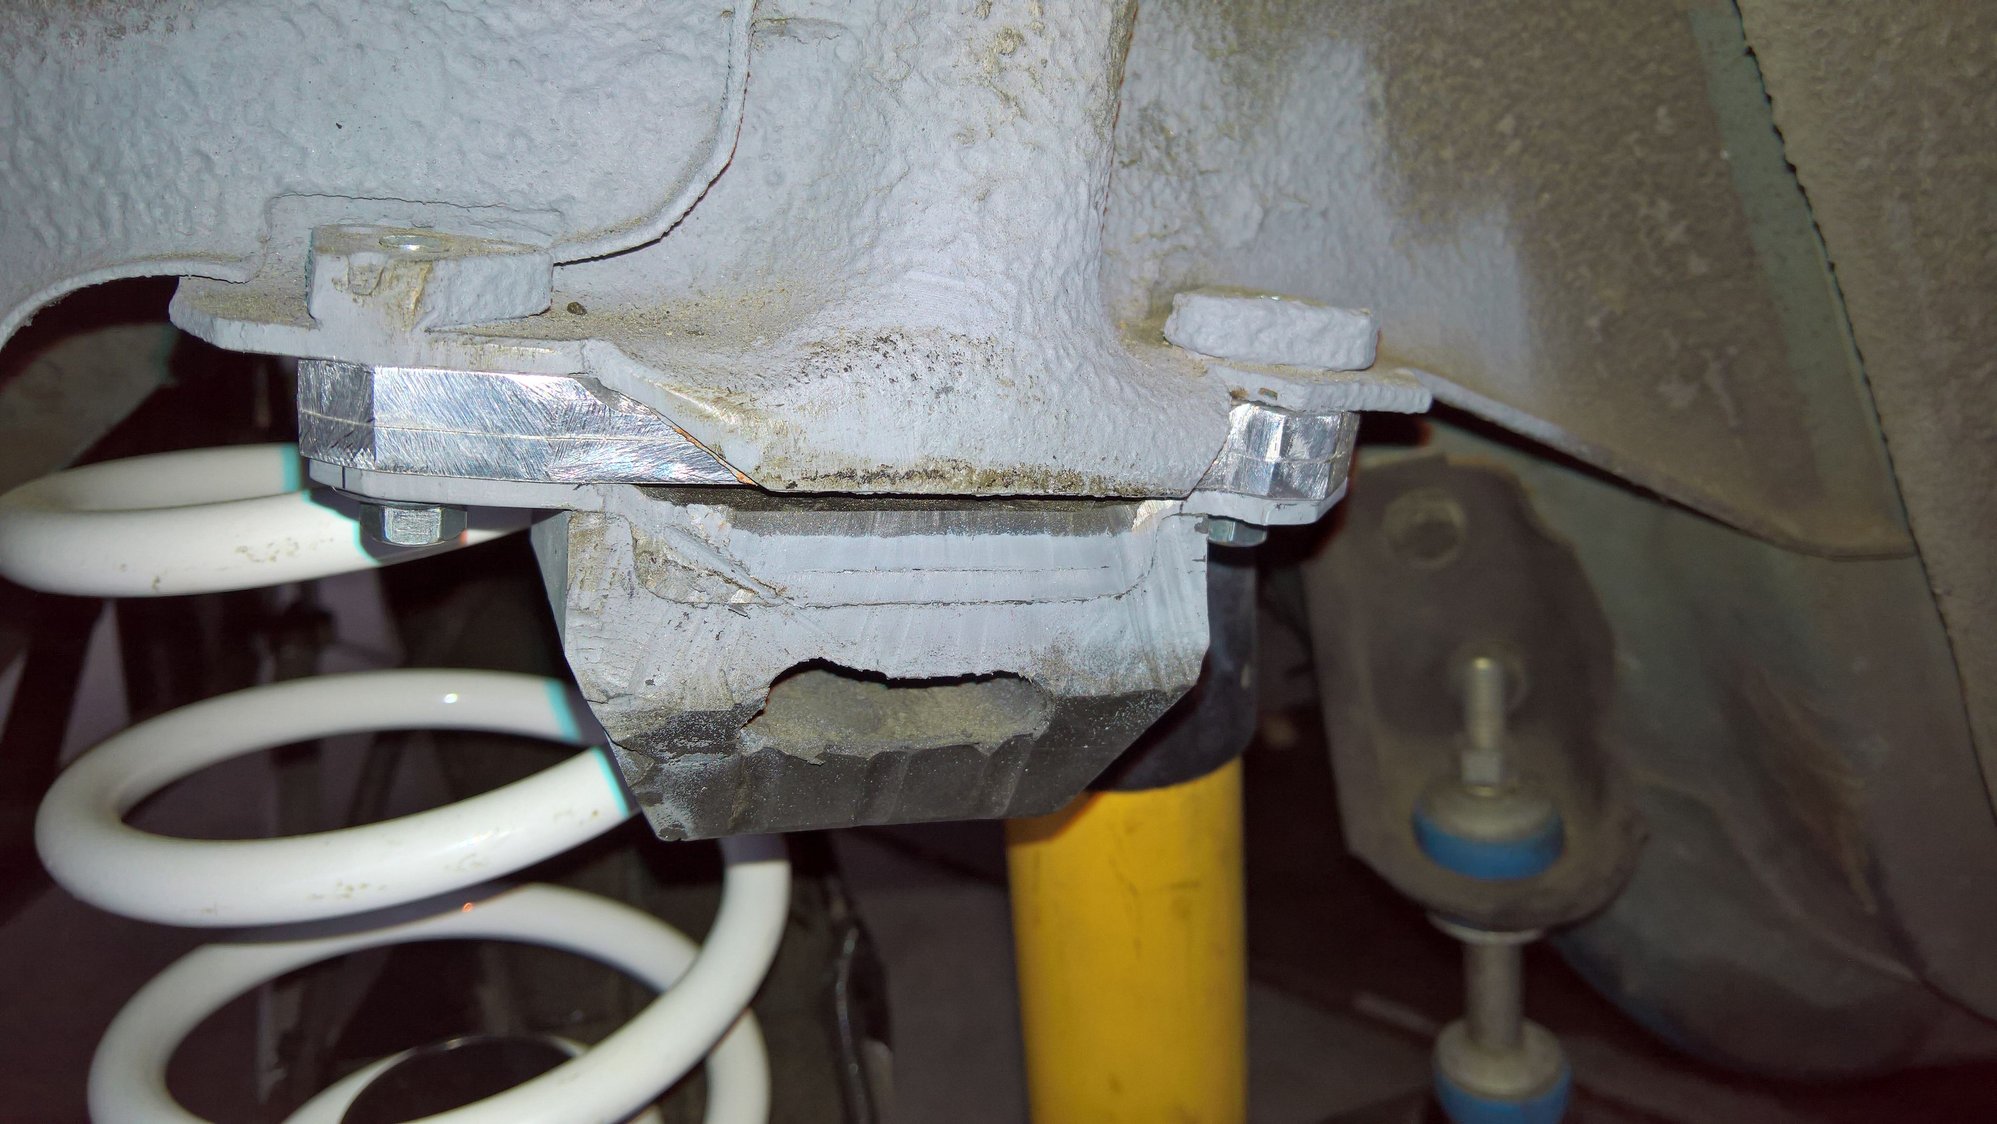
So as I said earlier, I added another aluminum spacer to the rear bump stops (the lower, slightly thinner one) to account for urethane deflection in the stops and prevent a gas tank puncture when bottoming out.
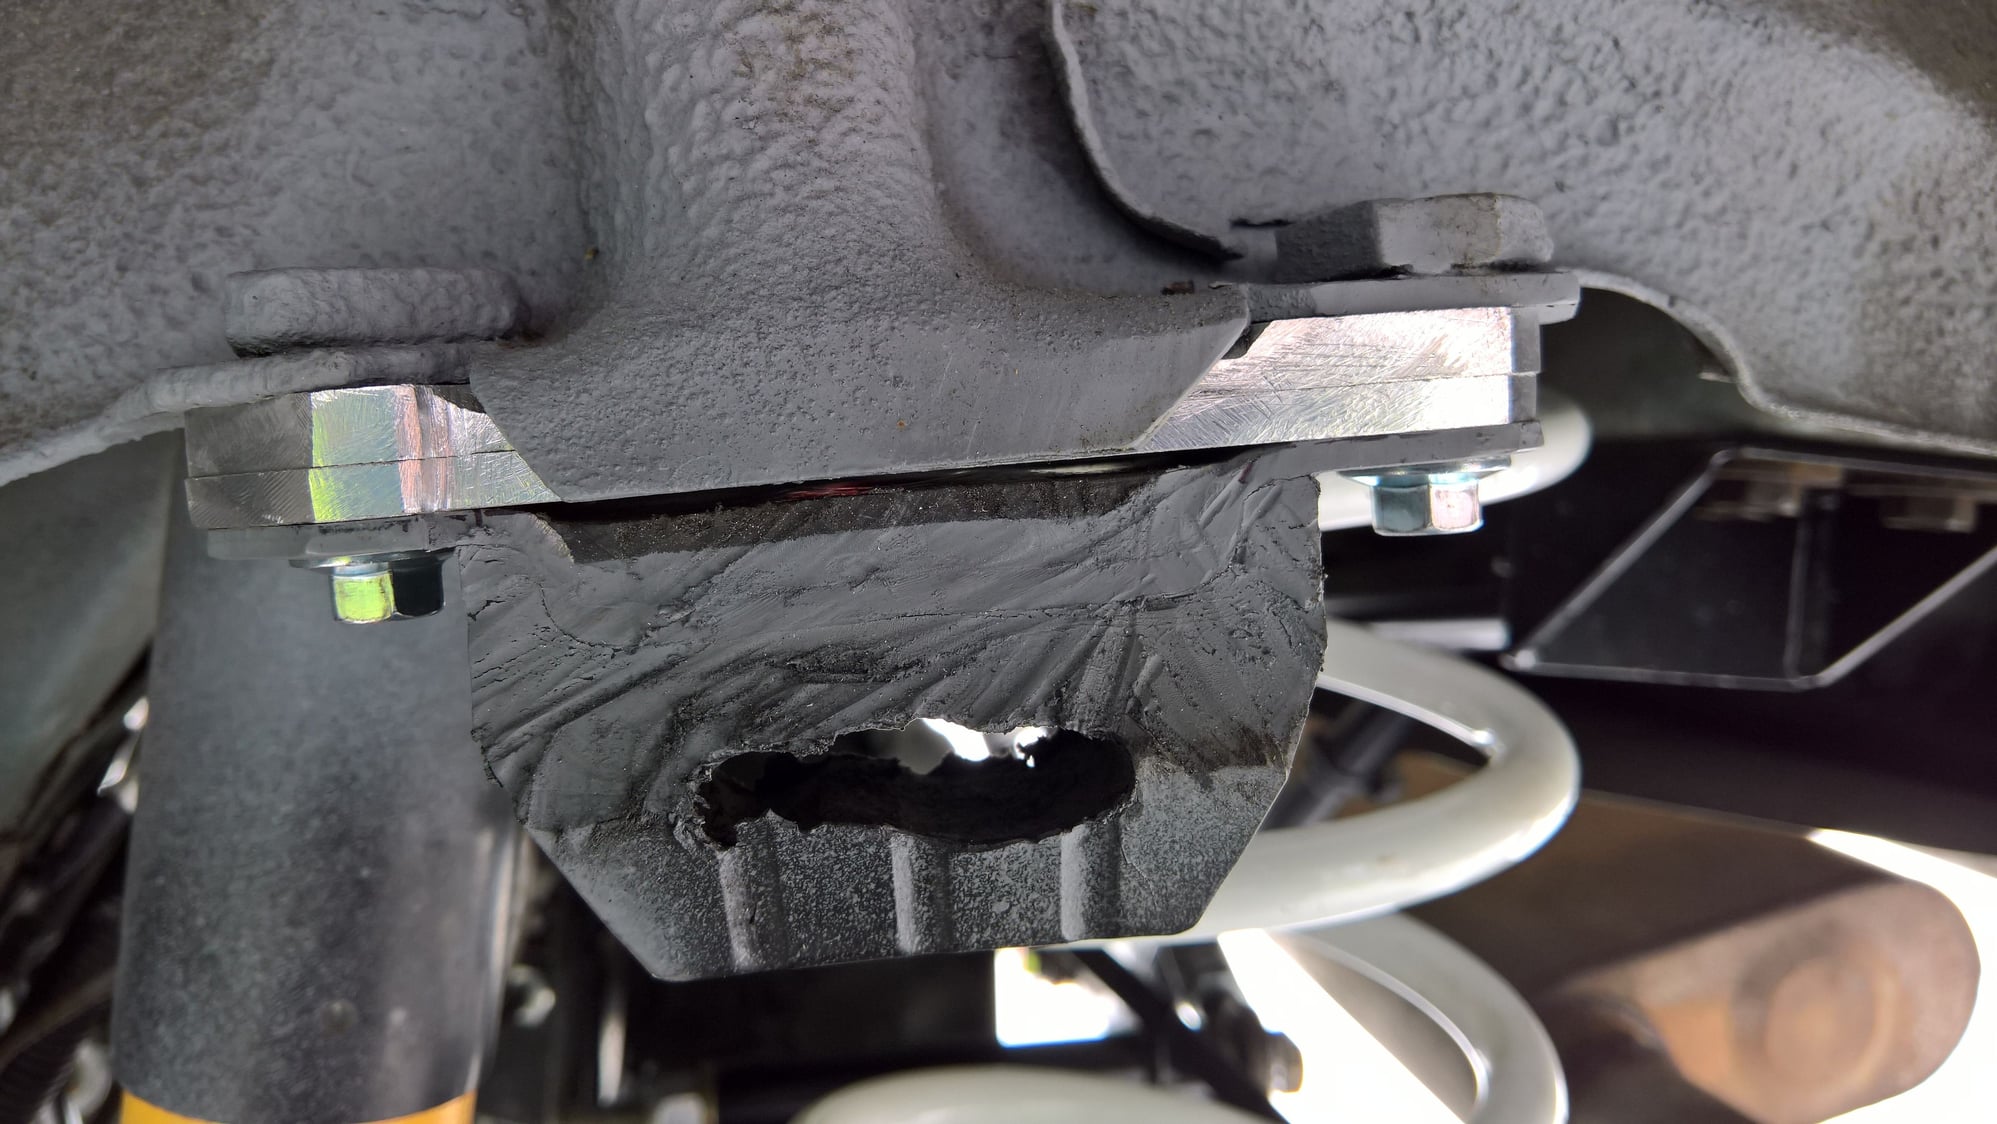
So as I said earlier, I added another aluminum spacer to the rear bump stops (the lower, slightly thinner one) to account for urethane deflection in the stops and prevent a gas tank puncture when bottoming out.
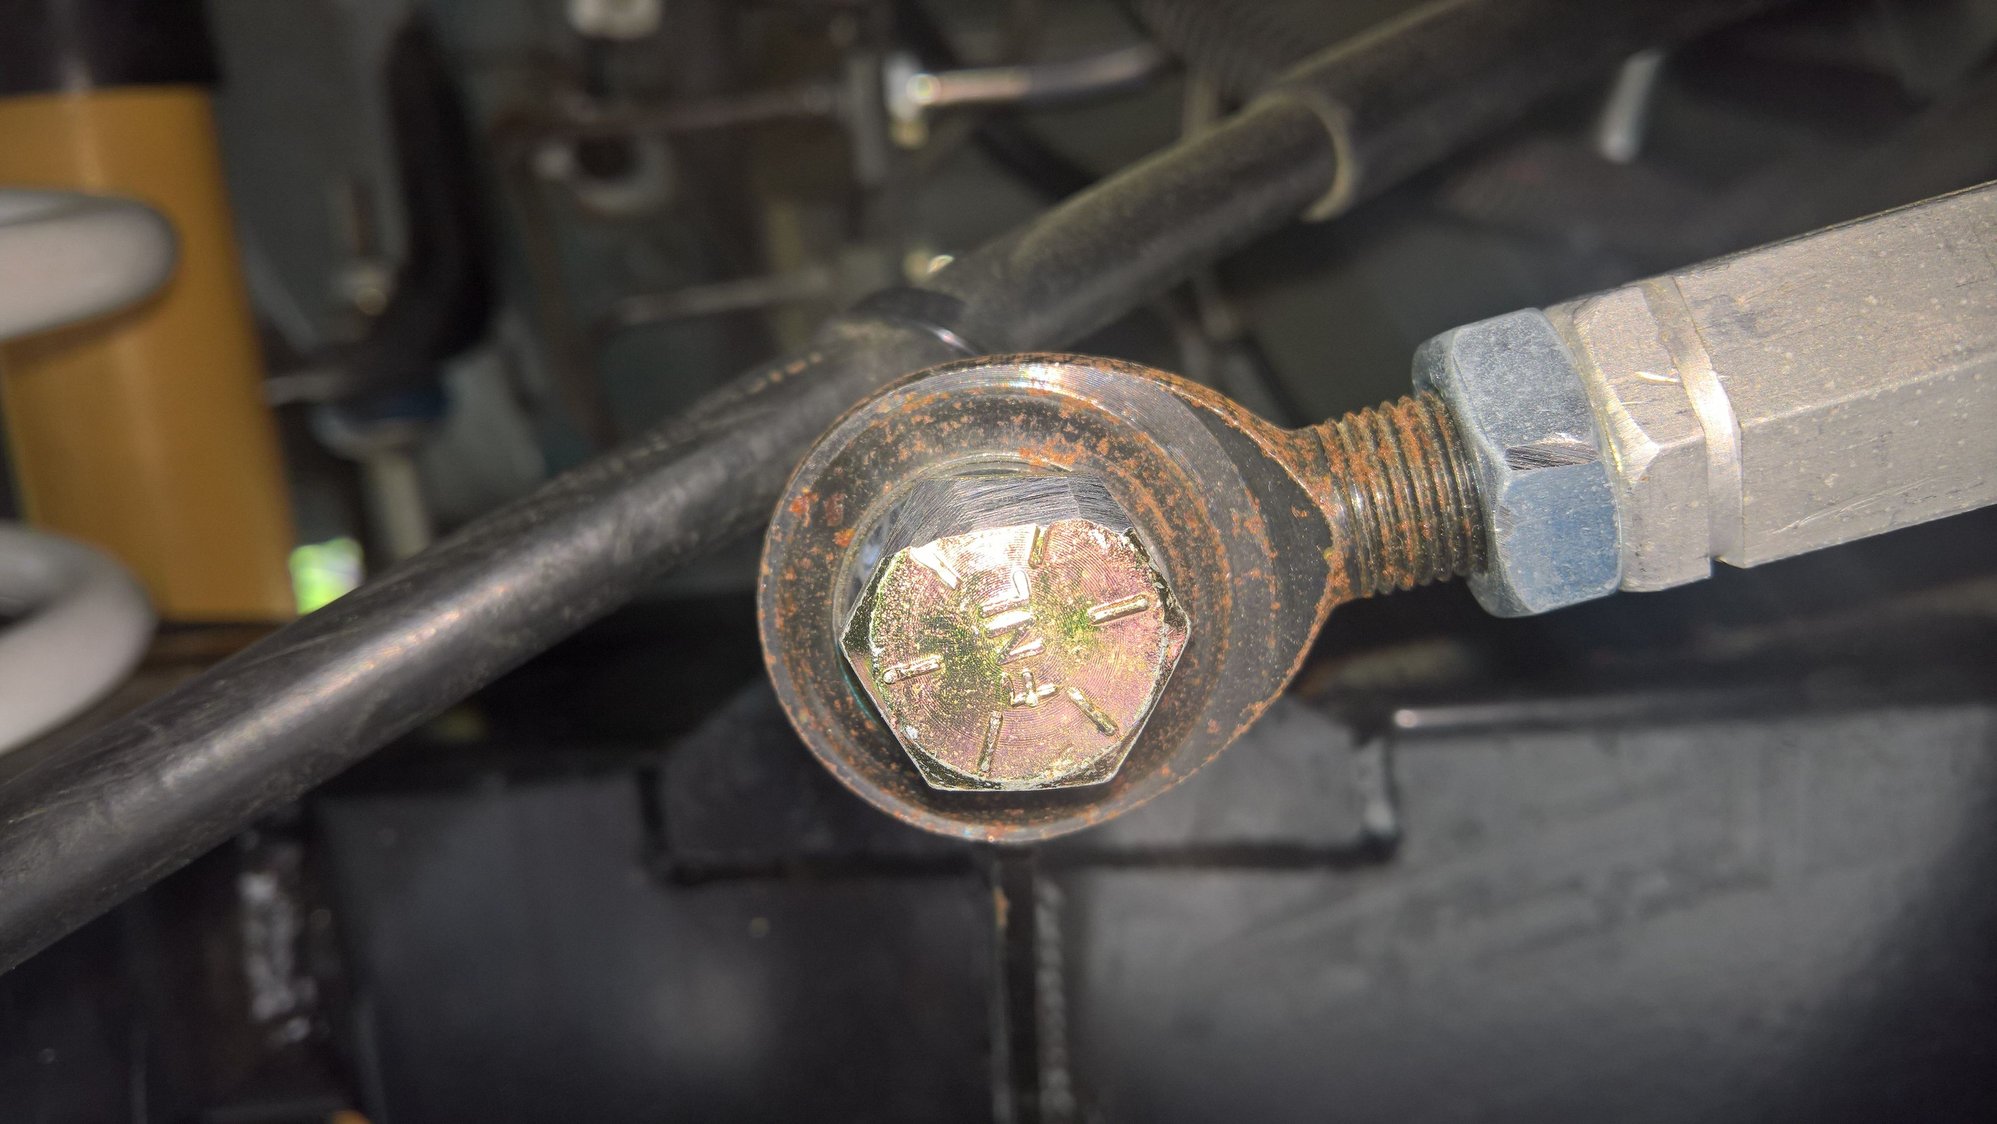
And I beveled the top edge of the watts link bolt.
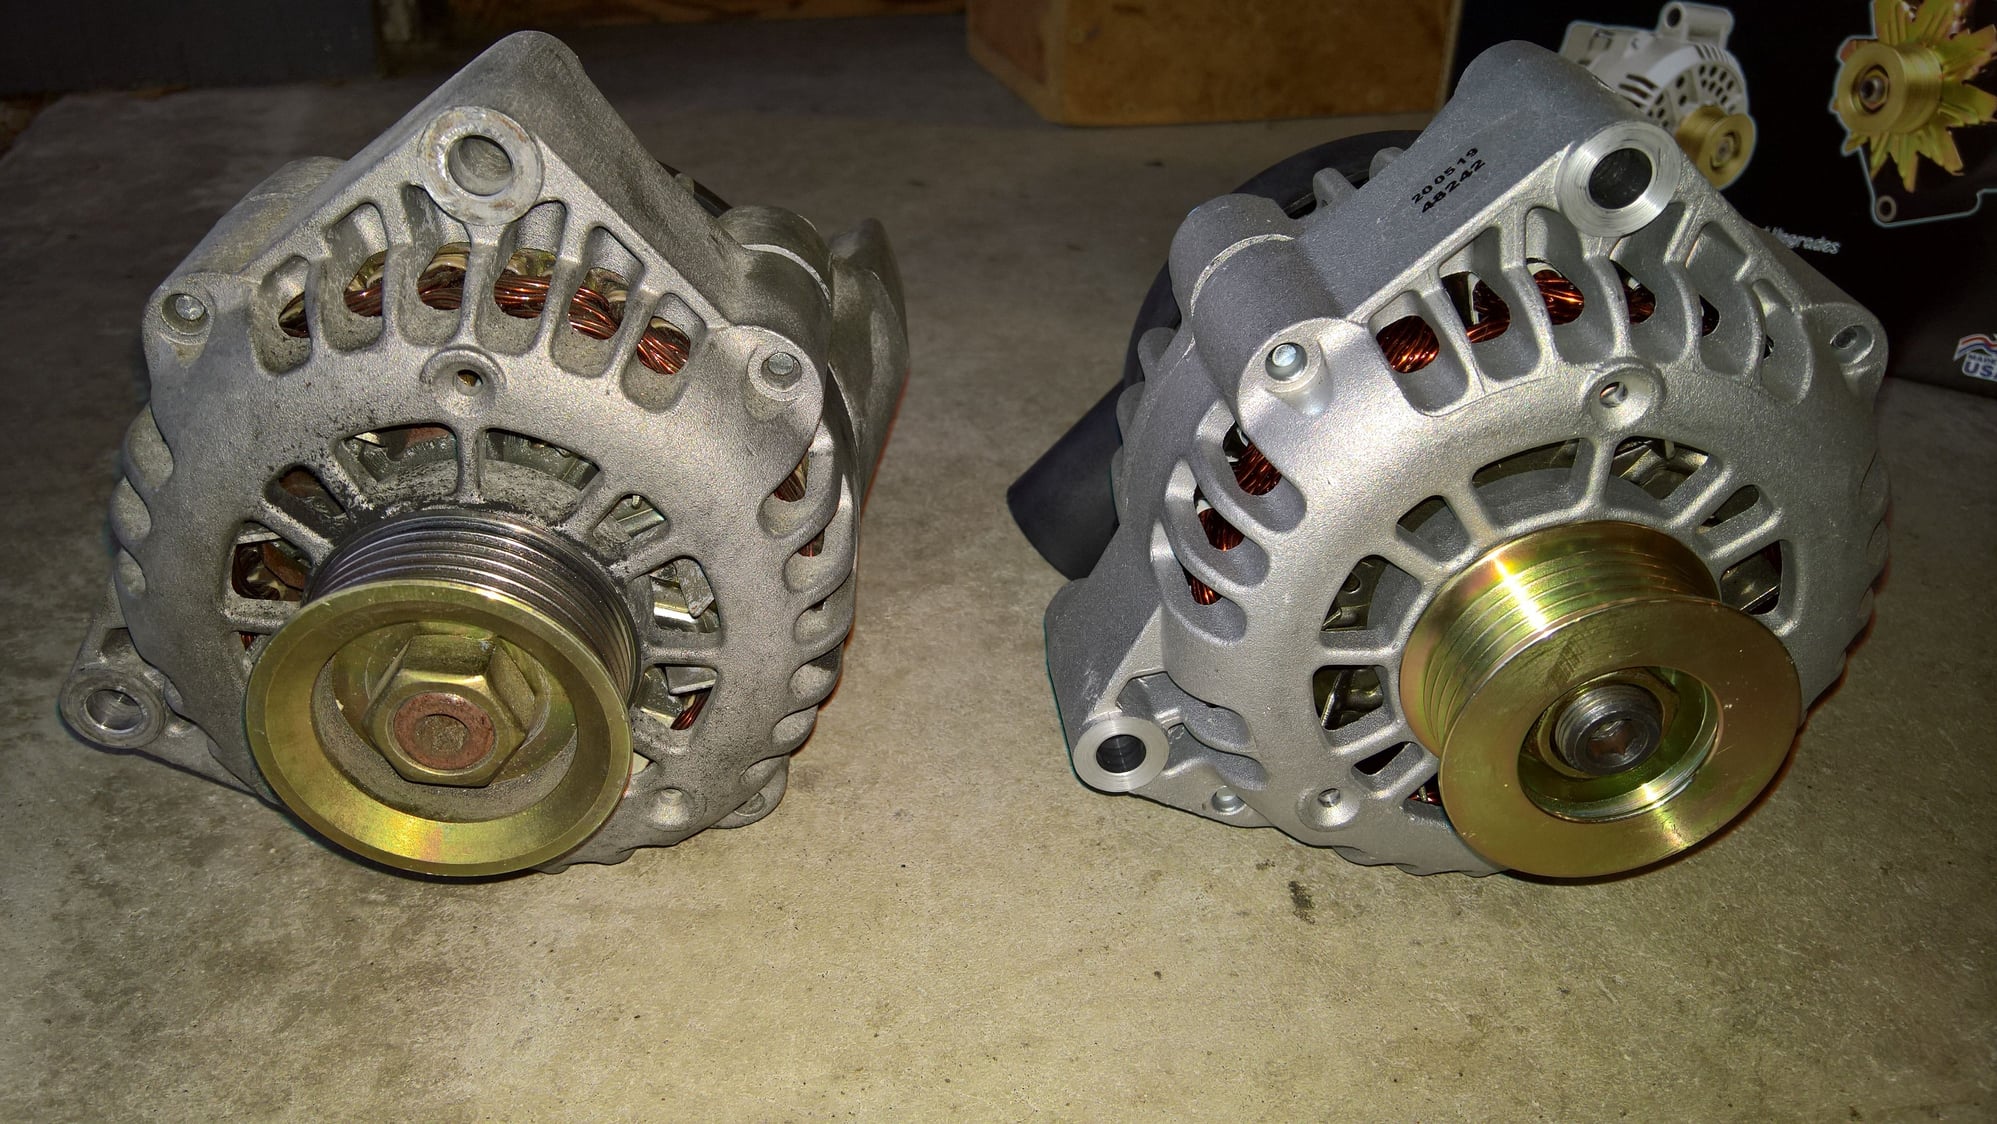
I was getting some good flickering from the gauges, which was very noticeable at night. And not just at idle. I replaced the OEM AC Delco 102 Amp alternator with a 165 Amp PowerMaster unit. I wonder how much of that boost comes from the smaller pulley? Either way, the flickering is completely gone now.
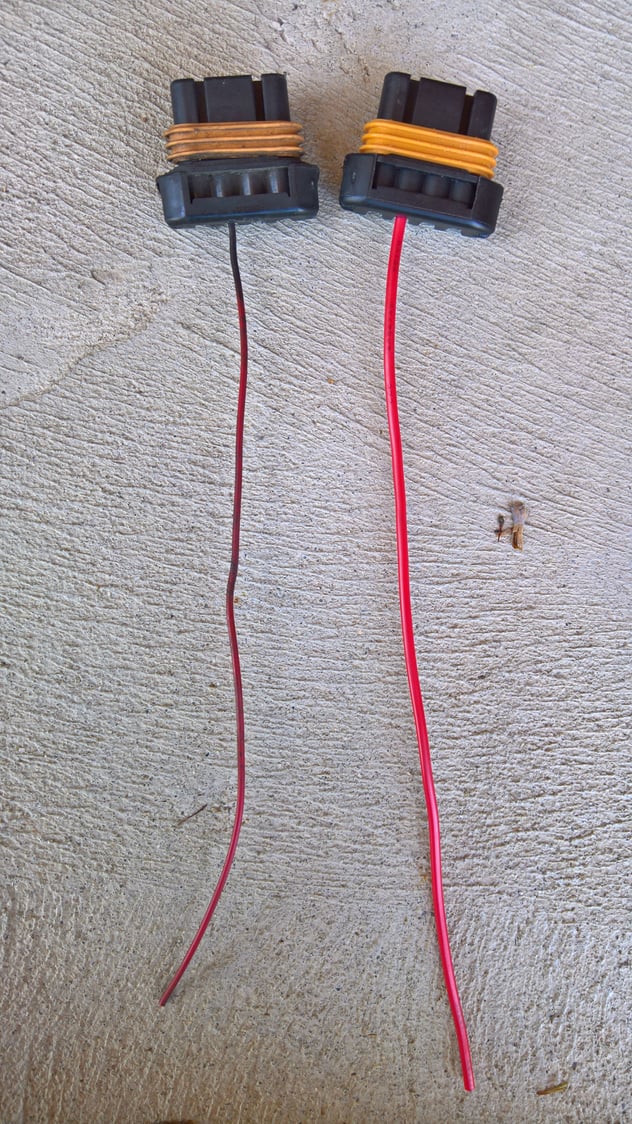
I'd repaired the 1-wire alternator connector years ago, so I figured I'd replace it while I was in there just in case. It's nice to see that this eBay replacement uses a heavier gauge wire to hopefully prevent future damage.
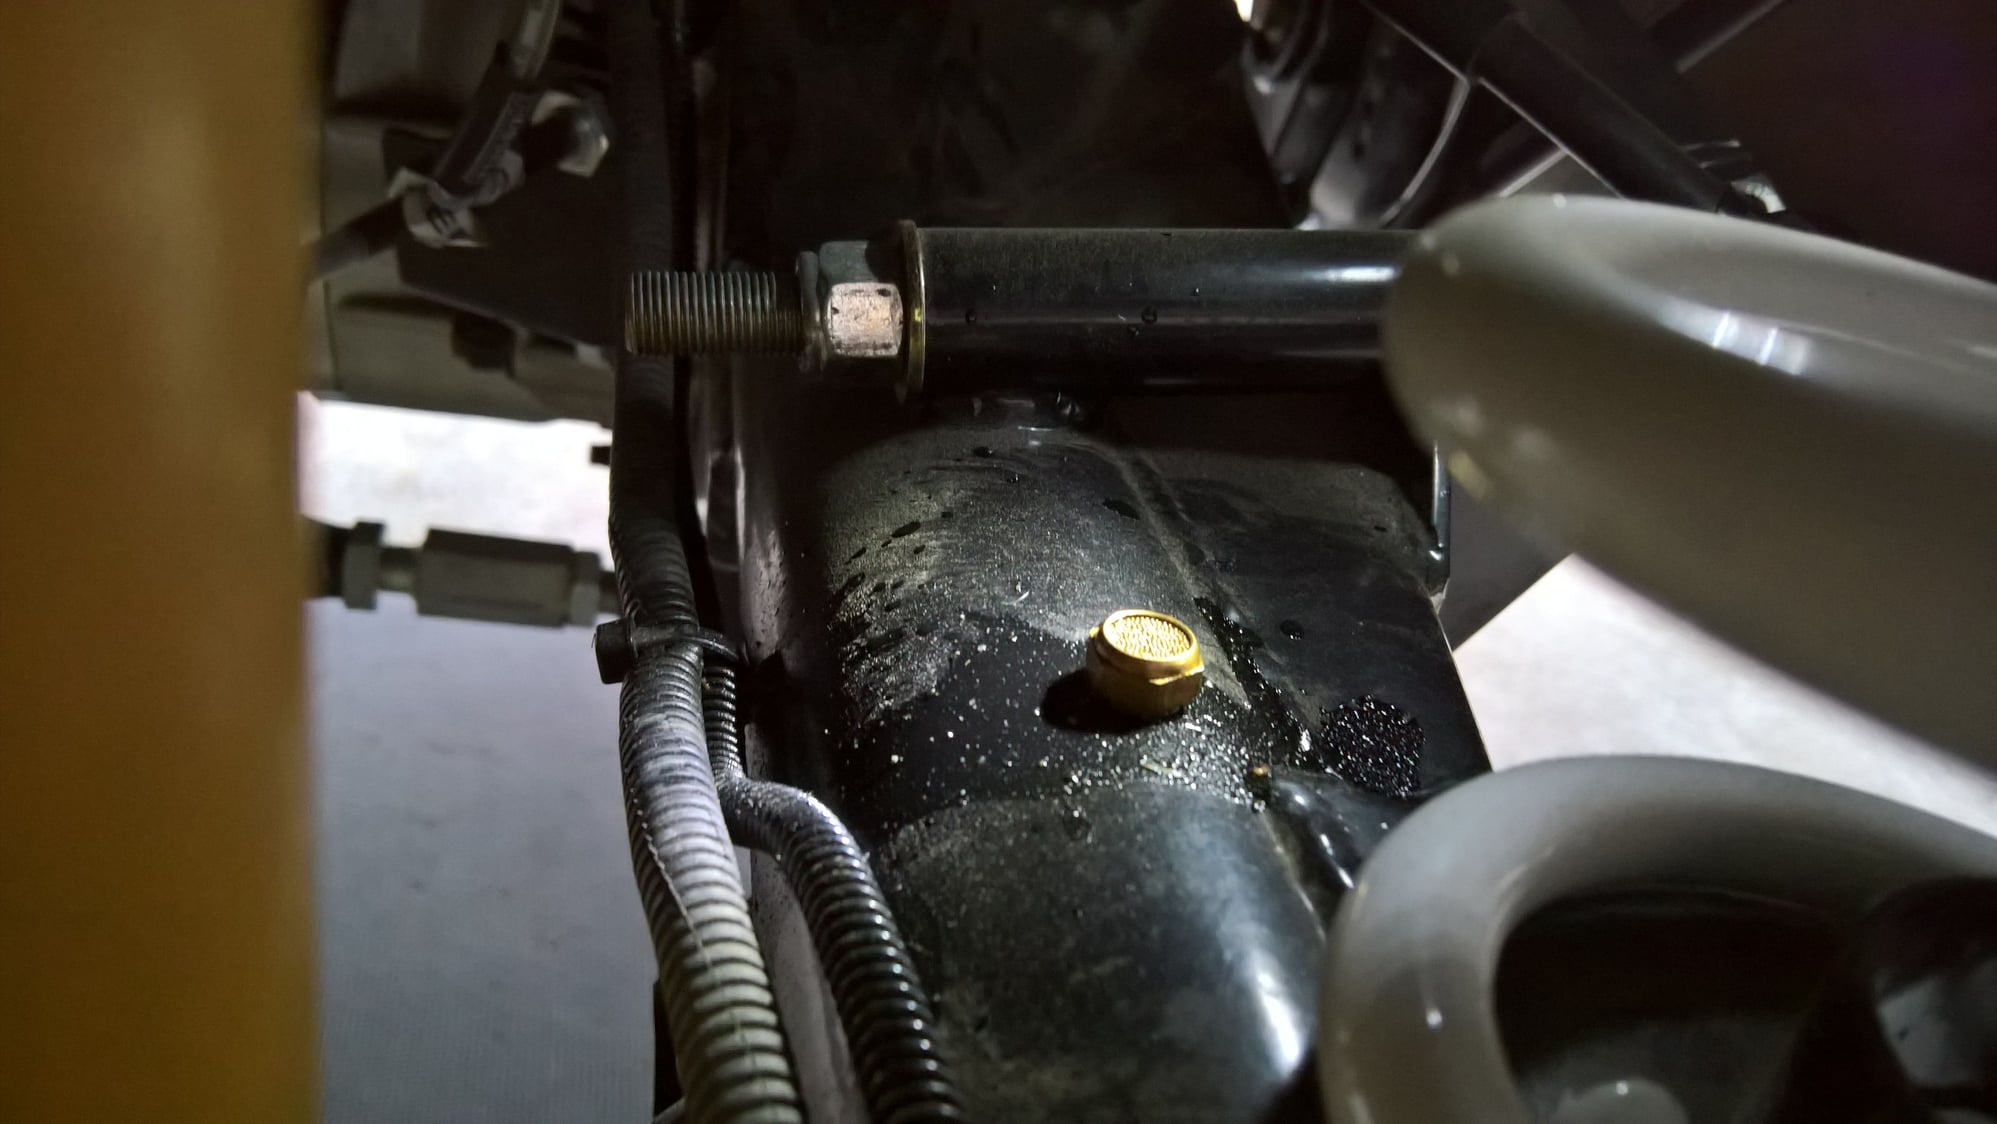
Yet more rear axle leaks. This time, from the vent port. I haven't even driven the car aggressively yet, due to the break in cycle, and it sprayed out everywhere.
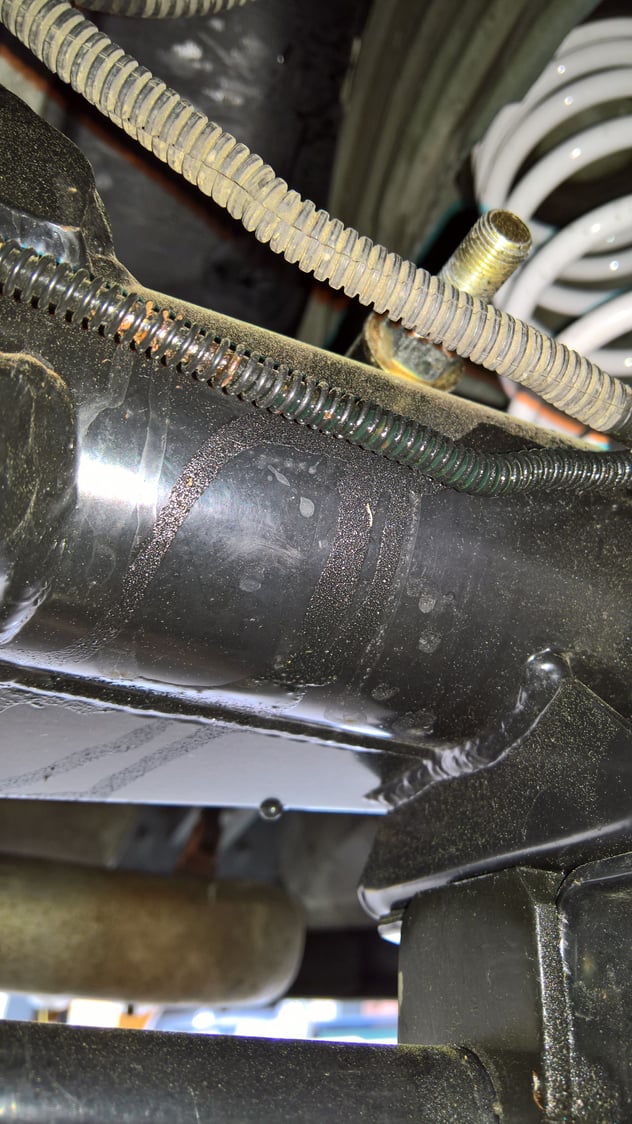
Yet more rear axle leaks. This time, from the vent port. I haven't even driven the car aggressively yet, due to the break in cycle, and it sprayed out everywhere.
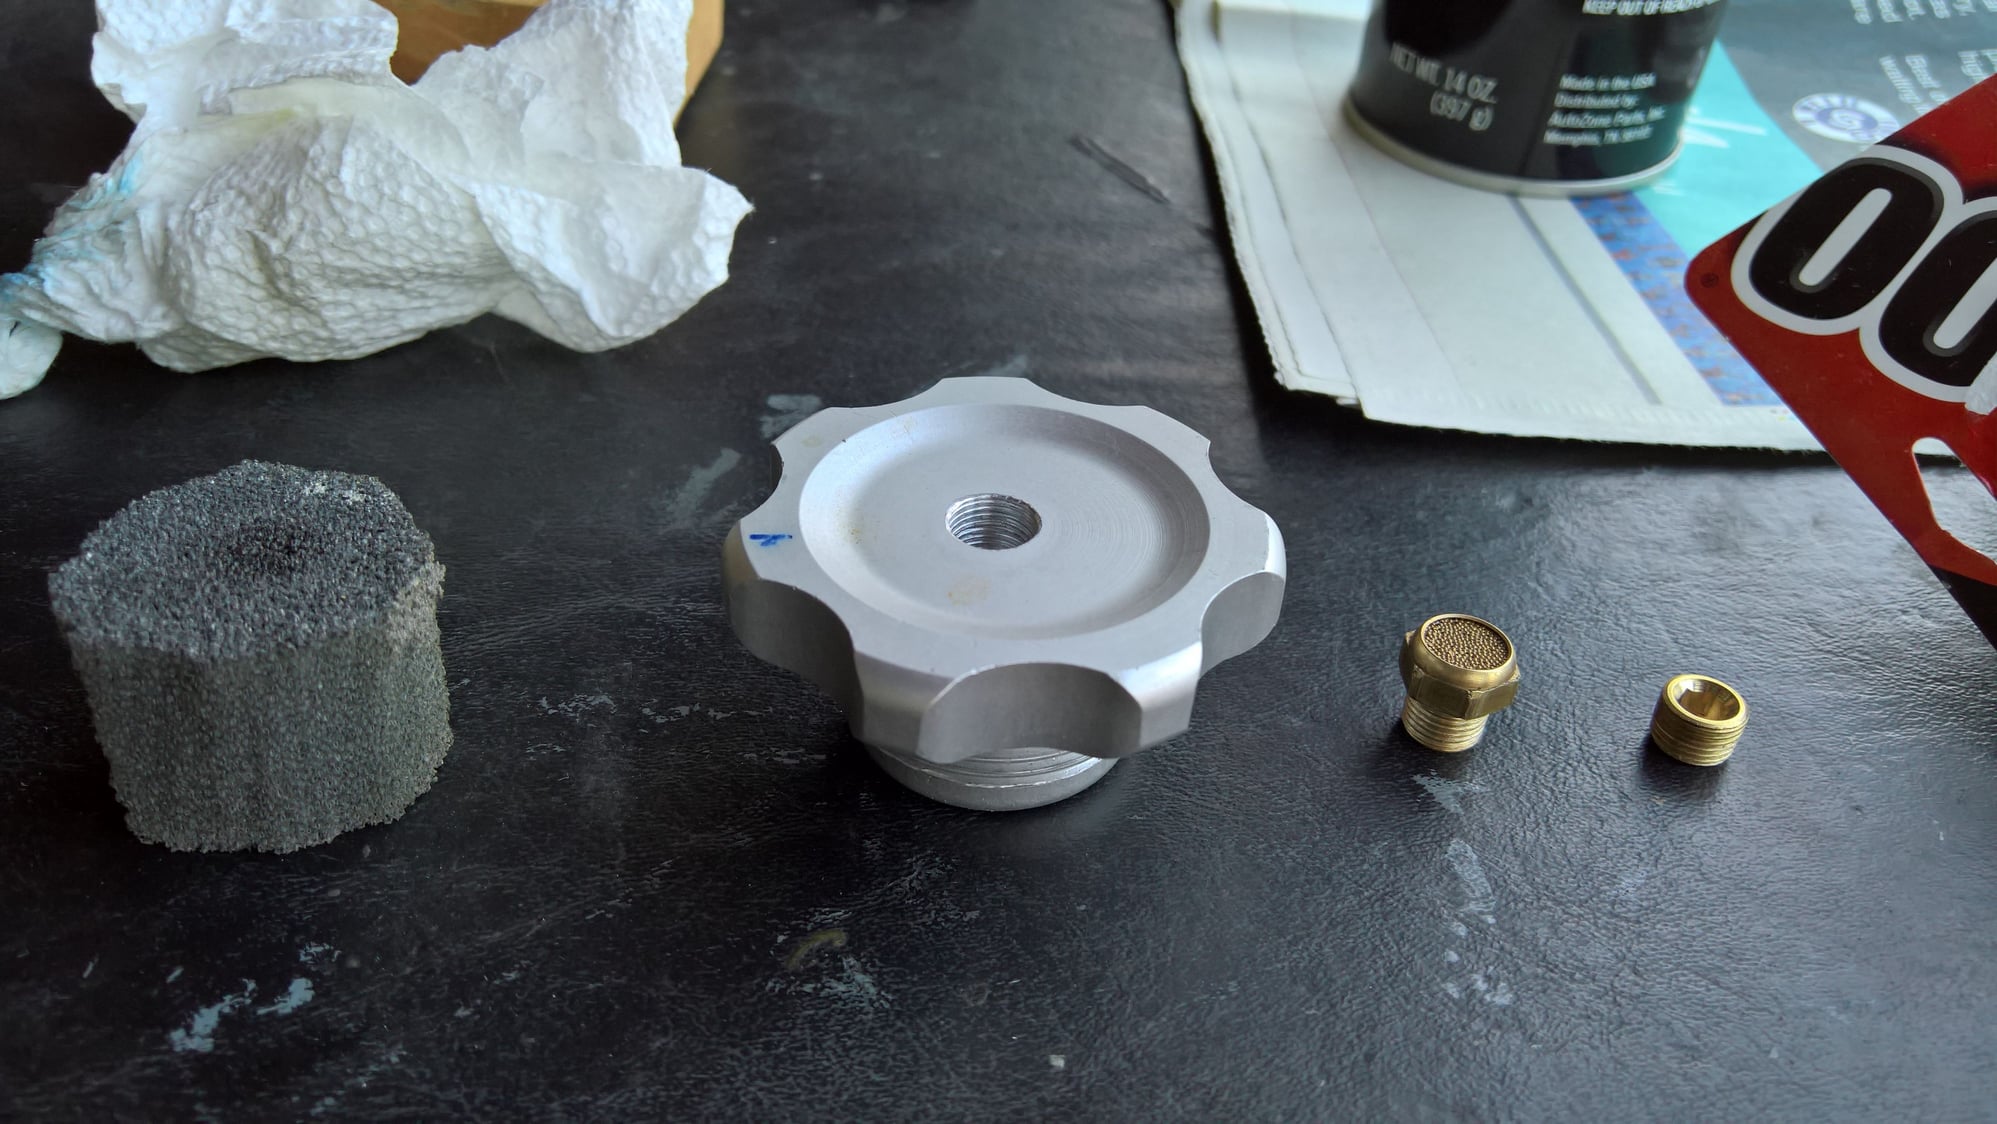
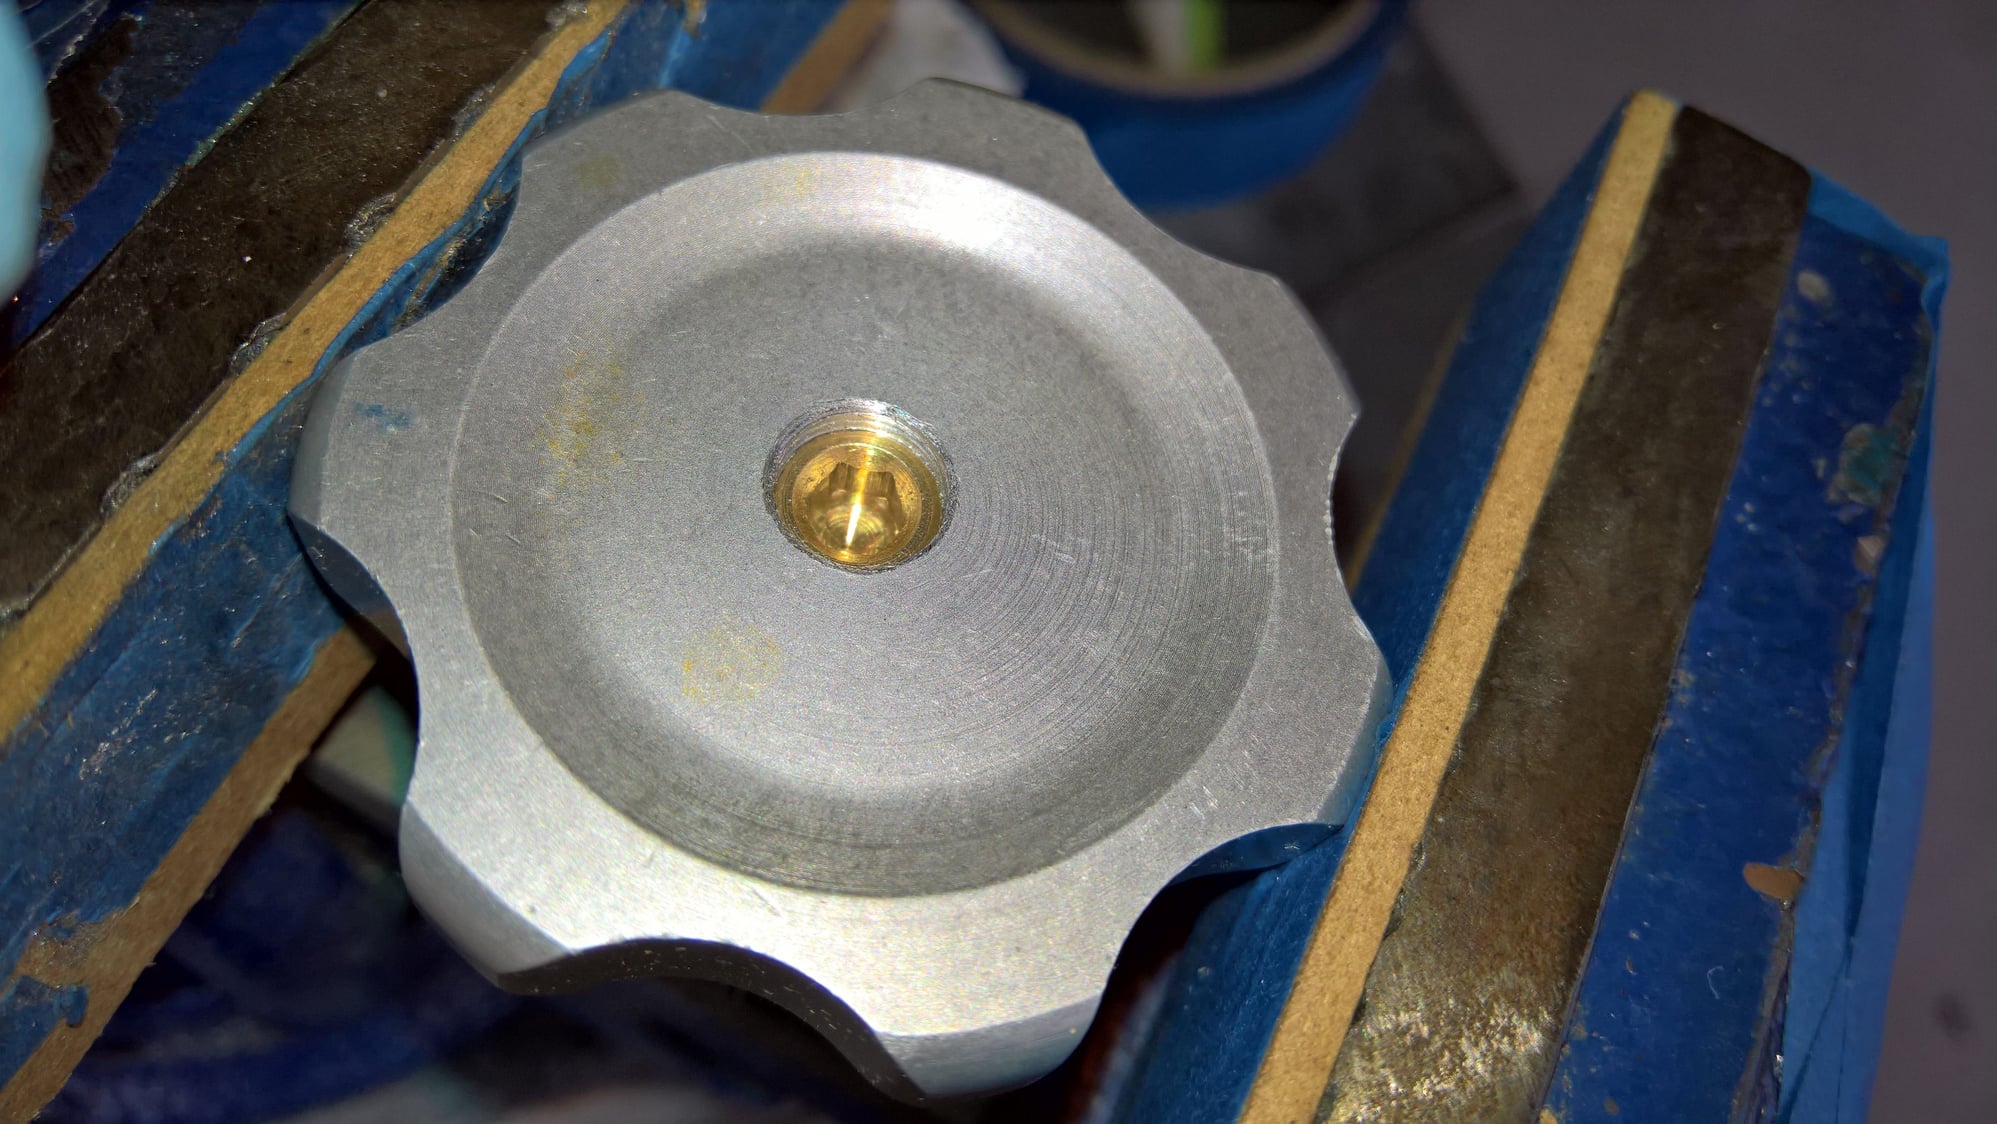
My first attempt at fixing the axle breather leak. From left-to-right: Part of an old sanding block, the filler cap, the original vent breather removed, and a plug to fill the original breather hole. In this pic, I have drilled and tapped the center of the cap to accept the breather vent.
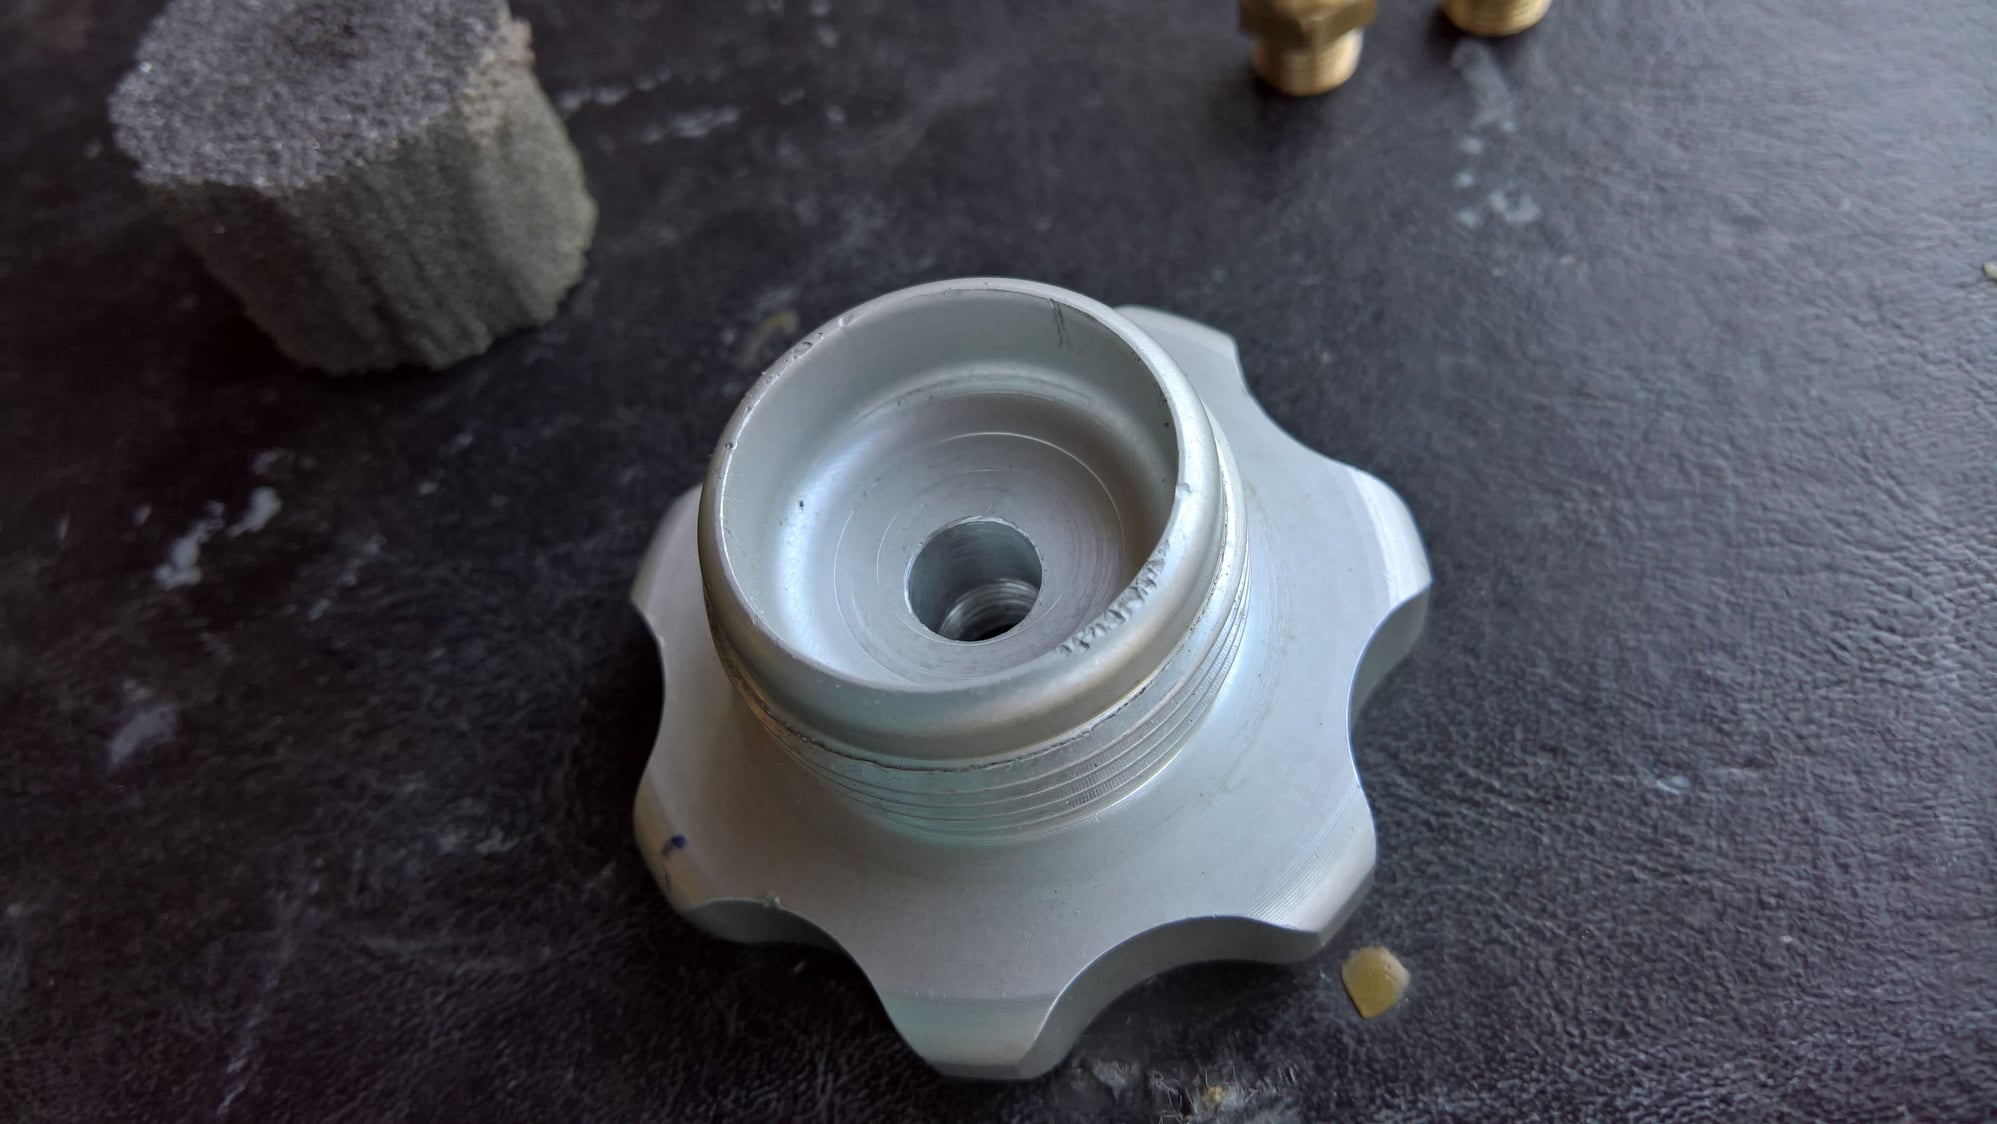
In this pic, I have drilled and tapped the center of the cap to accept the breather vent.
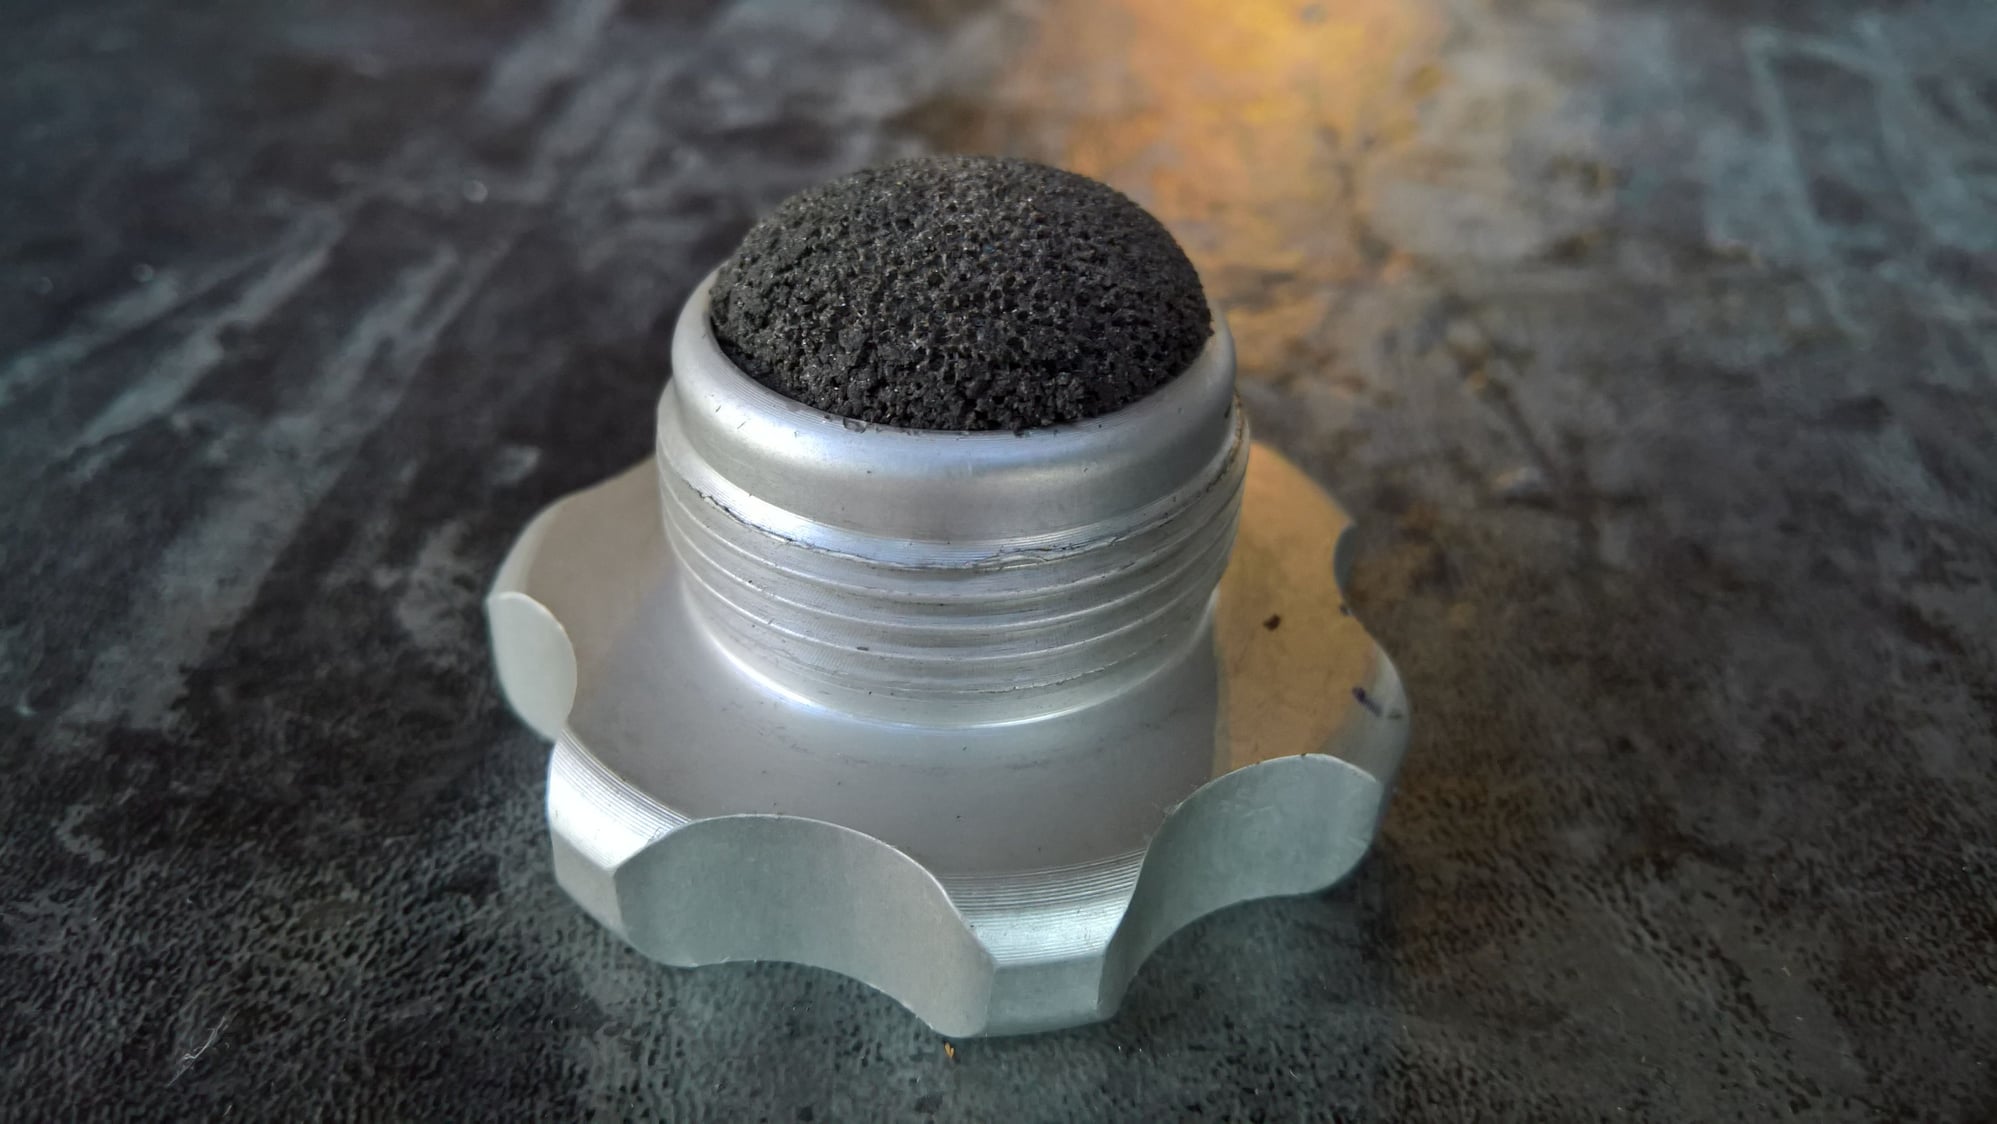
Here, I have used E6000 contact adhesive to glue the hard foam of the sanding block into the cap.
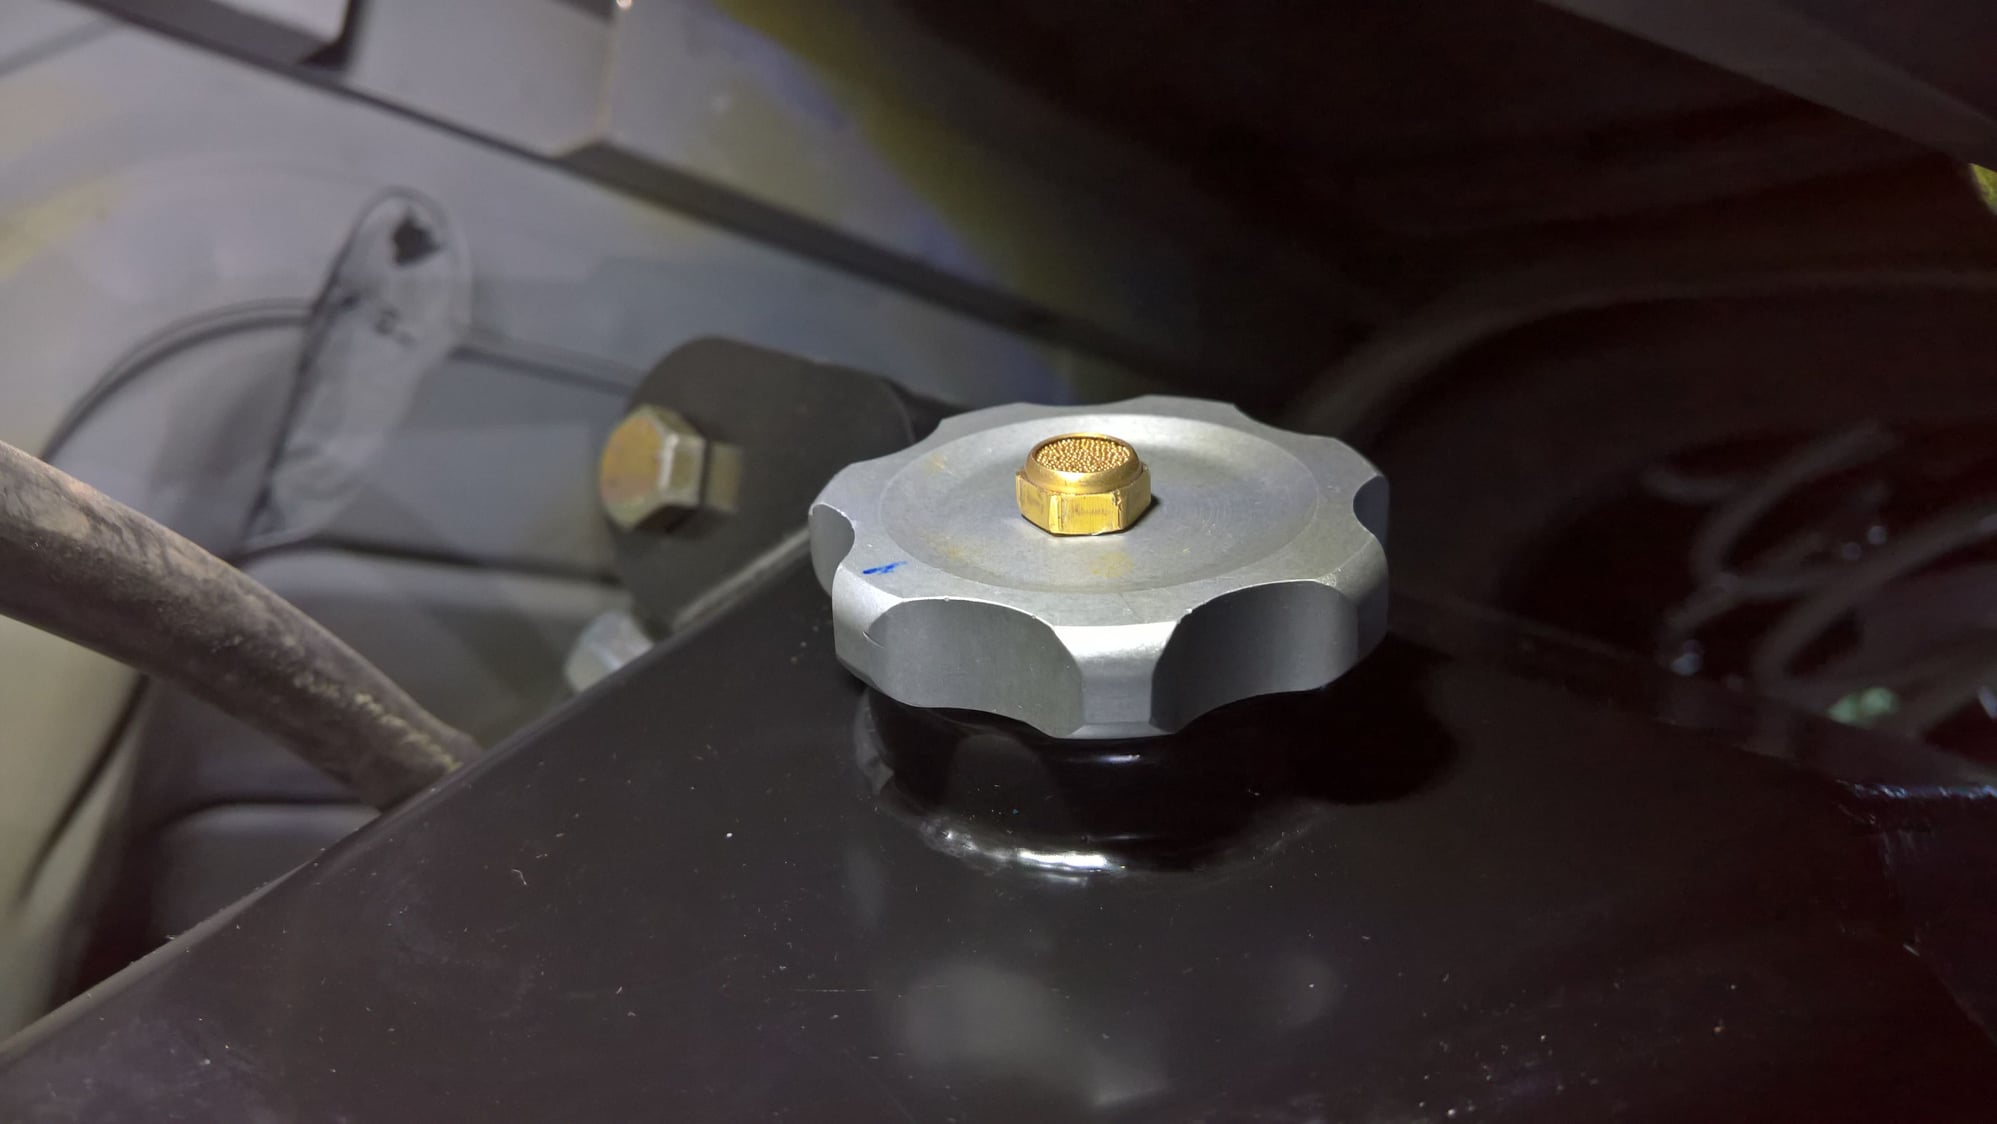
Here we see the new location for the breather vent.
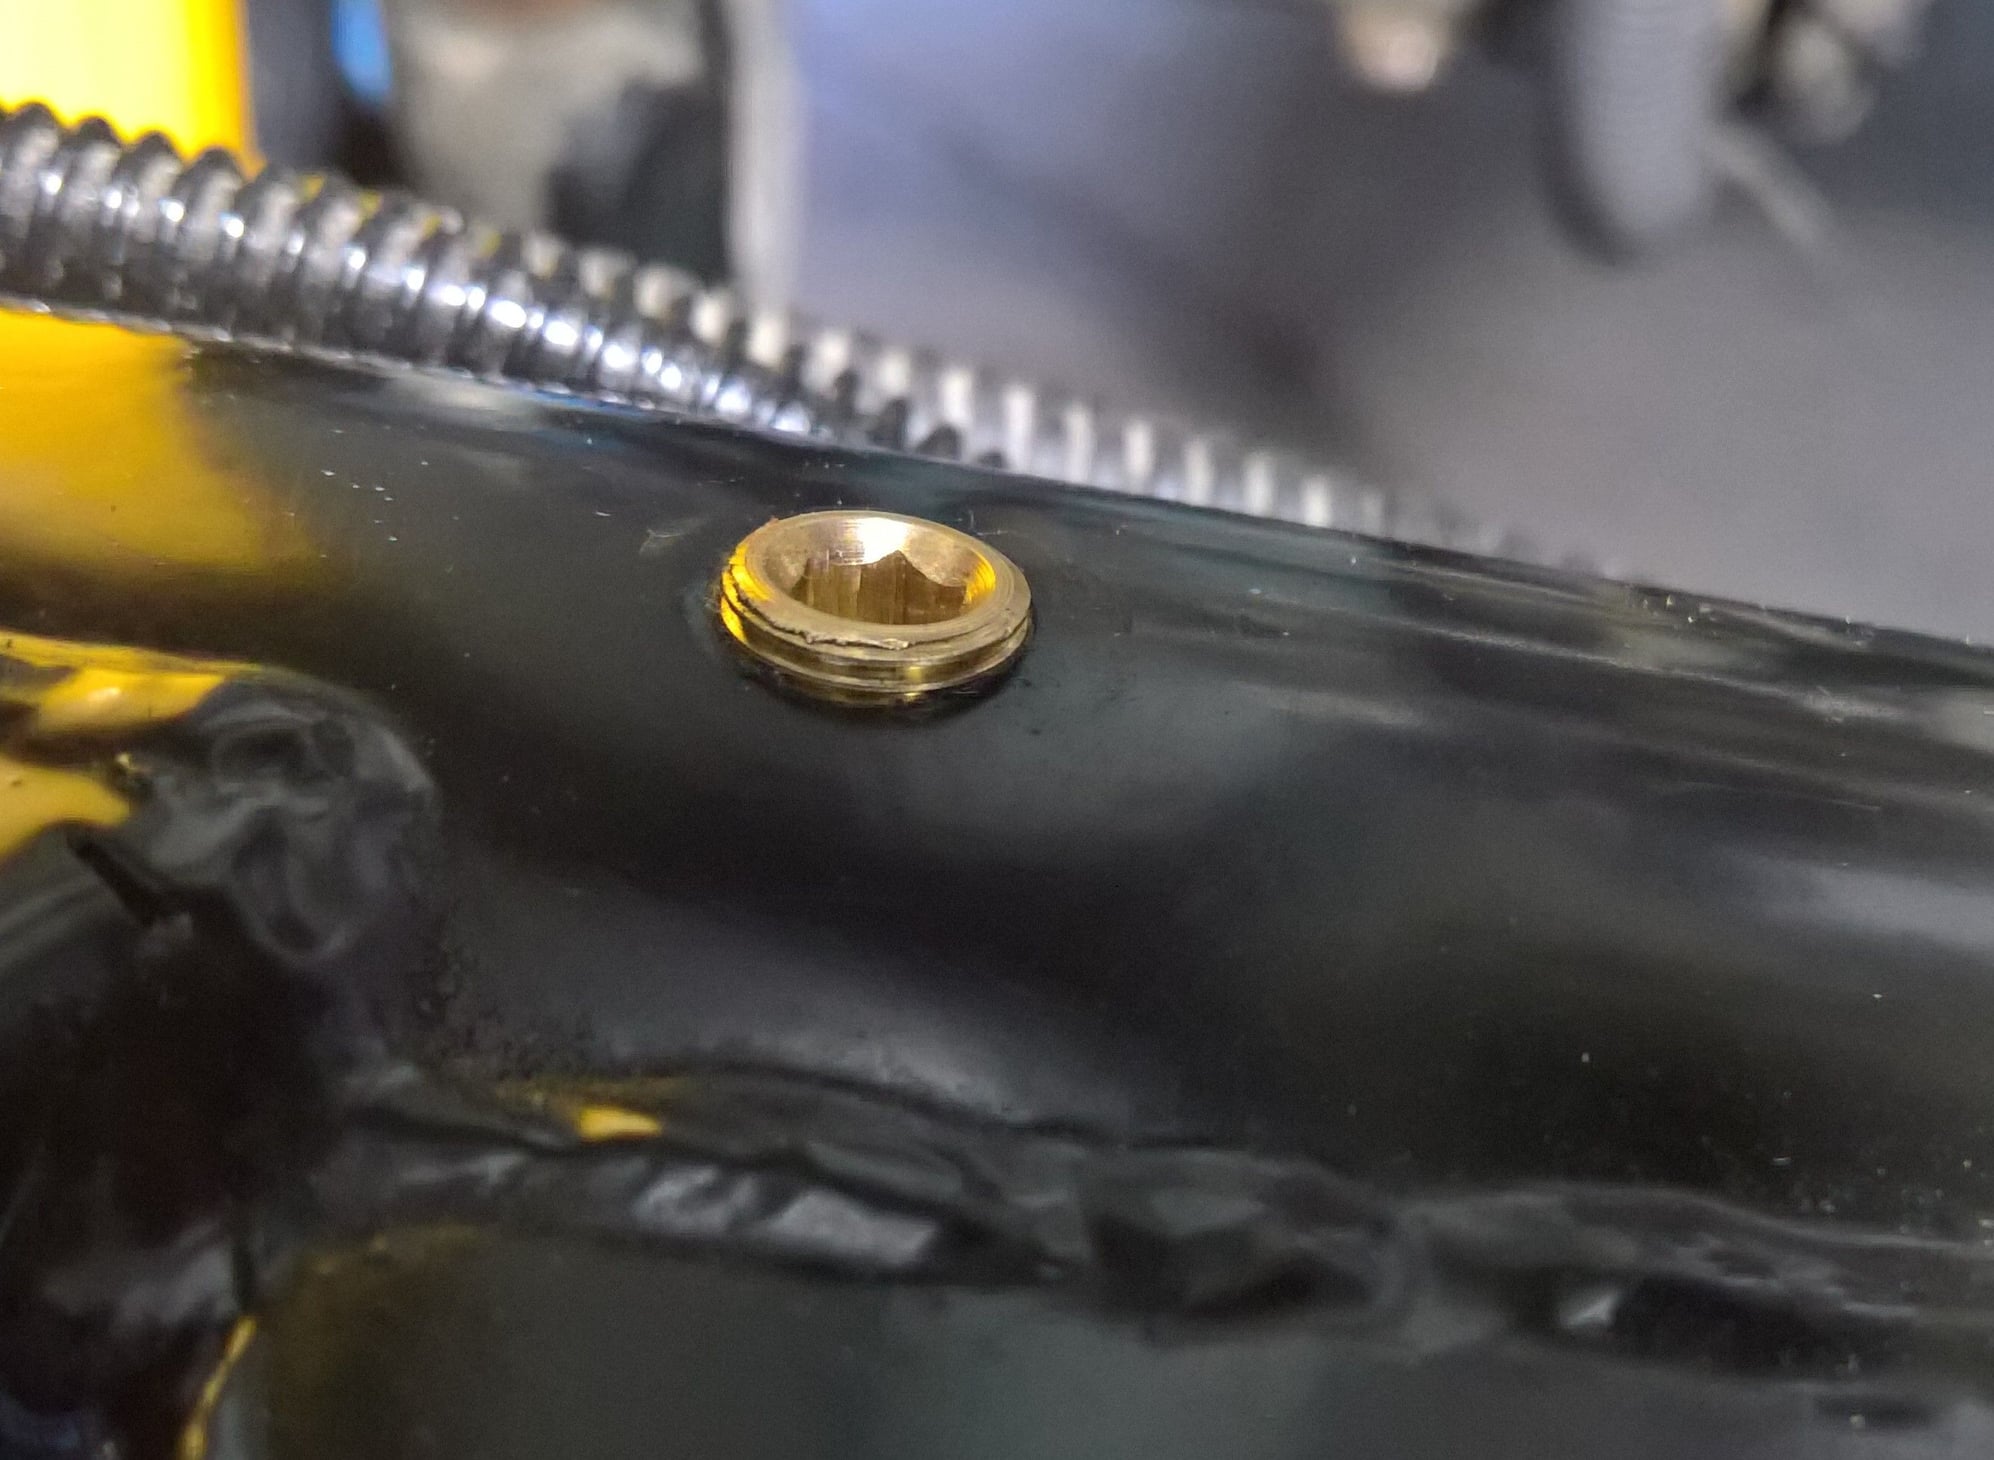
And the old axle vent location is plugged.
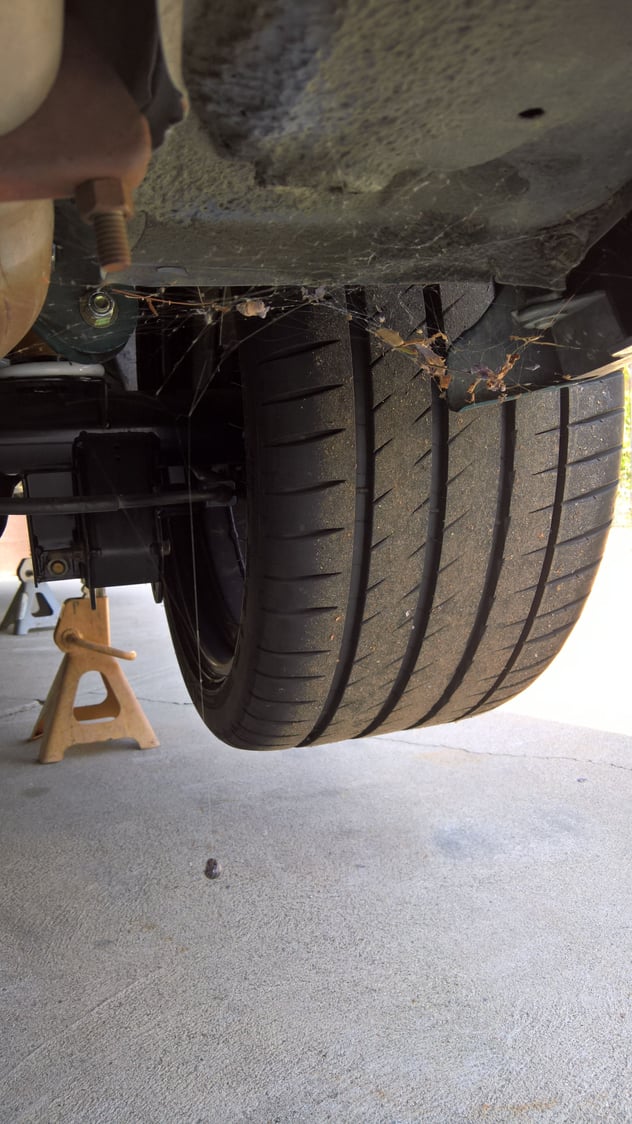
The spiders haven't gotten the hint that my car is no longer an inanimate object.
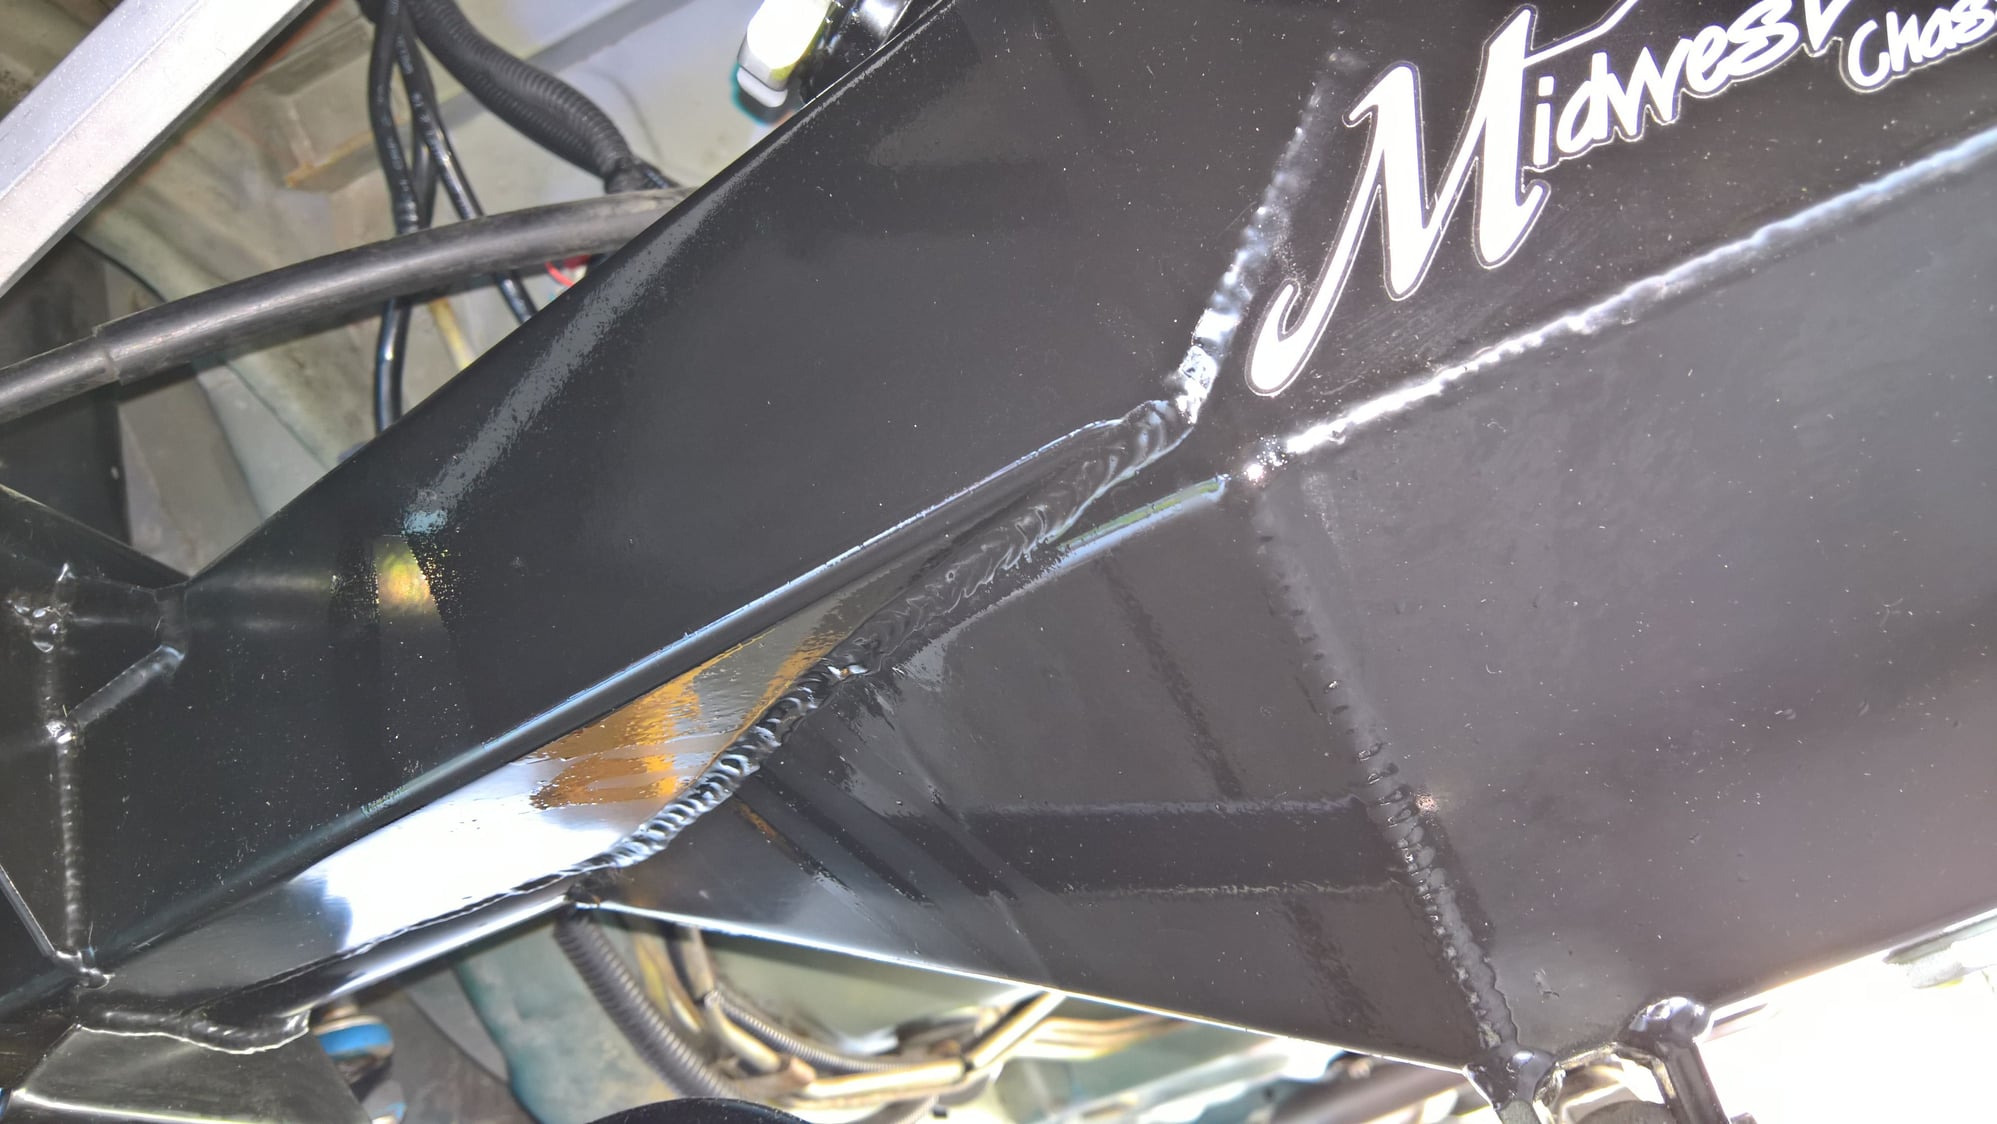
Well that didn't work. The foam acted like a sponge and the pressure pushed the fluid out.
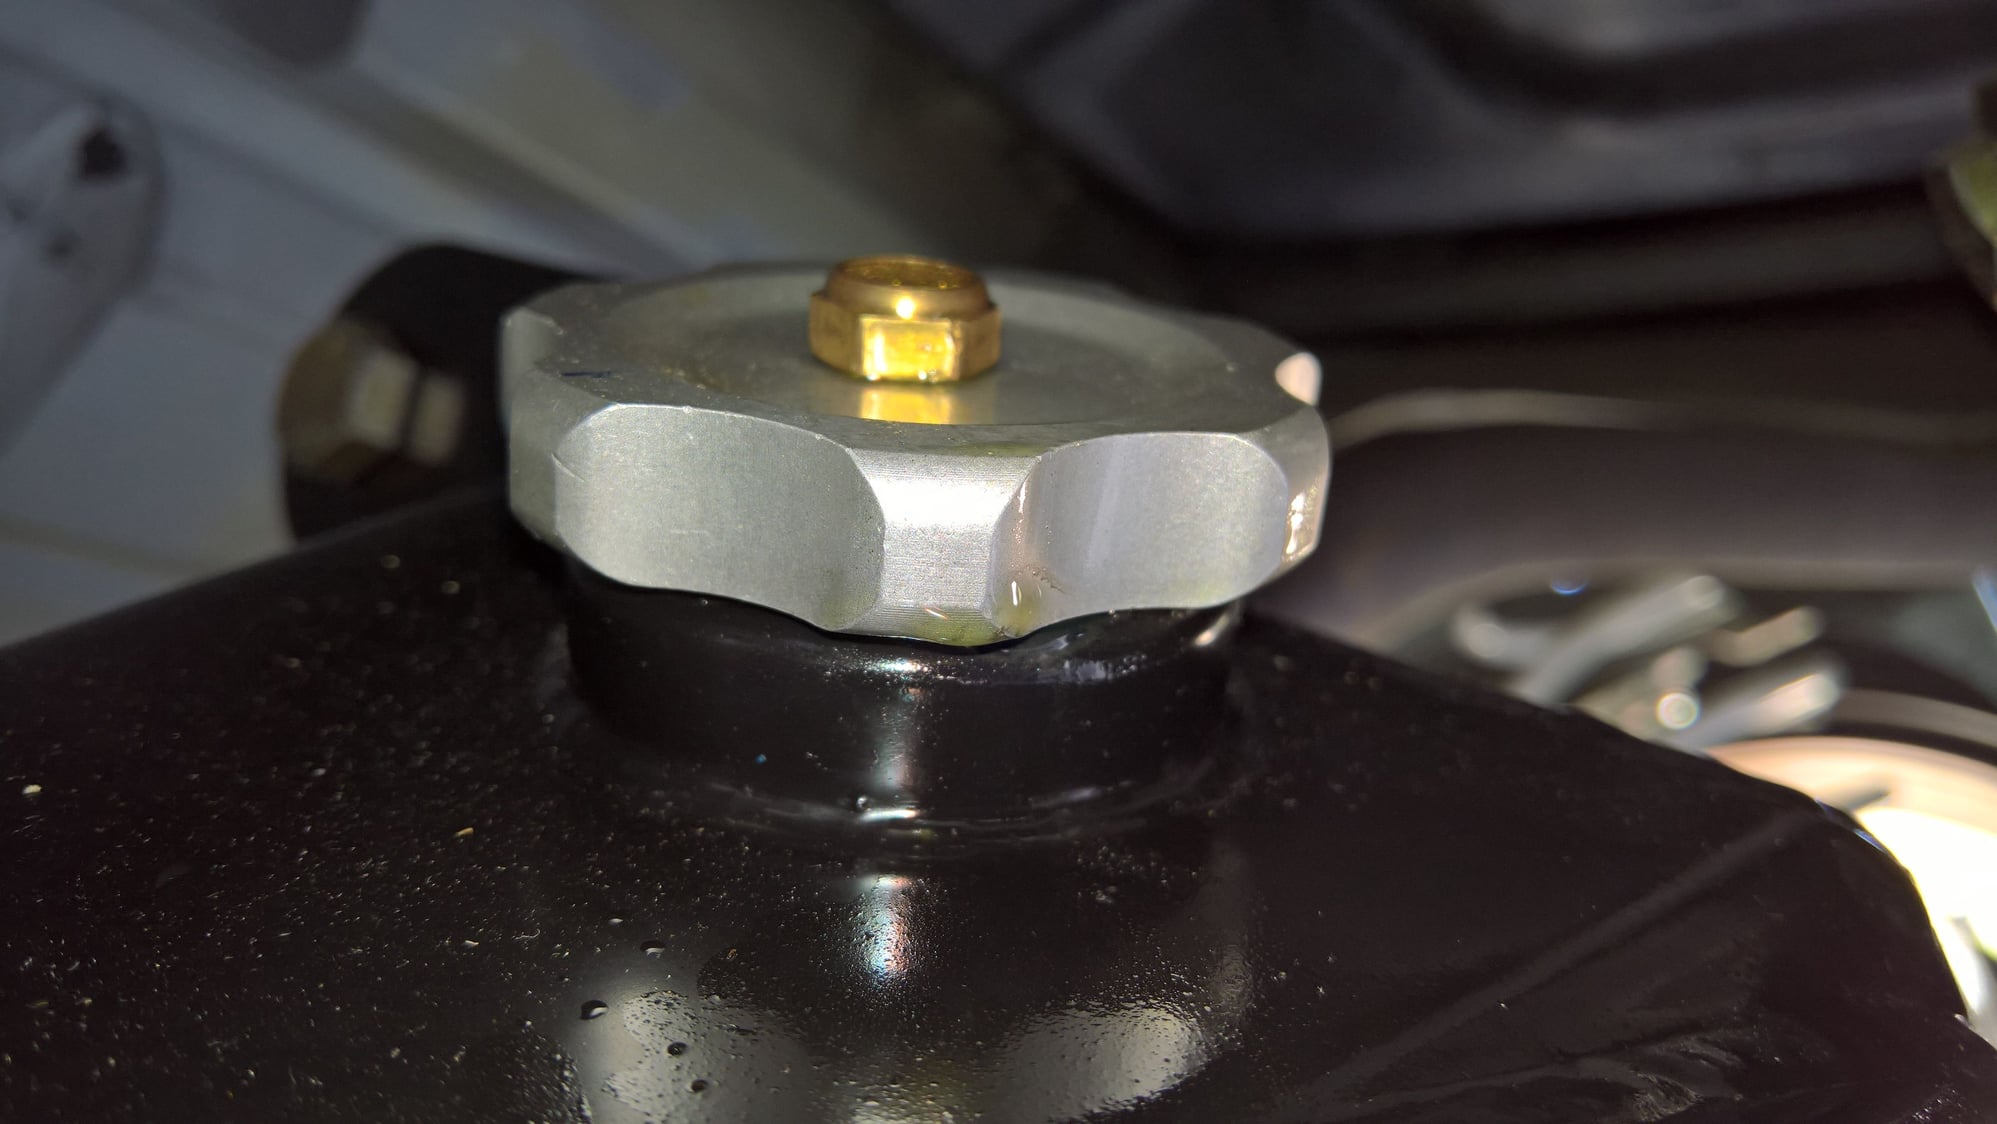
Well that didn't work. The foam acted like a sponge and the pressure pushed the fluid out.
So I moved the plug over to the cap and sealed up the hole I made.
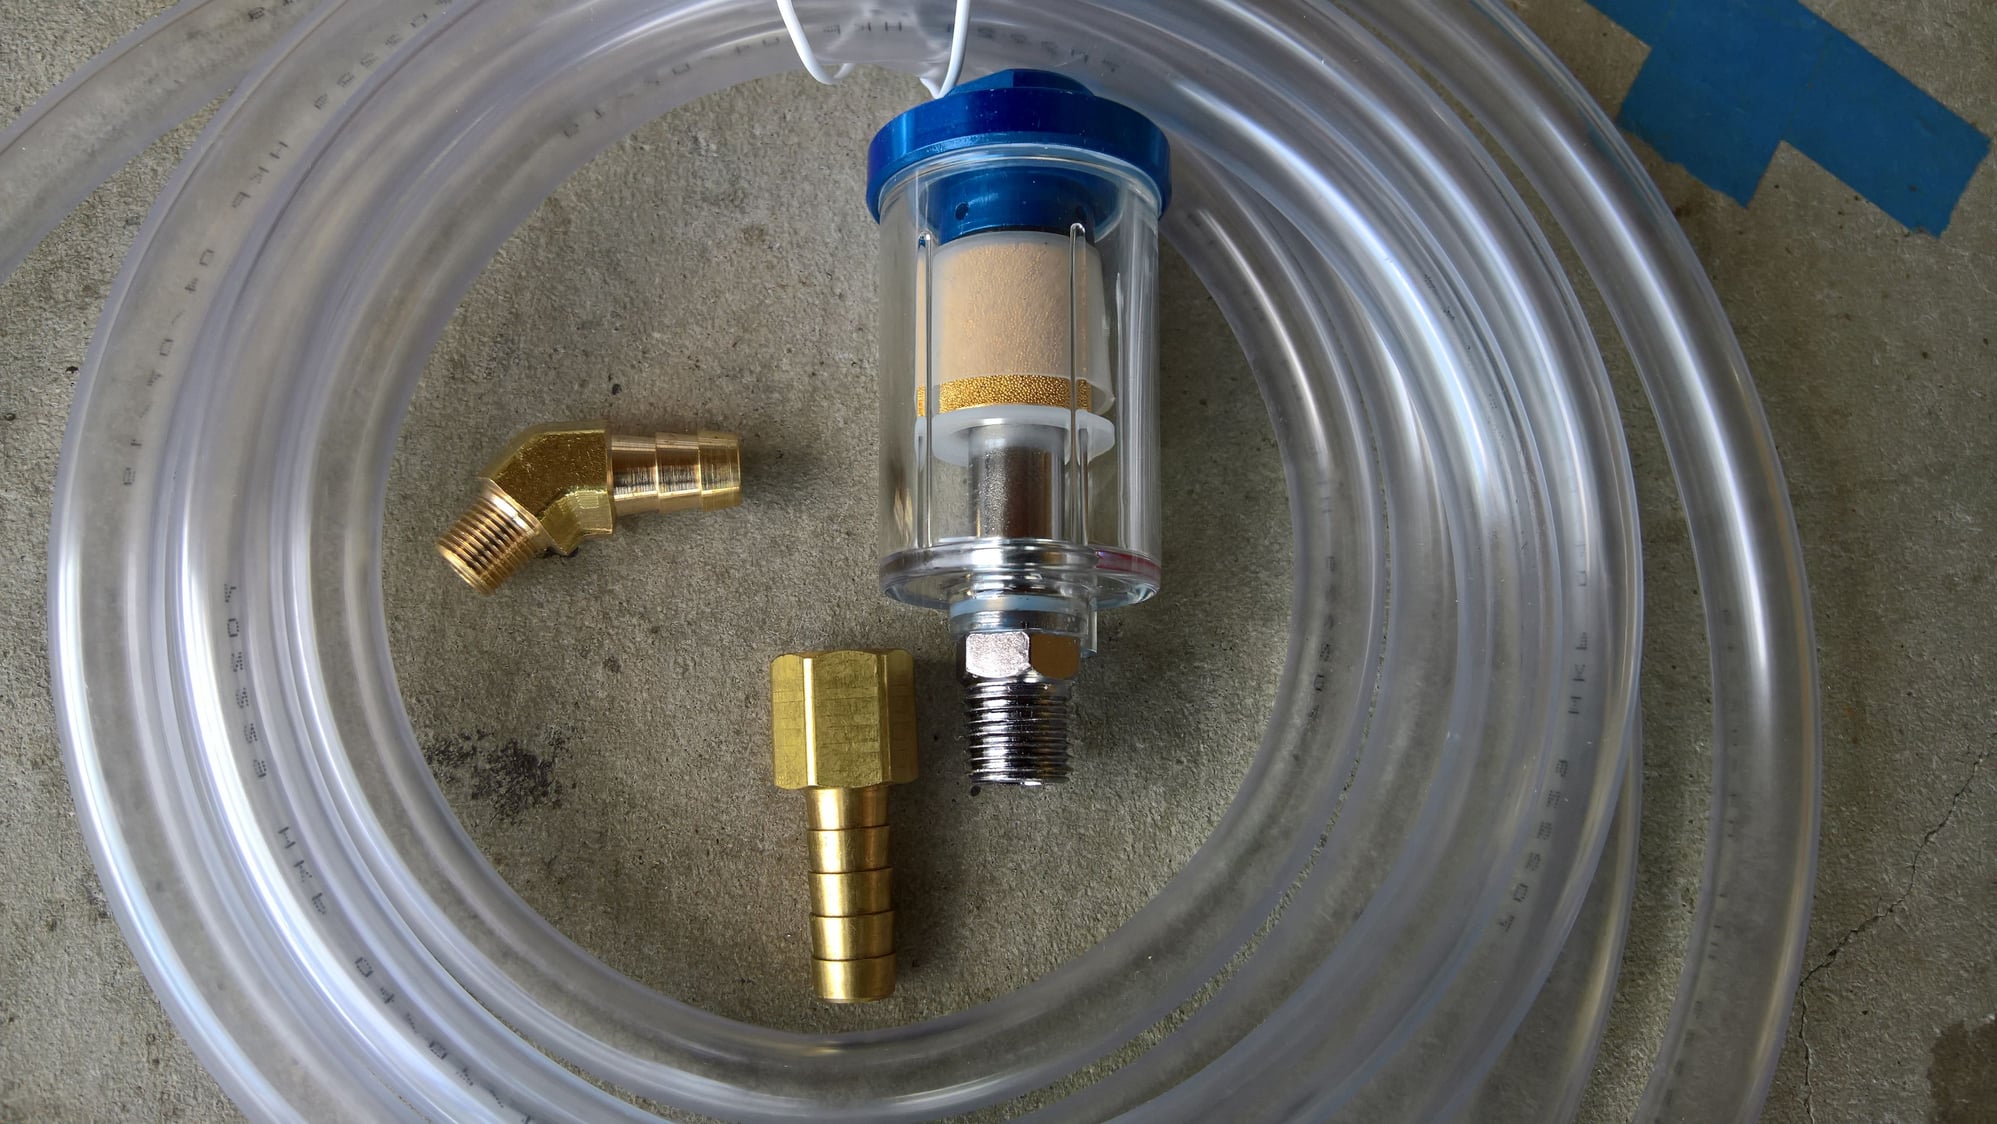
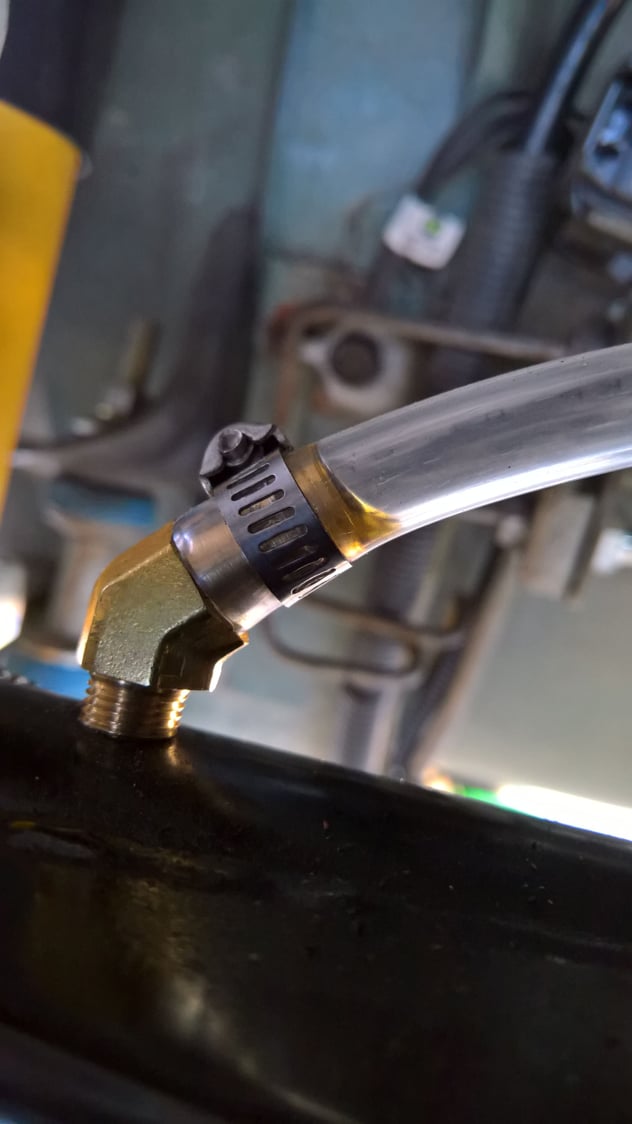
Attempt #2: A 45ᵒ fitting for 3/8" clear vinyl tubing (about 4' used) and an air water/oil separator for air compressor lines. It basically uses a larger version of the same filter in the small vent fitting, plus a reservoir with a drain valve. The fitting pictured will go to the base of the separator.
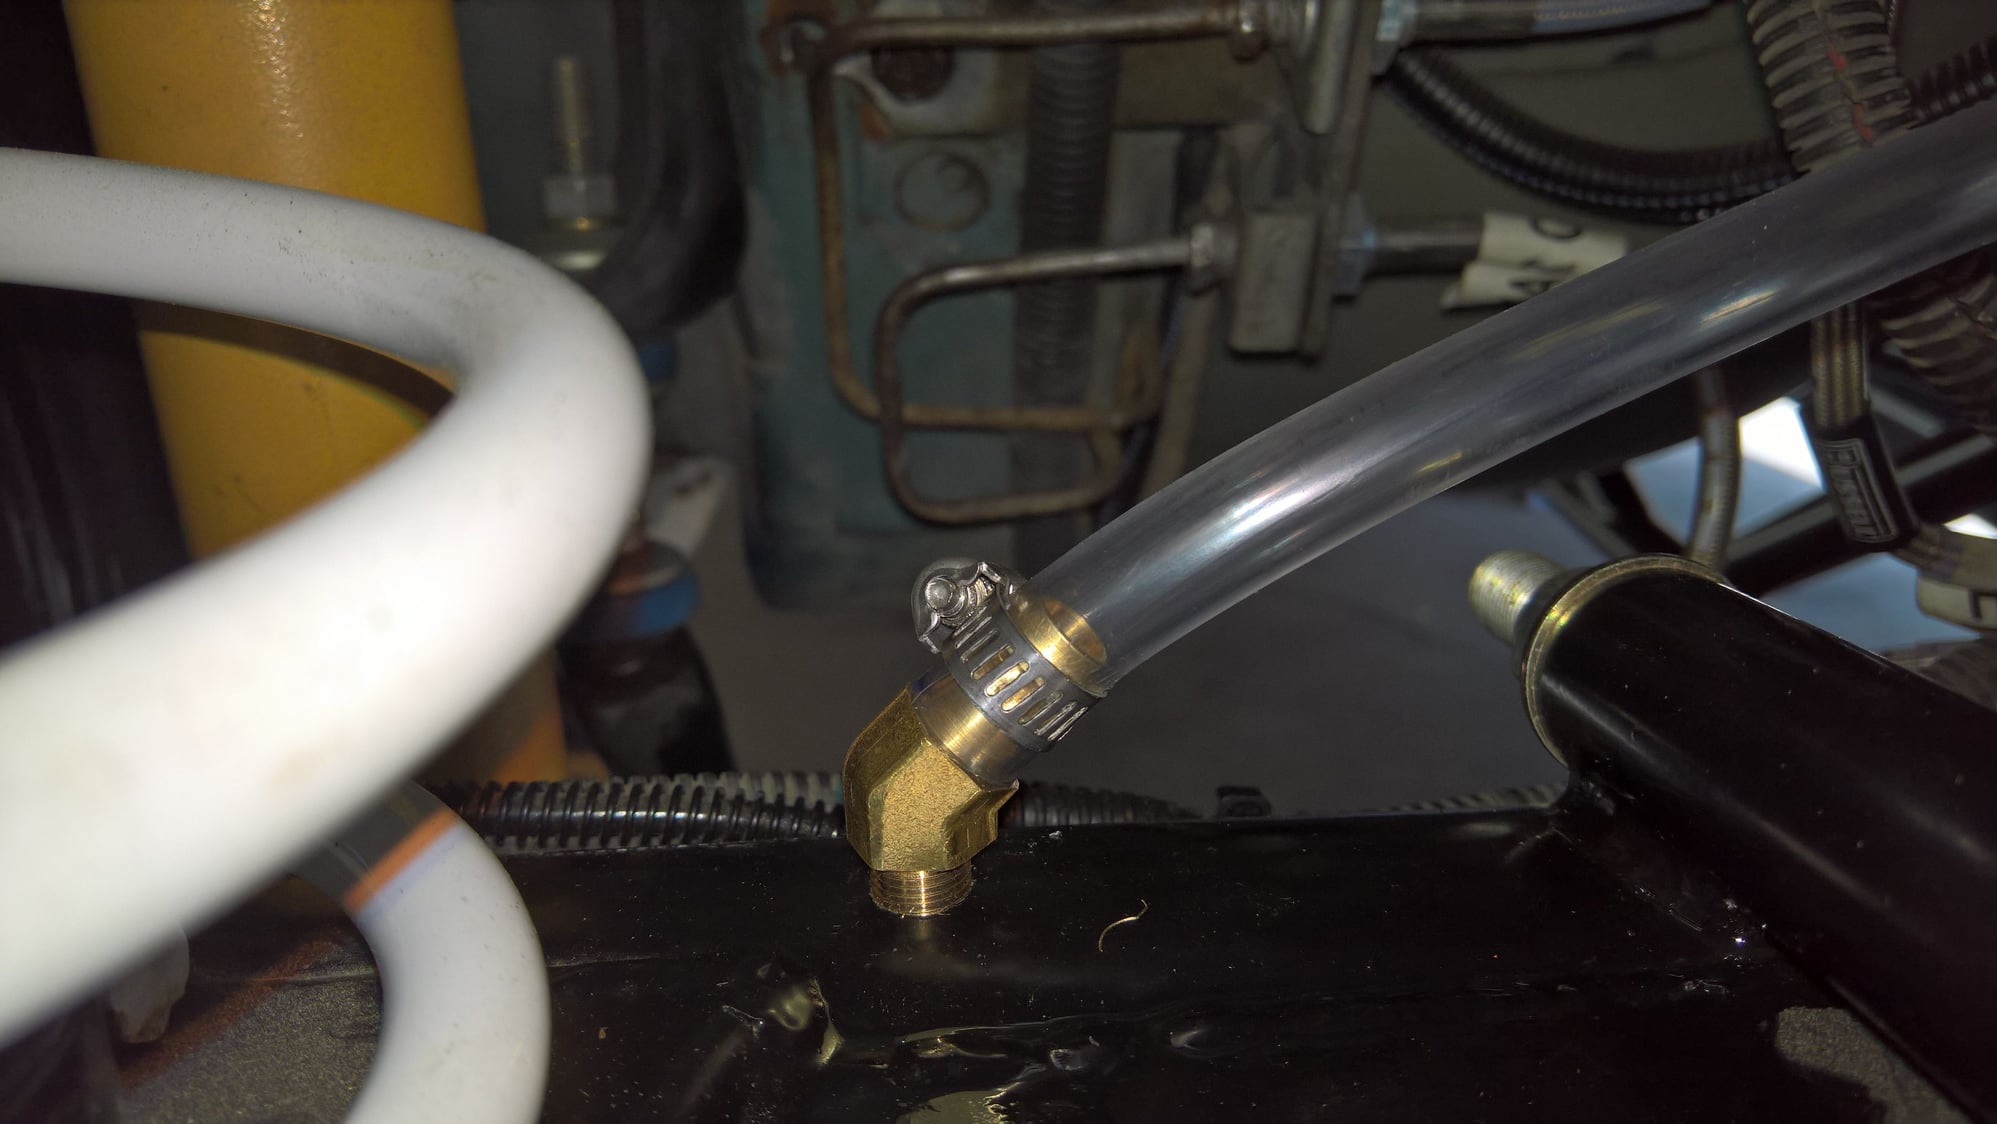
45ᵒ fitting for 3/8" clear vinyl tubing inserted in original vent location on driver's side.
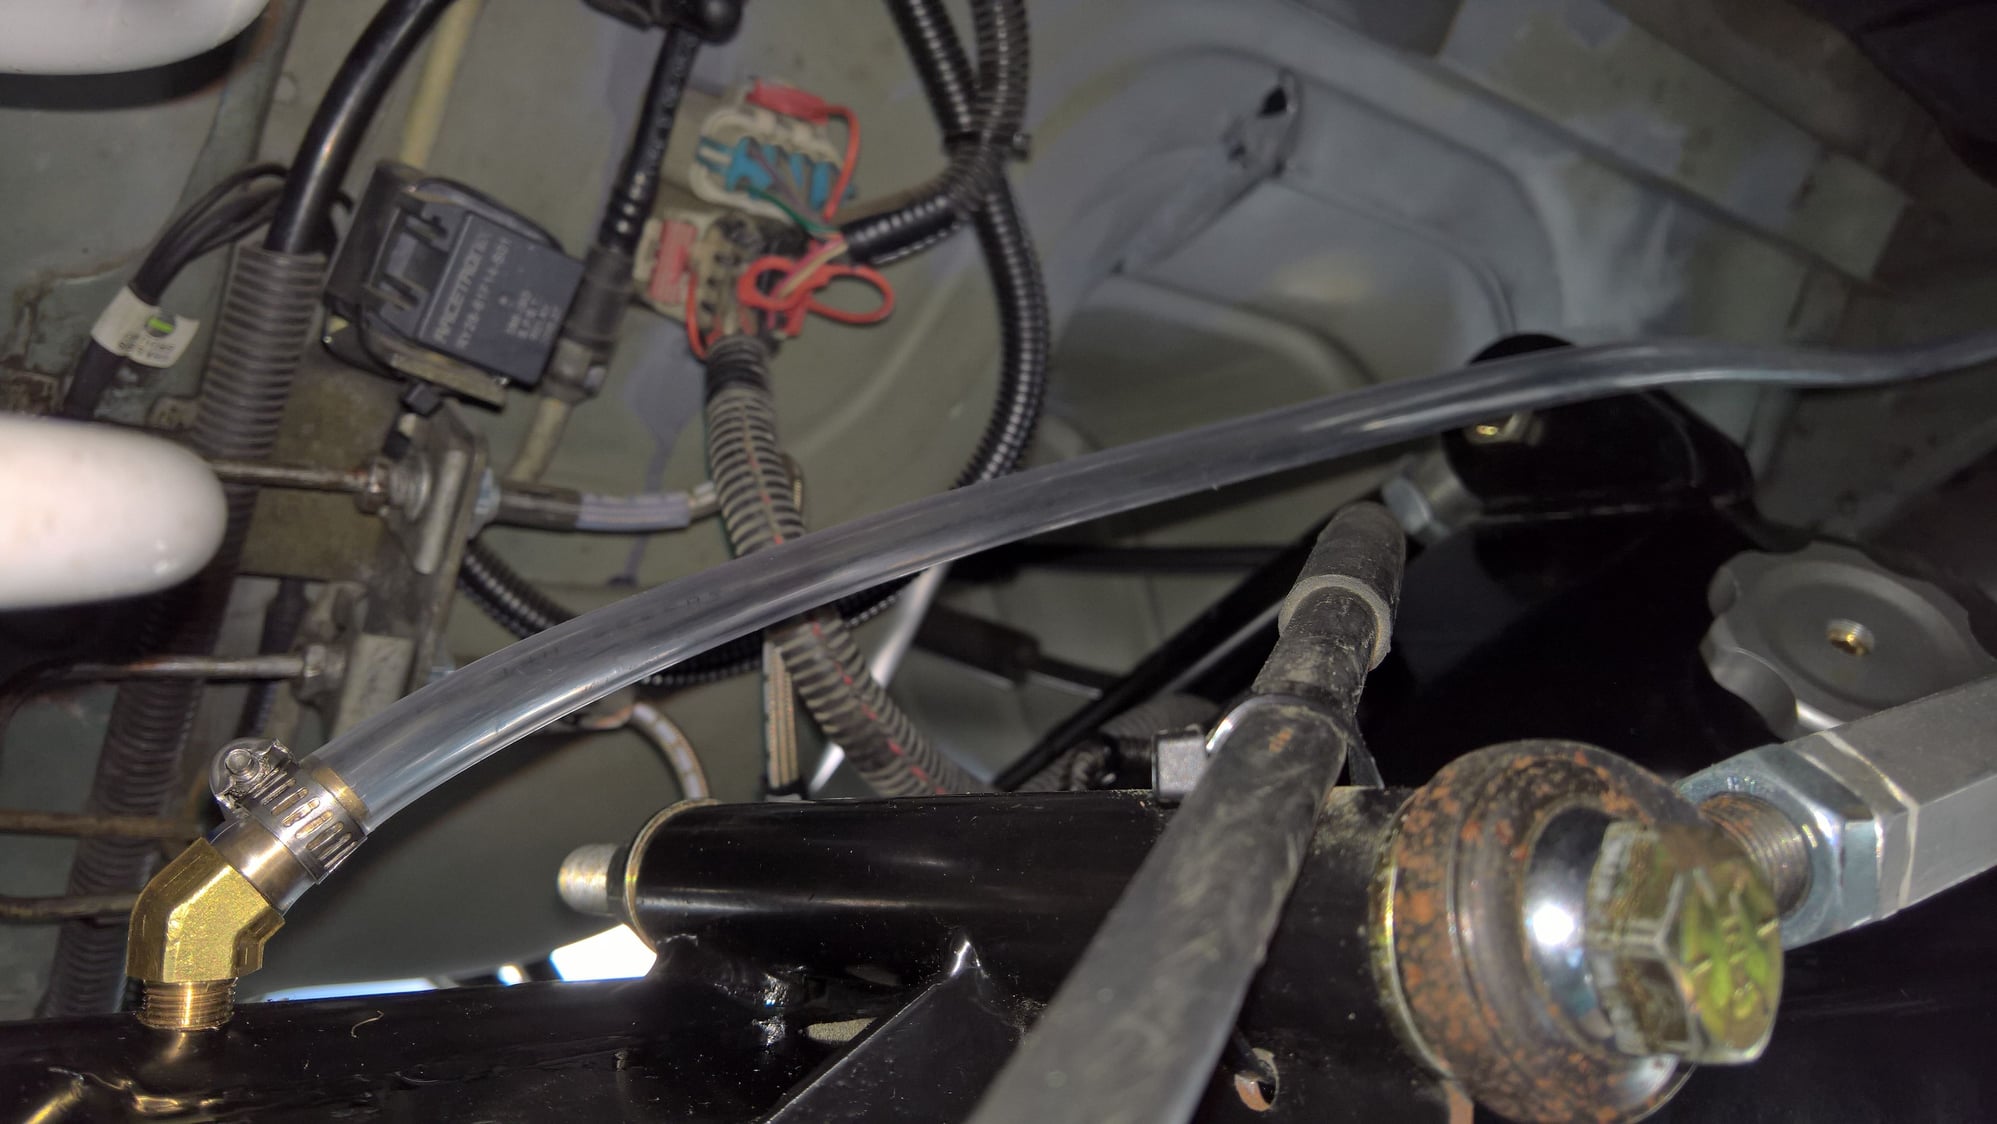
Tubing running uphill to passenger side (not pictured, zip ties to hold the line to the parking brake cable and the top of the axle behind the torque arm mount).
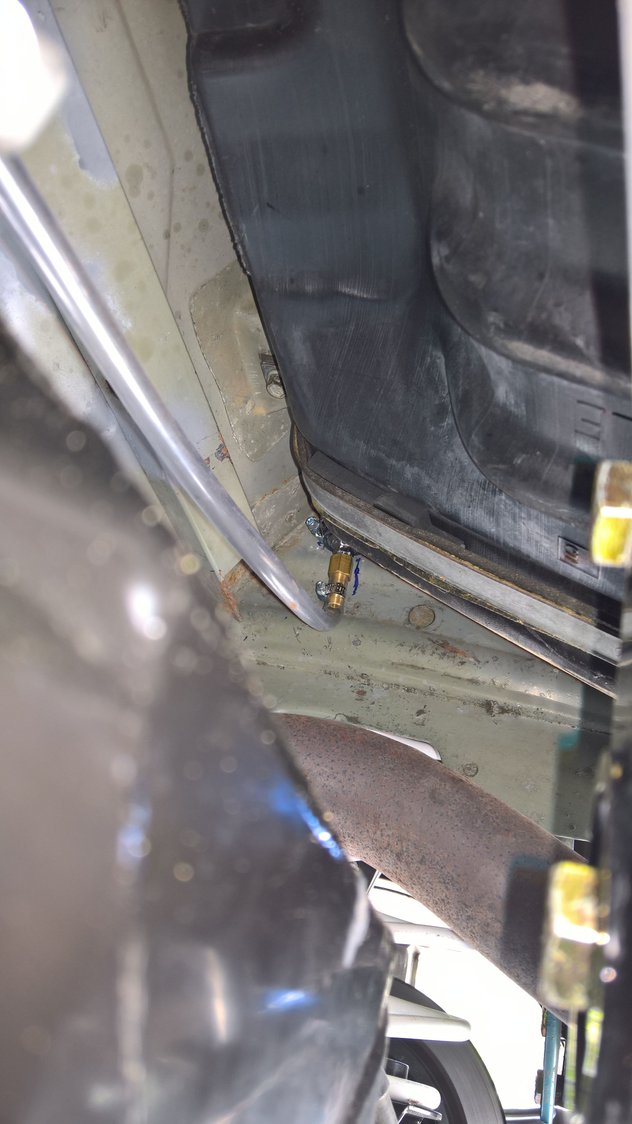
Tubing running uphill to passenger side (not pictured, zip ties to hold the line to the parking brake cable and the top of the axle behind the torque arm mount).
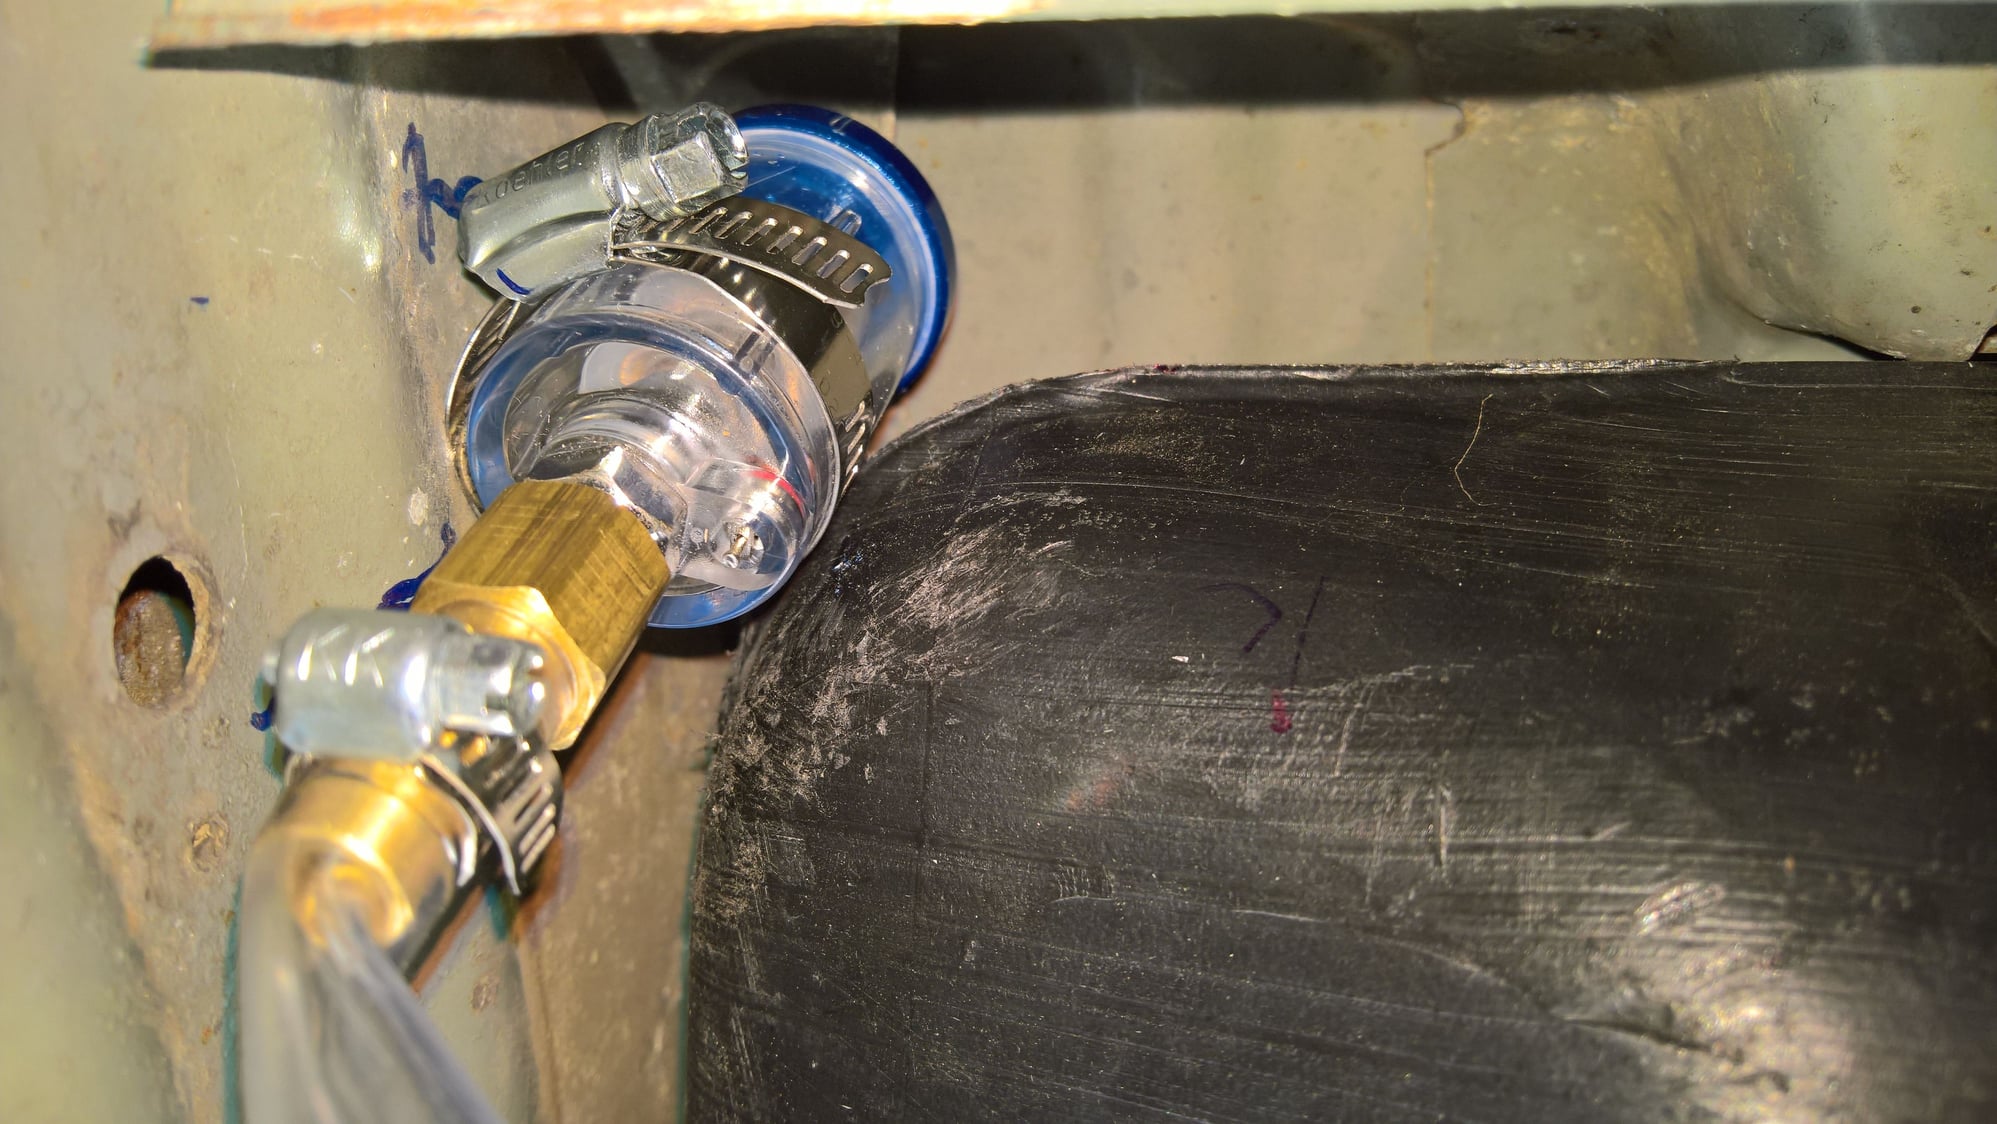
Mounted separator on passenger side in front of the gas tank. Visible here is the small drain valve, which I hope to never have to use, as access here is very difficult with exhaust and heat shielding requiring needing to be moved out of the way.
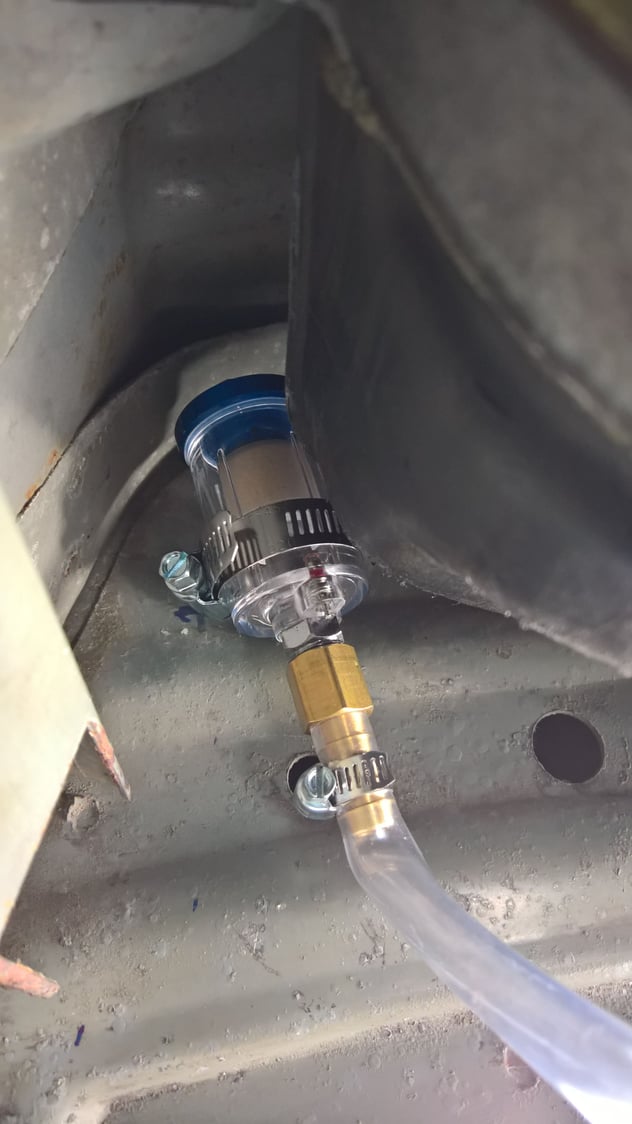
Mounted separator on passenger side in front of the gas tank.
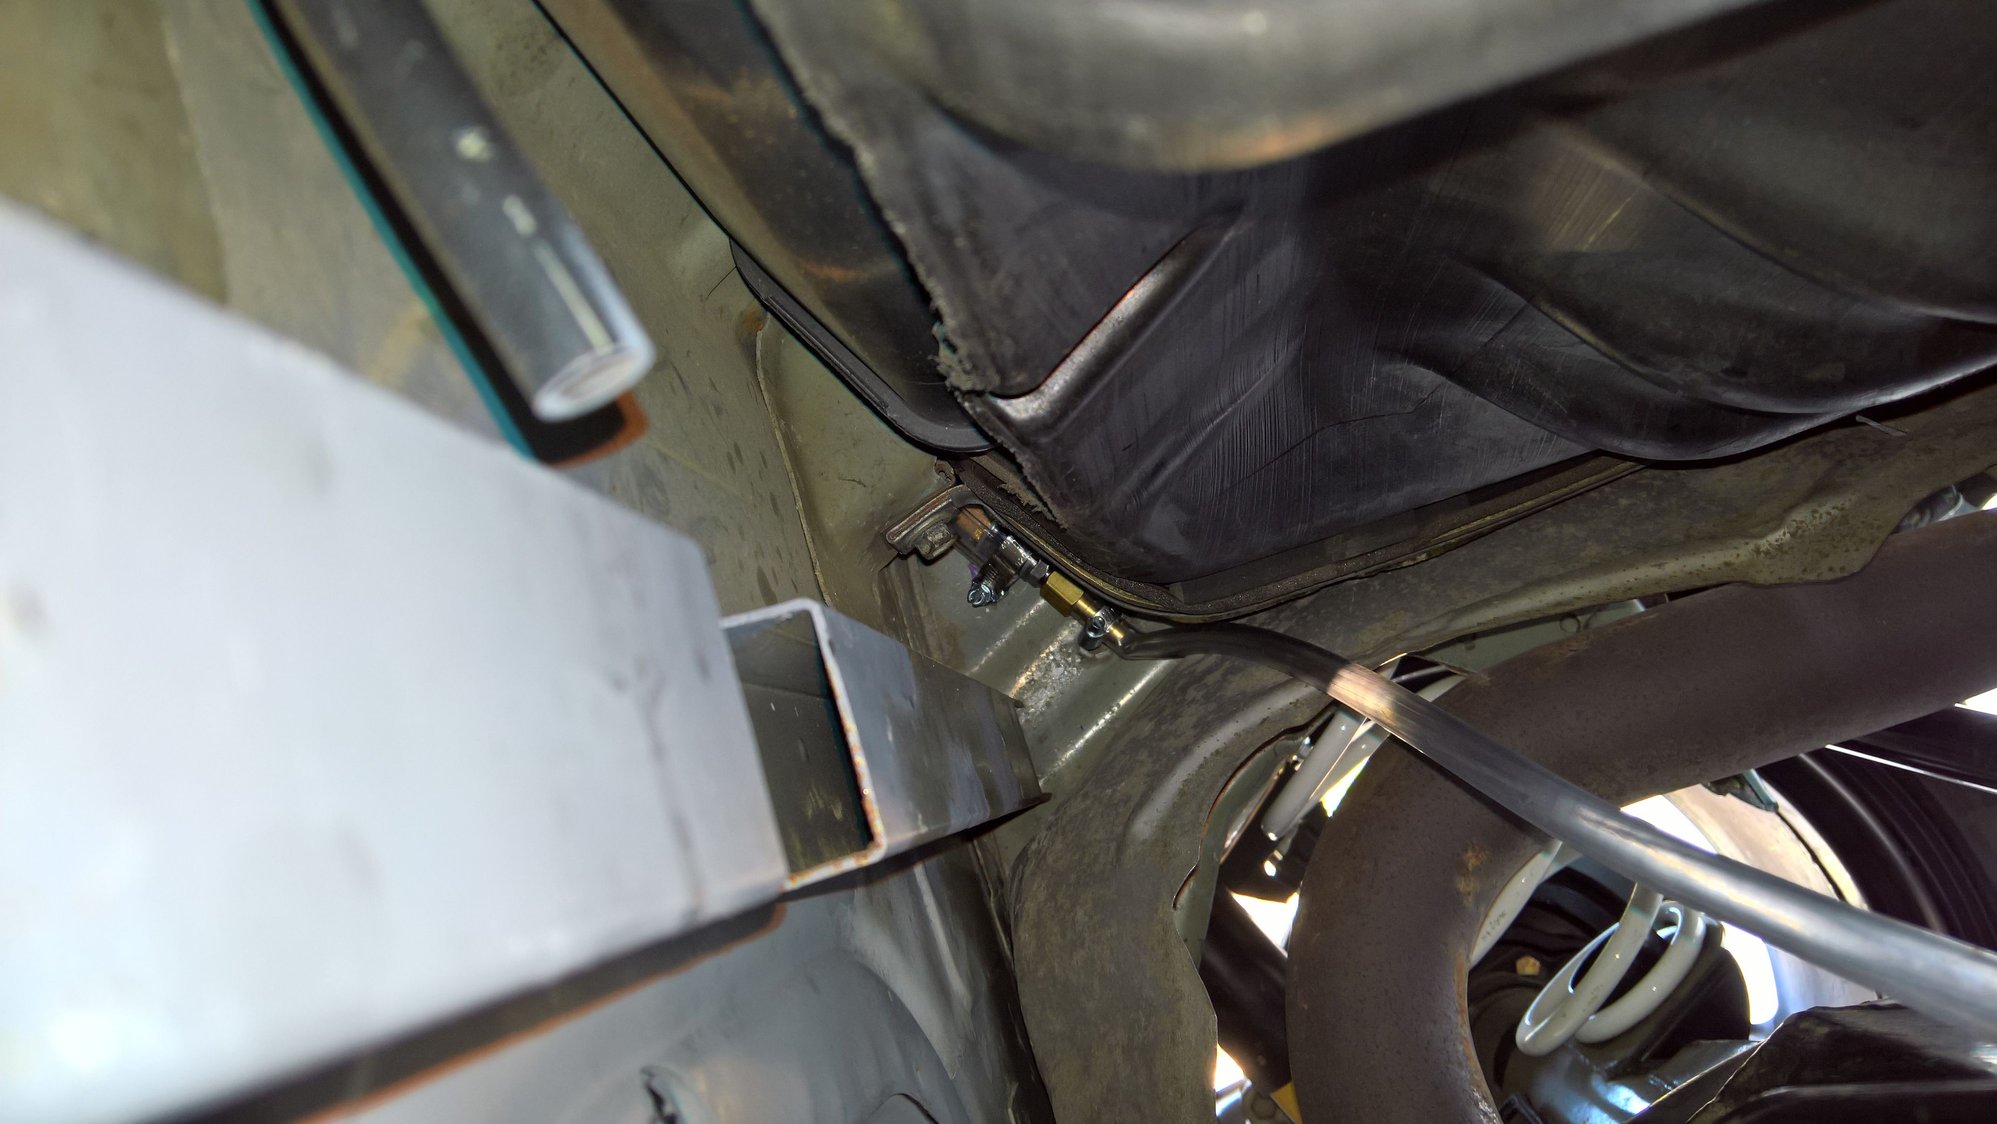
Here is everything with the heat shielding in place. The hose looks a little kinked, but that is with the axle at full extension. I don't want the hose to droop when on the ground, so I left very little slack. As you can see, it does not touch the exhaust.
#105
So I fixed the clutch issue, as you can see above, and have been driving the car to work and locally for over a month now. I've basically been addressing the issues as they present themselves. What I really need to do is start taking it to shops to get alignment, A/C recharged, brake ABS block bled, etc. My plan this weekend is to use a Dremmel to open up the idle air passageway in the eBay throttle body, as it doesn't have a very steady idle unless I open up the throttle butterfly stop screw, and I really don't like it idling that high if it doesn't have to. For one, I've been getting 11 MPG city, so I need all the help I can get.
I have something like 60 miles left of the 500 mile break in cycle for the engine, trans, clutch, and diff. I'll be changing fluids then, and opening the diff up to install a proper gasket (Lube Locker, silicone) so I can finally end the leaks. I'll also be checking the breather I constructed. Hopefully it does the job. MWC did a really poor job designing and assembling the axle.
One of the most troublesome bits is that the clutch makes an awful clattering sound around 1,500-2,500 RPM if you give it moderate throttle or more. In higher gears, the driveline will resonate through the whole car if allowed below 1,600 RPM. I worried myself that it might be the engine, but after looking at a particular YouTube review, I believe it is the clutch. It's a McLeod RST dual-plate. The issue is that it lacks dampener springs in the clutch plates. With my lightened assembly, there is nothing to absorb the individual engine pulses, so they are going into the trans and making a racket. I can live with the mild noise that the clutch makes at a stop. That has almost vanished through break in. However, the low RPM harmonics just seem like a very bad match for my custom build LS3. I will eventually pull the trans again and swap in a different clutch and maybe flywheel. I am trying to decide on an Exedy (expensive), Mantic (rare, heavier flywheel), or LS9X from a ZR1 C6 (requires a spacer which may not fit with my custom driveshaft). I will live with it for now, as I need to get things tuned and smogged so that I can get my registration sticker on my plate and stop worrying about getting pulled over. But one thing at a time.
The throttle pedal is super sensitive with lots of tip-in plus due to the lightweight rotating assembly. However, with the quick engaging clutch, you can rip off lightning quick shifts without even thinking about it. (I try to keep it below 3,000 RPM, and only hit maybe 3,600 RPM at most so far). The MGW shifter has loosened up enough that I have decided to live with it, and shifting is really short and direct. I will probably remove "the Antivenom-mod" to sample it with the full shift crispness. The brake pedal is surprisingly spongy for new MC, booster, braided steel lines, and 6-piston front Wilwood 14" brakes. I hope it's just air trapped in the ABS block, as I bled it the best I could at home. The clutch is fairly light, though it stiffens up occasionally, and I don't know why. I don't like how long the throw is though. It engages not far off the floor, and while I have gotten used to it, I don't like extending my tip-toe to reach it and how close it gets when lifted. I might switch to a Tick adjustable to trade stiffness for less travel. The steering is surprisingly heavy, so I loosened the preload on the rack, which I had tightened before the rebuild in an attempt to rectify the sudden loss of steering feel. That or break in miles have helped some, but I will loosen preload some more to see what that does. The small 13" wheel surely exacerbates matters. It is super direct though, and I love the way it feels taking corners. Handling was already great before this build, but there have been some minor improvements. The most significant is definitely the watts link, on which I need to test different roll centers.
Overall, the car is fun, and has gotten much less manic with the break in. It is a blast around corners, and the engine wants to be unleashed all the time--but I have managed to be measured with throttle until I drain out the break in oil. Oil pressure is healthy, engine temps always low, and no leaks apart from the axle. The interior is still stripped, so it feels pretty race car to drive around in, and I need to get that back from the upholstery shop.
Last edited by eb110americana; 06-28-2019 at 12:55 AM.
#106
The vent tube solution seems to be working. Very little fluid has entered the tube, and nearly everything looks to have drained back into the axle.
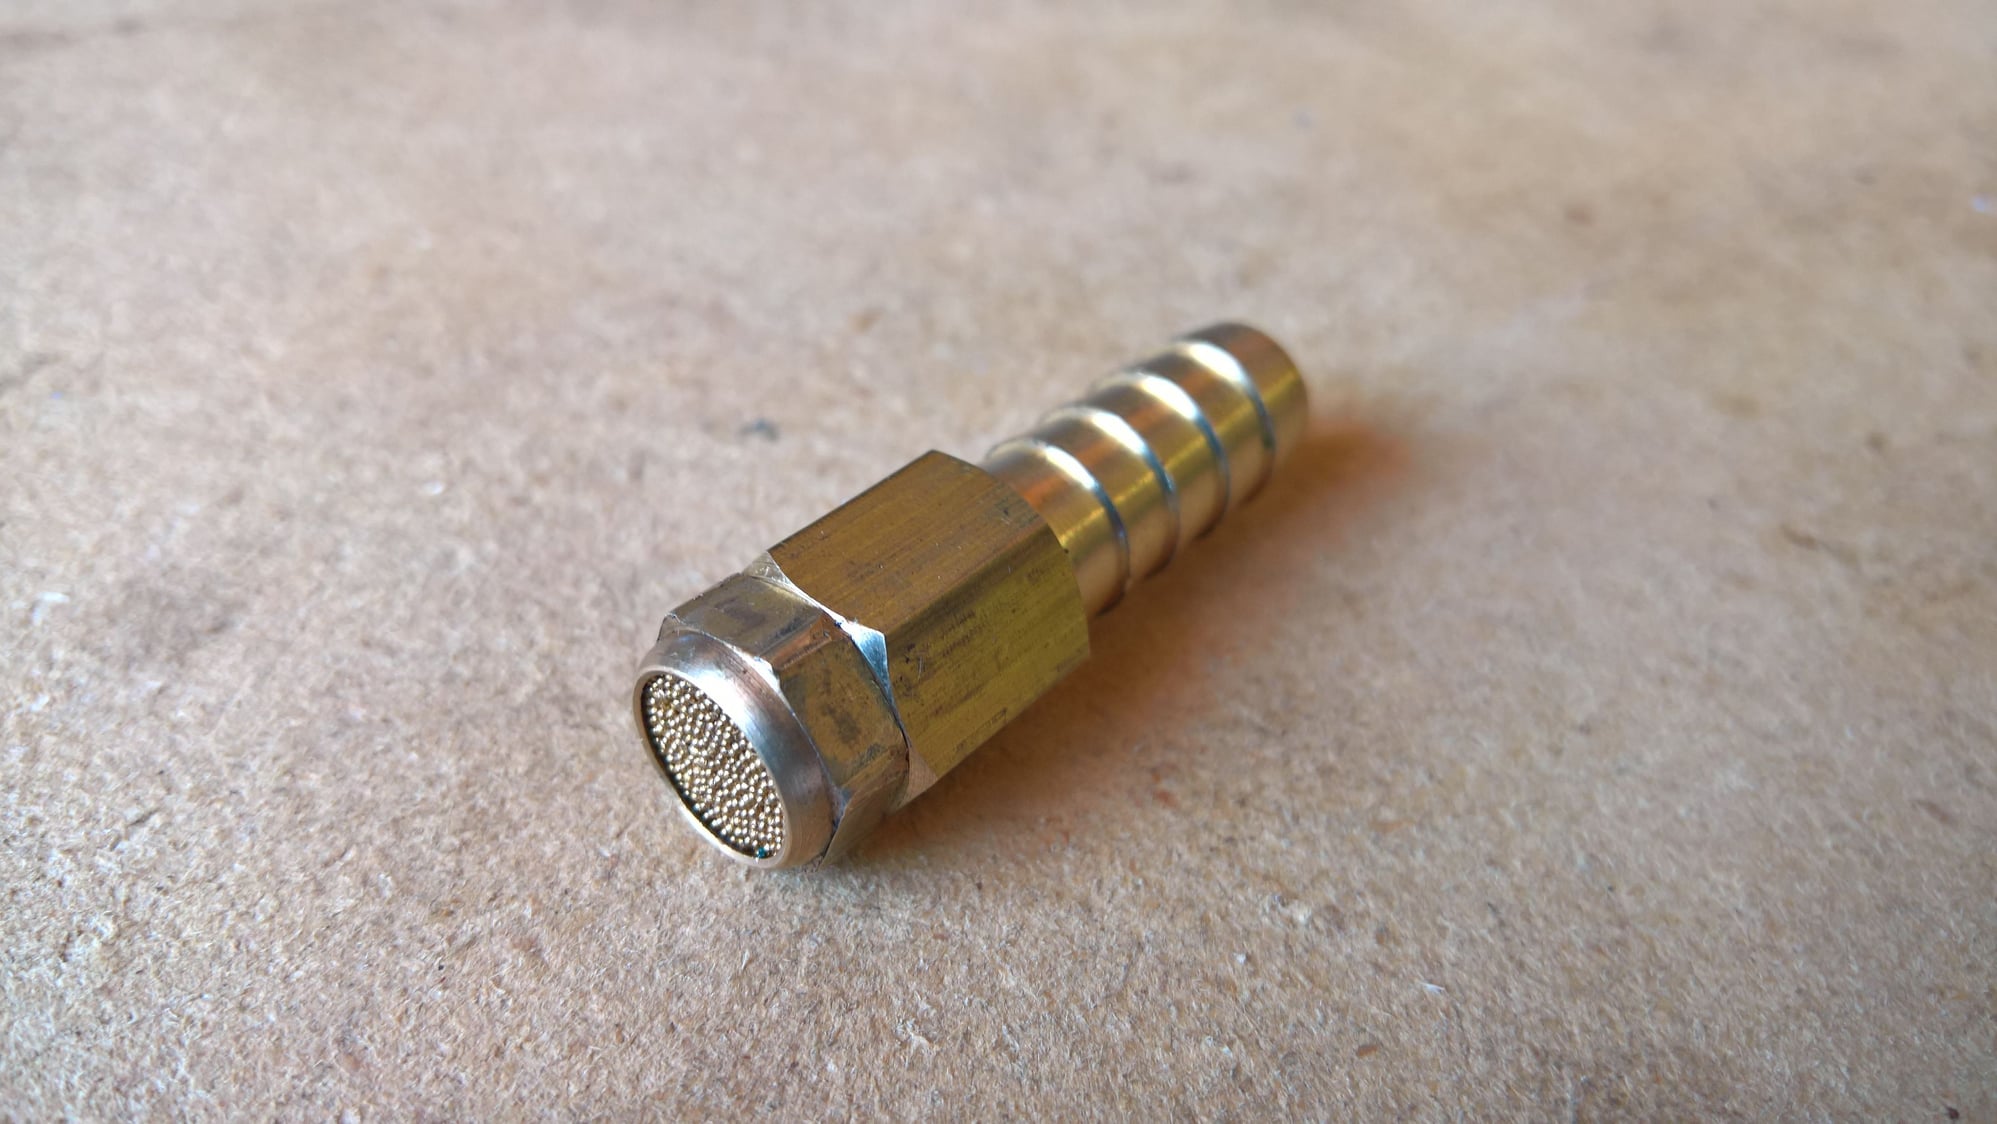
I bought a fitting to replace the water separator with the original vent port, because I could have sworn that the separator was more restrictive when I tried to blow through it. However, after testing them back-to-back, this is more restrictive, so I put everything back with some modifications.
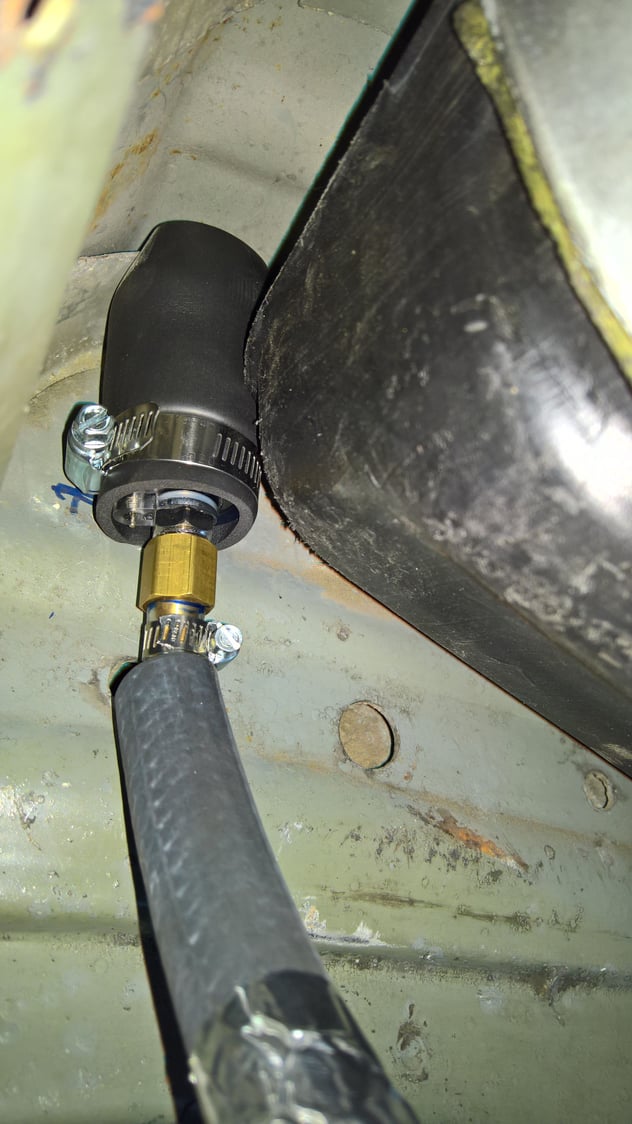
I wrapped the separator in an unused fuel pump sleeve. And I replaced the clear line with a little bit longer tubing, tubing on the outside to prevent kinking, and some some metal tape in the area over the exhaust.
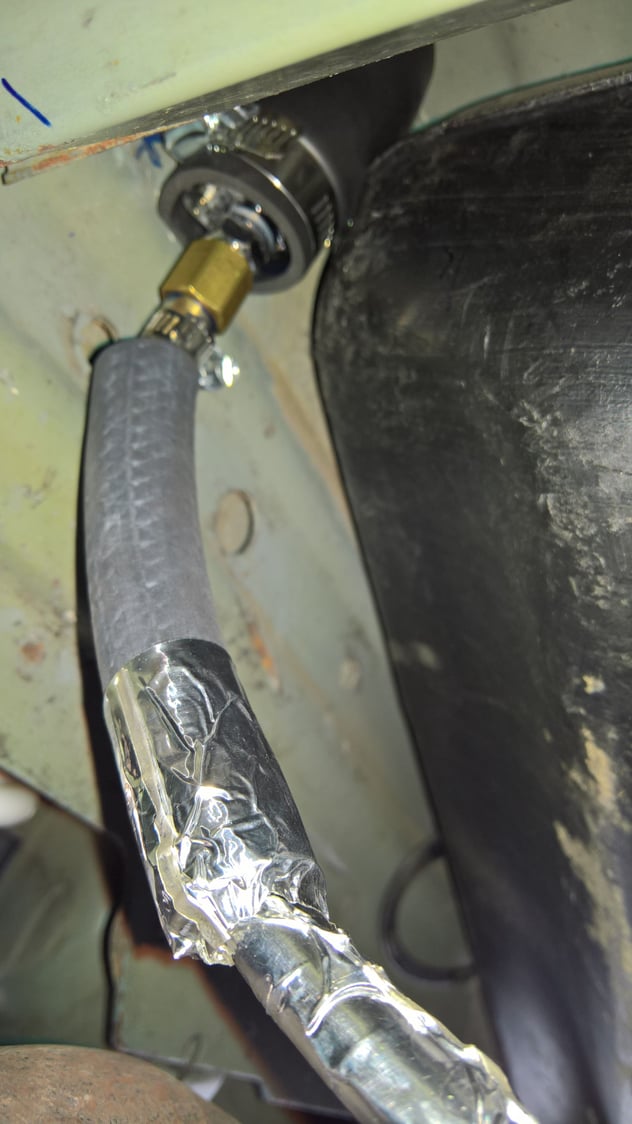
I wrapped the separator in an unused fuel pump sleeve. And I replaced the clear line with a little bit longer tubing, tubing on the outside to prevent kinking, and some some metal tape in the area over the exhaust.
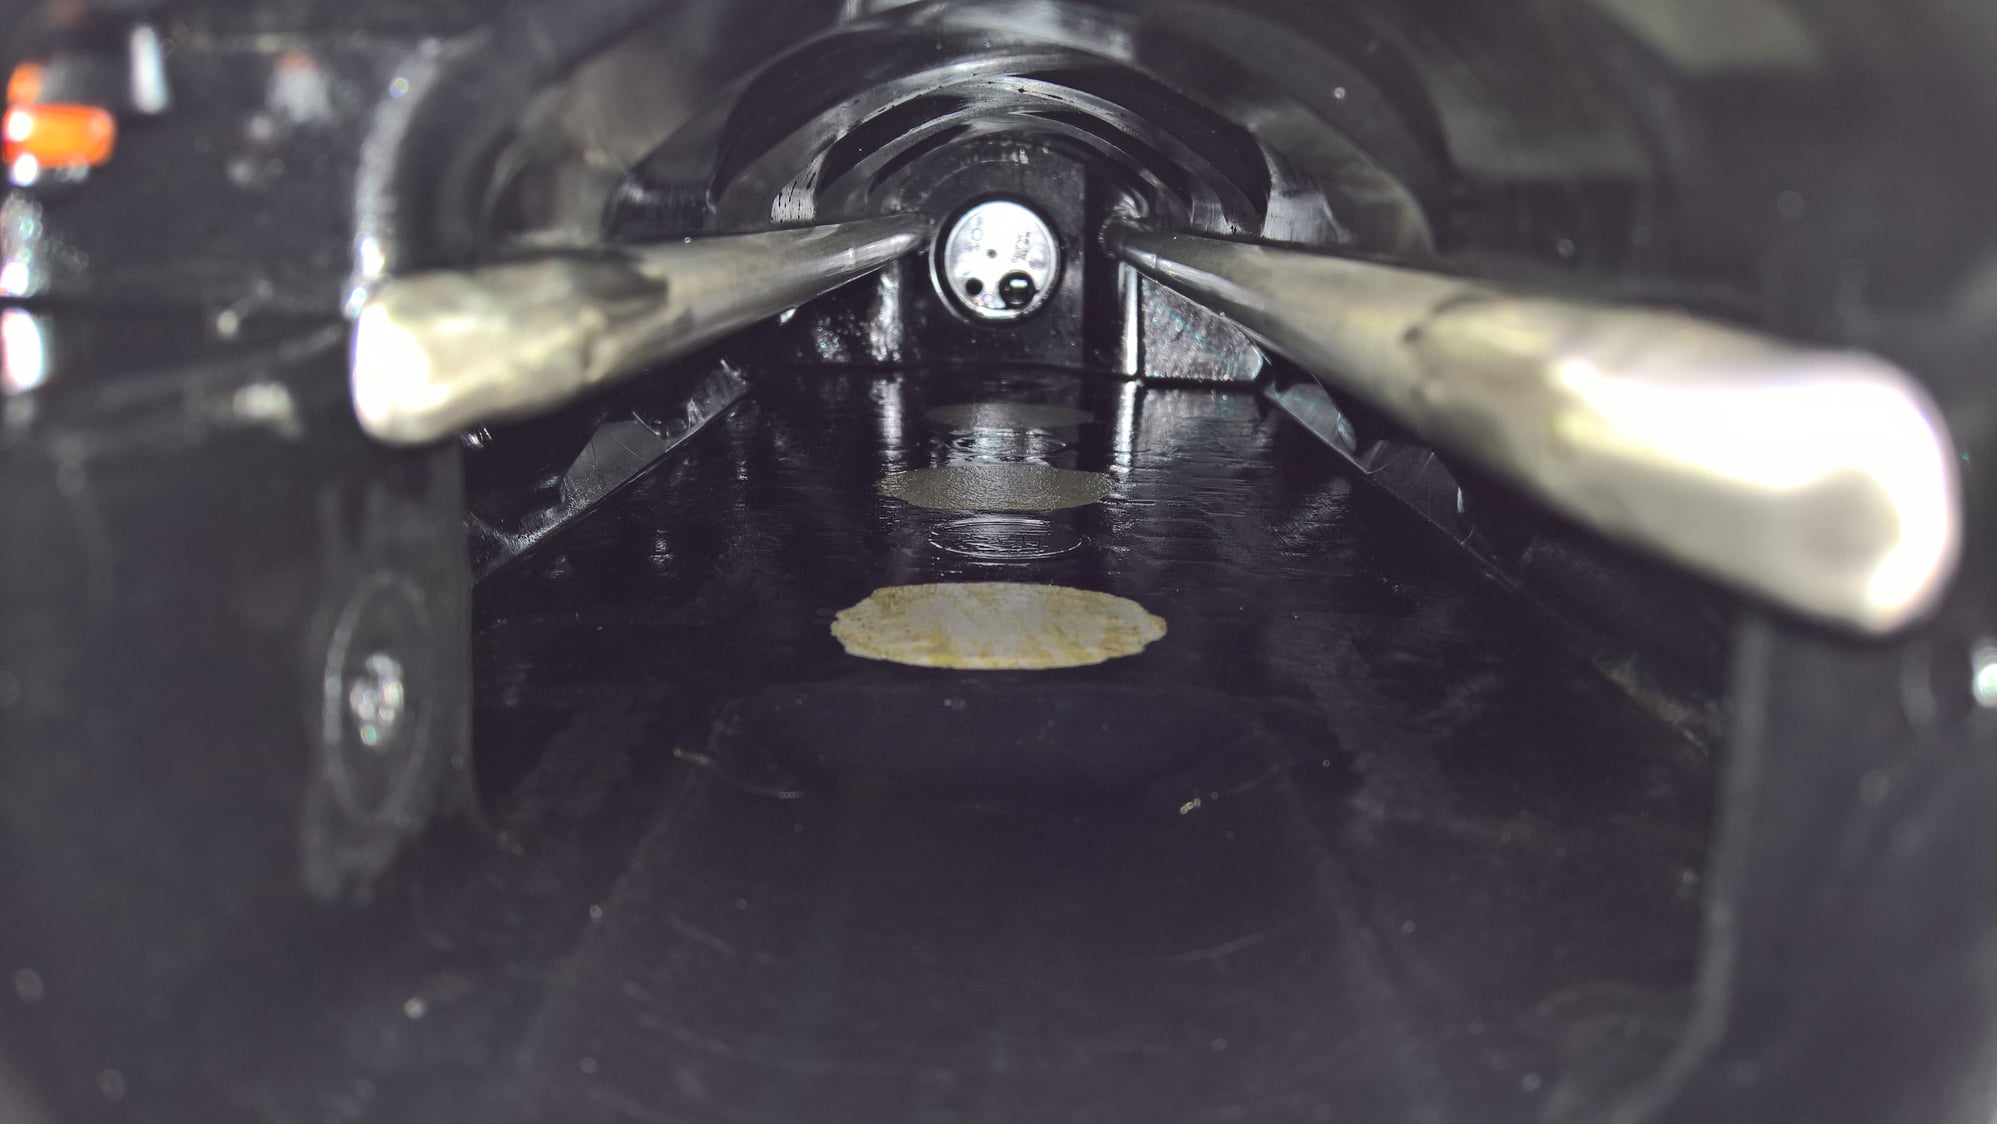
I removed the throttle body to find the intake full of oil. I started looking at catch cans, but then I noticed that the PCV port is the only area without oil on it. Hopefully this is just from the oil I originally slid the pistons in with. I will have to check again later.
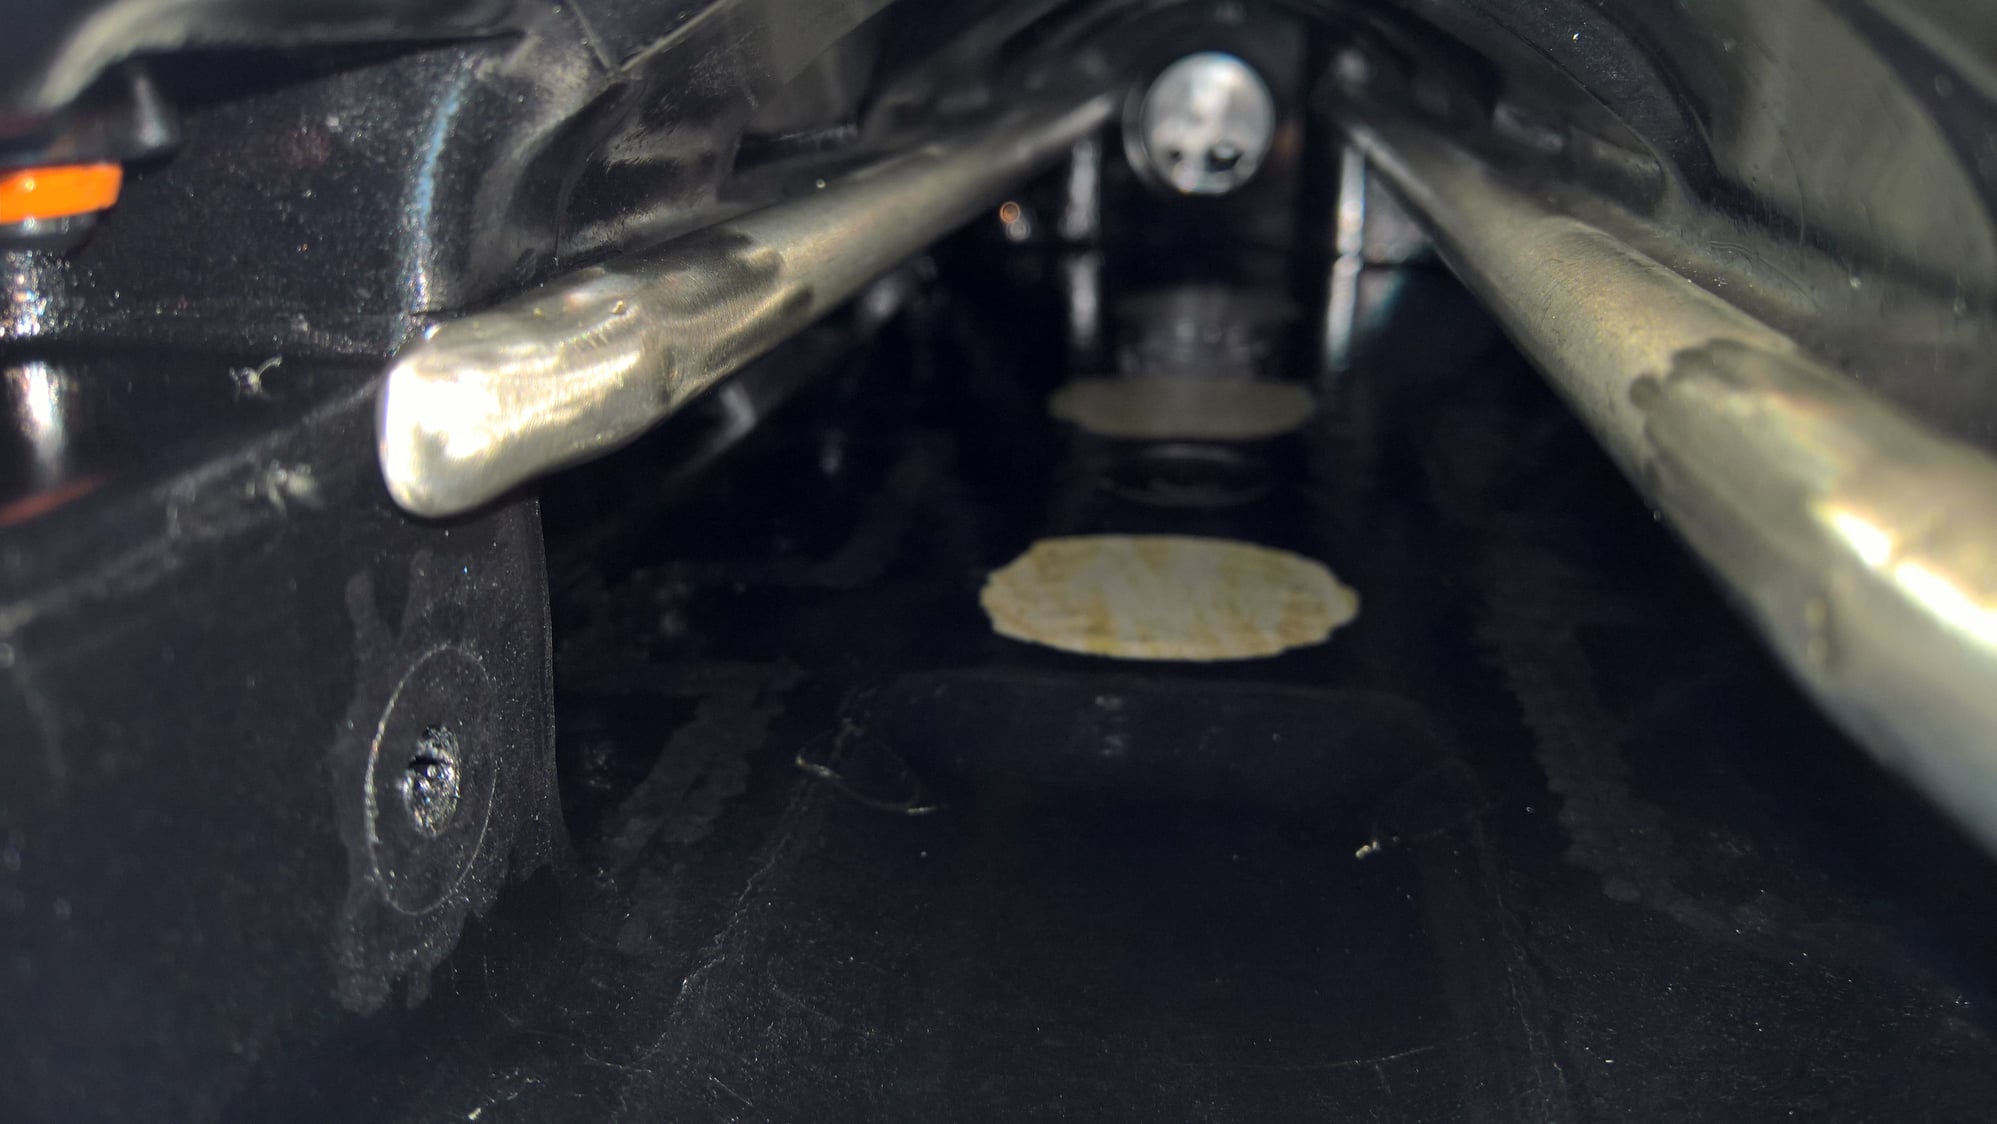
I removed the throttle body to find the intake full of oil. I started looking at catch cans, but then I noticed that the PCV port is the only area without oil on it. Hopefully this is just from the oil I originally slid the pistons in with. I will have to check again later.
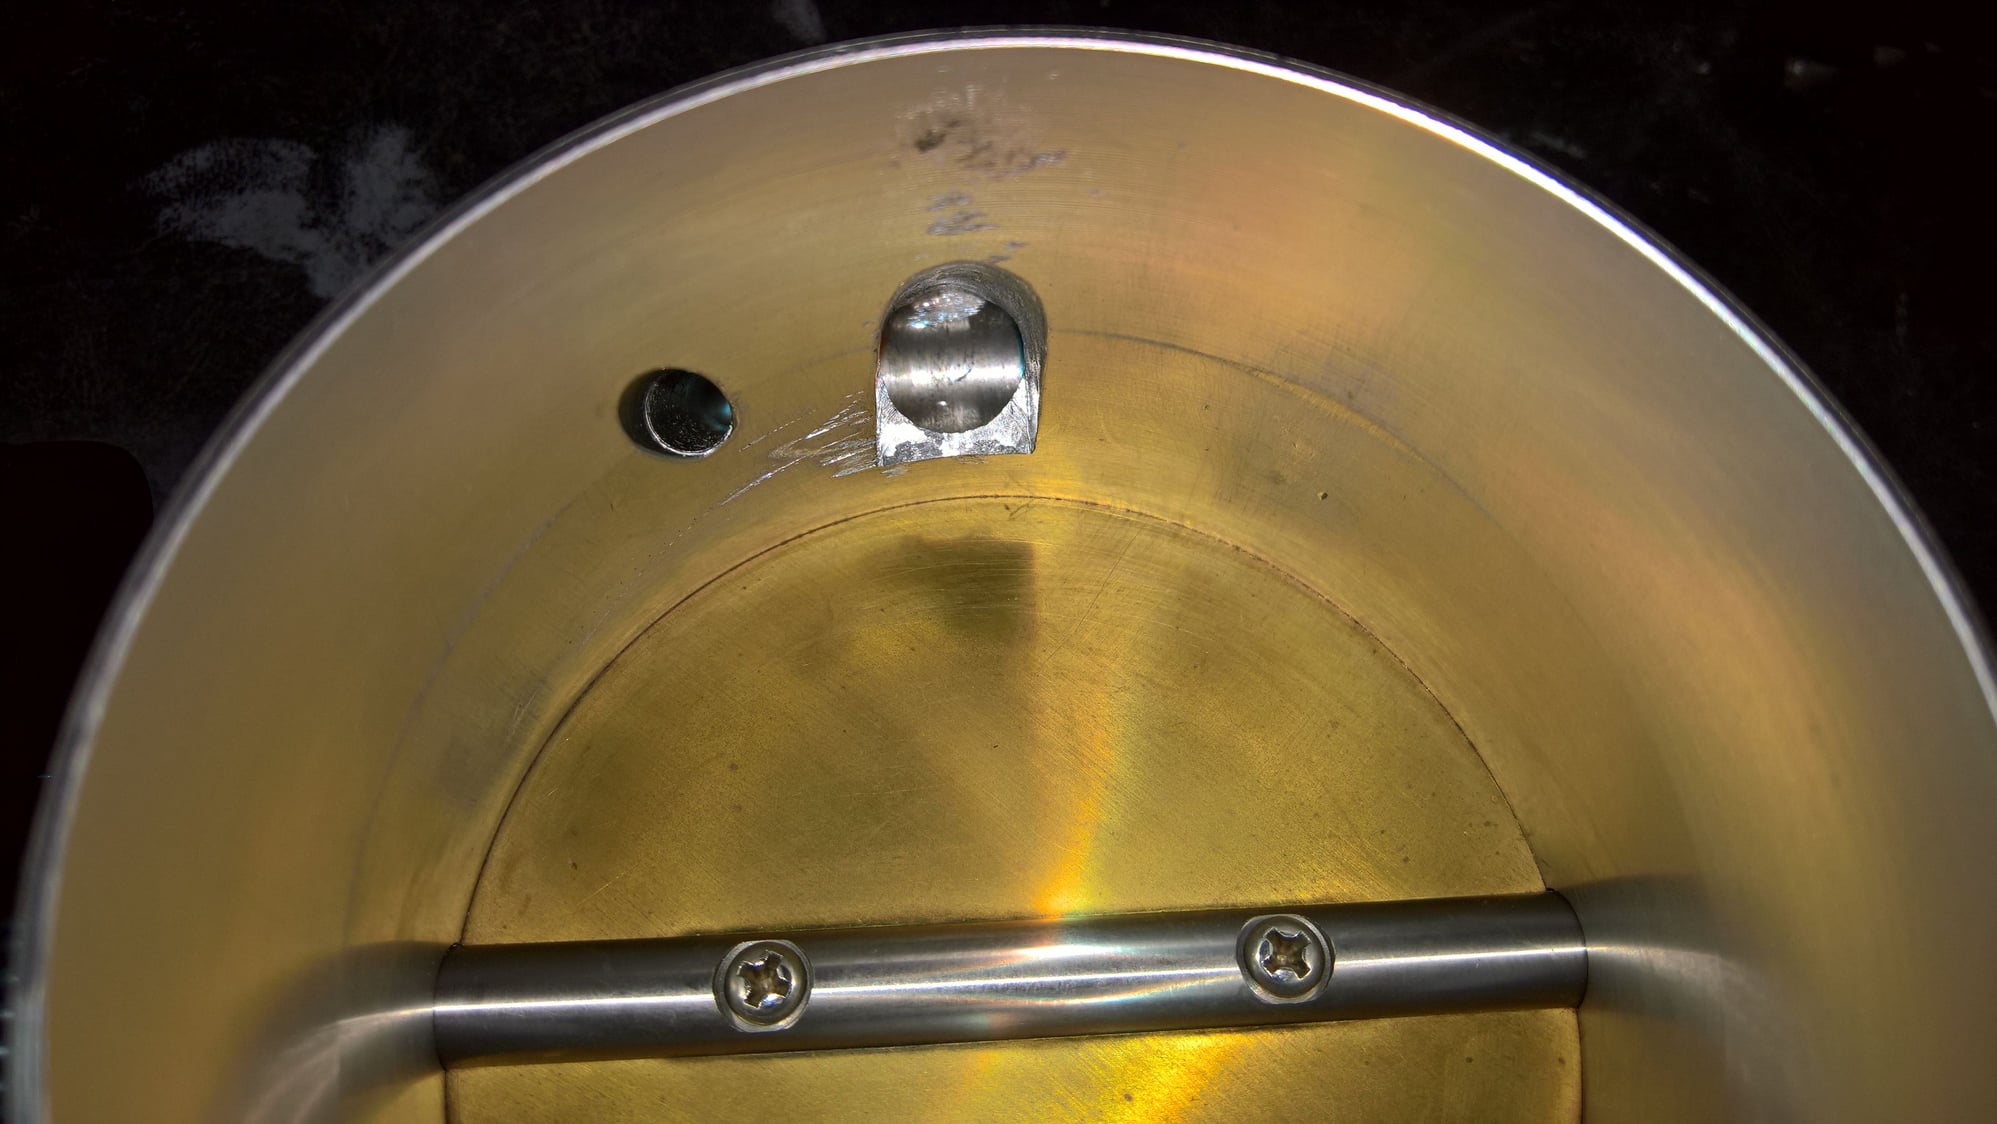
Car still stalls a lot. 92mm throttle body off eBay. I already deburred these PCV intake and IAC ports.
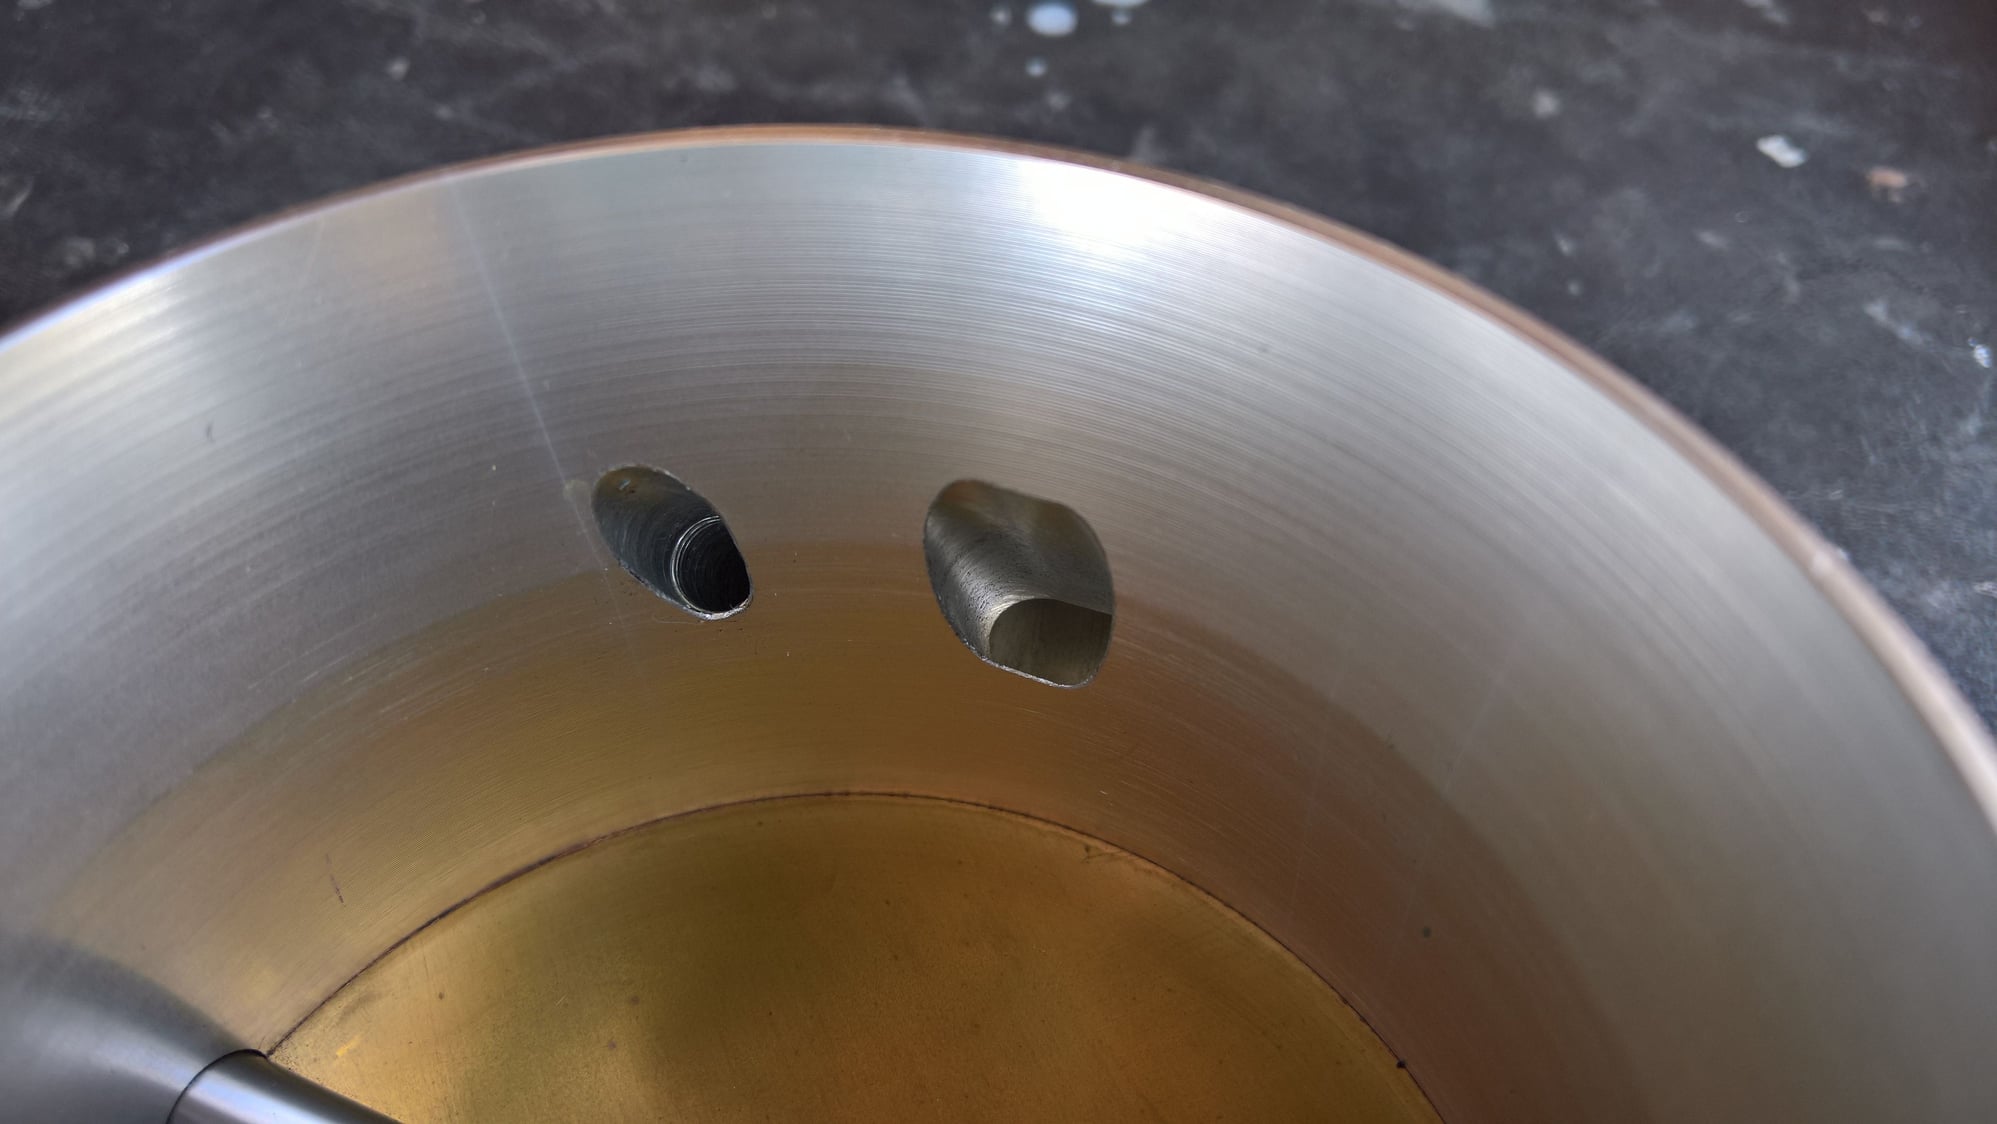
Car still stalls a lot. Opening up IAC port to look more like the Nick Williams throttle body.
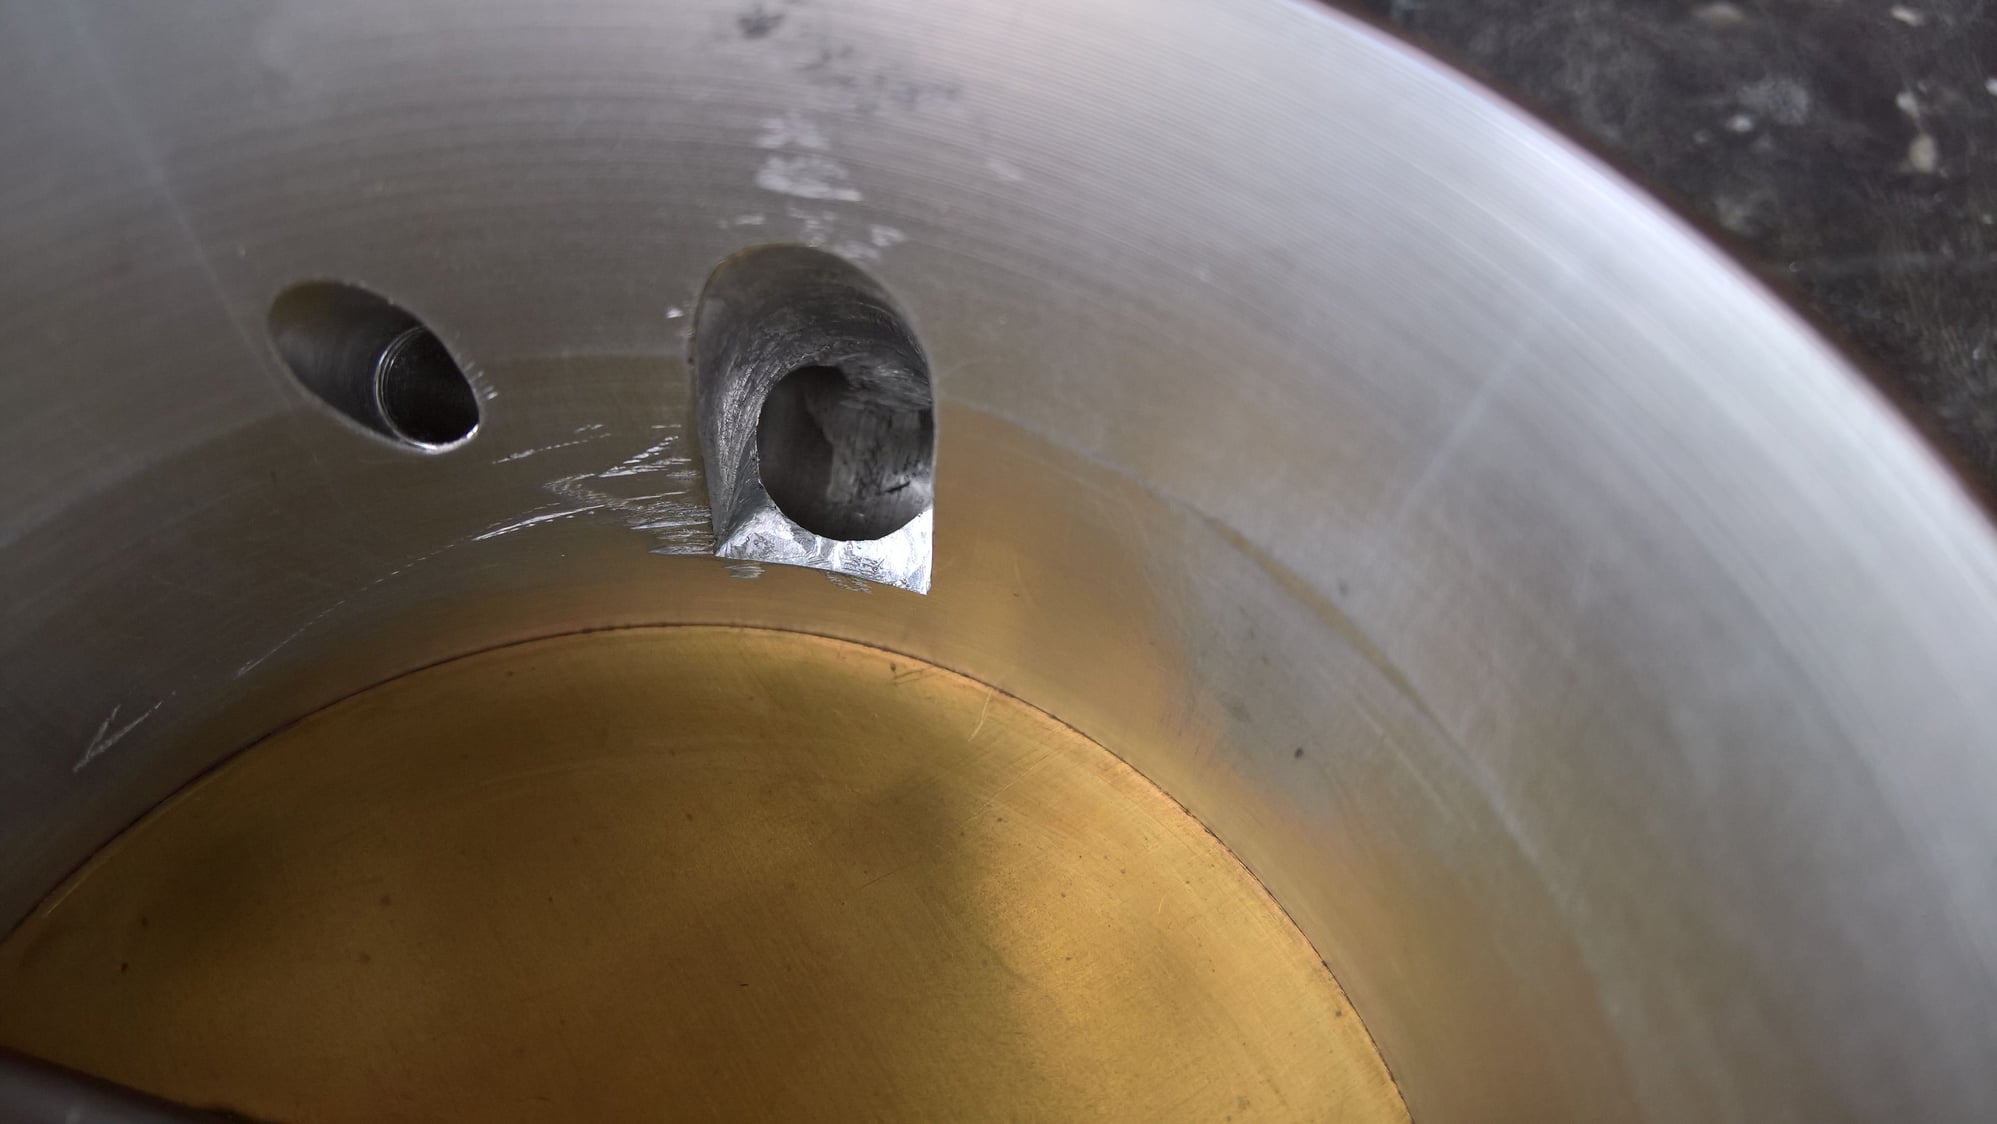
Car still stalls a lot. Opening up IAC port to look more like the Nick Williams throttle body.
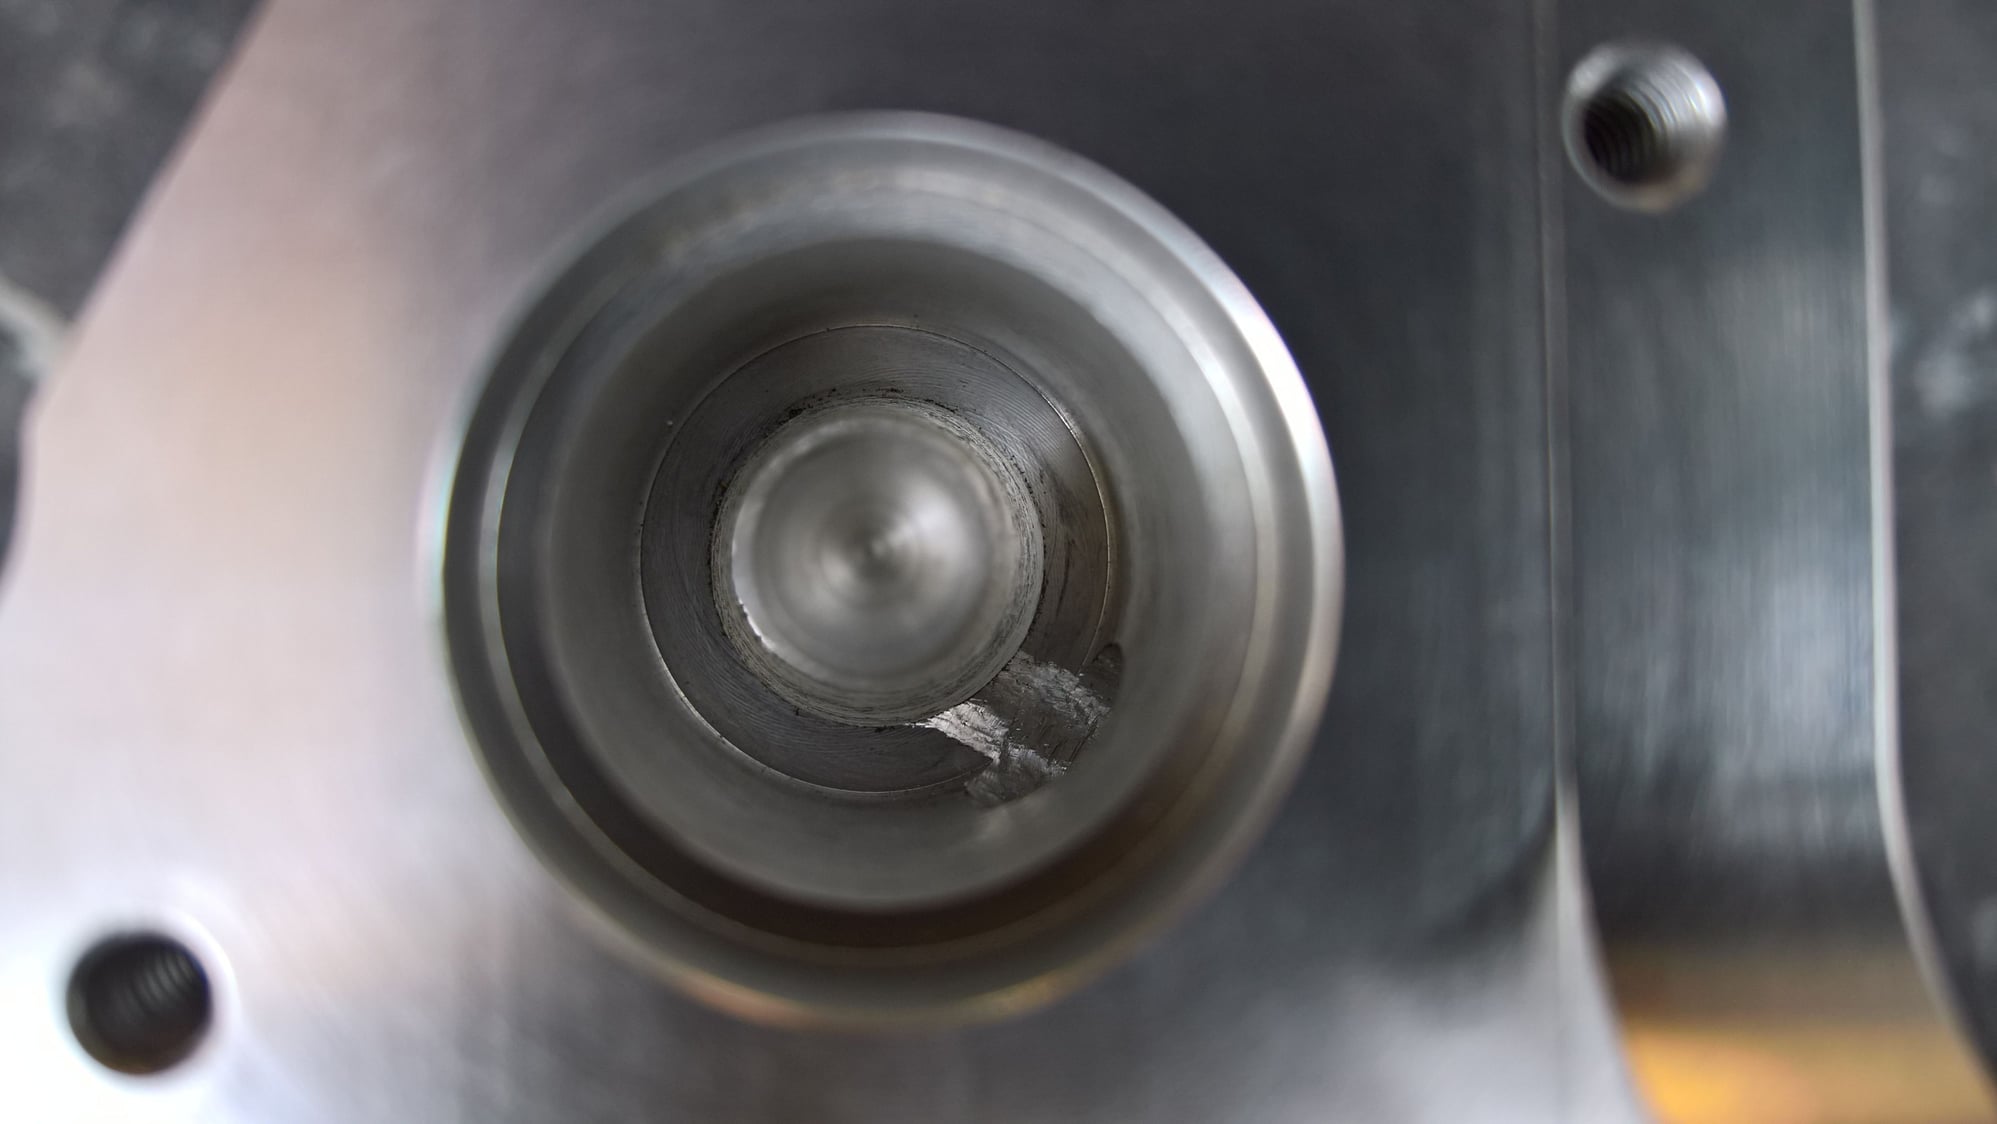
Car still stalls a lot. I also swapped in a metal pintle valve IAC from an older design which has a more pointed nose than the plastic factory pintle, which should let more air through.
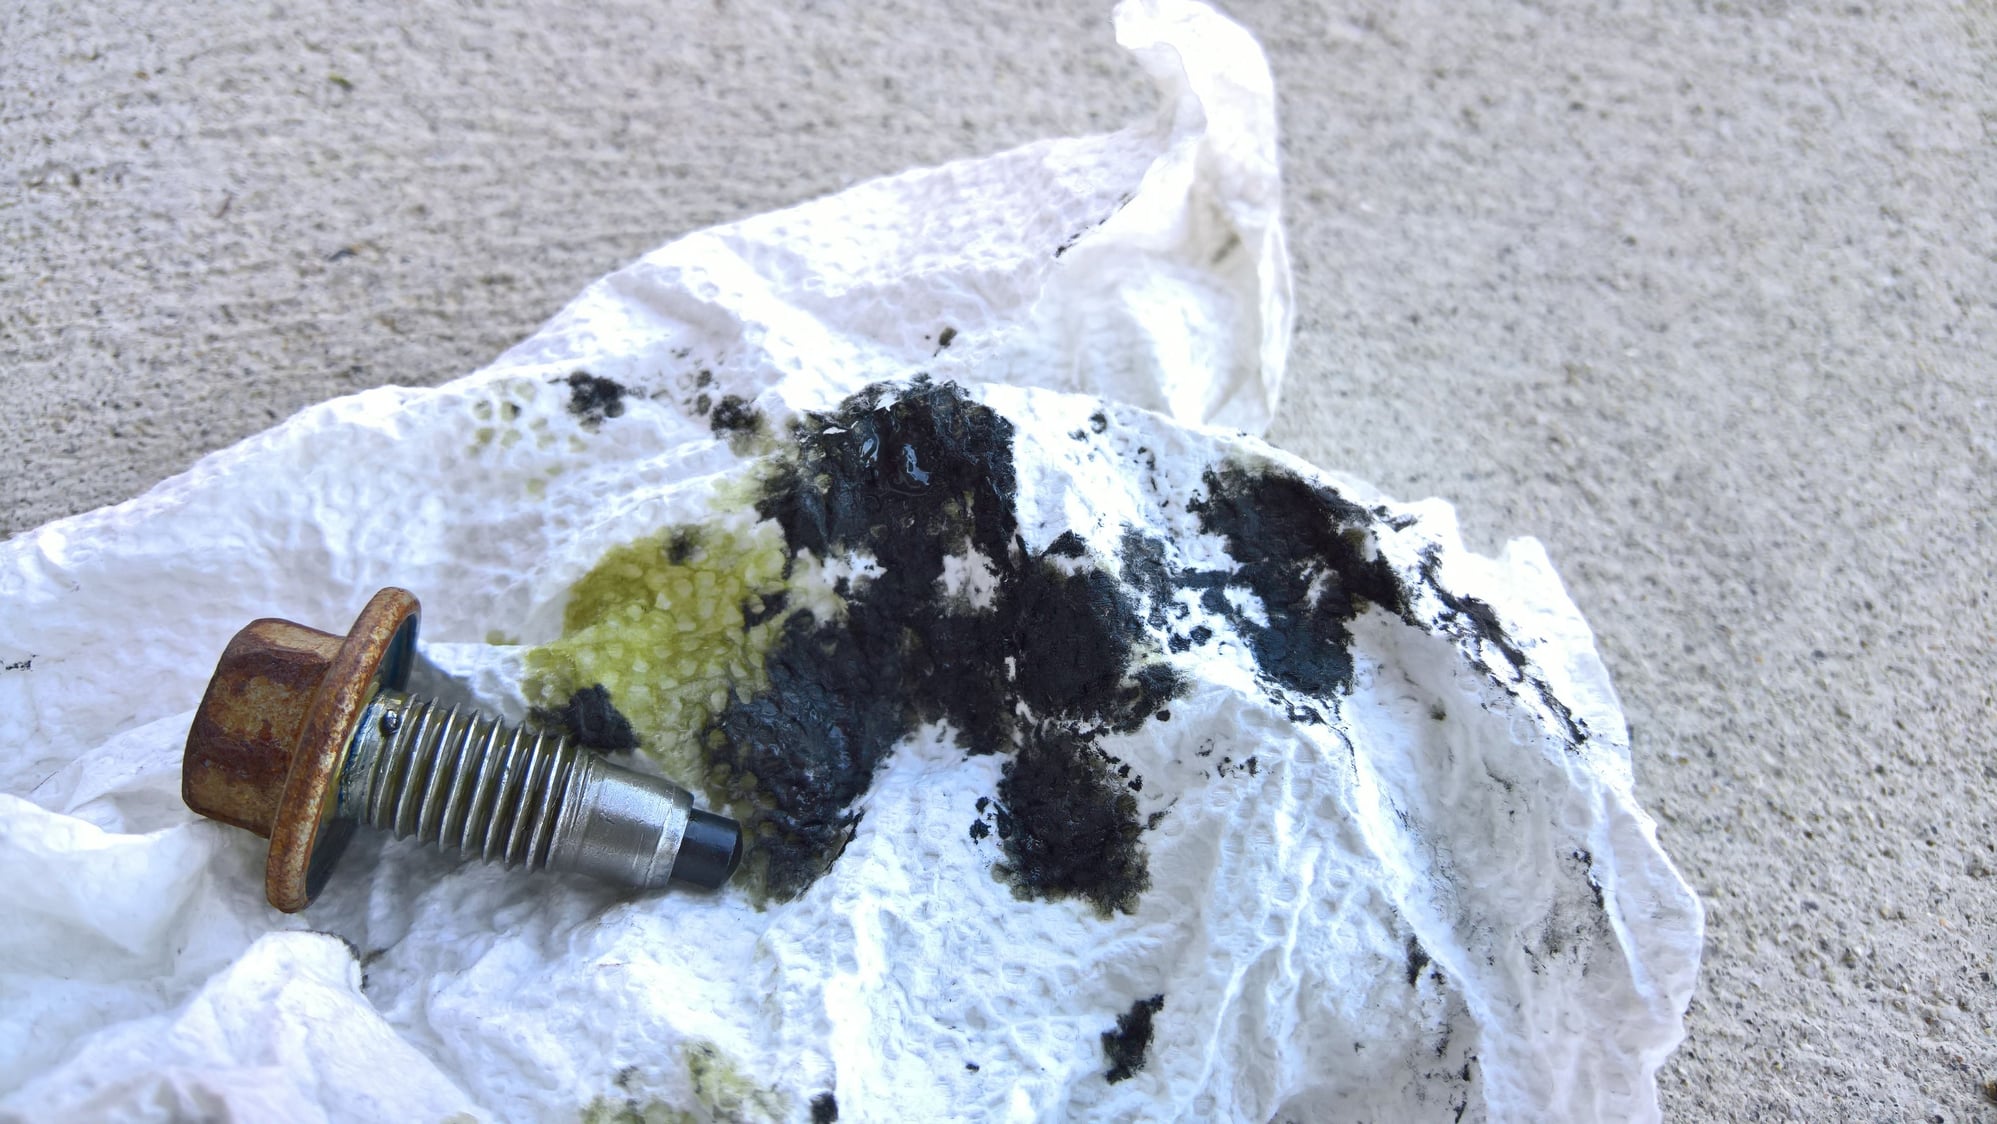
First oil change, draining the break-in oil. The oil looks pretty clean, just a small bit of black muck on the drain plug magnet. No shavings and oil has very little shimmer.
Transmission fluid change. Some metallic particles, but not bad.
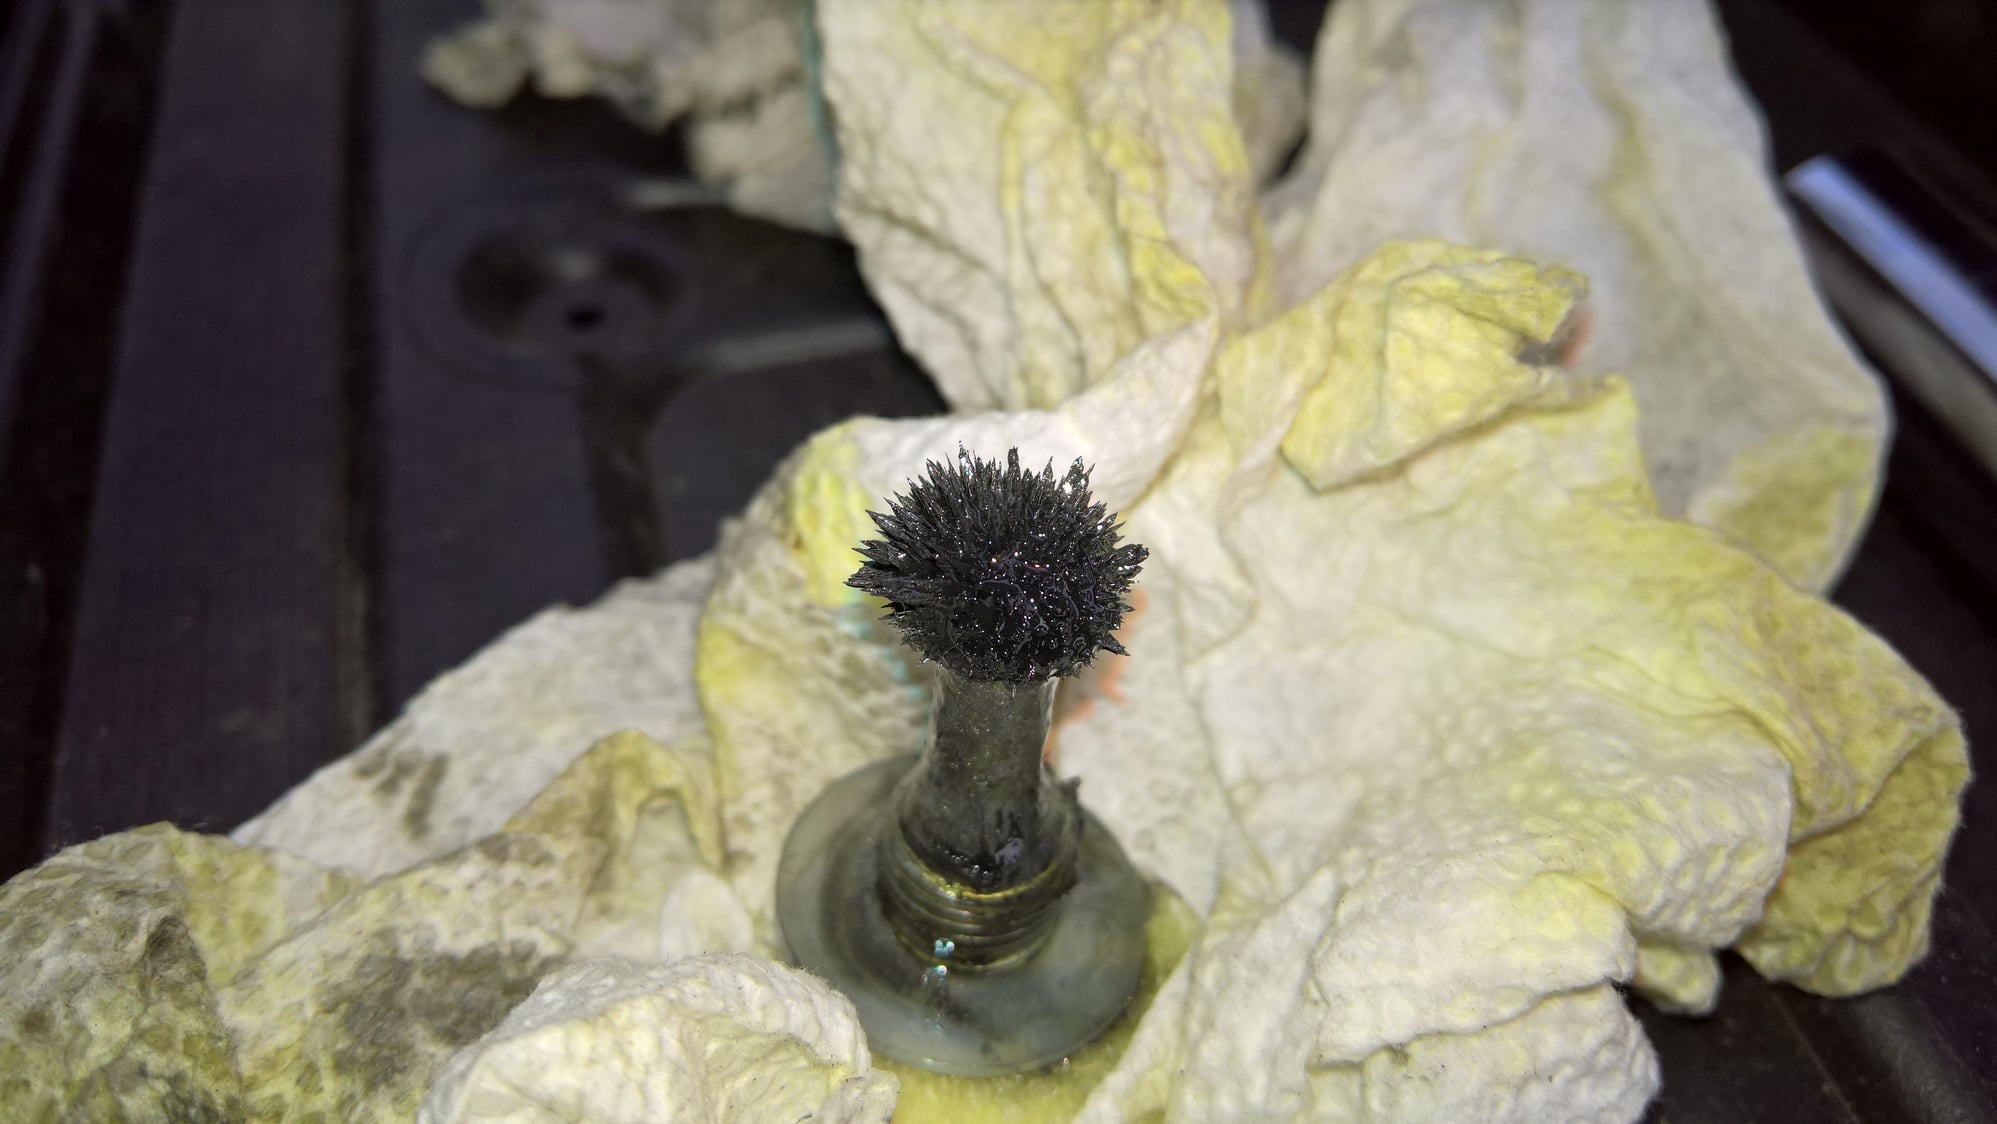
Draining gear oil from axle. So glad I installed this magnet. This was definitely the most metallic of all fluids changed at 500 miles.
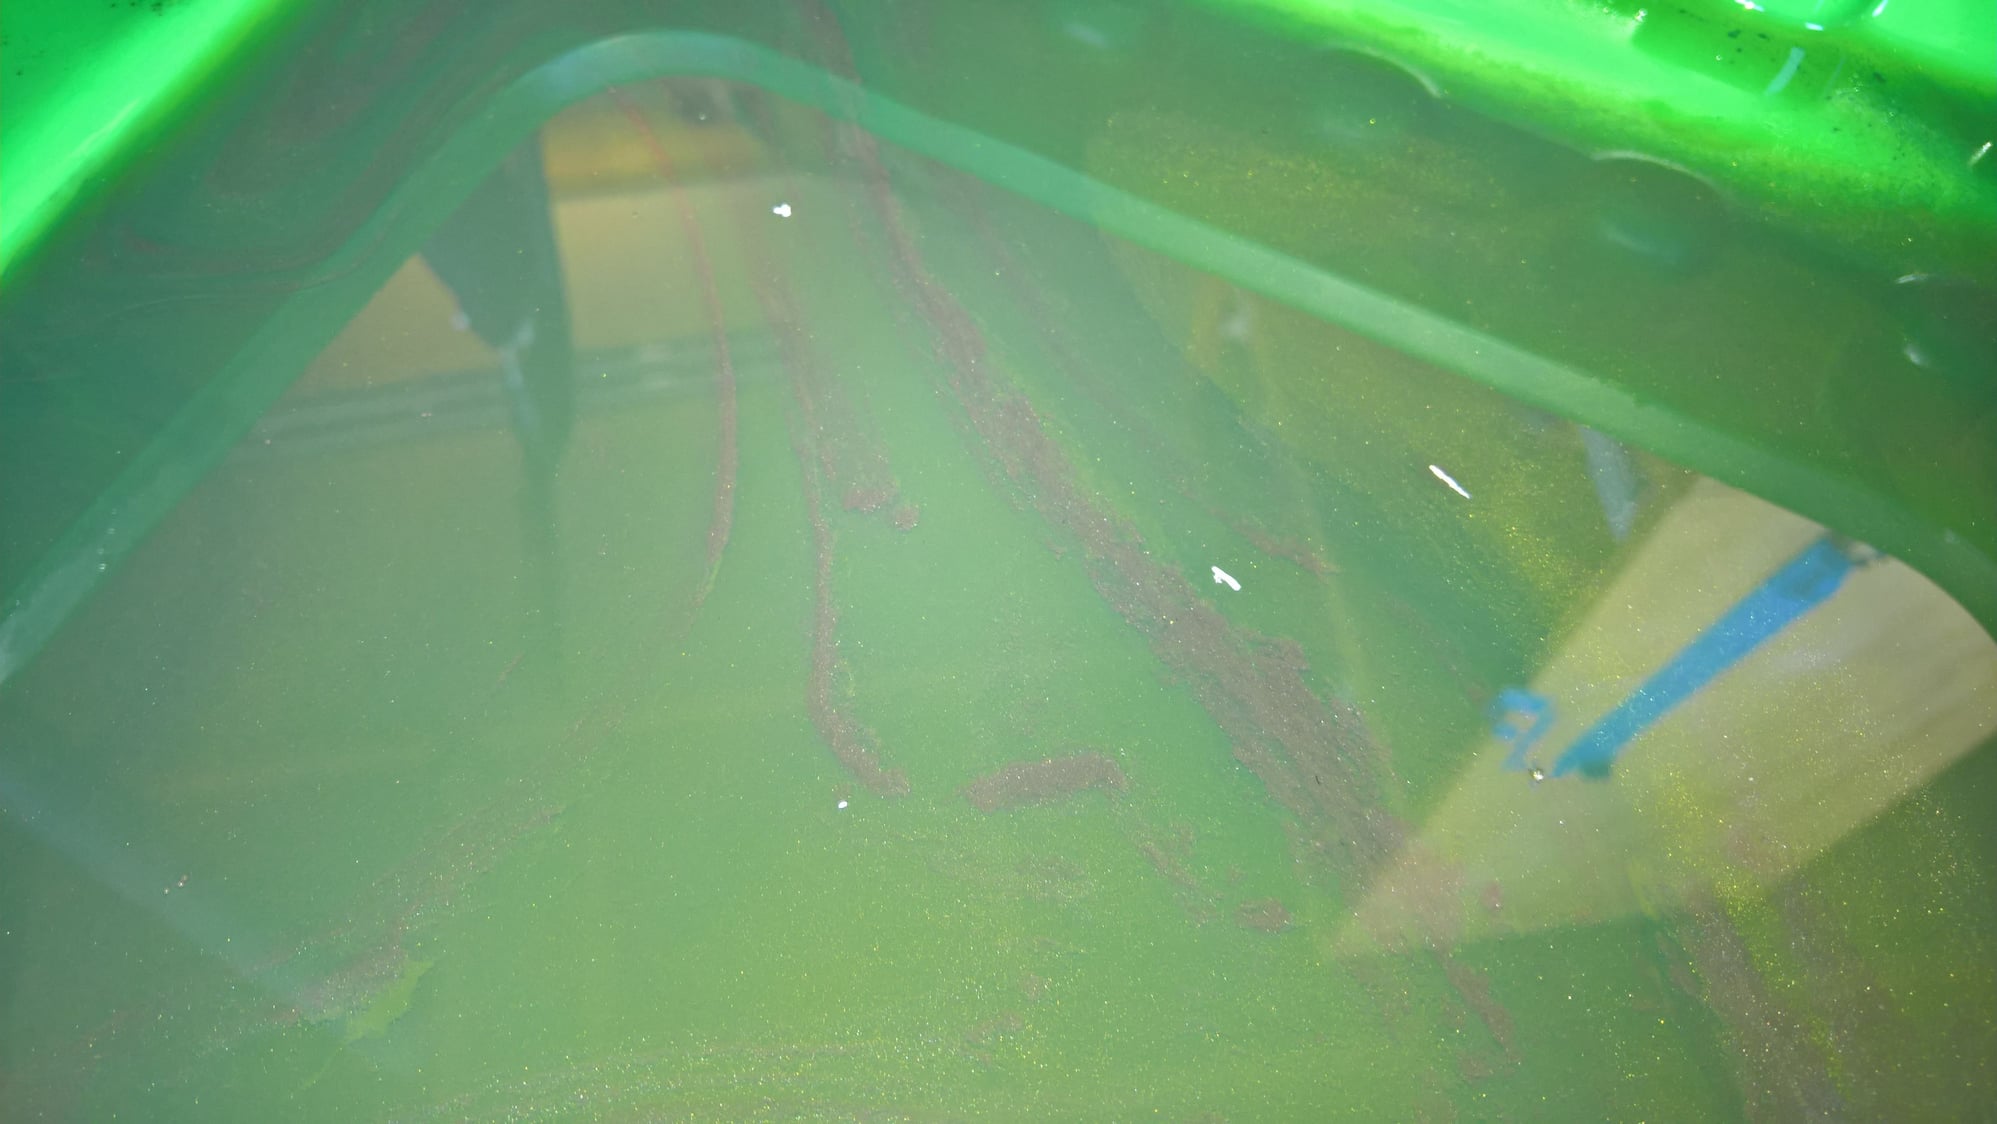
Draining gear oil from axle. So glad I installed this magnet. This was definitely the most metallic of all fluids changed at 500 miles.
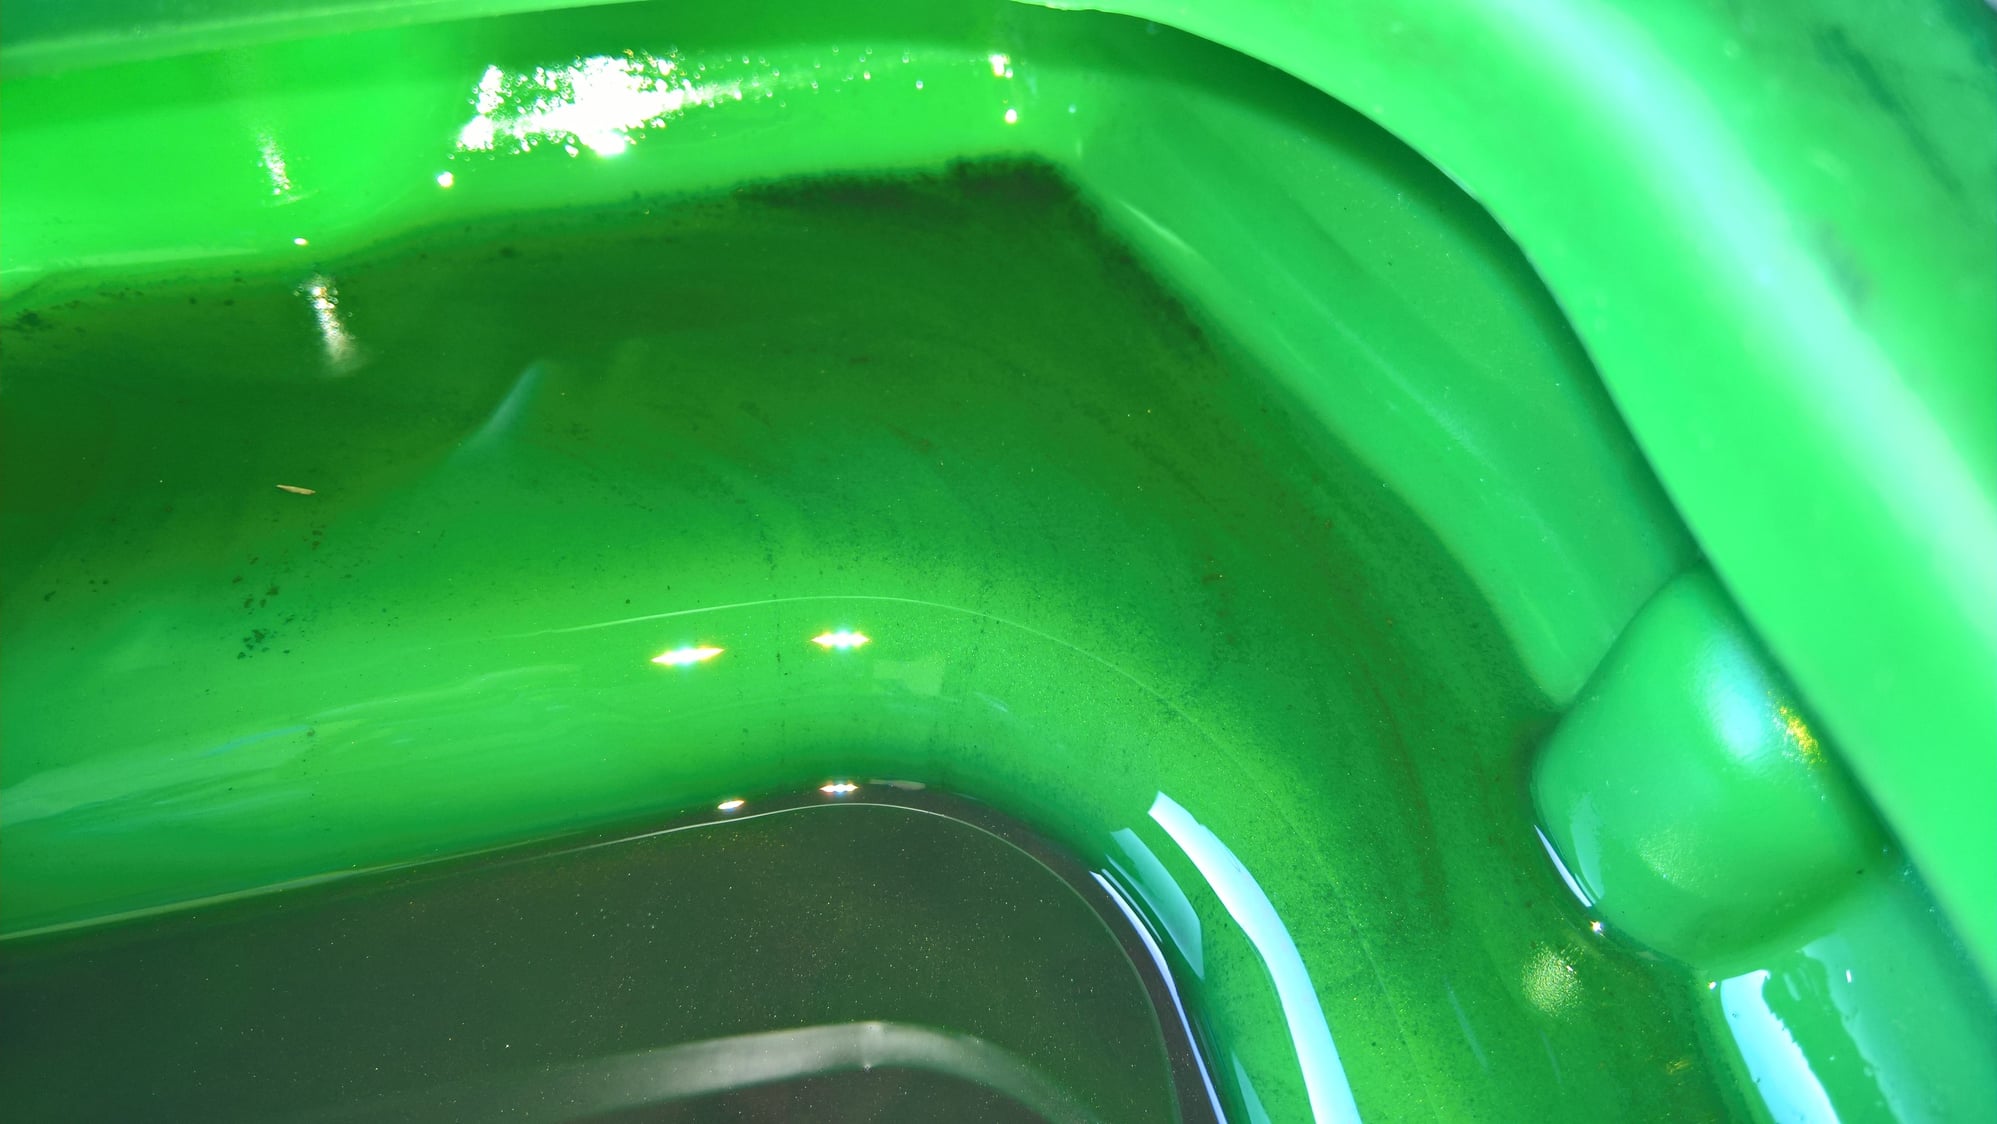
Draining gear oil from axle. So glad I installed this magnet. This was definitely the most metallic of all fluids changed at 500 miles.
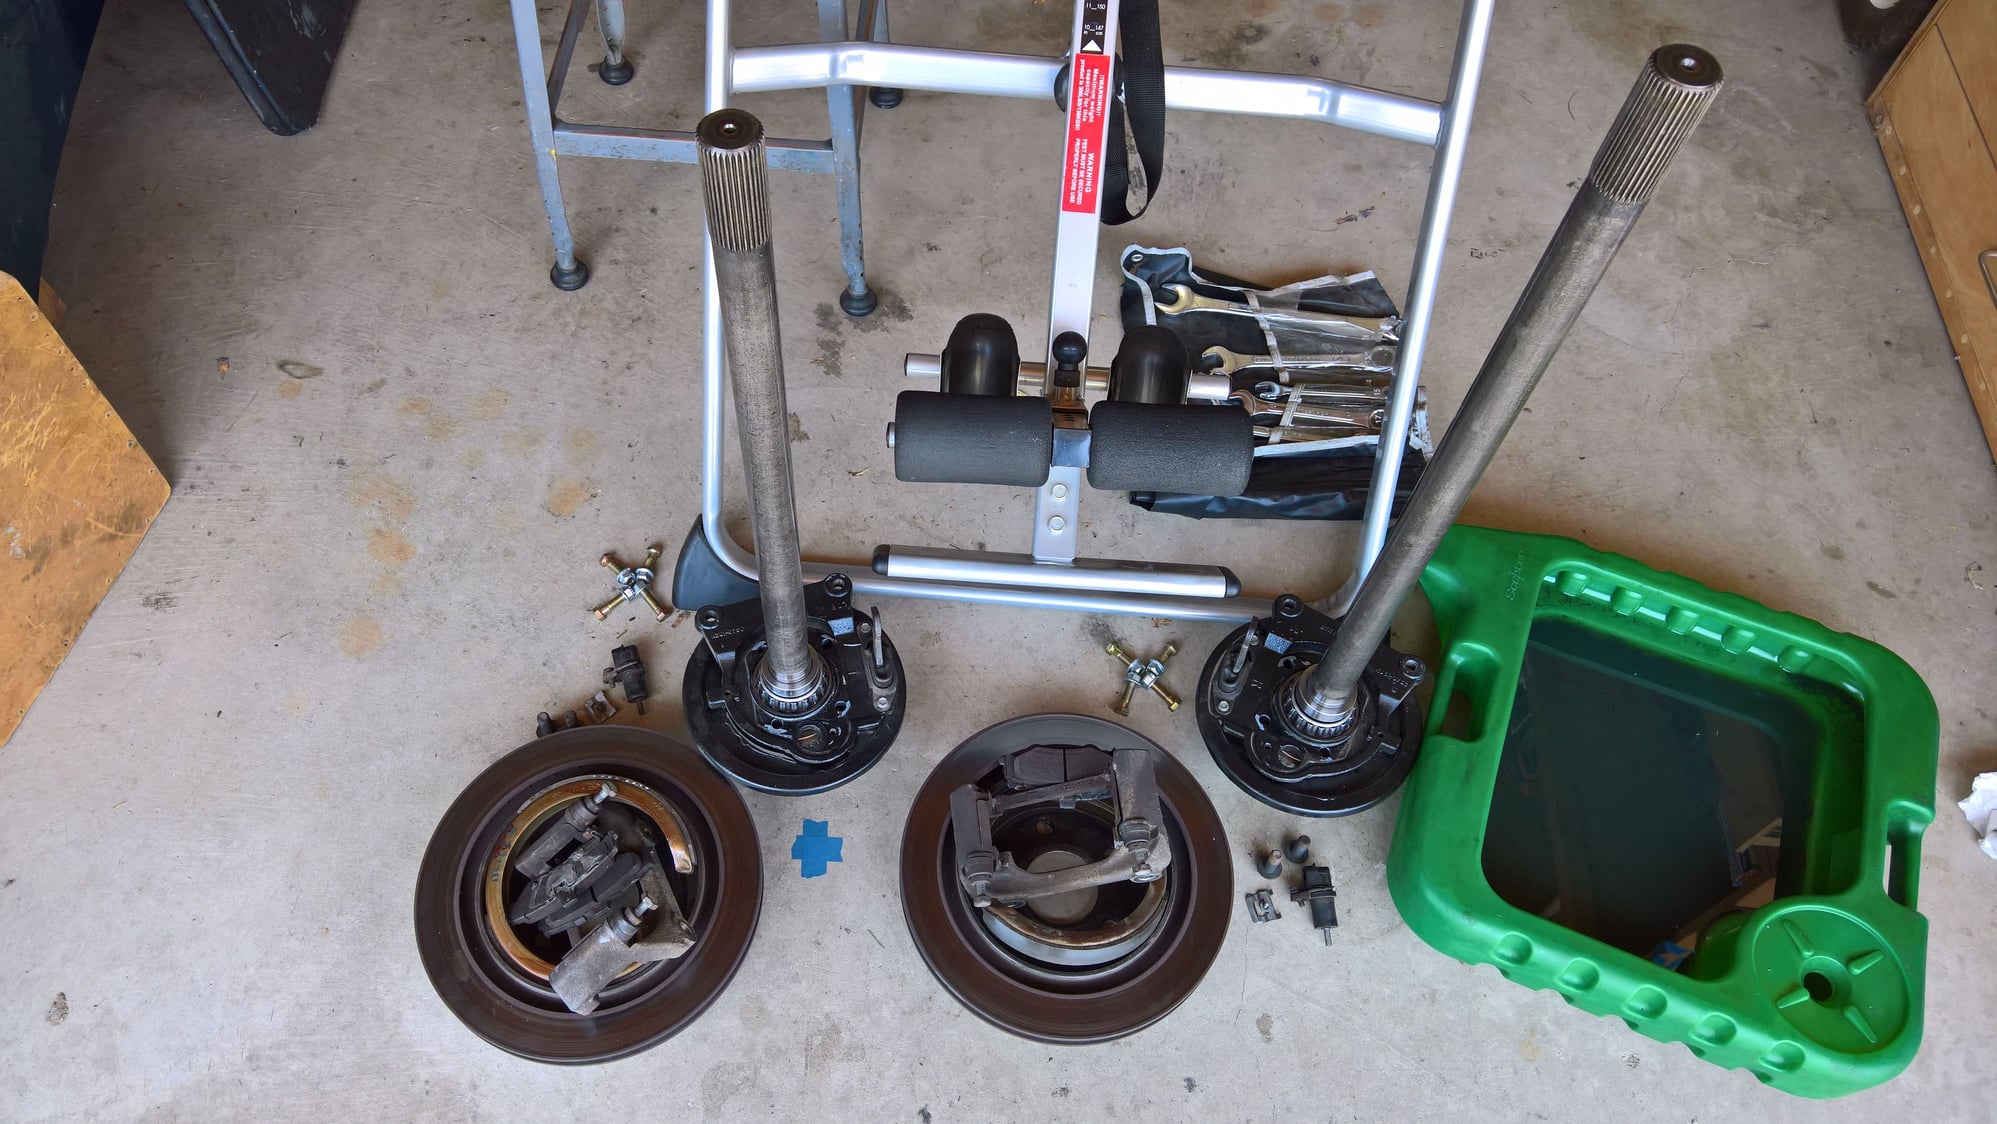
Because of the axle leak due to MWC poor assembly work, I had to pull the rear brakes, calipers and brackets, parking brakes, and rear axles to get the differential out.
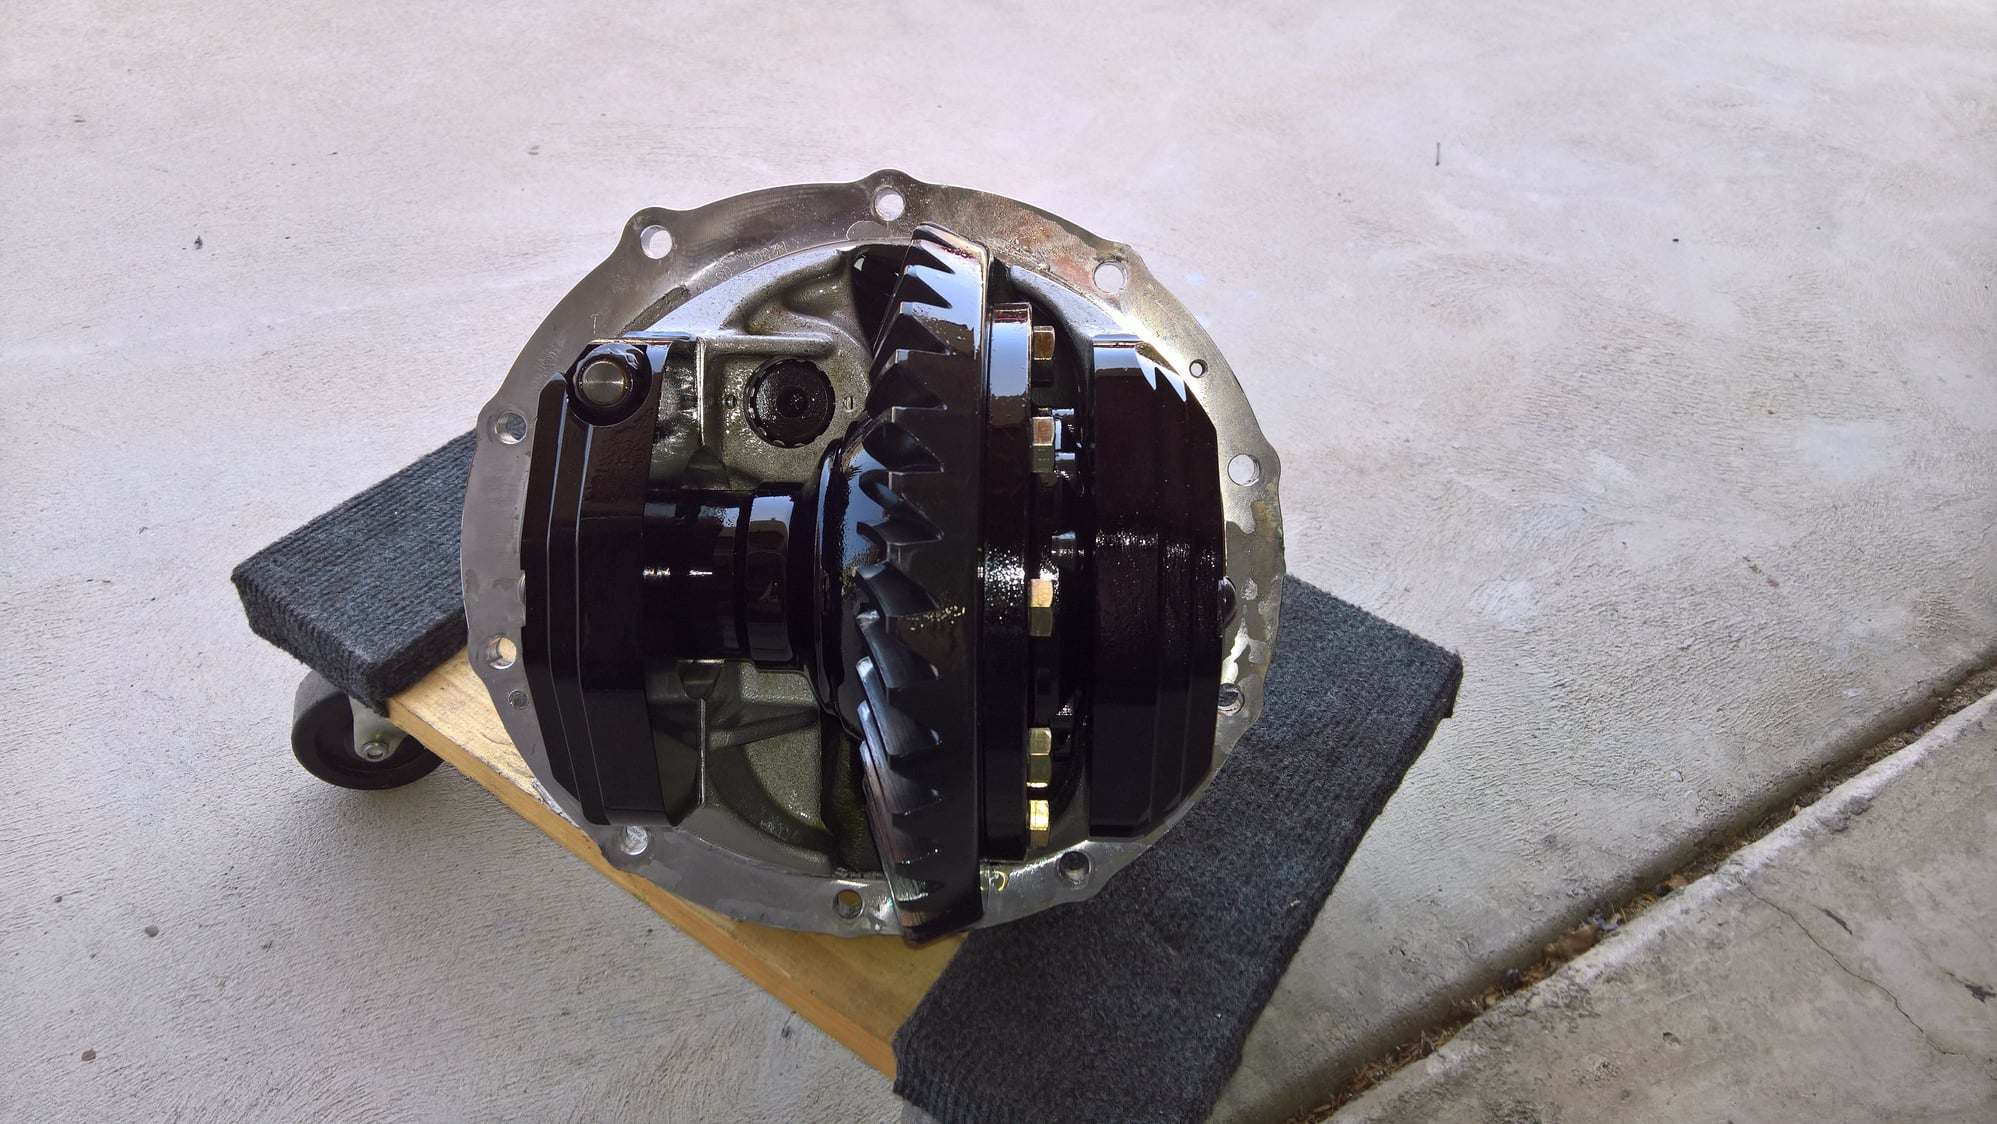
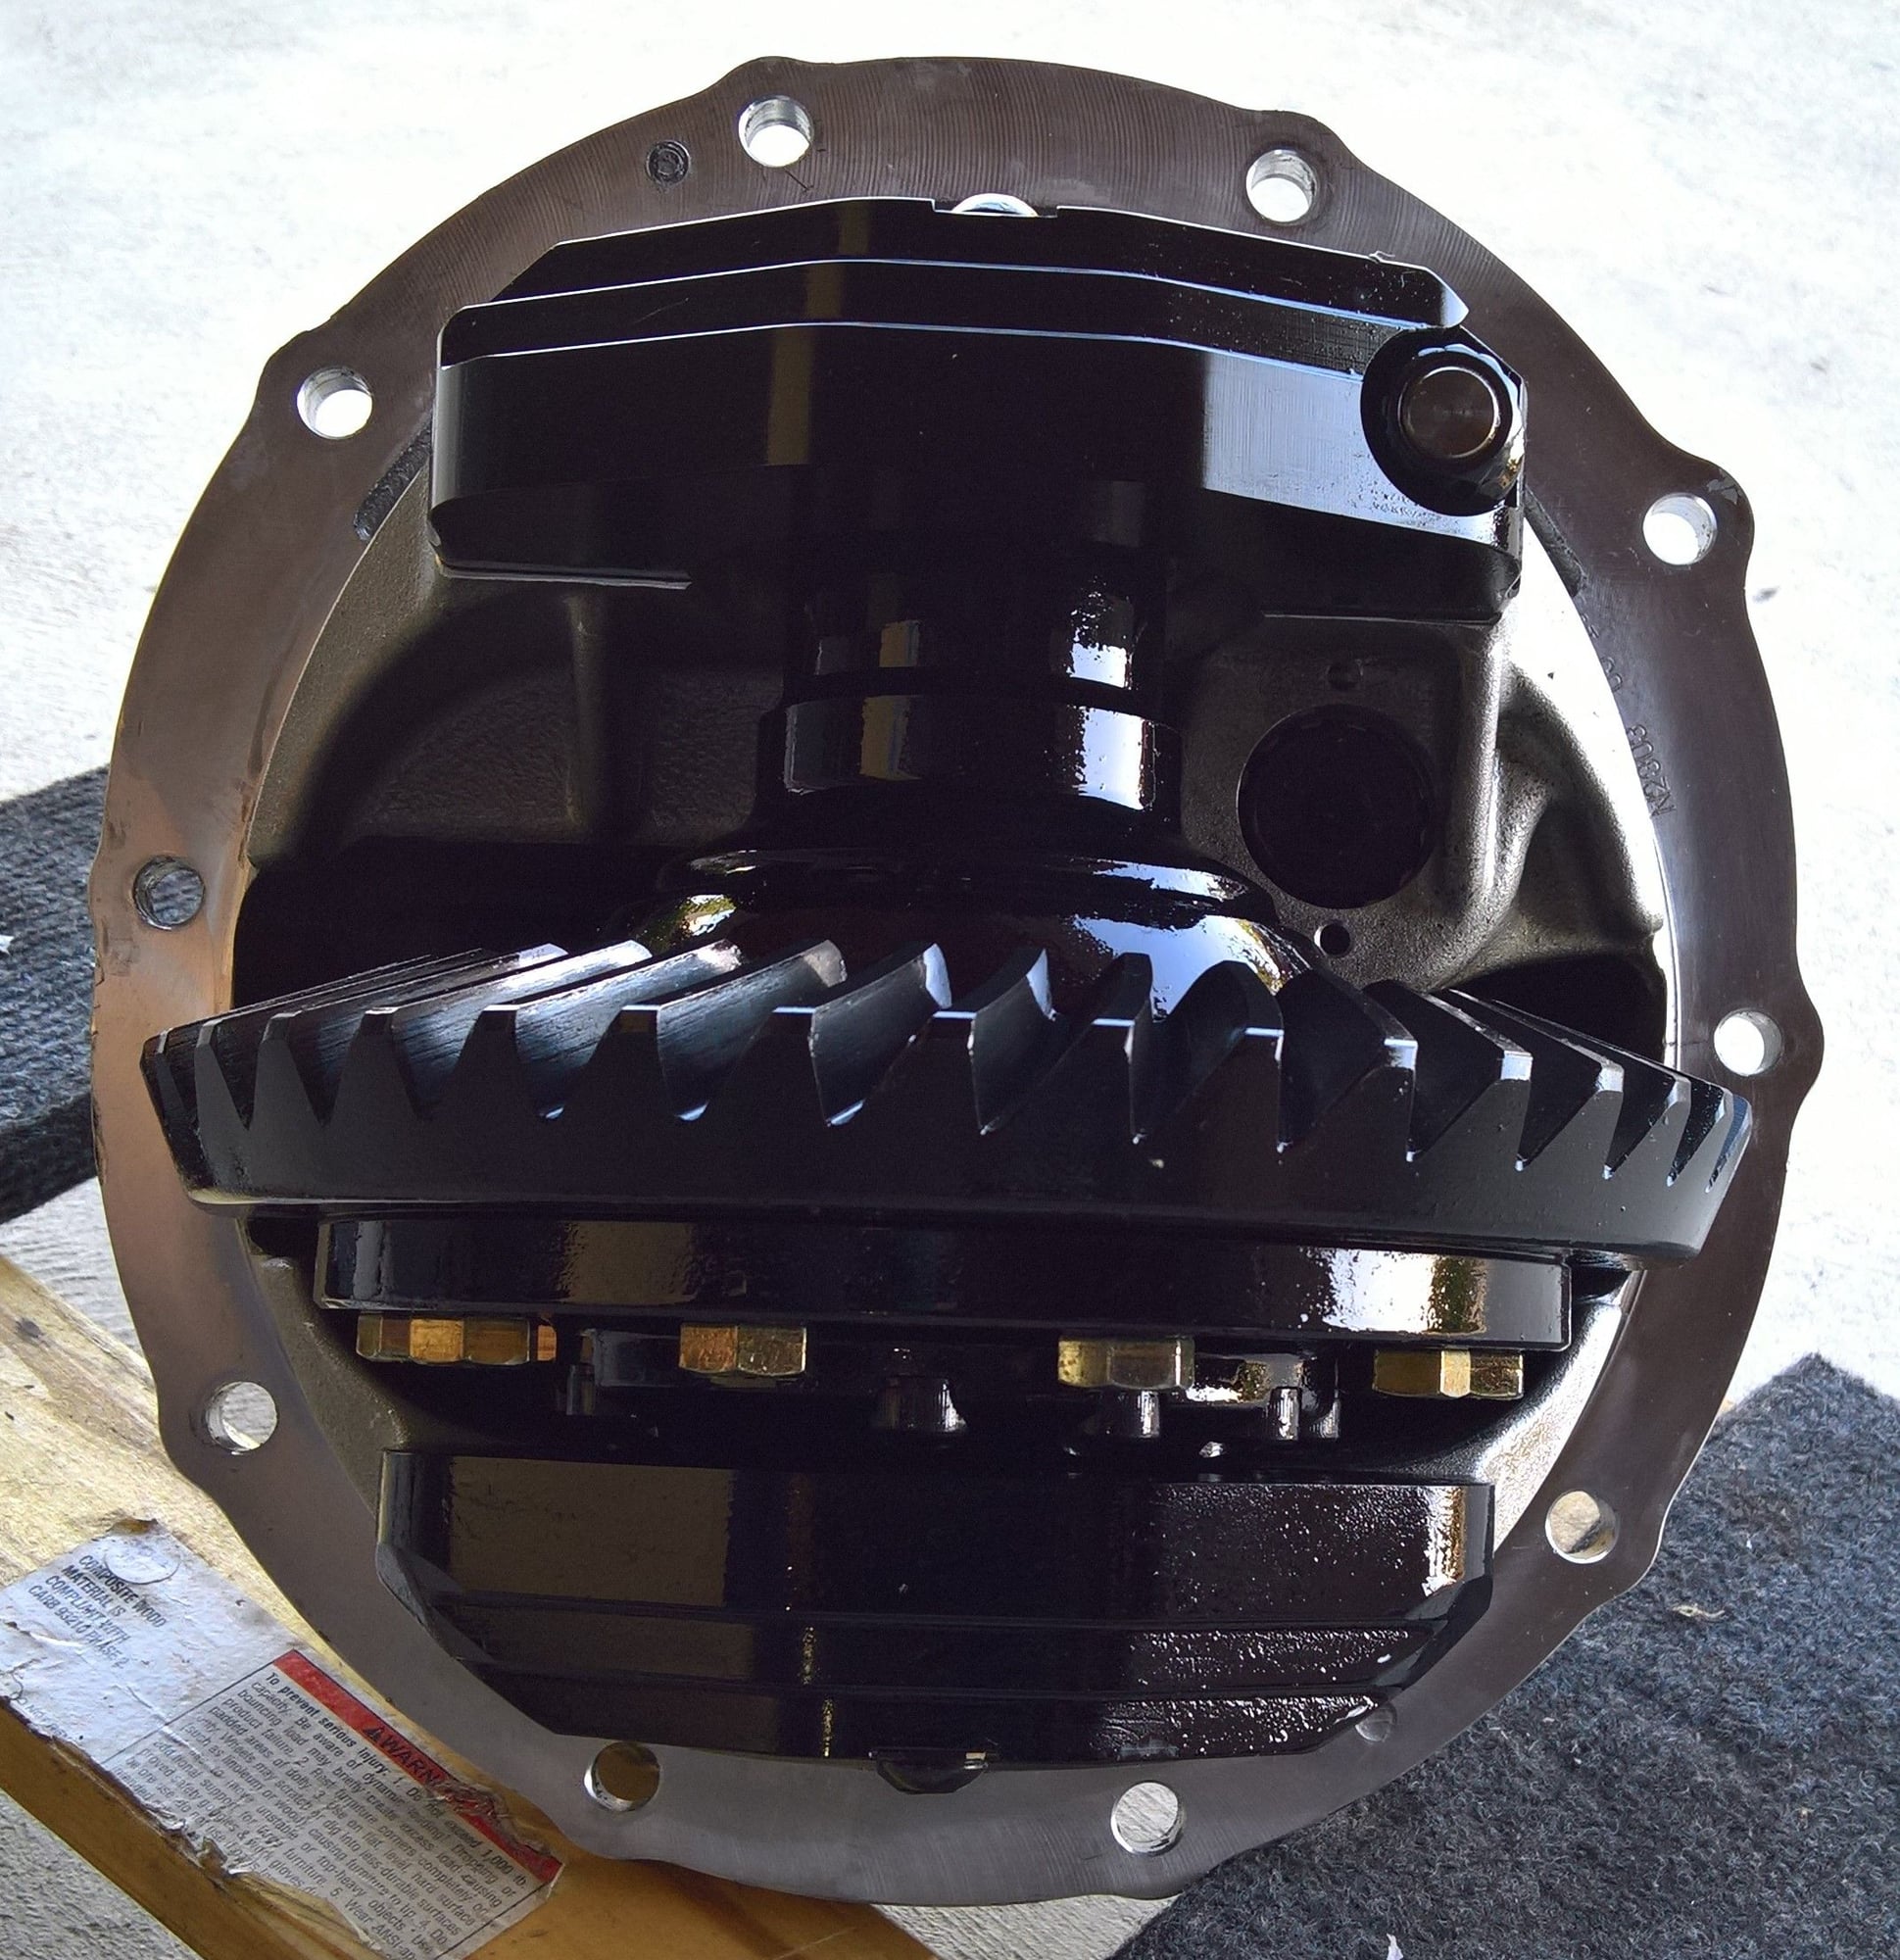
Differential removed
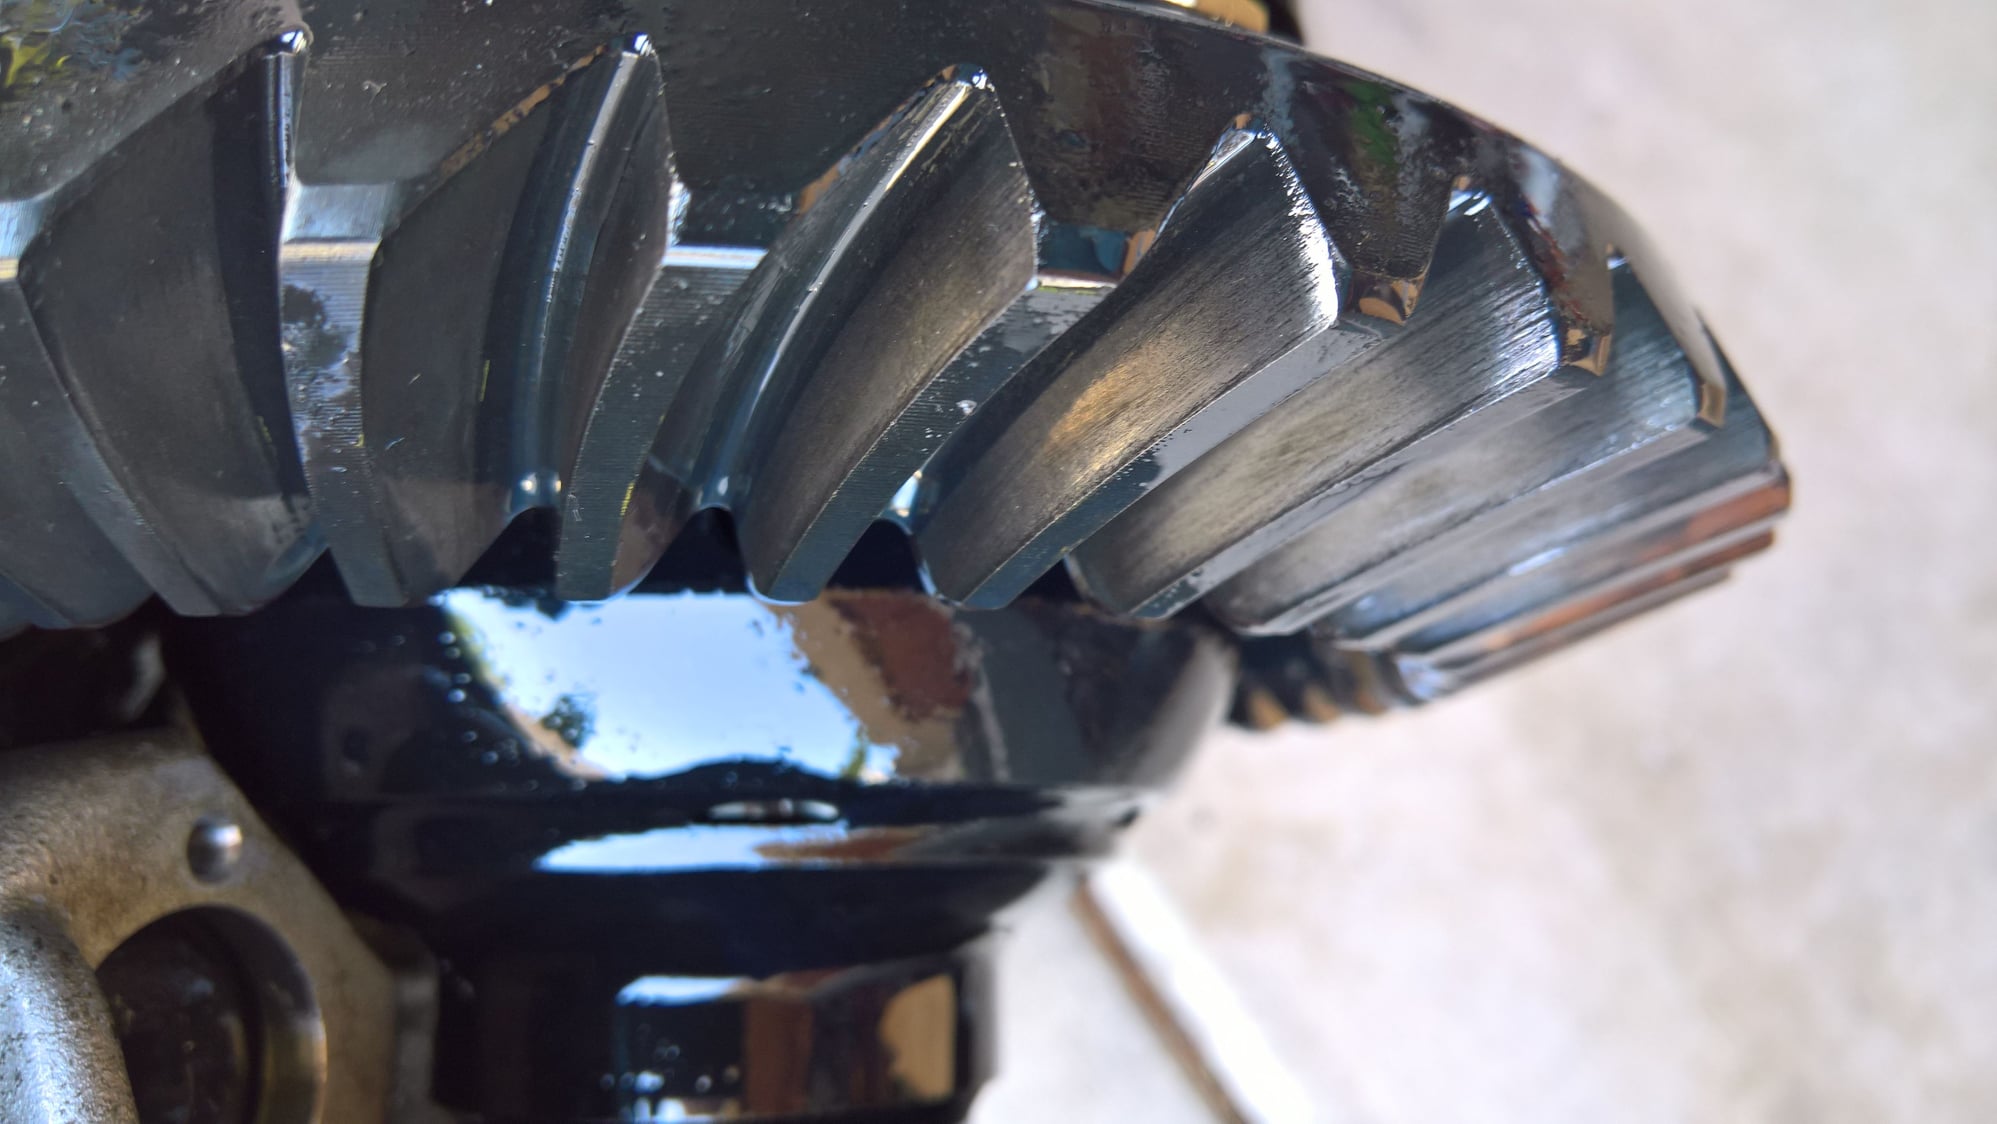
Differential removed. Hopefully this is a good wear pattern. No whine so far.
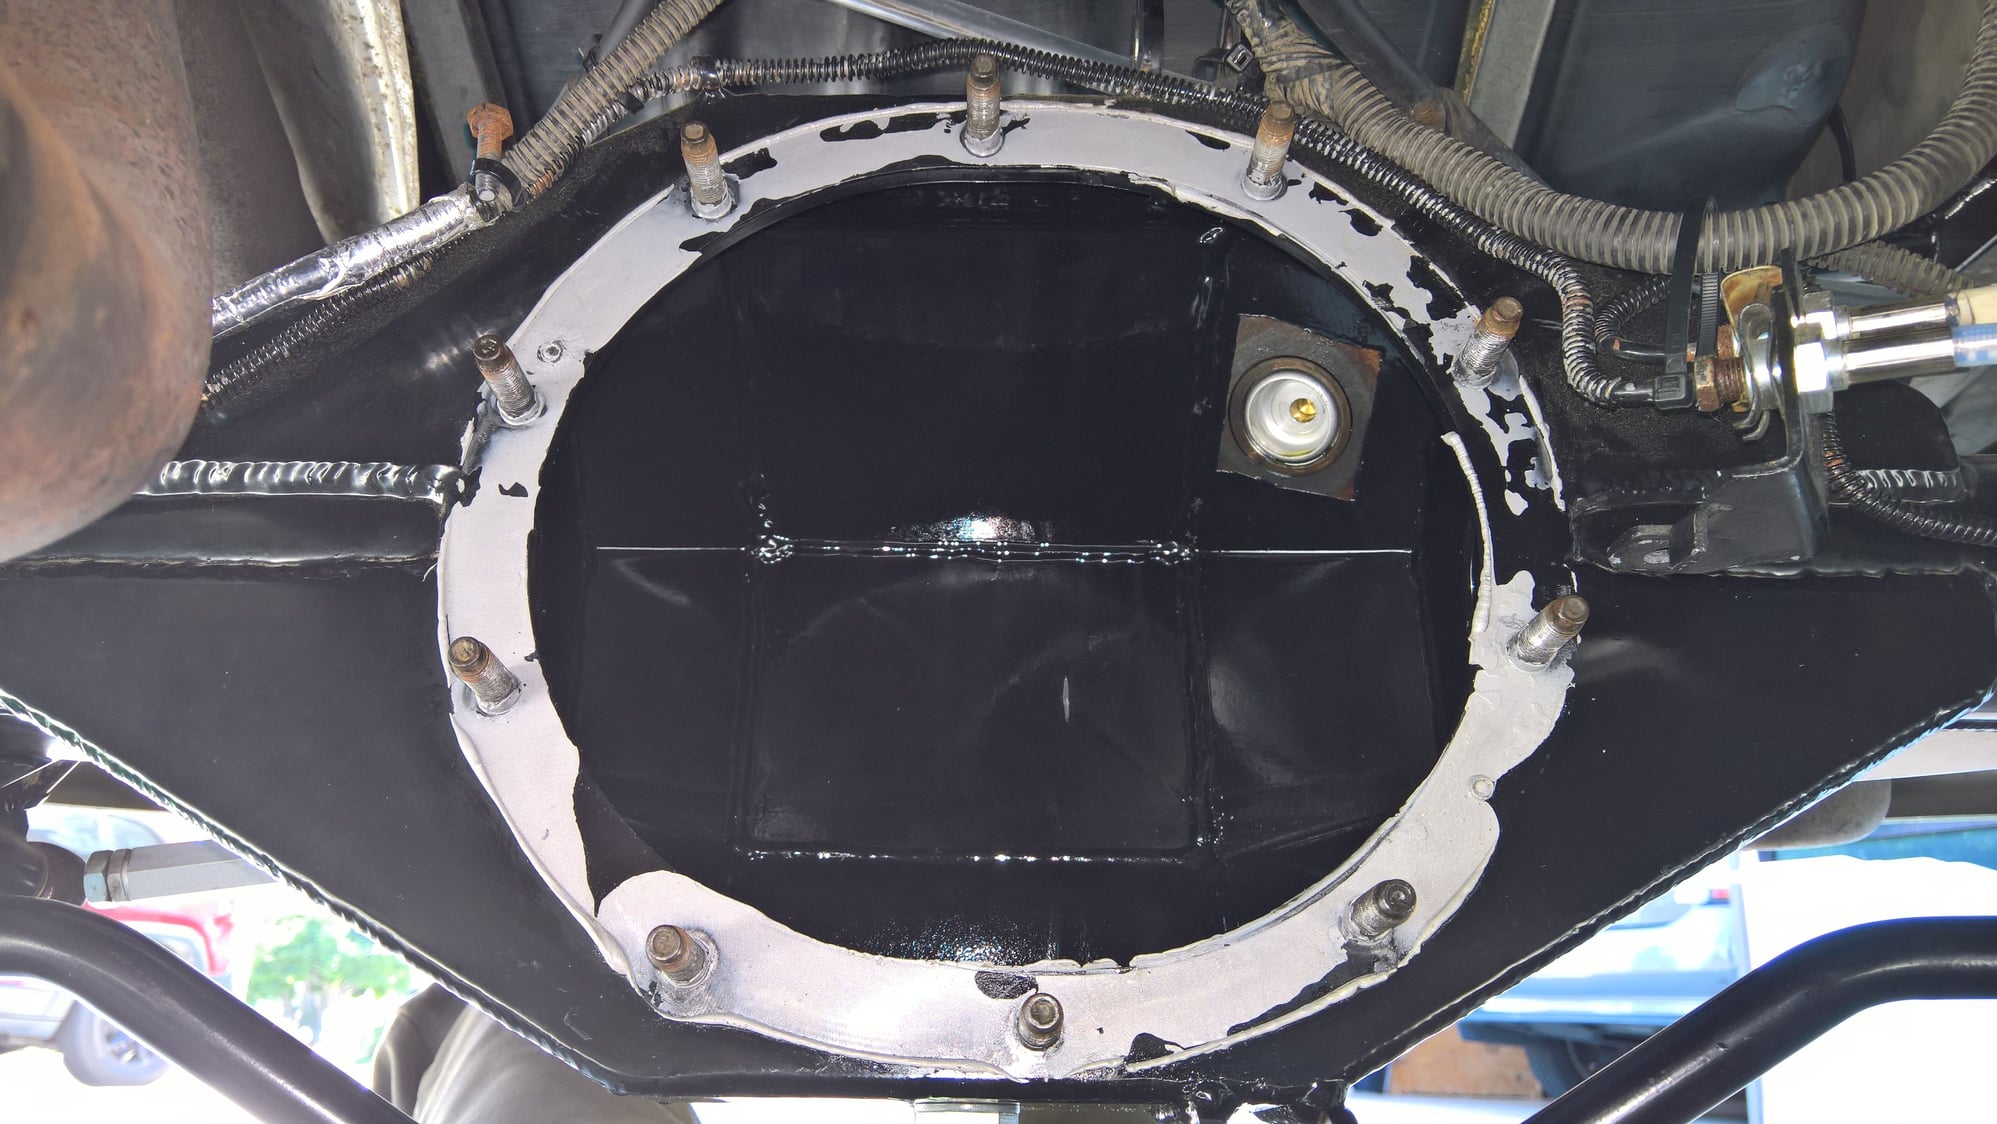
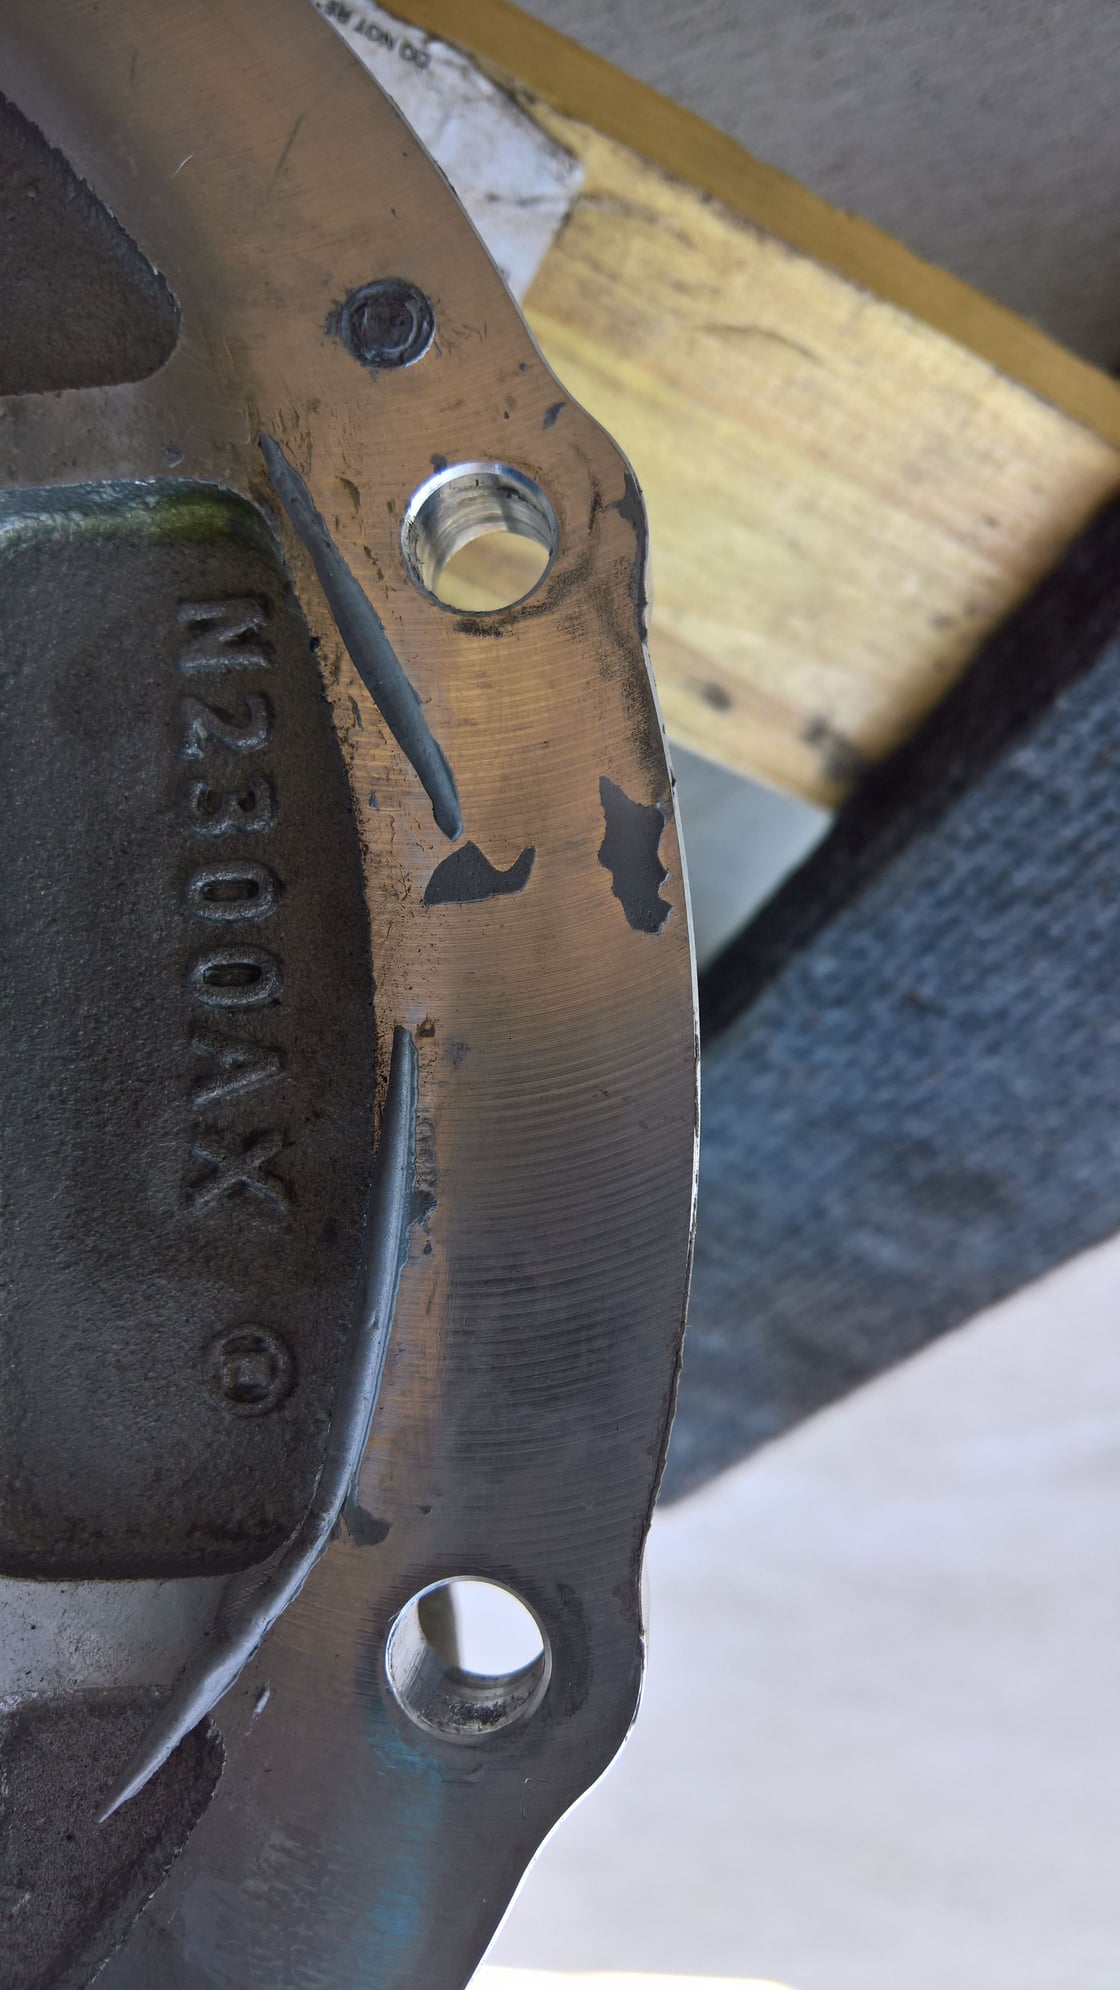
Mess of Ultra Gray sealant which leaked. (Leak point at 3 o'clock.)
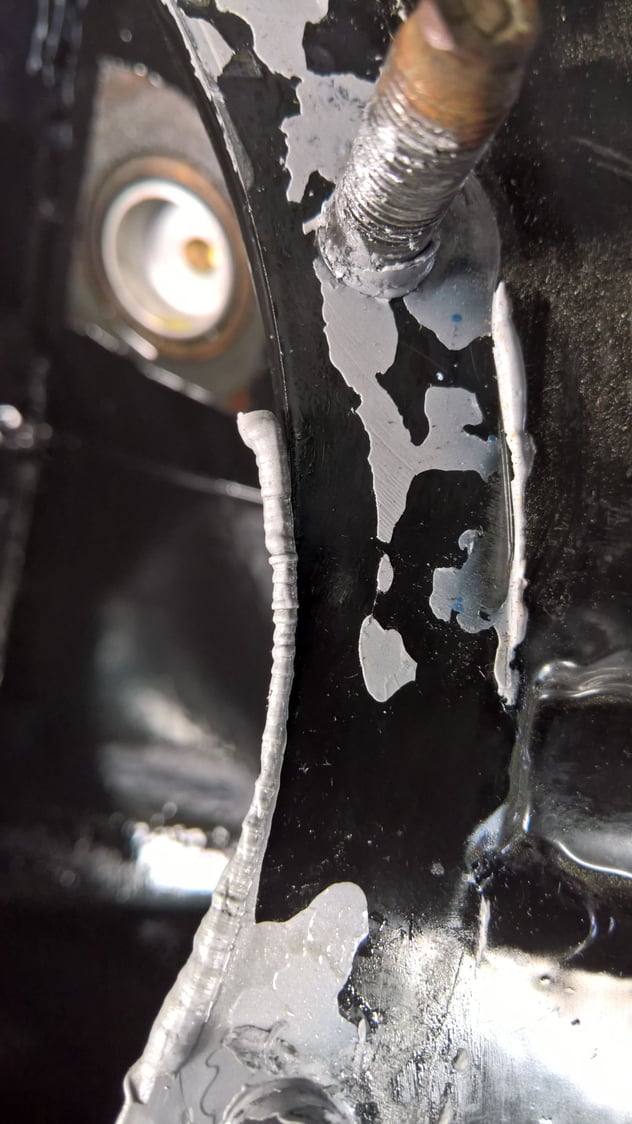
Here is where it was leaking from. As you can see, all the silicone squeezed out of the edges and nothing remained to seal it.
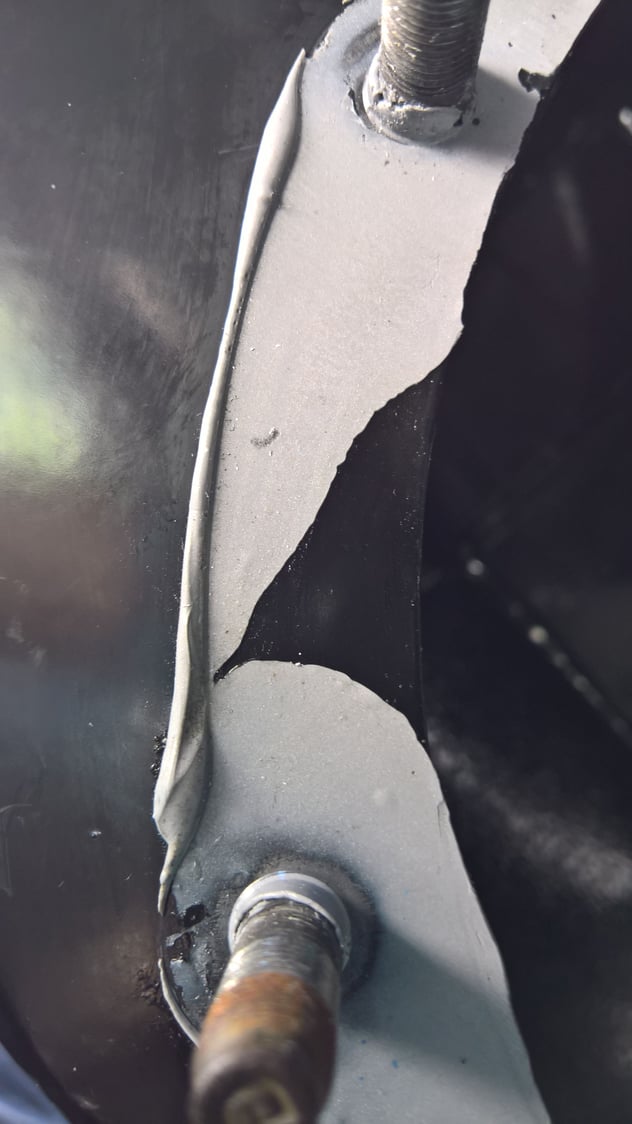
This is the same spot of the leak but on the diff side, which also shows the silicone squeezed out to the inside. As you can see, all the silicone squeezed out of the edges and nothing remained to seal it.
Here you can see a spot that very nearly leaked as well.
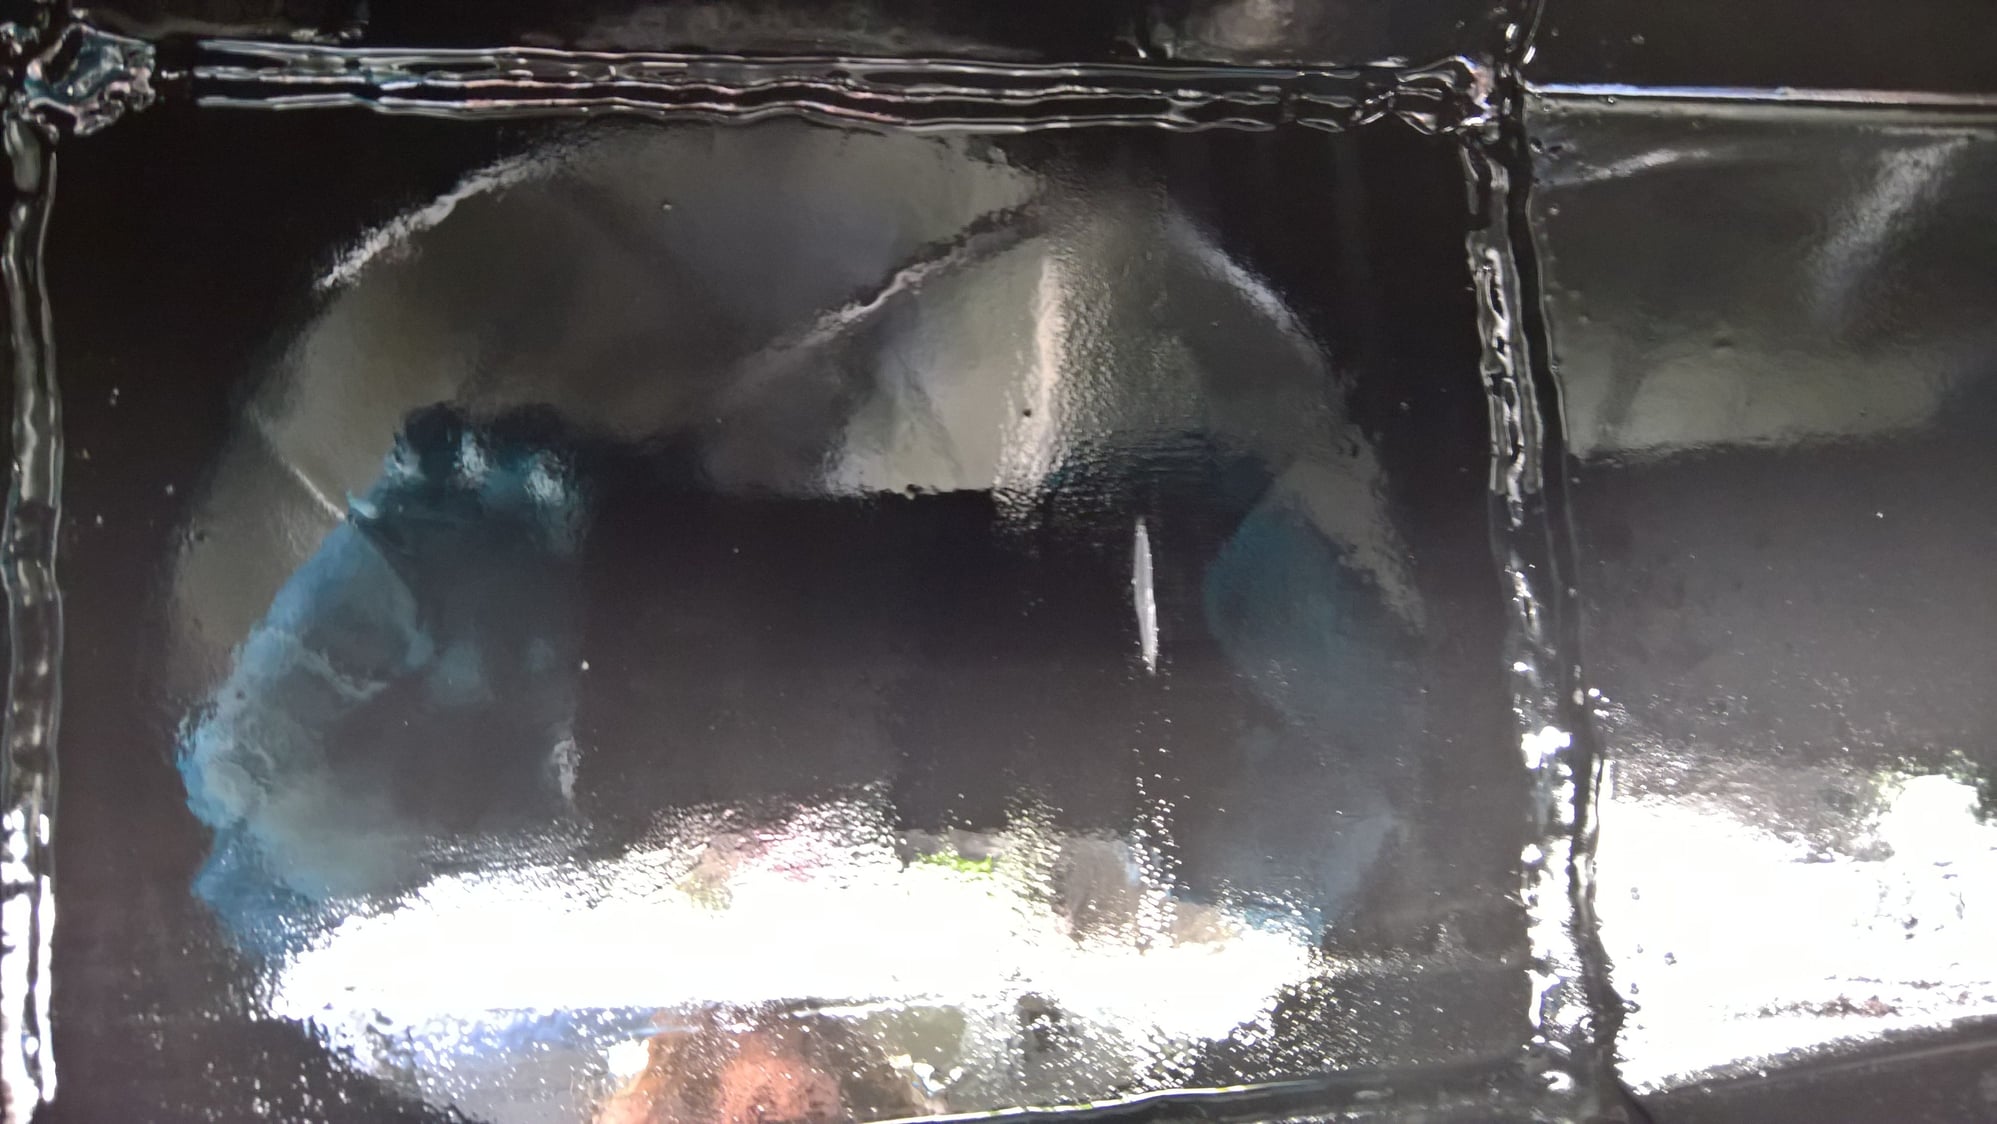
An unexpected rub mark inside the housing from the diff gears.
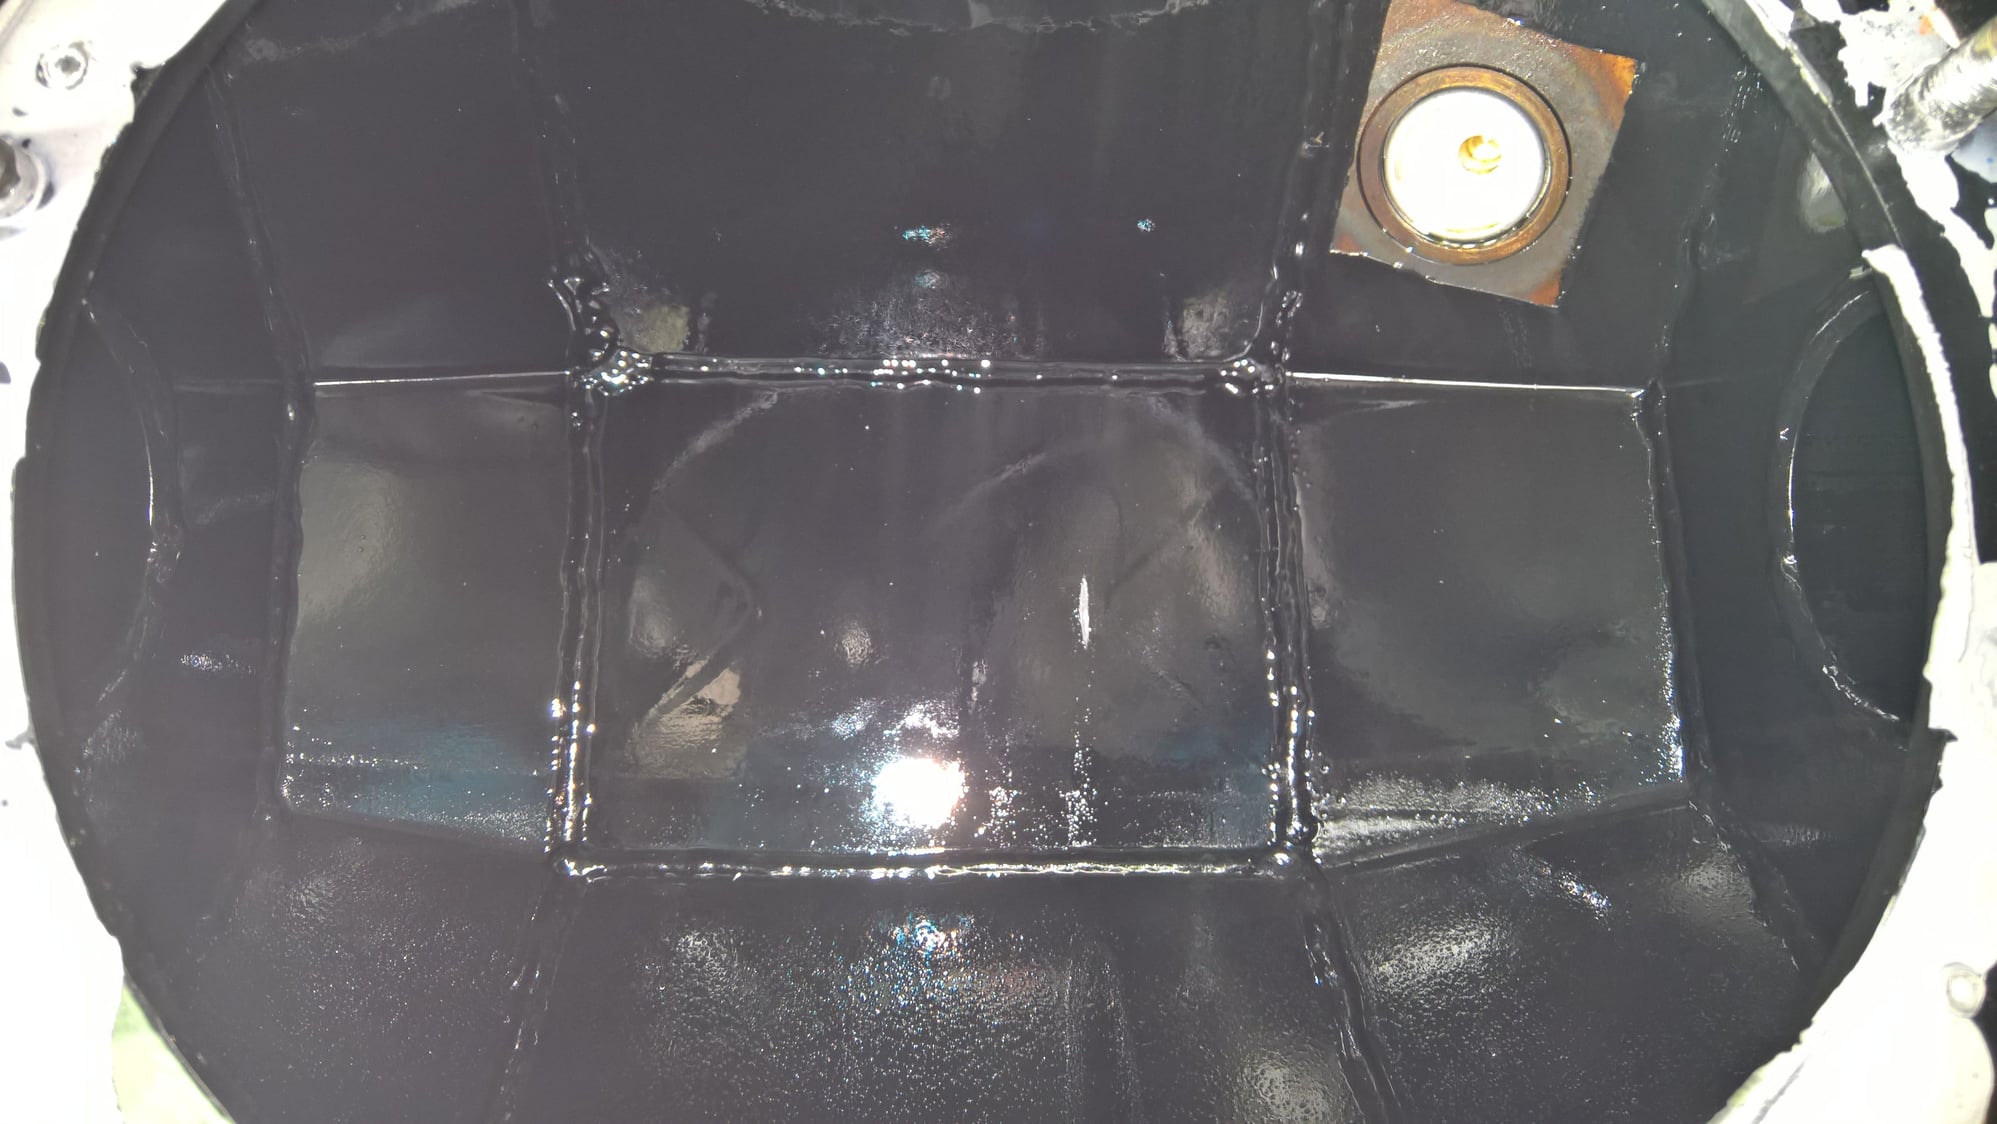
Quite a bit of metallic particles still inside housing.
After several hours of careful scraping, the Ultra Gray is gone.
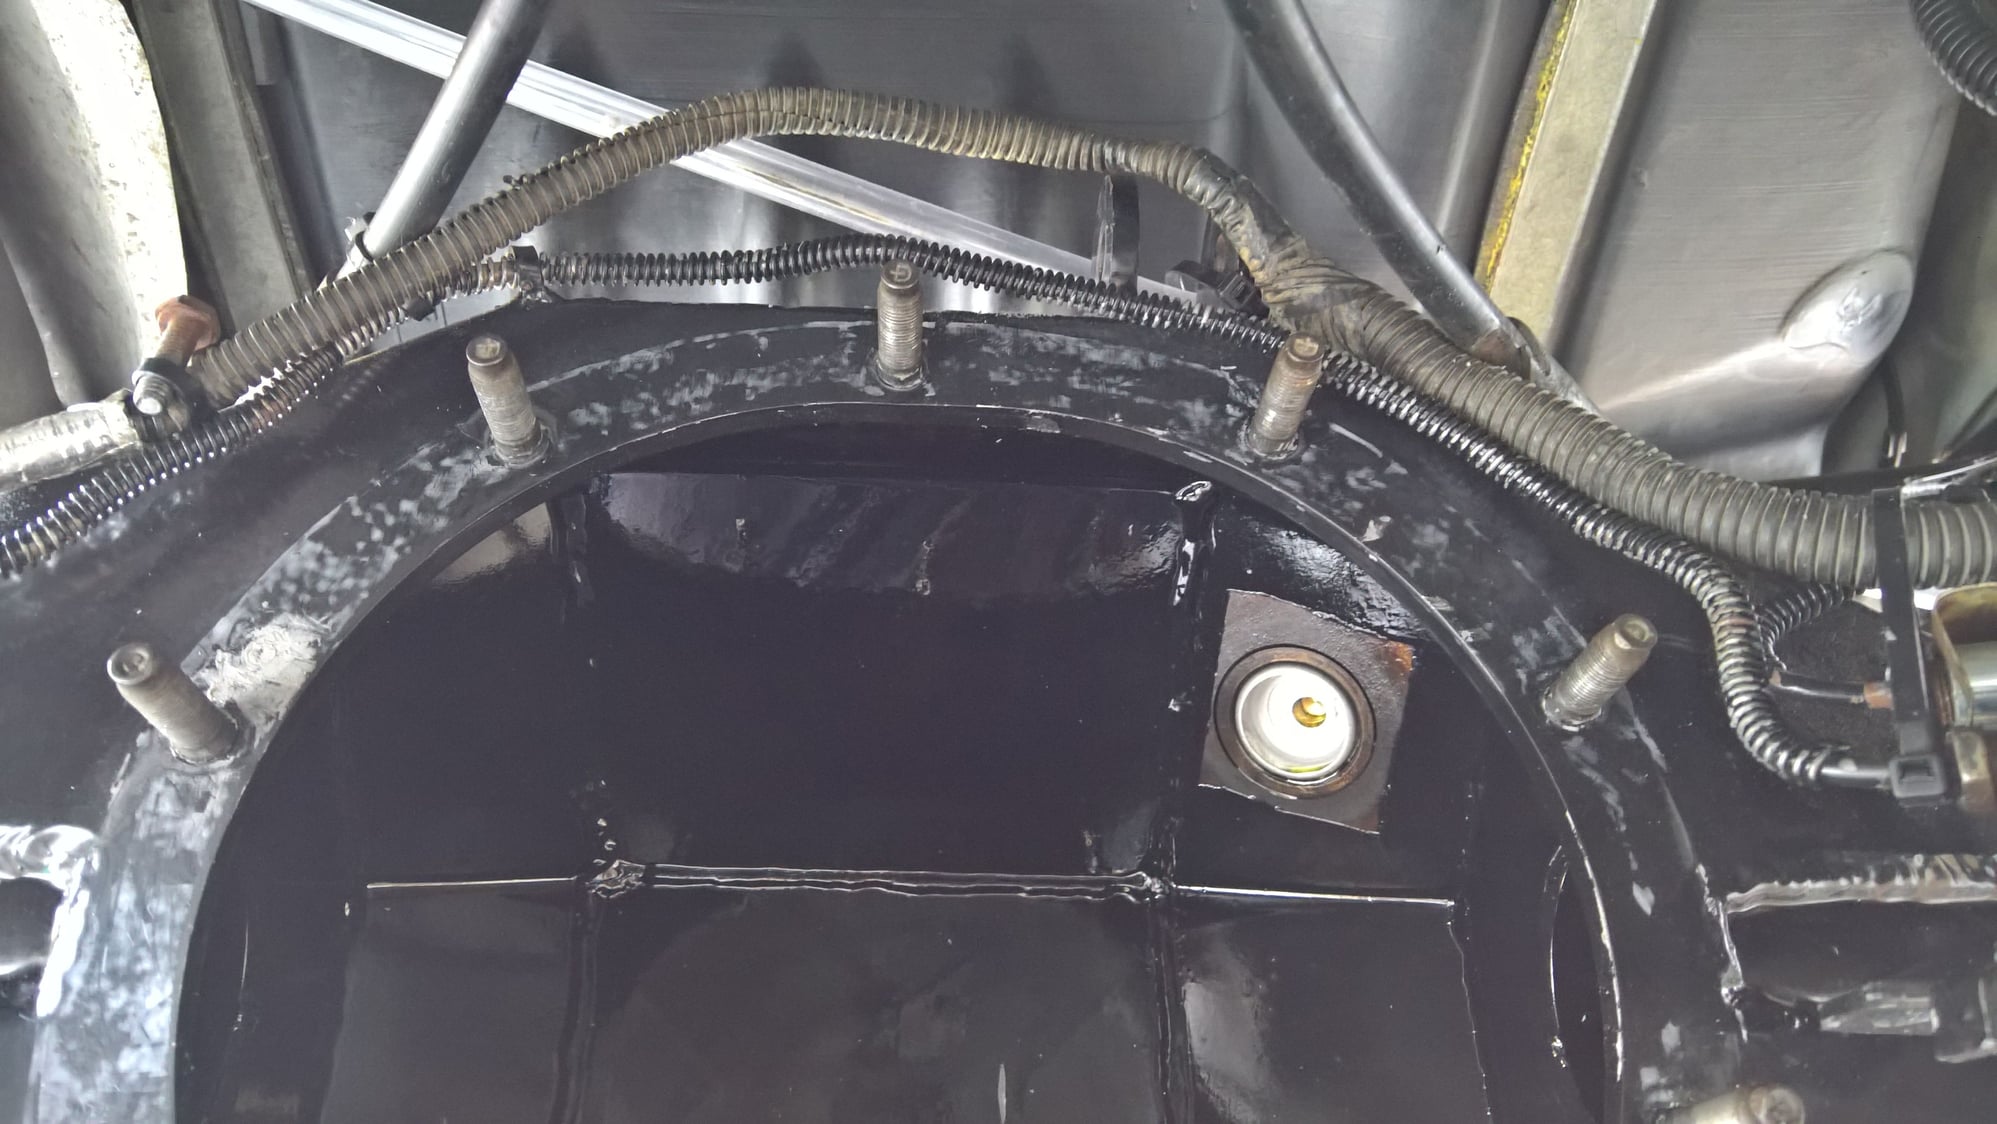
After several hours of careful scraping, the Ultra Gray is gone.
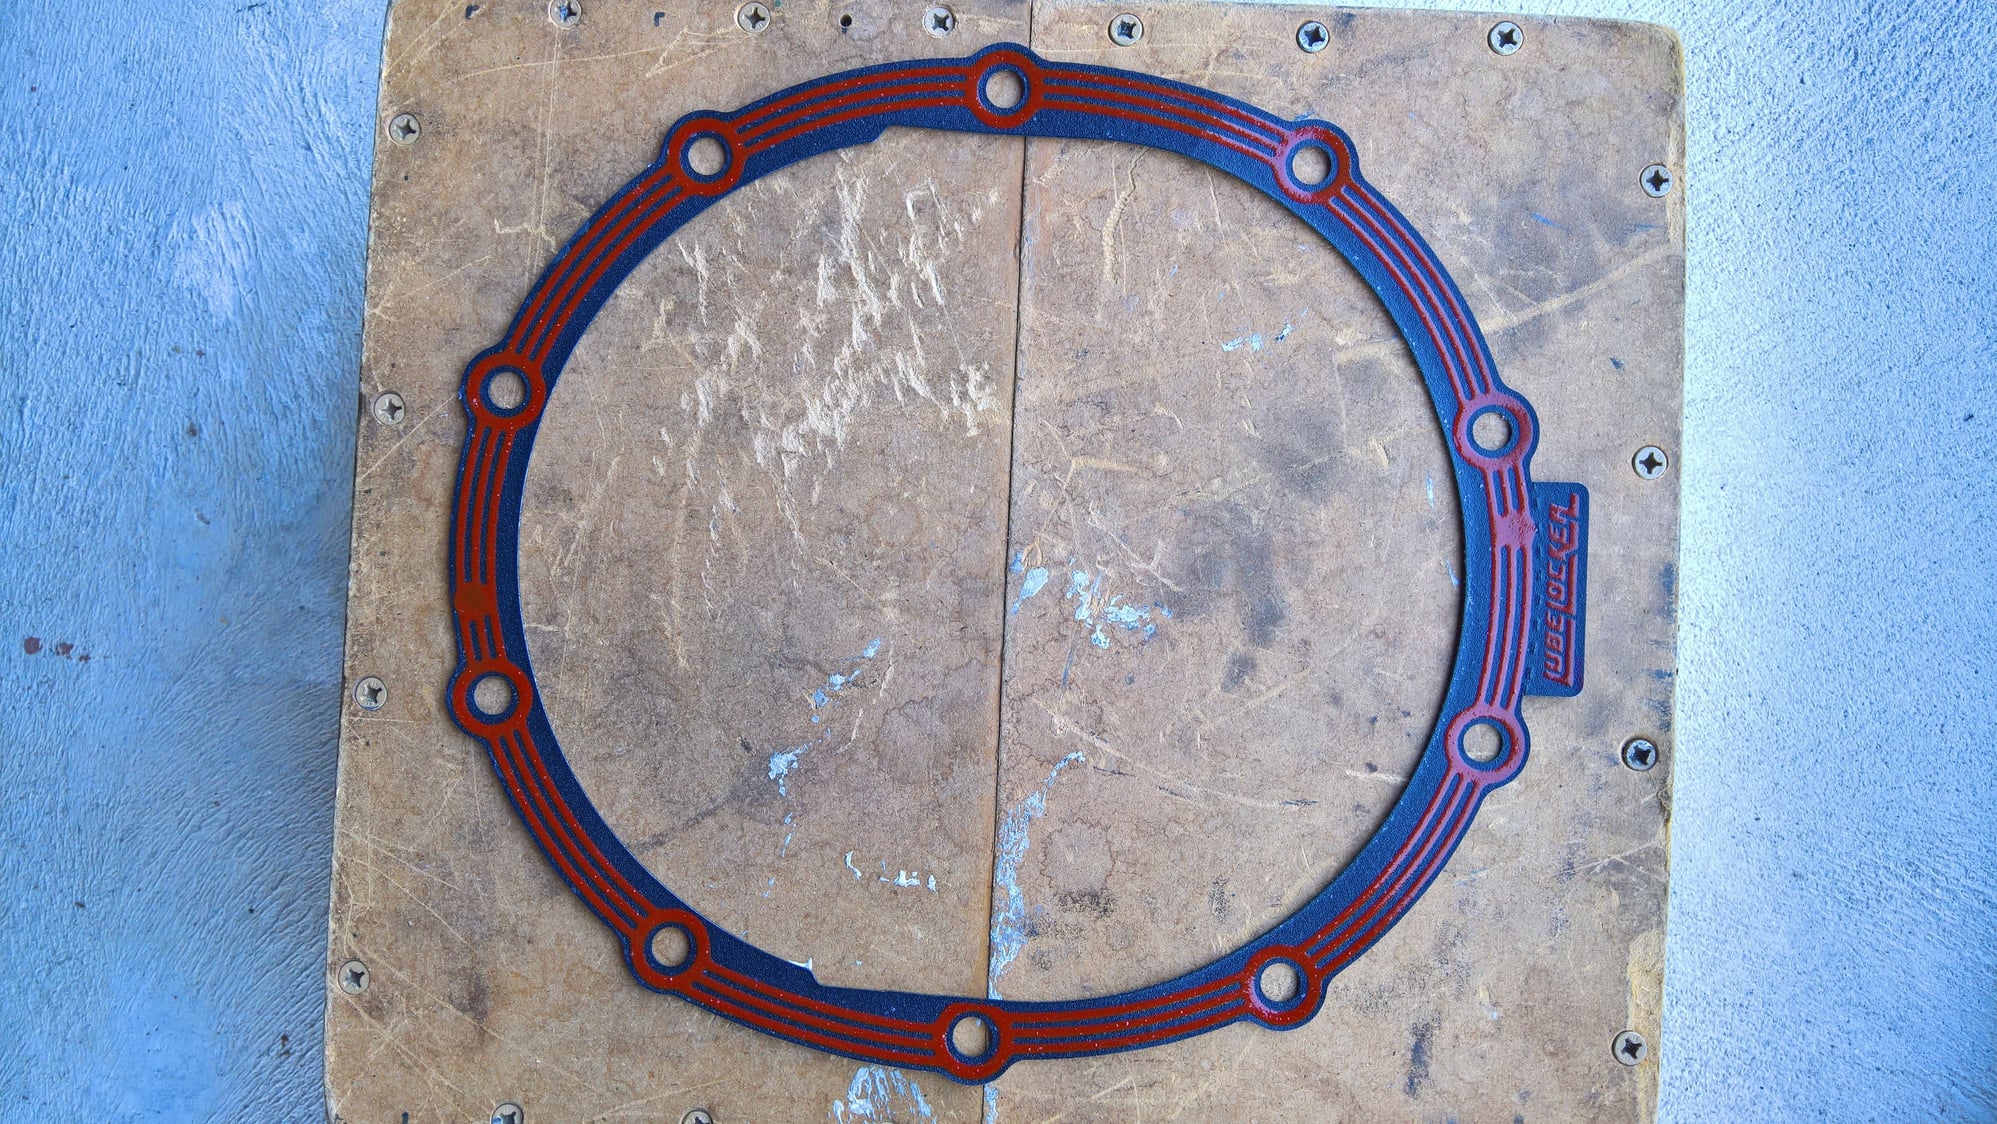
LubeLocker gasket was just a little over $20. They really should have installed one from the start.
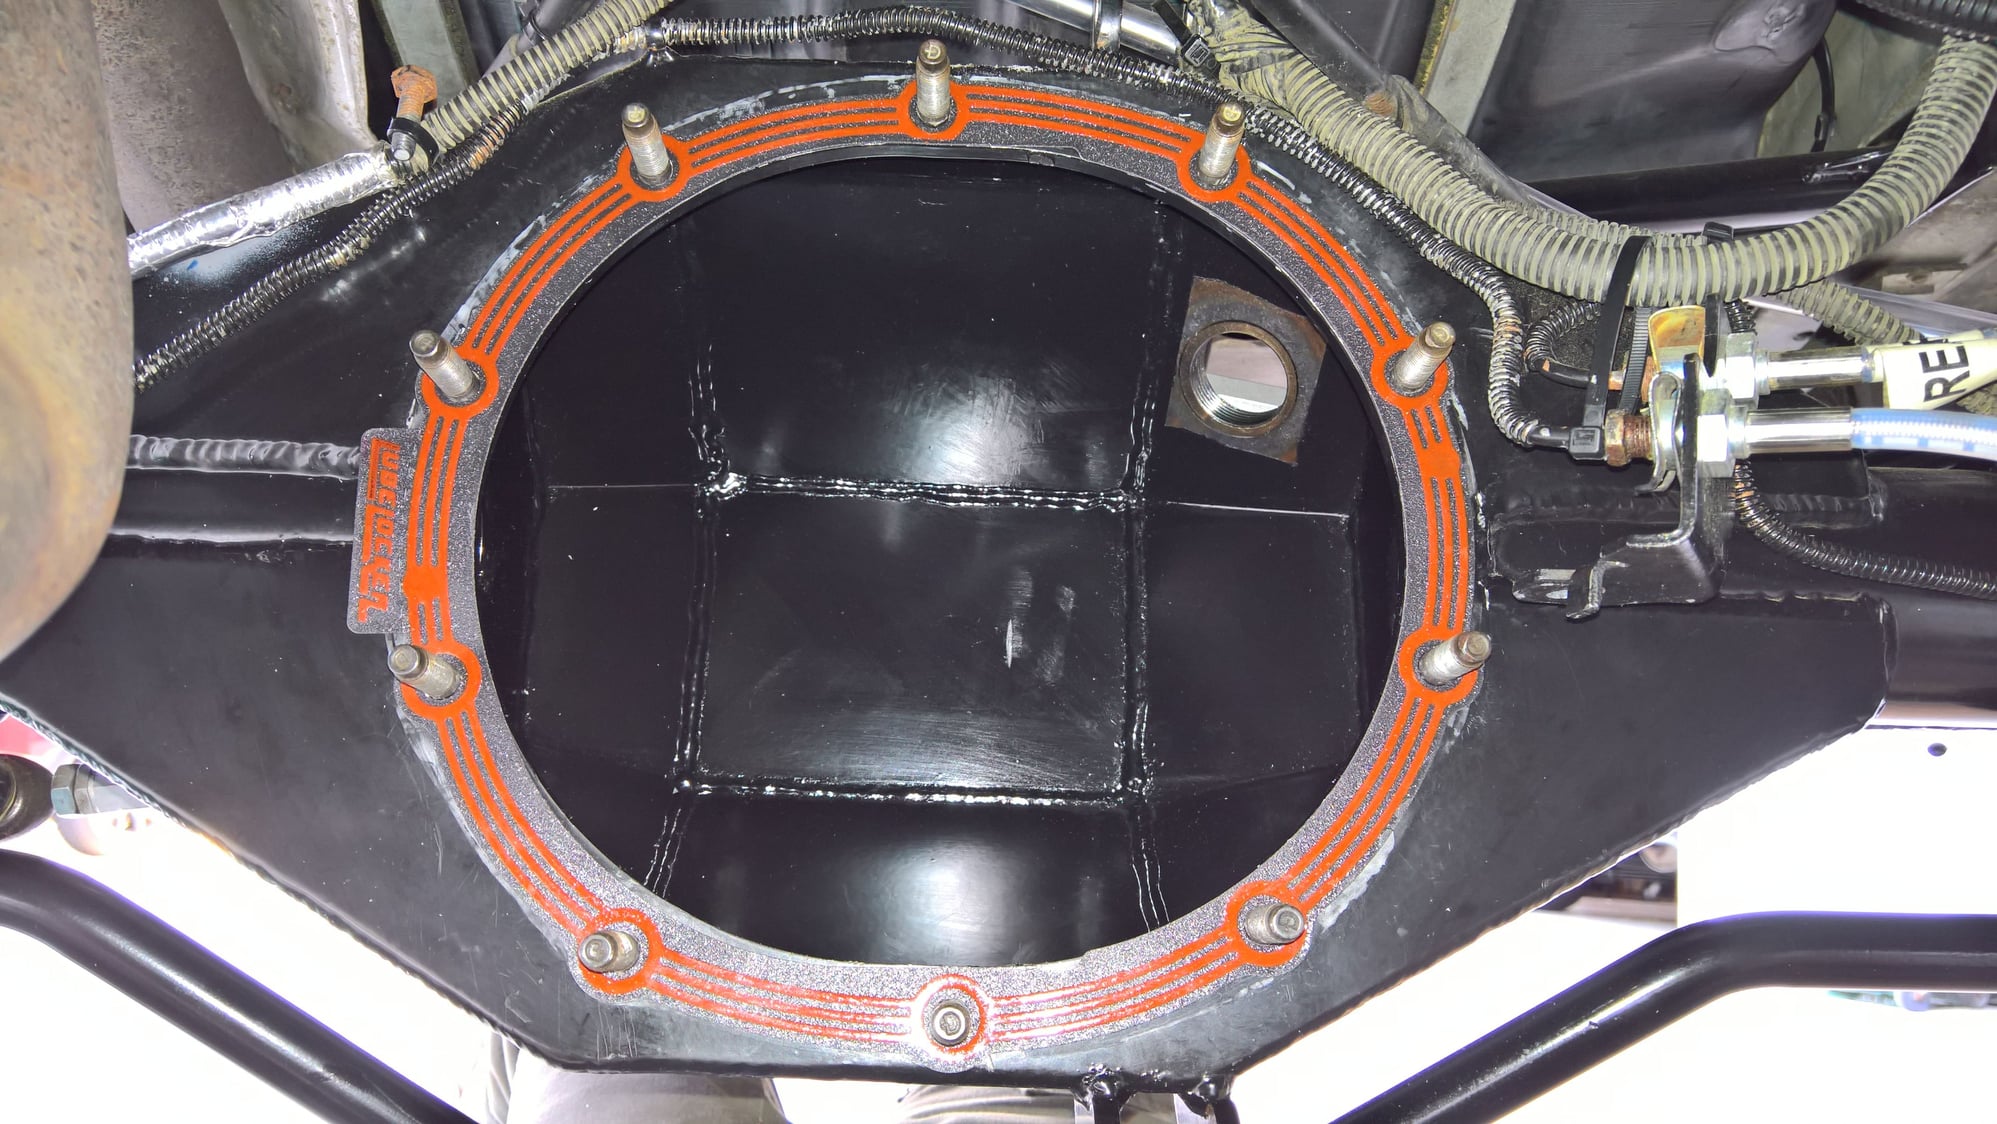
LubeLocker gasket installed. I also wiped out the inside of all metallic particles.
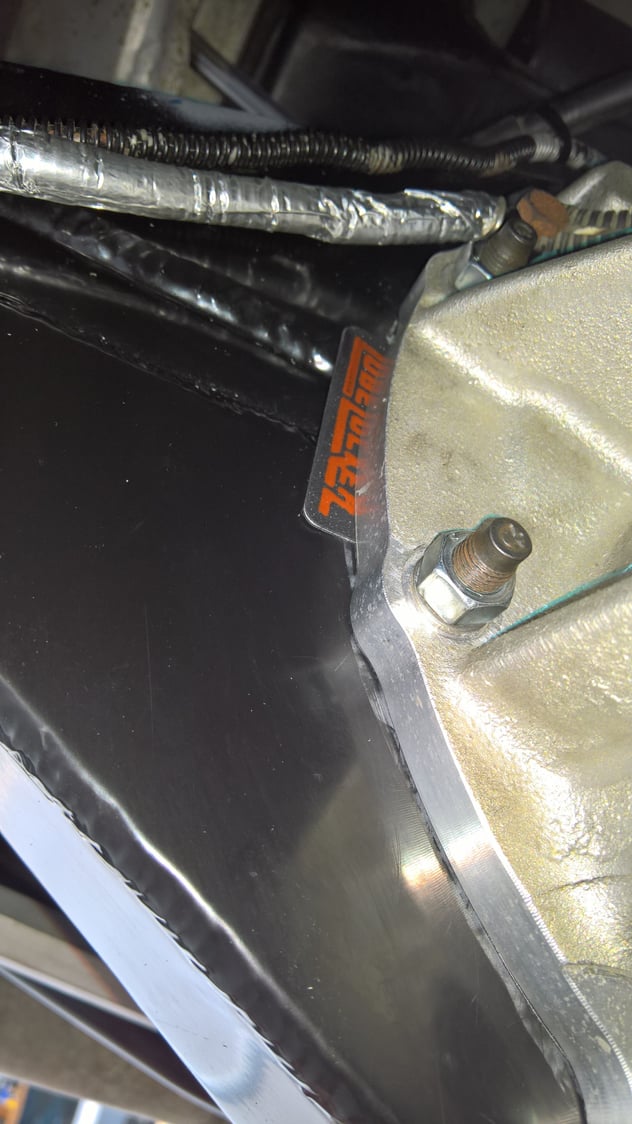
LubeLocker gasket was just a little over $20. They really should have installed one from the start.
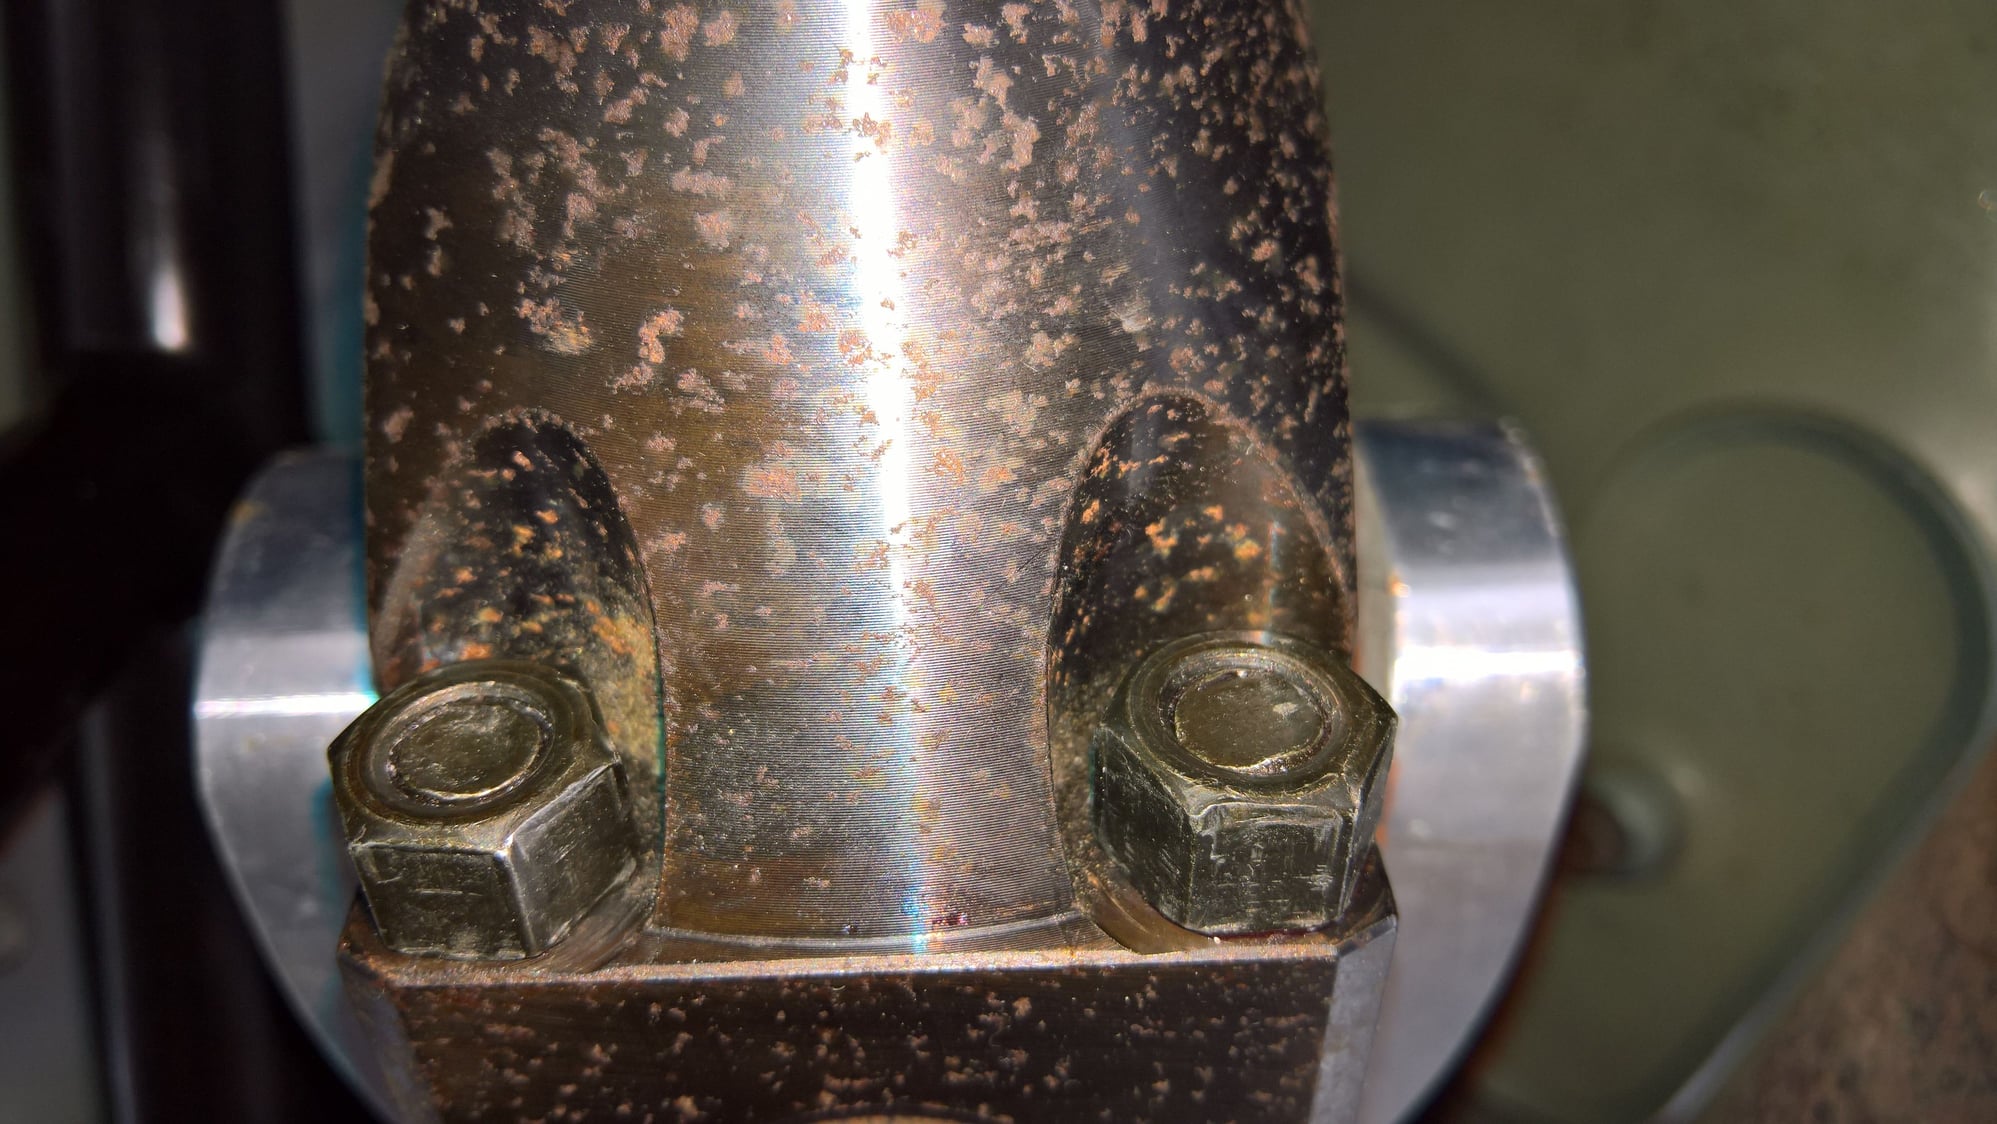
Driveshaft bolted back in with red Locktite again.
#107
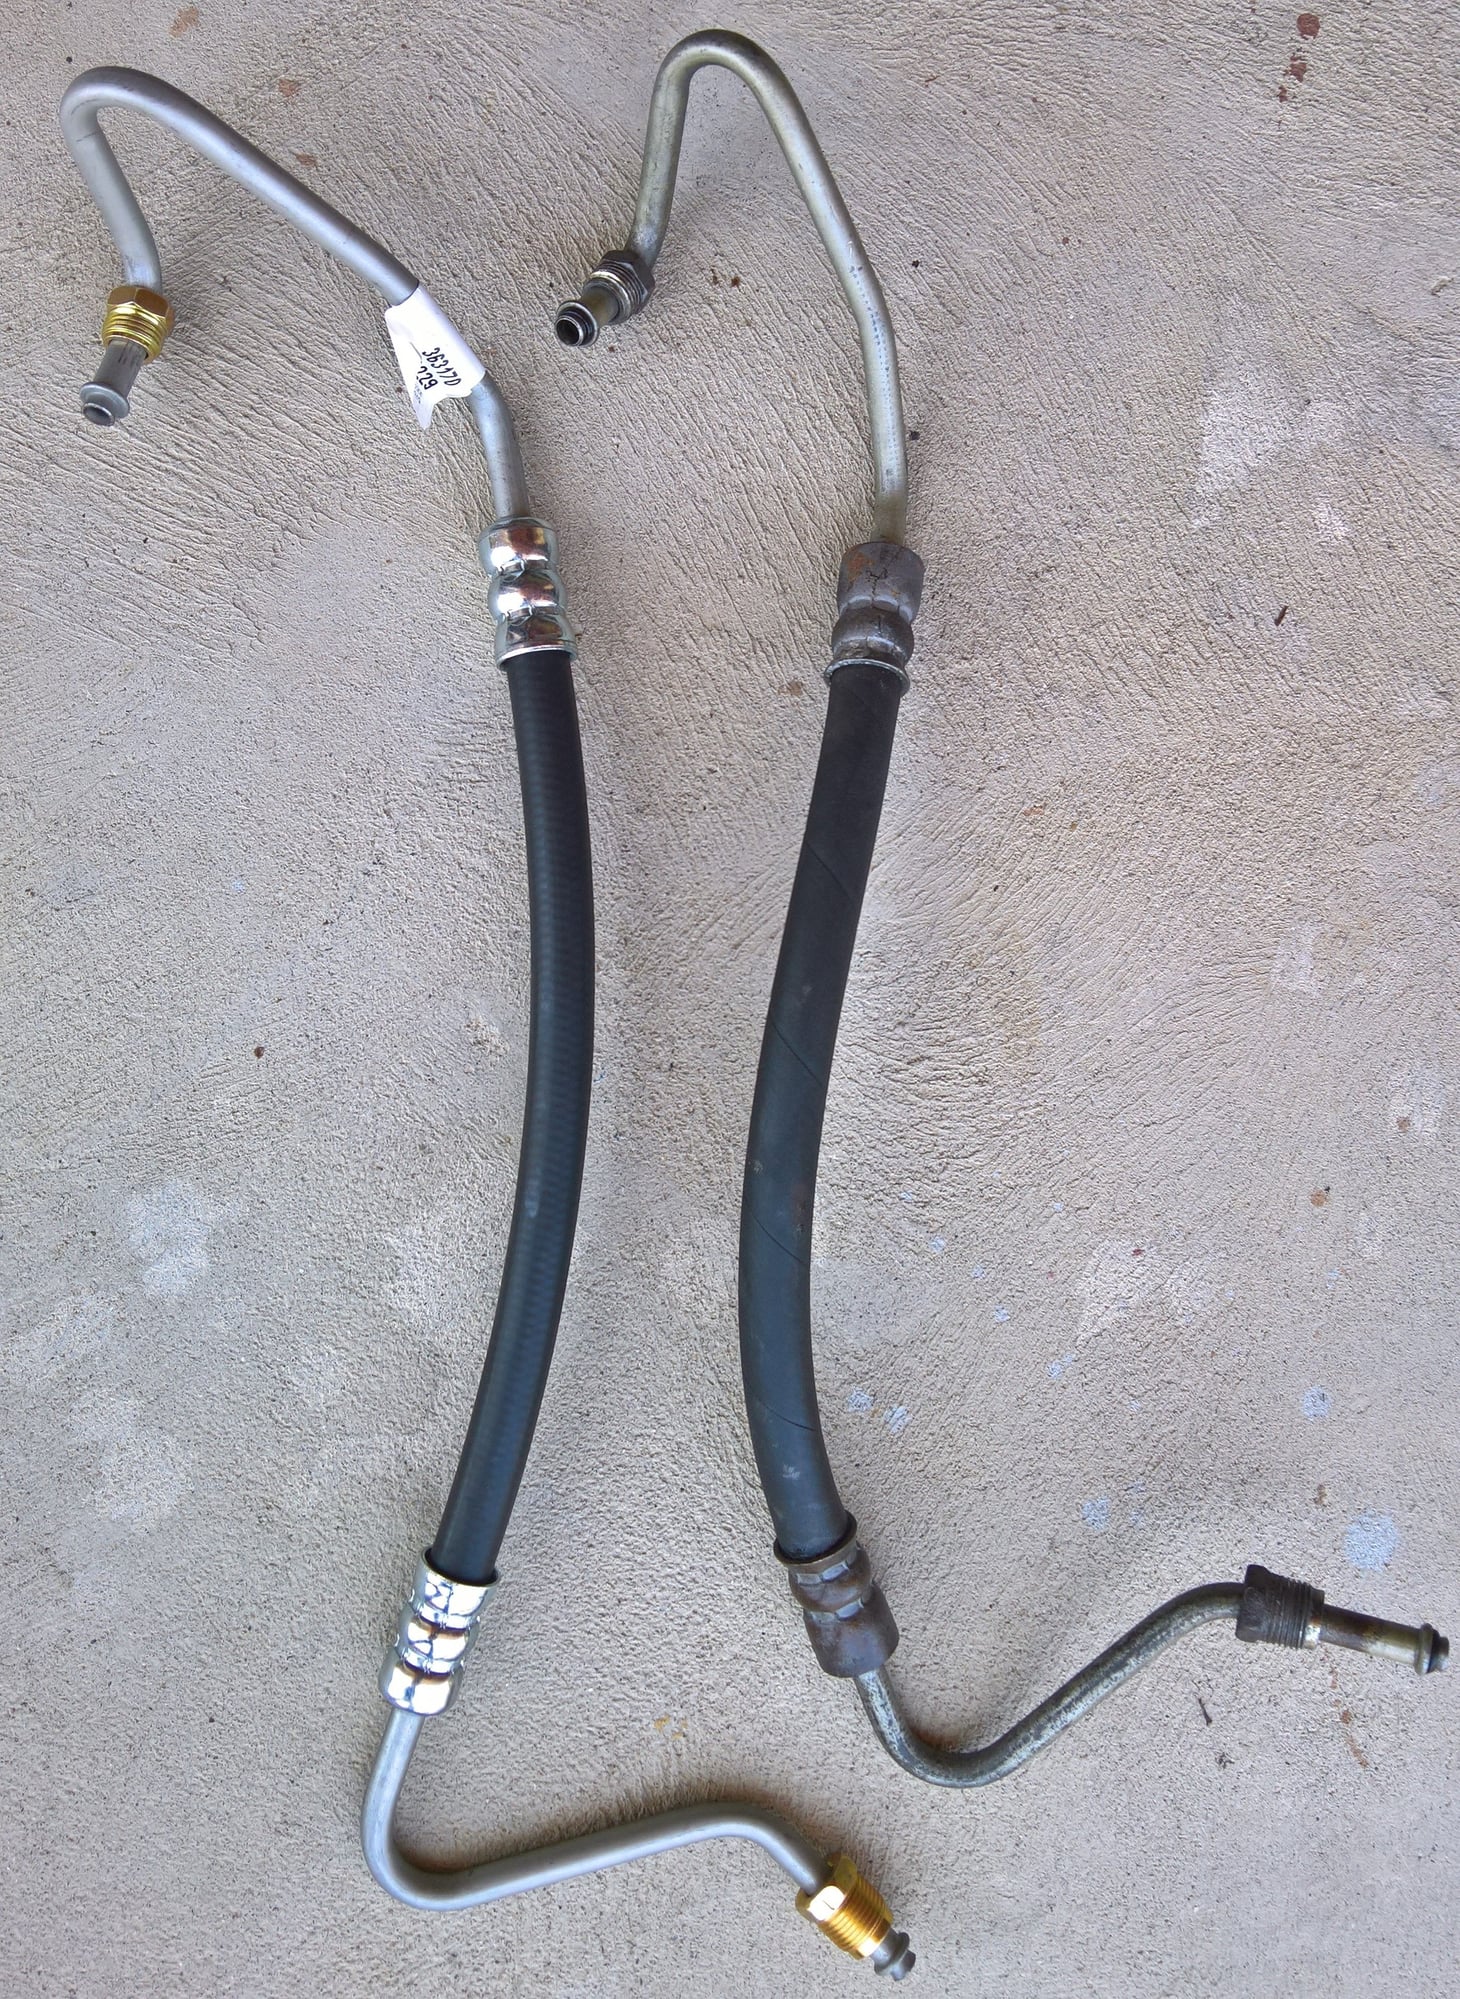
Fixed the oil leak by installing an all new engine, so the rear axle leaked. I fixed that, so of course the power steering had to spring a leak the next day. New OEM high pressure line on left, leaking one on right.
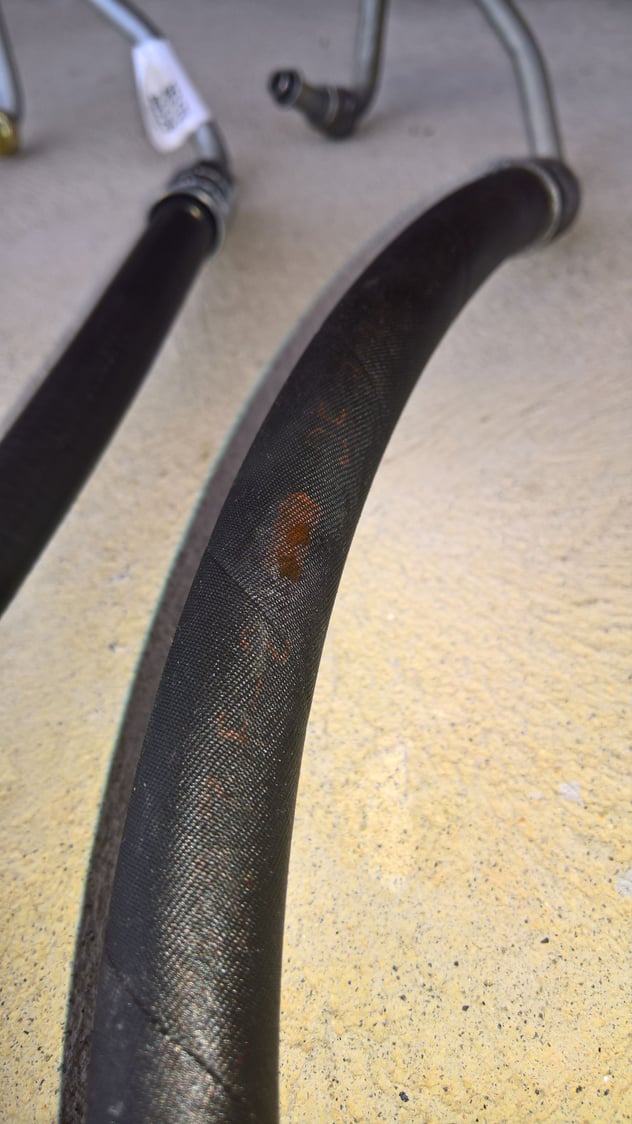
Leaking power steering line.
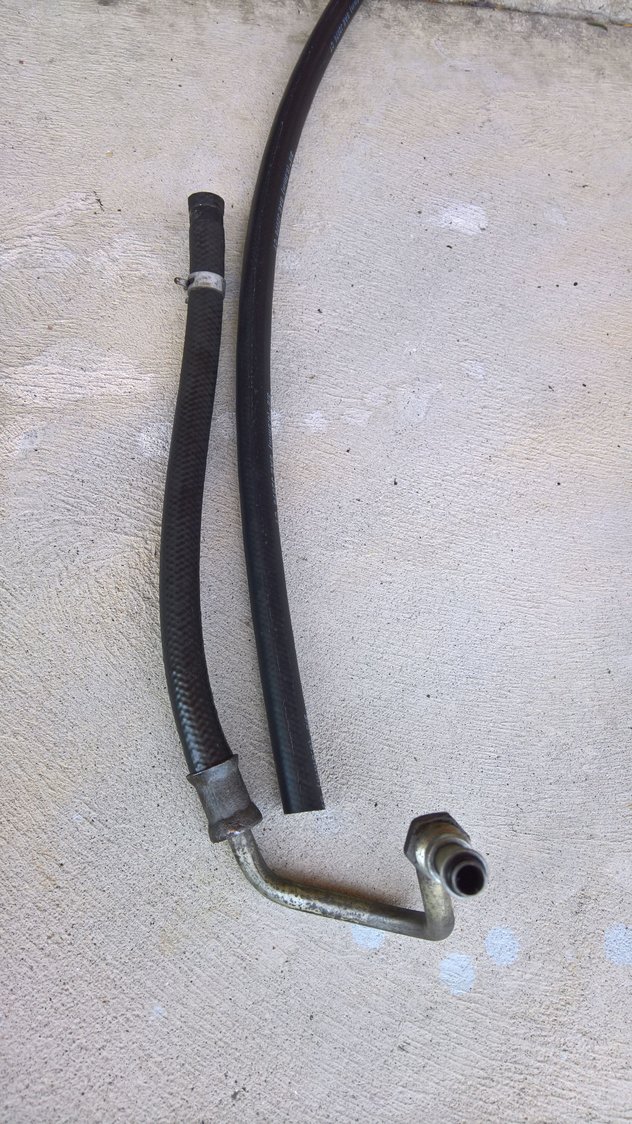
Power steering low pressure side is discontinued, so I made my own replacement as long as I was replacing the high pressure side.
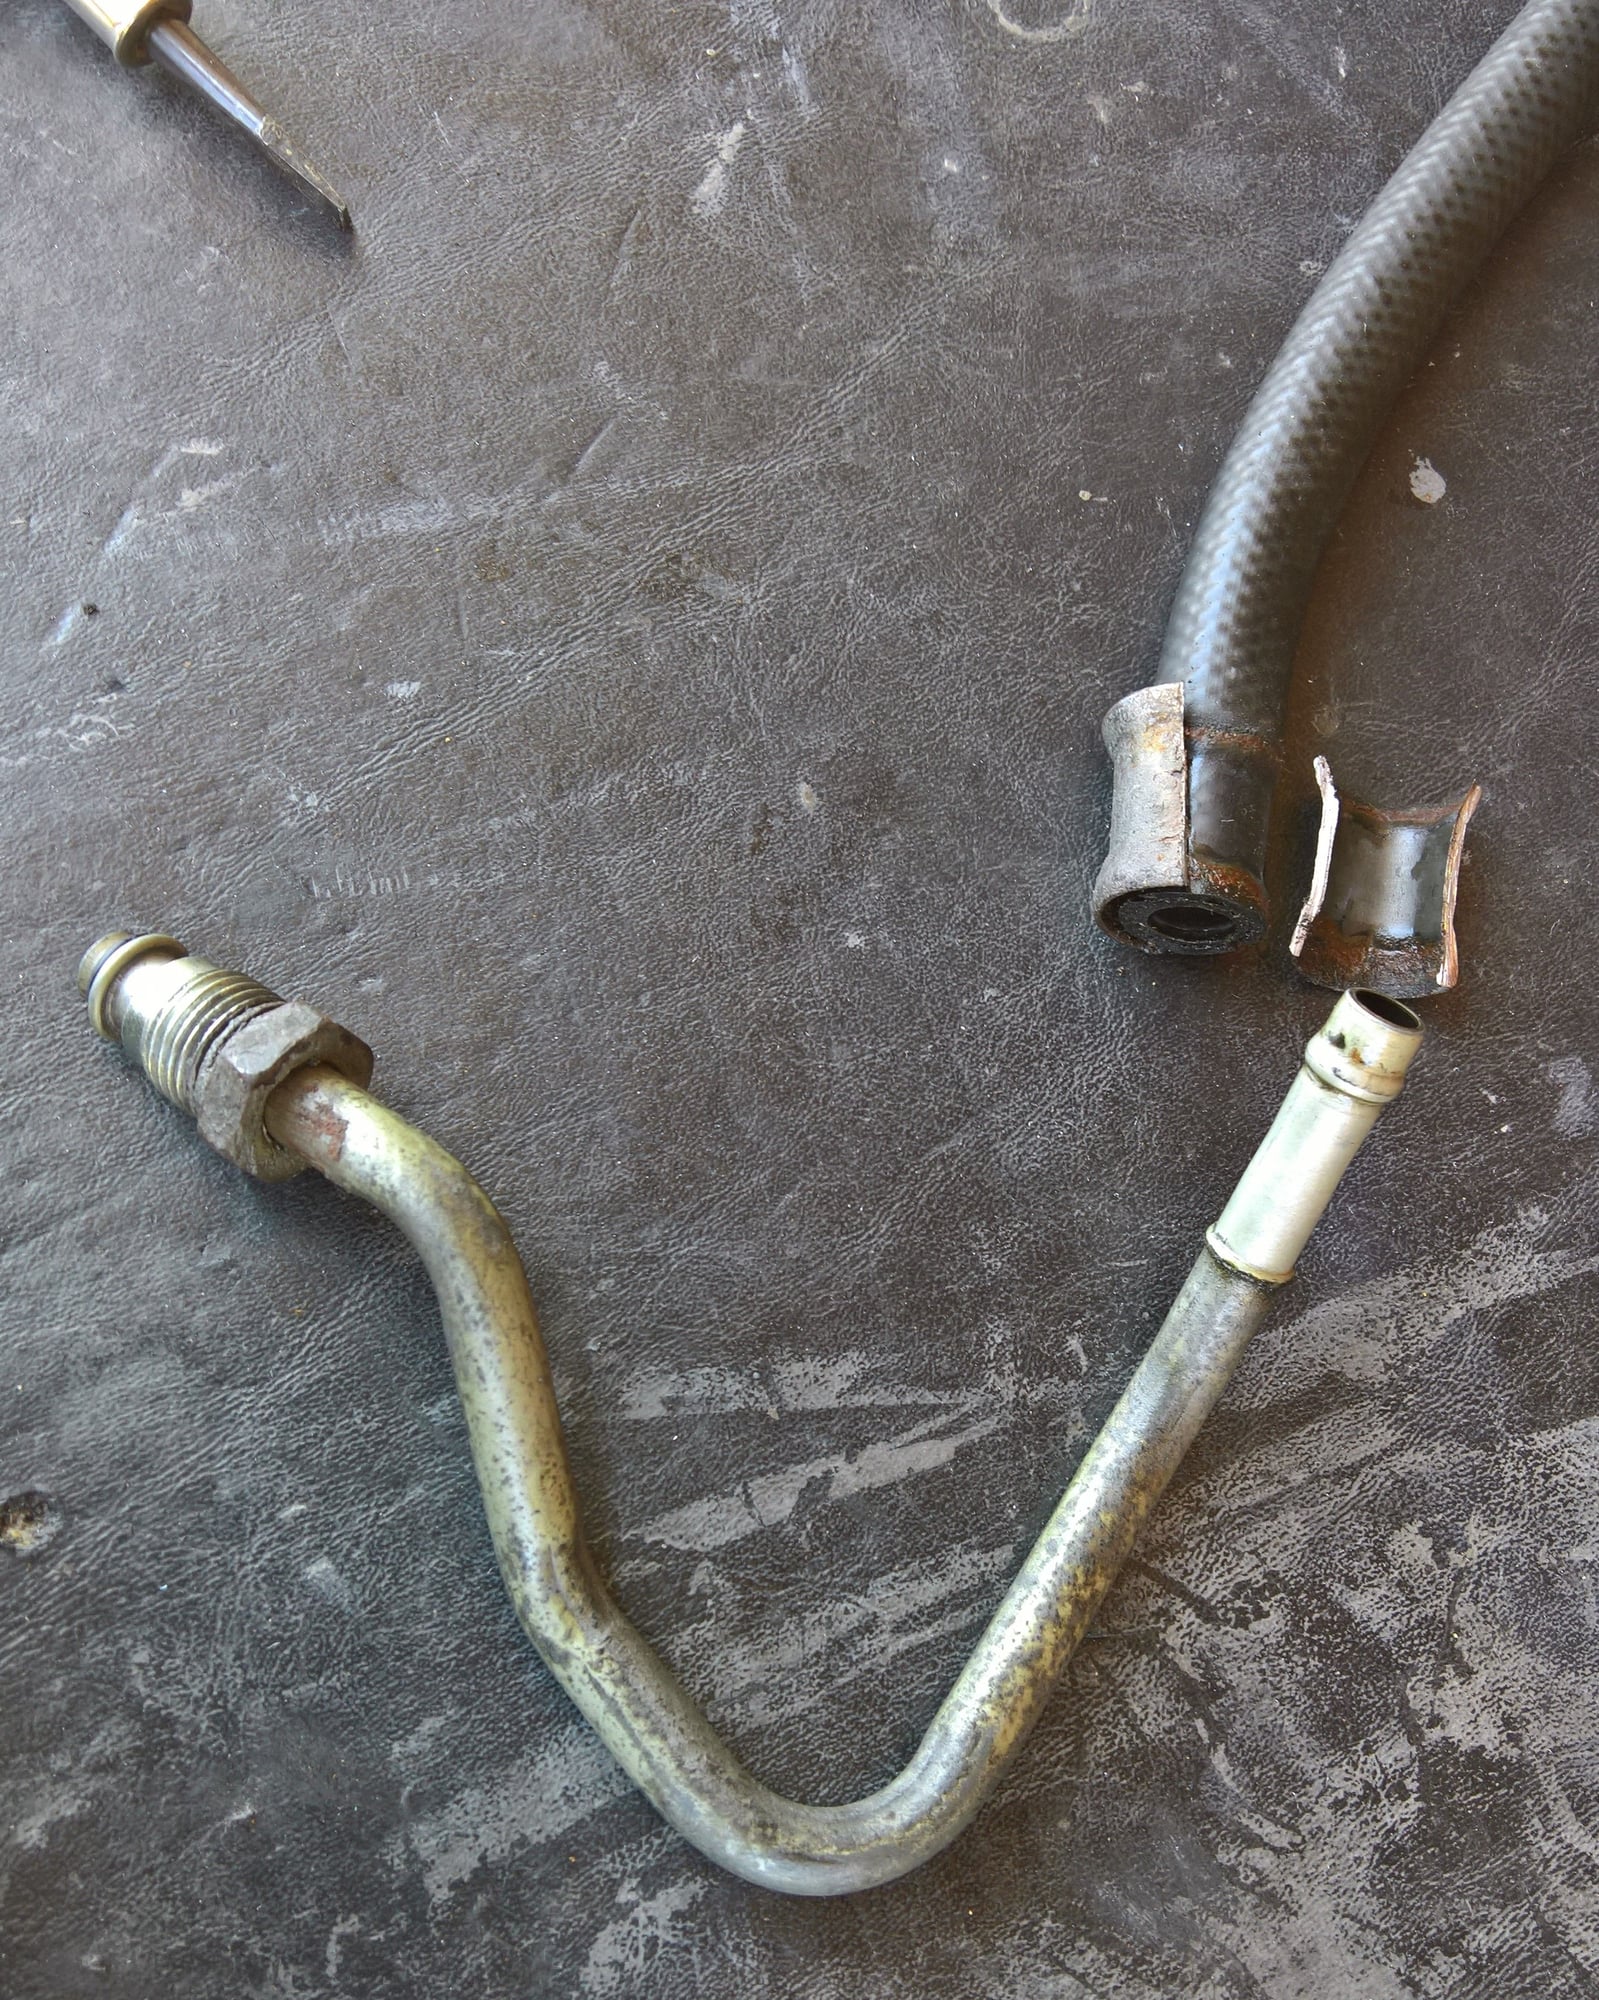
Power steering low pressure side is discontinued, so I made my own replacement as long as I was replacing the high pressure side.
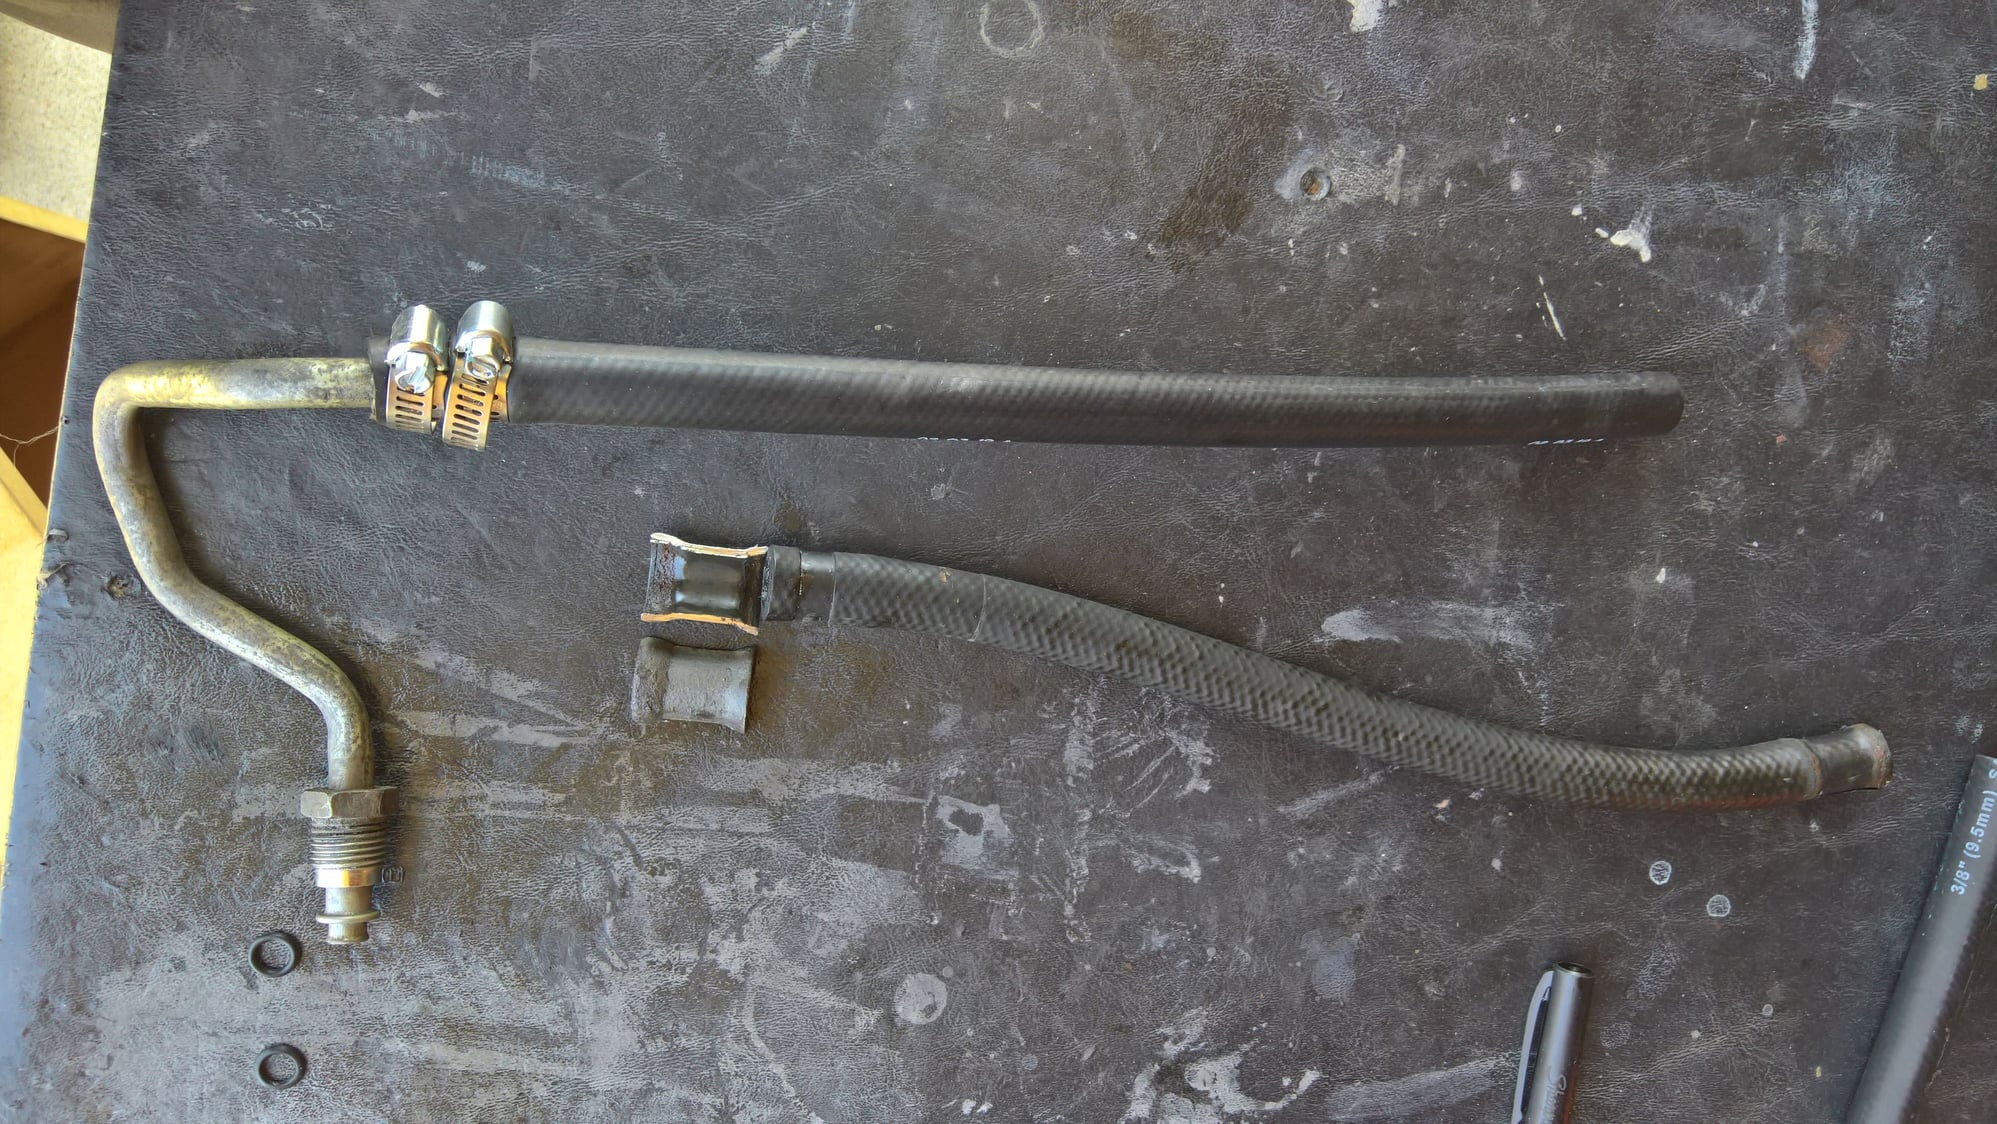
Power steering low pressure side is discontinued, so I made my own replacement as long as I was replacing the high pressure side.
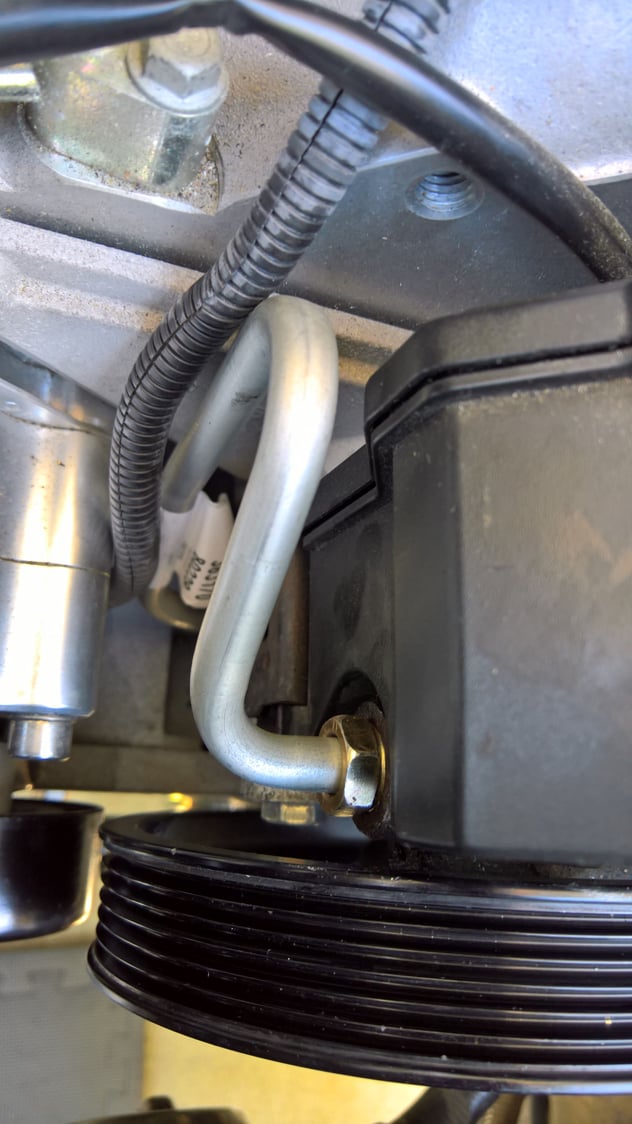
Power steering leaks fixed!
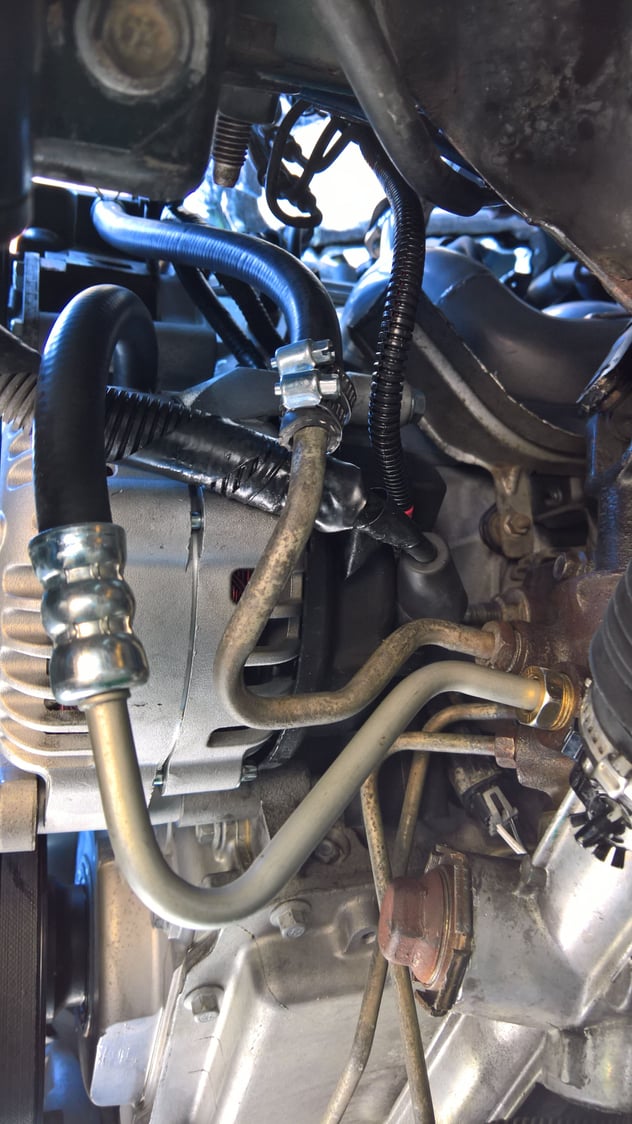
Power steering leaks fixed!
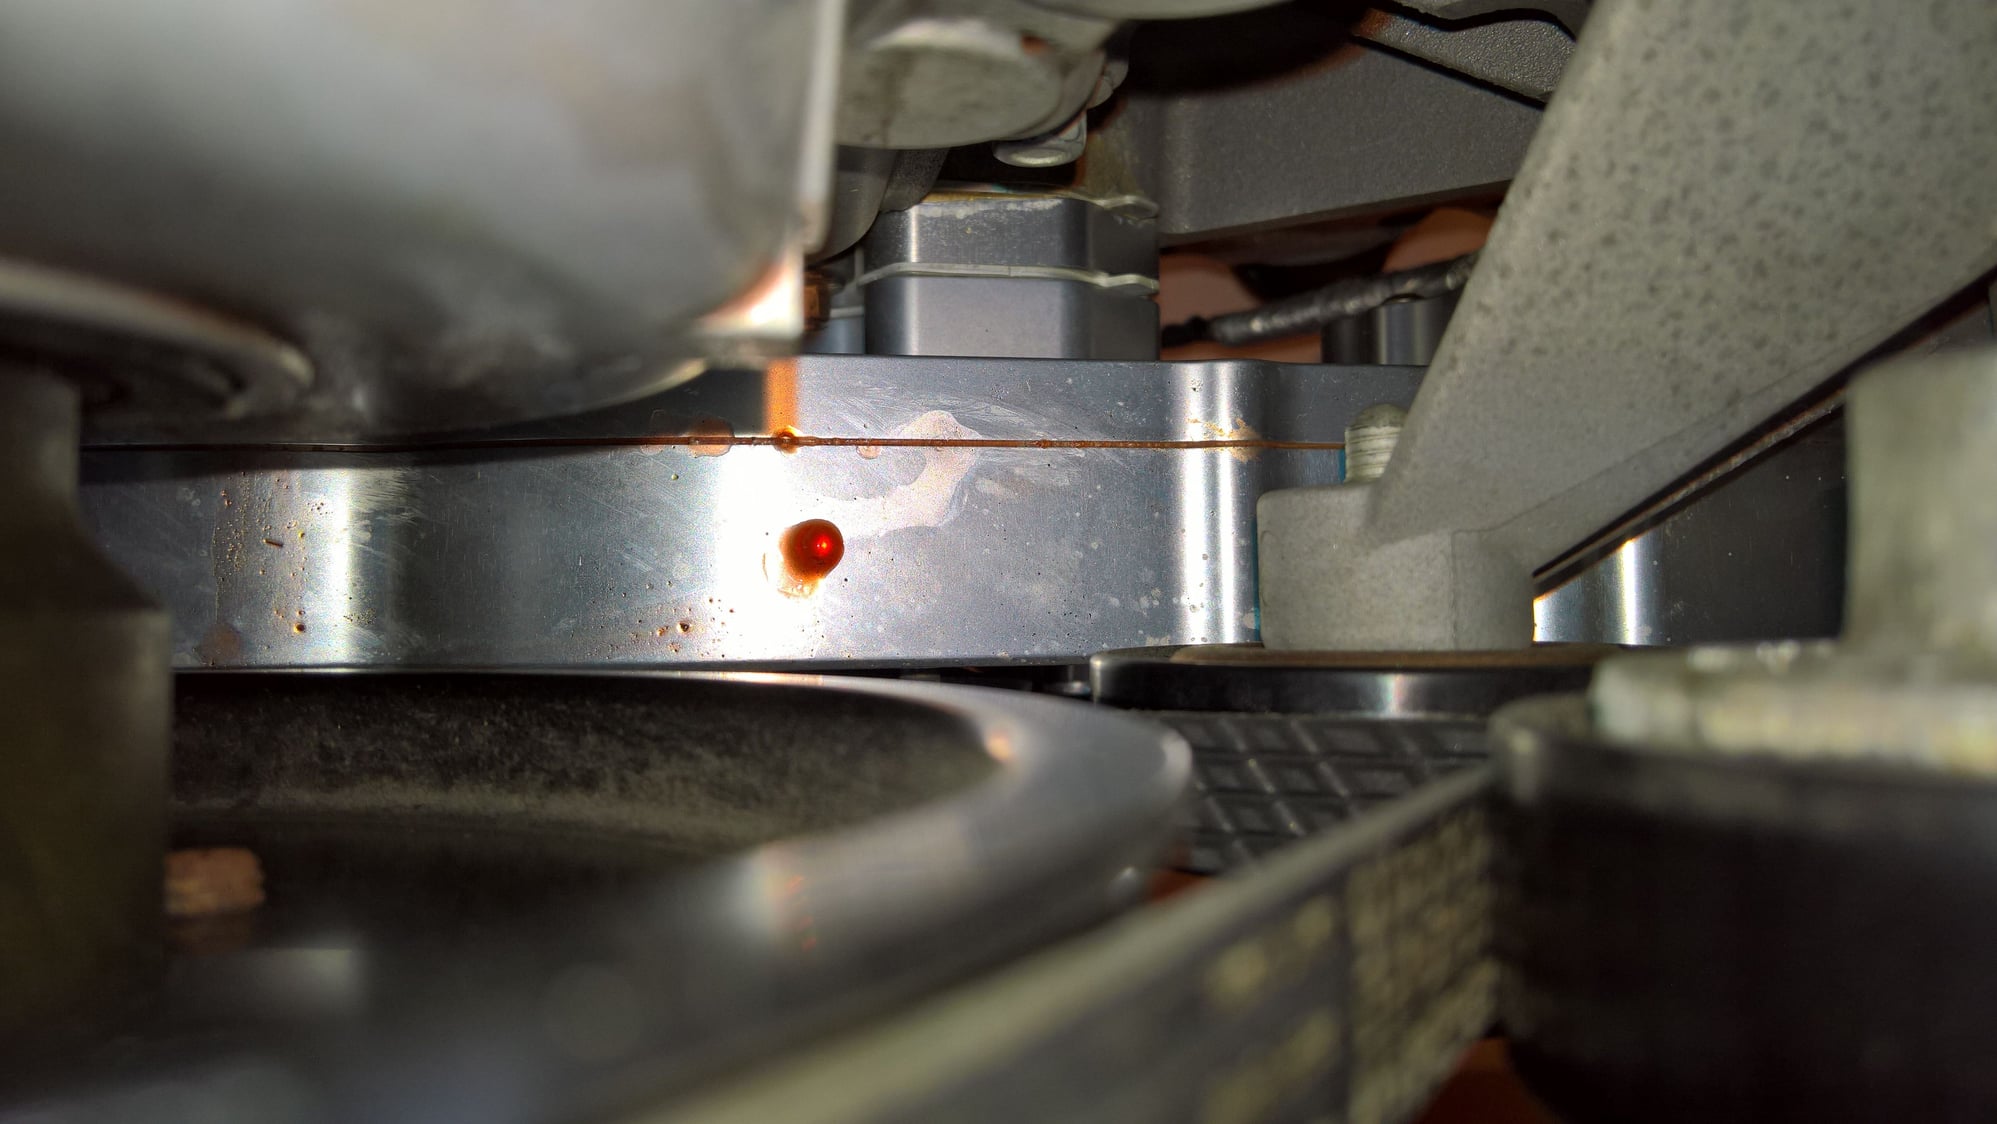
So of course, now that the power steering leak is fixed (and the rear axle leak, and the oil leak), the brand new Meziere electric water pump is leaking. Hopefully they will stand behind it, even though I bought it 3 years ago.
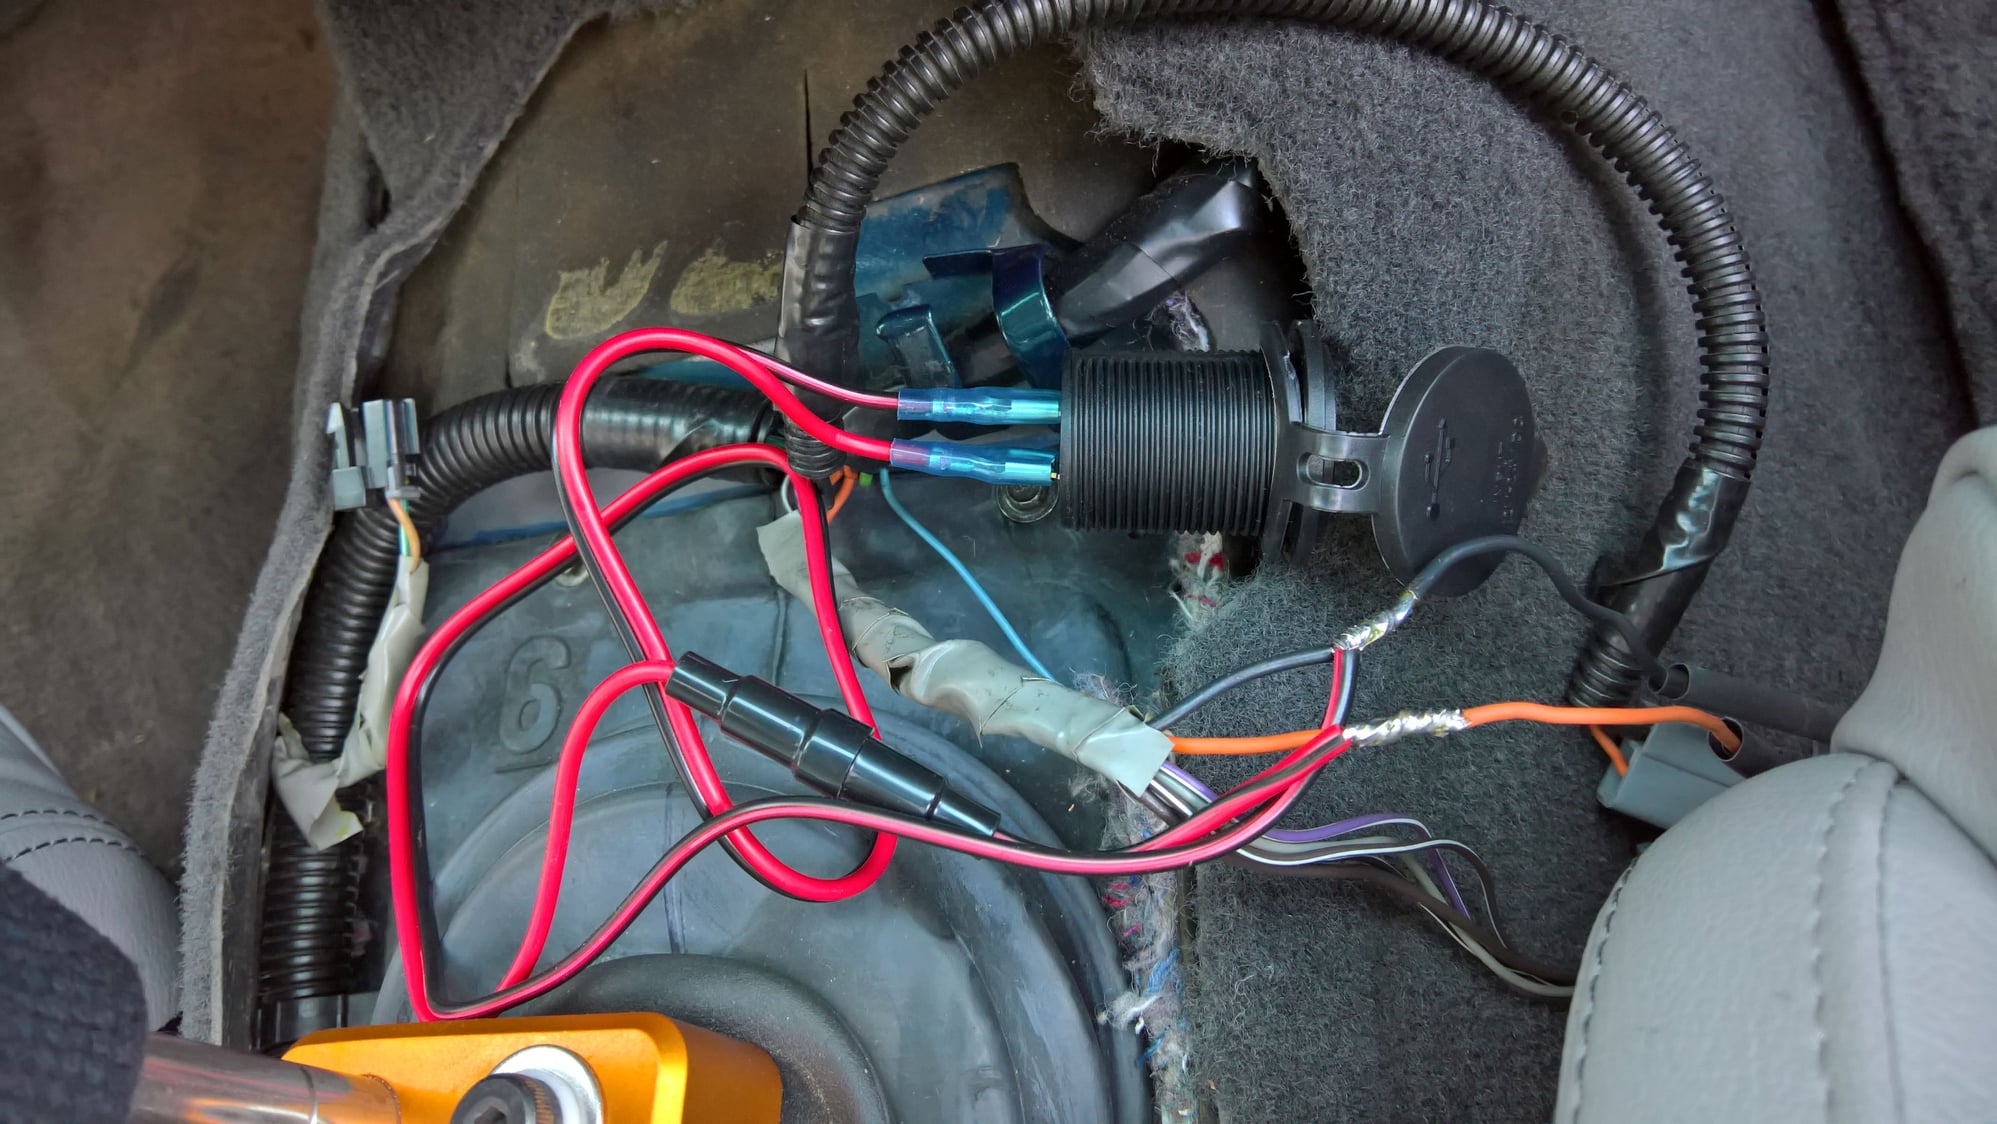
Soldering in auxiliary USB ports with a voltage readout.
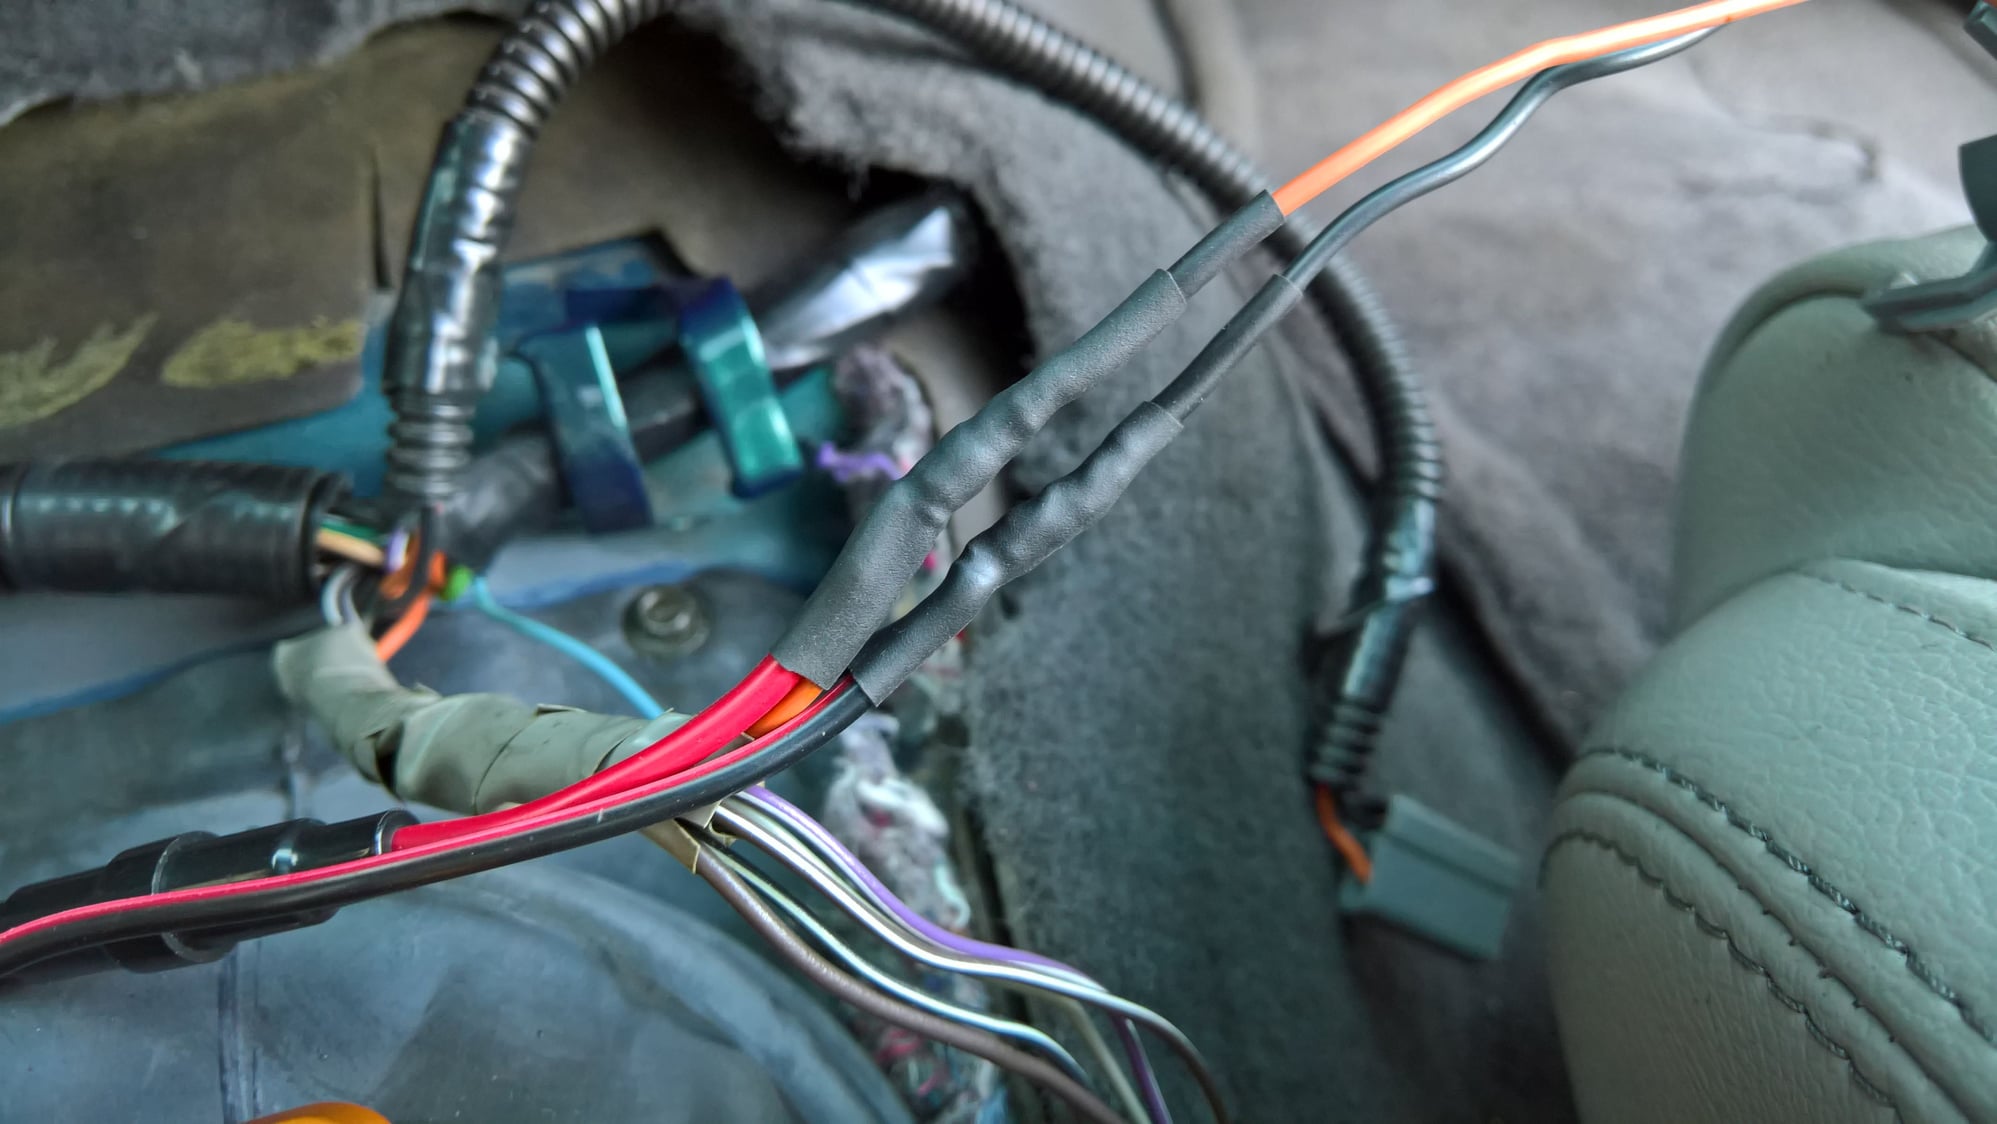
Soldering in auxiliary USB ports with a voltage readout.
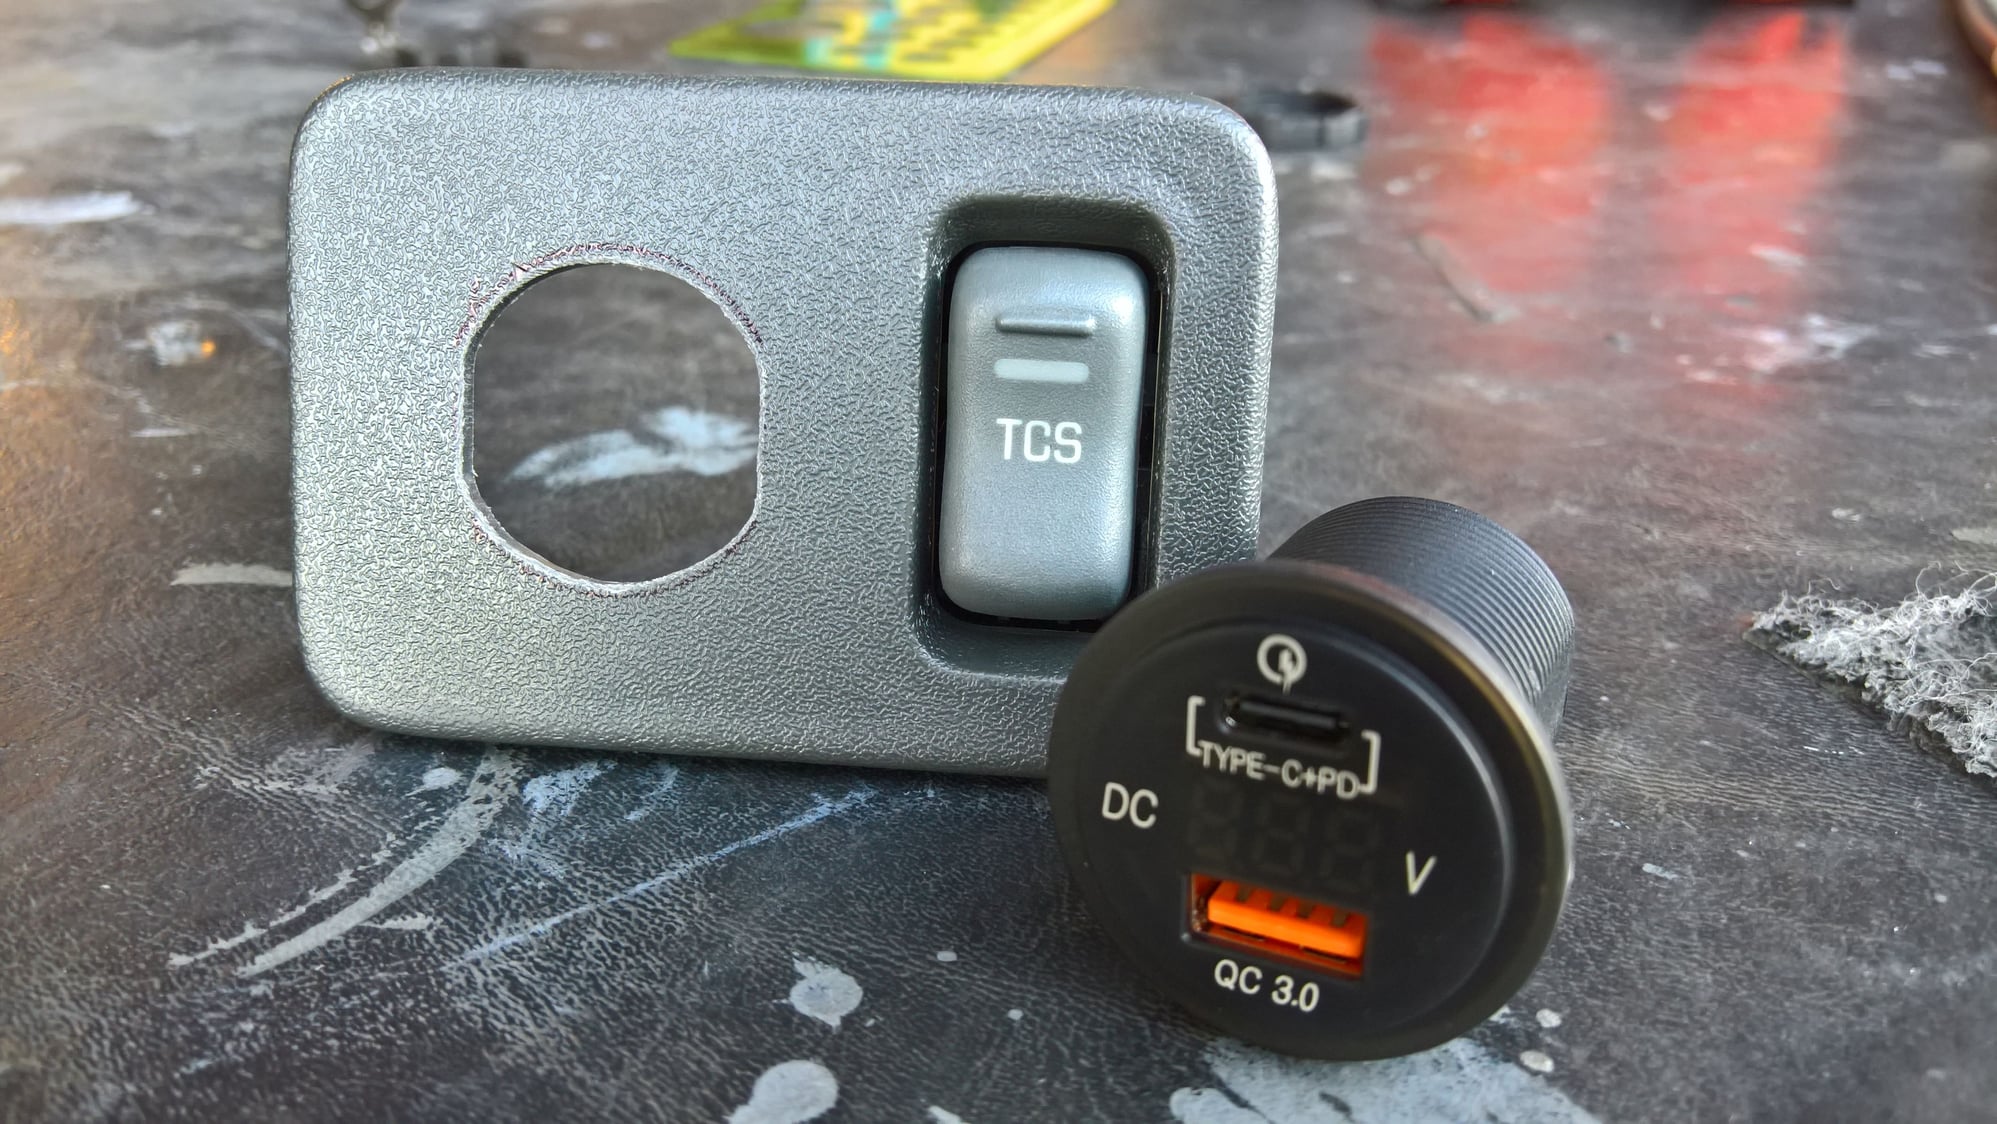
Soldering in auxiliary USB ports with a voltage readout.
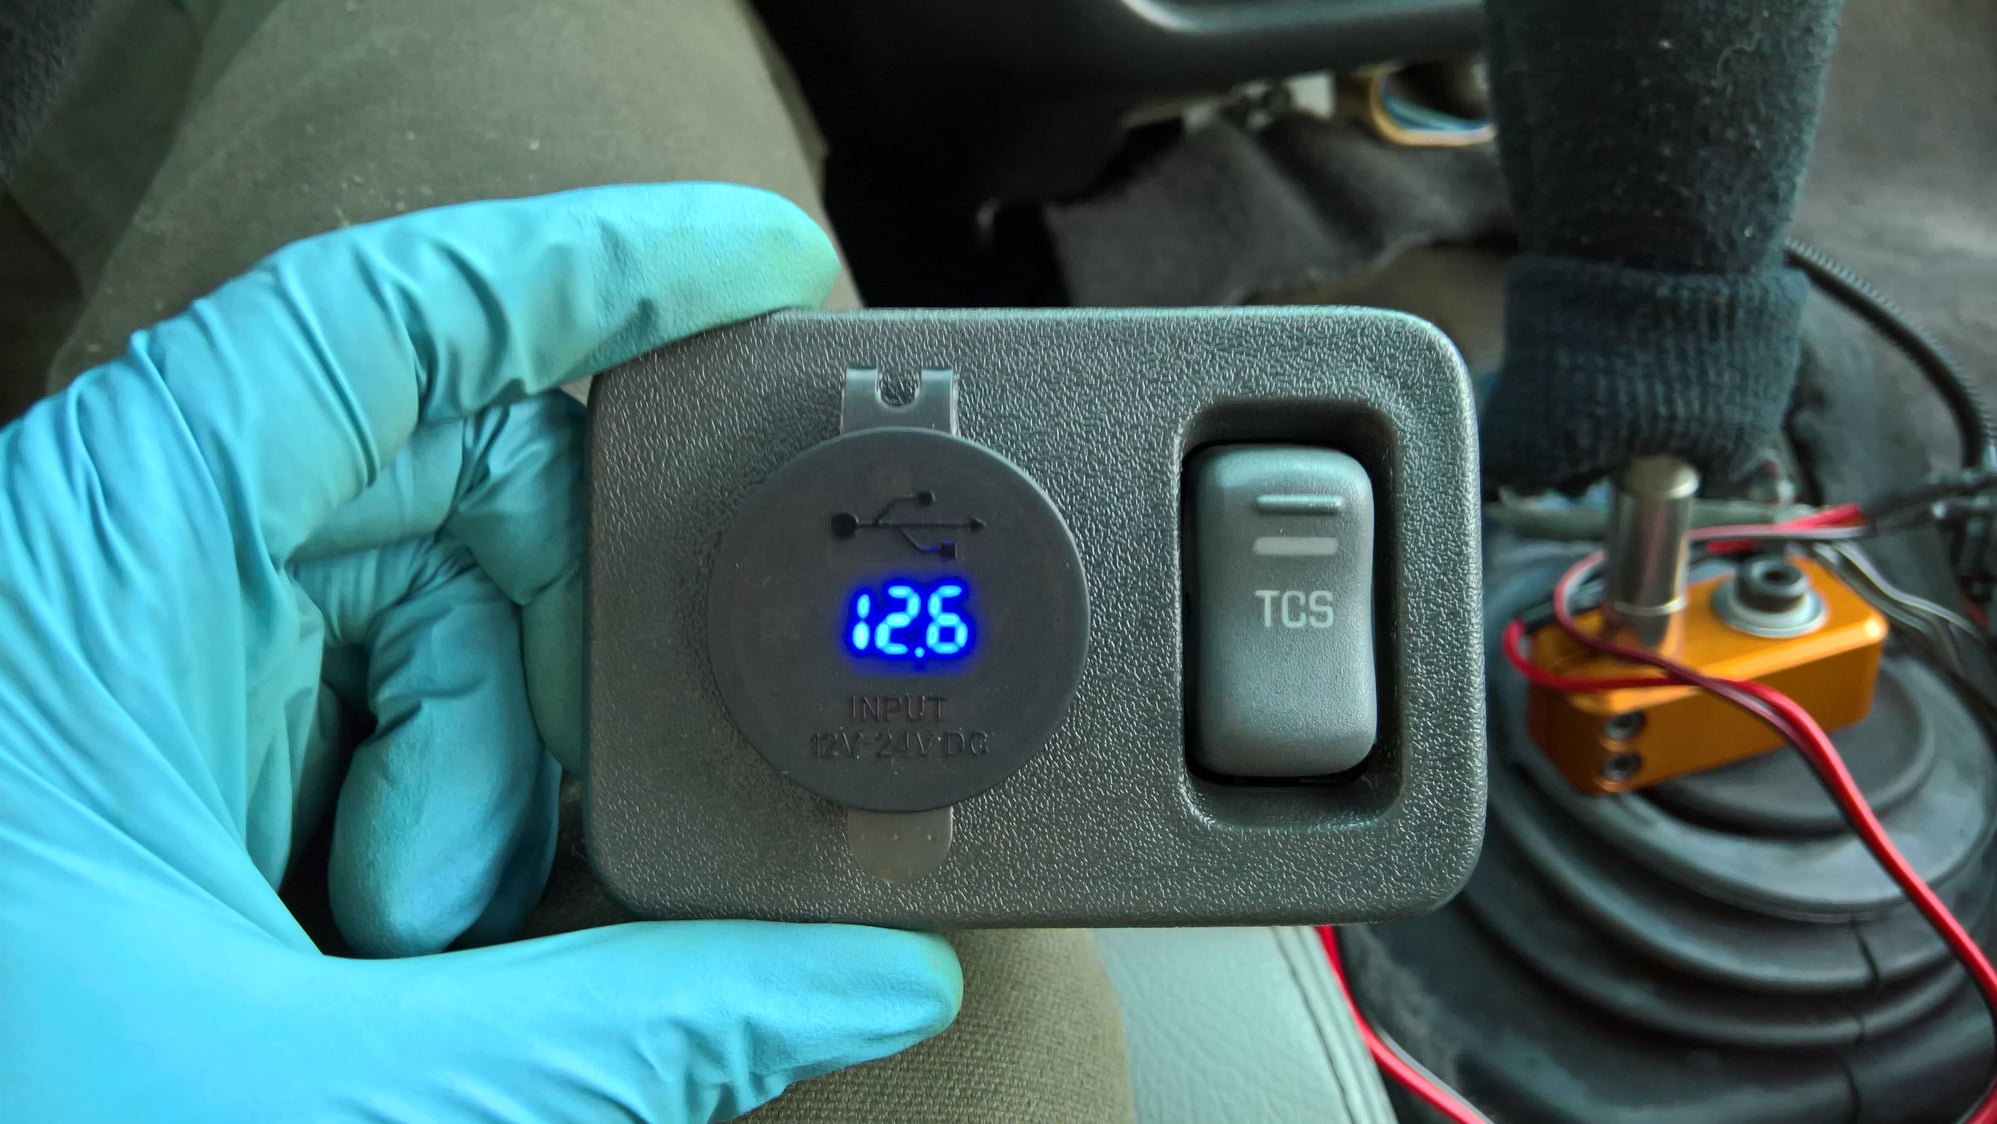
Soldering in auxiliary USB ports with a voltage readout.
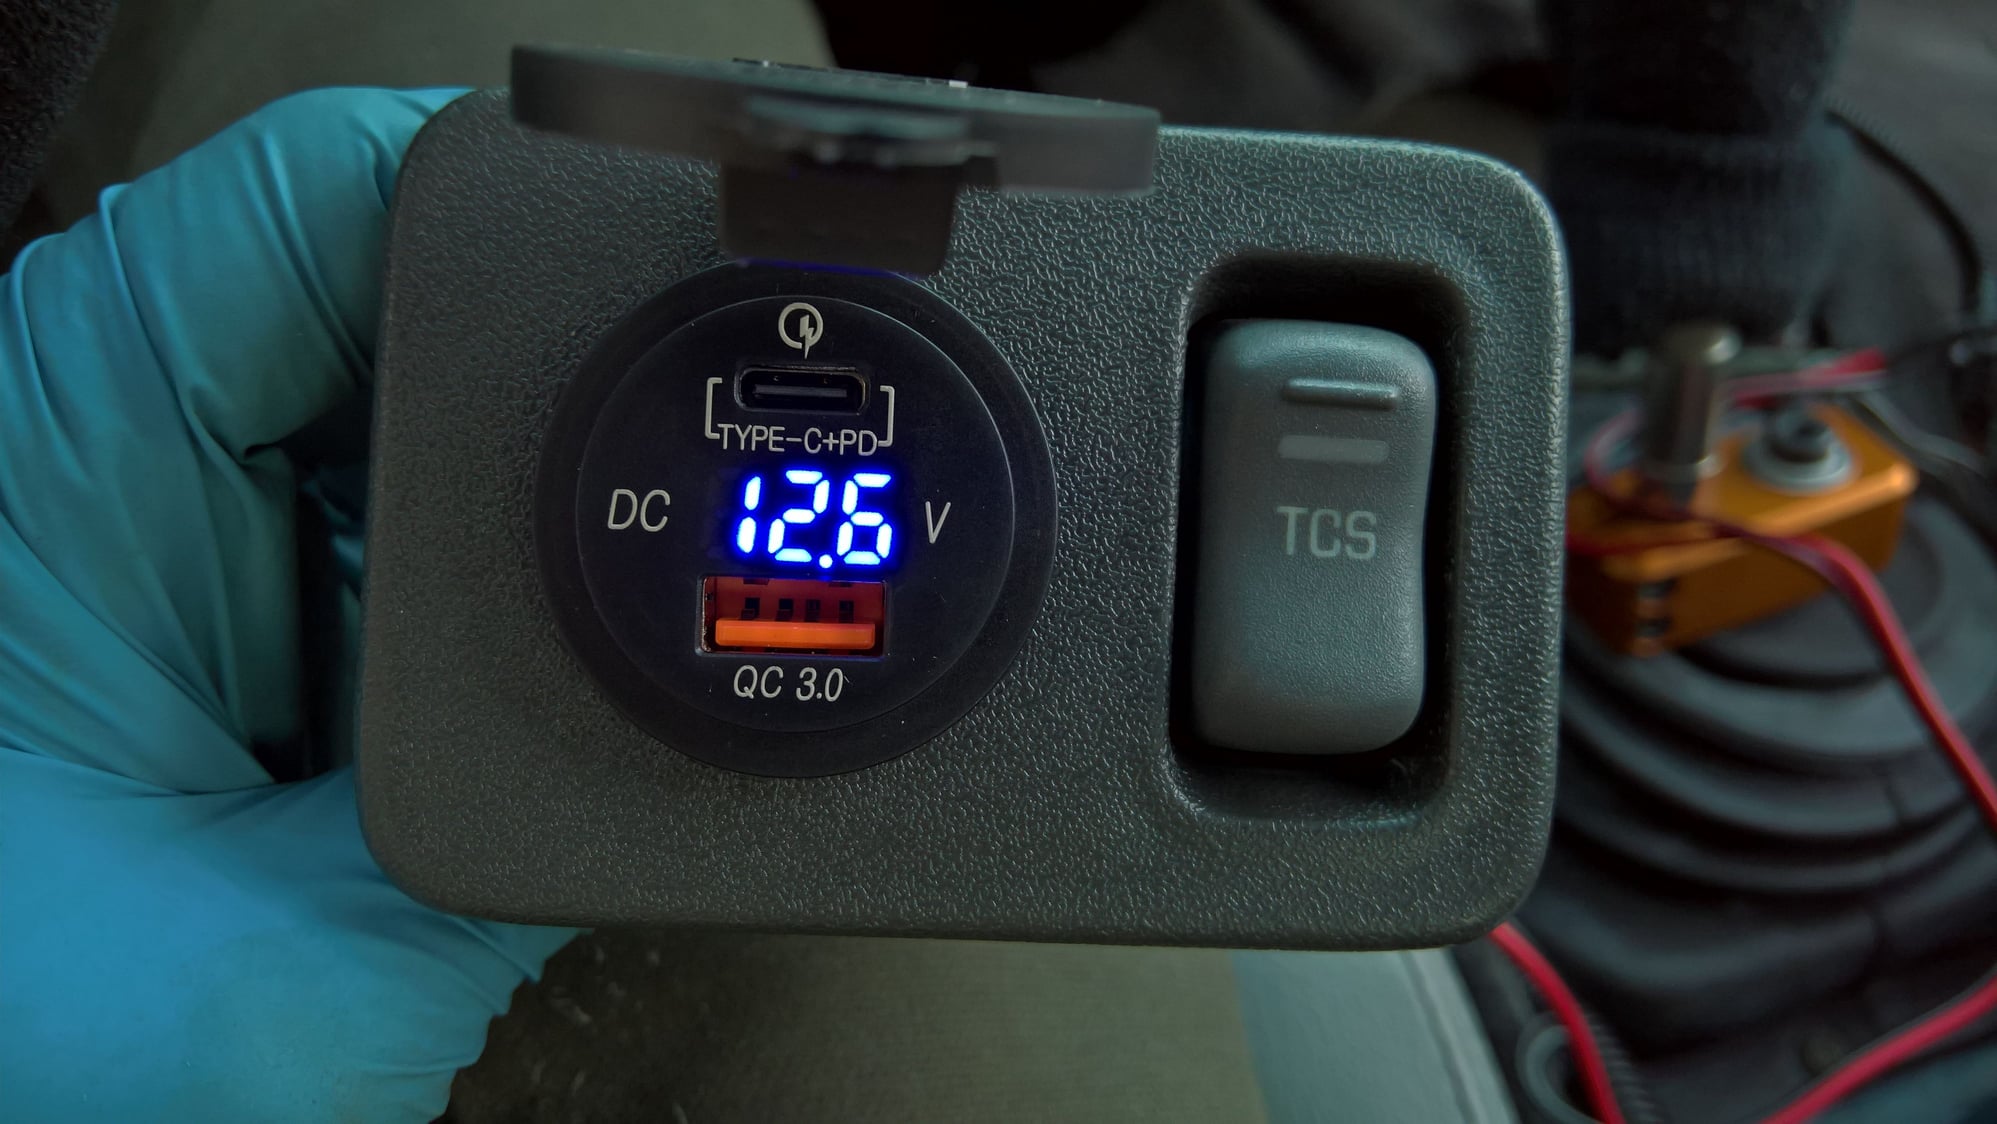
Soldering in auxiliary USB ports with a voltage readout.
#108
In addition to what you see above, I have had the A/C system recharged. It doesn't seem to be quite as strong as I remember. I don't know if that's from extra heat in the exhaust system due to burning more fuel (engine actually runs cooler with the electric pump and 3-core radiator, plus fans set at lower temps), from inadequate charge, the quality of the R-134a, or perhaps a duct issue, like the blend door not closing off heat fully.
As you can see, I reached the 500 mile break-in period, so I can drive it more aggressively now. I have definitely had it up over 4K RPM, but usually by that point, my attention is focused on the road and not the tach.
I have made a few attempts to get an alignment and pinion angle adjusted, but the shop I usually go to for that kind of stuff has been backed up. I will give them a call tomorrow. I also called Meziere about the water pump leaking last week, but they did not call me back, so I have to call again. Either way, I am going to have to drain all coolant to get the thing off.
I replaced the hatch latch with a newer 1999+ unit, as the stiff suspension was bouncing my hatch around with some annoying vibrations and even set fairly low, it still rattled. Plus, the hatch would not open half the time without me lifting on the spoiler simultaneously. I've pulled 2 1993-1998 latches from junk yards, and they all do this. The newer one works much better, but the one I got has a bad sensor in it, so I have to find another used one.
I also bought a new parking brake handle, as mine rattles side-to-side and it drives me nuts. There is also a little metal piece at the base that hits a pin when you lower it, and it rattles against the pin when down. I hope that the used replacement doesn't do this. I'm still waiting on delivery of that one.
The following users liked this post:
eb110americana (09-15-2019)


