When you click on links to various merchants on this site and make a purchase, this can result in this site earning a commission. Affiliate programs and affiliations include, but are not limited to, the eBay Partner Network.
I've been working on a circuit board design that will be used to do various things on my car. It will convert the stock Miata fuel sender output to something my VDO fuel gauge can understand. More importantly, it will do traction control. I'm also going to incorporate valet mode, anti theft, an odometer and trip odometer (my car only has a tach because race car LOL). My career was in embedded software design, and my education is in EE, so this is right up my alley. It's fun to do a board design for essentially the first time since school. As an embedded SW guy, I had to *understand* the hardware, but I didn't get to design it.
This board will plug on top of what is known as an "evaluation board". That kind of board is sold (cheaply) by microprocessor manufacturers so that potential customers can try out their processors in new designs. I'm using a board sold by Kinetis to allow customers to try out one of their ARM based products. Total overkill for what I'm doing, but overkill means the design (software especially) is easy and fast.
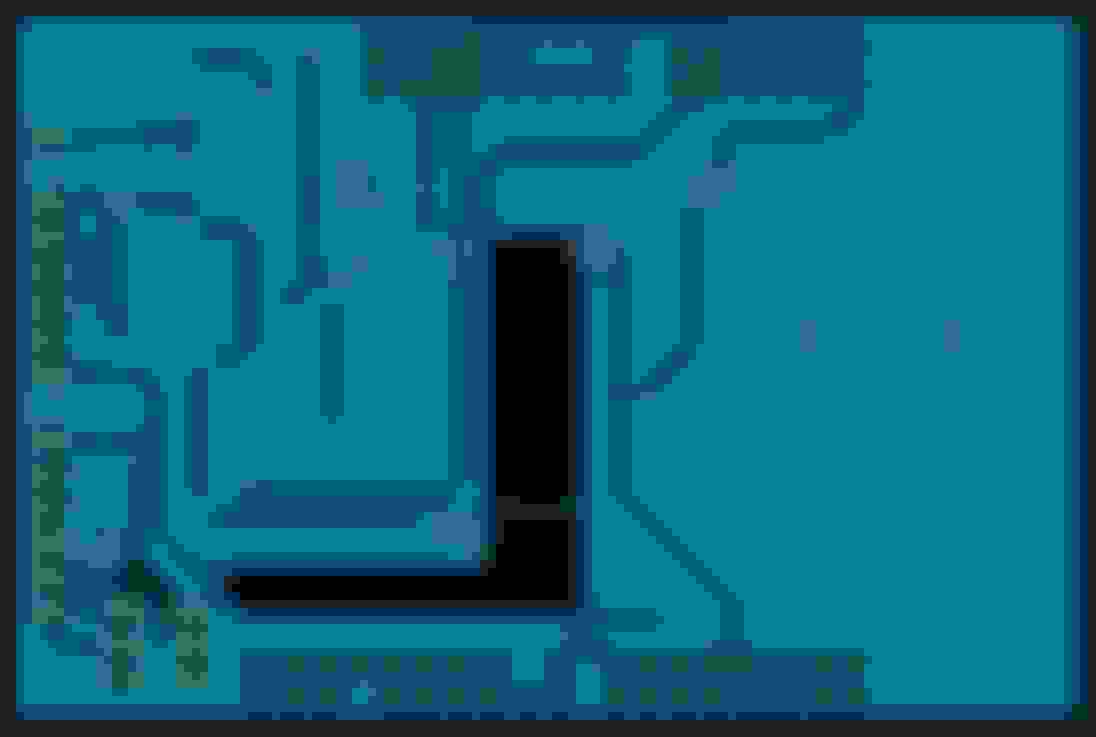
This is the top layer view of the board.
This is the bottom layer. This is a simple board, only two layers.
Wow! Lots of thought into making your car just what you want it to be!! Bravo!
Are the brake lines on the firewall from the factory or did you move them there to make life simple with the dropout cradle?
Thanks!
Dan
Wow! Lots of thought into making your car just what you want it to be!! Bravo!
Are the brake lines on the firewall from the factory or did you move them there to make life simple with the dropout cradle?
Thanks!
Dan
They are on the firewall from the factory. You have to hand tweak them a bit on the passenger side to make them run a bit closer to the frame rails.
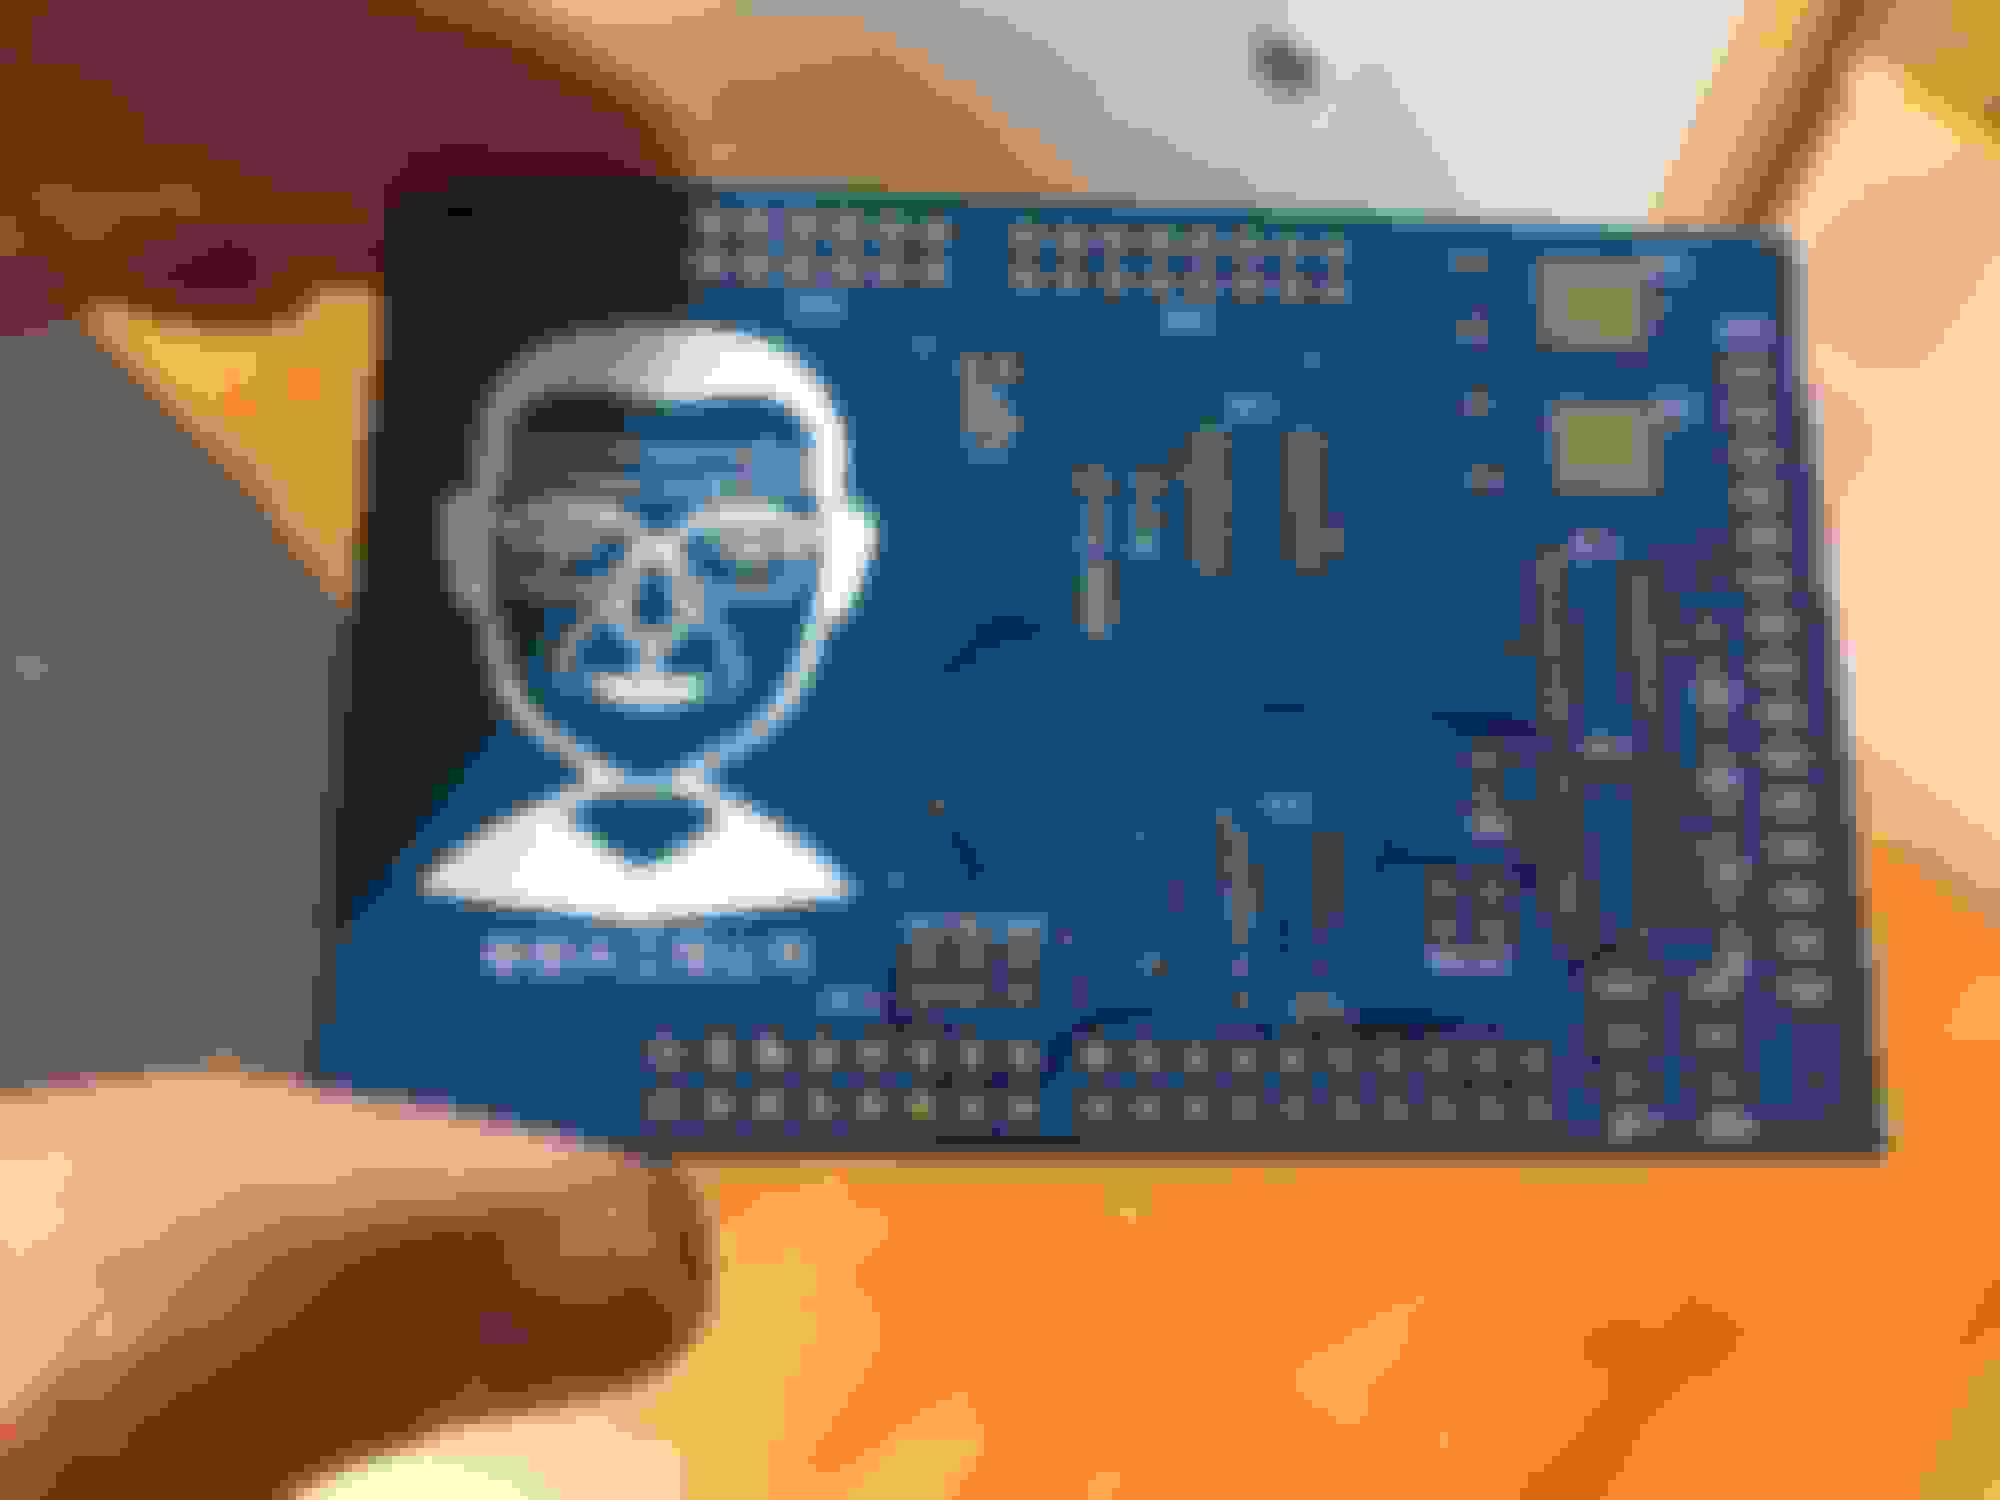
This is the finished board. I'm in the process of learning how to do SMT soldering in order to get one built up (I had 5 made). The Chinese characters mean "Crazy Old Man Engineering Company".
Metcal or other quality RF soldering iron. Really fine solder.
Or solder paste and a hot air gun.
Hopefully 0402 component size. 0201 stuff is hard to see!
A microscope helps!
I always felt it was unfair that the older I got the smaller the parts got. 😊
Worked with all that stuff at Tek. Primarily microwave and RF components.
Ron
I kept the components "large" on purpose. The smallest packages on there are the 0603 LEDs for the eyes. All resistors and caps are 0805. The ICs are SOIC. So nothing too small. I bought a microscope for this. :-)
This is the traction control board, all soldered up and assembled to the rest of the electronics. I'm currently debugging hardware and software. No huge issues found yet.
In other news, the car will get tuned on the 22nd of April. I decided that full load tuning was best done in a controlled environment. The driveability and low load behavior is very nice, which is one of the things I wanted out of this build, compared to how it was before.
The board on the bottom has the microprocessor that runs my code. The board on the top is my design, and does the required signal processing. The soldering wasn't as hard as I expected.
This took a bit longer than I expected. At first, the engine was down about 90 rwhp compared to the last time it went to the dyno as an LS376/525 motor. That trip yielded 462rwhp/425rwtq on this Mustang dyno. We were only showing 370-ish to start with today. I hadn't noticed any problems, because I've been behaving myself and hadn't been much over 2500 rpm 99.9% of the time.
We tracked it down to ignition. I had fiberglass sleeves protecting the plug wires, but Tom (Wong) told me that these aren't very good. They can lay right against a header tube, and not burn themselves, but allow the plug boot to melt inside of it and fail. I had 3 bad plug boots inside my fiberglass sleeves... they were only really unhappy under full load over 3500 rpm. I also had a cracked insulator on one plug, probably did it myself on install ... clearance on that plug (#7) is super tight on my headers, the plug socket actually contacts the tube a bit. I might have cocked the socket or something on install and stressed the plug. Tom supplied a new plug for that hole, and had the MSD boots in his stash to replace my bad ones. On his advice, I ordered a set of Accel ceramic plug wires (really, just the boots are ceramic). Those will go on when they get here.
Once that was done, we did a few more pulls and got up to 471rwhp/425rwtq. So only about 10 hp more than before....
BUT
It was done with about 10 degrees less overlap on the camshaft. I got 27.5 mpg on the drive down to the dyno ... *before* we found the ignition issues. The old motor got 23 on the highway. The new motor is *much* more civilized, and has awesome response anywhere in the rev range. I kind of thought I'd be closer to 500 rwhp than this, but on reflection, that's a bit silly. This cam is about the same overlap as the GM Hotcam, and the LS376/480 motor that comes with that cam (and doesn't drive as smooth as this motor), usually makes about 420 rwhp from what I read online. So me expecting to get to 500 on near the same cam duration was unrealistic, IMHO. I told Tony Mamo that I wanted better manners and fuel economy without giving up power, and he delivered for me. I can't say enough good things about Tony's attention to detail and customer service.
I also need to recommend Tom Wong of Wong's Performance Engineering to anybody in the Portland/Seattle area that wants good work done on their car. I've driven 3 hours each way to have him do my tunes twice now, and I'd do it again.
Tony and Tom are both professionals to the bone, and it shows.
Ron, I drive up and down I5 to the SF bay area from Seattle pretty regularly. We'll have to have coffee on one of those trips ... I think I may take the Miata in June/July timeframe.
We use belt dressing on the rollers in those cases. Works well. The two roller dynos can be tricky. The dyno dynamics is similar.
Or you can have two fat guys sit in the trunk! 😊
You scored on the weather. I got the C5 out last week. And here comes the rain. Which you can blame on me....
The weather the last 10 days around here has been nice weather for July. This is the NorthWet ... you *know* it wasn't going to last.
Now wait a minute... I've always heard it only rains twice a year in Oregon/Washington. First from Jan 1st to June 30th, then from July 5th to Dec 31st...

 01-12-2021 | 10:54 AM