How to - Transmission Cooler Install
 08-03-2013, 10:54 PM
#1
Staging Lane
Thread Starter

Join Date: Jan 2013
Posts: 98
Likes: 0
Received 0 Likes
on
0 Posts
ok i know theres already a thread for this but i have some other good information that could benefit people.
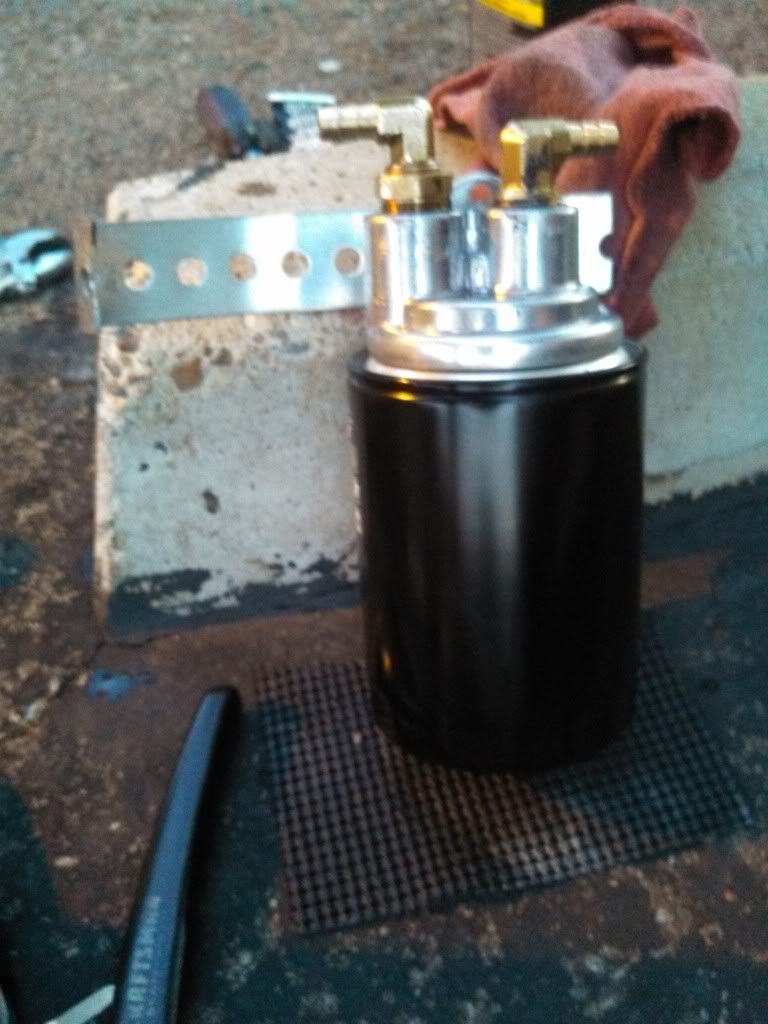
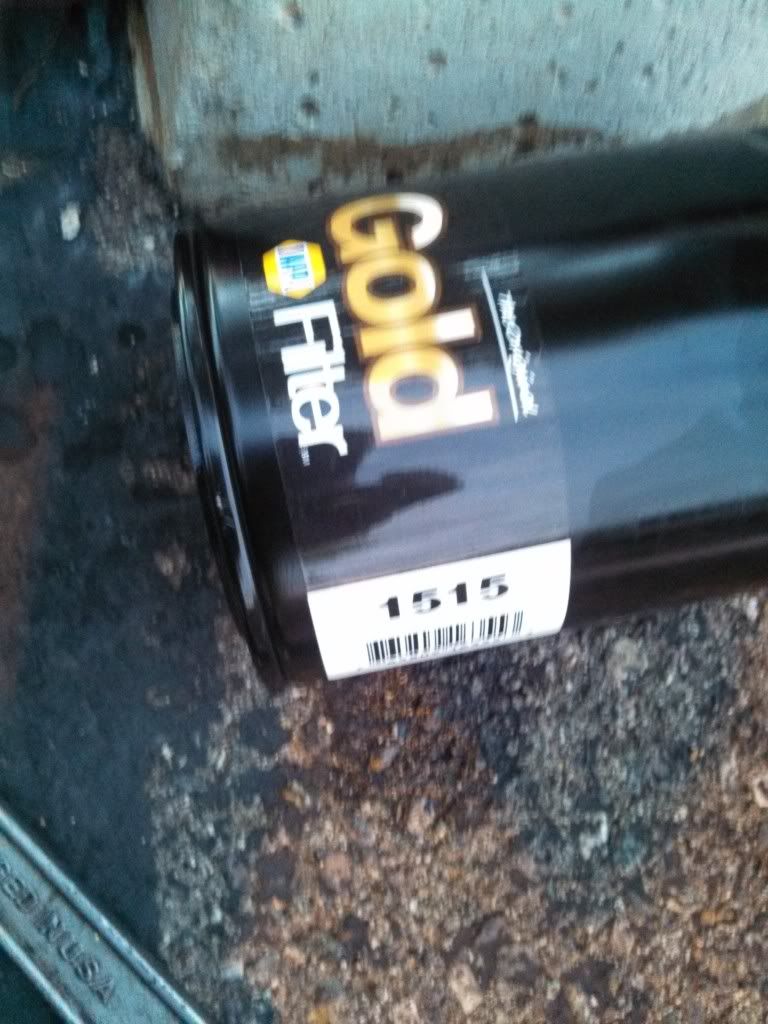
This is a right up for installing a stand-alone Transmission Cooler for the 4t65e-HD. This particular kit that I purchased if from TripleEdgePerformance.com and is the 6 inch tall model. (They sell a 4� & 6� sizes). My vehicle is a 2006 Pontiac Grand Prix GXP.
So to start this write up some pics of the kit that I purchased. I am not going to list a price so if you want to know the price email Dave at TEP.
The kit has A&N fittings for connecting to the transmission with a stainless steel braided line that runs to the cooler its self and has the A&N fittings welded to the coolers so that end will never leak.


Now for the install.

As you can see in the above pictures�.that�s where the cooler itself needs to end up�except more to the right. I put the bracket in the wrong place and have to move it over to the right some to make both of the brackets fit right.
Now how did I fit the cooler down in there without removing the bumper�.it�s simple. I removed a few bolts and took the entire hood latch assembly thingy MA-bobber out. Then I just took my time and slid the cooler in from the top and ran the lines where I wanted them. Wasn�t too bad. But I do recommend having two people just so you don�t damage the cooler. I did it myself and didn�t hurt it at all.
This is a picture of where I got the cooler in at�..there�s 4 bolts that you have to remove and it slides right in.

Ok ok ok after an hour and a half of working with this cooler ive got it as close to squared and centered as possible. I still can�t get the brackets that came with it to line up and work but frankly the cooler is nice and decently secured there where I don�t think it�s going to go anywhere at all. So some more pics of the install and all.


Installing lines to the transmission
These pics of the lines in the transmission were taken two days after I installed the kit�and yes im aware that I had a Class II leak�but that was fixed by taking a wrench and�well�.tightening the A&N fittings more. I will describe the two types of fittings that come with the kit shortly.


For removing the Stock lines from the transmission you will need 1 tool, it is called a dental pick. And this link is the exact set I ordered from amazon and they come in handy�.never, except for this one project.
The reason that you need these picks are to remove these

It�s really hard to get anything else in at the angles you need to be able to remove the clips but those picks got it done in seconds. Also these little clips love to go ping when you pull them off so I�d hold your hand over them when you�re popping them off.
In the picture below this is where the clips are hiding at and you have to pop them out of

This pictures shows what you can see of the lines running in the engine bay. They all shiny

In this picture, one of the lines are hidden by the plastic loom in down there but they�re both there

 08-03-2013, 10:55 PM
#2
Staging Lane
Thread Starter
Join Date: Jan 2013
Posts: 98
Likes: 0
Received 0 Likes
on
0 Posts
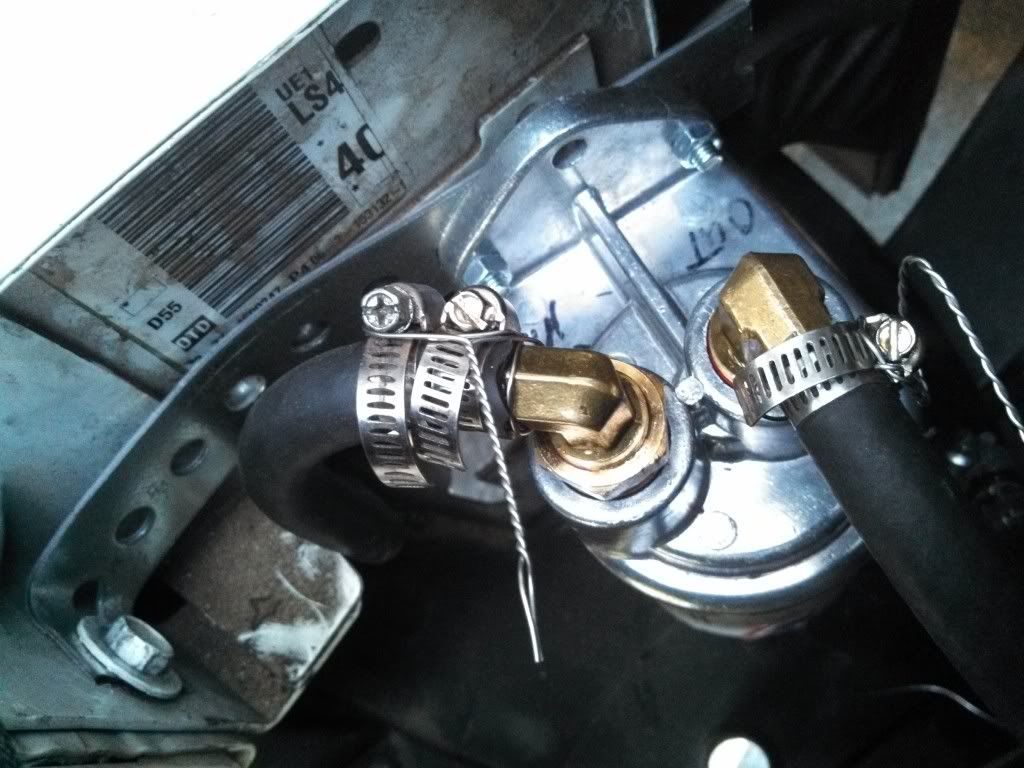
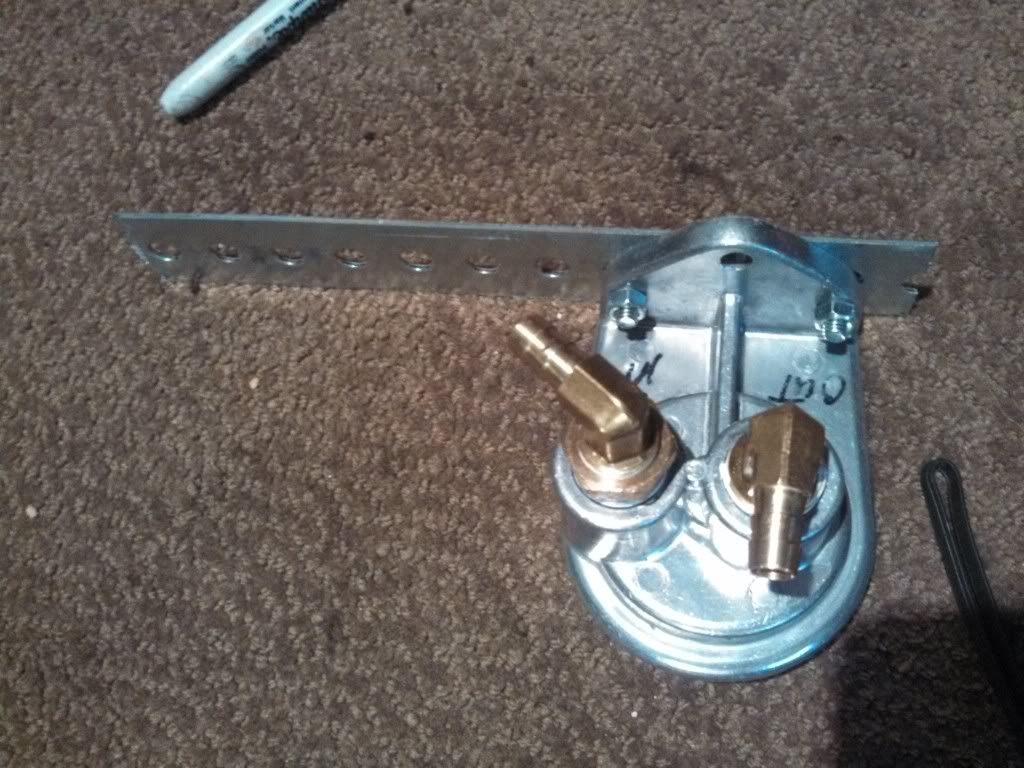
Ok now to describe how the fittings with this kit works.
The kit from TEP comes with these fittings as well.
The side of this fitting that has the rubber ring on it goes into the transmission. You only need to tighten this one down enough because you don’t want to destroy the rubber ring which over tightening will most definitely do.
The other end of that fitting will screw into this part of the lines
This is a part that you most definitely want to be very tight cause as I found out it will leak if it’s not stupid tight. There’s no torque specs but I used 1 wrench on the fitting that’s in the transmission and another on the SS line fitting….and used the rule of “3 grunts” to ensure that it’s nice and tight.
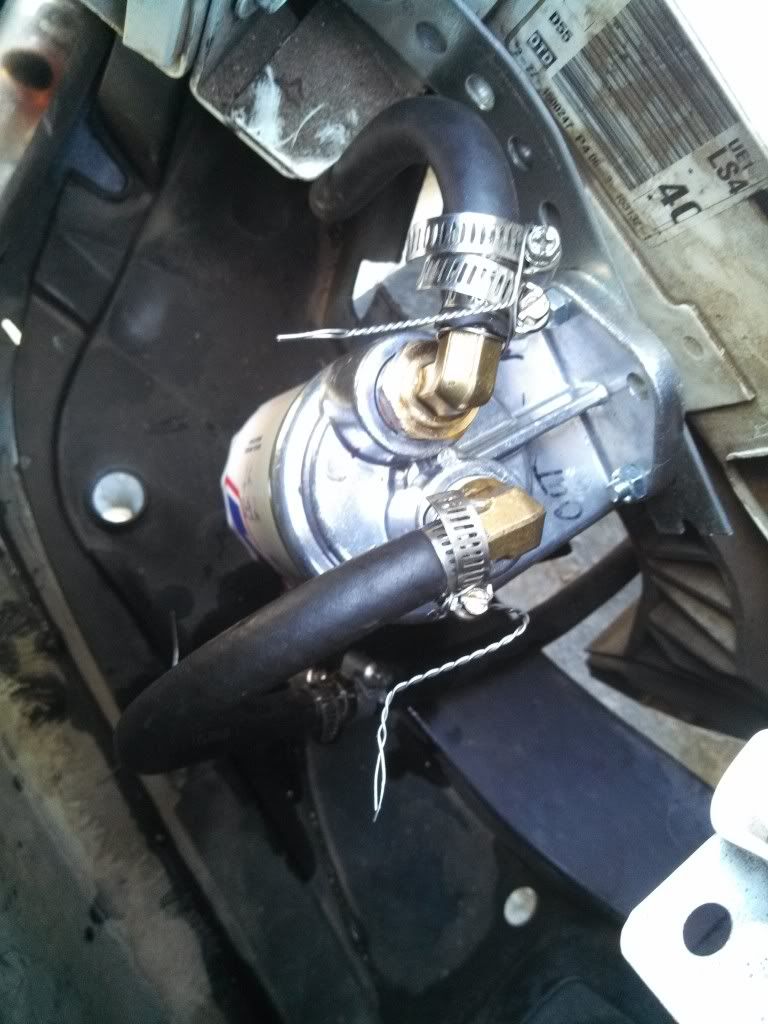
Now….as I found out the hard way…there’s only one way that you can run these lines and still get the cooler to mount up to the front of the car the way it’s supposed to. And this is not the correct way

As you can easily see in the picture I did have to use a dremel and remove some of that useless plastic there to be able to just mess with the lines…but removing it made it easier to work on it because it wasn’t in my way no more.
The correct way to run the lines is in the small little gap I have circled in the below picture. It is a very tight fit but I promise you that they will fit. You just have to force it in there like a tight virgin.

^^^^^God look at how tight that **** is
Some other side notes while I’m thinking about them, you will not lose much fluid at all when installing. When you pull the stock lines from the transmission you will lose a little but it will not just keep flowing out…it will stop in a second. And make sure you use some of the leaking transmission fluid to rub on the rubber seal for the fittings in the transmission and to lube everything up nicely.
Now for my feedback on this set-up.
5 Stars out of 5 Stars
I’ve been running it now for a week and can definitely tell a difference as far as temps go. I have not been able to get the temps to go above 180 no matter what I do. For daily driving around the base and town here it runs right at 170 which to me is a perfect temperature. So I’m no math expert but my stock transmission cooler (built in radiator one) would easily hit 220 degrees F on a warm day without messing around so basically there is about a 35-45 degree difference with the cooler over stock. Here’s a little chart to give you some idea on what kind of temps that you want.

The kit from TEP comes with these fittings as well.
The side of this fitting that has the rubber ring on it goes into the transmission. You only need to tighten this one down enough because you don’t want to destroy the rubber ring which over tightening will most definitely do.
The other end of that fitting will screw into this part of the lines
This is a part that you most definitely want to be very tight cause as I found out it will leak if it’s not stupid tight. There’s no torque specs but I used 1 wrench on the fitting that’s in the transmission and another on the SS line fitting….and used the rule of “3 grunts” to ensure that it’s nice and tight.
Now….as I found out the hard way…there’s only one way that you can run these lines and still get the cooler to mount up to the front of the car the way it’s supposed to. And this is not the correct way

As you can easily see in the picture I did have to use a dremel and remove some of that useless plastic there to be able to just mess with the lines…but removing it made it easier to work on it because it wasn’t in my way no more.
The correct way to run the lines is in the small little gap I have circled in the below picture. It is a very tight fit but I promise you that they will fit. You just have to force it in there like a tight virgin.

^^^^^God look at how tight that **** is
Some other side notes while I’m thinking about them, you will not lose much fluid at all when installing. When you pull the stock lines from the transmission you will lose a little but it will not just keep flowing out…it will stop in a second. And make sure you use some of the leaking transmission fluid to rub on the rubber seal for the fittings in the transmission and to lube everything up nicely.
Now for my feedback on this set-up.
5 Stars out of 5 Stars
I’ve been running it now for a week and can definitely tell a difference as far as temps go. I have not been able to get the temps to go above 180 no matter what I do. For daily driving around the base and town here it runs right at 170 which to me is a perfect temperature. So I’m no math expert but my stock transmission cooler (built in radiator one) would easily hit 220 degrees F on a warm day without messing around so basically there is about a 35-45 degree difference with the cooler over stock. Here’s a little chart to give you some idea on what kind of temps that you want.
 08-03-2013, 10:55 PM
#3
Staging Lane
Thread Starter
Join Date: Jan 2013
Posts: 98
Likes: 0
Received 0 Likes
on
0 Posts
Other transmission Cooler options
Now for those that are wanting to install a transmission cooler but don’t want to go through as much trouble like I did for this there’s a cheaper and easier way. Now keep in mind you will not see the same cooling results with this option as I am with this set up. The following option is what I did have before I installed this cooler and I never saw above 200 degrees F which is good. And that was only about a 15-20 degree difference from stock.
This is a link for the coolers I had before. I had two of them installed and never got above 200 as I said a second ago
http://www.oreillyauto.com/site/c/de...26+accessories
The way you want to install coolers like these is to find the line that is the return line from radiator to the transmission. On grand prix’s that line is the one that is the bottom on line on the radiator. it is also the shortest of the two lines on em as well.
This is both the outlet and inlet lines for the stock cooler. (Keep in mind the only reason that both of mine are cut like that was so I could easily remove the old lines from the car instead of trying to wiggle them out)
The line that is the longest is the one that goes to the top of the radiator and the shortest one is the return line back to the transmission.
You have to installation options.
1) Requires this http://www.oreillyauto.com/site/c/de...26+accessories
And the way that one works is you remove the stock fitting from the radiator on the bottom and install the thing I listed in the link right above this and put the rubber hose directly onto that with a hose clamp. You want the rubber hose that runs to the new cooler to be the one you install here. You also want to keep the part of the transmission line that comes from the tranny… could just use a little jig saw and cut it leaving a few inches at the transmission and slide the rubber hose that runs from the coolers to the tranny over it and secure it on there with a hose clamp or two as well.
And the other way which I recommend doing will require one of these
And you will want the 3/8 barbed one. They also sell them at local auto parts stores but I gave up trying to find a link at one.

Picture of both of the stock lines. The one we are referring to right now is the shortest one.
The center rubber section of the shortest one you want to cut. You can do it from the bottom of the car by removing the splash guard crap that is hiding it. Once you cut it. The end that is running from the radiator you want to use one of those barbed fitting and put it there with one running to the new coolers. Then the other part of the stock line you want to put the other barbed fitting with the line running from the new aftermarket cooler back to the transmission.
So basically with either of those setups you have all the coolers running in the following order
1.) Transmission to stock radiator
2.) Stock Radiator to Aftermarket cooler
3.) Aftermarket cooler back to the transmission
So some things others do is install an extra filter inline with the cooler to help take contaminants out of the fluid.

This filter can be found here
http://www.summitracing.com/parts/wi...FWZk7AodIlkA6g
and for some other stuff. This filter is 91parkave’s new filter for his transmission and it’s a much better upgrade from what he did have. Higher flow rates and filter is decently bigger
Photos of other transmission cooler options Courtesy of 91ParkAve
Now for those that are wanting to install a transmission cooler but don’t want to go through as much trouble like I did for this there’s a cheaper and easier way. Now keep in mind you will not see the same cooling results with this option as I am with this set up. The following option is what I did have before I installed this cooler and I never saw above 200 degrees F which is good. And that was only about a 15-20 degree difference from stock.
This is a link for the coolers I had before. I had two of them installed and never got above 200 as I said a second ago
http://www.oreillyauto.com/site/c/de...26+accessories
The way you want to install coolers like these is to find the line that is the return line from radiator to the transmission. On grand prix’s that line is the one that is the bottom on line on the radiator. it is also the shortest of the two lines on em as well.
This is both the outlet and inlet lines for the stock cooler. (Keep in mind the only reason that both of mine are cut like that was so I could easily remove the old lines from the car instead of trying to wiggle them out)
The line that is the longest is the one that goes to the top of the radiator and the shortest one is the return line back to the transmission.
You have to installation options.
1) Requires this http://www.oreillyauto.com/site/c/de...26+accessories
And the way that one works is you remove the stock fitting from the radiator on the bottom and install the thing I listed in the link right above this and put the rubber hose directly onto that with a hose clamp. You want the rubber hose that runs to the new cooler to be the one you install here. You also want to keep the part of the transmission line that comes from the tranny… could just use a little jig saw and cut it leaving a few inches at the transmission and slide the rubber hose that runs from the coolers to the tranny over it and secure it on there with a hose clamp or two as well.
And the other way which I recommend doing will require one of these
And you will want the 3/8 barbed one. They also sell them at local auto parts stores but I gave up trying to find a link at one.

Picture of both of the stock lines. The one we are referring to right now is the shortest one.
The center rubber section of the shortest one you want to cut. You can do it from the bottom of the car by removing the splash guard crap that is hiding it. Once you cut it. The end that is running from the radiator you want to use one of those barbed fitting and put it there with one running to the new coolers. Then the other part of the stock line you want to put the other barbed fitting with the line running from the new aftermarket cooler back to the transmission.
So basically with either of those setups you have all the coolers running in the following order
1.) Transmission to stock radiator
2.) Stock Radiator to Aftermarket cooler
3.) Aftermarket cooler back to the transmission
So some things others do is install an extra filter inline with the cooler to help take contaminants out of the fluid.

This filter can be found here
http://www.summitracing.com/parts/wi...FWZk7AodIlkA6g
and for some other stuff. This filter is 91parkave’s new filter for his transmission and it’s a much better upgrade from what he did have. Higher flow rates and filter is decently bigger


Photos of other transmission cooler options Courtesy of 91ParkAve
03-10-2021, 09:36 PM
#4
Registered User

Join Date: Mar 2021
Posts: 1
Likes: 0
Received 0 Likes
on
0 Posts
Ok now to describe how the fittings with this kit works.
The kit from TEP comes with these fittings as well.

The side of this fitting that has the rubber ring on it goes into the transmission. You only need to tighten this one down enough because you don�t want to destroy the rubber ring which over tightening will most definitely do.
The other end of that fitting will screw into this part of the lines

This is a part that you most definitely want to be very tight cause as I found out it will leak if it�s not stupid tight. There�s no torque specs but I used 1 wrench on the fitting that�s in the transmission and another on the SS line fitting�.and used the rule of �3 grunts� to ensure that it�s nice and tight.
Now�.as I found out the hard way�there�s only one way that you can run these lines and still get the cooler to mount up to the front of the car the way it�s supposed to. And this is not the correct way

As you can easily see in the picture I did have to use a dremel and remove some of that useless plastic there to be able to just mess with the lines�but removing it made it easier to work on it because it wasn�t in my way no more.
The correct way to run the lines is in the small little gap I have circled in the below picture. It is a very tight fit but I promise you that they will fit. You just have to force it in there like a tight virgin.

^^^^^God look at how tight that **** is
Some other side notes while I�m thinking about them, you will not lose much fluid at all when installing. When you pull the stock lines from the transmission you will lose a little but it will not just keep flowing out�it will stop in a second. And make sure you use some of the leaking transmission fluid to rub on the rubber seal for the fittings in the transmission and to lube everything up nicely.
Now for my feedback on this set-up.
5 Stars out of 5 Stars
I�ve been running it now for a week and can definitely tell a difference as far as temps go. I have not been able to get the temps to go above 180 no matter what I do. For daily driving around the base and town here it runs right at 170 which to me is a perfect temperature. So I�m no math expert but my stock transmission cooler (built in radiator one) would easily hit 220 degrees F on a warm day without messing around so basically there is about a 35-45 degree difference with the cooler over stock. Here�s a little chart to give you some idea on what kind of temps that you want.

The kit from TEP comes with these fittings as well.
The side of this fitting that has the rubber ring on it goes into the transmission. You only need to tighten this one down enough because you don�t want to destroy the rubber ring which over tightening will most definitely do.
The other end of that fitting will screw into this part of the lines
This is a part that you most definitely want to be very tight cause as I found out it will leak if it�s not stupid tight. There�s no torque specs but I used 1 wrench on the fitting that�s in the transmission and another on the SS line fitting�.and used the rule of �3 grunts� to ensure that it�s nice and tight.
Now�.as I found out the hard way�there�s only one way that you can run these lines and still get the cooler to mount up to the front of the car the way it�s supposed to. And this is not the correct way
As you can easily see in the picture I did have to use a dremel and remove some of that useless plastic there to be able to just mess with the lines�but removing it made it easier to work on it because it wasn�t in my way no more.
The correct way to run the lines is in the small little gap I have circled in the below picture. It is a very tight fit but I promise you that they will fit. You just have to force it in there like a tight virgin.
^^^^^God look at how tight that **** is
Some other side notes while I�m thinking about them, you will not lose much fluid at all when installing. When you pull the stock lines from the transmission you will lose a little but it will not just keep flowing out�it will stop in a second. And make sure you use some of the leaking transmission fluid to rub on the rubber seal for the fittings in the transmission and to lube everything up nicely.
Now for my feedback on this set-up.
5 Stars out of 5 Stars
I�ve been running it now for a week and can definitely tell a difference as far as temps go. I have not been able to get the temps to go above 180 no matter what I do. For daily driving around the base and town here it runs right at 170 which to me is a perfect temperature. So I�m no math expert but my stock transmission cooler (built in radiator one) would easily hit 220 degrees F on a warm day without messing around so basically there is about a 35-45 degree difference with the cooler over stock. Here�s a little chart to give you some idea on what kind of temps that you want.