


Oil pan gasket install
It seems most people are using felpro oil pan gaskets. The instructions say to install the gasket dry, but I've heard people say to rtv the corners and some people say to rtv the whole area around the front and back of the pan I was planning on using some of "The Right Stuff" on the 4 corners and on both sides of the gasket.
What has everyone else done? Completely dry? Corners? Complete front and back?
What has everyone else done? Completely dry? Corners? Complete front and back?
I did mine with a thin bead on the front and back and it still leaks as well. I read the documents that came with the gasket kit and it says to install dry with a dab at the 4 corners but what corners are they talking about?? Is it the corners where the radius around the front cover and the rear main meet the block or the very outside corners? Anyone who has repeatedly installed the one piece fel pro gasket with success please chime in!! Th oil leak is pretty much the only reason I am doing the 383 and if another oil leak costs me 5 grand I am going to start drinking  ...heavily
...heavily I installed it completely clean and dry and never had a problem with it. I applied a very little amount of RTV where the Timing Cover and the Block meet, and the same on the Rear Main Seal Bracket.
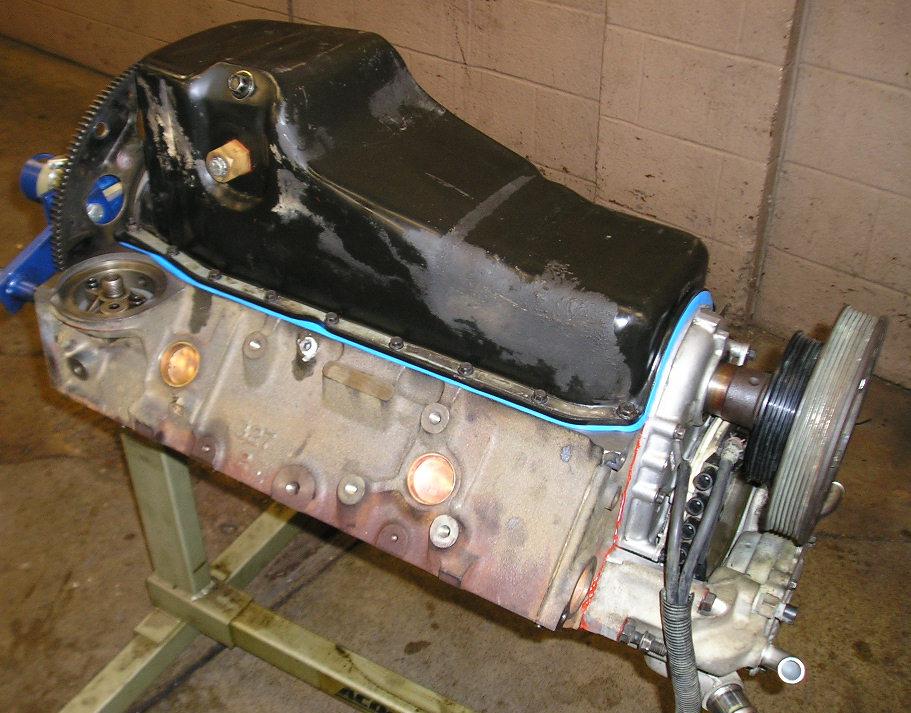
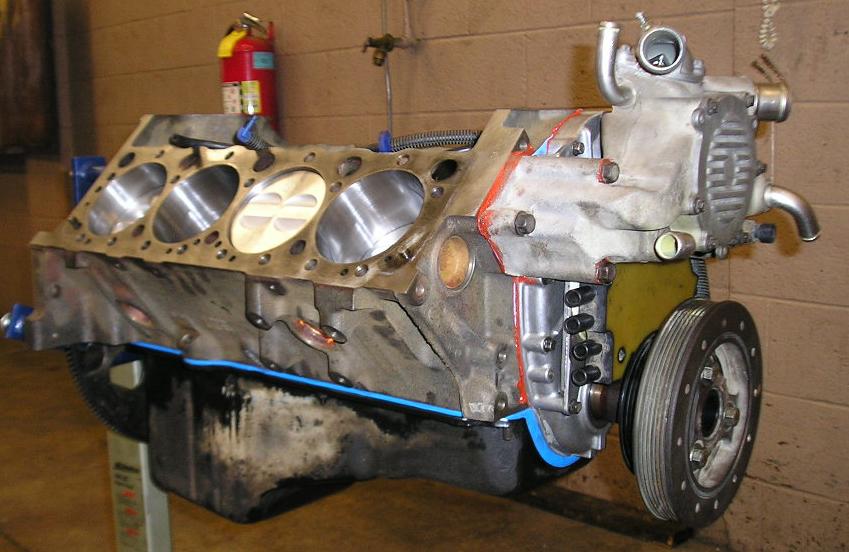

These are some old pics..lol
These are some old pics..lol
Just in the corners or aound the entire radius? And you must have read the instructions because it looks like you put a decent amount of RTV on every other damn thing on there so if you didn't put any on the pan it must have been for a good reason 
Trending Topics

TECH Veteran


Joined: Apr 2008
Posts: 4,985
Likes: 113
I put a 1" bead on the "corners" where the rear main plate meets the flat bottom part of the block...same up front on timing cover...sides I leave dry..never leaked on a few motors I have done
if you are replacing the pan gasket because it leaks...make sure it in fact is the source. could be rear main...not likely..or intake manifold and oil drips down and appears to be the pan.
if you are replacing the pan gasket because it leaks...make sure it in fact is the source. could be rear main...not likely..or intake manifold and oil drips down and appears to be the pan.
LS1 Tech Stories
The Best V8 Stories One Small Block at Time

Topdon ONE vs. Artidiag 800 BT2: Which is the Diagnostic Tablet For You?
Pouria Savadkouei
Gas Monkey Built a 6-Wheel Ferrari Testarossa With a Corvette LT4 Engine
Verdad Gallardo
7 Most Reliable High-Performance Engines GM Has Ever Built
Verdad Gallardo
Amazing '71 Camaro Restomod Is Modern Muscle Car Under the Skin
Verdad Gallardo
6 Common C5 Corvette Failures and What's Involved In Repairing Them
Pouria Savadkouei
Retro Modern Bandit Pontiac Trans AM Comes With Burt Reynolds' Autograph
Verdad Gallardo
Top 10 Greatest Cadillac V Series Performance Models Ever, Ranked
Pouria Savadkouei
Top 10 Most Powerful Chevy Trucks Ever Made!

Hennessey's New Supercharged Silverado ZR2 Has 700 HP
Verdad GallardoTECH Regular
Joined: Apr 2007
Posts: 420
Likes: 0
From: Kempner, TX
First, use a one piece gasket that has torque limiters built in. They are sort of like built-in washers that prevent torqueing the gaskets too tightly, which would cause it to seueeze out.
Clean the block pan rails and the oil pan rails thoroughly to remove any trace of oil.
Then hand install all the bolts, but don't tighten them. Just run them down finger tight.
Next pull the four corner bolts down to half torque, then follow the torque sequence for the remainder of the bolts. Finally torque the four corner bolts.
I never use any sealant, anywhere on the one-piece pan gaskets, and the directions say to install the gasket dry, with no sealant. I just did it that way, again for the ump-teenth time, on my son's 96 LT1 during a heads and cam swap.
Jake
West Point ROCKS!

Well it looks like I'm going to install it dry with some "The Right Stuff" just on the corners on both sides of the gasket.
Its best to clean the surfaces with brake parts cleaner correct? Then I'll wipe the surfaces down with a damp shop towel in case there is any brake parts cleaner residue. Then install the gasket dry with 4 dabs of rtv on the corners.
Its best to clean the surfaces with brake parts cleaner correct? Then I'll wipe the surfaces down with a damp shop towel in case there is any brake parts cleaner residue. Then install the gasket dry with 4 dabs of rtv on the corners.
TECH Regular
Joined: Oct 2008
Posts: 430
Likes: 0
From: Bahrain
i only apply RTV on the bottom surface of the gasket where it meets the oil pan on the radius and corners of the rear main and front cover, i let the RTV stand for 5 mins befor i put the pan on and torque to spec.

The important thing is to make sure EVERYTHING is sqeaky clean with a good cleaner such as the 3M super brake cleaner. That stuff is different from brand X brake cleaner. Once you use it you won't use anything else on gasket surfaces. Also, use a dab of the new GM engine sealant. It is now the new stuff for intake manifold and everything else from gasoline to diesel and it works!

Launching!
Joined: Apr 2015
Posts: 200
Likes: 2
First, use a one piece gasket that has torque limiters built in. They are sort of like built-in washers that prevent torqueing the gaskets too tightly, which would cause it to seueeze out.
Clean the block pan rails and the oil pan rails thoroughly to remove any trace of oil.
Then hand install all the bolts, but don't tighten them. Just run them down finger tight.
Next pull the four corner bolts down to half torque, then follow the torque sequence for the remainder of the bolts. Finally torque the four corner bolts.
I never use any sealant, anywhere on the one-piece pan gaskets, and the directions say to install the gasket dry, with no sealant. I just did it that way, again for the ump-teenth time, on my son's 96 LT1 during a heads and cam swap.
Jake
West Point ROCKS!
Clean the block pan rails and the oil pan rails thoroughly to remove any trace of oil.
Then hand install all the bolts, but don't tighten them. Just run them down finger tight.
Next pull the four corner bolts down to half torque, then follow the torque sequence for the remainder of the bolts. Finally torque the four corner bolts.
I never use any sealant, anywhere on the one-piece pan gaskets, and the directions say to install the gasket dry, with no sealant. I just did it that way, again for the ump-teenth time, on my son's 96 LT1 during a heads and cam swap.
Jake
West Point ROCKS!
I have had my oil pan (Fel-Pro) gasket leak twice. I am using a Mahle gasket this time around. I plan to use "Right Stuff" ONLY in the corners where the rear main seal meets the block, in the corners where the timing cover meets the block, and at the corners of the semi-circular cutouts at both ends of the pan

(exactly like specified in manual). I like your torque sequence, and plan to follow that ending with manual specific torque per bolts. Do you think this will work well?
Thank you!