


LT1 383 Blower Build

Thread Starter
Joined: Mar 2005
Posts: 2,161
Likes: 4
From: Millstone Twp, NJ
Fonse Performance in S. Jersey did the work. They have done machine work on LT1's before that were prepped for a 383 and came well recommended.
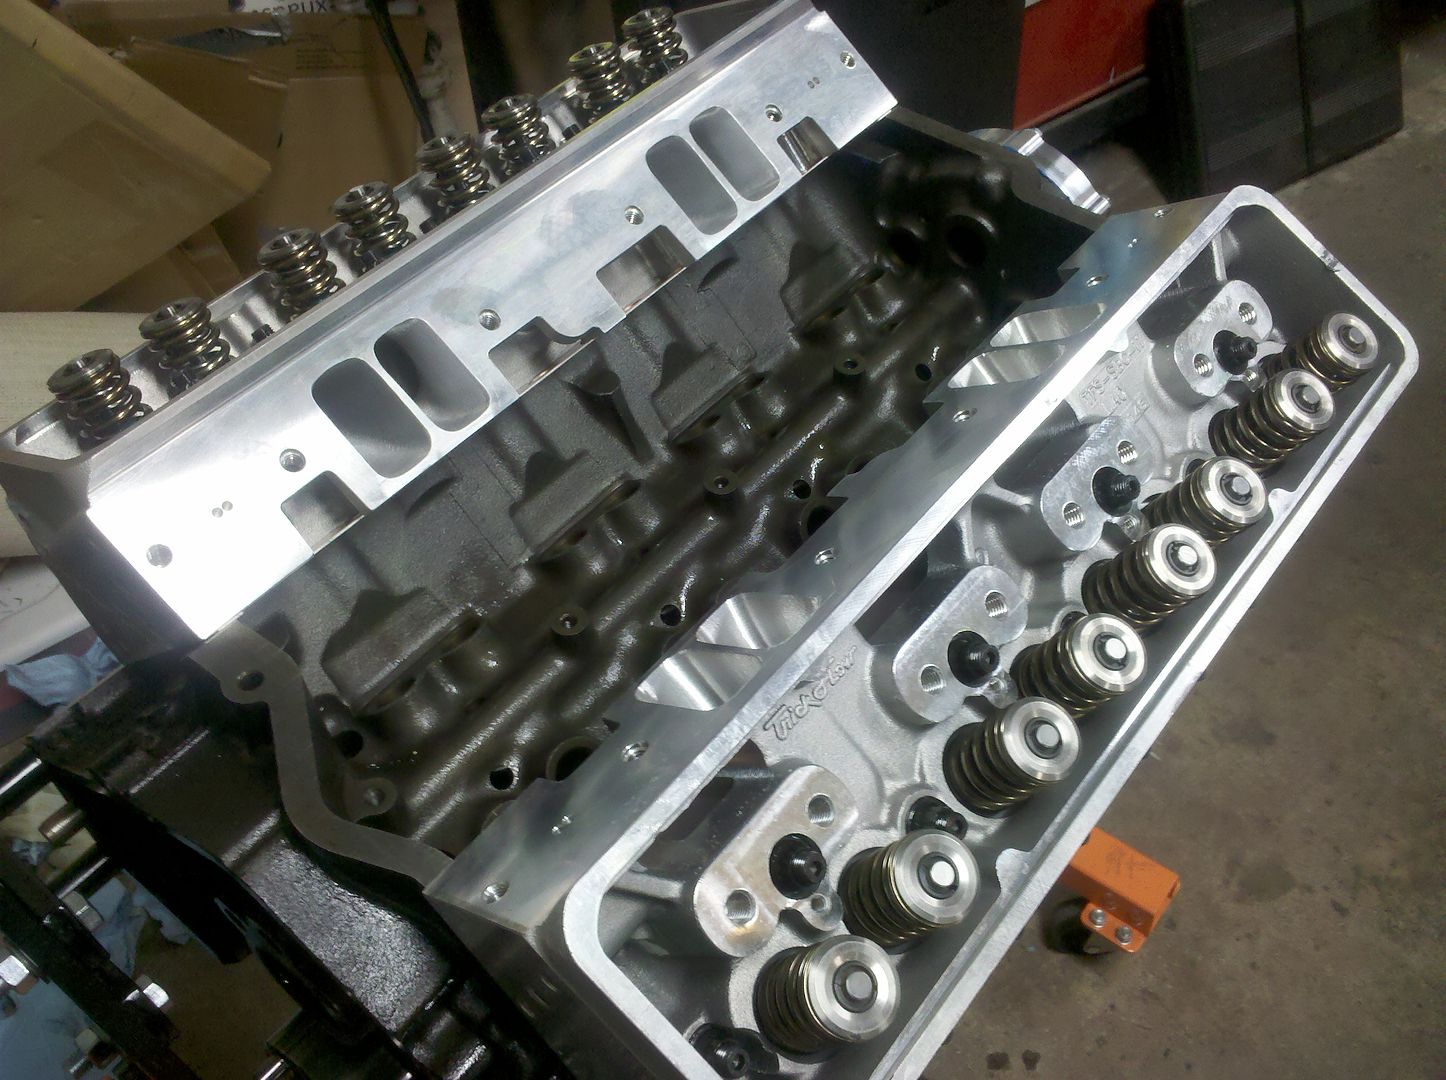
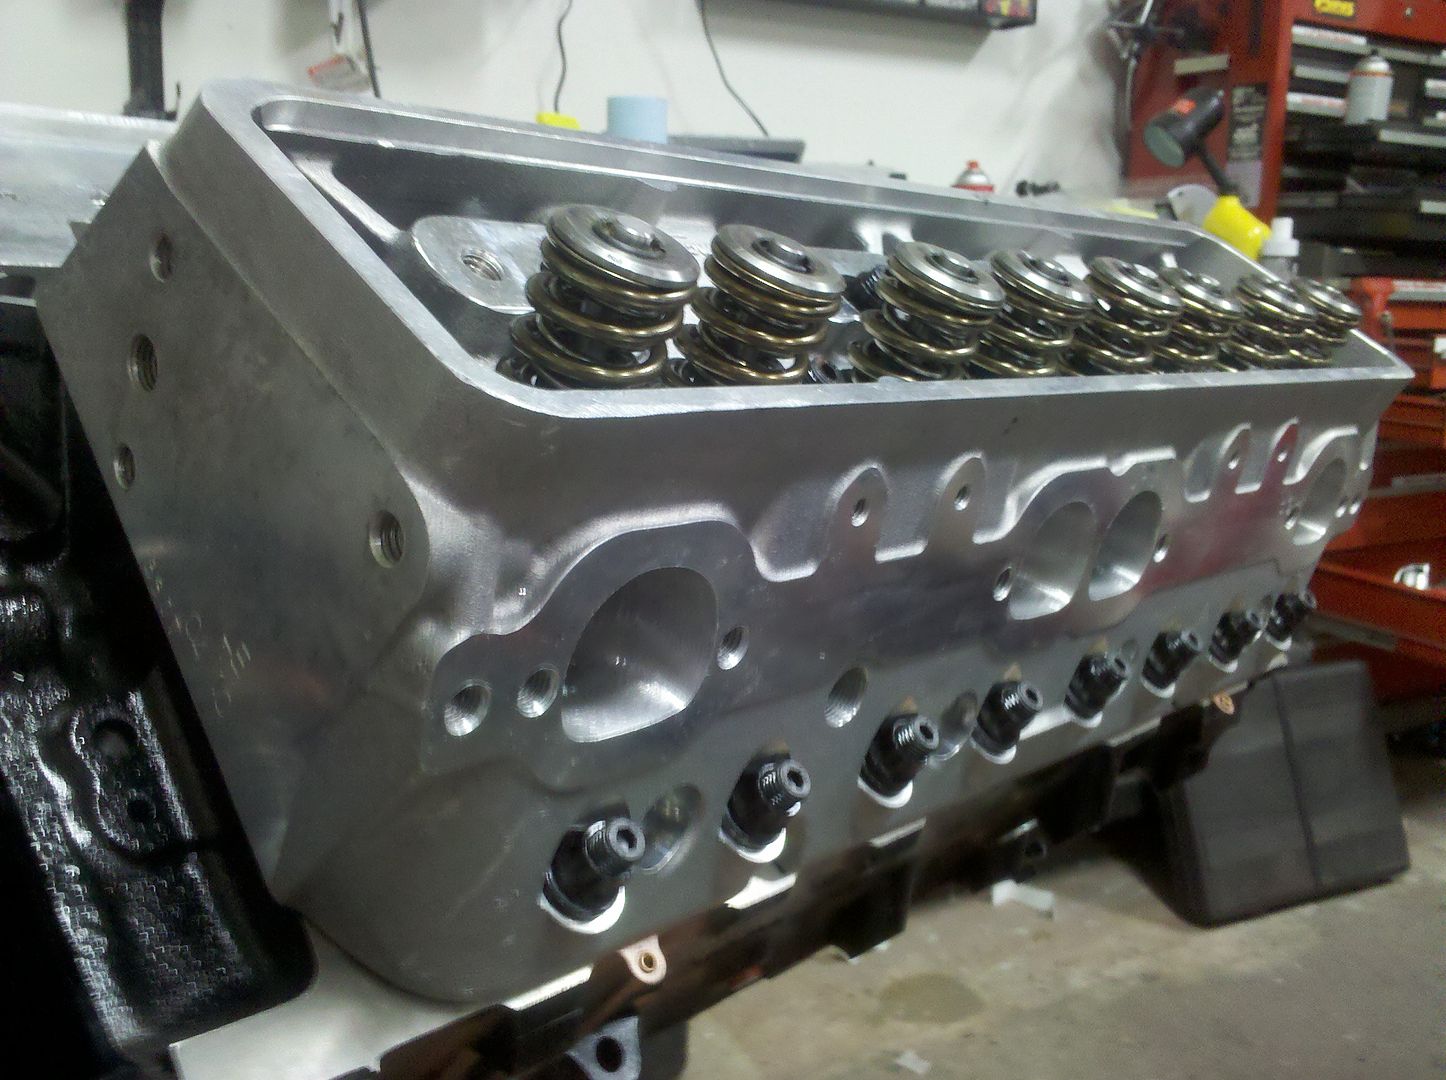
More pics.
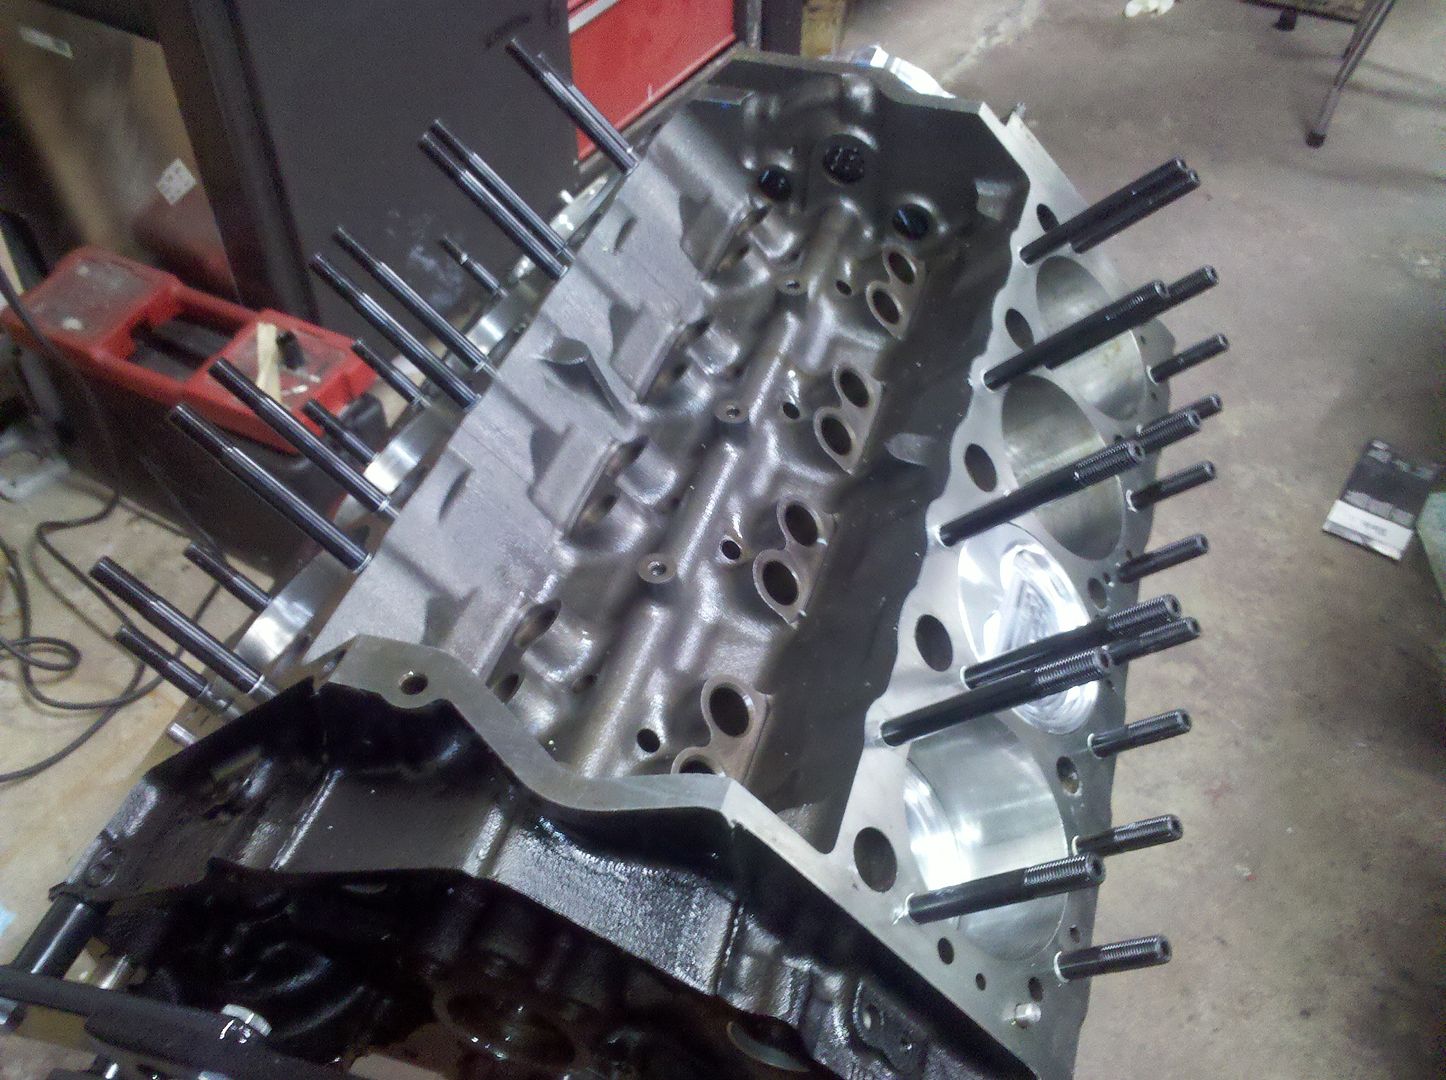
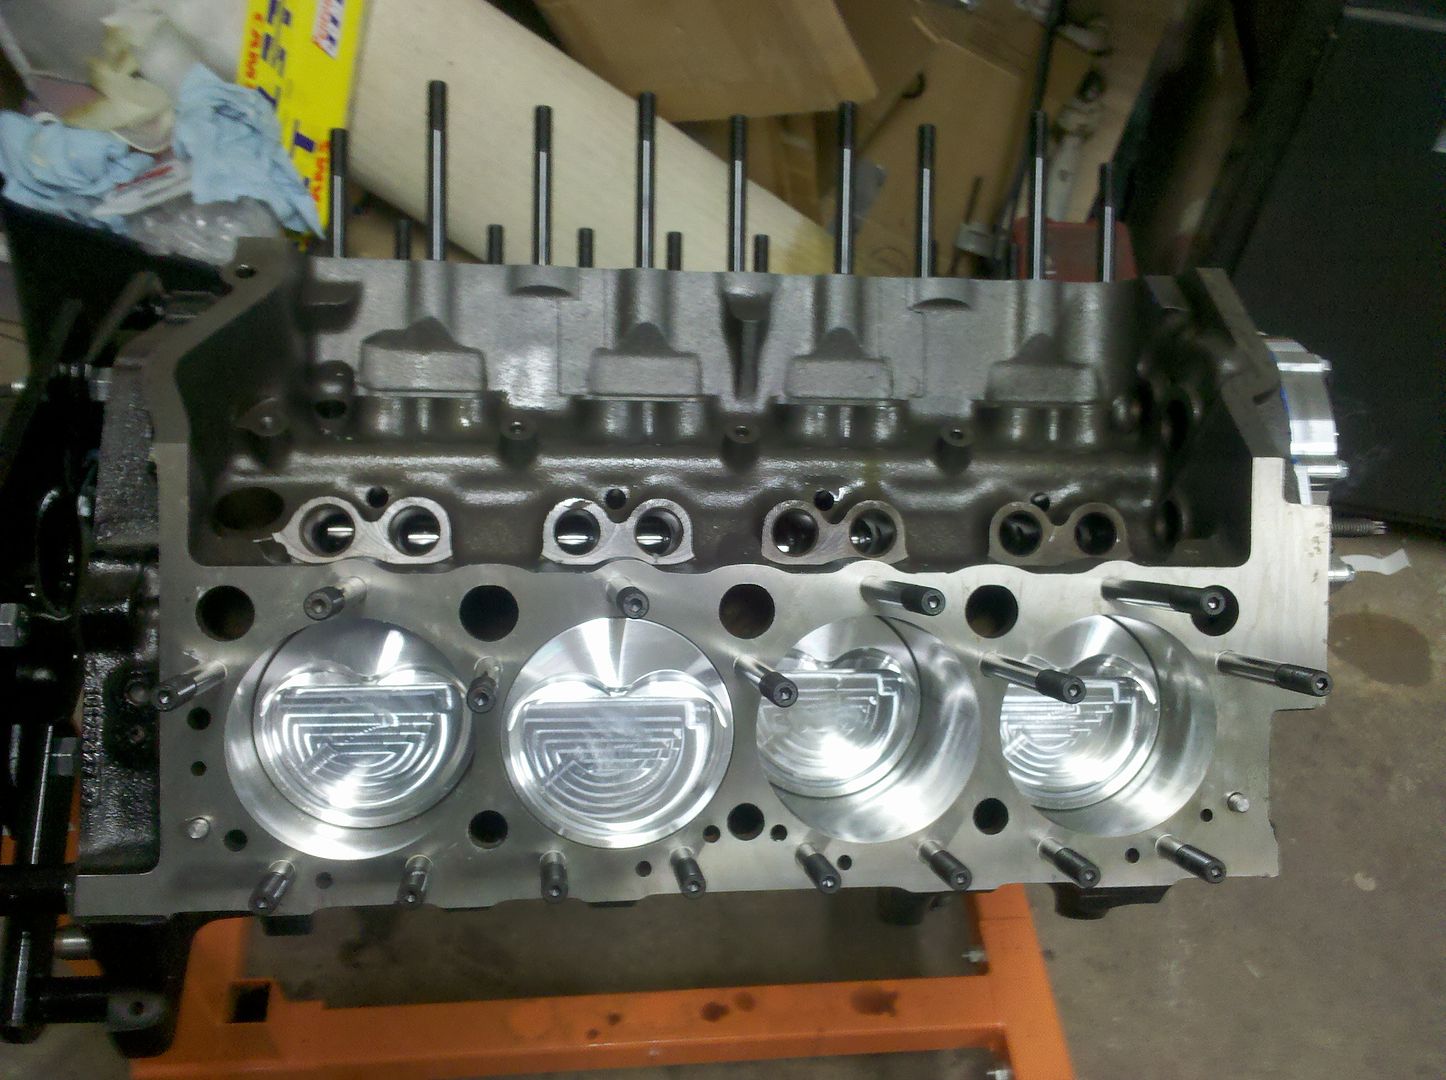
Installed:
ARP head studs
Trick Flow Heads
Cometic MLS Head Gaskets
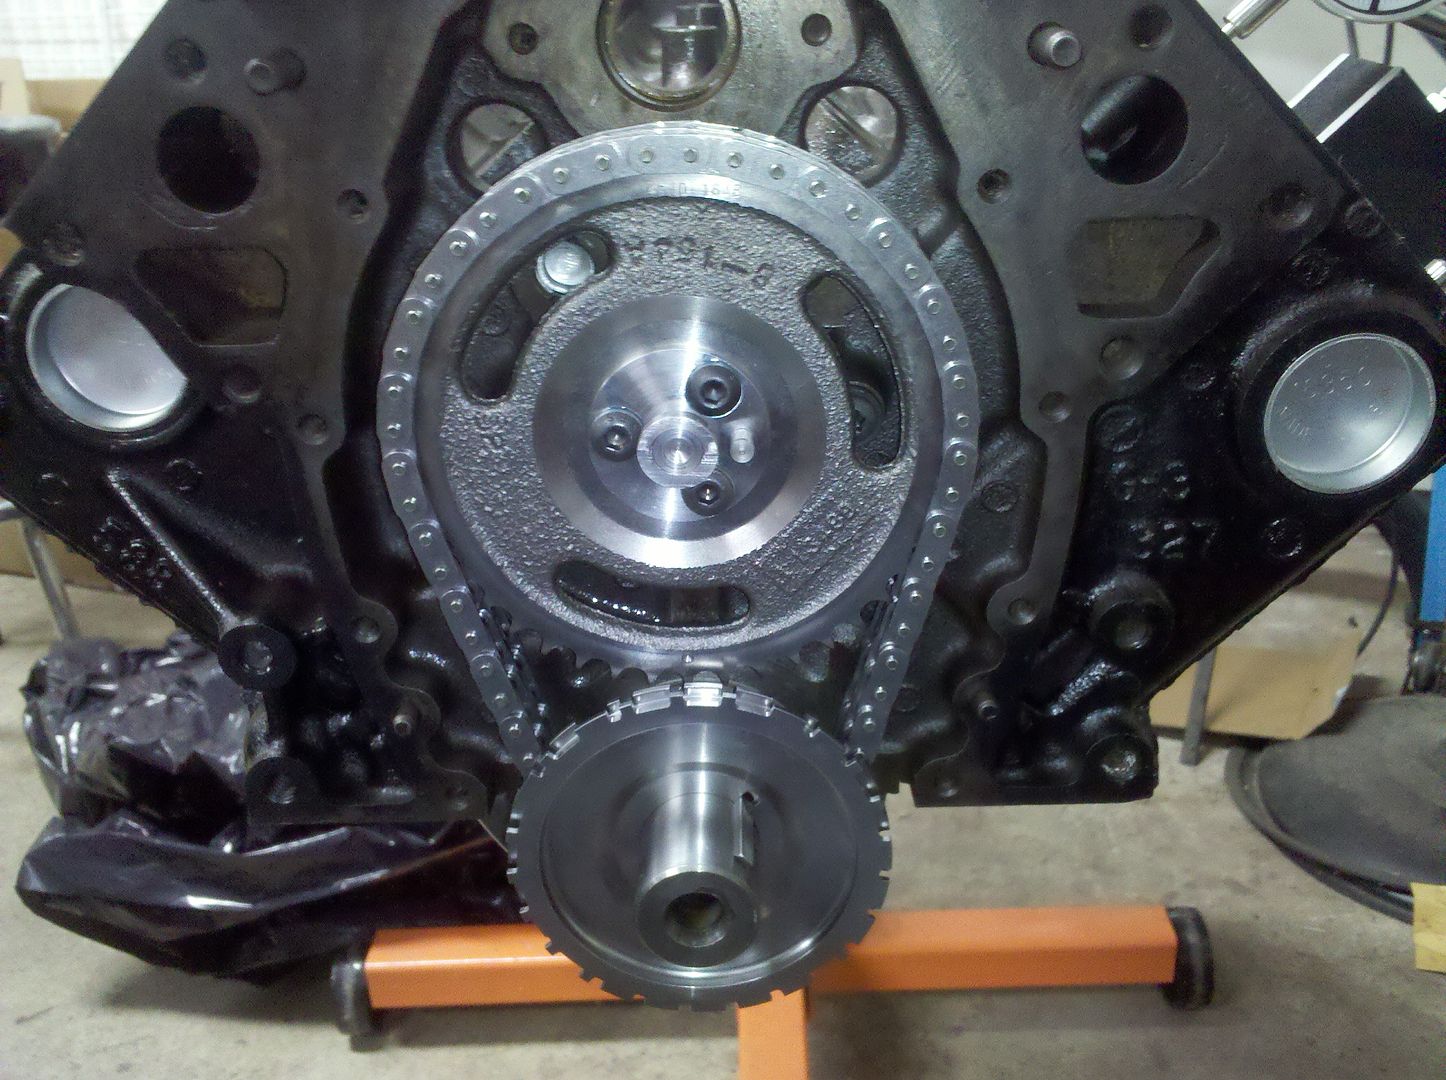
Cloyes double roller timing set
Blower Cam
EFI Connection 24x cam and crank reluctor
TPIS Timing Cover
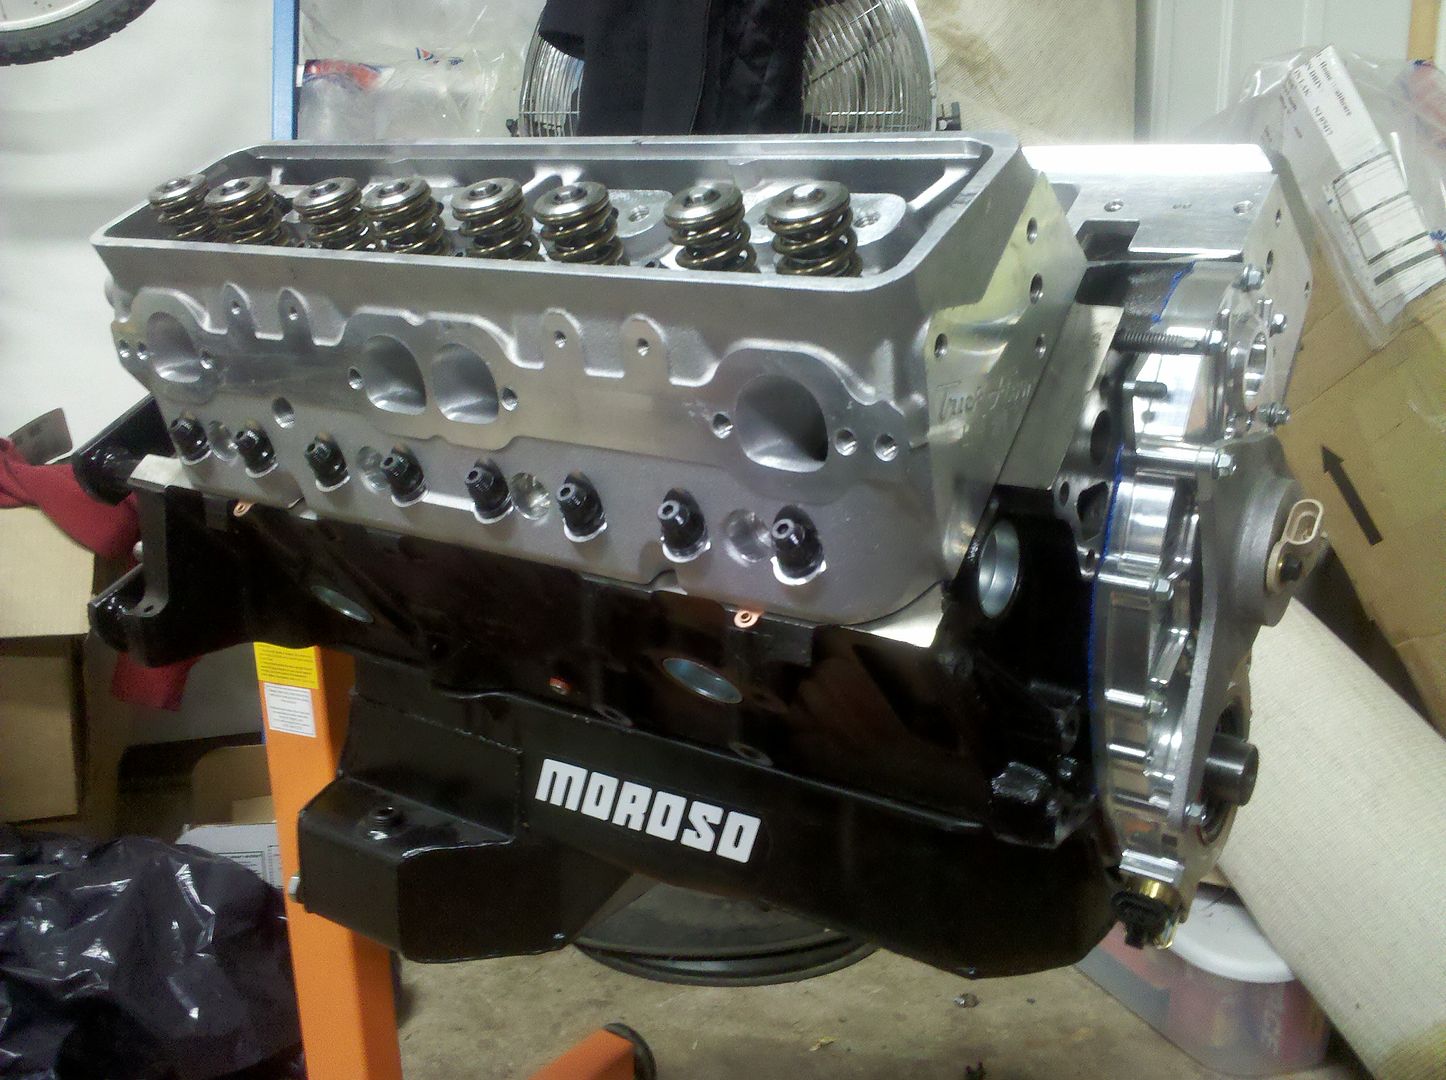
Moroso pan - just thrown on for looks/cover the bottom end.

Thread Starter
Joined: Mar 2005
Posts: 2,161
Likes: 4
From: Millstone Twp, NJ
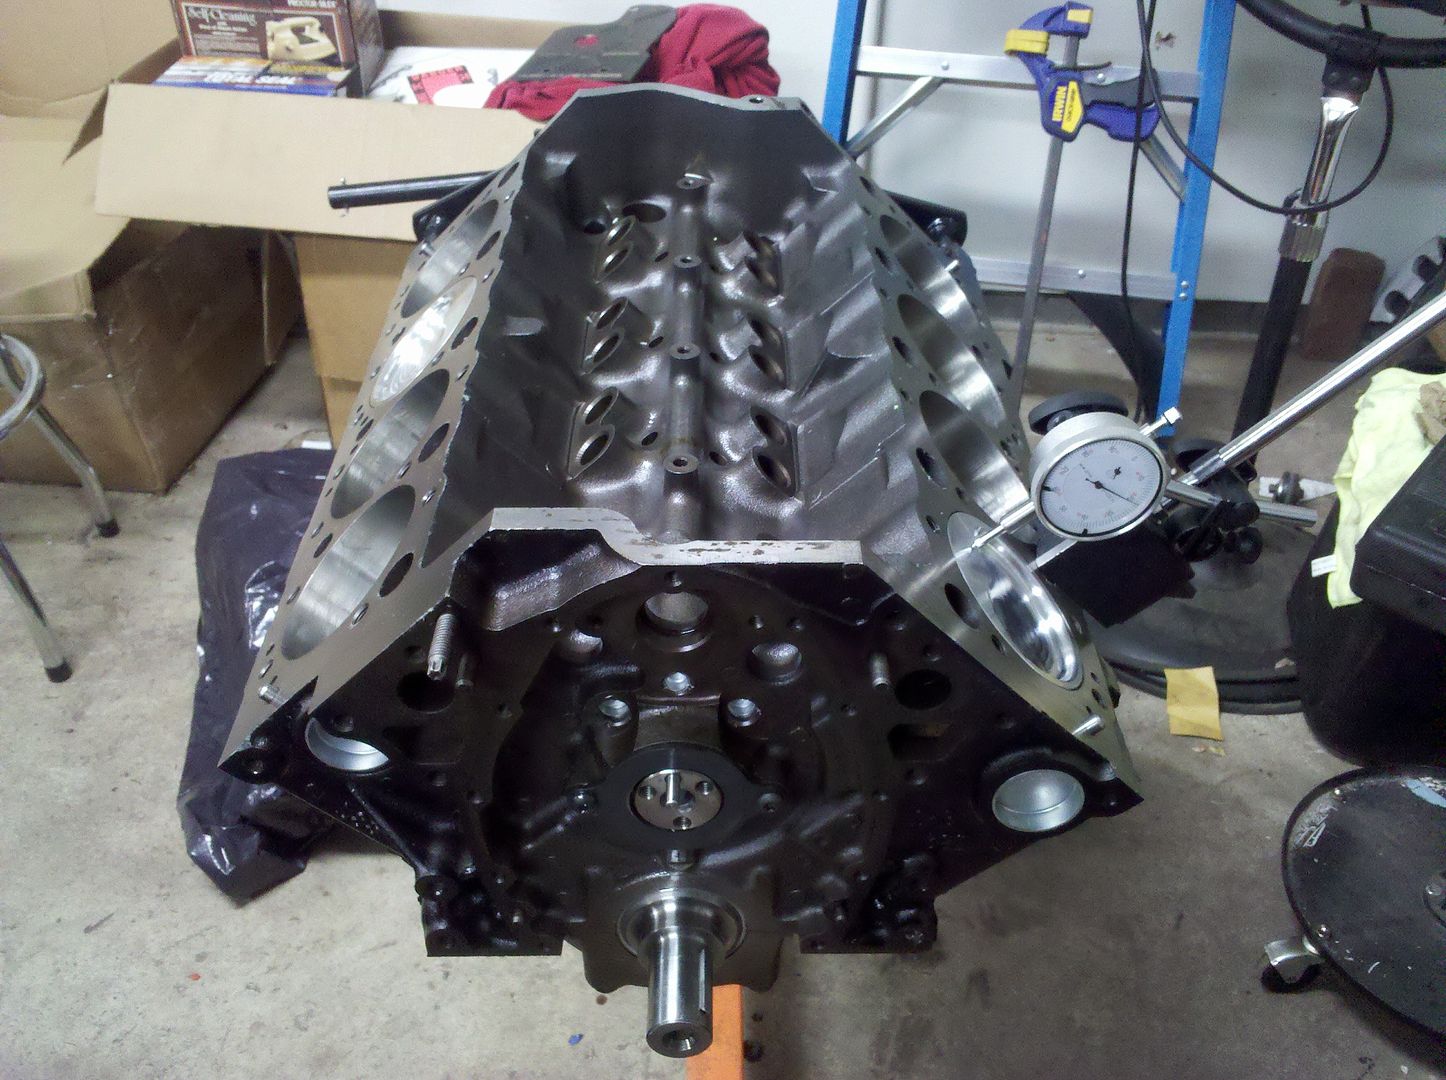
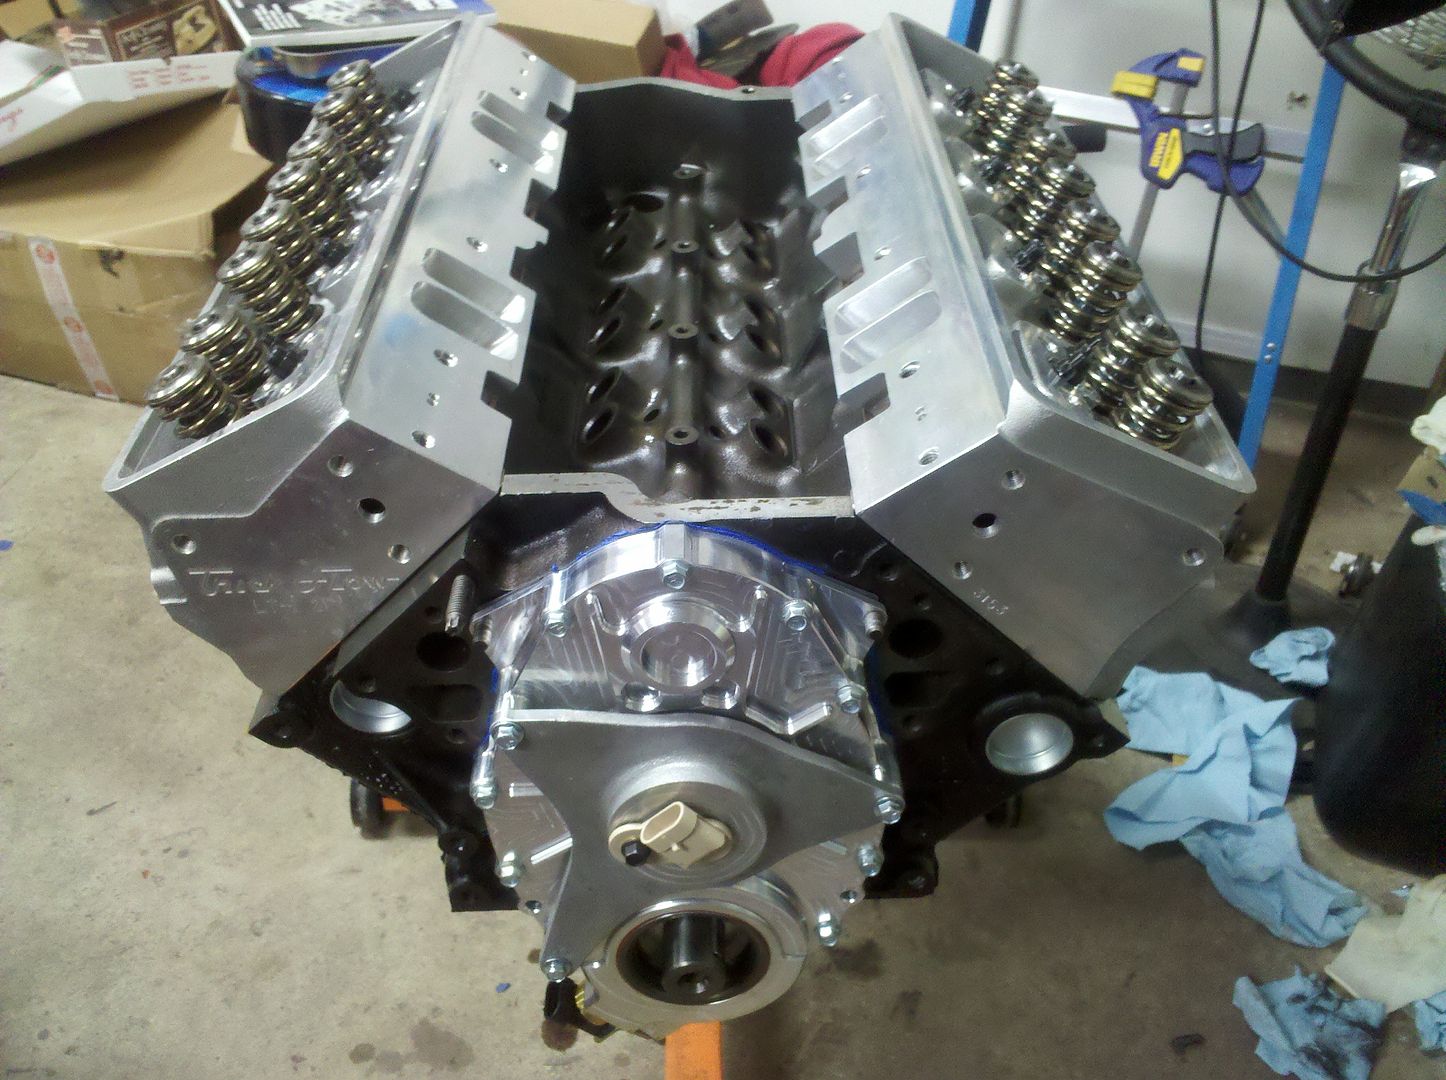
Thanks! In the picture I was making sure I was at absolute TDC before I threw the cam in. I wanted to make sure the dots on the timing set lined up accordingly.
Looking great Brian. I almost wish I built my motor instead of bought it outright. It would have been a lot more expensive, but I would have gotten to experience the awesome feeling of taking those pics of brand new bling.
Thread Starter
Joined: Mar 2005
Posts: 2,161
Likes: 4
From: Millstone Twp, NJ
Waiting on a few bolts in the mail to finish up a few things but otherwise the engine is almost done. I'm a little bit nervous to bolt on the blower with the engine stand wobbling with all the weight now LOL.
Nothing wrong with buying it outright and hopefully mine will run as good as yours. Like a new born, all I want is for it to be healthy...and wouldn't mind it throwing down some decent power too 
I am taking a lot of pics because sadly, you (hopefully) won't see this stuff once its all covered up.
I am taking a lot of pics because sadly, you (hopefully) won't see this stuff once its all covered up.
LS1 Tech Stories
The Best V8 Stories One Small Block at Time

6 Common C5 Corvette Failures and What's Involved In Repairing Them
Pouria Savadkouei
Retro Modern Bandit Pontiac Trans AM Comes With Burt Reynolds' Autograph
Verdad Gallardo
Top 10 Greatest Cadillac V Series Performance Models Ever, Ranked
Pouria Savadkouei
Top 10 Most Powerful Chevy Trucks Ever Made!

Hennessey's New Supercharged Silverado ZR2 Has 700 HP
Verdad Gallardo
Coachbuilt N2A Anteros Is an LS2-Powered C6 Corvette In Italian Clothes
Verdad Gallardo
Awesome K5 Blazer Restomod Comes With C7 Corvette Power
Verdad Gallardo
10 Camaros You Should Never Buy

10 LS Engine Myths That Refuse to Die
Verdad Gallardo
Thread Starter
Joined: Mar 2005
Posts: 2,161
Likes: 4
From: Millstone Twp, NJ
I got mine from Bob @ Brutespeed. He is a sponsor here and gave me a great price. The F1A head unit is an upgrade option on the D1 kit but not always listed explicitly that way.
To source an F series from ATI, you need to specify it. It's sort of a custom-order thing.
I would advise using the SDCE tensioner kit with it, I think it's also available from Brutespeed.
They seem to be swallowing all of the Procharger business around here. I haven't heard anything negative about them yet.
I bought my kit complete (sort of) from a member on here. Everything was right and was there except for the charge pipes, but I had those re-done and tucked up nicely and powdercoated!
In short, contact Bob@Brutespeed for more info.
And if you're not going for huge numbers (650+ at the wheels) an F-series procharger isn't necessary. There are a couple people with D series units making big power (Call911, and a couple others I think).
I could make more power with a bigger cam and a smaller pulley (~725-750), but I over-engineered my build so nothing is being maxed out (I'm an engineer, go figure). Procharger and valvetrain aren't being over-worked or pushed to the limit, so I can basically beat on it as hard as I want to and not worry about breaking anything.
Thread Starter
Joined: Mar 2005
Posts: 2,161
Likes: 4
From: Millstone Twp, NJ
Well need some help guys.
First, the damper/hub install tool I rented from Advance Auto isn't going to work. This is the one I grabbed.
http://shop.advanceautoparts.com/web...%7CGRP2083____
Does anyone know the tool to allow me to press the crank hub onto the snout of the crank?
To make things more difficult, Callies decided to start the threads deeper into the crank snout so I need a longer 7/16 fine thread rod to ?? thread adapter to even think about using this tool. I will be calling Callies tomorrow to see what they recommend.
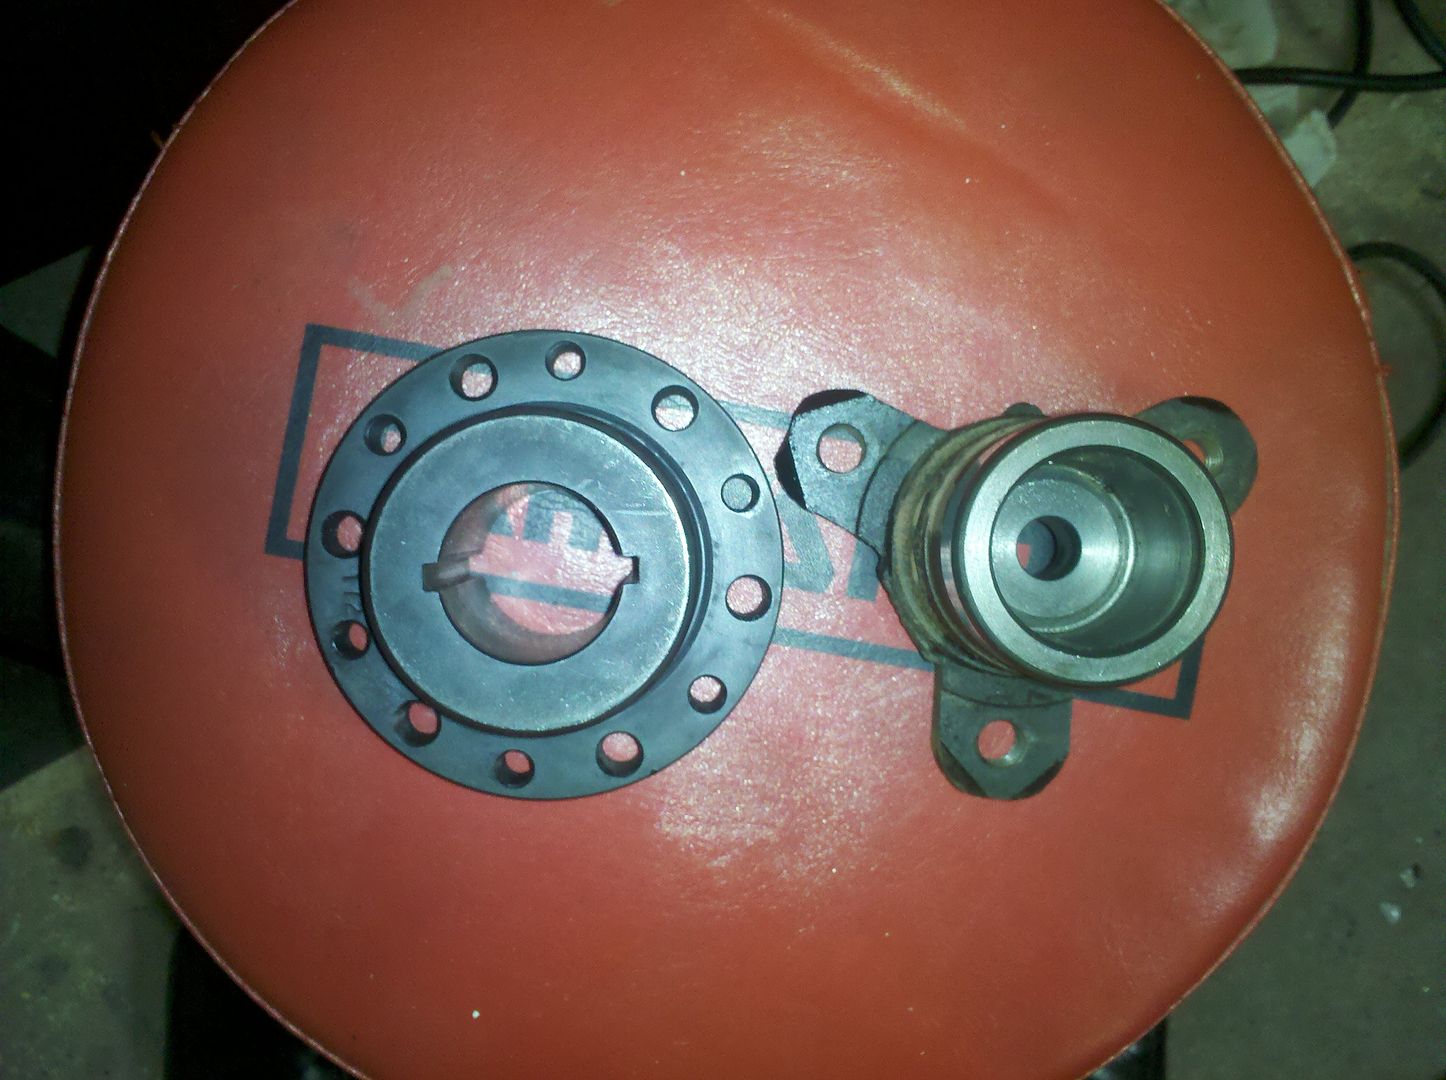
I didn't think of this before but I also don't know how the bolt in the center will even secure the crank hub when installed. See the pic below compared to the old crank hub. Its clear the old crank hub is smaller in the center to allow the bolt to actually do something.
Summit sent me the wrong pushrods (Comp Hi-Tech pushrods) which were 7.1" not 7.2". The box listed the correct length but the rods said something different. Summit was really good. I called them and they are sending new ones out immediately and only need me to send the old ones back when the new package arrives.
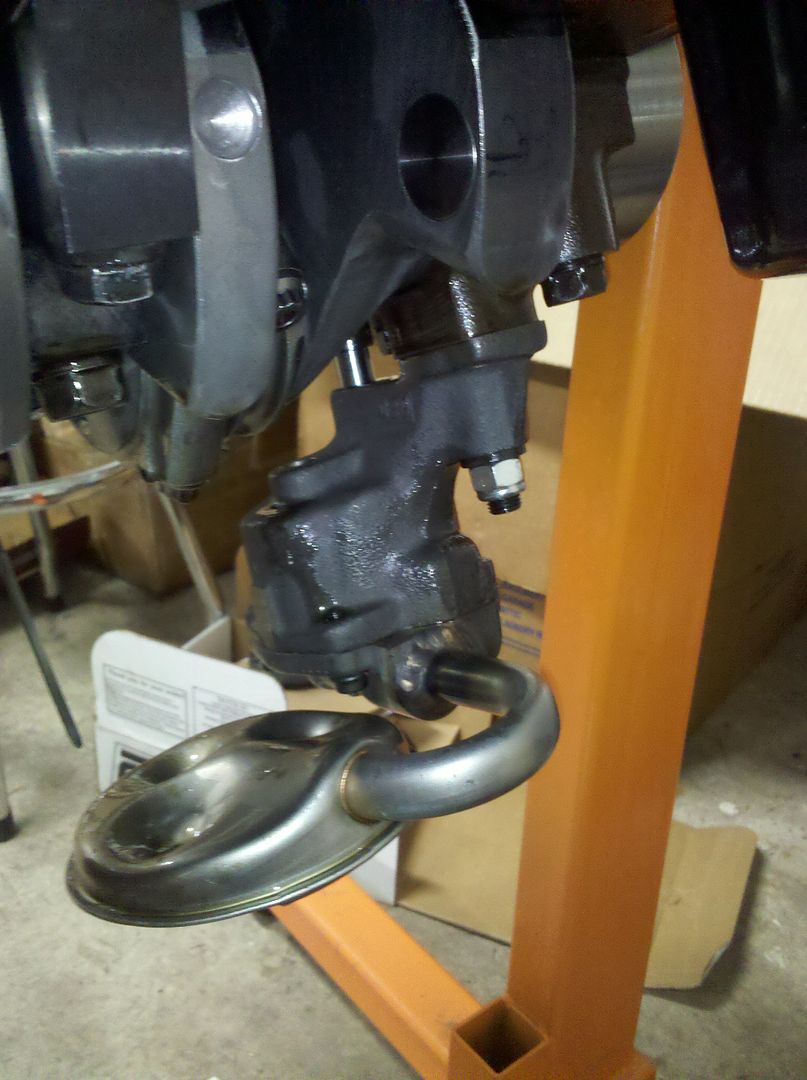
Now, onto what I did get done...not much granted the other issues I ran into. I got the new white spring installed in the Melling Select oil pump. Pump was primed, installed and the stud torqued to spec.
Also installed my lokar dipstick which required trimming of the shroud going into the block. The shroud hit the splayed main cap so I simply cut off the necessary length and its all good now. The lokar stick is a much more rigid piece than a stock flimsy unit so I don't imagine I will run into issues.
My other crafty idea actually seems to be working out. The polished elbow going into the throttle body has a fitting for the IAT sensor. The MAF is a 5-wire which has the IAT built in. Since I didn't need the fitting in the elbow, I converted it to be a port for the meth injection. The port was threaded too large to simply drill and re-tap the hole so I found a nice Russell 1/8NPT to 3/8NPT to hopefully make it work. I got the proper drill and tap for the 3/8NPT and successfully got the fitting installed. Looks great and should work perfectly fine.
First, the damper/hub install tool I rented from Advance Auto isn't going to work. This is the one I grabbed.
http://shop.advanceautoparts.com/web...%7CGRP2083____
Does anyone know the tool to allow me to press the crank hub onto the snout of the crank?
To make things more difficult, Callies decided to start the threads deeper into the crank snout so I need a longer 7/16 fine thread rod to ?? thread adapter to even think about using this tool. I will be calling Callies tomorrow to see what they recommend.
I didn't think of this before but I also don't know how the bolt in the center will even secure the crank hub when installed. See the pic below compared to the old crank hub. Its clear the old crank hub is smaller in the center to allow the bolt to actually do something.
Summit sent me the wrong pushrods (Comp Hi-Tech pushrods) which were 7.1" not 7.2". The box listed the correct length but the rods said something different. Summit was really good. I called them and they are sending new ones out immediately and only need me to send the old ones back when the new package arrives.
Now, onto what I did get done...not much granted the other issues I ran into. I got the new white spring installed in the Melling Select oil pump. Pump was primed, installed and the stud torqued to spec.
Also installed my lokar dipstick which required trimming of the shroud going into the block. The shroud hit the splayed main cap so I simply cut off the necessary length and its all good now. The lokar stick is a much more rigid piece than a stock flimsy unit so I don't imagine I will run into issues.
My other crafty idea actually seems to be working out. The polished elbow going into the throttle body has a fitting for the IAT sensor. The MAF is a 5-wire which has the IAT built in. Since I didn't need the fitting in the elbow, I converted it to be a port for the meth injection. The port was threaded too large to simply drill and re-tap the hole so I found a nice Russell 1/8NPT to 3/8NPT to hopefully make it work. I got the proper drill and tap for the 3/8NPT and successfully got the fitting installed. Looks great and should work perfectly fine.
You need to buy a standard small block Chevy Harmonic Balancer bolt. It has a large washer that holds the hub in place.
Do not buy cheap all-threaded rod to pull the balancer on, it is soft & will often break off in the crank. Grade 8 all-thread is not commonly available. I recommend an installer tool. They are rather cheap cosidering the problems caused when you break somehing off in the crank.
Do not buy cheap all-threaded rod to pull the balancer on, it is soft & will often break off in the crank. Grade 8 all-thread is not commonly available. I recommend an installer tool. They are rather cheap cosidering the problems caused when you break somehing off in the crank.
Thread Starter
Joined: Mar 2005
Posts: 2,161
Likes: 4
From: Millstone Twp, NJ
You need to buy a standard small block Chevy Harmonic Balancer bolt. It has a large washer that holds the hub in place.
Do not buy cheap all-threaded rod to pull the balancer on, it is soft & will often break off in the crank. Grade 8 all-thread is not commonly available. I recommend an installer tool. They are rather cheap cosidering the problems caused when you break somehing off in the crank.
Do not buy cheap all-threaded rod to pull the balancer on, it is soft & will often break off in the crank. Grade 8 all-thread is not commonly available. I recommend an installer tool. They are rather cheap cosidering the problems caused when you break somehing off in the crank.
The new cover, besides looking pretty sweet, is clearanced for the big block crank hub.
^ I can't remember if we touched on that on here or on LTXTech. The BBC crank hub is good for higher HP supercharger setups, more specifically, the F-series of ATI blowers. Especially if you're running a 12-rib setup. The LT1 crank snout and stock hub can be weak, and have snapped before. This is just a bit of extra engineering to ensure a long, healthy life.
Brian - As far as installing the ATI hub, You just need an SBC crank hub bolt with the big washer. I just had an ARP one that was brand new that I just sold...should have though about ya!
As far as the install tool...I ran into the same issue. I ended up using a fairly unorthodox "install tool" - a block of wood and a rubber mallet. I know I'll get slayed for saying that, but you know...if you know what you're doing and you're careful, it'll be fine. Can't tell you how many times my dad and I installed hubs on 900+HP BBC dragster motors like that.
Of course, getting a better tool is a better idea. But sometimes you gotta do what you gotta do.
Thread Starter
Joined: Mar 2005
Posts: 2,161
Likes: 4
From: Millstone Twp, NJ
^ I can't remember if we touched on that on here or on LTXTech. The BBC crank hub is good for higher HP supercharger setups, more specifically, the F-series of ATI blowers. Especially if you're running a 12-rib setup. The LT1 crank snout and stock hub can be weak, and have snapped before. This is just a bit of extra engineering to ensure a long, healthy life.
Brian - As far as installing the ATI hub, You just need an SBC crank hub bolt with the big washer. I just had an ARP one that was brand new that I just sold...should have though about ya!
As far as the install tool...I ran into the same issue. I ended up using a fairly unorthodox "install tool" - a block of wood and a rubber mallet. I know I'll get slayed for saying that, but you know...if you know what you're doing and you're careful, it'll be fine. Can't tell you how many times my dad and I installed hubs on 900+HP BBC dragster motors like that.
Of course, getting a better tool is a better idea. But sometimes you gotta do what you gotta do.
Brian - As far as installing the ATI hub, You just need an SBC crank hub bolt with the big washer. I just had an ARP one that was brand new that I just sold...should have though about ya!
As far as the install tool...I ran into the same issue. I ended up using a fairly unorthodox "install tool" - a block of wood and a rubber mallet. I know I'll get slayed for saying that, but you know...if you know what you're doing and you're careful, it'll be fine. Can't tell you how many times my dad and I installed hubs on 900+HP BBC dragster motors like that.
Of course, getting a better tool is a better idea. But sometimes you gotta do what you gotta do.
As for a hub install tool, I'm going to make my own with all grade 8 hardware including a 7/16-20 1' threaded rod, nuts, and large thick washers. I will use the thrust bearing from the kit to press the hub on when I get everything setup.
^ Psshh...you people and your "special tools". I like the hammer better 
Sounds great Brian. Keep up the good work. I think I may just beat you to the punch though...I've only got a few more things to do and I'm ready for startup!
Sounds great Brian. Keep up the good work. I think I may just beat you to the punch though...I've only got a few more things to do and I'm ready for startup!
Thread Starter
Joined: Mar 2005
Posts: 2,161
Likes: 4
From: Millstone Twp, NJ
The machine shop that did the balancing on the rotating assembly took a little off the inside of the hub to make it easier to get on but its still going to be a tight fit. You are way ahead of me but slacking on the pics.
