


nhra cage build help
Thread Starter
11 Second Club
Joined: Sep 2006
Posts: 93
Likes: 0
From: lakeville, mn
alright, i have the main hoop bent and the plates welded down, i just want to see how you guys are bending the door bars and rear bars. also does the number of or angle of the bends have an effect on how nhra likes it or not.
just for exra info Im tig welding it in and its 4130 pipe...
just for exra info Im tig welding it in and its 4130 pipe...
Last edited by kolorzcars; Mar 23, 2011 at 11:50 AM.
Door bars are required to pass at the drivers shoulder, and I believe the knee. IIRC its been a few years since needing a cage done, but the rears went from the main hoop to just behind the shock mount and had an X brace between them. The door bars left the main hoop just above the shoulder and went down to the front door bar at the kickpanel. If you check the nhra website they have illistrations to help you out and pretty definitive IIRC. G/L
10 Second Club


Joined: Oct 2007
Posts: 2,630
Likes: 28
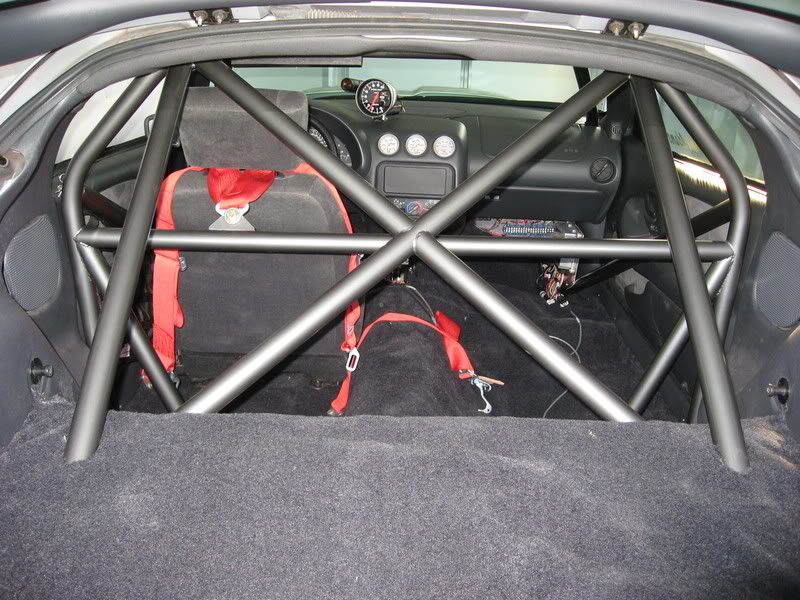
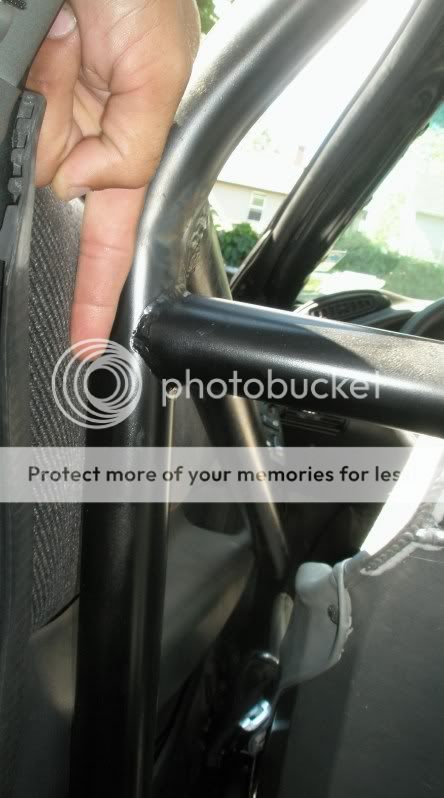
Here's mine. It was custom built by a friend of mine. He tucked the door bars in very close to the panels. The kits you buy don't come this close.

Notice how wide the bars go out to the side where the panel is. That gives me the most arm room.

I paid $275 for the material and $600 or $650 for the install (can't remember exactly). My cage weighed 46 lbs including the 6 plates.
Notice how wide the bars go out to the side where the panel is. That gives me the most arm room.
I paid $275 for the material and $600 or $650 for the install (can't remember exactly). My cage weighed 46 lbs including the 6 plates.
Trending Topics
LS1 Tech Stories
The Best V8 Stories One Small Block at Time

Topdon ONE vs. Artidiag 800 BT2: Which is the Diagnostic Tablet For You?
Pouria Savadkouei
Gas Monkey Built a 6-Wheel Ferrari Testarossa With a Corvette LT4 Engine
Verdad Gallardo
7 Most Reliable High-Performance Engines GM Has Ever Built
Verdad Gallardo
Amazing '71 Camaro Restomod Is Modern Muscle Car Under the Skin
Verdad Gallardo
6 Common C5 Corvette Failures and What's Involved In Repairing Them
Pouria Savadkouei
Retro Modern Bandit Pontiac Trans AM Comes With Burt Reynolds' Autograph
Verdad Gallardo
Top 10 Greatest Cadillac V Series Performance Models Ever, Ranked
Pouria Savadkouei
Top 10 Most Powerful Chevy Trucks Ever Made!

Hennessey's New Supercharged Silverado ZR2 Has 700 HP
Verdad Gallardo Just finished my cage last Friday. I got to help some, but it was installed by Jon at DB Rods in Taylor, TX and he did an outstanding job. It's a Wolfe 6 point with 2 additional down bars from the main hoop to convert it to an 8 point. The Wolfe kit is a decent kit but I'm not too impressed with some of the bends which are flattened a little. I used RJS cam lock 3" 5 point harnesses with 2" crotch strap. They fit very well and are super easy to get in and out of.

IMG_1087 by tx20d, on Flickr

IMG_1081 by tx20d, on Flickr

IMG_1080 by tx20d, on Flickr

IMG_1082 by tx20d, on Flickr

IMG_1084 by tx20d, on Flickr

IMG_1085 by tx20d, on Flickr
IMG_1087 by tx20d, on Flickr
IMG_1081 by tx20d, on Flickr
IMG_1080 by tx20d, on Flickr
IMG_1082 by tx20d, on Flickr
IMG_1084 by tx20d, on Flickr
IMG_1085 by tx20d, on Flickr
Thread Starter
11 Second Club
Joined: Sep 2006
Posts: 93
Likes: 0
From: lakeville, mn
great info gizmo, thats the best part of this forum, the little guys like me get to ask the top guns questions
formula383, i drooled over your car when it was in gmhightech! thing looks nice, cage turned out sweet. thanks for the pics
formula383, i drooled over your car when it was in gmhightech! thing looks nice, cage turned out sweet. thanks for the pics
The difference betwean my cage and both of the others pictured is that it is tied into the shock mounts, spring seats, and frame connectors. I am actually "using" the cage to help the car launch. They all look good. It just depends on what you are trying to do with the car and space requirements.
Thread Starter
11 Second Club
Joined: Sep 2006
Posts: 93
Likes: 0
From: lakeville, mn
tied into the shock mounts, spring seats, and frame connectors
Thread Starter
11 Second Club
Joined: Sep 2006
Posts: 93
Likes: 0
From: lakeville, mn
yep, for sure, i had my kid in there for mock up, and Ill be putting foam pad around all the rear bars when they are in there, and this is the last summer i will have a back seat(the girls wanted me to keep it one more year). I ran 11.46 with a 1.70 60' last year and after that pass, my t-tops dont fit right and my drivers door squeels when i open it, so i figure its time for the sub-connectors and roll bar.
Last edited by kolorzcars; Mar 24, 2011 at 03:52 PM.