


Water in Firebird Tail lights
Well if finally happened. Car has been sitting around since the engine is hydro-locked. However the last 3 years I have been watching the colors change in my Lt1 sytle tail lights on my Formula. Anyways left for work this week and after a week of rain there is water in my drivers side tail light. I have a feeling the passenger side is not that far behind.
I have looked around but just find right ups on the Ls1 Honeycomb style tail lights. Has anyone done the lt1 style or are they just like the honeycombs. I also have the fading on the black sections of the tail light.
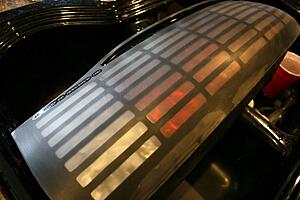
Kinda like this one where the top is a grey almost white and the bottom is still black. (This is not my taillight, this is one raided from ebay.)

I would like to try to restore these lights as I am also trying to pull the motor in a week to check it out and see what it needs to rebuild or what I can raid for the next one. I want this car back on the road.
Edit: Forgot to add the link to the one thing I found
http://www.ls1lt1.com/forum/4th-gen-...amp-rehab.html
I have looked around but just find right ups on the Ls1 Honeycomb style tail lights. Has anyone done the lt1 style or are they just like the honeycombs. I also have the fading on the black sections of the tail light.
Kinda like this one where the top is a grey almost white and the bottom is still black. (This is not my taillight, this is one raided from ebay.)
I would like to try to restore these lights as I am also trying to pull the motor in a week to check it out and see what it needs to rebuild or what I can raid for the next one. I want this car back on the road.
Edit: Forgot to add the link to the one thing I found
http://www.ls1lt1.com/forum/4th-gen-...amp-rehab.html
TECH Apprentice
Joined: Feb 2005
Posts: 384
Likes: 0
My taillights were delaminating as well. I did what forums user "dubga" came up with in the following thread:
https://ls1tech.com/forums/appearanc...new-again.html
Basically, wetsand the lights with 1500~2500 grit paper, apply vinyl stencils from Brent Franker, paint the grid pattern back on using VHT Nightshades paint (5~6 coats), peel the vinyl stencils off, lightly wetsand again, paint it all with several coats of clearcoat, wetsand, then polish them back out.
Took some effort, but my delaminating lights look brand new now:
Before (+ wetsanding):
After:

Don't have a straight shot from behind the car, unfortunately. I also did the center plastic section between the lights, so everything is color-matched.
https://ls1tech.com/forums/appearanc...new-again.html
Basically, wetsand the lights with 1500~2500 grit paper, apply vinyl stencils from Brent Franker, paint the grid pattern back on using VHT Nightshades paint (5~6 coats), peel the vinyl stencils off, lightly wetsand again, paint it all with several coats of clearcoat, wetsand, then polish them back out.
Took some effort, but my delaminating lights look brand new now:
Before (+ wetsanding):

After:

Don't have a straight shot from behind the car, unfortunately. I also did the center plastic section between the lights, so everything is color-matched.
TECH Apprentice
Joined: Feb 2005
Posts: 384
Likes: 0
Sorry, I didn't realize your lenses are cracked. [Edit] Apparently that's not your light. Nevermind.
I can't help you with the water leaking problem -- I've never physically torn the lights apart. You'd obviously first need to locate the leak.
I was merely showing that you can technically fix the grids. As far as I know, this is the ONLY way you can fix the grids themselves, else you need to buy new/undamaged taillights. I believe Brent Franker tried fixing the grids from the inside, and it didn't work.
Last edited by Alex94TAGT; Dec 13, 2013 at 05:23 PM.
Quick Fix -
Remove the lamp housings, then drill small drain holes in the bottom of each chamber, to allow the water to drain out.
(Yes, I know, it does not address the root cause of the problem, just a symptom.)
Remove the lamp housings, then drill small drain holes in the bottom of each chamber, to allow the water to drain out.
(Yes, I know, it does not address the root cause of the problem, just a symptom.)
My taillights were delaminating as well. I did what forums user "dubga" came up with in the following thread:
https://ls1tech.com/forums/appearanc...new-again.html
Basically, wetsand the lights with 1500~2500 grit paper, apply vinyl stencils from Brent Franker, paint the grid pattern back on using VHT Nightshades paint (5~6 coats), peel the vinyl stencils off, lightly wetsand again, paint it all with several coats of clearcoat, wetsand, then polish them back out.
Took some effort, but my delaminating lights look brand new now:
Before (+ wetsanding):

After:


Don't have a straight shot from behind the car, unfortunately. I also did the center plastic section between the lights, so everything is color-matched.
https://ls1tech.com/forums/appearanc...new-again.html
Basically, wetsand the lights with 1500~2500 grit paper, apply vinyl stencils from Brent Franker, paint the grid pattern back on using VHT Nightshades paint (5~6 coats), peel the vinyl stencils off, lightly wetsand again, paint it all with several coats of clearcoat, wetsand, then polish them back out.
Took some effort, but my delaminating lights look brand new now:
Before (+ wetsanding):
After:
Don't have a straight shot from behind the car, unfortunately. I also did the center plastic section between the lights, so everything is color-matched.
Sorry, I didn't realize your lenses are cracked. [Edit] Apparently that's not your light. Nevermind.
I can't help you with the water leaking problem -- I've never physically torn the lights apart. You'd obviously first need to locate the leak.
I was merely showing that you can technically fix the grids. As far as I know, this is the ONLY way you can fix the grids themselves, else you need to buy new/undamaged taillights. I believe Brent Franker tried fixing the grids from the inside, and it didn't work.
I can't help you with the water leaking problem -- I've never physically torn the lights apart. You'd obviously first need to locate the leak.
I was merely showing that you can technically fix the grids. As far as I know, this is the ONLY way you can fix the grids themselves, else you need to buy new/undamaged taillights. I believe Brent Franker tried fixing the grids from the inside, and it didn't work.
I have herd this but its not enough to leak out. Its just enough right now to fog up the tail lights. Would like to be able to keep these sealed up when I take them apart.
I know this isn't your exact problem, but does anyone know where to get the gaskets that go around the bulb sockets?? I get water in my tail lights due to missing a few of them.
Maybe a junk yard. Otherwise maybe the dealer or autoparts store. Cant find it on gm parts direct.
Trending Topics
LS1 Tech Stories
The Best V8 Stories One Small Block at Time

6 Common C5 Corvette Failures and What's Involved In Repairing Them
Pouria Savadkouei
Retro Modern Bandit Pontiac Trans AM Comes With Burt Reynolds' Autograph
Verdad Gallardo
Top 10 Greatest Cadillac V Series Performance Models Ever, Ranked
Pouria Savadkouei
Top 10 Most Powerful Chevy Trucks Ever Made!

Hennessey's New Supercharged Silverado ZR2 Has 700 HP
Verdad Gallardo
Coachbuilt N2A Anteros Is an LS2-Powered C6 Corvette In Italian Clothes
Verdad Gallardo
Awesome K5 Blazer Restomod Comes With C7 Corvette Power
Verdad Gallardo
10 Camaros You Should Never Buy

10 LS Engine Myths That Refuse to Die
Verdad Gallardo
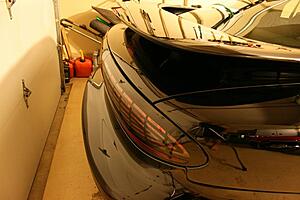
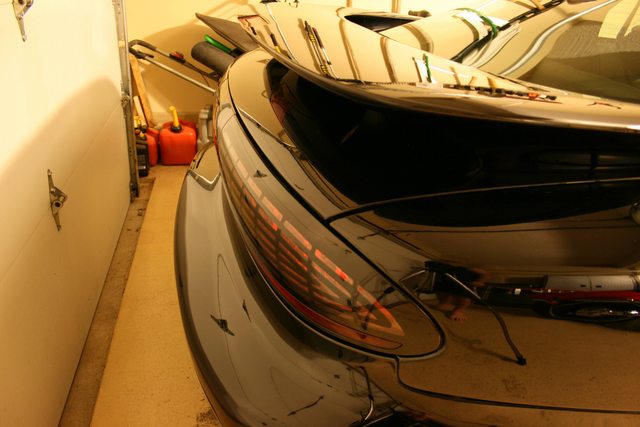
Bumping this up. Since the engine is coming out of the car I decided to look into my tail light. Well the drivers side had a gallon of water in it. Anyways decided the seal was the problem. I put them in the open at 200 for 12 mins. Pulled them out to more delamination.
Here is what they look like.
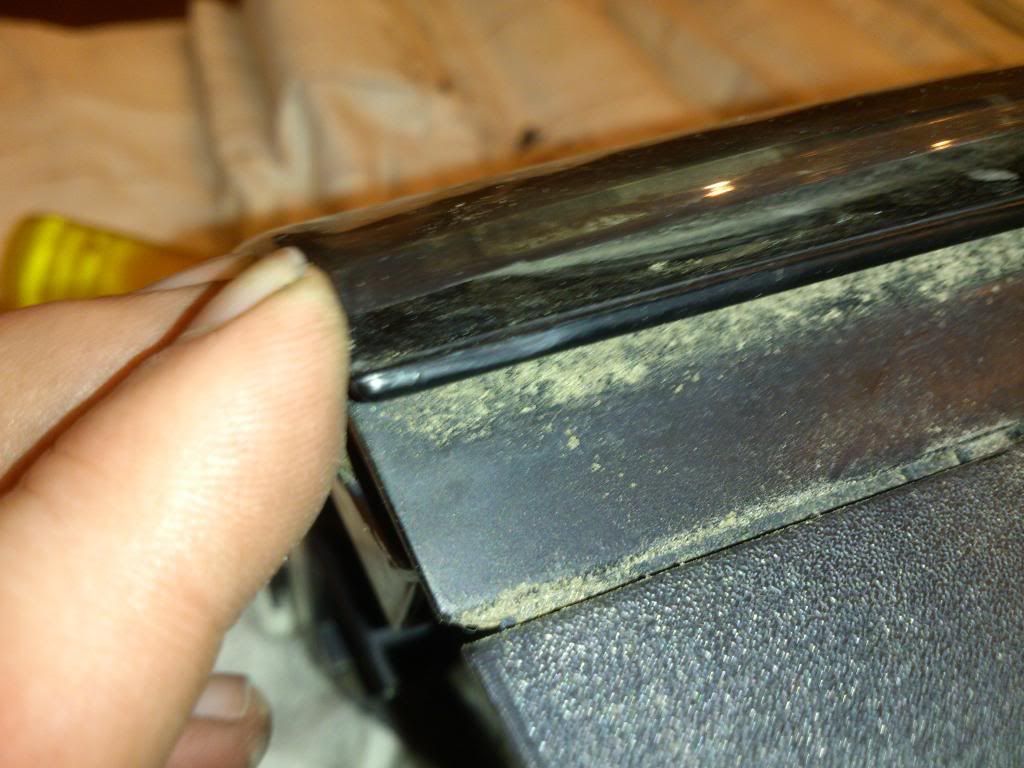
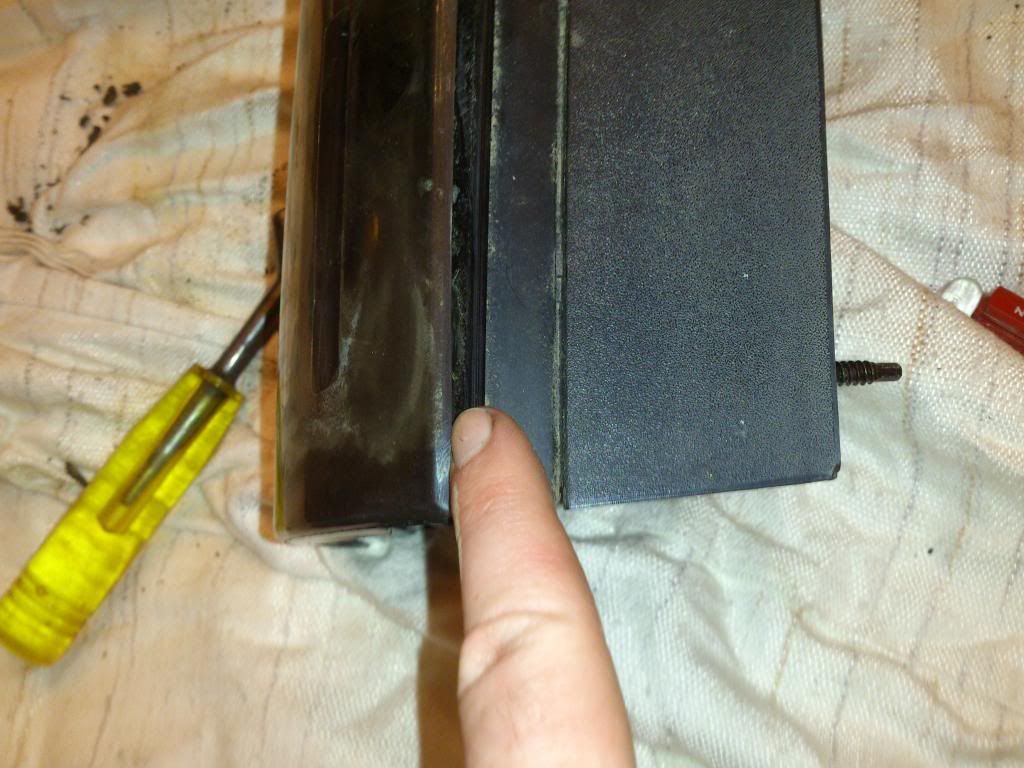
Anything I can do or is it a hunt for a set of of tail lights. Thinking some v6 with a load of nightshade.
Here is what they look like.


Anything I can do or is it a hunt for a set of of tail lights. Thinking some v6 with a load of nightshade.
