


Gauges
Thread Starter
TECH Regular
Joined: Oct 2005
Posts: 431
Likes: 1
From: Lexington, NC
Ok guys, so I have been planning on doing some gauges for my car for a while and I finaly got around to doing it.
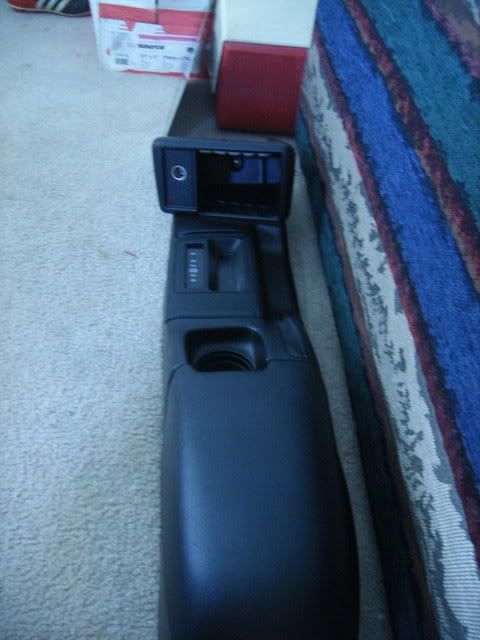
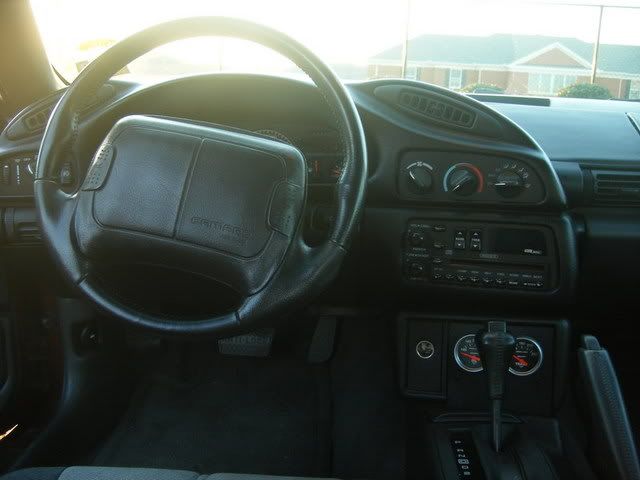
I decided to do something custom and put the gauges in the pocket infront of the shifter, that is basicly useless.
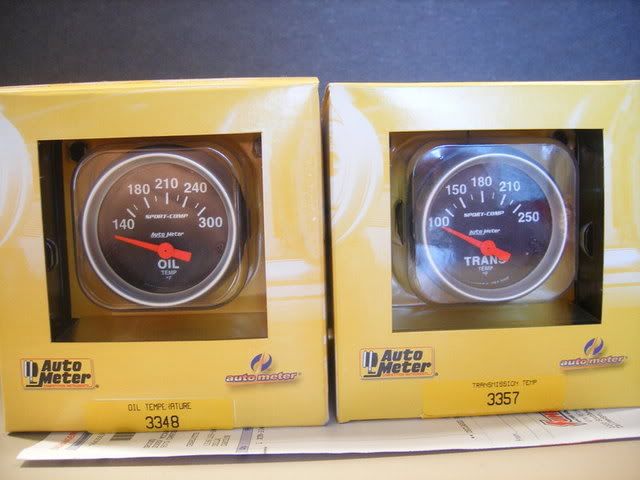
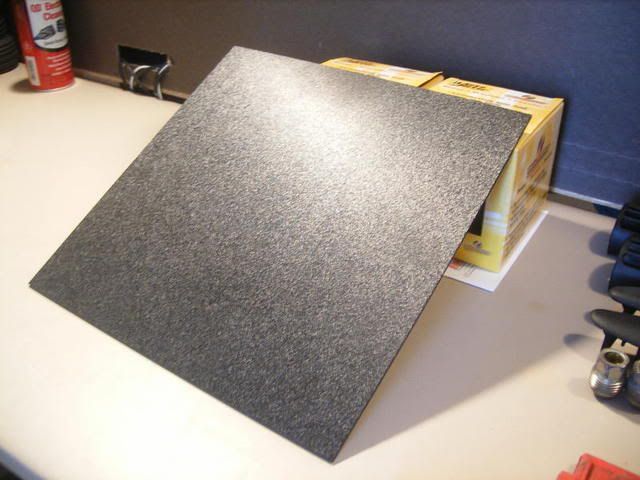
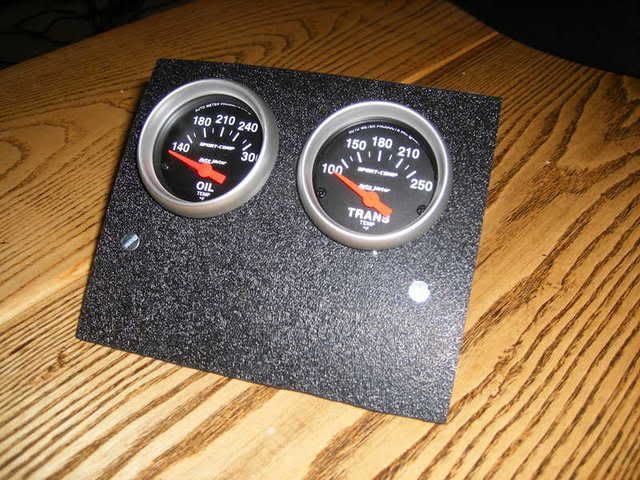
I have two sport comp gauges, tranny and oil. Today I went to best buy and got a peice of 12"x12" black ABS plastic that matched perfectly for 5 bucks, from the install guy.
After playing with the dremel and sticking my tounge out for a while (that what engages the thinking side of my brain) This is what I have thus far.
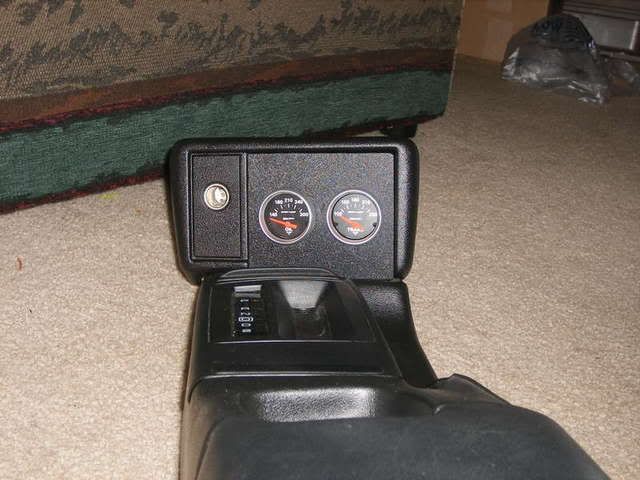
So I am going to make some more face plates since I have one done, and put the holes for the gauges a bit higher, and maybe do one with gauges go at a diagonal downward, or upward.
My question though is on the wiring of the sending unit. I know the trans temp will be cake, but the oil temp. I heard that there is a place I can put the oil temp around the oil filter or something, but I havent been able to figure out where. Where is it?
Also, for the lighting of the gauges I am going to splice into the light in the console that lights up the shifter, A4. There is a black and a grey wire. Which one is the ground, lol?
Thanks guys. I will post pics when the project is completely done.
-bryan
I decided to do something custom and put the gauges in the pocket infront of the shifter, that is basicly useless.
I have two sport comp gauges, tranny and oil. Today I went to best buy and got a peice of 12"x12" black ABS plastic that matched perfectly for 5 bucks, from the install guy.
After playing with the dremel and sticking my tounge out for a while (that what engages the thinking side of my brain) This is what I have thus far.
So I am going to make some more face plates since I have one done, and put the holes for the gauges a bit higher, and maybe do one with gauges go at a diagonal downward, or upward.
My question though is on the wiring of the sending unit. I know the trans temp will be cake, but the oil temp. I heard that there is a place I can put the oil temp around the oil filter or something, but I havent been able to figure out where. Where is it?
Also, for the lighting of the gauges I am going to splice into the light in the console that lights up the shifter, A4. There is a black and a grey wire. Which one is the ground, lol?
Thanks guys. I will post pics when the project is completely done.
-bryan
That looks awesome! Wish I would have mounted mine down there, I like where they are on the dash -- but that looks super clean.
I can't really help you with the oil temp -- try a search or PM Injuneer on CZ28.com, he seems to be the gauge-hooking-up-install-master. For the wires for the lighting -- the black is the ground and the grey is power. It'll work to use the power source to the light on the shifter, but that is a pretty small gauge wire. For the ground, run all of your grounds together and use the ground bolt that is underneath the glove box on the passenger side. Just pull the interior panel piece that is covering the area below the glove box and it'll be right near the door jamb. Put a circle "O" spade connector on the end of the wire and just take the nut off the ground spot and put the "O" on there.
It is slightly confusing, I'll try to get pics when I get home if you need them.
Thread Starter
TECH Regular
Joined: Oct 2005
Posts: 431
Likes: 1
From: Lexington, NC
I know exactly what you are talking about. I was planning on just grounding to the light, but I guess that wont work? Regardless it wont be hard to get the wire over to the door with the gauges being where they are located.
I spoke with one of the guys at Zeus Performance today, and I know what I am going to do as of now. Im off now to make another face plate to move the gauges up some.
I have had a few guys interested in having me make a peice for them to do the same thing to. I know that RK sport used to make one of the panels a while back but discontinued them.
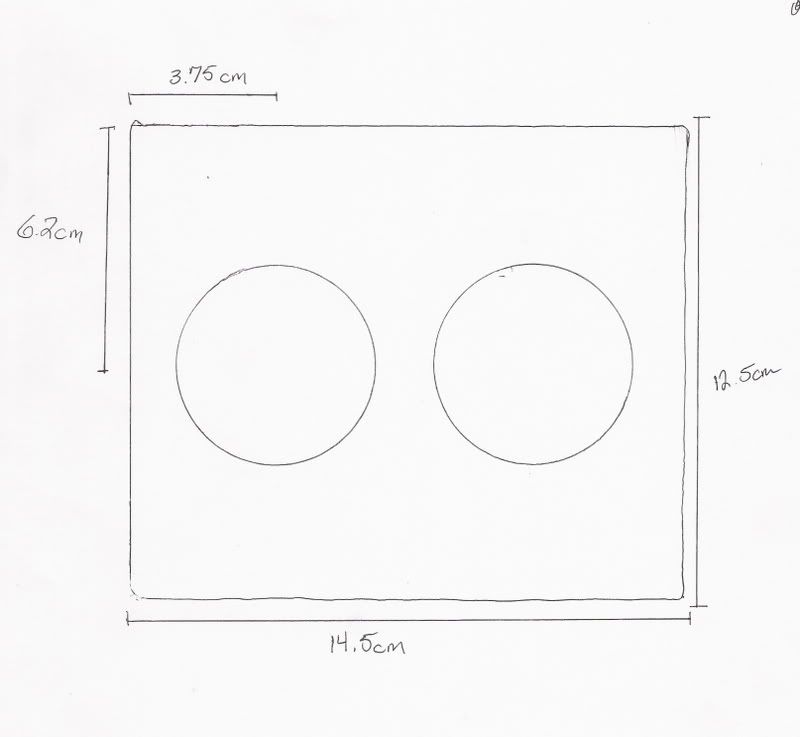
Would any one like me to trace up a template with some measurements and post it up?
-bryan
I spoke with one of the guys at Zeus Performance today, and I know what I am going to do as of now. Im off now to make another face plate to move the gauges up some.
I have had a few guys interested in having me make a peice for them to do the same thing to. I know that RK sport used to make one of the panels a while back but discontinued them.
Would any one like me to trace up a template with some measurements and post it up?
-bryan
Trending Topics
LS1 Tech Stories
The Best V8 Stories One Small Block at Time

Topdon ONE vs. Artidiag 800 BT2: Which is the Diagnostic Tablet For You?
Pouria Savadkouei
Gas Monkey Built a 6-Wheel Ferrari Testarossa With a Corvette LT4 Engine
Verdad Gallardo
7 Most Reliable High-Performance Engines GM Has Ever Built
Verdad Gallardo
Amazing '71 Camaro Restomod Is Modern Muscle Car Under the Skin
Verdad Gallardo
6 Common C5 Corvette Failures and What's Involved In Repairing Them
Pouria Savadkouei
Retro Modern Bandit Pontiac Trans AM Comes With Burt Reynolds' Autograph
Verdad Gallardo
Top 10 Greatest Cadillac V Series Performance Models Ever, Ranked
Pouria Savadkouei
Top 10 Most Powerful Chevy Trucks Ever Made!

Hennessey's New Supercharged Silverado ZR2 Has 700 HP
Verdad Gallardo Thread Starter
TECH Regular
Joined: Oct 2005
Posts: 431
Likes: 1
From: Lexington, NC
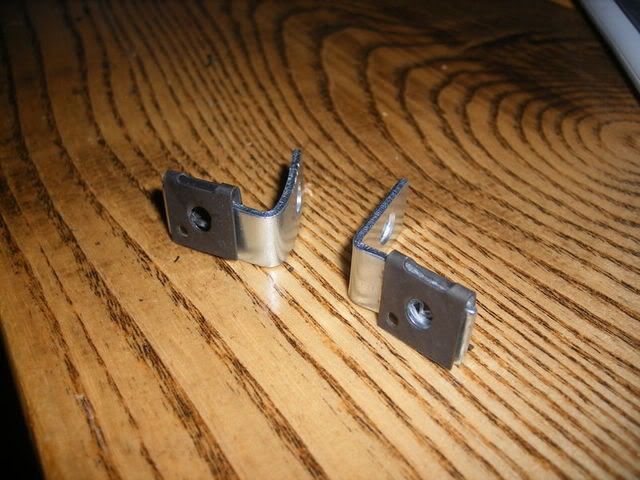
Two angle brakets. I will post pics up later, but I had to bend them up some to make the angle of the inside of the pocket. But on the back side of the bracket I will have a nut stuck to it, so I can just screw the plate on and off. the other end is just screwed in with a small screw.
I know thats confusing, but I will get pics later.
-bryan
I know thats confusing, but I will get pics later.
-bryan
Nice.
When I got my gauges I was hoping 3 would fit across, but they wouldn't. So I just hung mine with the pods, I'm going to make a switch panel below them.
So what you are doing is great if you have two gauges, you could have the two gauges and switches if you needed them.
When I got my gauges I was hoping 3 would fit across, but they wouldn't. So I just hung mine with the pods, I'm going to make a switch panel below them.
So what you are doing is great if you have two gauges, you could have the two gauges and switches if you needed them.
Thread Starter
TECH Regular
Joined: Oct 2005
Posts: 431
Likes: 1
From: Lexington, NC
Thats what I plan to do. Leave the bottom side open for switches and such later.
I am headed out to the parking deck in the next few to hook them up. Hopefully I will have pics shortly.
-bryan
I am headed out to the parking deck in the next few to hook them up. Hopefully I will have pics shortly.
-bryan
Thread Starter
TECH Regular
Joined: Oct 2005
Posts: 431
Likes: 1
From: Lexington, NC
ITS DONE! Well 95% of it is done. After dicking around with wiring for what seemed like forever, I got it all hooked up.
The Trans temp sensor went in the pressure port just fine and tightened down snuggly. However the oil temp is the problem. The port above the oil filter is larger than 1/8" and the adapters that autometer sends wont fit. So I ran the wire to the back of the gauge and Travis (tbird31) secured the extra wire to the bottom of the car around the trans brace, I think, so that when I get the right adapter all I have to do is thread it in and hook it up.
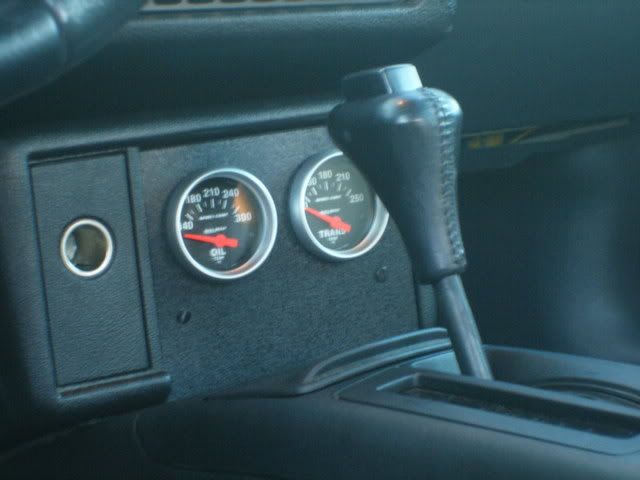
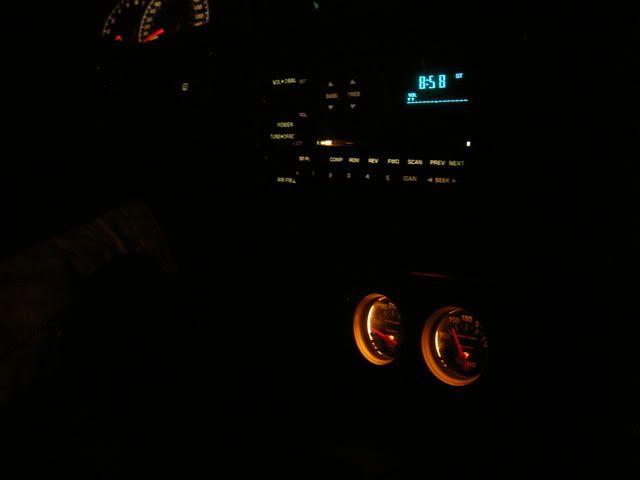
The sport comp lights match the interior perfectly, and they are very easy to read.
I went for a cruze and in Drive, easing around Charlotte/Concord area, the temps slowly got to a tic of 150 F, I then got on 85 south in OD and at 80mph the temps dropped to just below 150. The hottest it got was when I was pulling into the appartment parking lot, with it staying in the stall and easing around it picked up to 165.
Is this about normal for what everyone experinces. There is an aftermarket trans cooler hooked up as well.
I have work at 10, and have been up for 43 hours with about 3 hours of sleep. I am going to bed and will have pics tomorrow night. As for the the template, give me a couple days and I will get that up for yall.
Special thanks to my boy, tbird31, for all the help and keeping me sane.
-bryan
The Trans temp sensor went in the pressure port just fine and tightened down snuggly. However the oil temp is the problem. The port above the oil filter is larger than 1/8" and the adapters that autometer sends wont fit. So I ran the wire to the back of the gauge and Travis (tbird31) secured the extra wire to the bottom of the car around the trans brace, I think, so that when I get the right adapter all I have to do is thread it in and hook it up.
The sport comp lights match the interior perfectly, and they are very easy to read.
I went for a cruze and in Drive, easing around Charlotte/Concord area, the temps slowly got to a tic of 150 F, I then got on 85 south in OD and at 80mph the temps dropped to just below 150. The hottest it got was when I was pulling into the appartment parking lot, with it staying in the stall and easing around it picked up to 165.
Is this about normal for what everyone experinces. There is an aftermarket trans cooler hooked up as well.
I have work at 10, and have been up for 43 hours with about 3 hours of sleep. I am going to bed and will have pics tomorrow night. As for the the template, give me a couple days and I will get that up for yall.
Special thanks to my boy, tbird31, for all the help and keeping me sane.
-bryan
Thread Starter
TECH Regular
Joined: Oct 2005
Posts: 431
Likes: 1
From: Lexington, NC
There is room for a third gauge if you staggar. All those wires might be the problem, lol. After we pulled all of them into the pocket we were wondering if it would fit.
-bryan
-bryan
Last edited by bmccrary; Apr 22, 2007 at 08:33 PM.
Thread Starter
TECH Regular
Joined: Oct 2005
Posts: 431
Likes: 1
From: Lexington, NC
Ok guys, here are the pics. I don't have the oil temp hooked up like I said, but other than that it is done.
After making a new panel to get the gauges to sit higher.
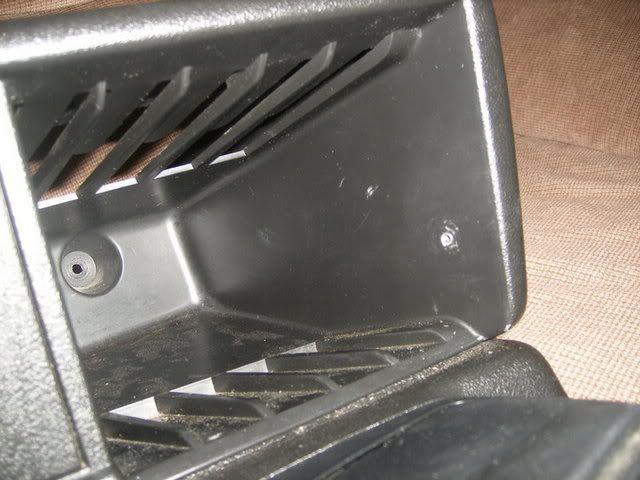
Mounting the panel (a few of you were asking about this)
(The only holes I had to put in the console, there is one on the other side)
This goes on the back of the bracket so I can take the panel on and off with out having to deal with a nut back there

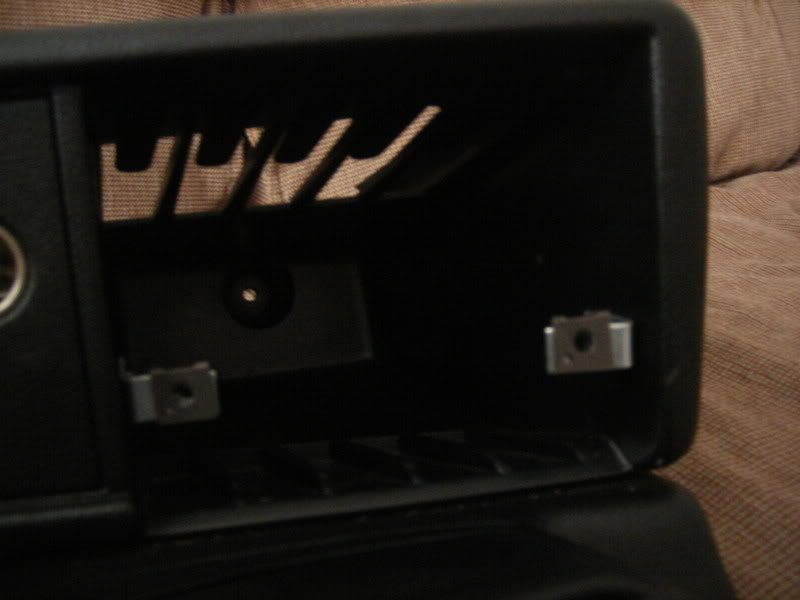
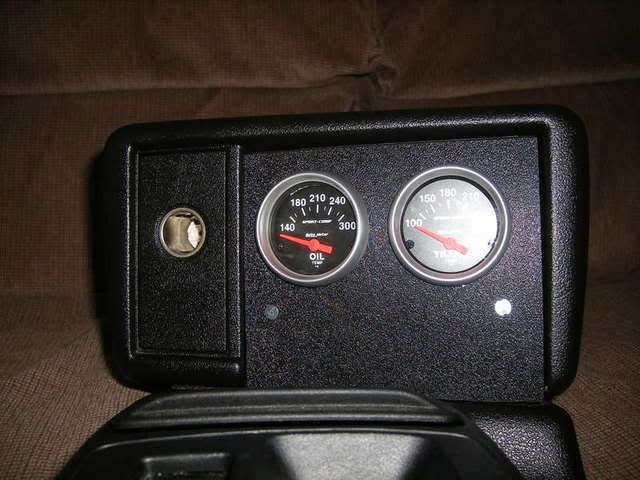
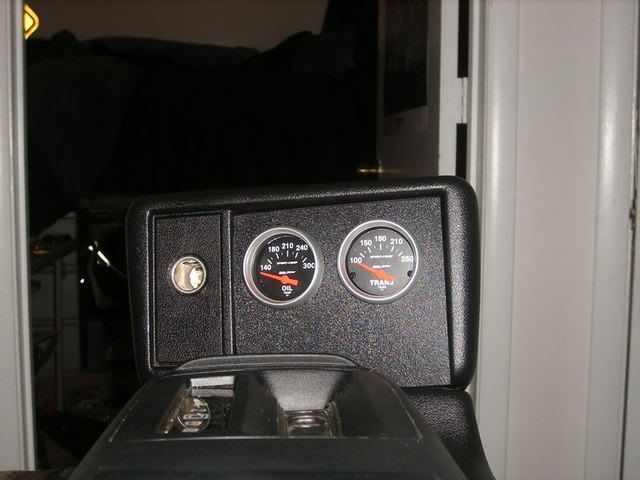
Mouted up!
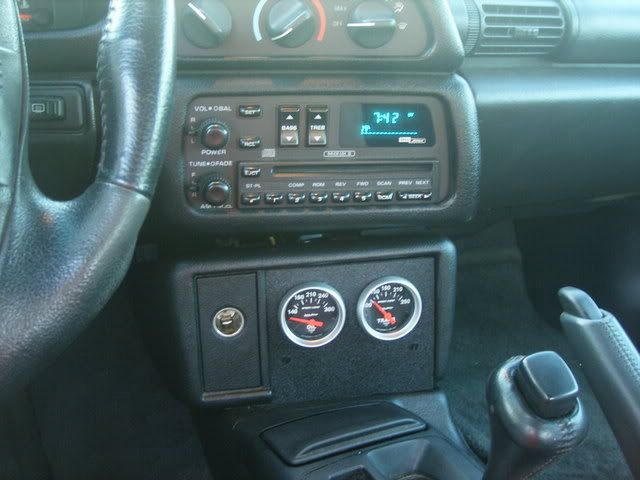
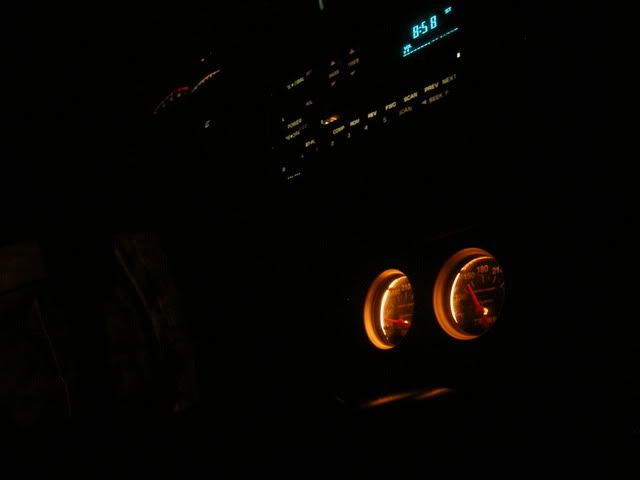
Night Shots!

For those of you wanting the template. This is the first one I made where the gauges were too low. I didn't want to pull the new one out yet. In order to get it where I did, I believe I just moved the wholes up about half ince or so. The measurements are rough, a bit over. So if you go to cutting be aware that you will have to do some trimming it get it perfect.
I am rather stoked about it. I dont have too much invested into it, it helps when you get the discount at Lowes, lol.
I am going to order an adapter kit from autobarn so I can get the oil temp hooked up ASAP. Does anyknow the exact size of that, or what did yall use to get it to work?
-bryan
After making a new panel to get the gauges to sit higher.
Mounting the panel (a few of you were asking about this)
(The only holes I had to put in the console, there is one on the other side)
This goes on the back of the bracket so I can take the panel on and off with out having to deal with a nut back there
Mouted up!
Night Shots!
For those of you wanting the template. This is the first one I made where the gauges were too low. I didn't want to pull the new one out yet. In order to get it where I did, I believe I just moved the wholes up about half ince or so. The measurements are rough, a bit over. So if you go to cutting be aware that you will have to do some trimming it get it perfect.
I am rather stoked about it. I dont have too much invested into it, it helps when you get the discount at Lowes, lol.
I am going to order an adapter kit from autobarn so I can get the oil temp hooked up ASAP. Does anyknow the exact size of that, or what did yall use to get it to work?
-bryan
Originally Posted by bmccrary
Special thanks to my boy, tbird31, for all the help and keeping me sane.
we were up till freaking 1:30 in the damn parking deck doing this...i was like falling asleep as we put the console back in and bry was using some choice words. haha
looks so good in person though. he always does top notch stuff.
Thread Starter
TECH Regular
Joined: Oct 2005
Posts: 431
Likes: 1
From: Lexington, NC
Not a problem! I hope some people put it to good use.
BTW, my issue with the oil temp sensor... how did everyone else do theirs. I know alot of you have them on this forum, how did yall hook them up. I would like to go into that spot above the oil filter, but I am not sure of the thread pitch and all. I know where I could order some adapters, but I just want to make sure they will work before I go through with it.
Thanks
-bryan