When you click on links to various merchants on this site and make a purchase, this can result in this site earning a commission. Affiliate programs and affiliations include, but are not limited to, the eBay Partner Network.
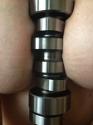
I am in the process of installing Tick's adjustable clutch master cylinder, and have ran into a problem. What I believe to be the white ring that I am supposed to push into the fitting to disconnect the hydraulic line has come off of my line! Is this the ring? If so, how would you recommend I disconnect the fitting? I'm also including a picture of my fitting just to help make sure that I am correctly identifying the white ring. Also, any creative ideas on how I could bleed everything without a helper?
You cant put it back on and push it in? It helps to push the whole line into the trans while you do it as well.
I honestly didn't even think of doing something that simple lol.I havent tried that yet, will do when I get home from work and report back with results. Thanks!
I put the white ring back on. I pushed it in toward the slave cylinder. Now it is stuck in there and the line will not disconnect. Should it go in farther than this?
It won't push any farther. Do I just need to keep trying to push it farther, or am I gonna have to drop the transmission and replace the slave cylinder?
They can be a pain in the ***. Did you push the line in while pushing the white ring? I have always been able to just use a flat head. Try pushing on different parts of the ring of maybe you can use a fuel line disconnect tool
They can be a pain in the ***. Did you push the line in while pushing the white ring? I have always been able to just use a flat head. Try pushing on different parts of the ring of maybe you can use a fuel line disconnect tool
I tried to push in on the line while I was pushing the ring in, but I couldn't really since I was using 2 screw drivers so that I could get the ring in straight. As of right now, the ring won't push farther in or come out, the line won't move in or out, but my clutch pedal is hard as a rock, so it must be disconnected.
That looks a lot like my first attempt. I boogared the **** out of it and barely got the line separated. Once you get it off, replace the white ring with a new one. As you'll have the technique figured out, it won't get ruined the next time.
So I guess my question is, does the plastic part have to sit flush with the slave cylinder side of the connection for the line to pop out? I'm trying to decide if I should keep trying to force the plastic thing in, or if it's a lost cause lol.
Last edited by 1995_maro_z; Aug 31, 2015 at 05:46 PM.
To disconnect the line I use the flat side of an open-end wrench on the plastic ring instead of screwdrivers. I think 11/16" fits nicely IIRC. To install the line I use a 5/8" wrench, if fits the hub right behind the plastic ring.
Did you get it? I know I had a hell of a time getting mine to release when I had my 2000 SS. Keep working at it as it will eventually just pop out. Like stated, once you get the technique down the next (if there is one) won't be so hard.
I got a disconnect tool and tried for a while more last night. I know that the line is disconnected because my clutch pedal is stiff. I cant get it out of the slave or pushed back in. That being said, I just decided to order a new slave cylinder, pilot bearing, and a Tick speed bleeder to install while I've got the tranny out. Can anyone think of anything else I should replace while it's out? The clutch, flywheel, and pressure plated only have 15,000 on then and I honestly don't have the money for new ones at the moment anyway lol. Also, I have read through the McLeod clutch install on installuniversity, but I need some more detailed info on installation and removal of the pilot bearing? Can it be removed with the bellhousing, clutch, etc still on the engine? Also, can this be done without a tranny jack? Thanks everyone for all of your help!
Last edited by 1995_maro_z; Sep 1, 2015 at 03:53 PM.
Clutch has to corn out to replace the pilot bearing. I wouldn't worry about it if your not doing the clutch. Tranny jack depend on your manliness... I would work more on getting the line out. I'm sure some one on the forum is local and could give you a hand. If it's disconnected it should come out.
Now I am having an issue getting the u bolt that holds the stock master on. There is this washer thing on one side of it, but it is behind the brace that hold the clutch pedal, and I have no idea how to get this damn u bolt out. It won't push, and I can't get at the washer thing to cut it or anything. How did you guys do this?!
I took that bracket off. It was bolted on somewhere up high but it's been too long ago. Then I used needle noses pliers to rip that thing off. You think that's hard, just wait till you're wrestling the tick in.
Pulling the steering shaft helped me quite a bit. At the time I still had stock manifolds. I don't know how I would do it with long tubes without dropping the drivers side header
I took that bracket off. It was bolted on somewhere up high but it's been too long ago. Then I used needle noses pliers to rip that thing off. You think that's hard, just wait till you're wrestling the tick in.
Pulling the steering shaft helped me quite a bit. At the time I still had stock manifolds. I don't know how I would do it with long tubes without dropping the drivers side header
I was able to pry the bracket back enough without taking it off to rip the star thing out with needle nose. Not looking forward to getting the tick in... lol. Does anyone with headers have any suggestions/advice on getting the Tick MC in? Also, any advice on dropping the tranny with just a floor jack (no tranny jack) and without a helper?
I installed my Tick MC with 1 7/8" LTs intact. It is a tight bitch but it will go in. As Darth mentioned, removing the steering shaft helps quite a bit. I left the reservoir hose off and slipped it on after the MC was in place. As I recall I had to oval the inside hole in the firewall just slightly to get the 2nd MC bolt in.
Gas Monkey Built a 6-Wheel Ferrari Testarossa With a Corvette LT4 Engine
Slideshow: The controversial Ferrari F6 swaps its original flat-12 for a Corvette Z06-derived LT4 V8 and sends power to four rear wheels through a custom-built drivetrain.
7 Most Reliable High-Performance Engines GM Has Ever Built
Slideshow:These GM engines didn't just make huge power, they survived abuse, boost, track days, and six-digit mileage with a reputation for refusing to quit.
6 Common C5 Corvette Failures and What's Involved In Repairing Them
Slideshow: From wobbling harmonic balancers to failed EBCMs, these are the issues that define long-term C5 ownership and what repairs typically involve.
Retro Modern Bandit Pontiac Trans AM Comes With Burt Reynolds' Autograph
Slideshow: A modern Camaro transformed into a retro icon, this limited-run "Bandit" build blends nostalgia with brute force in a way few revivals manage.
Top 10 Greatest Cadillac V Series Performance Models Ever, Ranked
Slideshow: Cadillac didn't just crash the high-performance luxury vehicle party, it showed up loud, supercharged, and occasionally a little unhinged...
Coachbuilt N2A Anteros Is an LS2-Powered C6 Corvette In Italian Clothes
Slideshow: A one-off sports car that looks like a vintage Italian exotic-but hides a C6 Corvette underneath-just sold for the price of a new mid-engine Corvette.





 Tick clutch master install problem



 I havent tried that yet, will do when I get home from work and report back with results. Thanks!