How to install aftermarket shifter
 04-02-2018, 04:23 AM
#1
On The Tree
Thread Starter
After some browsing I was not able to find a good “step-by-step” guide for installing an aftermarket shifter in an F-Body. Of course, with my luck, I know when I post this thread people will post ten links to guides just like this one. Just the luck of the draw I suppose!
Anyhow, I like step by step guides, especially since I am learning about these cars as I go, and I am sure there are other people out there like me who would rather print out a guide than watch a how to video. So, that said, let me get my review out of the way first:
We chose to go with an MGW, I have a good relationship with the company, and their quality is second to none. I’ve used their shifters in Mustangs for years so it was the natural choice. I’ve read several threads talking about an “unnatural” feeling of the gates, as well as a “break in” period. I did not experience any of that. I bolted this thing in and was immediately impressed with how much better it was than what I believe is the stock Hurst unit.
We drove it around town and me, nor the Boss Lady, had any trouble being locked out of any gear or any sort of bad experience, we just enjoyed smooth, short shifts.
Anyhow, I hope you all find this guide helpful.
How to install an MGW shifter in your 1993-2002 F-Body, Pontiac Trans Am or Chevrolet Camaro with a T56 Six-Speed transmission: This shifter is from March of 2018, you may have a slightly different model or product revision, but the basics should be the same.
Tools you will need:
Ratchet
7mm socket
10mm socket
6 to 10 inch extension
13mm ratcheting wrench or socket
If you have a shift **** with a jam nut, most take a 3/4” box wrench
Optionally, you can use a battery powered impact wrench for speed
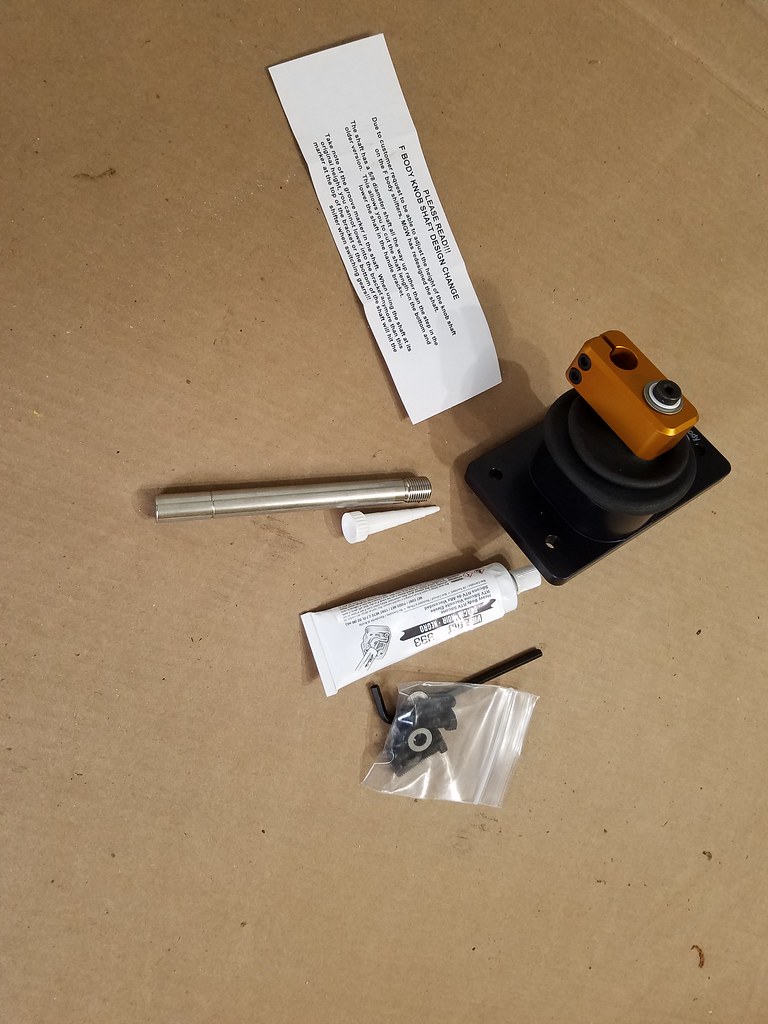
First – unpack the shifter:
Pictured you see:
A note from MGW, it reads:
“PLEASE READ!!!
F BODY **** SHAFT DESIGN CHANGE
Due to customer request to be able to adjust the height of the **** shaft on the F body shifters, MGW has redesigned the shaft.
The shaft has a 5/8 diameter shaft all the way up rather than the step in the older version. This allows you to cut the shaft length on the bottom and lower the shaft in the handle bracket.
Take note of the groove marker in the shaft. When using the shaft at its original height, you cannot lower the bracket any more than this marker at the top of the bracket or the bottom of the shaft will hit the shifter when switching gears!!!”
Beside the note is a tube of RTV silicone.
Next is the shifter body and the shaft for the **** and the Allen key to tighten the shaft down into the body.
The bolts, washers and lock washers for the shifter.
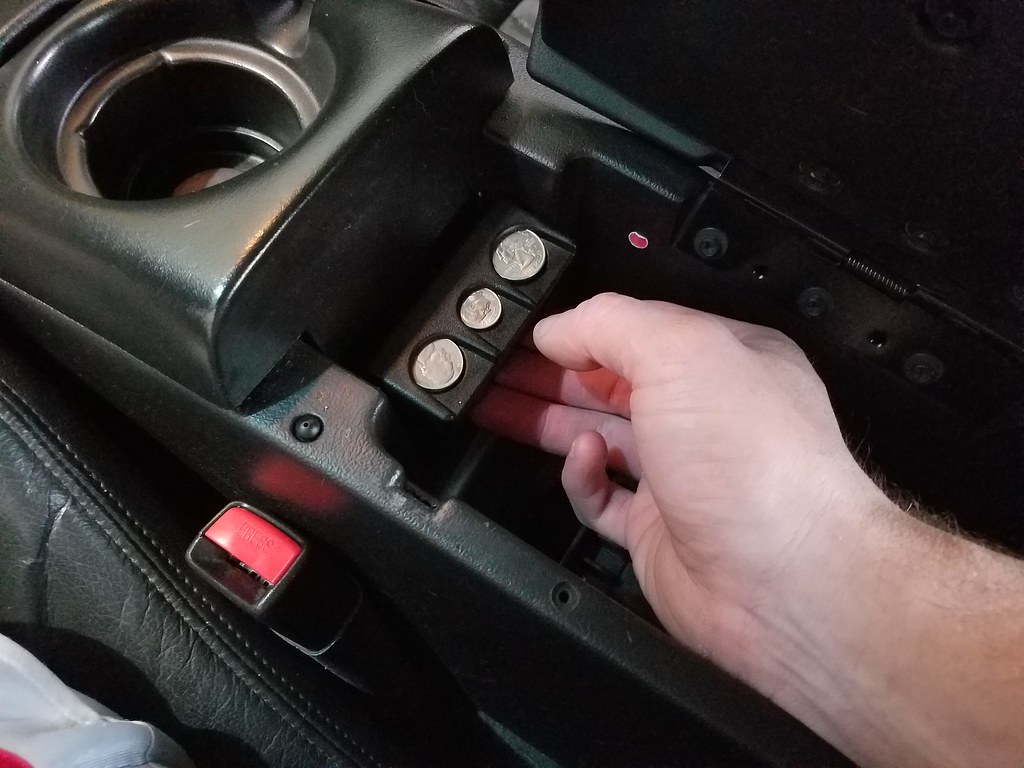
Let’s get started, first you will need to remove the upper center console:
Remove the change holder if so equipped. Just pull up firmly from the bottom:
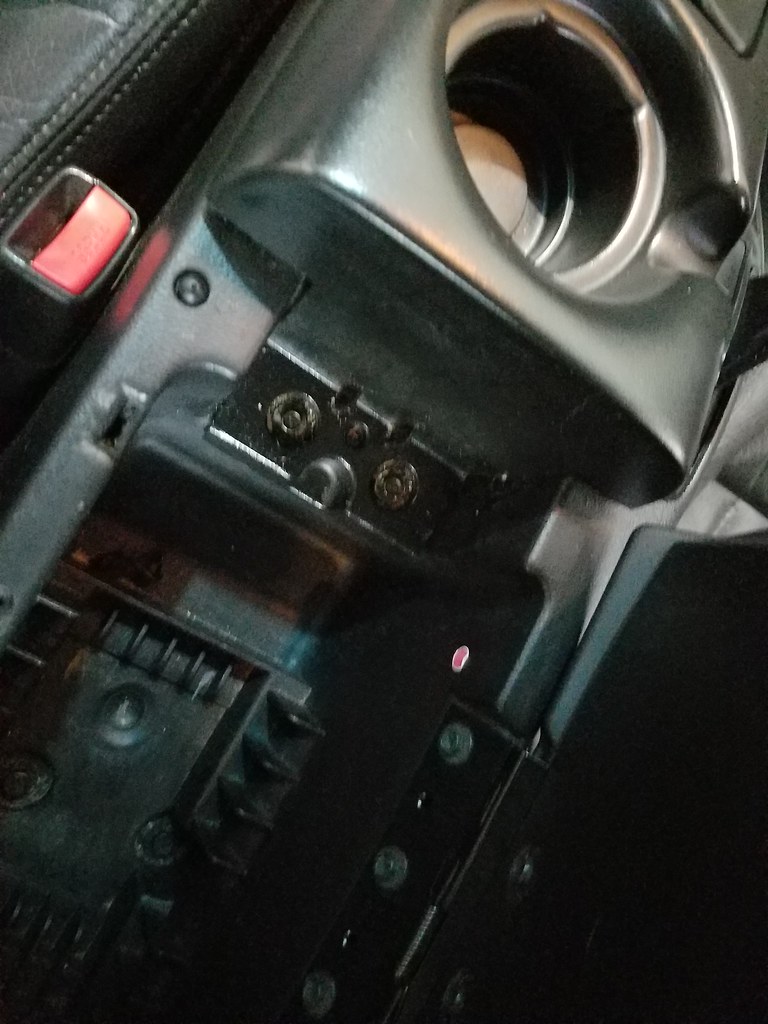
Under the change holder there are two screws to remove – use your 7mm socket and an extension to do so.
Next, remove the shift ****. You may need to loosen a jam nut, otherwise just back it off, counter clock-wise.
There are clips by the shift boot area, so gently lift the console from the rear and it should raise up. Do not force these clips as they may break.
Next, unplug the cigarette lighter. These are very simple push connections:
The ashtray light (not pictures) comes out with a clockwise twist. This is counter-intuitive, do not try forcing it to the left or you may break it.
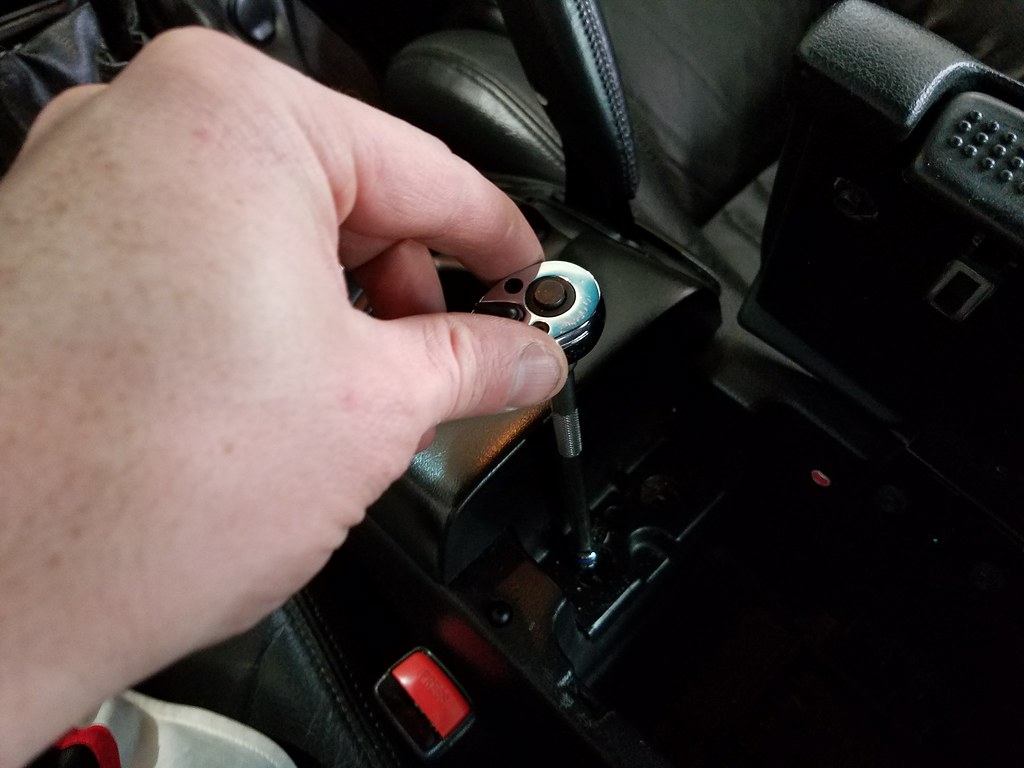
Stock shifter arm removal, you will need a 13mm ratcheting wrench, box wrench, or socket. I personally prefer the ratcheting wrench.
It will easily slide off.
Once that is done, remove the lower center console. Do this by removing the two 10mm bolts from the rear, one from the center, and two on either side of the console. Raise up on the rear of the console until you clear the emergency brake. Once up you will need to do some maneuvering and twisting to get it to clear. This can be completed with both seats in the vehicle in normal position, no need to lay any seats back or anything:
Pictured is the center bolt. Two are in the lower storage area of the console. Two are in the very front, on either side.
Once the console is out, remove the boot. You will be removing 7 – 7mm bolts:
Once all of the screws have been removed, lift up on the center of the dust boot, it should pull up easily.
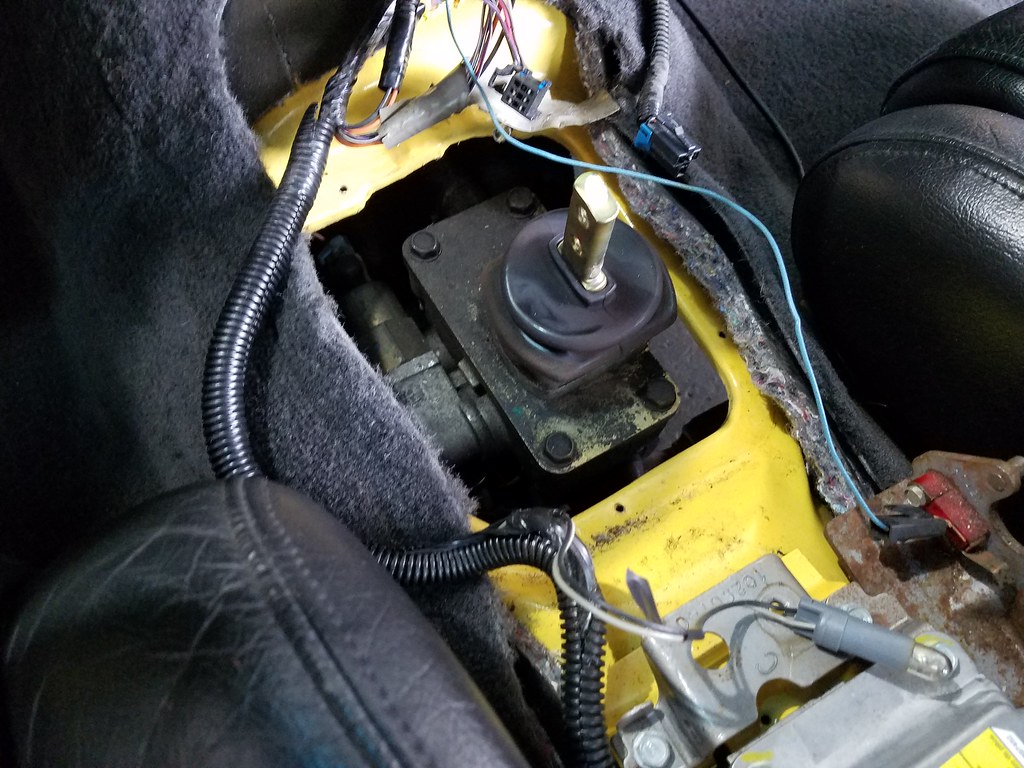
Now the shifter will be completely exposed. Remove the four bolts using a 13mm socket with an extension. Once removed, you may need to apply some side-to-side force while the transmission is in neutral. This should be enough force to break the seal.
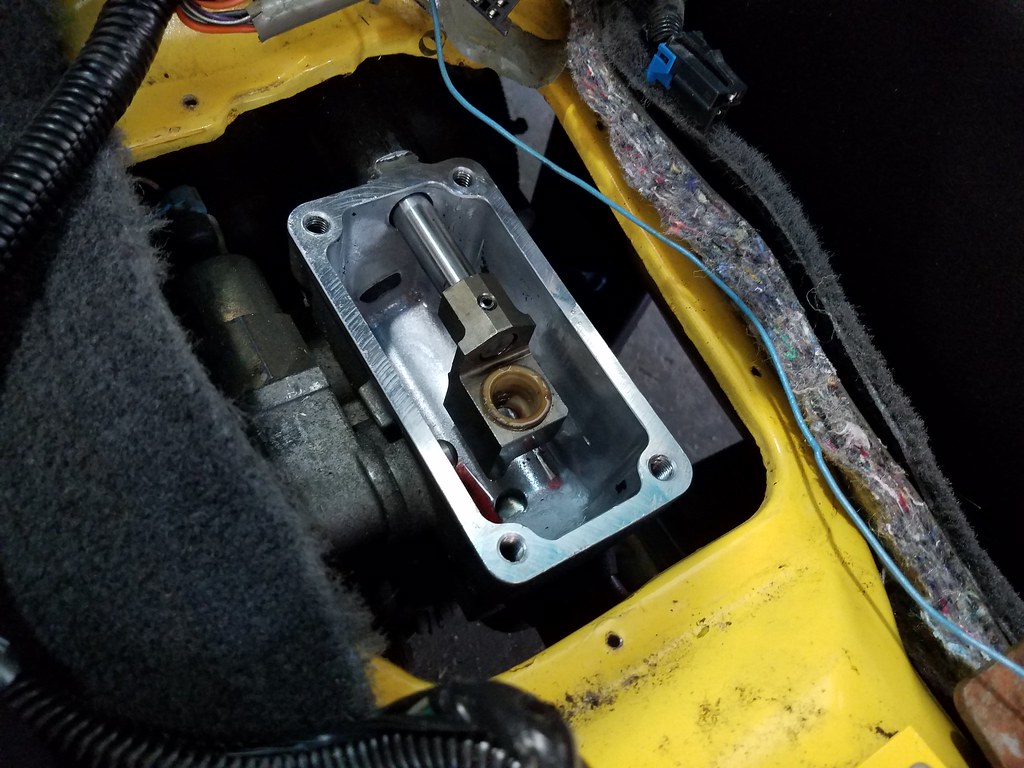
Clean up the mating surface to accept the new shifter and silicone.
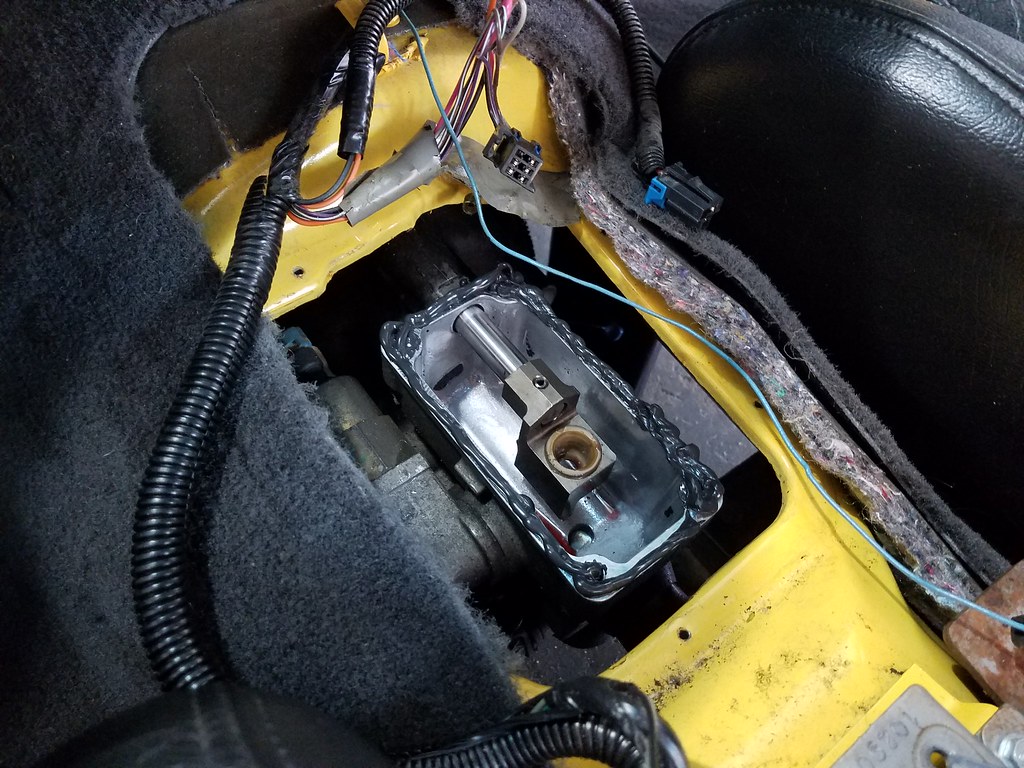
Apply a bead of silicone around the top of the transmission. Go around the bolt holes. You can also apply some silicone to the threads of the new bolts.
Put the new shifter on with the MGW logo forward. Use the new bolts, washers and lock washers. The shifter can only fit one way. Start all four bolts before tightening any of them all the way.
Attach the shifter arm with the threaded portion up using the supplied Allen key. Put the boot back in place with the 7 bolts using a 7mm ratchet.
Now would be a good time to vacuum with the center console completely out of the way.
Next put the console back in place. Put the front end down then slide the back over the emergency brake. Replace the 5 bolts that were removed, using a 10mm socket.
Replace the top half of the console; it should just go right into place. Replace the 7mm screws in the rear. Then replace the change holder. (Ignore the passenger seat being removed. Not relevant to the installation, just a deep cleaning)
That’s it! Now enjoy some nice crisp shifting.
Also, if the passenger seat is removed, the back seat is actually quite roomy:
Thanks for looking.
Anyhow, I like step by step guides, especially since I am learning about these cars as I go, and I am sure there are other people out there like me who would rather print out a guide than watch a how to video. So, that said, let me get my review out of the way first:
We chose to go with an MGW, I have a good relationship with the company, and their quality is second to none. I’ve used their shifters in Mustangs for years so it was the natural choice. I’ve read several threads talking about an “unnatural” feeling of the gates, as well as a “break in” period. I did not experience any of that. I bolted this thing in and was immediately impressed with how much better it was than what I believe is the stock Hurst unit.
We drove it around town and me, nor the Boss Lady, had any trouble being locked out of any gear or any sort of bad experience, we just enjoyed smooth, short shifts.
Anyhow, I hope you all find this guide helpful.
How to install an MGW shifter in your 1993-2002 F-Body, Pontiac Trans Am or Chevrolet Camaro with a T56 Six-Speed transmission: This shifter is from March of 2018, you may have a slightly different model or product revision, but the basics should be the same.
Tools you will need:
Ratchet
7mm socket
10mm socket
6 to 10 inch extension
13mm ratcheting wrench or socket
If you have a shift **** with a jam nut, most take a 3/4” box wrench
Optionally, you can use a battery powered impact wrench for speed
First – unpack the shifter:
Pictured you see:
A note from MGW, it reads:
“PLEASE READ!!!
F BODY **** SHAFT DESIGN CHANGE
Due to customer request to be able to adjust the height of the **** shaft on the F body shifters, MGW has redesigned the shaft.
The shaft has a 5/8 diameter shaft all the way up rather than the step in the older version. This allows you to cut the shaft length on the bottom and lower the shaft in the handle bracket.
Take note of the groove marker in the shaft. When using the shaft at its original height, you cannot lower the bracket any more than this marker at the top of the bracket or the bottom of the shaft will hit the shifter when switching gears!!!”
Beside the note is a tube of RTV silicone.
Next is the shifter body and the shaft for the **** and the Allen key to tighten the shaft down into the body.
The bolts, washers and lock washers for the shifter.

Let’s get started, first you will need to remove the upper center console:
Remove the change holder if so equipped. Just pull up firmly from the bottom:
Under the change holder there are two screws to remove – use your 7mm socket and an extension to do so.
Next, remove the shift ****. You may need to loosen a jam nut, otherwise just back it off, counter clock-wise.

There are clips by the shift boot area, so gently lift the console from the rear and it should raise up. Do not force these clips as they may break.
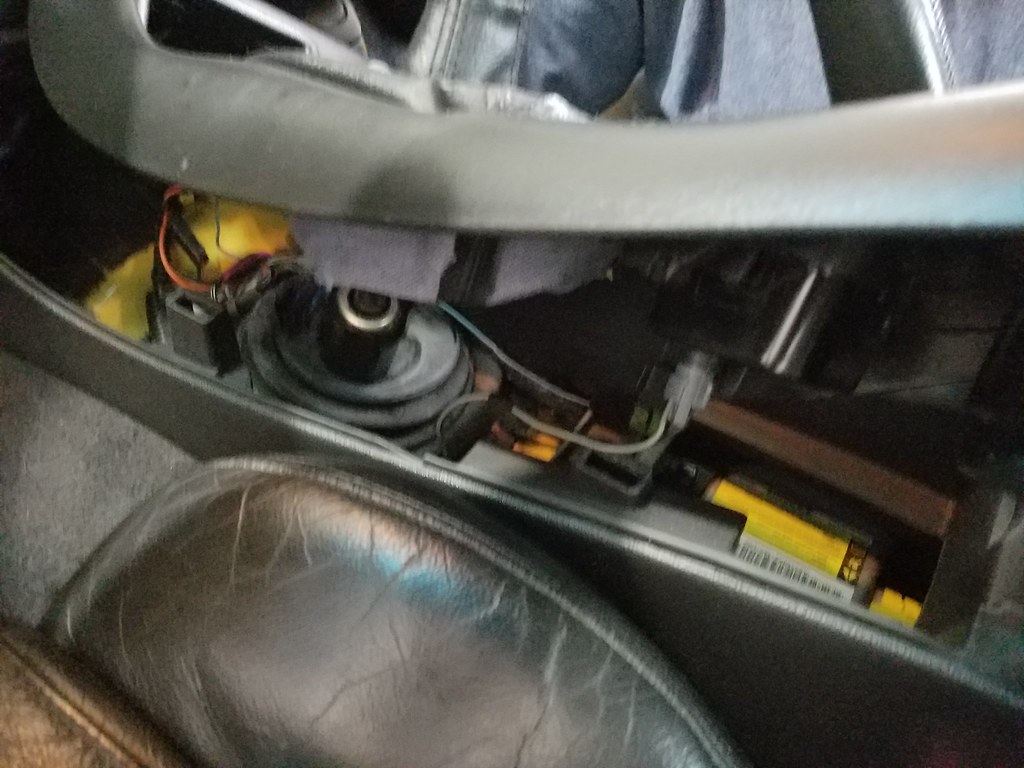
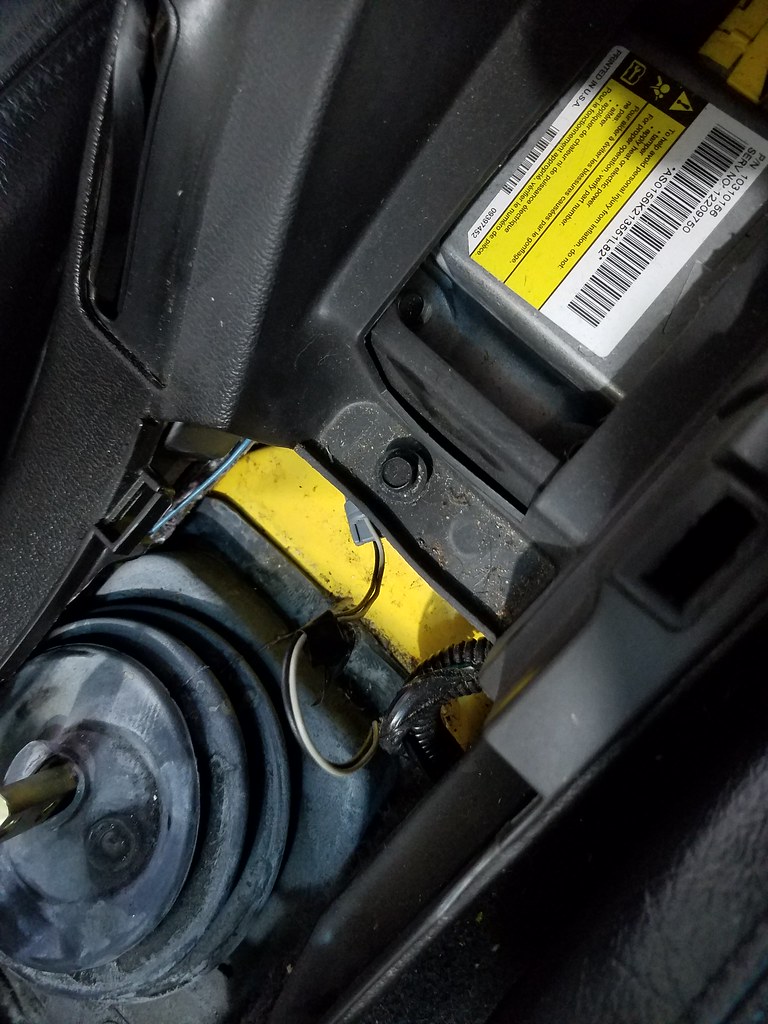
Next, unplug the cigarette lighter. These are very simple push connections:
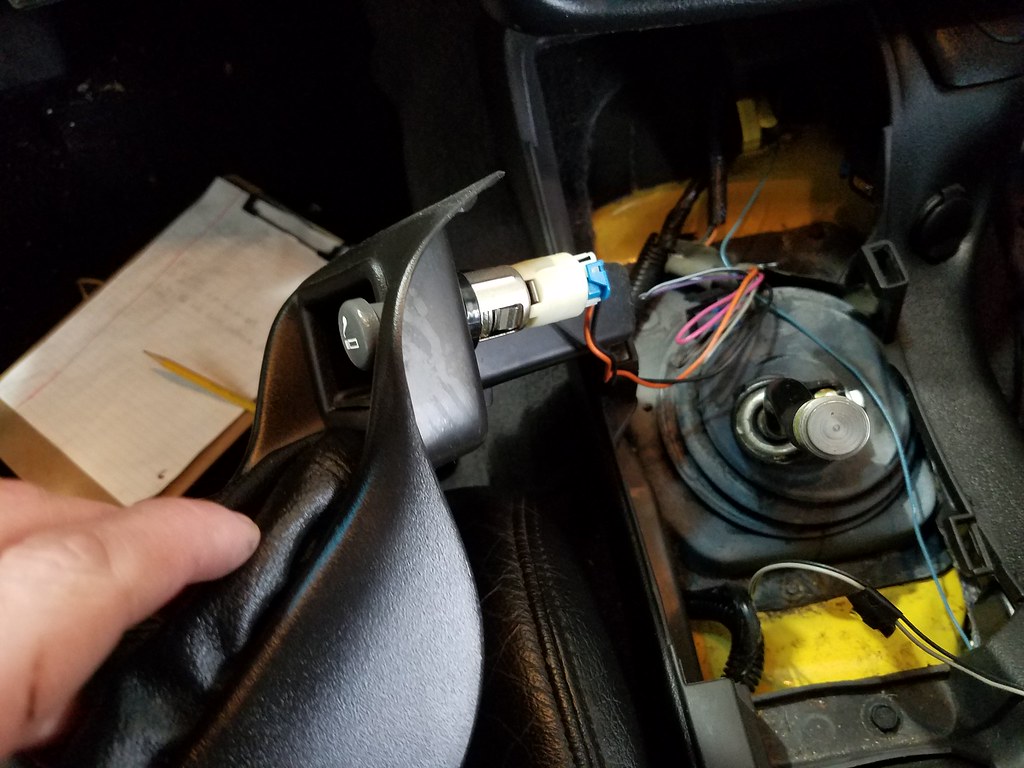
The ashtray light (not pictures) comes out with a clockwise twist. This is counter-intuitive, do not try forcing it to the left or you may break it.
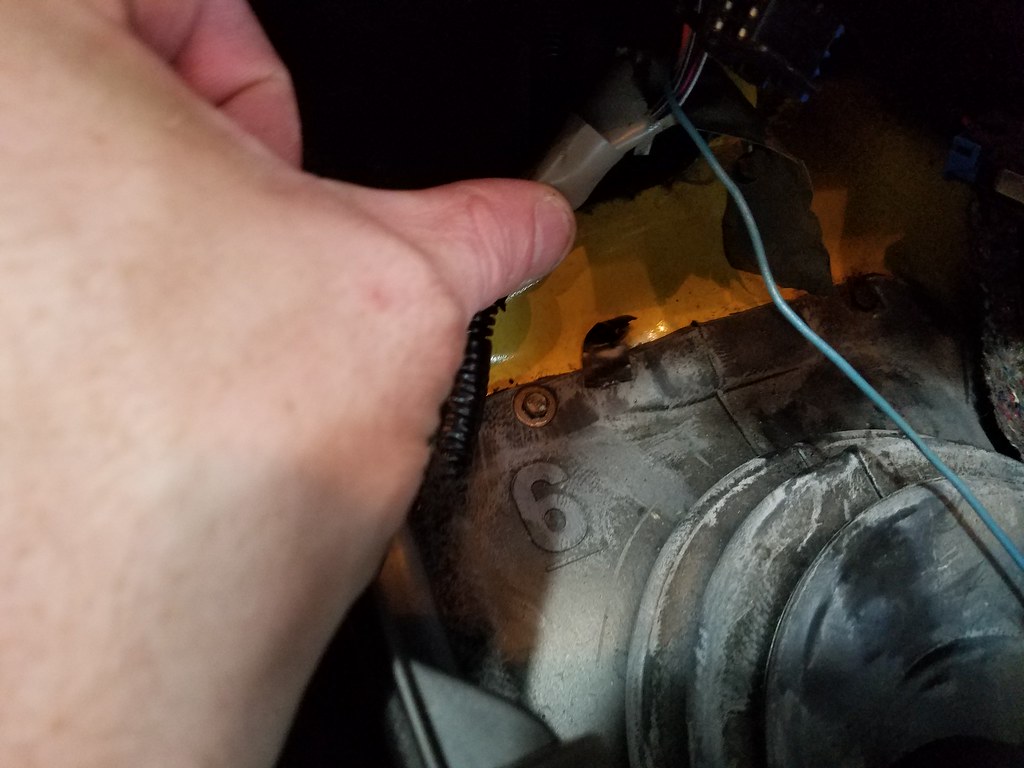
Stock shifter arm removal, you will need a 13mm ratcheting wrench, box wrench, or socket. I personally prefer the ratcheting wrench.
It will easily slide off.
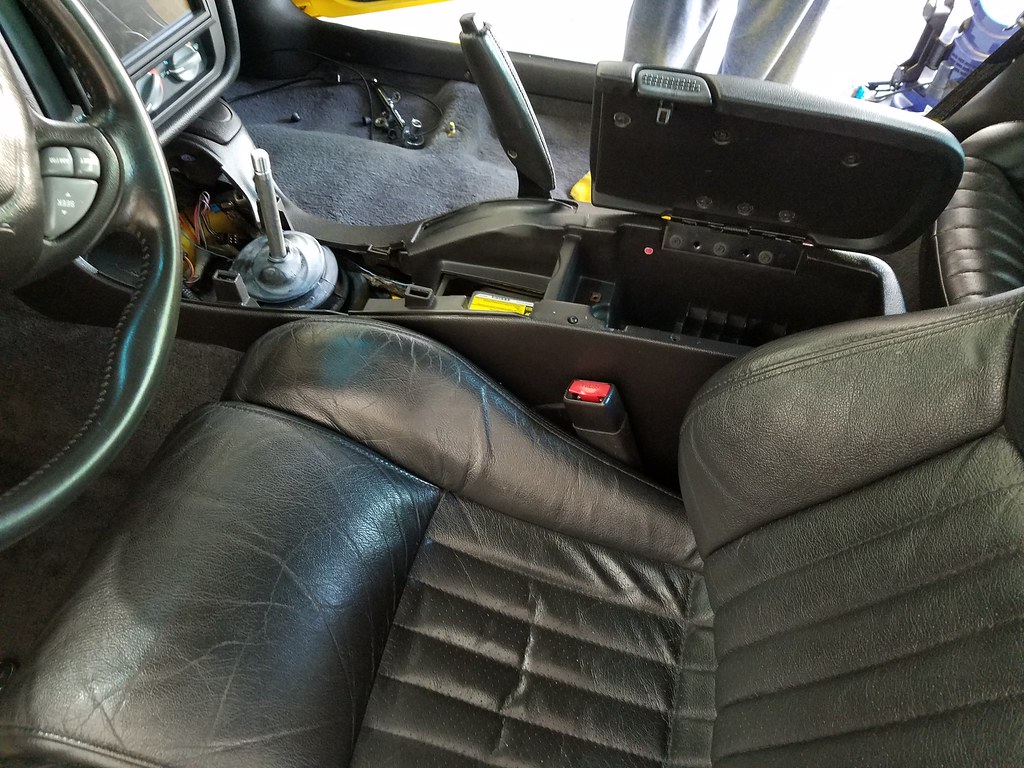
Once that is done, remove the lower center console. Do this by removing the two 10mm bolts from the rear, one from the center, and two on either side of the console. Raise up on the rear of the console until you clear the emergency brake. Once up you will need to do some maneuvering and twisting to get it to clear. This can be completed with both seats in the vehicle in normal position, no need to lay any seats back or anything:
Pictured is the center bolt. Two are in the lower storage area of the console. Two are in the very front, on either side.
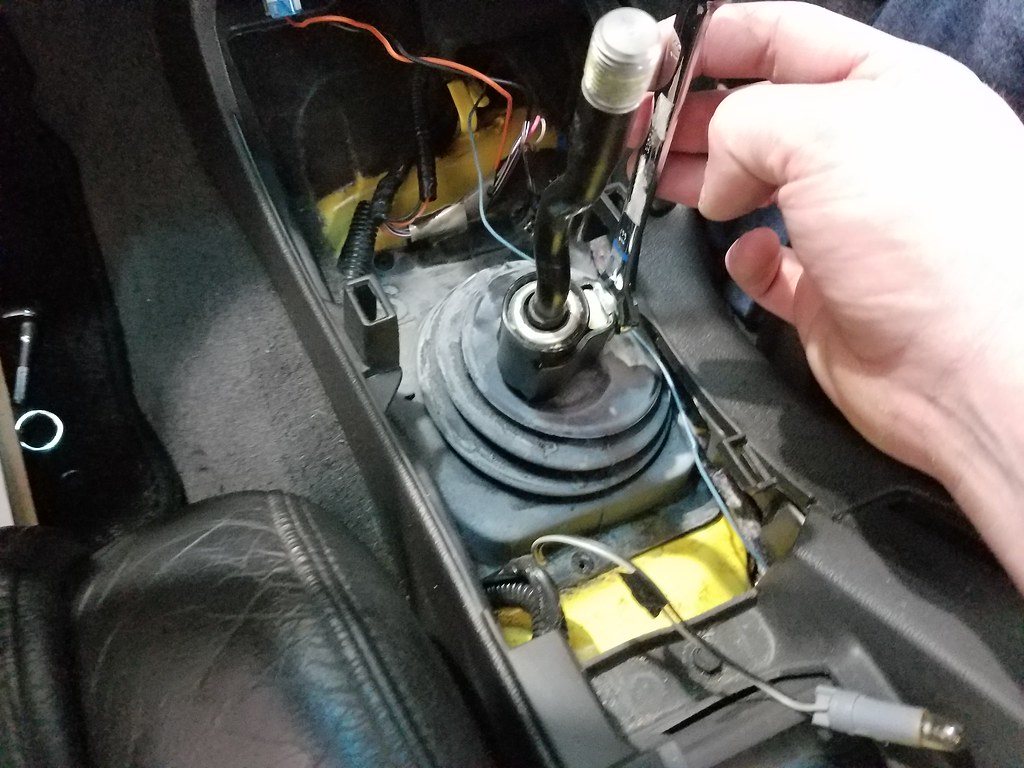
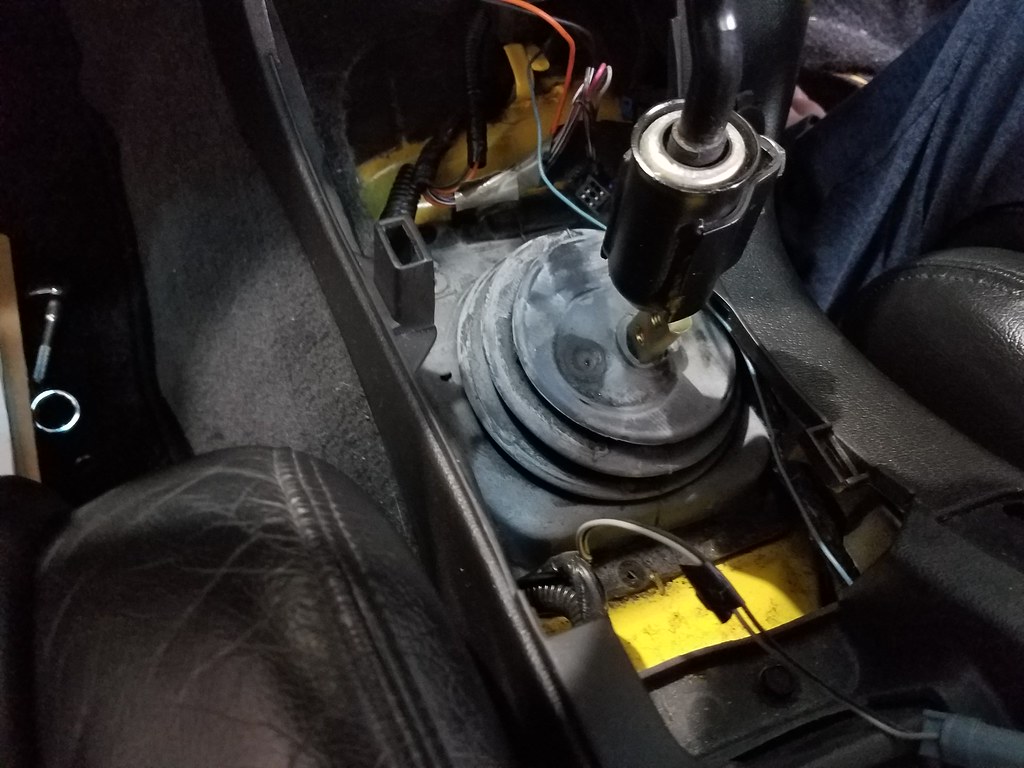
Once the console is out, remove the boot. You will be removing 7 – 7mm bolts:
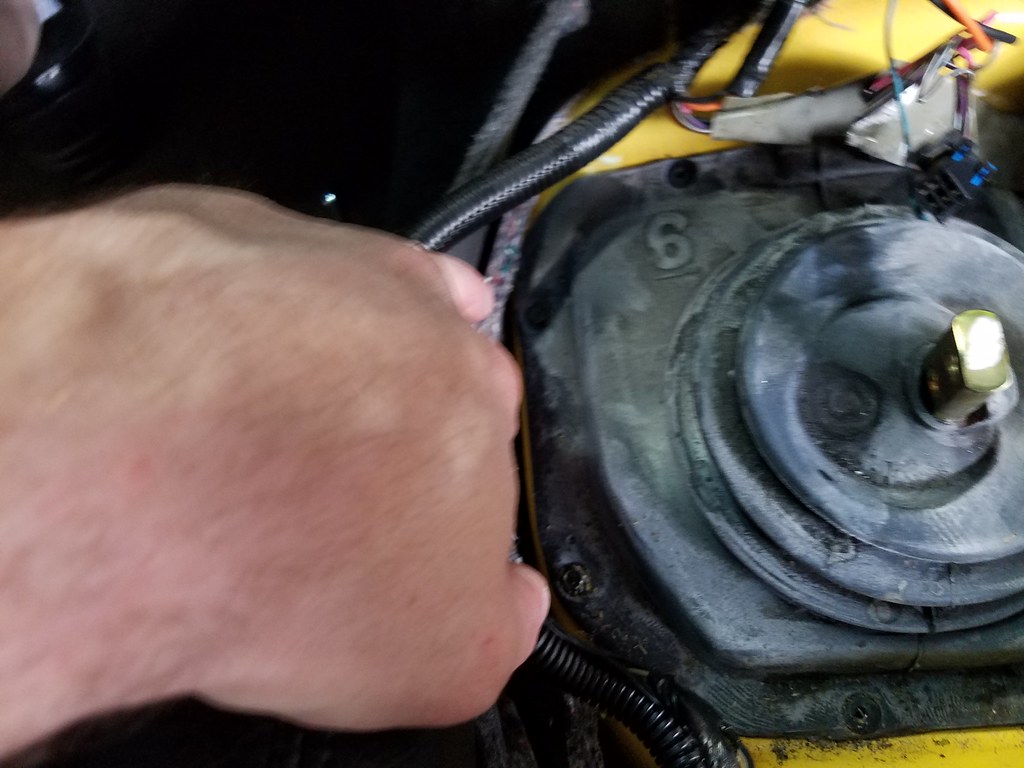
Once all of the screws have been removed, lift up on the center of the dust boot, it should pull up easily.
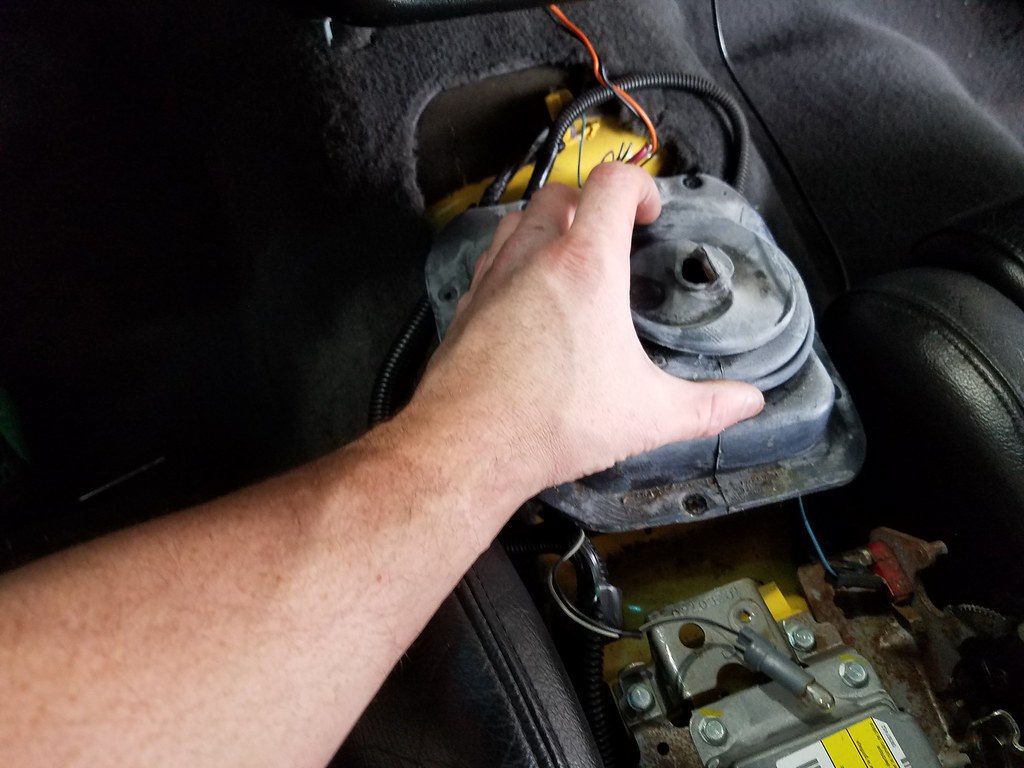
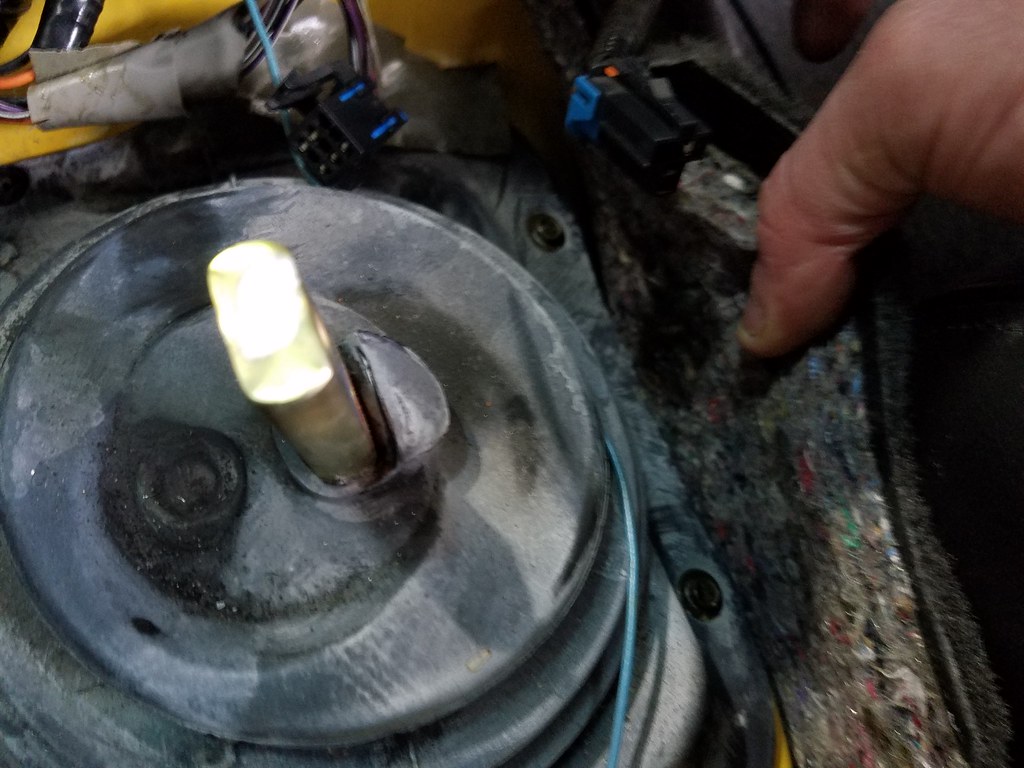
Now the shifter will be completely exposed. Remove the four bolts using a 13mm socket with an extension. Once removed, you may need to apply some side-to-side force while the transmission is in neutral. This should be enough force to break the seal.

Clean up the mating surface to accept the new shifter and silicone.
Apply a bead of silicone around the top of the transmission. Go around the bolt holes. You can also apply some silicone to the threads of the new bolts.
Put the new shifter on with the MGW logo forward. Use the new bolts, washers and lock washers. The shifter can only fit one way. Start all four bolts before tightening any of them all the way.
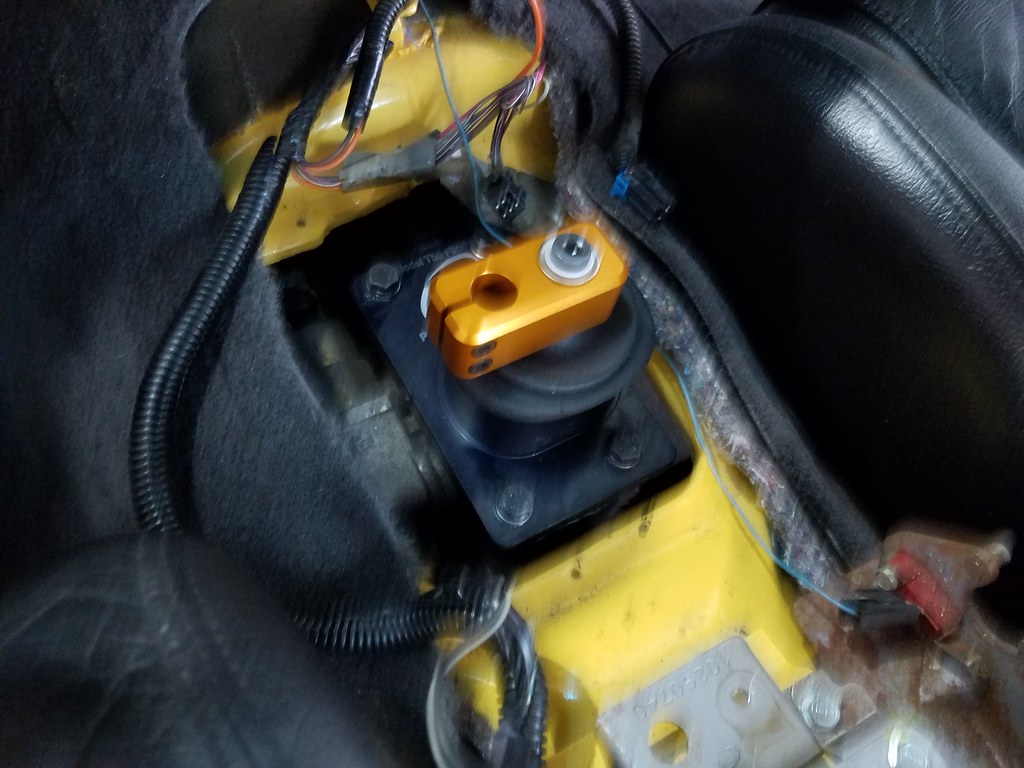
Attach the shifter arm with the threaded portion up using the supplied Allen key. Put the boot back in place with the 7 bolts using a 7mm ratchet.

Now would be a good time to vacuum with the center console completely out of the way.
Next put the console back in place. Put the front end down then slide the back over the emergency brake. Replace the 5 bolts that were removed, using a 10mm socket.
Replace the top half of the console; it should just go right into place. Replace the 7mm screws in the rear. Then replace the change holder. (Ignore the passenger seat being removed. Not relevant to the installation, just a deep cleaning)
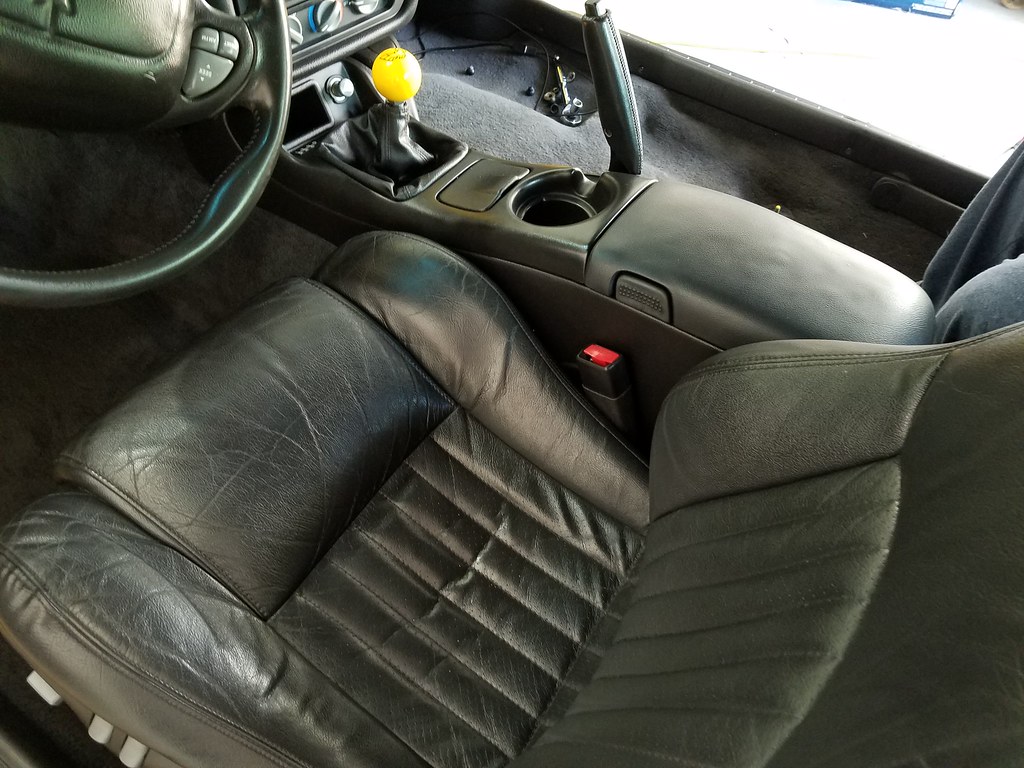
That’s it! Now enjoy some nice crisp shifting.
Also, if the passenger seat is removed, the back seat is actually quite roomy:

Thanks for looking.
Last edited by Number Tew; 04-02-2018 at 04:42 AM.
 04-02-2018, 06:24 AM
#2
