1994 Z28, Mini Restoration and Boost
 02-02-2021, 10:38 PM
#21
TECH Senior Member
Thread Starter
iTrader: (96)
Join Date: Aug 2007
Location: Turnin' Wrenches Infractions: 005
Posts: 24,240
Likes: 0
Received 81 Likes
on
72 Posts

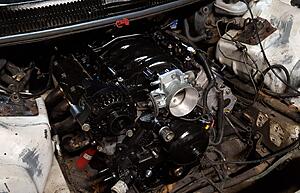
Between work and my side business time is scarce, but I been chipping away. Here's some parts installed and some mocked up. Cam, springs, and pushrods are installed. Got about 80 on the preload with a 7.425 pushrod, and went with an Elgin beehive (1218 equivalent I believe), new intake gaskets, new ZR1 map (had to drill the map hole out and use an adapter harness) and used a huron speed alt relocation. Why, bc my red car has one, same belt size (keep a spare) and it's worked well no complaints. Battery is going to the back, 98 pcm is going in the trash (01 PCM here, needs a repin of the 98 harness), 80 deka injectors (direct plug and play) with the stock LS1 rails.


 02-10-2021, 10:13 PM
#22
TECH Senior Member
Thread Starter
iTrader: (96)
Join Date: Aug 2007
Location: Turnin' Wrenches Infractions: 005
Posts: 24,240
Likes: 0
Received 81 Likes
on
72 Posts
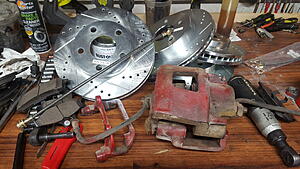
Brakes are off (junk/rusted and in the trash) and some nice ebay replacements are here, pads and rotors x4. All calipers are gonna be repainted black. Rears are done now (leaving the parking brake intact for the moment), looking at the front the ball joint and tie rod boots seem to be busted, so upper/lower ball joints/outer tie rods are on order. Jesus what a money pit.
New PS pump and pulley. Lets throw some sparks.
Upper radiator support gone and in the trash.
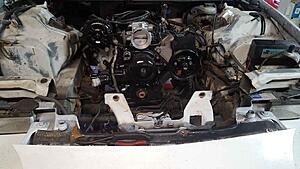
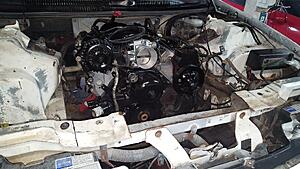
Made some block off plates for the upper frame rail, and made a hood latch support rail out of flat bar. Radiator is still too far up and back for my liking, so I'm gonna take out the lower radiator support and remake it. Goal is to have the radiator lower and more forward then pictured, I want a lot of room for the turbo.

New PS pump and pulley. Lets throw some sparks.

Upper radiator support gone and in the trash.

Made some block off plates for the upper frame rail, and made a hood latch support rail out of flat bar. Radiator is still too far up and back for my liking, so I'm gonna take out the lower radiator support and remake it. Goal is to have the radiator lower and more forward then pictured, I want a lot of room for the turbo.
 02-11-2021, 08:15 AM
#23
TECH Enthusiast

Looking good. Id say you certainly got more than $350 worth of car out of that transaction. I may have to invest in a set of those lugnuts. The ones that came with my jegs wheels do not fit well at all.
02-12-2021, 07:53 PM
#24
TECH Senior Member
Thread Starter
iTrader: (96)
Join Date: Aug 2007
Location: Turnin' Wrenches Infractions: 005
Posts: 24,240
Likes: 0
Received 81 Likes
on
72 Posts
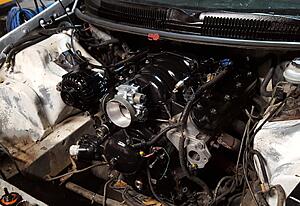
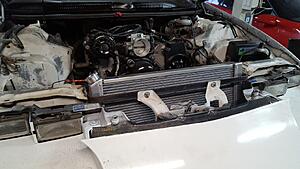
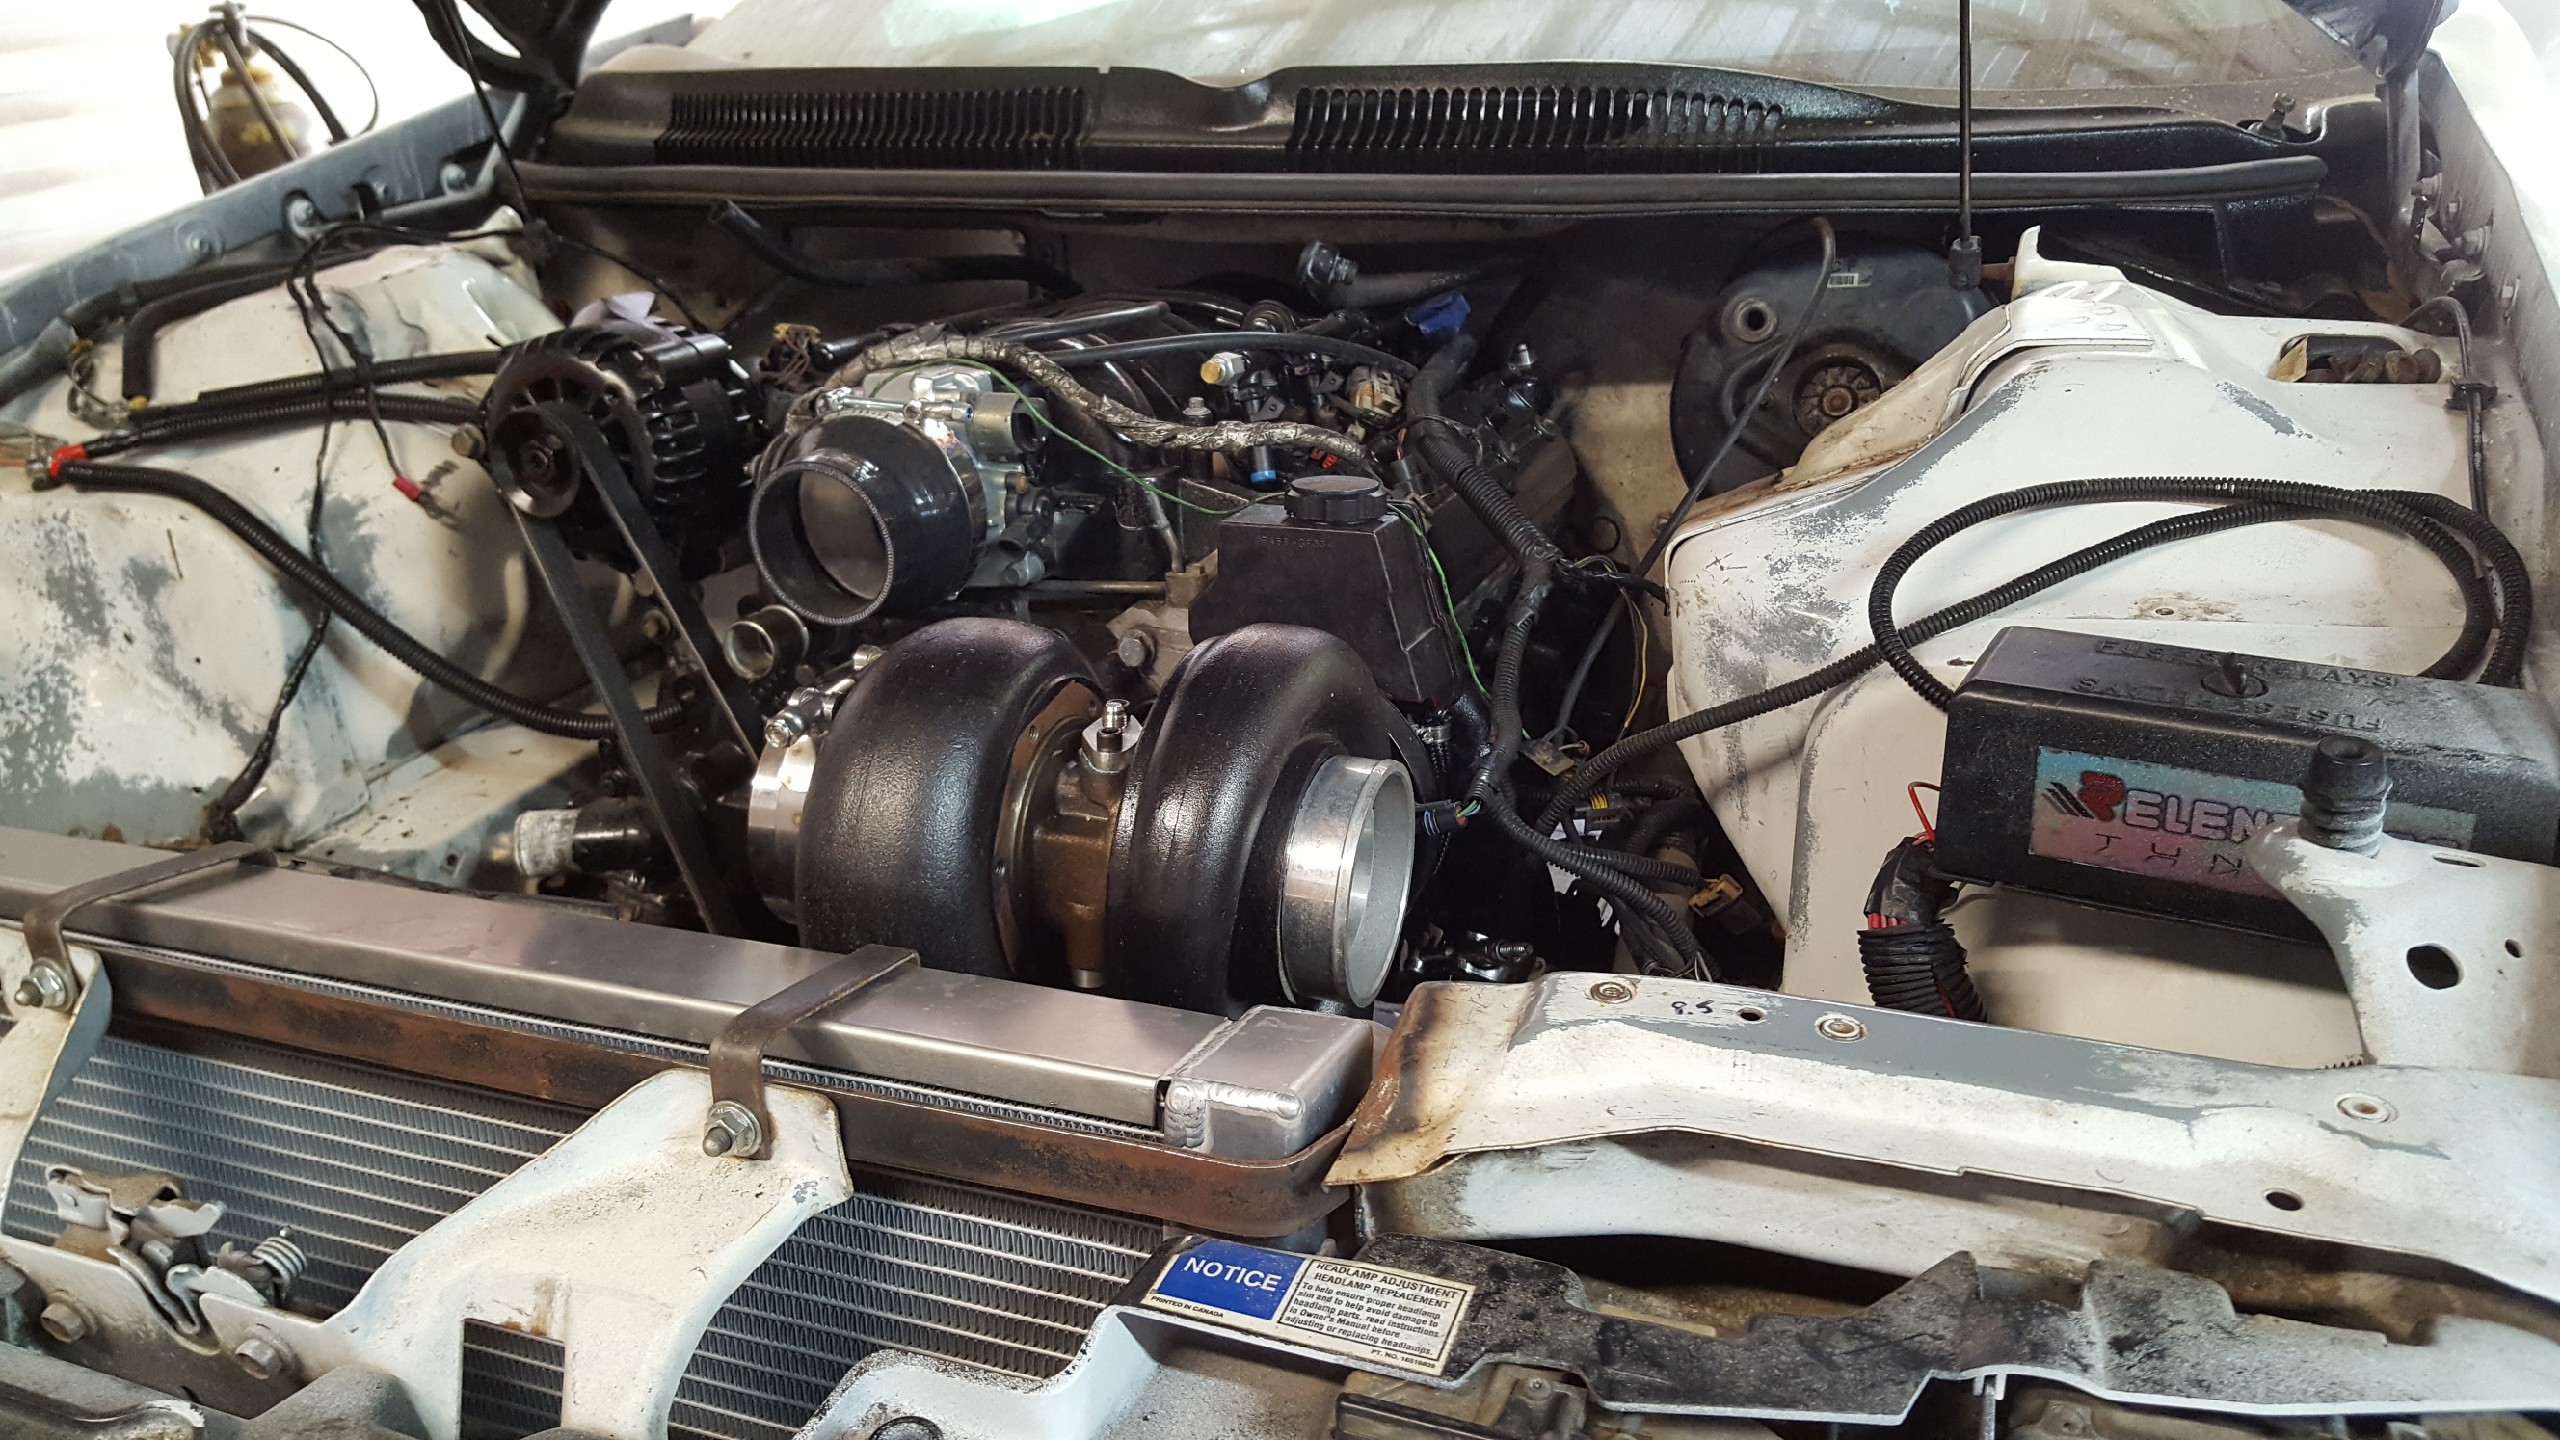
On to my mini disaster. I had plans, and they keep getting altered or made more difficult. As you can see the radiator sits too high (hood does close with no cap on) but I also didnt like the way it looked. So I cut out the entire lower support, bent a simple piece of 1" flat bar to the right distance to set the proper height, and welded it in. I used a small (1/2") steel square tube welded to it to make the flat bar rigid. The upper rails were cut 29", the radiator is approx 28", well there was no way a cap was going on in its new location. Also, when the radiator is lower then the highest point on the engine, you can no longer properly bleed the engine when filling coolant from the traditional cap location (learned this the hard way on my turbo red car). Having an 04 yukon I took a page from that design where you dont fill from the radiator. I'm going to position the upper hose where it is the highest point and add in one of those aluminum splice sections with a built in cap, then vent there to an overflow. I chopped the filler neck off and welded a 3/8 npt bung there to help get all the air out of the radiator when filling from the upper hose. I then took that same flat bar and made some quick upper brackets. Looking now, it's still gonna be a tight fit but I believe we can make it work with ease of maintenance in mind. What you can't see in the pic is the fact that I bit the bullet and bought that goofy gt45 special flange which will dump out to a 4, which i will the reduce to a 3. I also welded a 1/4 nipple to the housing to feed the wastegates, and welded a straight 3" aluminum intercooler pipe to the turbo out because it has some kind of goofy 3.5" outer diameter exit. Plan was to go sloppy style and weld one WG to the turbo. Being that there is less room then expected I ordered another WG and will just position one on each bank wherever they are easiest to locate. Stock fans are trimmed and I put two tabs for them to slip into, seems pretty secure for now. Oh and that alt relocate needs the cast threaded boss on the driver's side that only comes on aluminum engines, this is a cast iron 5.3, so it wont directly work (that was in their instructions and I just didn't pay attention). Placed the cold side housing on the frame rail just to give a size per space visual.

Last edited by 01ssreda4; 02-12-2021 at 08:00 PM.
The following users liked this post:
AnnivSS (02-19-2021)
02-20-2021, 09:47 PM
#25
TECH Senior Member
Thread Starter
iTrader: (96)
Join Date: Aug 2007
Location: Turnin' Wrenches Infractions: 005
Posts: 24,240
Likes: 0
Received 81 Likes
on
72 Posts
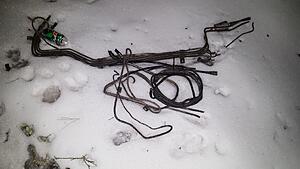
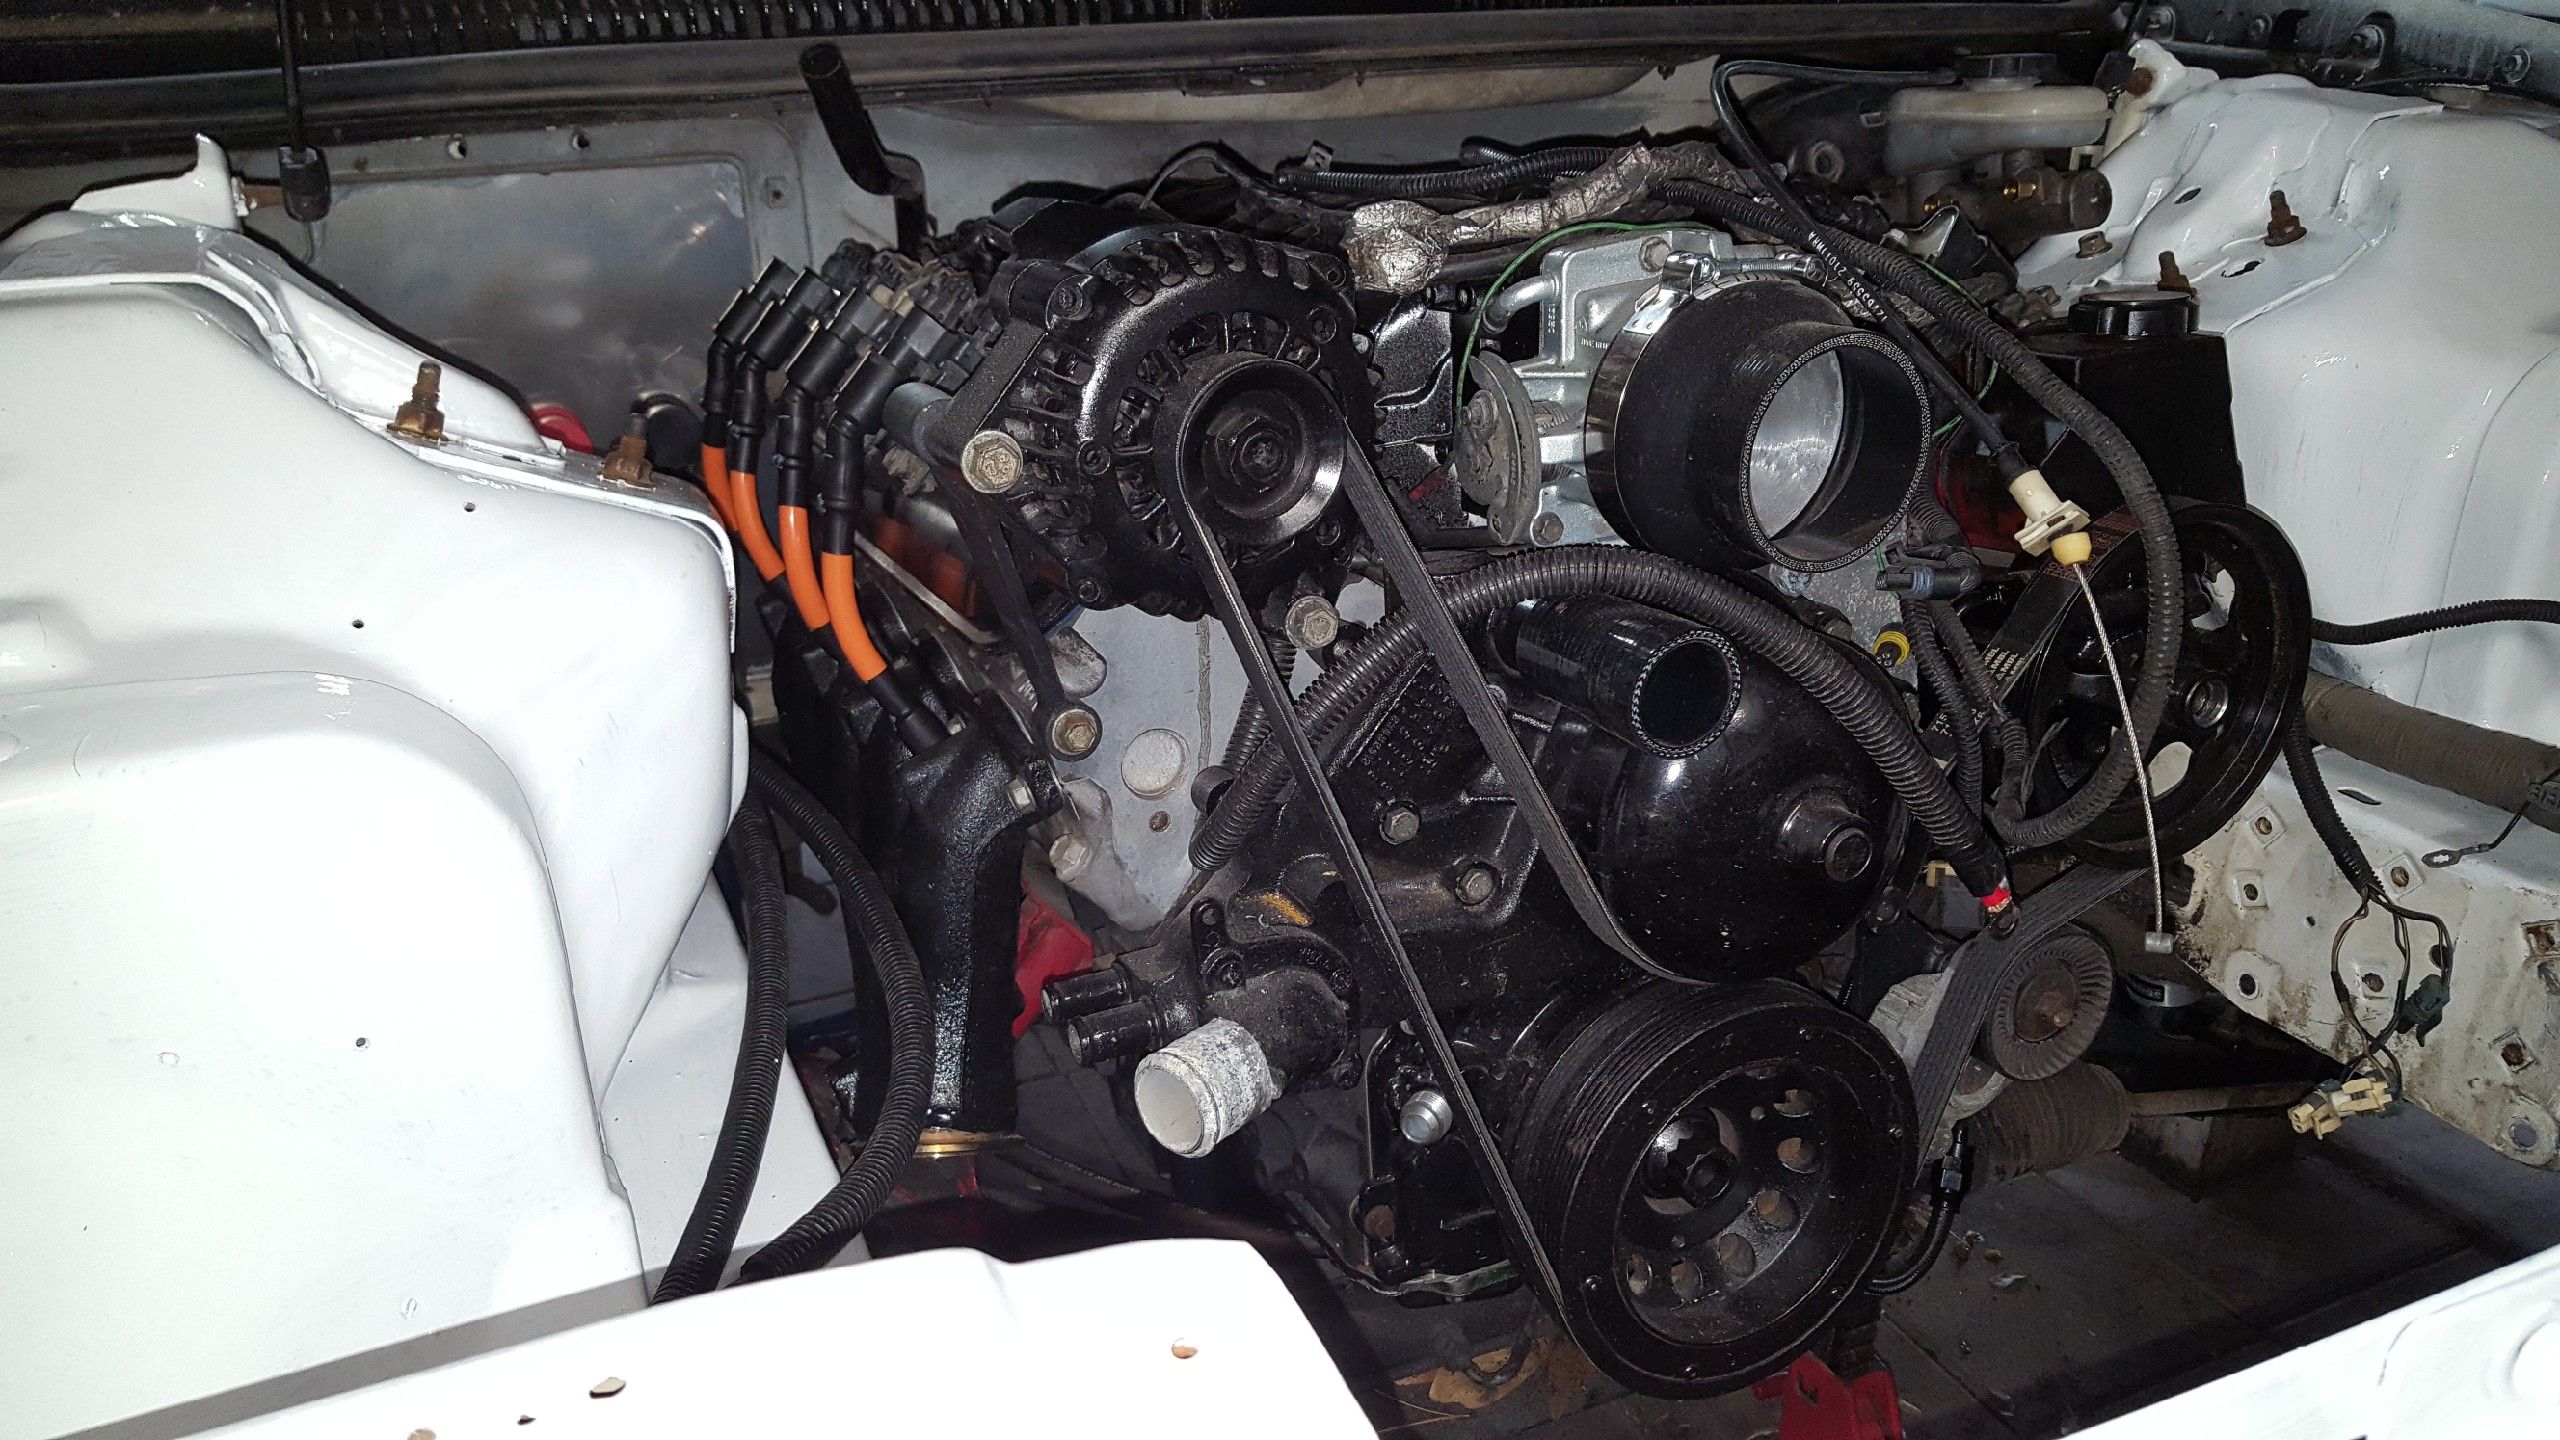
How about some Louisiana snow? Been nuts around here, low temps and barely getting to work, roads and interstate is clogged or stopped. In this pic is fuel lines, brakes lines, and transmission lines. All will be replaced.
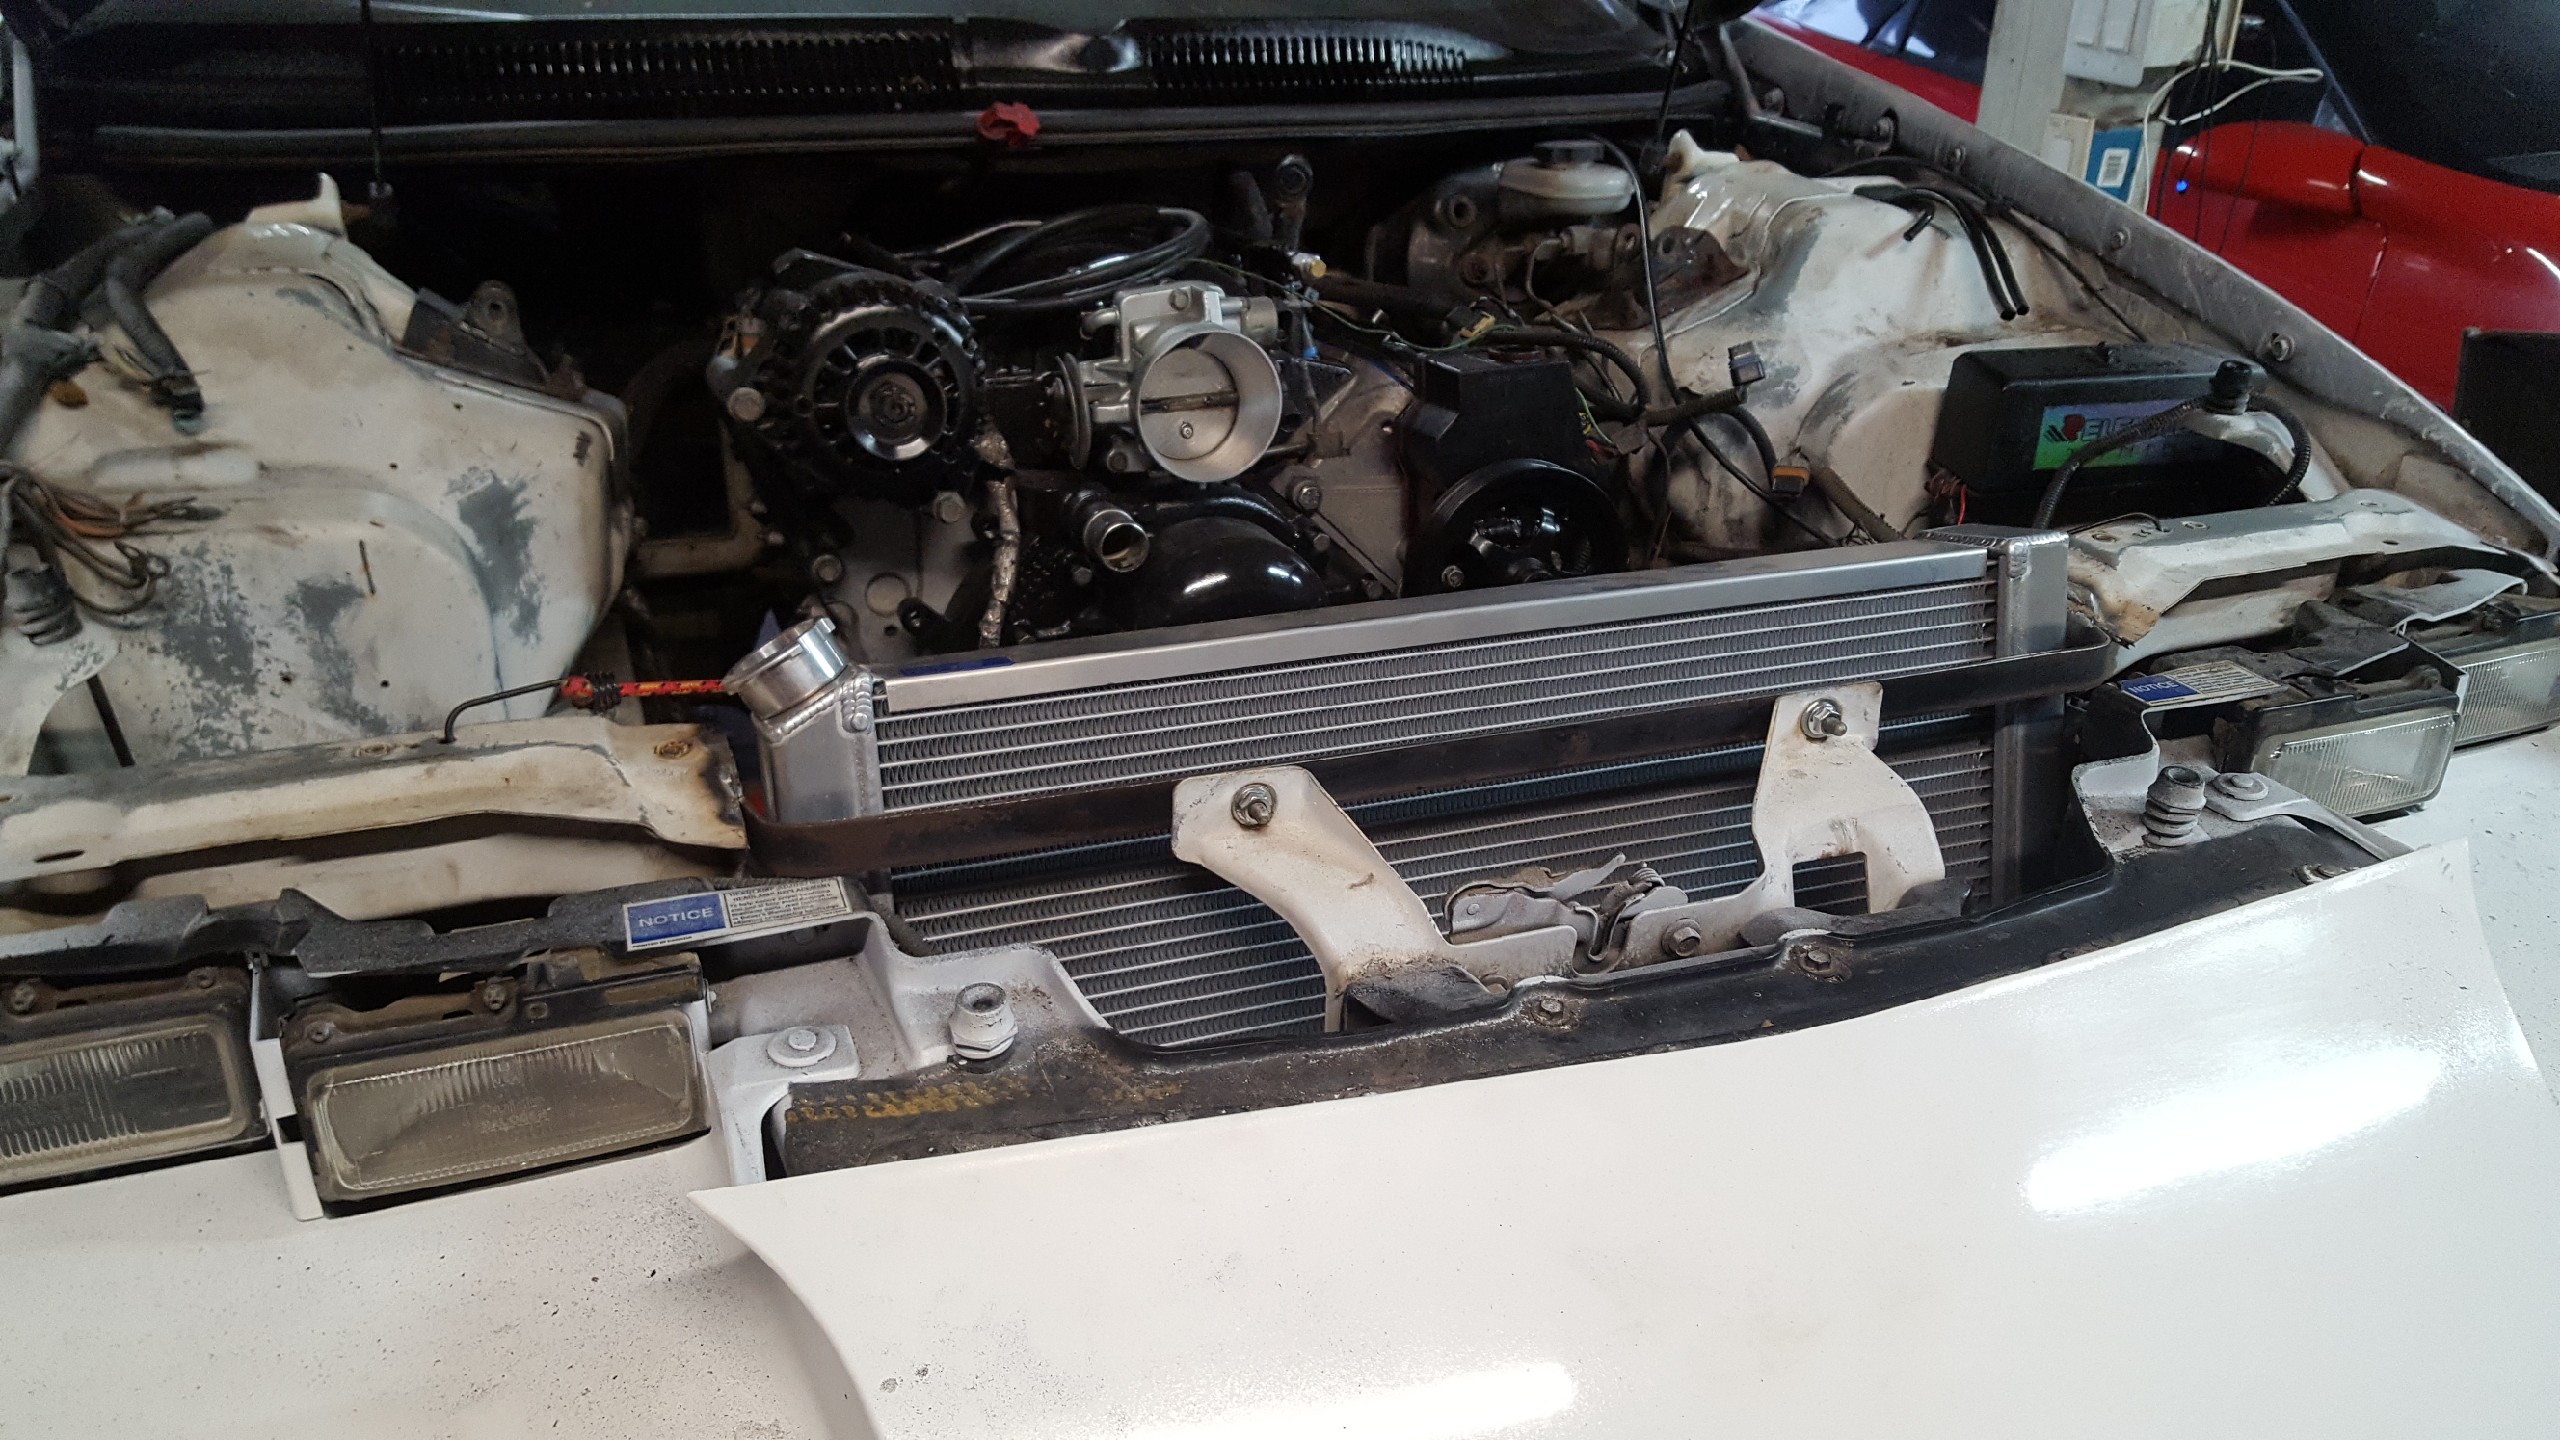
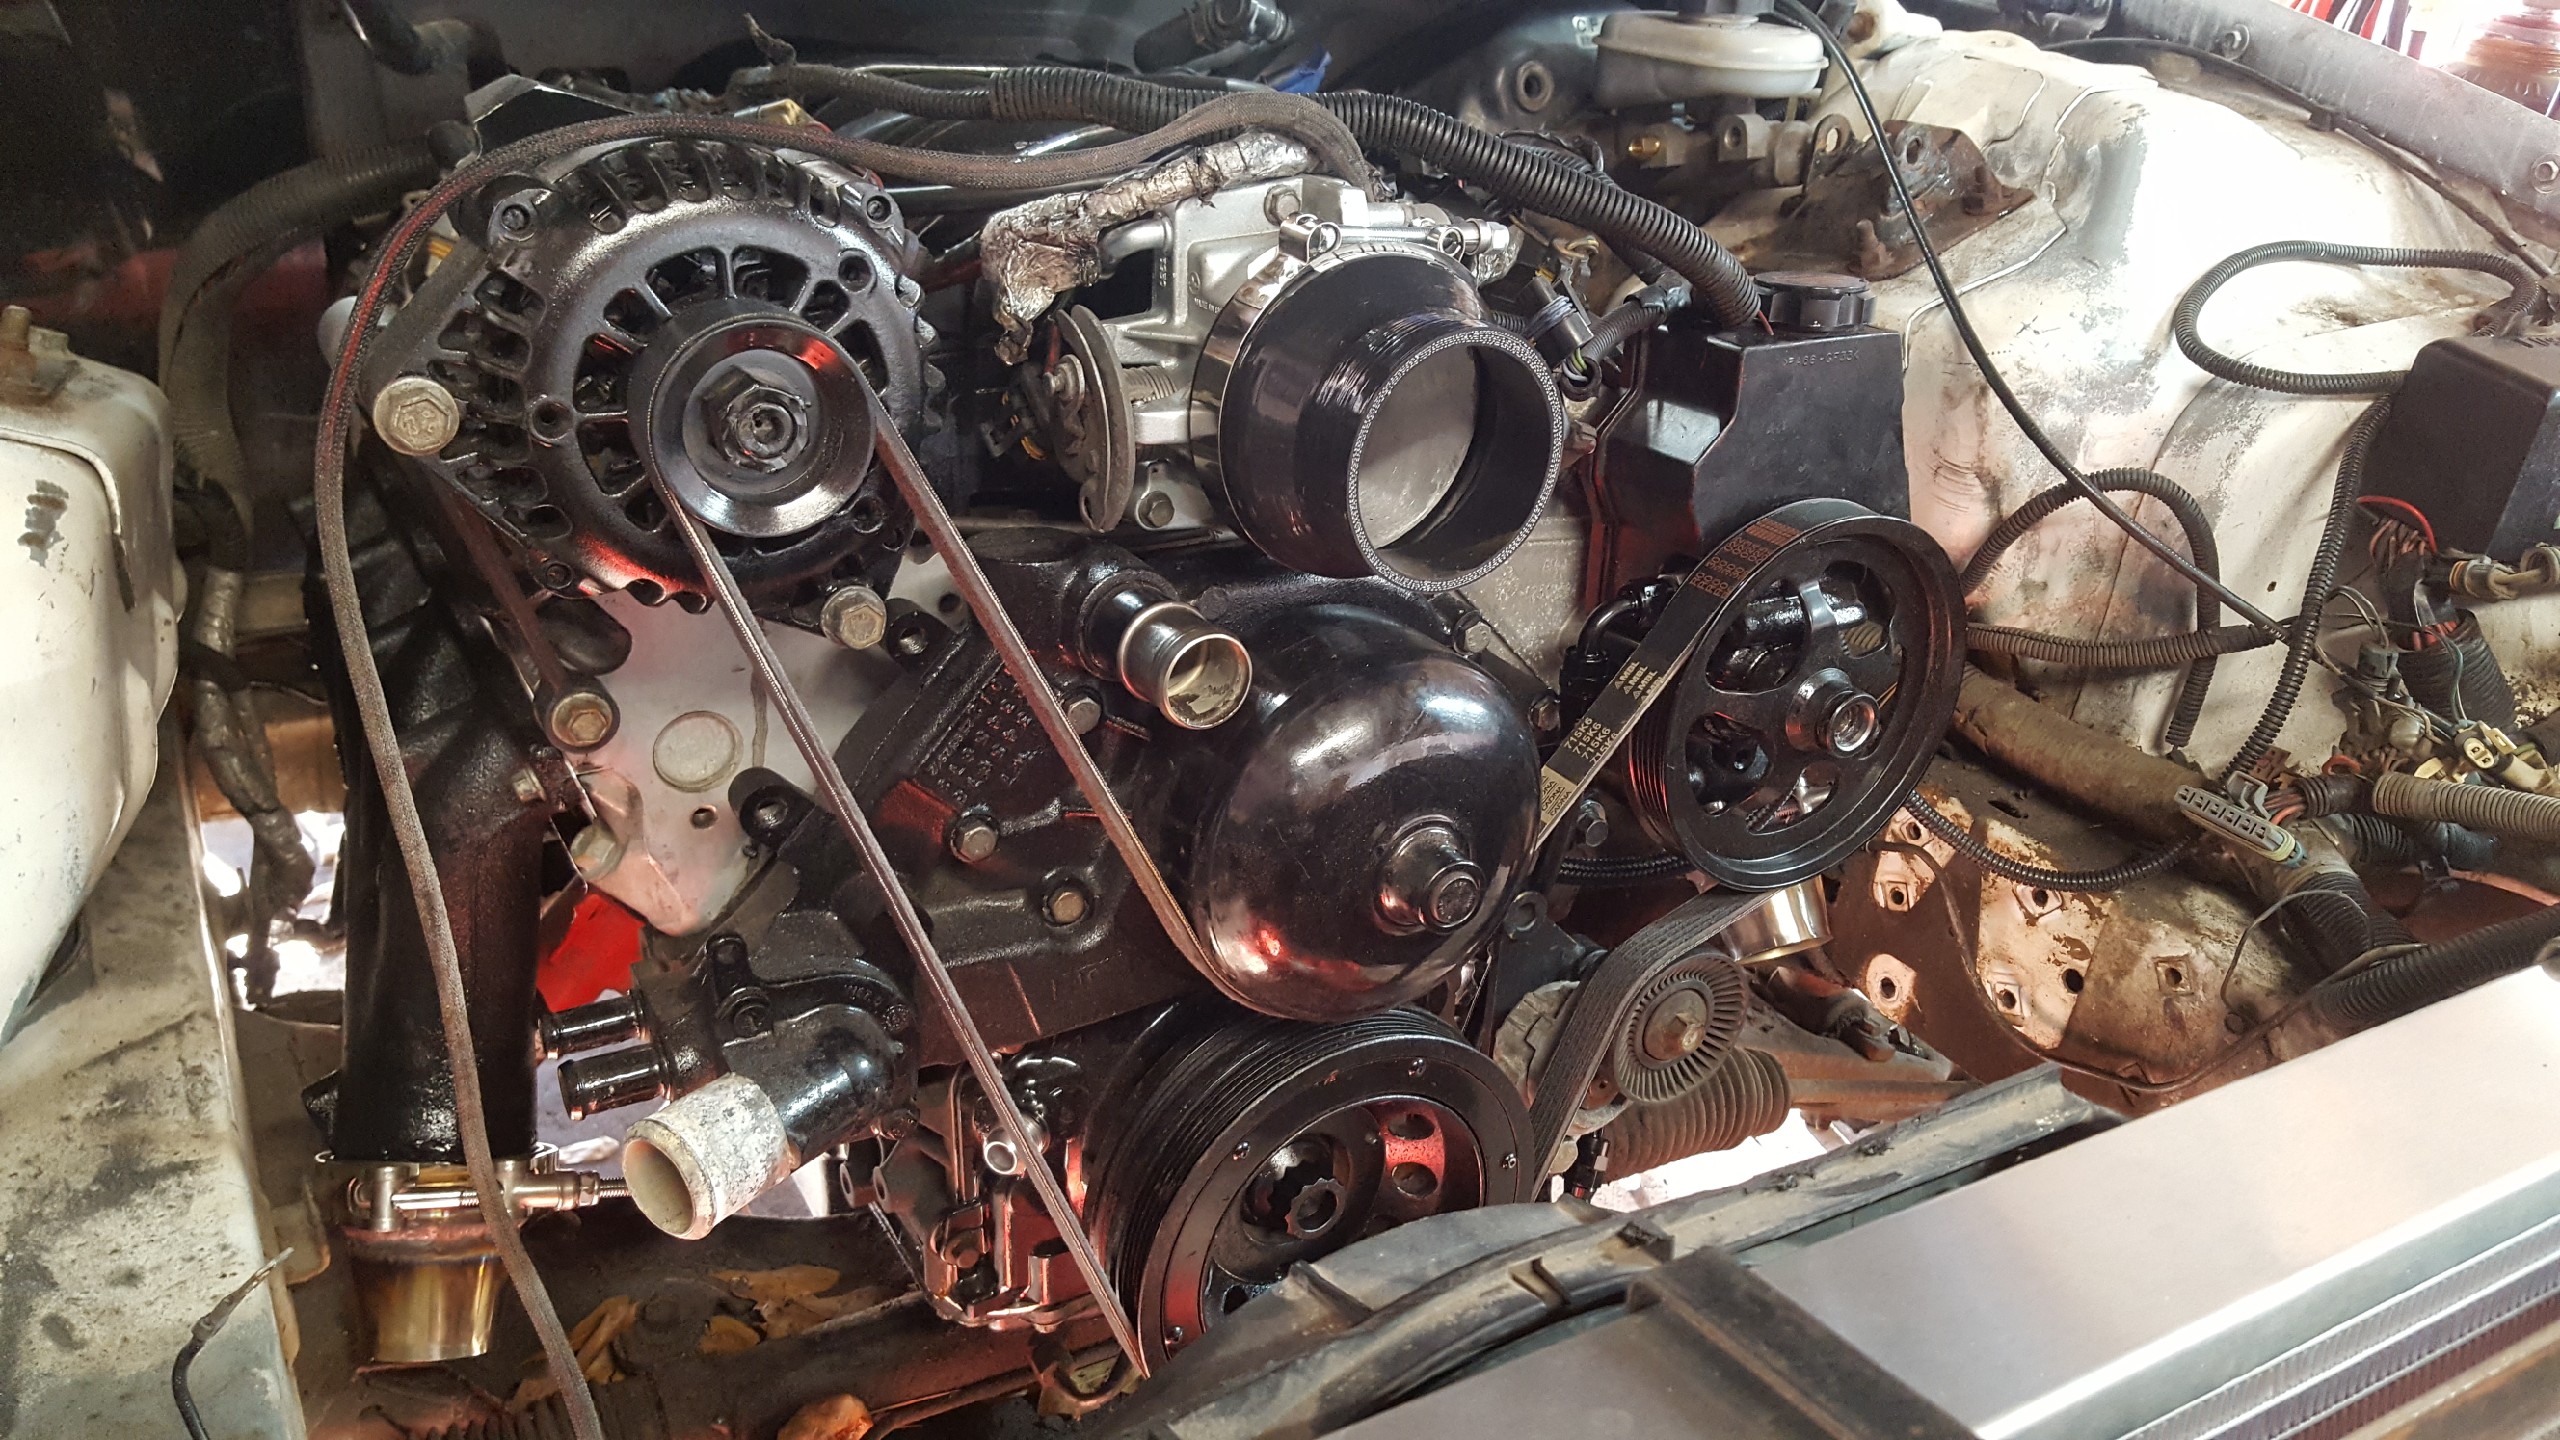
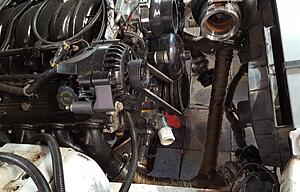
Before it was just mocked up, now its installed. New crank seal in the timing cover, new WP gaskets, and the SFI balancer reinstalled (this car is filled with gems aint it?) I solved that pesky problem of the alt relocation, I added a small flat bar bracket which connects to the upper block bolt. I used my other car to guestimate the placement (can see it in this pic). Ribbed pulley had to be swapped with a smooth one. Oil is empty, and I drilled a hole in a perfectly good trans pan! Breaking out the welder tomorrow, new oil pan has a shitty drain, trans pan is getting a drain, manifolds need vbands etc. More pics to come.

Before it was just mocked up, now its installed. New crank seal in the timing cover, new WP gaskets, and the SFI balancer reinstalled (this car is filled with gems aint it?) I solved that pesky problem of the alt relocation, I added a small flat bar bracket which connects to the upper block bolt. I used my other car to guestimate the placement (can see it in this pic). Ribbed pulley had to be swapped with a smooth one. Oil is empty, and I drilled a hole in a perfectly good trans pan! Breaking out the welder tomorrow, new oil pan has a shitty drain, trans pan is getting a drain, manifolds need vbands etc. More pics to come.
 02-22-2021, 06:52 AM
#27

Nice build following along. You said you trimmed the stock fans, what did you trim down? I see your using the stock fan housing. Years ago I tossed mine with my s-trim build and wondered how important it is if I should grab another? That�s some nasty weather for you guys for sure!
02-22-2021, 07:13 AM
#28
TECH Senior Member
Thread Starter
iTrader: (96)
Join Date: Aug 2007
Location: Turnin' Wrenches Infractions: 005
Posts: 24,240
Likes: 0
Received 81 Likes
on
72 Posts
Trimmed about 2 inches along the top, basically as much as possible without getting into the round fan shroud part, then had to trim the two corners for the hose outlets on the radiator.
The following users liked this post:
SCLT1 (02-22-2021)
02-22-2021, 08:08 AM
#29
TECH Enthusiast
How about some Louisiana snow? Been nuts around here, low temps and barely getting to work, roads and interstate is clogged or stopped. In this pic is fuel lines, brakes lines, and transmission lines. All will be replaced.

Before it was just mocked up, now its installed. New crank seal in the timing cover, new WP gaskets, and the SFI balancer reinstalled (this car is filled with gems aint it?) I solved that pesky problem of the alt relocation, I added a small flat bar bracket which connects to the upper block bolt. I used my other car to guestimate the placement (can see it in this pic). Ribbed pulley had to be swapped with a smooth one. Oil is empty, and I drilled a hole in a perfectly good trans pan! Breaking out the welder tomorrow, new oil pan has a shitty drain, trans pan is getting a drain, manifolds need vbands etc. More pics to come.

Before it was just mocked up, now its installed. New crank seal in the timing cover, new WP gaskets, and the SFI balancer reinstalled (this car is filled with gems aint it?) I solved that pesky problem of the alt relocation, I added a small flat bar bracket which connects to the upper block bolt. I used my other car to guestimate the placement (can see it in this pic). Ribbed pulley had to be swapped with a smooth one. Oil is empty, and I drilled a hole in a perfectly good trans pan! Breaking out the welder tomorrow, new oil pan has a shitty drain, trans pan is getting a drain, manifolds need vbands etc. More pics to come.
Where are the replacement lines coming from? Mine have definitely seen better days. We have a midwest hose and supply locally that can remake them fairly easily and reasonably priced but I was curious what route you decided to go.
02-22-2021, 08:16 AM
#30
TECH Senior Member
Thread Starter
iTrader: (96)
Join Date: Aug 2007
Location: Turnin' Wrenches Infractions: 005
Posts: 24,240
Likes: 0
Received 81 Likes
on
72 Posts
Pretty simple. Brake lines will all be converted to the standard 3/16 line. I have adapters for the master, and new soft lines. Auto parts stores keep preflared lines in stock. Will likely use that, Teed, for both fronts. For the rear i have a spool of soft bending hose i can cut and flare for the long run going to the rear. Fuel lines will be ptfe -6 from ebay, transmission same but not ptfe.
The following users liked this post:
AnnivSS (02-22-2021)
02-22-2021, 08:25 AM
#31
TECH Enthusiast
Thanks. Mine appeared to have been pinched by a lift arm or high centered on a trailer at some point.
02-23-2021, 06:01 AM
#32
TECH Veteran
Cool thread here 
02-25-2021, 09:21 PM
#33
TECH Senior Member
Thread Starter
iTrader: (96)
Join Date: Aug 2007
Location: Turnin' Wrenches Infractions: 005
Posts: 24,240
Likes: 0
Received 81 Likes
on
72 Posts
Thanks.
Louisiana snow again. I tore up the yard, I did donuts on the hwy, and basically acted like a hoodlum.

Some of the non-glamorous stuff, my 5 bottles of brake parts cleaner hate me. New (to me) fbody pan with a -10 drain welded in, cleaned, painted and installed. Truck manifolds with a 2.5 vband tig welded on.
New addition to the fleet, a Primeweld 225x. Do I need this, no.

But whats that beautiful Miller in the background? Its a 250x I bought for $375 bucks. Broken front and rolled hard and put away wet.
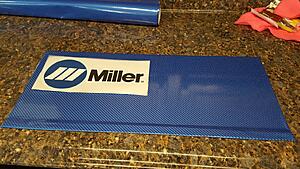
Ebay carbon fiber wrap, decals, and a new front plate.
$500 in this total, the new 252 Miller is $3k. I'm too broke for all that.
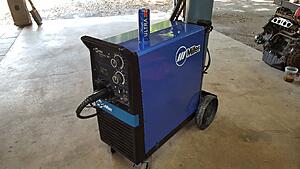
In the fleet, a Miller econotig 165 (ac/dc tig/stick), Miller 250x (220v MIG), Lincoln 140 (110v flux), Primeweld 225x.(220v ac/dc tig/stick).
Louisiana snow again. I tore up the yard, I did donuts on the hwy, and basically acted like a hoodlum.

Some of the non-glamorous stuff, my 5 bottles of brake parts cleaner hate me. New (to me) fbody pan with a -10 drain welded in, cleaned, painted and installed. Truck manifolds with a 2.5 vband tig welded on.

New addition to the fleet, a Primeweld 225x. Do I need this, no.

But whats that beautiful Miller in the background? Its a 250x I bought for $375 bucks. Broken front and rolled hard and put away wet.

Ebay carbon fiber wrap, decals, and a new front plate.

$500 in this total, the new 252 Miller is $3k. I'm too broke for all that.

In the fleet, a Miller econotig 165 (ac/dc tig/stick), Miller 250x (220v MIG), Lincoln 140 (110v flux), Primeweld 225x.(220v ac/dc tig/stick).
03-07-2021, 11:23 PM
#34
TECH Senior Member
Thread Starter
iTrader: (96)
Join Date: Aug 2007
Location: Turnin' Wrenches Infractions: 005
Posts: 24,240
Likes: 0
Received 81 Likes
on
72 Posts
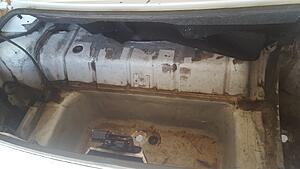
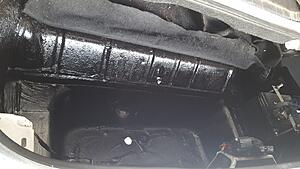
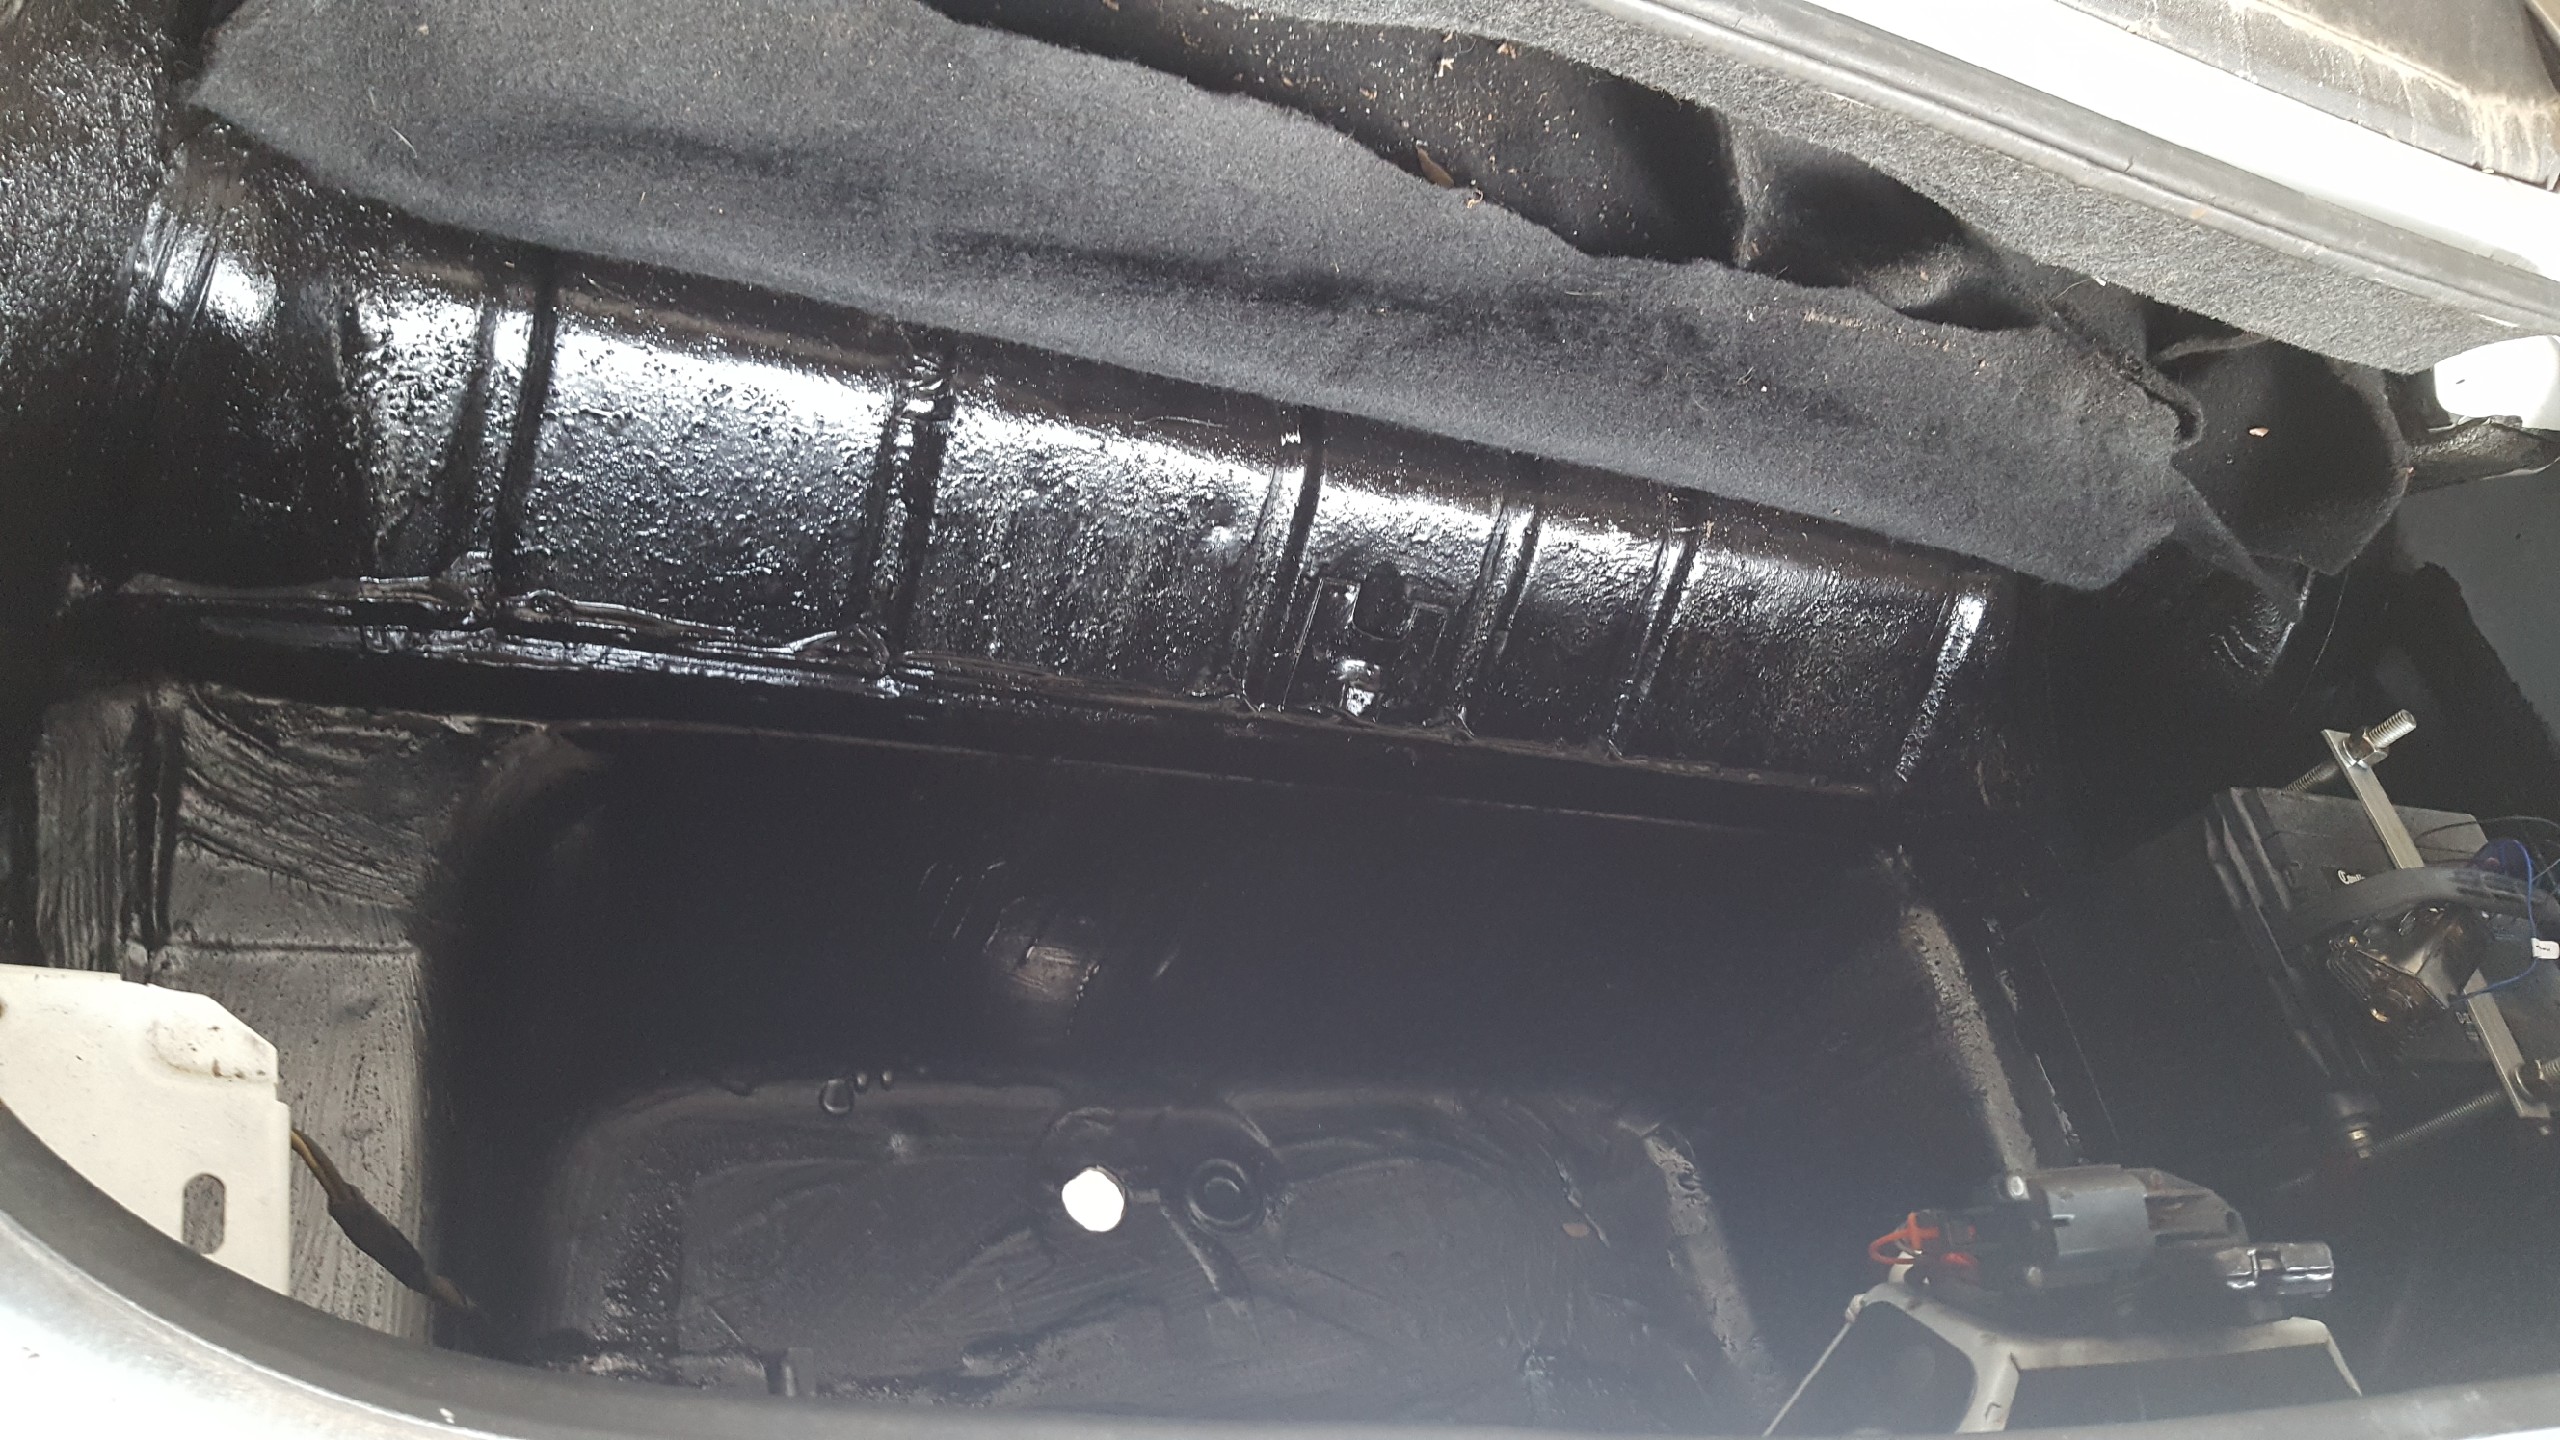
Starting with some junk. The trunk leaks some, am I gonna fix it? No. Line it with some bedliner, throw the carpet in the trash and call it good. Drill a hole so the water drains amirite?
Made a bracket for the battery out of some angle iron. No battery box, Welded a bolt for ground, but still gonna run one up to the motor area.
ARP crank bolt, belt (that fits), AN braided power steering hoses, manilfolds (with MLS gaskets) vbands with 2.5>2" reducers tig welded on, hot dang we're getting somewhere. Both brake ports are m11 apparently, so 1 is on order.
 04-07-2021, 10:25 PM
#35
TECH Senior Member
Thread Starter
iTrader: (96)
Join Date: Aug 2007
Location: Turnin' Wrenches Infractions: 005
Posts: 24,240
Likes: 0
Received 81 Likes
on
72 Posts
I still love these forums, call me old school. But if you're so inclined to give the FB page a like. That is what funds the fun stuff.
https://www.facebook.com/CustomANHose
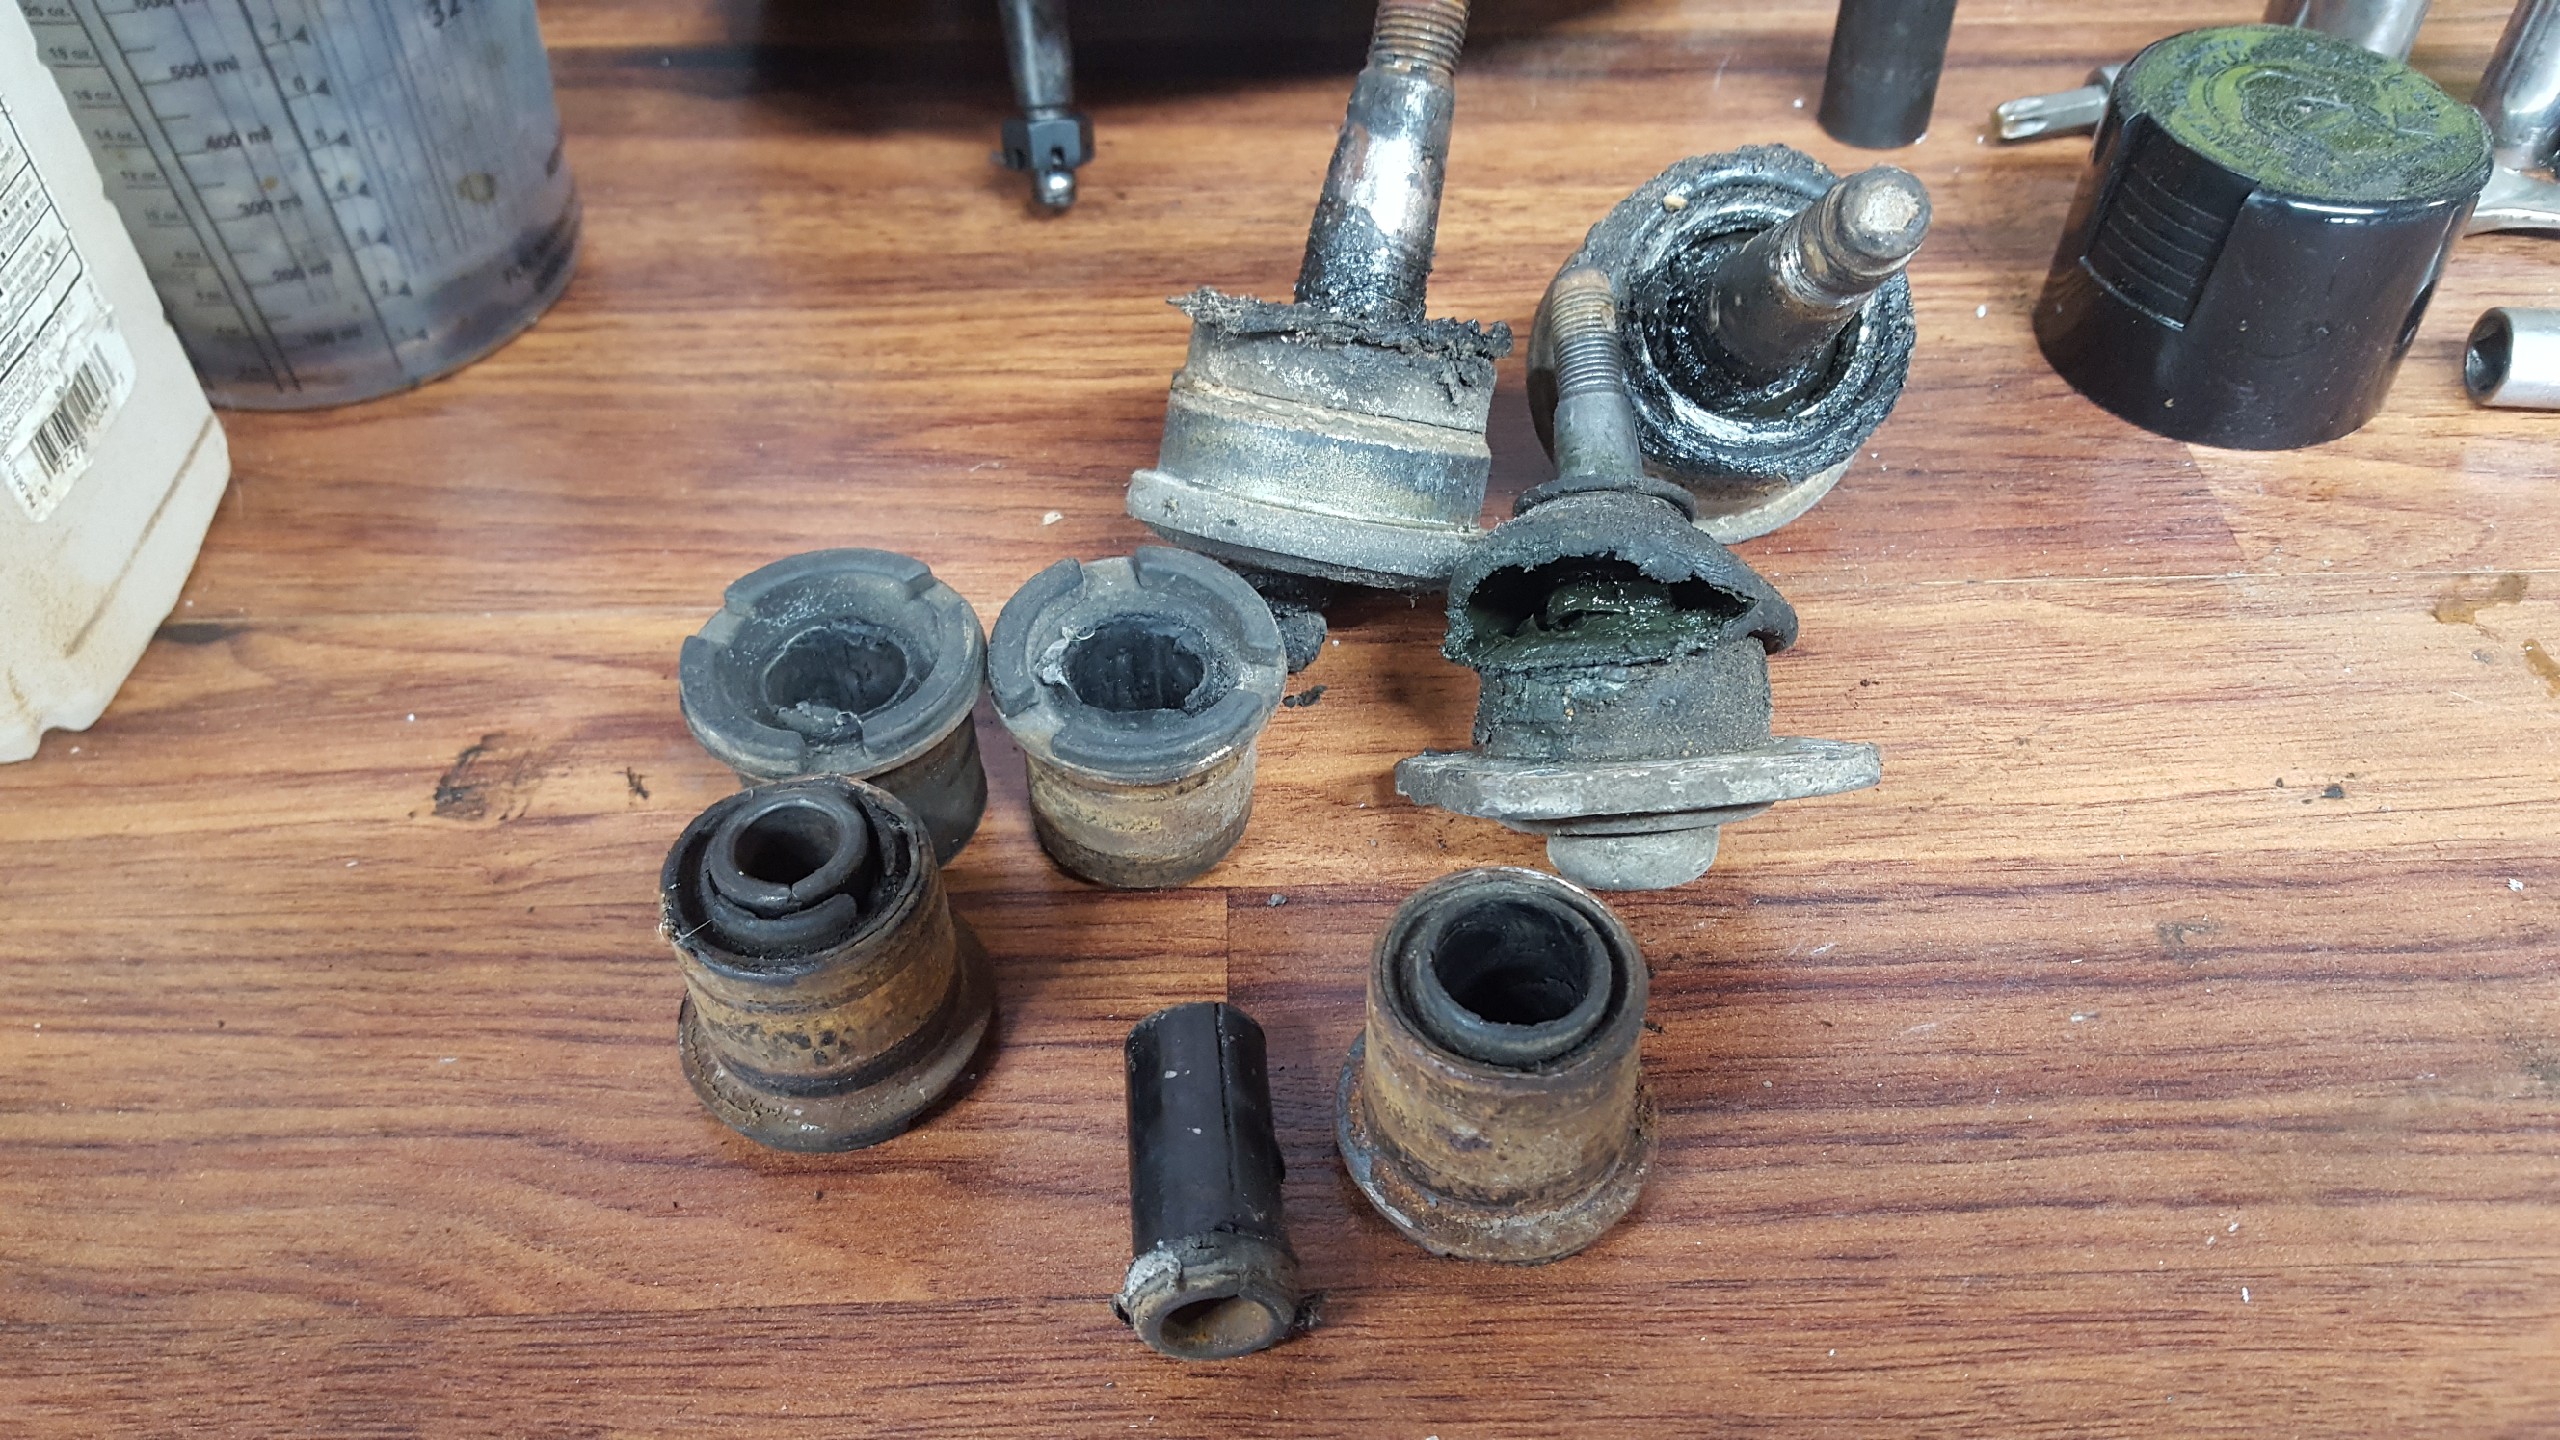
I bought upper and lower balljoints, and tie rod ends. Amazingly do I say, this crap is OEM at 27 years old?? Sad and amazing in the same sentence. Forgive the leaves, shed built junk over here.
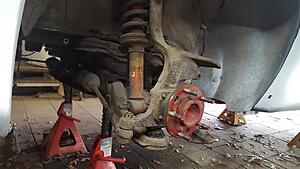
As bad as this looks I'm giving it a pass just because of age. Unfortunately the upper arm bushings were blown out, which I did not order. So those are on the way.

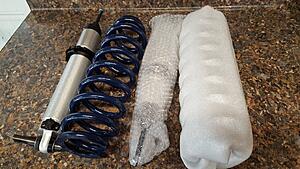
I said I wouldn't do this....but I ordered Strange coilovers for the front. This is their single adjustable front with a hybrid spring. What does that mean? It is not the traditional coilover spring, it has a coilover bottom diameter, and an upper diameter that matches the stock spring mount. The good news is the upper spring mounts are reusable. So we should be good once we get the upper bushings installed. #300 springs for those who are wondering.
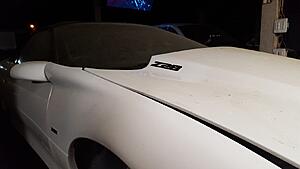
Came across a great deal on some stainless emblems, decided the hood was a great place for them. Forgive the pollen, as soon as the snow melted the trees pissed yellow dust on everything I own and my eyes have been itching for days.
https://www.facebook.com/CustomANHose
I bought upper and lower balljoints, and tie rod ends. Amazingly do I say, this crap is OEM at 27 years old?? Sad and amazing in the same sentence. Forgive the leaves, shed built junk over here.

As bad as this looks I'm giving it a pass just because of age. Unfortunately the upper arm bushings were blown out, which I did not order. So those are on the way.
I said I wouldn't do this....but I ordered Strange coilovers for the front. This is their single adjustable front with a hybrid spring. What does that mean? It is not the traditional coilover spring, it has a coilover bottom diameter, and an upper diameter that matches the stock spring mount. The good news is the upper spring mounts are reusable. So we should be good once we get the upper bushings installed. #300 springs for those who are wondering.

Came across a great deal on some stainless emblems, decided the hood was a great place for them. Forgive the pollen, as soon as the snow melted the trees pissed yellow dust on everything I own and my eyes have been itching for days.
 04-08-2021, 10:20 PM
#36
TECH Senior Member
Thread Starter
iTrader: (96)
Join Date: Aug 2007
Location: Turnin' Wrenches Infractions: 005
Posts: 24,240
Likes: 0
Received 81 Likes
on
72 Posts
Did I promise boost? I did. Truck manifolds, 2.5" reduced down to 2" with a bunch of bends from Speedway Motors. Installed twin 44mm gates (ebay) with what I think is 14psi springs (perfect). They are stuck wherever I could fit them, not prioritized, but they should work well.
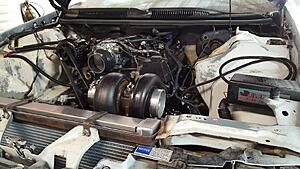
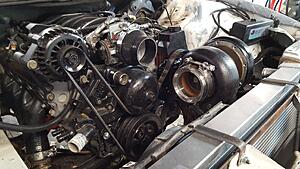
Super short drivers side (fitting the WG) and had the passenger side out of the way since I'm gonna try and snake a full exhaust on this car, It needs to get by the passenger side.

Super short drivers side (fitting the WG) and had the passenger side out of the way since I'm gonna try and snake a full exhaust on this car, It needs to get by the passenger side.

The following users liked this post:
AnnivSS (04-09-2021)
04-16-2021, 08:26 PM
#37
TECH Senior Member
Thread Starter
iTrader: (96)
Join Date: Aug 2007
Location: Turnin' Wrenches Infractions: 005
Posts: 24,240
Likes: 0
Received 81 Likes
on
72 Posts
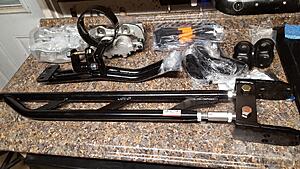
Don't worry about the BS in the background, focus on the Spohn chassis mount torque arm. I have a truck tail to go on the 4l60e (no TA mount). I hate the way these ride but I hate tail mounted TAs worse. Why Spohn? BC they were in stock, period. It'll do.
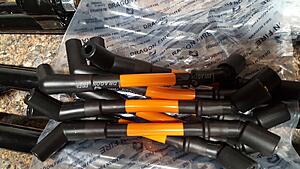
Ebay plug wires, dragon fire, bout $50ish bucks. On the short scale they all ohmed out at .097-.099. Good or bad, not sure but I'm gonna try em mated with br7s gapped at .022.
True Cool 40k and my $99 ebay intercooler, something around 28x14x3 inches. Some flat bar brackets from home depot and a tig and its an easy install. There is a 2 inch gap between the two. Does this trans cooler work? Hell yeah. Do i have a trans temp gauge? Nope. Just gonna not think about it.

Putting some fresh white on the inner fenders. Turbo kit is off (hopefully for the last time). Once the paint is dry the its going back together for the last time (yeah not really), but for the start up.
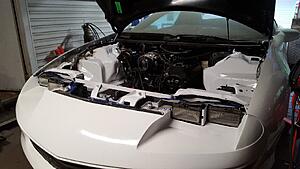
And I'm gonna leave this here. It so fits my life LMAO.


Ebay plug wires, dragon fire, bout $50ish bucks. On the short scale they all ohmed out at .097-.099. Good or bad, not sure but I'm gonna try em mated with br7s gapped at .022.

True Cool 40k and my $99 ebay intercooler, something around 28x14x3 inches. Some flat bar brackets from home depot and a tig and its an easy install. There is a 2 inch gap between the two. Does this trans cooler work? Hell yeah. Do i have a trans temp gauge? Nope. Just gonna not think about it.

Putting some fresh white on the inner fenders. Turbo kit is off (hopefully for the last time). Once the paint is dry the its going back together for the last time (yeah not really), but for the start up.

And I'm gonna leave this here. It so fits my life LMAO.
 04-17-2021, 06:44 PM
#38
Moving along nicely and paint job looks good!
04-17-2021, 06:52 PM
#39


Nice work. Be interesting to see how that $99 ebay intercooler does.
04-17-2021, 11:27 PM
#40
TECH Senior Member
Thread Starter
iTrader: (96)
Join Date: Aug 2007
Location: Turnin' Wrenches Infractions: 005
Posts: 24,240
Likes: 0
Received 81 Likes
on
72 Posts
Thanks.
Should do good for what I'm doing.
Coilovers, new front suspension, brakes, braided lines, Sunkist orange plug wires, TR7s gapped at .024 are in.

Should do good for what I'm doing.
Coilovers, new front suspension, brakes, braided lines, Sunkist orange plug wires, TR7s gapped at .024 are in.
The following users liked this post:
SCLT1 (04-18-2021)