


How to wire neatly and professionally
All of my wires are practically invisible and that's how it should be.
On the interior I have 9 switches and two gauges not including the window swtch in the glove box. In the engine bay I have 5 relays, 6 solenoids, 2 FPSS's, 4 gauge senders, stand-alone and I'm probably forgetting something.
All of the wires come from the glovebox, custom panels in the ashtray and cubby hole replacement panel unseen through the same hole as the hood latch under the fender on top of the plastic wheel well out under the fuse boxes. Then the 5 relays are mounted along the fuse bozes. The wires from the relay are wire loomed. The hood latch is also ran over the plastic wheel well. The wires to activate the noids are ran back over the plastic wheel well out of a 1" hoel in the rear driver fender under the cowl and down through loom under the fuel injector wire loom and to the noids on the DP and to the head mounted noids.
I use spade connections on the relays, interior switch panels, and noids so everything can quickly be removed. Say if some ******* hits me and I need to take out the nitrous stuff before the claim guy comes.
My bottle heater and relays for that are hidden in the spare tire well.

Thread Starter
11 Second Club
iTrader: (14)
Joined: Nov 2004
Posts: 1,653
Likes: 1
From: Michigan (Macomb or Lansing)
Anyone know a good place to get an electronic kit with wires, heatshrink, connectors, etc. If i goto radio shack and get each thing individually, itll probably be over 100$.
I have the tools except a heat gun and crimper.
I have the tools except a heat gun and crimper.
Check the links that I put in my post. You can get the weatherpack stuff from that guy and the other stuff you need from McMaster. I just bought Automotive wire from Napa and used the correct sizes for each component.
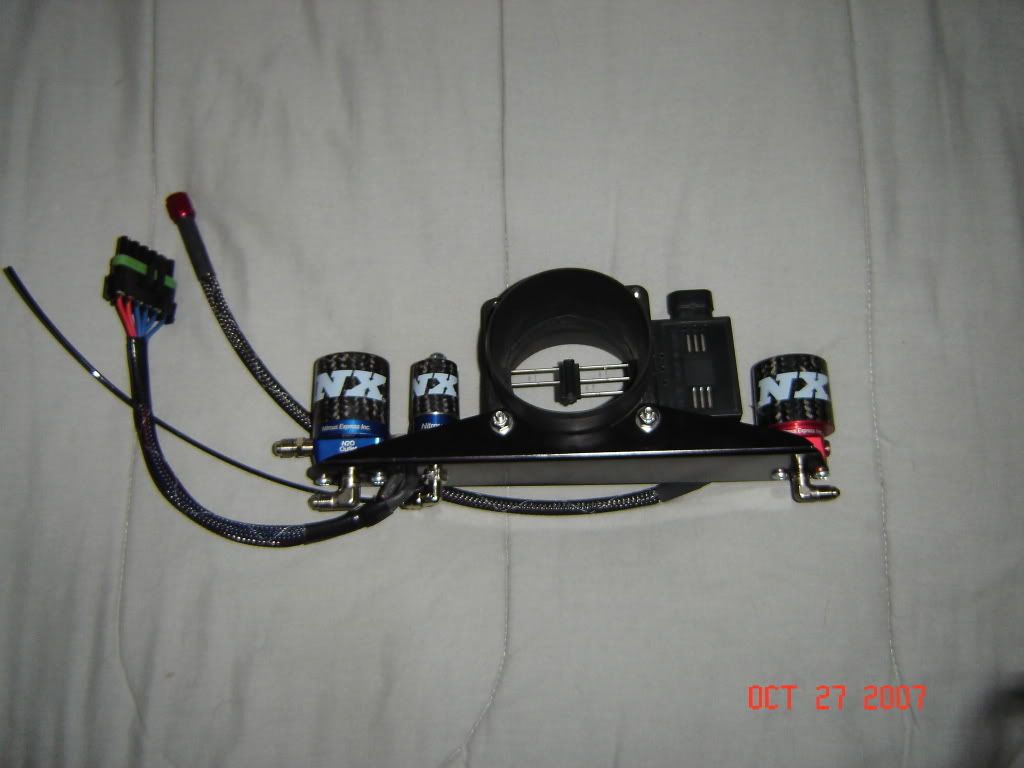
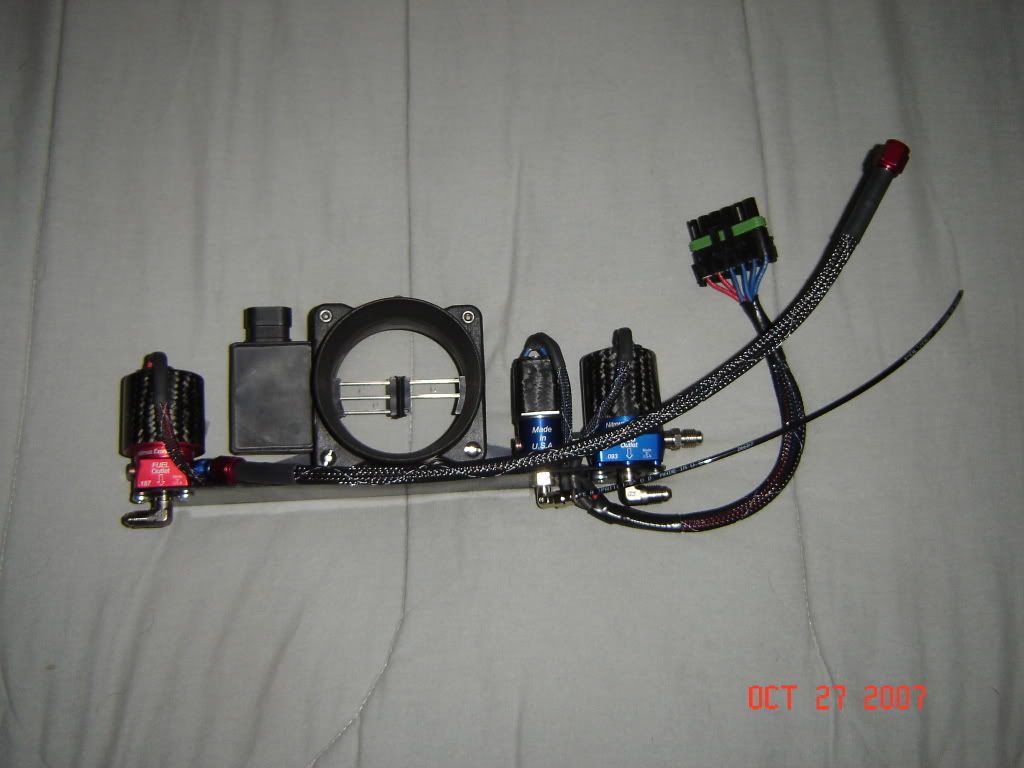
I used weatherpack connectors wherever possible and still soldered all of the crimped connections. I also put a Nylon sleeving (flame retardant) over all of my wires and nitrous lines with heat-shrink on the ends. I think it looks a lot neater and better than the standard convoluted tubing. I also purchased sealed relay's that are waterproof. I got the Nylon sleeve and heatshrink from McMaster Carr as they've got an awesome selection and good prices. The cheapest place I found for the weather pack stuff is a seller on Ebay called MJM National You probably won't find anyone else cheaper. I got the crimpers for the connectors at Napa before I know about this guy. You can see in the bottom pic in the lower left corner my two fuse holders for the entire system. One is for the heater and misc items and the other is for the solenoids. Here's a few pics of my install:


When I wired my kit one thing I did is make sure you use different color wires for everything, and keep your wiring diagram handy. Solderign everything is a must IMO, I admit I did use a butt connector or 2 but before the interior goes back togeher, that stuff will be done right.
I don't personally like using the relay's to activate the kit, I used the relay to activate a big *** starter solenoid I got from napa, this way all the high power stuff is runnign right from the battery to the solenoids, and the big starter solenoid takes care of the switching. I know it seems like overkill, but I feel it's safer. The wiring for my particular setup is very simple, because there's no window switch or fuel pressure safety switch or any of that, with a 5400 converter and the nitrous engages off the transbrake button, there's really no way for the kit to ever come on at an unsafe rpm. I am using a WOT switch as well, so unless the kit's armed, transbrake isn't on and the WOT switch is on, kit no workie. I have loomed all the wires in the engine bay so it's cleanly wired, I'm not sure if I will leave the kit the way it is or move it around though, with all the changes that are going on there's about to be a TON more room in the engine bay that there wasn't so I may find myself doing a little rewiring this spring, mainly so I can get the kit on in a little more organized/simple matter. Plus the fuel system is changing as well (going to a 3 gallon cell mounted in front of the radiator with aftermarket rails and a pressure regulator, possibly a 2nd pump/2nd regulator for the nitrous, although I feel that's total overkill for a 100 to 150 shot thru the Nos plate kit I am running.
I didn't bother with the FPSS, alot of people would say that's really unsafe, but I know more people that have had inconsistant results with those that I don't feel it's really needed, I've put a racetronix pump in the tank with the hotwire kit, the tune's a little rich, jetting is a touch rich and to be honest, of the 4 passes I have made on the jug I haven't once had time to even look at what the pressure is, it's enough to watch the tach and pull 2nd when I want to LOL. Hell I went and bought the biggest brightest shift light autometer sells because the little pen size that came on my tach isn't bright enough to see during the day.
LS1 Tech Stories
The Best V8 Stories One Small Block at Time

6 Common C5 Corvette Failures and What's Involved In Repairing Them
Pouria Savadkouei
Retro Modern Bandit Pontiac Trans AM Comes With Burt Reynolds' Autograph
Verdad Gallardo
Top 10 Greatest Cadillac V Series Performance Models Ever, Ranked
Pouria Savadkouei
Top 10 Most Powerful Chevy Trucks Ever Made!

Hennessey's New Supercharged Silverado ZR2 Has 700 HP
Verdad Gallardo
Coachbuilt N2A Anteros Is an LS2-Powered C6 Corvette In Italian Clothes
Verdad Gallardo
Awesome K5 Blazer Restomod Comes With C7 Corvette Power
Verdad Gallardo
10 Camaros You Should Never Buy

10 LS Engine Myths That Refuse to Die
Verdad Gallardo to add my 2 cents..again
lay everything out before you cut one wire. I don't know how many countless times I've come up just short because when I tucked the wire away to hide it...it took more room that I had thought.
lay everything out before you cut one wire. I don't know how many countless times I've come up just short because when I tucked the wire away to hide it...it took more room that I had thought.

Subscribing!!!!!
I used to always say I was going to take my time and wire up everything neat but I always got in a hurry. Well we just got a few more inches of snow so it looks like my car is going to be parked for the next couple weeks AGAIN!!!!
I plan on using nothing but heat shrink and soldering. Also, I just ordered a whole assortment of weather pac connectors so hopefully when it is all said and done it will look good.
Beer - I like your method of wiring up everything in series, but with a bottle heater on and engine start switch with the arming switch, will that pull too many amps with only a 25 amp fuse?? Or do you use a lot of relays???
Right now I have a relay for my nitrous kit but should I go ahead and run a relay for both my heaters and my purge too???
Think about how your going to use your accessories, your starting the car, nothing else is armed/on. The arming switch is a relay, the heater is a relay. The only items not on a relay on my system is the opener (not used with the system on), the LC-1 LED/Cal, and the Line Lock (not used with the system on). Have not blown the fuse yet.
LOL but I am a checklist kind of guy (ex Navy flew USN P-3C UII/II.5 Orion's as Tactical Coordinator).
LOL but I am a checklist kind of guy (ex Navy flew USN P-3C UII/II.5 Orion's as Tactical Coordinator).
 In fact, it was the basis for my entire installation. Everything I wired up was based on the switch panel as a starting point. It really made it easy. If I had to do it over again, I would start with a Beer panel and go from there.
99 FRC
what size wiring do you guys use for all your kits? I am going to be rewiring everything here shortly when I rip my engine out for a buildup. In the past I usually solder it all up and have used butt connectors as well. Going to make it a cleaner install this time around.
I have a two stage setup and currently have my dry stage wiring routed through wire loom that is also around the hood latch cable to make it all look stock and hidden.
I have a two stage setup and currently have my dry stage wiring routed through wire loom that is also around the hood latch cable to make it all look stock and hidden.

Here are some tips I got from someone on another forum, hope he doesn't mind me posting this....
Molex connectors are cheap and common, often times you crimp on and solder the pins to the wires before building the connector, so they are pretty secure.
a) draw a diagram that has all the components--PCM, gauges, nitrous, wideband etc.
b) draw each connection as a series of traces among the components
c) group the traces and draw connectors in place, ideally so you can completely remove one of the components without removing anything else
d) based on the diagram, buy 16ga and 22ga wires in several colors in case you need to extend connections
e) buy 1, 2, 3, 4, 6, and 9-pin Molex connectors and the appropriate crimp tool
f) get a labeler to help keep the connectors and wires straight (optional, but nice to have)
g) go after every crimp on and replace it with a solder/heat-shrink connection
Thread Starter
11 Second Club
iTrader: (14)
Joined: Nov 2004
Posts: 1,653
Likes: 1
From: Michigan (Macomb or Lansing)
Awesome guys, great tips! Ill be sure to post some pics of my setup in the summer, I already got some great plans now. Of course it's gonna be pretty stealth 
