NPU Headlight for TA need some Fiberglass help (lots of pics)


 09-24-2009, 05:44 PM
#24
How did you form the lenses? I am getting ready to make some for my LT1 and i have all the fiber glassing or in my case carbon fiber-ing planned out, but for the lens i'm a little confused. I was thinking of removing my stock headlight lid, laying the lexan/acrylic over it, and baking it. But im not sure how hot and how long. Is this what you did?
Af for fiberglassing, my way takes some real artistic skill, im an artist. PLus i have an LT1. Very square. Im just going to measure up all the inside lengths of the square opening, and make a wooden replica. Once i have the lexan lenses made, i will mount them on top. So i have a wooden "Bucket" with the lens in place. im going to spray in expanding urethane foam up until where i want the base of the headlight to sit. Again i wont know where until im ready. Once ive established a strong enough base for support, i will inlay Metal piping. (i plan on taking my projectors into a hardware store and seeing what size pipe will house the projector easily).then i will simply finish filling the box with foam (after blocking off the opening in the front of the pipe). Then ill simply go back and carve and cut out what ever shape i want. Then i'll remove the pipes (oh yea sorry i forgot to meantion i would have them coated in releasing agent so the foam wouldn't sick).Then seperate the wood from the foam (sorry, forgot to mention that releasing agent again).this leaves you a foam impression of what will be the final headlight bucket design. Then you soak the foam in fiberglass resin, and finish like any thing else. Bondo and paint, or carbon fiber.
In the meantime, grind,sand, ploish the pipes. You may or may not want to bevel the edges that will show. And at that point you can finish them how you want eg; paint, brushed chromed. Cut the back of the pipe to the back of the bucket's length. I am going to fab up the mounting system on the back of the light. Overall the pipes/projector housings will only extend past the light about 1/8" so it wont disrupt the light output. That way you can adjust and angle them on the back of the lights, with the hood open like any other car.
You may or may not have top make more lenses, if you a releasing agent it will grately reduce your risk. BUT, after assembly, final step would be some rubber based sealant around all edges. I hope it makes sense to you, i plan on making a youtube video set.
Now for the LS1. What i would do is almost the same thing. The difference is how you would make the bucket. Because of the curves you couldn't simply measure and make it out of wood like on my LT1. I would take a peice of lexan and simple insert it into the opening, against the back edge of the headlight opening. I would use a heat gun until it was formable and simple push it up against the opening into the edge of the hood, enabling it to mimic the required curve. That give you the back wall of the opening. Then i would use a flat peice of lexan for the bottom. And then another flat peice for the side. Trace the side of the finder so you know how to cut that last peice. Then glue it altogether. Then set your lenses on top, and finish the whole thing just like on my LT1. In fact, using lexan instead of wood probably means you could just add to the bucket as opposed to removing it later, I think i'll just use lexan on mine from the beginning too!
Last edited by evilZO6; 09-24-2009 at 05:52 PM.

 09-27-2009, 06:39 AM
#26

i was going to do this to my firebird but i couldnt justify 1500 then nor could i now for freakin heaadlights... but if SOMEBODY DOES THIS...please make it a damn sticky!!! with step by step on what to buy..and a video so the rest of us dont fk it up!!!
09-28-2009, 05:31 AM
#27
On the lenses, I would make then from the stronger and higher heat resistant lexan and then apply a protective film to protect from small scratches. There are specialty films designed just for these applications.
On the housing, do you already have a basic enclosure and your just needing to mold the insides around the projectors for cosmetic reasons? I say try modeling clay. When it's warm it's soft and easy to work with. Just shape and reshape to your hearts content. Once you got the look you want, cover it in fiberglass and you have your negative mold. Clean all the clay out of the mold and then use bondo to fill any holes and to smooth it out. Then you cover with release agent and lay in the new fiberglass. You can also make several copies fairly easily if you wanted to.
As you probably remember I'm making my own setup as well. I'm making new steel covers (22ga) that extend all the way forward for a very aerodynamic, slick look. My projectors are going to more under the hood so they will be harder to see and I'm going to cut away the metal housing just enough for the light beam to come out. I'll cut out my film to match the shape I cut in the cover. Attach a slightly oversized piece of lexan under the metal cover and then apply the film. The metal cover will be panted to match the car and hopefully the film will be close in thickness to the cover metal so the whole thing is nice and flush fitting.
You might consider painting the outside of your clear covers (except for the beam output) and then apply a clear film over the whole lense to protect it and the paint.
One question, are you wanting the headlight insides to be black or red?
Last edited by JasonWW; 09-28-2009 at 05:47 AM.
10-09-2009, 09:00 PM
#28
Staging Lane
Thread Starter
iTrader: (5)
Join Date: Aug 2009
Location: KANSAS
Posts: 89
Likes: 0
Received 0 Likes
on
0 Posts
Many thanks for the suggestions!!!!! sorry have been away for a bit, I finally got back and had to find a house and such....glad I got one with a garage!!!!
and some pics........I know shes dirty....my apologies LS1 gods
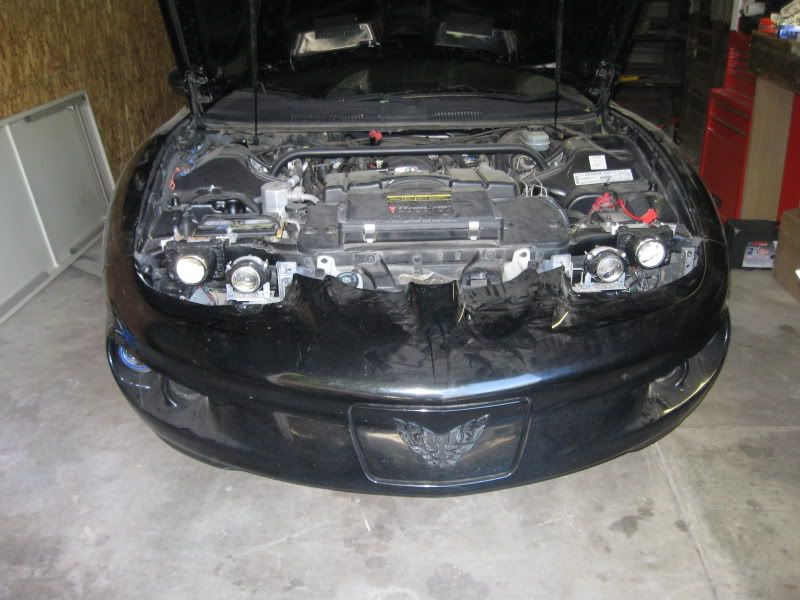
using the black car to try this out on, she was just rescued from storage and brought to the garage... this was the light setup I had on her before I left a
year ago...
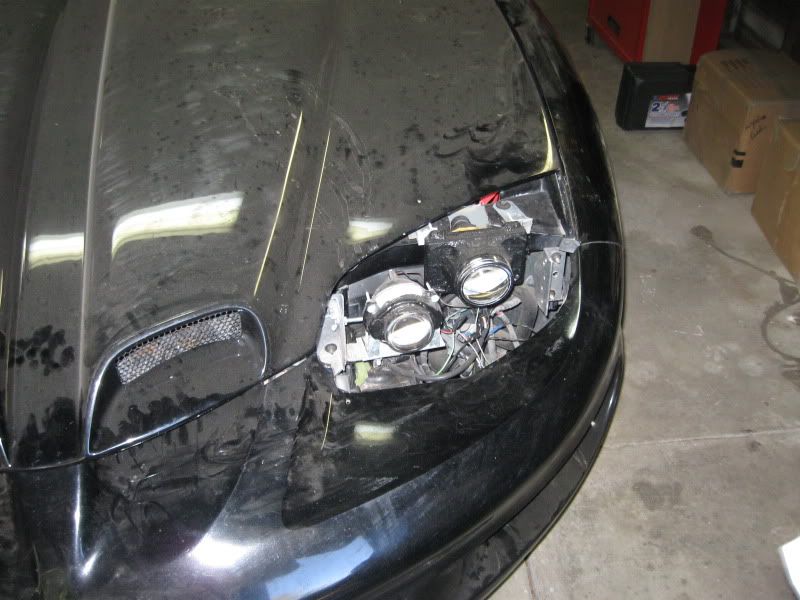
decided to go with the drivers side first to try my luck and the new info I learned.
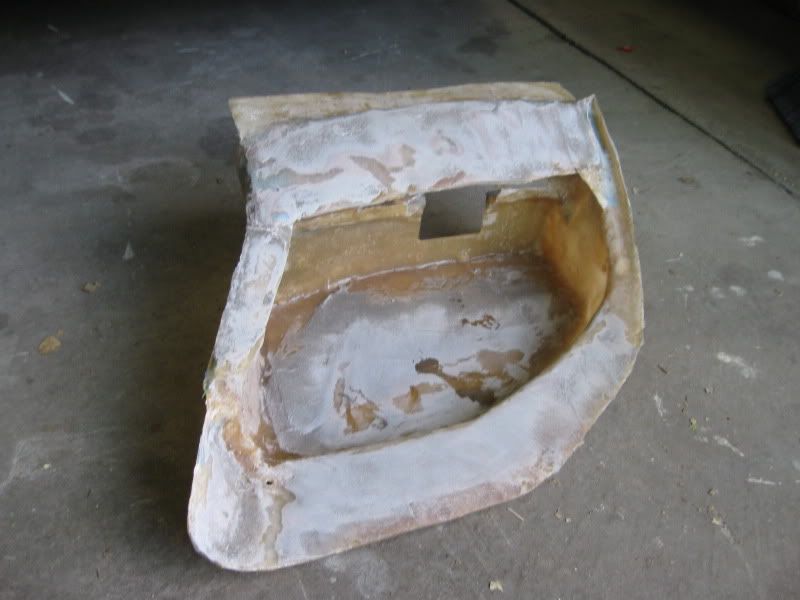
an old piece from when I had tried to make a fiberglass inner covering so the lights wouldnt get dirty from the underside... I cut the bucket part out and used the remaining piece as the frame.
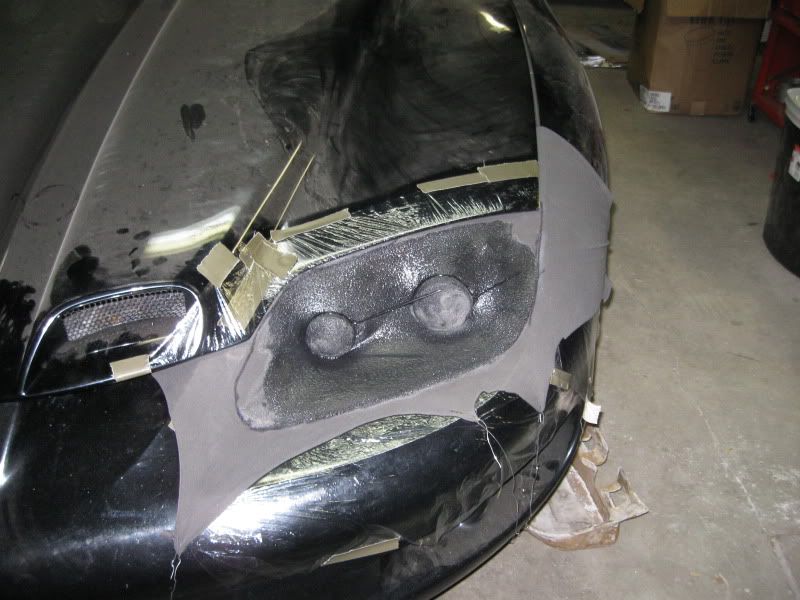
got some cloth from walmart....says its sweatshirt material....worked out
pretty good, very stretchy.
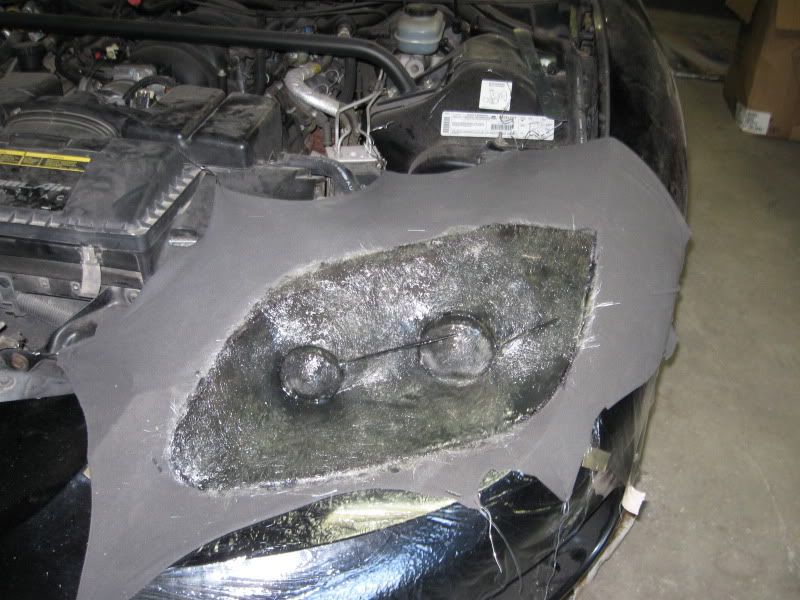
I was elated to say the least when they came out this well...
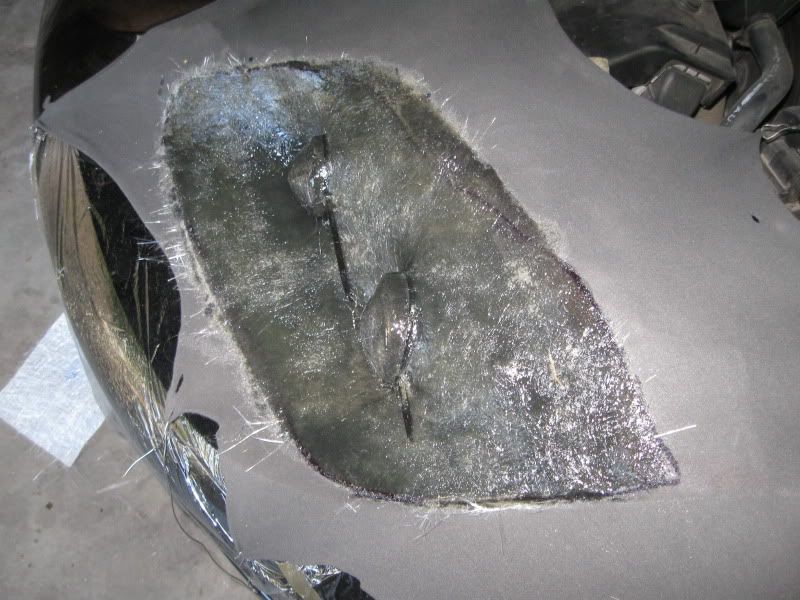
and a shot from the back side...
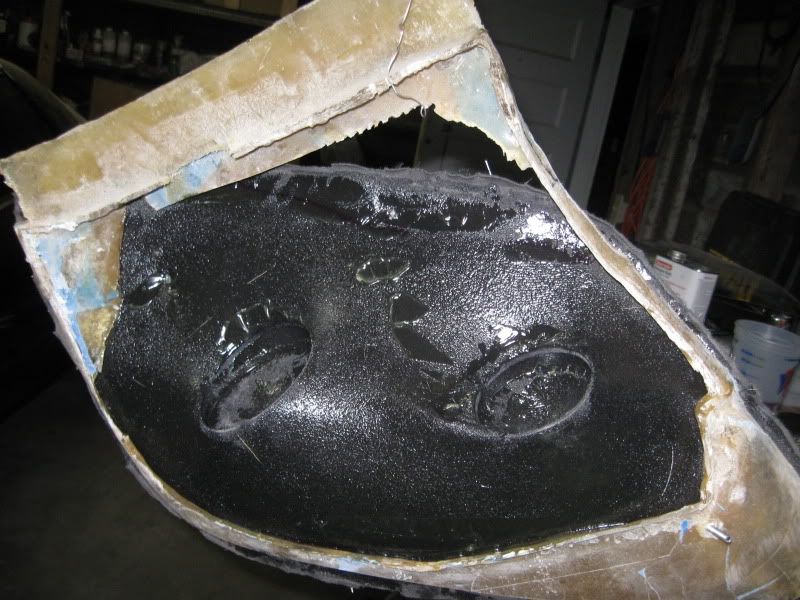
so anyone have any comments? suggestions? am I getting this right so far?
and some pics........I know shes dirty....my apologies LS1 gods
using the black car to try this out on, she was just rescued from storage and brought to the garage... this was the light setup I had on her before I left a
year ago...
decided to go with the drivers side first to try my luck and the new info I learned.
an old piece from when I had tried to make a fiberglass inner covering so the lights wouldnt get dirty from the underside... I cut the bucket part out and used the remaining piece as the frame.
got some cloth from walmart....says its sweatshirt material....worked out
pretty good, very stretchy.
I was elated to say the least when they came out this well...
and a shot from the back side...
so anyone have any comments? suggestions? am I getting this right so far?

 10-13-2009, 07:22 PM
#35
Something else you can consider is vacuum molding. Have you watched this guys videos? He posts on Solsticeforums.com and in this video he shos you how to make a shroud, you could easily apply the same principles to yours. Watch the whole thing and for more info watch all 4 videos.
http://www.youtube.com/watch?v=mg_C_jtonZw
http://www.youtube.com/watch?v=mg_C_jtonZw
 10-14-2009, 07:37 PM
#40
http://www.youtube.com/watch?v=e5CGfoxnKaQ