


Painting LS6 Intake
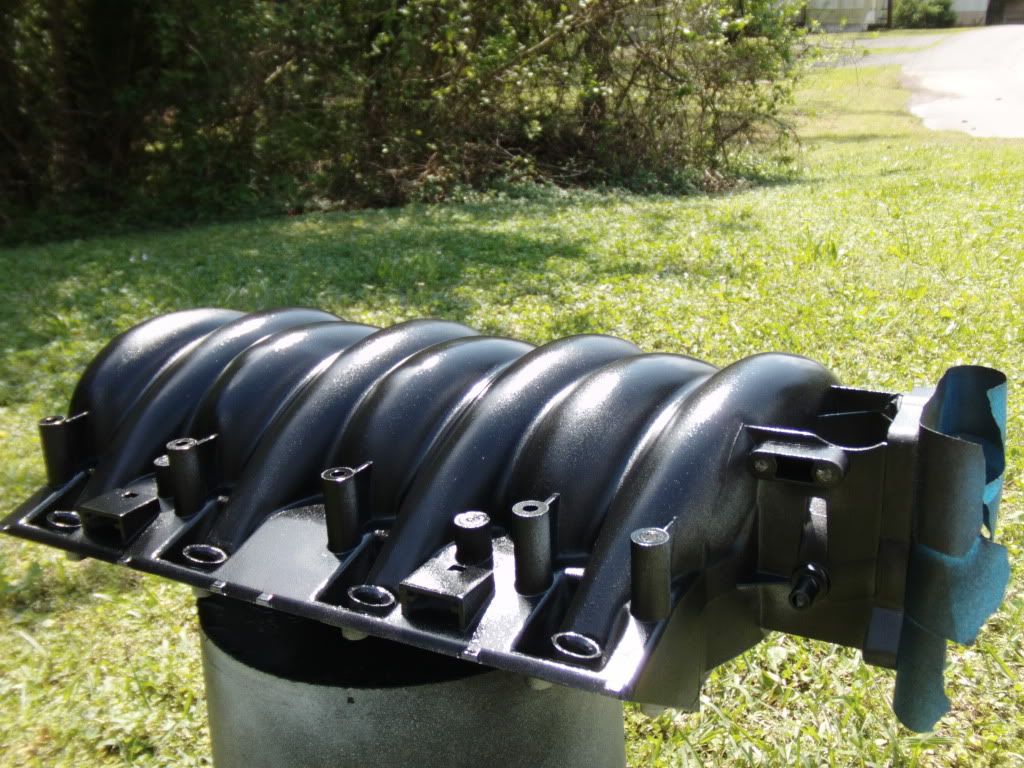
Hi, guys. I have decided to paint my intake and just figured I would go over what I am doing to make it happen, just in case it turns out decent. I blew the stock LS1 and I was afraid the intake was going to ugly up the new motors look so......I started with some 180 grit all the way around, and first off realized why I do not miss body work and prep. The valleys and circles take some real elbow grease. I did it in stages. About two valleys a night. I should be painting here soon now that the prep is done. I will be using Promoter, and Primer, and gloss black engine paint. Oreily auto parts ****. rattle can baby. I have heard bad things about clearing them. Thinking about hitting it with a couple coats anyways.
Here are a few pics
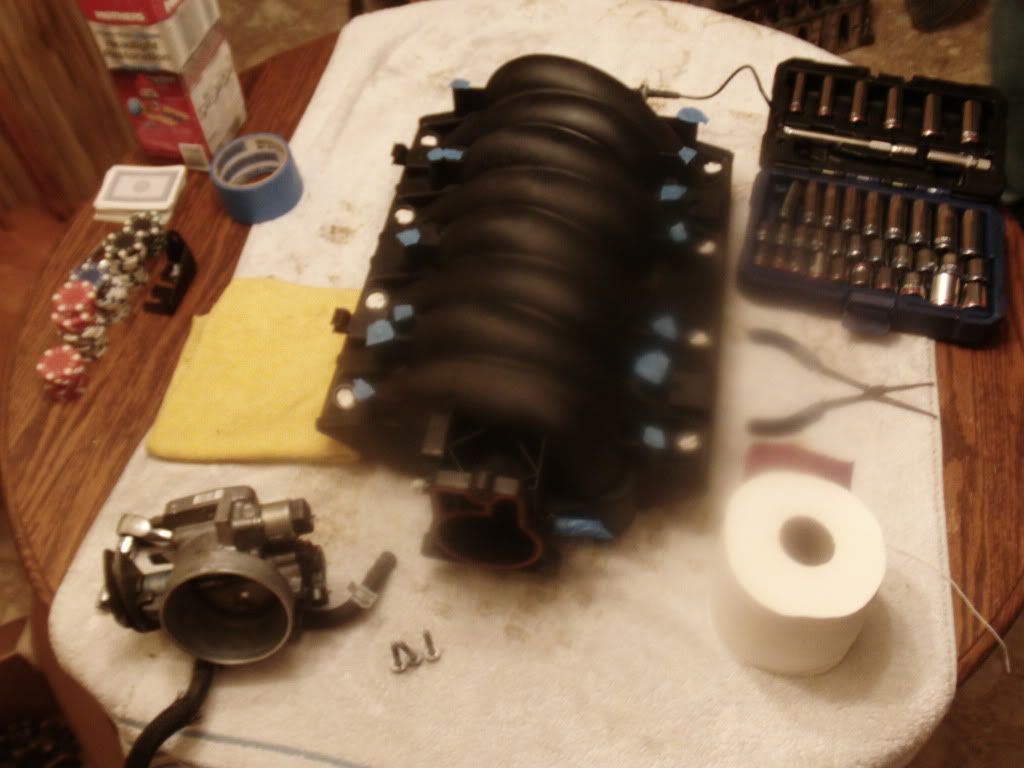

Here are a few pics
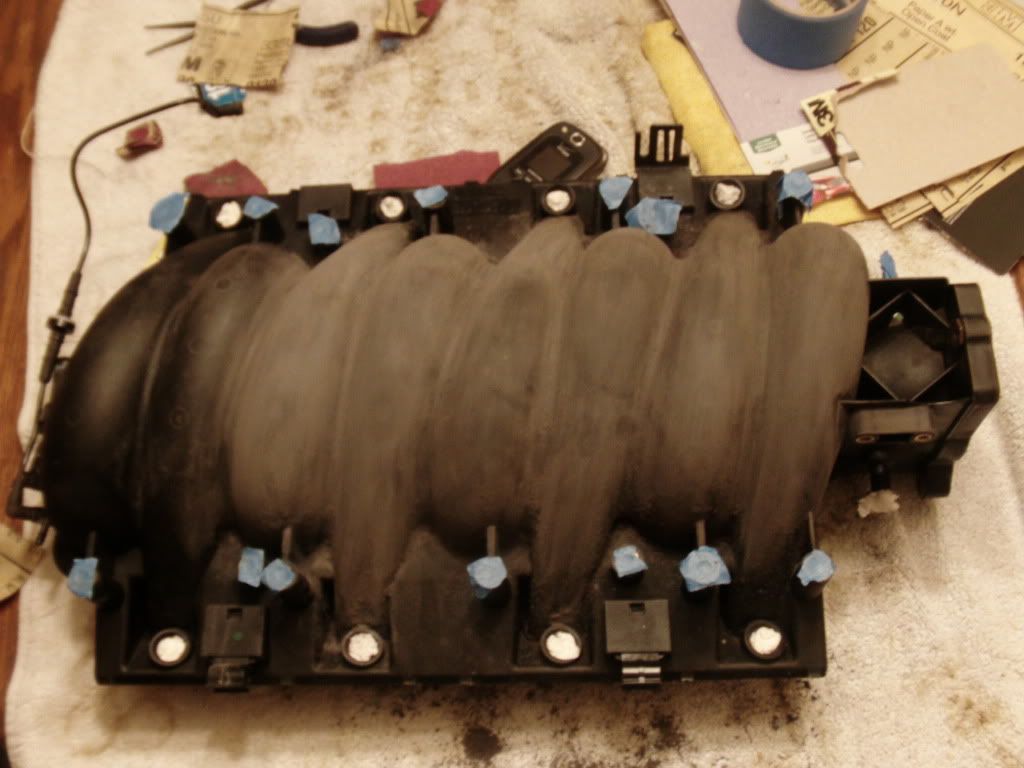
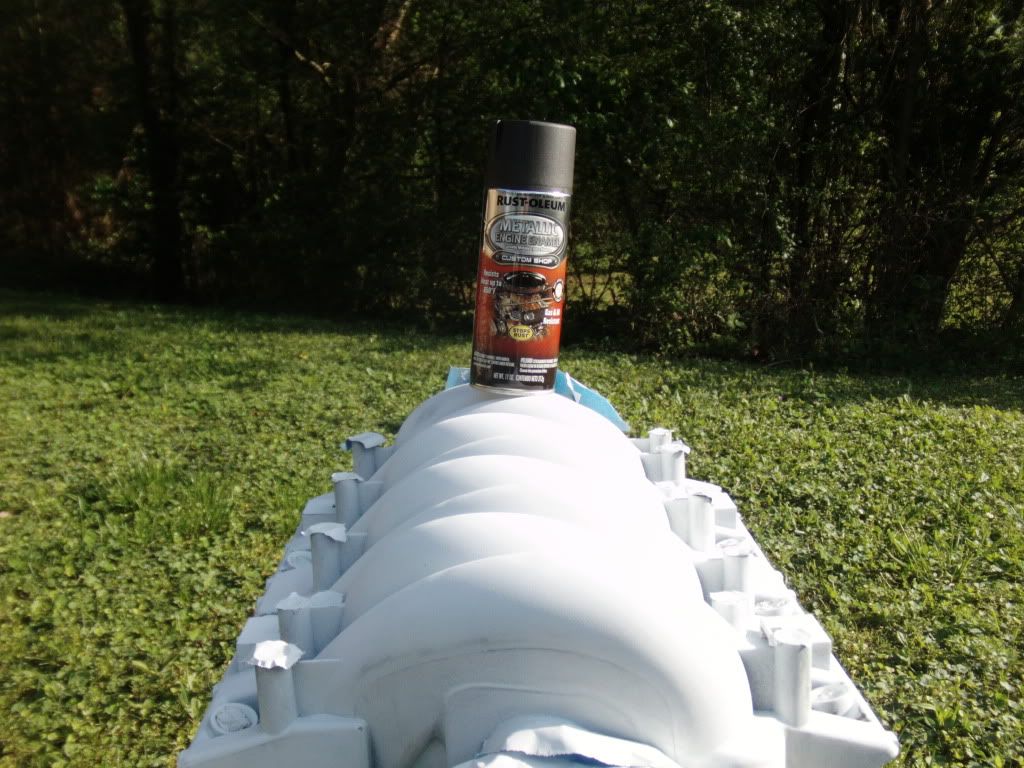
well getting in all the tiny nooks and crannies is quite the chore. i mean you cant get your fingers or any type of sander in there, but i did the best i could. i figured as long as i rough/scuff up the surface enough to get it to adhere it should be fine. I just got done blowing it off with the air compressor, and some of the mounds of plastic dust were somehow stuck in there so i had to spray it off with the high pressure hose, re tape it up and i have it in the oven now on the warm setting which i think is around 150-180 degrees drying off. I am going to start with the priming and painting tomorrow. gunna do one light coat then one slightly heavier coat of the promoter and the primer both. then for 3-4 coats of the black. I think it is going to look really nice in addition to the shiny new AES 390, black anodized battery cover, and red fuel rail covers....all my procharger pipes have been powdercoated gloss black too and they shine like the car does when its clean. the only thing under the hood that will not be black is the trans am fuel rail covers and the stainless steel fuel lines. its not only to go fast, but it will look good doing it. i get tired of looking under LS hoods and seeing pure nasty messy ****. the wire mod will be the next.
oh yeah def going to wet sand the primer. thats a given...however i am only going to go as high as 300 with the paper because if its too smooth the paint will have a harder time adhering, and from the naked eye the difference would not be noticeable. i have had a few people tell me that they made it too smooth, and that if they would have left the surface a little rougher they think it would have adhered better. we will see. thanks for the great tip though! fixing to start now ......after some ice cream and buds.

Staging Lane
Joined: Apr 2007
Posts: 80
Likes: 0
oh yeah def going to wet sand the primer. thats a given...however i am only going to go as high as 300 with the paper because if its too smooth the paint will have a harder time adhering, and from the naked eye the difference would not be noticeable. i have had a few people tell me that they made it too smooth, and that if they would have left the surface a little rougher they think it would have adhered better. we will see. thanks for the great tip though! fixing to start now ......after some ice cream and buds.
Trending Topics
naah. no sealer. I sanded it with the 320 and it is looking really smooth. I can see minimal scratch marks on it, but I think once the black is on, plus the fact that it has metallic in in and I plan on 3-4 light coats, it will not be visible unless you get on it with a magnifying glass. I just wet sanded the primer after 1 light coat and then 2 more and sanded once again. Had good light and humidity today. Just blew it off with the air compressor and saw what I was working with. I am doing this with minimal effort just in my spare time, either way I am quite sure it will look waaay better than it did even if i did not pay for a pro to do it, or attempt the powder coating. Waiting for her to dry now, before a final assessment. may go ahead and move onto paint, and throw on 2 lights clear coats. Although I have heard bad things about the clear, I guess i like to find out for myself. The adhesion promoter really did its job with the primer, the hardest place to spray was in between the low valleys on the very side where you cannot get your fingers....the primer will pool right there and flake off, and I am debating spraying it in there because of the pooling effect creating such a thick primer coat that it will have detrimental effects on the overall look, the only thing that really matters are the top parts of the valleys. here are a few new snap shots.
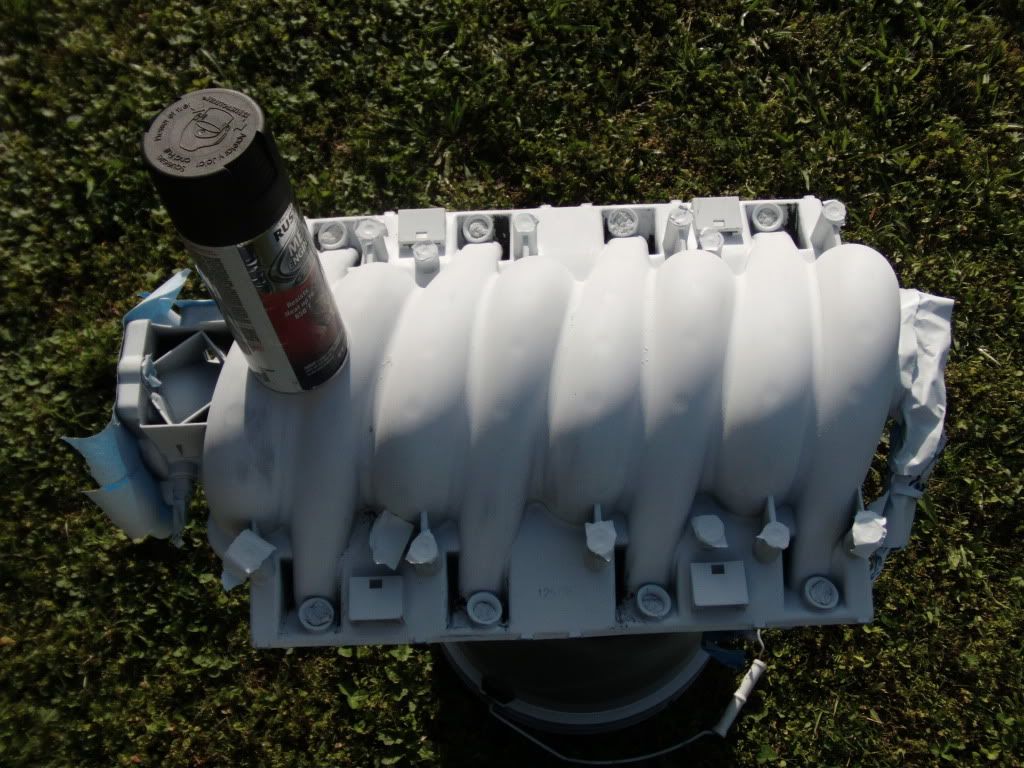
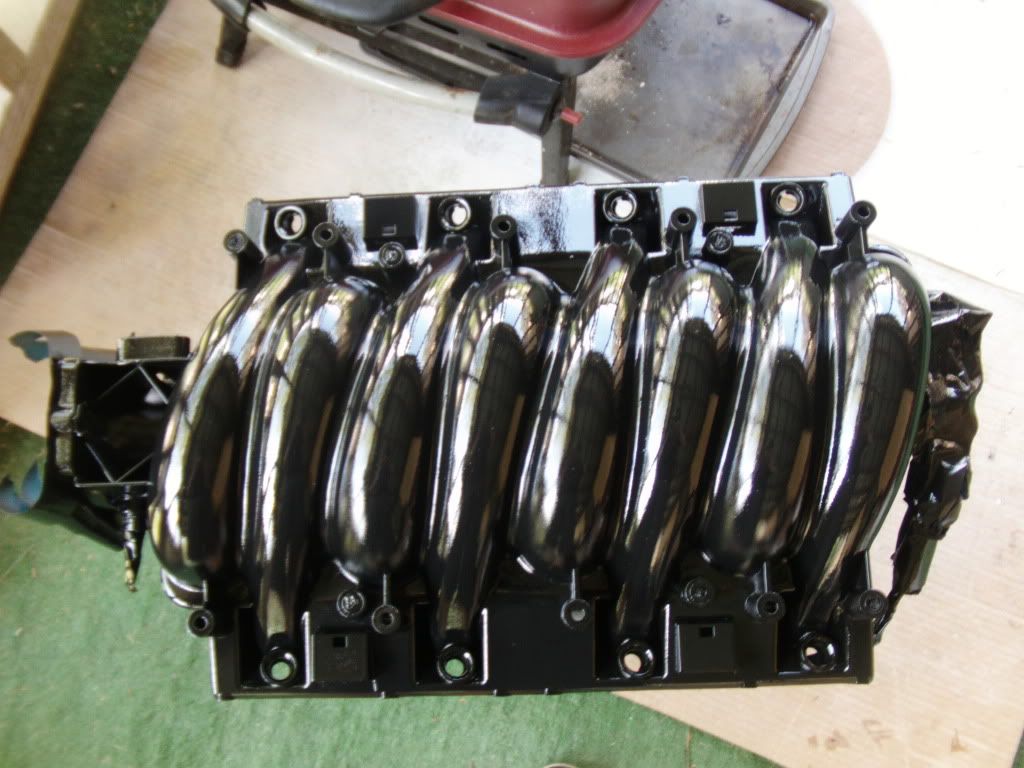
now onto paint which is a mix of gloss black and metallic. 3 coats first light progressively getting heavier done over a one hour span every 20-25 minutes.

now onto paint which is a mix of gloss black and metallic. 3 coats first light progressively getting heavier done over a one hour span every 20-25 minutes.
Last edited by I8UR4RD; Apr 1, 2012 at 01:39 PM. Reason: added pics
LS1 Tech Stories
The Best V8 Stories One Small Block at Time

Gas Monkey Built a 6-Wheel Ferrari Testarossa With a Corvette LT4 Engine
Verdad Gallardo
7 Most Reliable High-Performance Engines GM Has Ever Built
Verdad Gallardo
Amazing '71 Camaro Restomod Is Modern Muscle Car Under the Skin
Verdad Gallardo
6 Common C5 Corvette Failures and What's Involved In Repairing Them
Pouria Savadkouei
Retro Modern Bandit Pontiac Trans AM Comes With Burt Reynolds' Autograph
Verdad Gallardo
Top 10 Greatest Cadillac V Series Performance Models Ever, Ranked
Pouria Savadkouei
Top 10 Most Powerful Chevy Trucks Ever Made!

Hennessey's New Supercharged Silverado ZR2 Has 700 HP
Verdad Gallardo
Coachbuilt N2A Anteros Is an LS2-Powered C6 Corvette In Italian Clothes
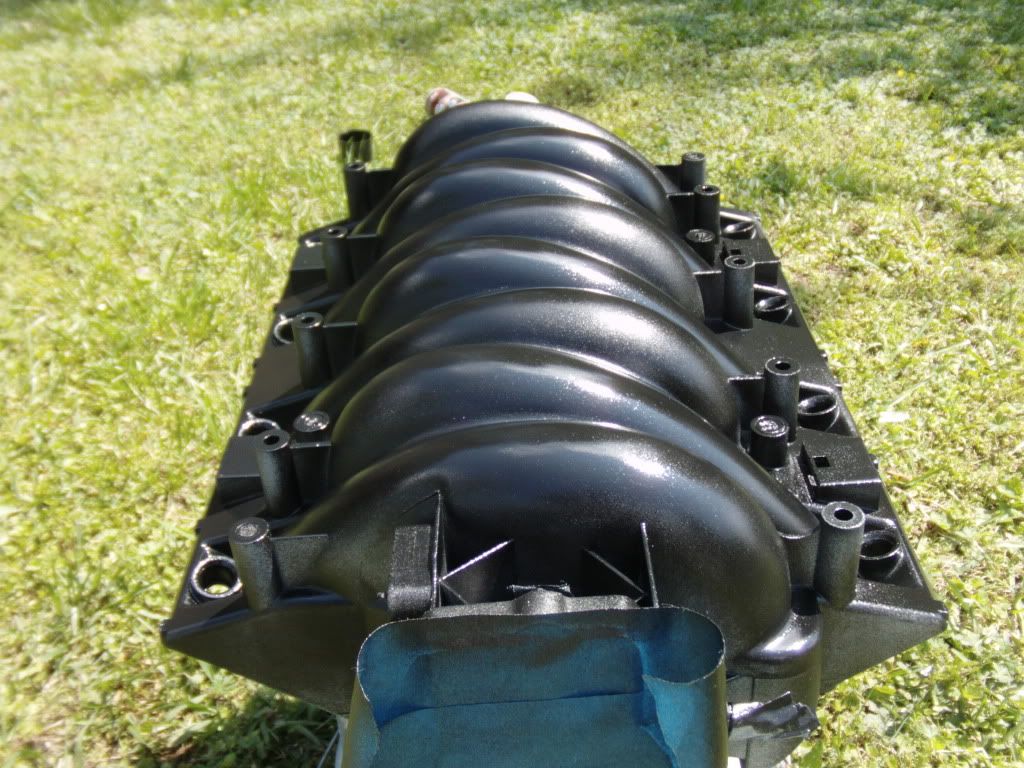
Verdad Gallardo i still have a few light spots but dont wanna get to anxious. taking my time. the first coat went on really well, and I am super excited to start seeing all this pay off. I think my fav part will be putting on the clear. i bought the high gloss shiney ****. will prob crack off in a year, but it will look nice for the time being. one day IM sure this will be for sale and I will upgrade to a fast 90 90 combo that comes done outta the box. but for now this will most certainly suffice for my purposes.

yeah. I finally finished doing the clear, which really made it no shinier than it was to me, but seemed to make it smoother to the touch. I let it cure for about a week in a box in my room ( nothing like coming home to some nice fumes) and took some car Polish and a drill driven polishing pad and ran that over it a few times, and I am really excited to see it on top of a new motor with stainless steel lines, new fuel rails,and red or black fuel rail covers with black or silver lettering. It was a fun project, now I just need something else to do, thinking about having the valvecovers powder coated once I find out whether or not we can use them. But thanks alot guys.
I will post pics of it on here around august september along with other dressup items.
I will post pics of it on here around august september along with other dressup items.
Last edited by I8UR4RD; Apr 16, 2012 at 10:37 PM.