


Engine Bay Project Complete

Thread Starter
TECH Addict
iTrader: (8)
Joined: Aug 2005
Posts: 2,541
Likes: 2
From: Spartanburg, SC
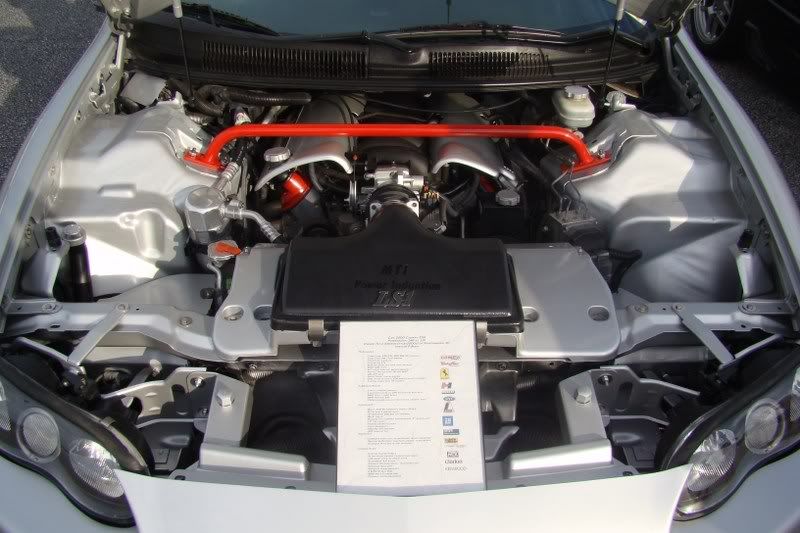
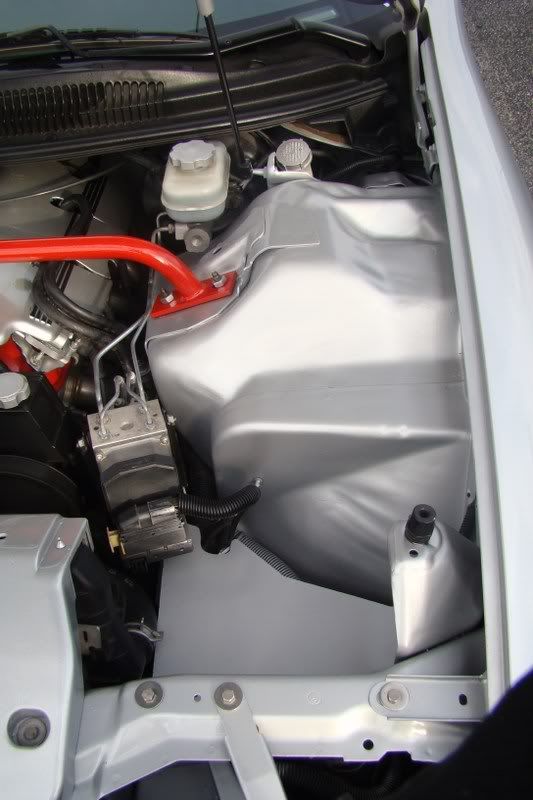
finally i have the engine bay presentable and showable. i still have a few spots that are hard to see where theres overspray and ill get around to fixing that sometime, but all in all i was pleased with how this turned out since ive never done any kind of body filled or that type of thing. i just wanted to make this thread to show what an avg person can do on their own w/o paying a body shop an arm and leg, everything was doen with the motor stil in the car...also a painted LS6 intake is in a month or so, but heres where i am now...feel free to comment and give const critism if ya see anytihng that can be changed to look better.
if ya missed my last threads, heres what ive done:
-complete wire tuck (both fenders)
-all holes filled in and shaved
-everything painted w/ single stage acrylic enamel w/ HVLP gun.
-relocated battery, traction control, an fuses boxes
-painted valve covers, TB, MAF, STB, bumpers support, and all brackets.
-stainless nuts, bolts, and washers
-lexan covers to hide battery cables and fuse box hole, and pcm, all painted.
-shaved corvette FRC, painted silver.
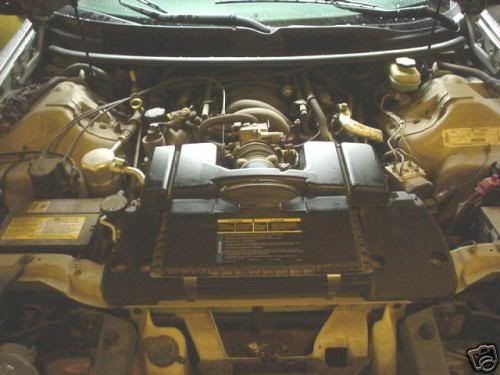
just for comparison....heres what it looked like when i got the car a few years back
if ya missed my last threads, heres what ive done:
-complete wire tuck (both fenders)
-all holes filled in and shaved
-everything painted w/ single stage acrylic enamel w/ HVLP gun.
-relocated battery, traction control, an fuses boxes
-painted valve covers, TB, MAF, STB, bumpers support, and all brackets.
-stainless nuts, bolts, and washers
-lexan covers to hide battery cables and fuse box hole, and pcm, all painted.
-shaved corvette FRC, painted silver.
just for comparison....heres what it looked like when i got the car a few years back
Last edited by kyles2000z; Jun 29, 2008 at 09:48 AM.
Thread Starter
TECH Addict
iTrader: (8)
Joined: Aug 2005
Posts: 2,541
Likes: 2
From: Spartanburg, SC
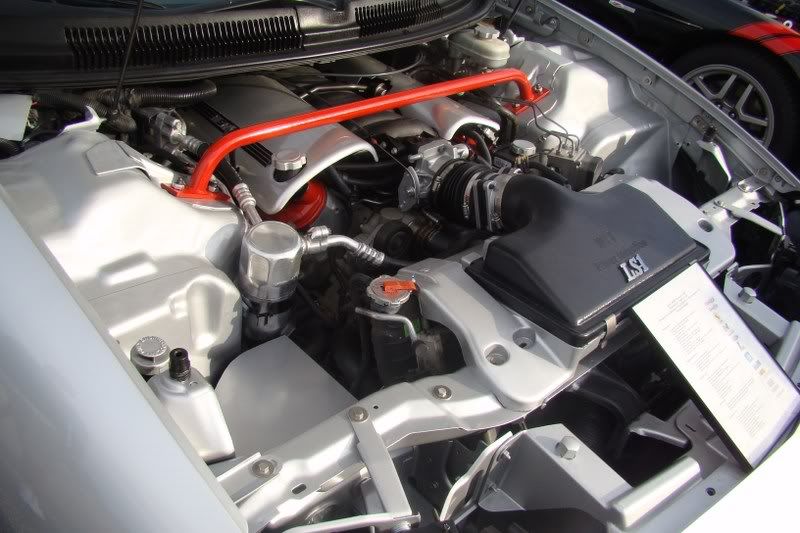
just pull the fuse boxes up, remove the holder they sit it and youll see is hole that just big enough to cram the fuse boxes throgh, one at a time. when you do it, make sure you position them so the labels are facing down so you can stil lchange them iff nessecary. the boxes will be relocated in the compartment where the foglights are on a camaro, not sure about the birs tho...
Thread Starter
TECH Addict
iTrader: (8)
Joined: Aug 2005
Posts: 2,541
Likes: 2
From: Spartanburg, SC
it took a TON of cleaning to even get it looking clean again, then all the fun began a year later when i started painting parts. last year i had it lookin decent, but didnt fill the holes in and relocate everything until last week.
Trending Topics
LS1 Tech Stories
The Best V8 Stories One Small Block at Time

6 Common C5 Corvette Failures and What's Involved In Repairing Them
Pouria Savadkouei
Retro Modern Bandit Pontiac Trans AM Comes With Burt Reynolds' Autograph
Verdad Gallardo
Top 10 Greatest Cadillac V Series Performance Models Ever, Ranked
Pouria Savadkouei
Top 10 Most Powerful Chevy Trucks Ever Made!

Hennessey's New Supercharged Silverado ZR2 Has 700 HP
Verdad Gallardo
Coachbuilt N2A Anteros Is an LS2-Powered C6 Corvette In Italian Clothes
Verdad Gallardo
Awesome K5 Blazer Restomod Comes With C7 Corvette Power
Verdad Gallardo
10 Camaros You Should Never Buy

10 LS Engine Myths That Refuse to Die
Verdad Gallardo


Badass man, especially after looking at the before and after pics. How are you holding those lexan pieces in place? Have you considered covering up the ps wall where the wiring tucks into the wheel well? This stuff is inspiring for me, but it takes time and patience which I'm not really good with.
Thread Starter
TECH Addict
iTrader: (8)
Joined: Aug 2005
Posts: 2,541
Likes: 2
From: Spartanburg, SC
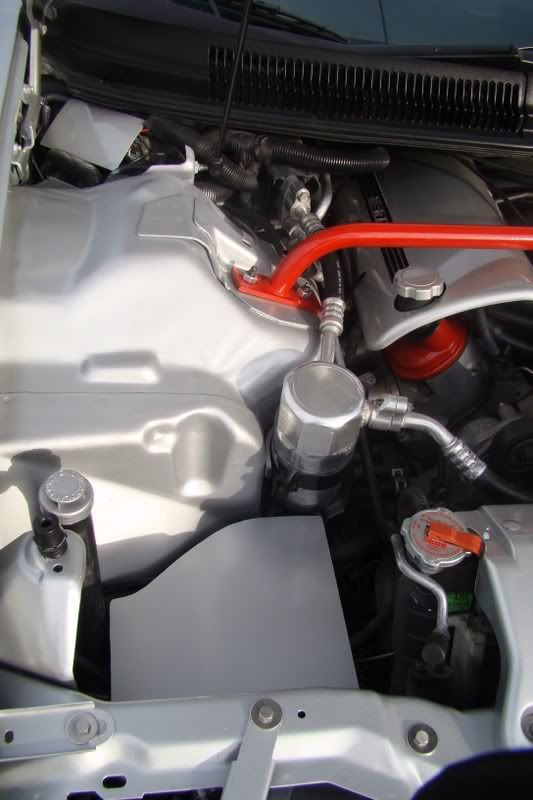
thanks for al the compliments ppl...evaporate, as far as hiding the wiring going into the wheel well, im not sure i know what youre talkin about....elaborate some more? im always tryin to find ways to hide everthing and still keep things functional at the same time! are you talkin about the ABS unit and the brake lines?


evaporate, as far as hiding the wiring going into the wheel well, im not sure i know what youre talkin about....elaborate some more? im always tryin to find ways to hide everthing and still keep things functional at the same time! are you talkin about the ABS unit and the brake lines?

Thread Starter
TECH Addict
iTrader: (8)
Joined: Aug 2005
Posts: 2,541
Likes: 2
From: Spartanburg, SC
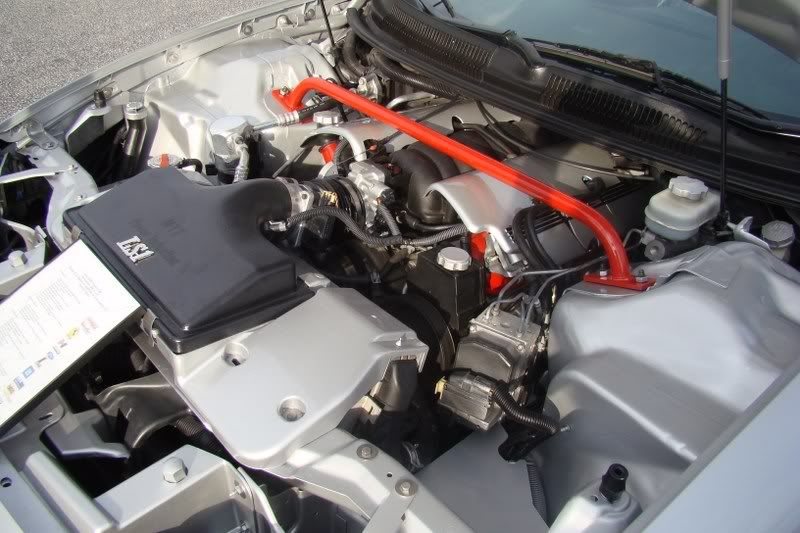
hows it out of place? i have red valve covers. when you do things you gotta have a main color (silver) and an accent color (red) so everything isnt the same. what color would look better you think?