My New Project: 2001 WS6
 04-12-2015, 10:25 AM
#81
Staging Lane
Thread Starter
Here is the ebony upholstery panel from my cracked door panel:
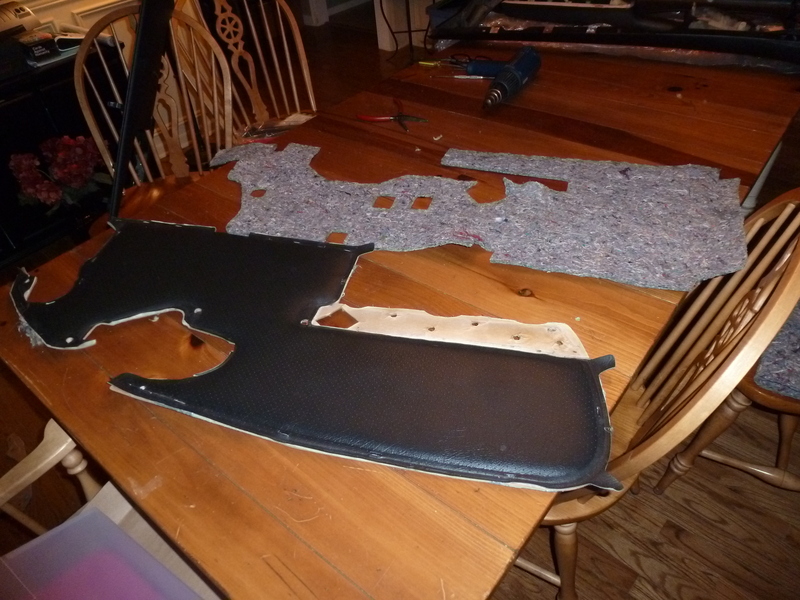
With the ebony arm rest and map pocket in place, now came time to plastic weld the map pocket in to place. The arm rest has to wait until the cardboard upholstery panel is in place as its mounting tabs are melted over the panel.
I used a plastic welder with a flat tip (basically just an overpriced soldering iron), to melt the tabs back into the panel and bond them together.


With the ebony arm rest and map pocket in place, now came time to plastic weld the map pocket in to place. The arm rest has to wait until the cardboard upholstery panel is in place as its mounting tabs are melted over the panel.

I used a plastic welder with a flat tip (basically just an overpriced soldering iron), to melt the tabs back into the panel and bond them together.

Last edited by njsteve; 04-12-2015 at 10:53 AM.
 04-12-2015, 10:33 AM
#82
Staging Lane
Thread Starter
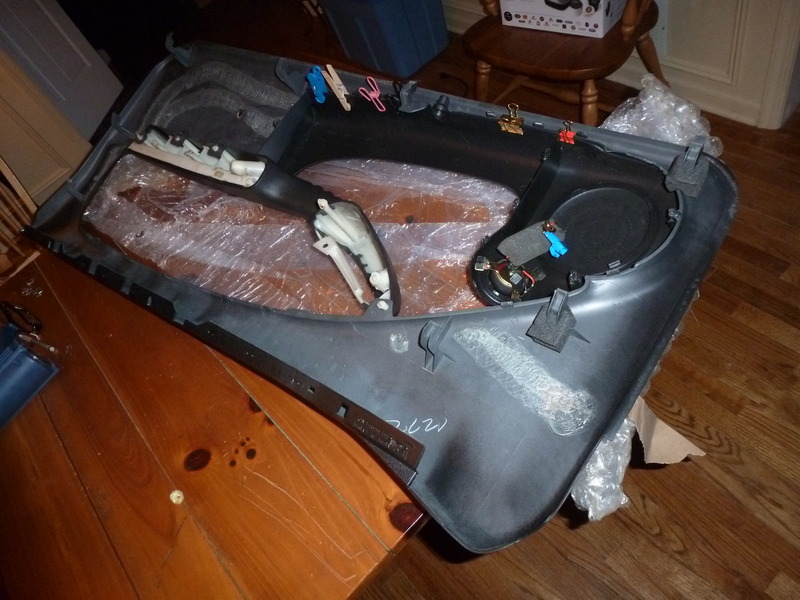
Once the map pocket was welded into place I reset the ebony upholstery panel onto the mounting tabs and heated each tab in order to retain the panel in its original position. Once again, the large, white plastic plastic tabs for the arm rest are the hardest to heat and manipulate due to whatever plastic they are made of.
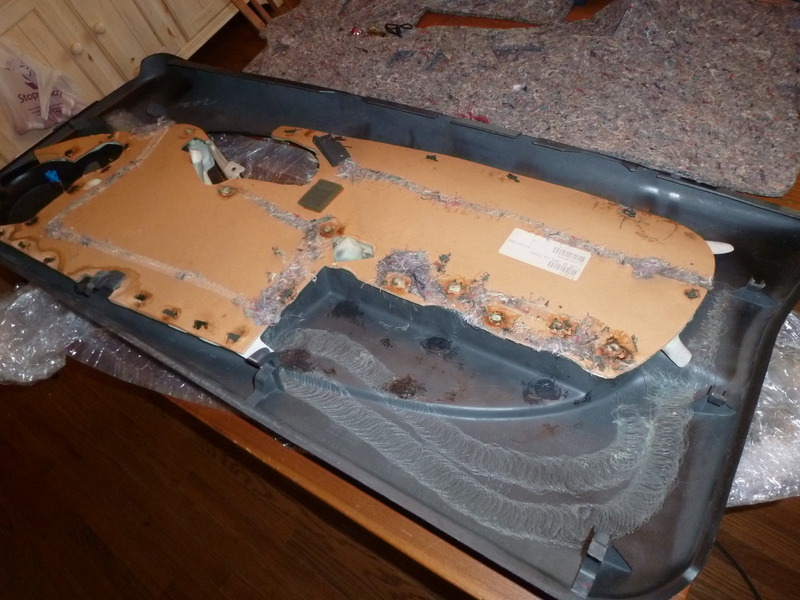
And then the insulation is reapplied. It was rather easy to use the heat gun in order to reactivate the existing sloppy application of glue all over the back of the panel (all the circular squiggly lines are glue). The insulation then stuck right into place.
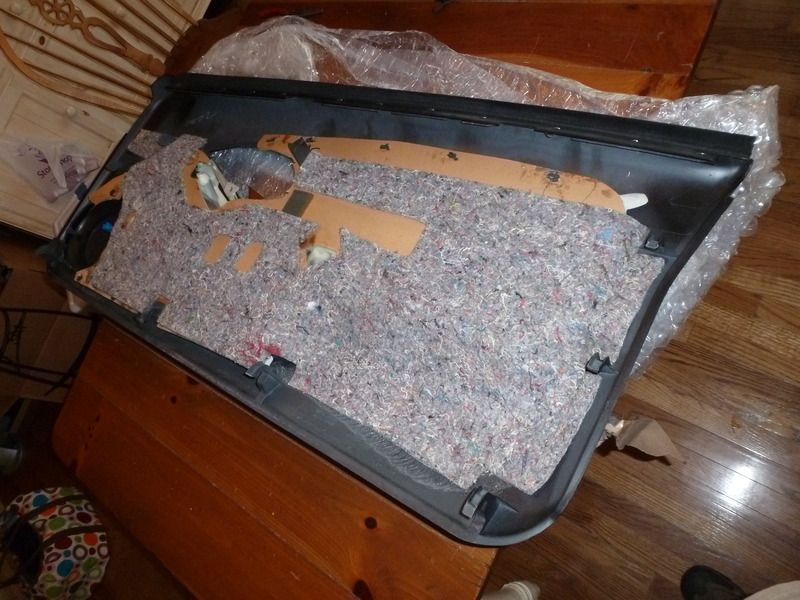
I also reinstalled the original window felt using the wire from large paperclips. I cut them to a horseshoe shape and then bent them to form the new replacement staples. This allows the weatherstrip to flex a little and not bind the panel on hot/cold days.
And here is the finished job:

Last edited by njsteve; 04-12-2015 at 10:53 AM.
04-12-2015, 10:39 AM
#83
Staging Lane
Thread Starter
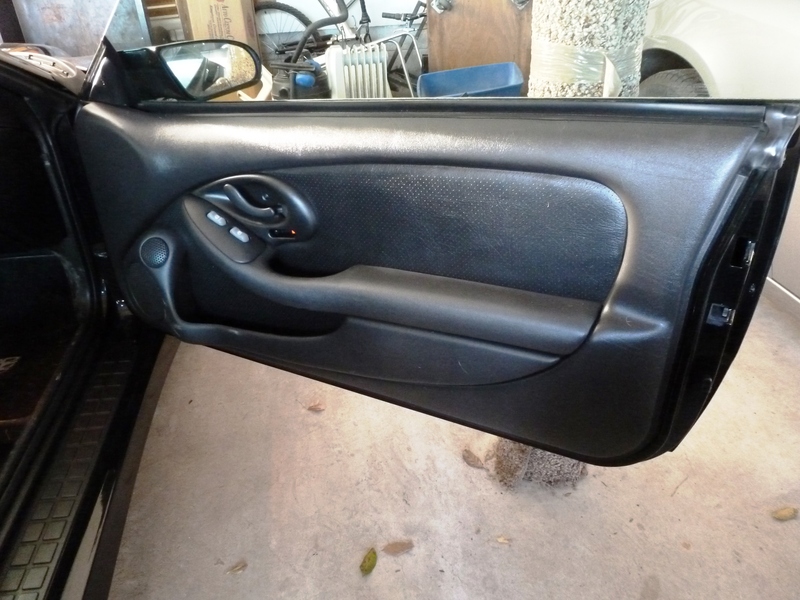
And here is how it looks in the car, when compared to the original ebony passenger side panel:
All in all the grey 1996 panel cost me $75 plus shipping and the can of SEM Laundau Black interior dye was $12. Sure beats $300 for a used ebony panel that is already brittle and ready to crack.

All in all the grey 1996 panel cost me $75 plus shipping and the can of SEM Laundau Black interior dye was $12. Sure beats $300 for a used ebony panel that is already brittle and ready to crack.


Last edited by njsteve; 04-12-2015 at 10:53 AM.
04-12-2015, 11:07 AM
#84

Looks great! The door panels are the only thing that is wrong with the interior of my 2001. I've been tossing around the idea of getting some from the junkyard and painting them, but I've heard people have had problems with getting a dye to match the ebony color from the factory. Now that I've seen your pictures, I'm much more confident! Looks like I'll be heading to the pick and pull soon, haha!
04-12-2015, 11:13 AM
#85
Staging Lane
Thread Starter
The SEM Laundau black #15013, is a great paint/dye. I have used it for all sorts of stuff over the years, including repainting the black fiberglass fan shrouds in second gen Firebirds, as well as early interior parts. If you wanted the panel components to all match each other perfectly you could lightly mist the ebony map pocket and arm rest with the paint as well. But remember that the individual parts were made of different materials and didn't perfectly match each other to begin with.
04-13-2015, 04:43 PM
#86
Staging Lane
Thread Starter
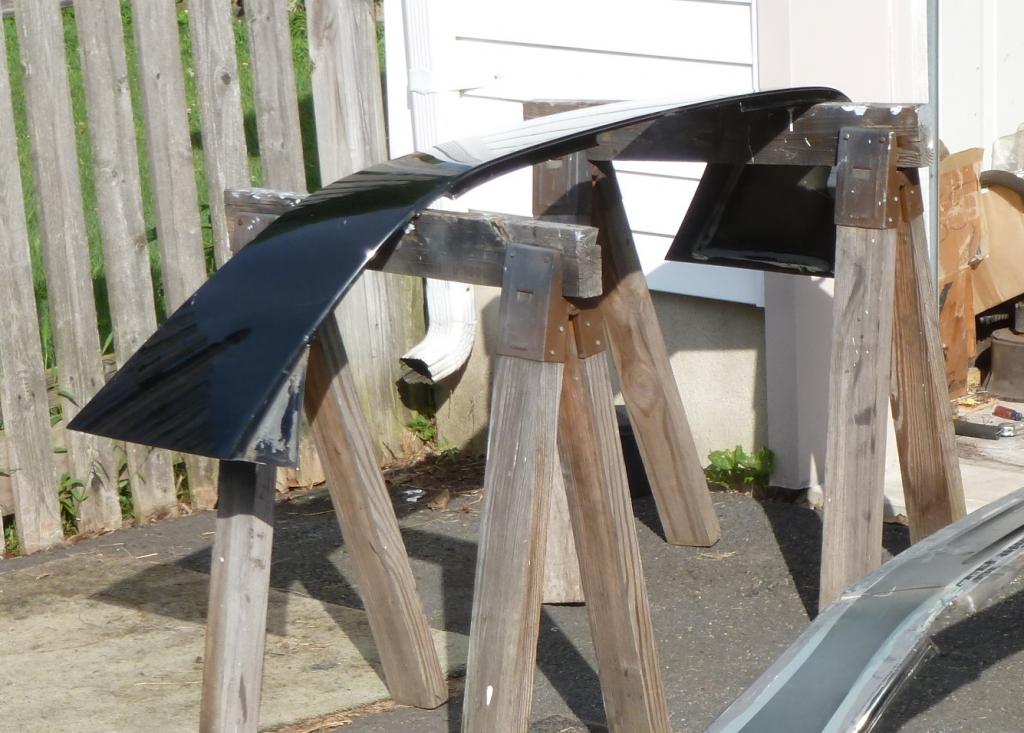
I stopped by the bodyshop today to get an estimate for replacing the "targa panel" that has the factory defects from the adhesive bleed-through. I left the replacement panel with him so he could start prepping and painting it. Here is a shot from when I spent several days last summer removing it from the sawed-off roof section of a donor car. The bodyman indicated that it will be much easier for him to remove the existing panel from the car since it does not need to be salvaged and he can use heat from the painted side to loosen the adhesive.
04-15-2015, 07:10 PM
#87
Staging Lane
Thread Starter
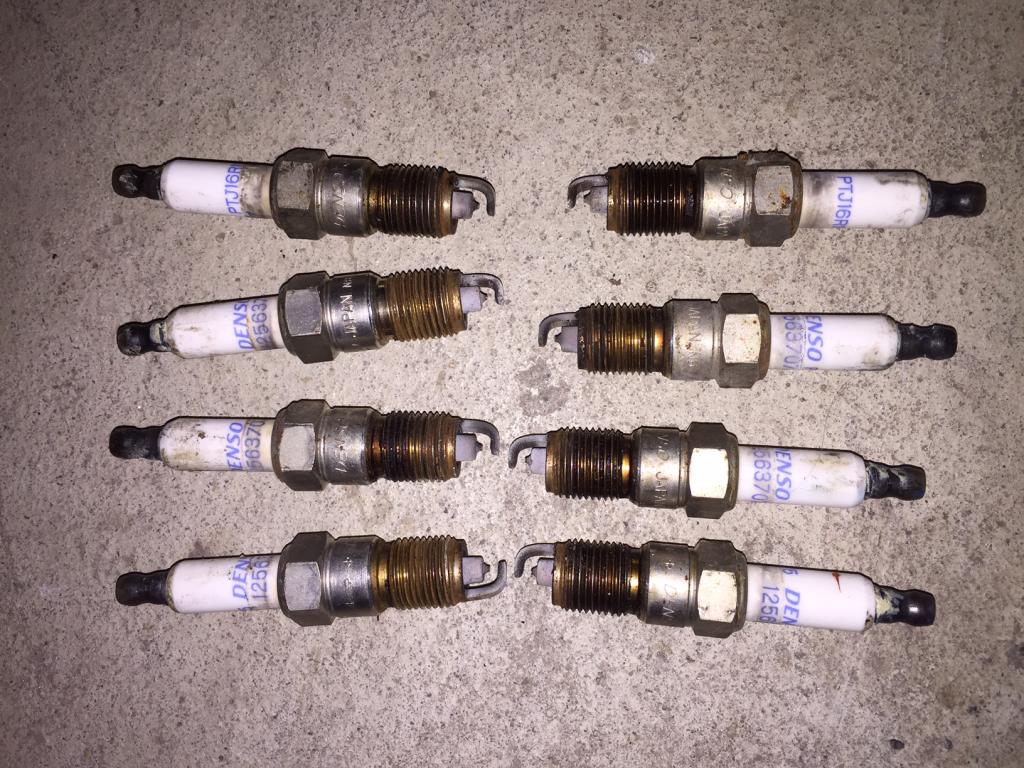
I tackled the spark plug and wire set challenge yesterday. Boy is that an insane job. Plugs 1,3,5, and 7 can be done with a minimum of effort, while lying across the front end of the car with your arms pretzeled along the side of the engine. Plugs 2, 4 and 6 require the smog tube to be disconnected from the manifold to give you some room to get your hand in. Luckily the bolts came out without breaking due to the low mileage.
Number 8 has to be done from under the car, sticking your arm straight up alongside the block. The hardest thing is using two fingers (because that's all the room you have) to pull the plug wire off the plug and coil. I could have used some of Bruce Lee's "One Inch Death Punch" training to get the finger strength to work in that tiny work area.
And of course, GM had to sharpen all the edges of every pointy piece of metal and shielding in the general area of the plugs and wires. At the moment, my right arm looks like it lost a fight with a rabid honey badger.
The original Denso PTJ16R15 12563707 plugs were still in the engine. They look like they were burning nicely but the gaps had worn to over .060 in 14 years of running. I replaced them with some regular copper ACDelcos. She idles much more smoothly now.
Last edited by njsteve; 04-15-2015 at 07:26 PM.
05-28-2015, 05:47 PM
#88
Staging Lane
Thread Starter
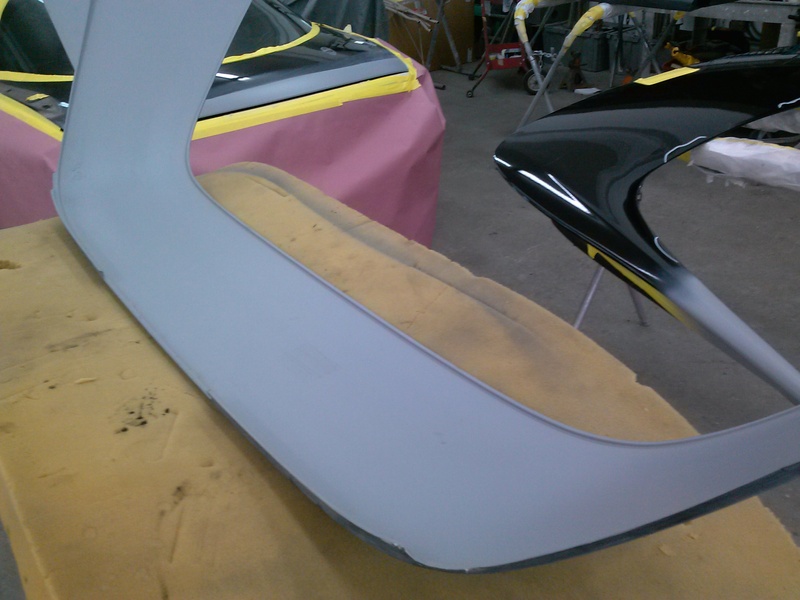
The WS6 is currently at the body shop getting the replacement roof panel prepped for installation. He was able to remove the old panel in one piece with heat and wire.
The underside of the new panel all prepped:
The steel support panel getting cleaned up:


The underside of the new panel all prepped:
The steel support panel getting cleaned up:
Last edited by njsteve; 05-28-2015 at 05:55 PM.
05-28-2015, 05:51 PM
#89
Staging Lane
Thread Starter
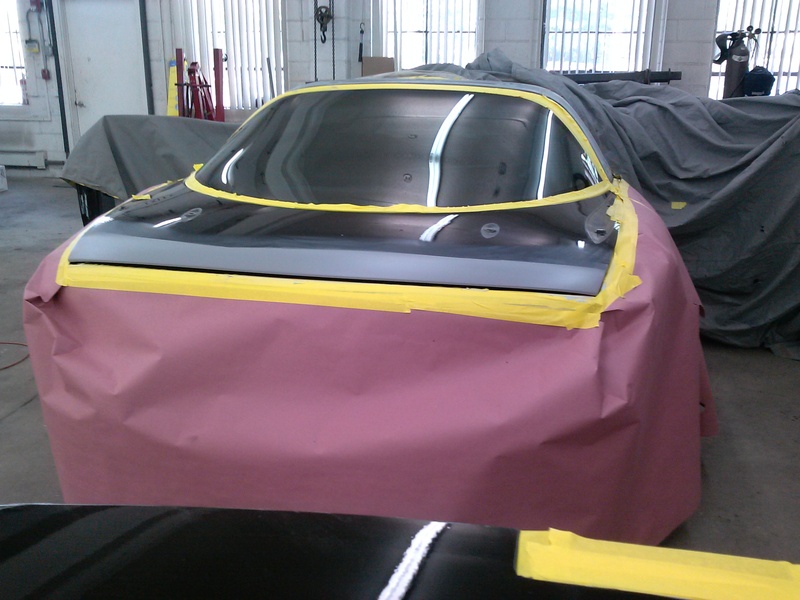
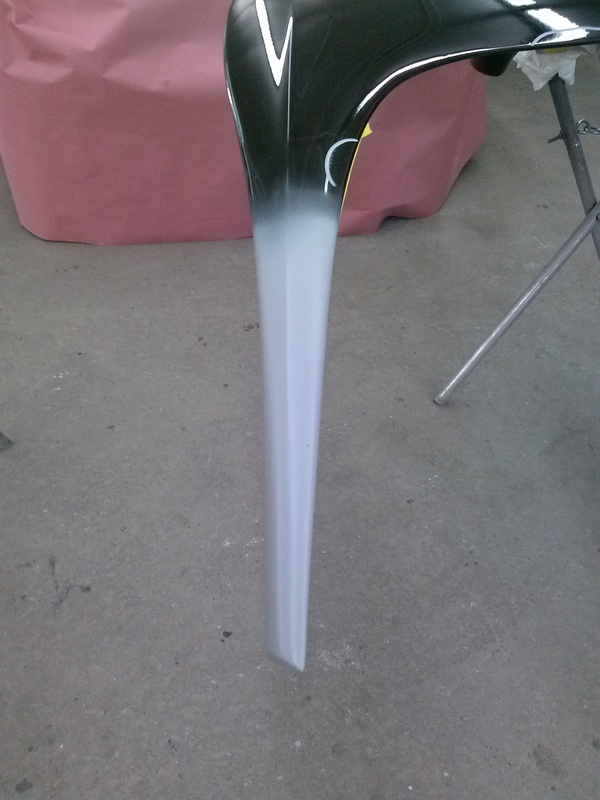
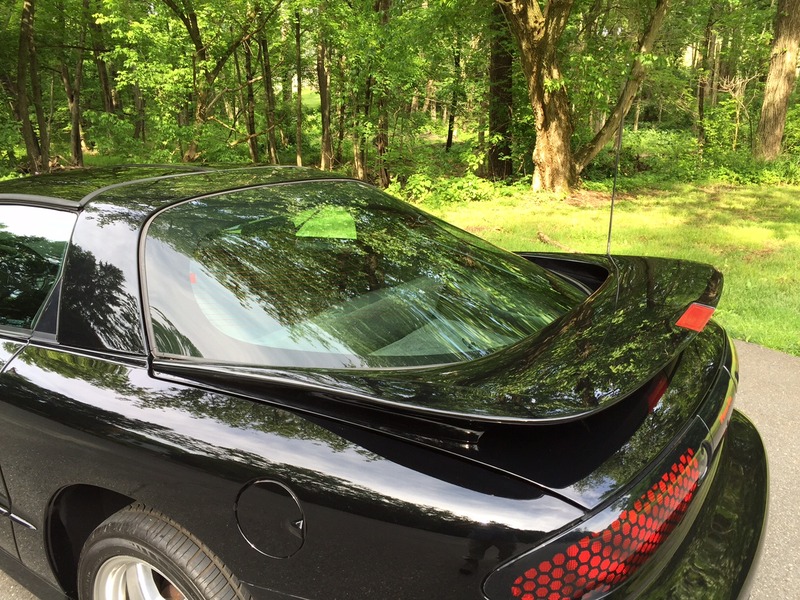
The trunk lid edges also needed some paint attention and the paint flaking on the tips of the spoilers as well.

Last edited by njsteve; 05-28-2015 at 06:00 PM.

The following users liked this post:
fucter (03-29-2021)
05-27-2016, 06:34 PM
#92
Staging Lane
Thread Starter
A little update.
We have only put on 900 miles since buying the car in 2014. Lately, I have been trying to identify an annoying engine-related noise that occurred only under constant throttle - not coasting or heavy throttle. It was hard to pinpoint exactly because of how loud this car is under acceleration with the aftermarket muffler on it. (Time is of the essense too, as the third extended warranty is getting ready to expire after 15 years in December 2016).
After pulling the serpentine belt and spinning everything by hand, that spins, I was able to isolate it to the alternator bearing and several of the idler pulleys. So I brought it to the local Chevy dealer and they did a nice job working on the car. They had just been through two days of dealing with the extended GM warranty with my daughter's Impala SS - replacing a leaky steering rack, the power steering hoses, the trans cooler lines, the oil pan gasket, and an engine mount. I found all of these items while underneath the car changing the oil last week. The GM extended warranties are wonderful to deal with compared with an aftermarket one. They even gave us a free 2016 Impala with 300 miles on it as a courtesy car! Total bill: $107. ($100 deductible plan)
The aftermarket extended warranty that the original owner bought is another story. The service writers were able to deal with the crazy people at the warranty company who, as usual, put you on hold for 20 minutes at a time and try to make it hard enough that you give up. For example, they agreed that it needed a new alternator. So instead of allowing the Chevy dealer to simply install the AC/Delco alternator that was in stock on their shelf, at the Chevy dealer price, they had the exact same part number AC/Delco alternator overnight Fedexed to the dealership. While they might have gotten the alternator $30 cheaper than the dealer price, they just spent $100 overnighting it!!! The same thing with the main idler pulley. The dealer only asked for the pulley - a $40 item. The warranty company balked at that but then sends them the entire AC/Delco idler assembly (a $200+ part) overnight. They also refused to pay the dealer hourly rate - undercutting it by $10 an hour...but then end up paying the extra hour for the idler assembly replacement instead of the pulley. (BTW, I think they actually get their parts from Rockauto based on the packaging).
So in the end, I paid $112 consisting of the $50 deductible plus another $45 in the unreimbursed labor charges, plus tax, for a bill that cost the warranty company around $1,000 ($500 in parts and $400 in labor and $100 in shipping). And I got to keep the original alternator and all the pulleys, idler, etc.
And the annoying mystery noise is gone!
BTW, When I brought it in to the dealer, they know how particular I am about my car so they had a space inside all ready for it - and it stayed inside for the three days it was there. The funny thing was when I brought the car in, the twenty-something male service writer didn't know how to drive a manual transmission so he handed the keys to a twenty-something young lady with full sleeve tattoos who gave me the all knowing nod (turns out she has a Mustang Cobra and an old pickup truck - both with stickshifts). Cool lady. If my son was older I would have played matchmaker.

 06-26-2016, 05:06 PM
#94
Staging Lane
Thread Starter
You betcha. We drove it to the cruise night they had at the former Performance Years warehouse in Hatfield PA last week. Around 100 mile roundtrip. The car ran great. A/C was nice and cold and no noises from the alternator any more.
07-13-2016, 10:03 PM
#96

The funny thing was when I brought the car in, the twenty-something male service writer didn't know how to drive a manual transmission so he handed the keys to a twenty-something young lady with full sleeve tattoos who gave me the all knowing nod (turns out she has a Mustang Cobra and an old pickup truck - both with stickshifts). Cool lady. If my son was older I would have played matchmaker.
 07-19-2016, 03:56 PM
#97
Teching In
Join Date: Jan 2013
Location: Melbourne, FL
Posts: 18
Likes: 0
Received 0 Likes
on
0 Posts
The reason she was selling the car was that she and her husband moved to a large property out in the country on the end of a long dirt and gravel road and she hadn't driven the car in months because she hated seeing it get dirty. The car had never been driven in snow and very rarely in rain.
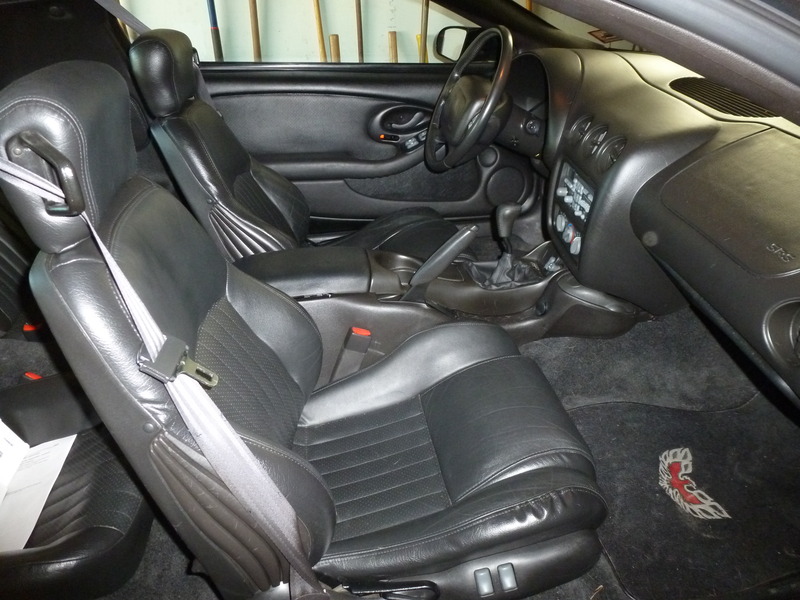
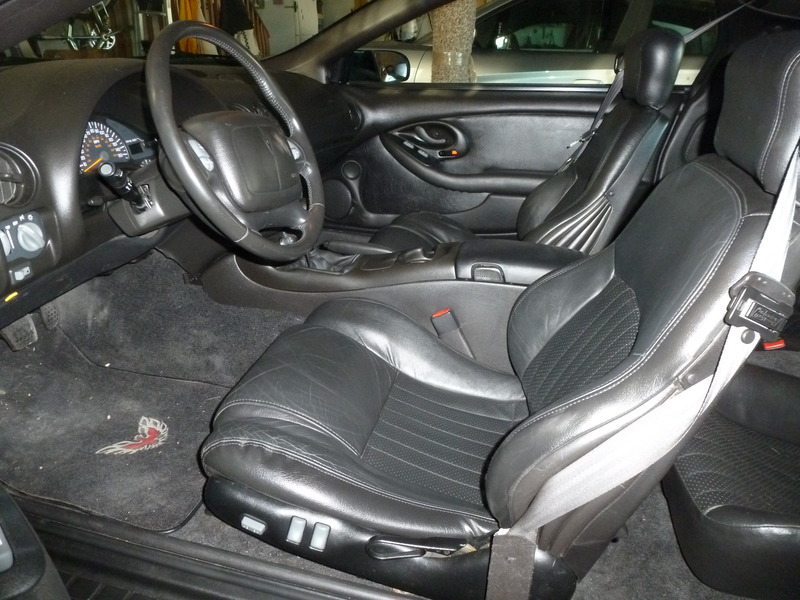
Here's the ebony leather interior. The seats are very nice but the car does need a new carpet set because she was a former smoker and the carpet has really absorbed that tobacco smell. There is a cracked outer plastic molding on the driver's seat where the power adjustment switches are.
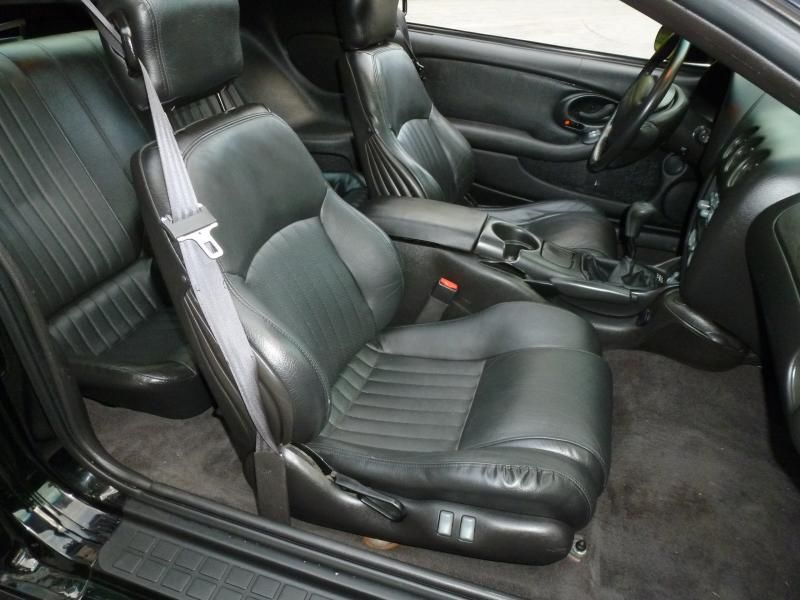
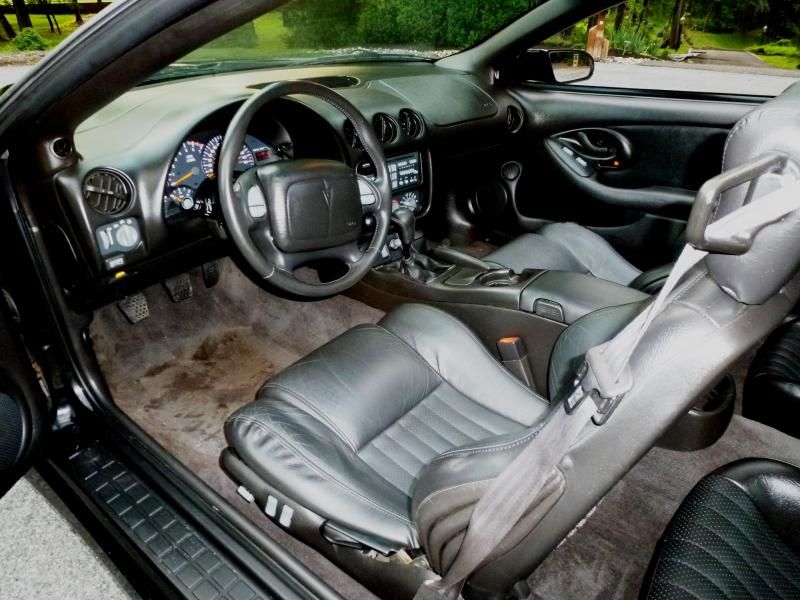
And the obligatory cracked door panel that these cars are renowned for. She didn't realize that this could have been covered under the GM warranties had she only asked at the time they were in effect.
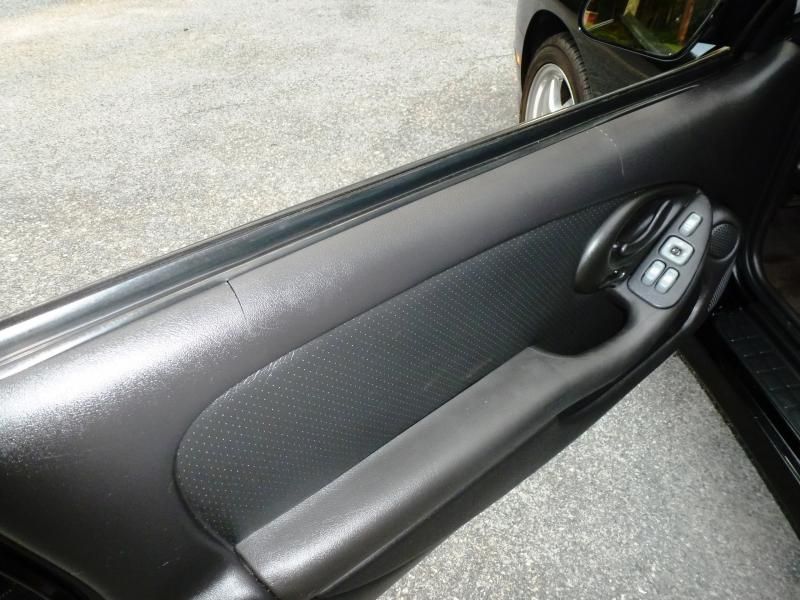
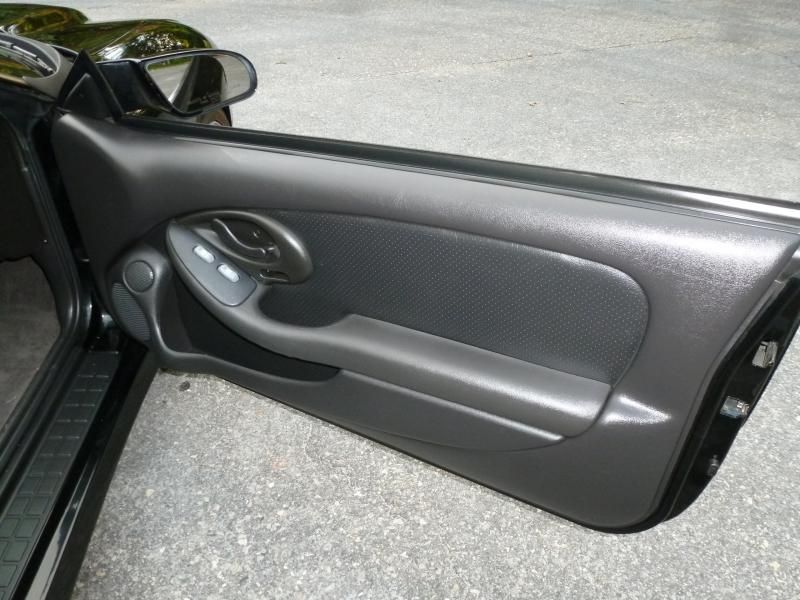
The passenger door panel is perfect:
Here's the ebony leather interior. The seats are very nice but the car does need a new carpet set because she was a former smoker and the carpet has really absorbed that tobacco smell. There is a cracked outer plastic molding on the driver's seat where the power adjustment switches are.
And the obligatory cracked door panel that these cars are renowned for. She didn't realize that this could have been covered under the GM warranties had she only asked at the time they were in effect.
The passenger door panel is perfect:
IF YOU Decide to sell let me know.. lol
I have a few rare birds myself.
09-03-2017, 02:44 PM
#98
Staging Lane
Thread Starter
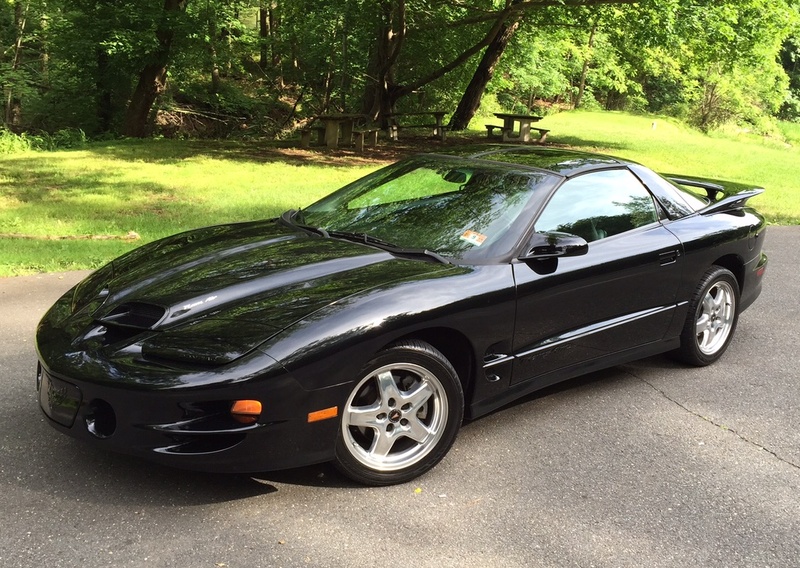
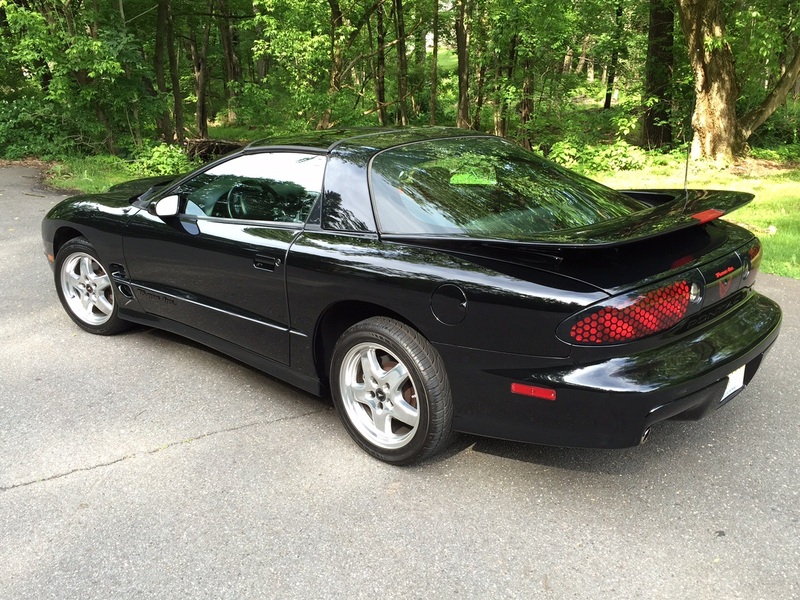
I am looking to sell the WS6 in case anyone is interested.
Since photobucket has ruined the photos in the rest of this thread you can go to the yenko site to see the ad with a bunch of large photos.
http://www.yenko.net/forum/showthread.php?t=144186
Thanks, NJSteve
Since photobucket has ruined the photos in the rest of this thread you can go to the yenko site to see the ad with a bunch of large photos.
http://www.yenko.net/forum/showthread.php?t=144186
Thanks, NJSteve