When you click on links to various merchants on this site and make a purchase, this can result in this site earning a commission. Affiliate programs and affiliations include, but are not limited to, the eBay Partner Network.
Re-Intrroducing myself to everyone. My build (as it stands now).
Let me begin by saying, I've been off this forum for almost 6 years. When I stopped posting, there wasn't much going on, as far as the GTO was concerned. I've been on LS1GTO (under the same name).
I got my car in July of 2014
On Friday, March 11th 2016, I was headed hom after work. I came over a hill and the woman in front of me didn't have tail lights. I rear ended her-totalling my GTO
--- I bought a donor car from erepairables, had the header repaired professionally and I put the car back together myself by Memorial Day that same year
In November of 2018, I spun a bearing on cylinders #4 and #6. I went a little crazy with my build and decided to drop some $$$ on a motor.
Fast Forward to this year. On March 18th (Friday), I dropped my car off at a friends shop (Rada Race Lab) in McHenry, IL for a mini-tub. I was going to do this myself, but I'm in my mothers garage (father passed away last October). I no longer have the time to do this sort of stuff. What would have taken me months to do, they finished in a weekend. The called and had the car completed on the morning of the 20th (Sunday). Here's a pic of my car in their shop:
Here are a few pics of the build:
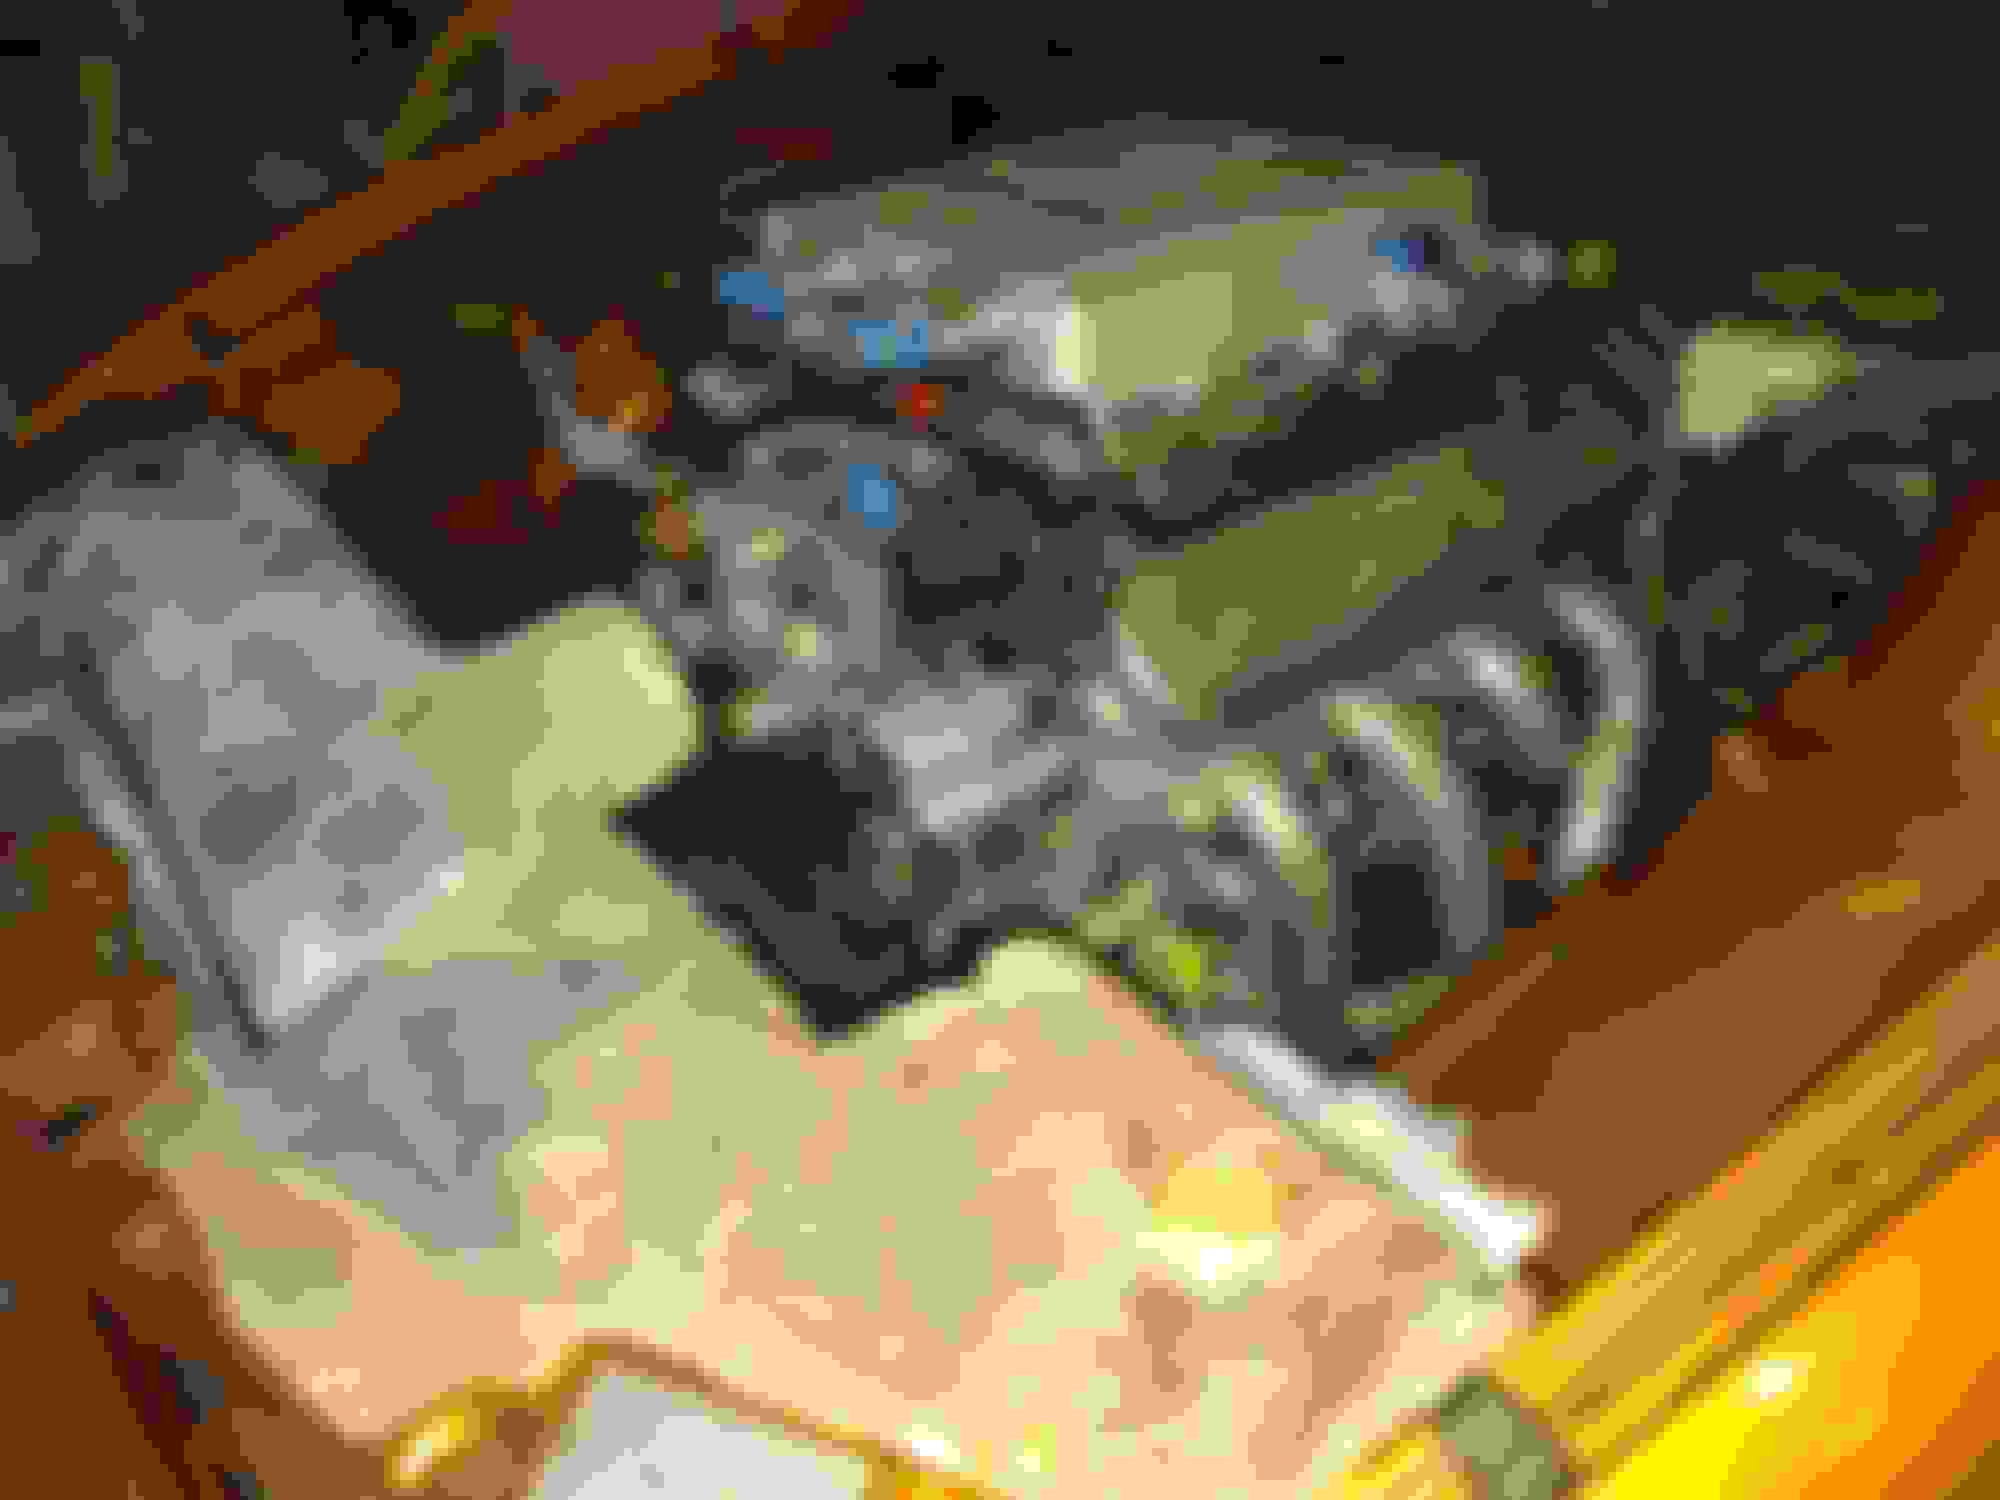
First motor rebuild:
Aluminum 6.0, 364 cid, 243 heads with a mild port. custom grind ERSON cam, upgraded springs and retainers, JBA shortys with a stock exhaust (with cutouts at the bend after the cat's). I ddi the Comp Cam's trunion upgrade, as well as some other upgrades, but nothing too crazy to write about:
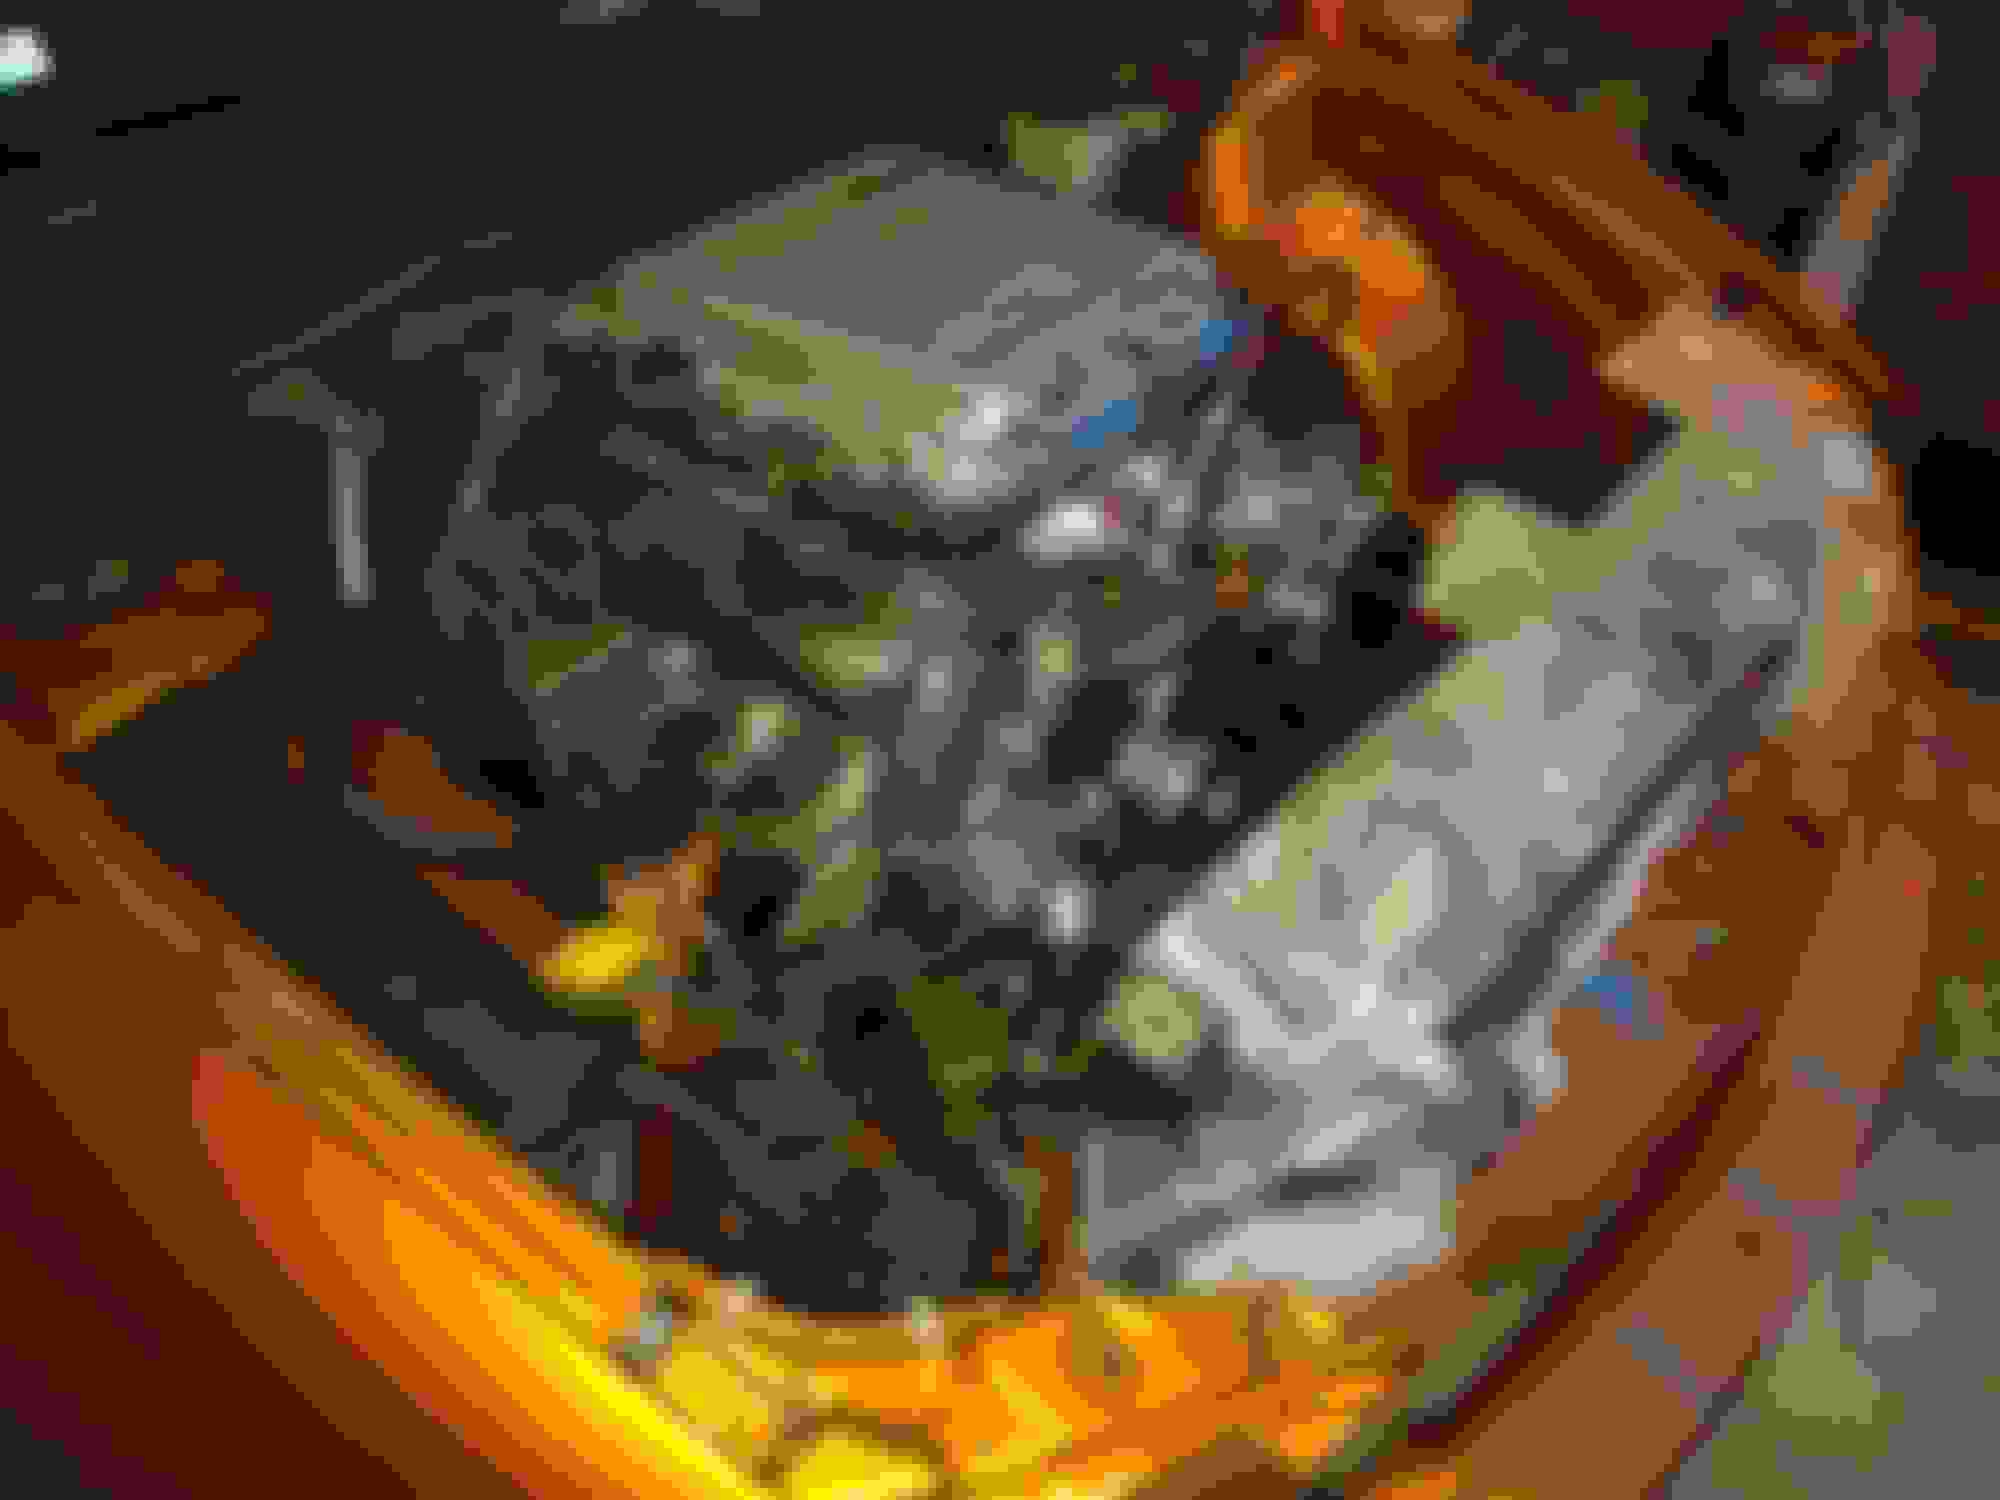
I was going to go with an LSA, but I came across a SMOKIN' deal on an LS9 off of eBay...so I bought it. Here's the first mock up of the LS9 ont he motor.
Here's a pic of when I cut the LS9 snout inlet off with a hack saw. I'm NOT a welder, so I had a friend of mine weld it back on, but upside down. Because of the odd angle of the cut I made, when welded back on, but upside down, the inlet had almost a straight line from the intake tube into the S/C casing. Looking across in the picture, so you can use the fender as a guide as to the height of the inlet.
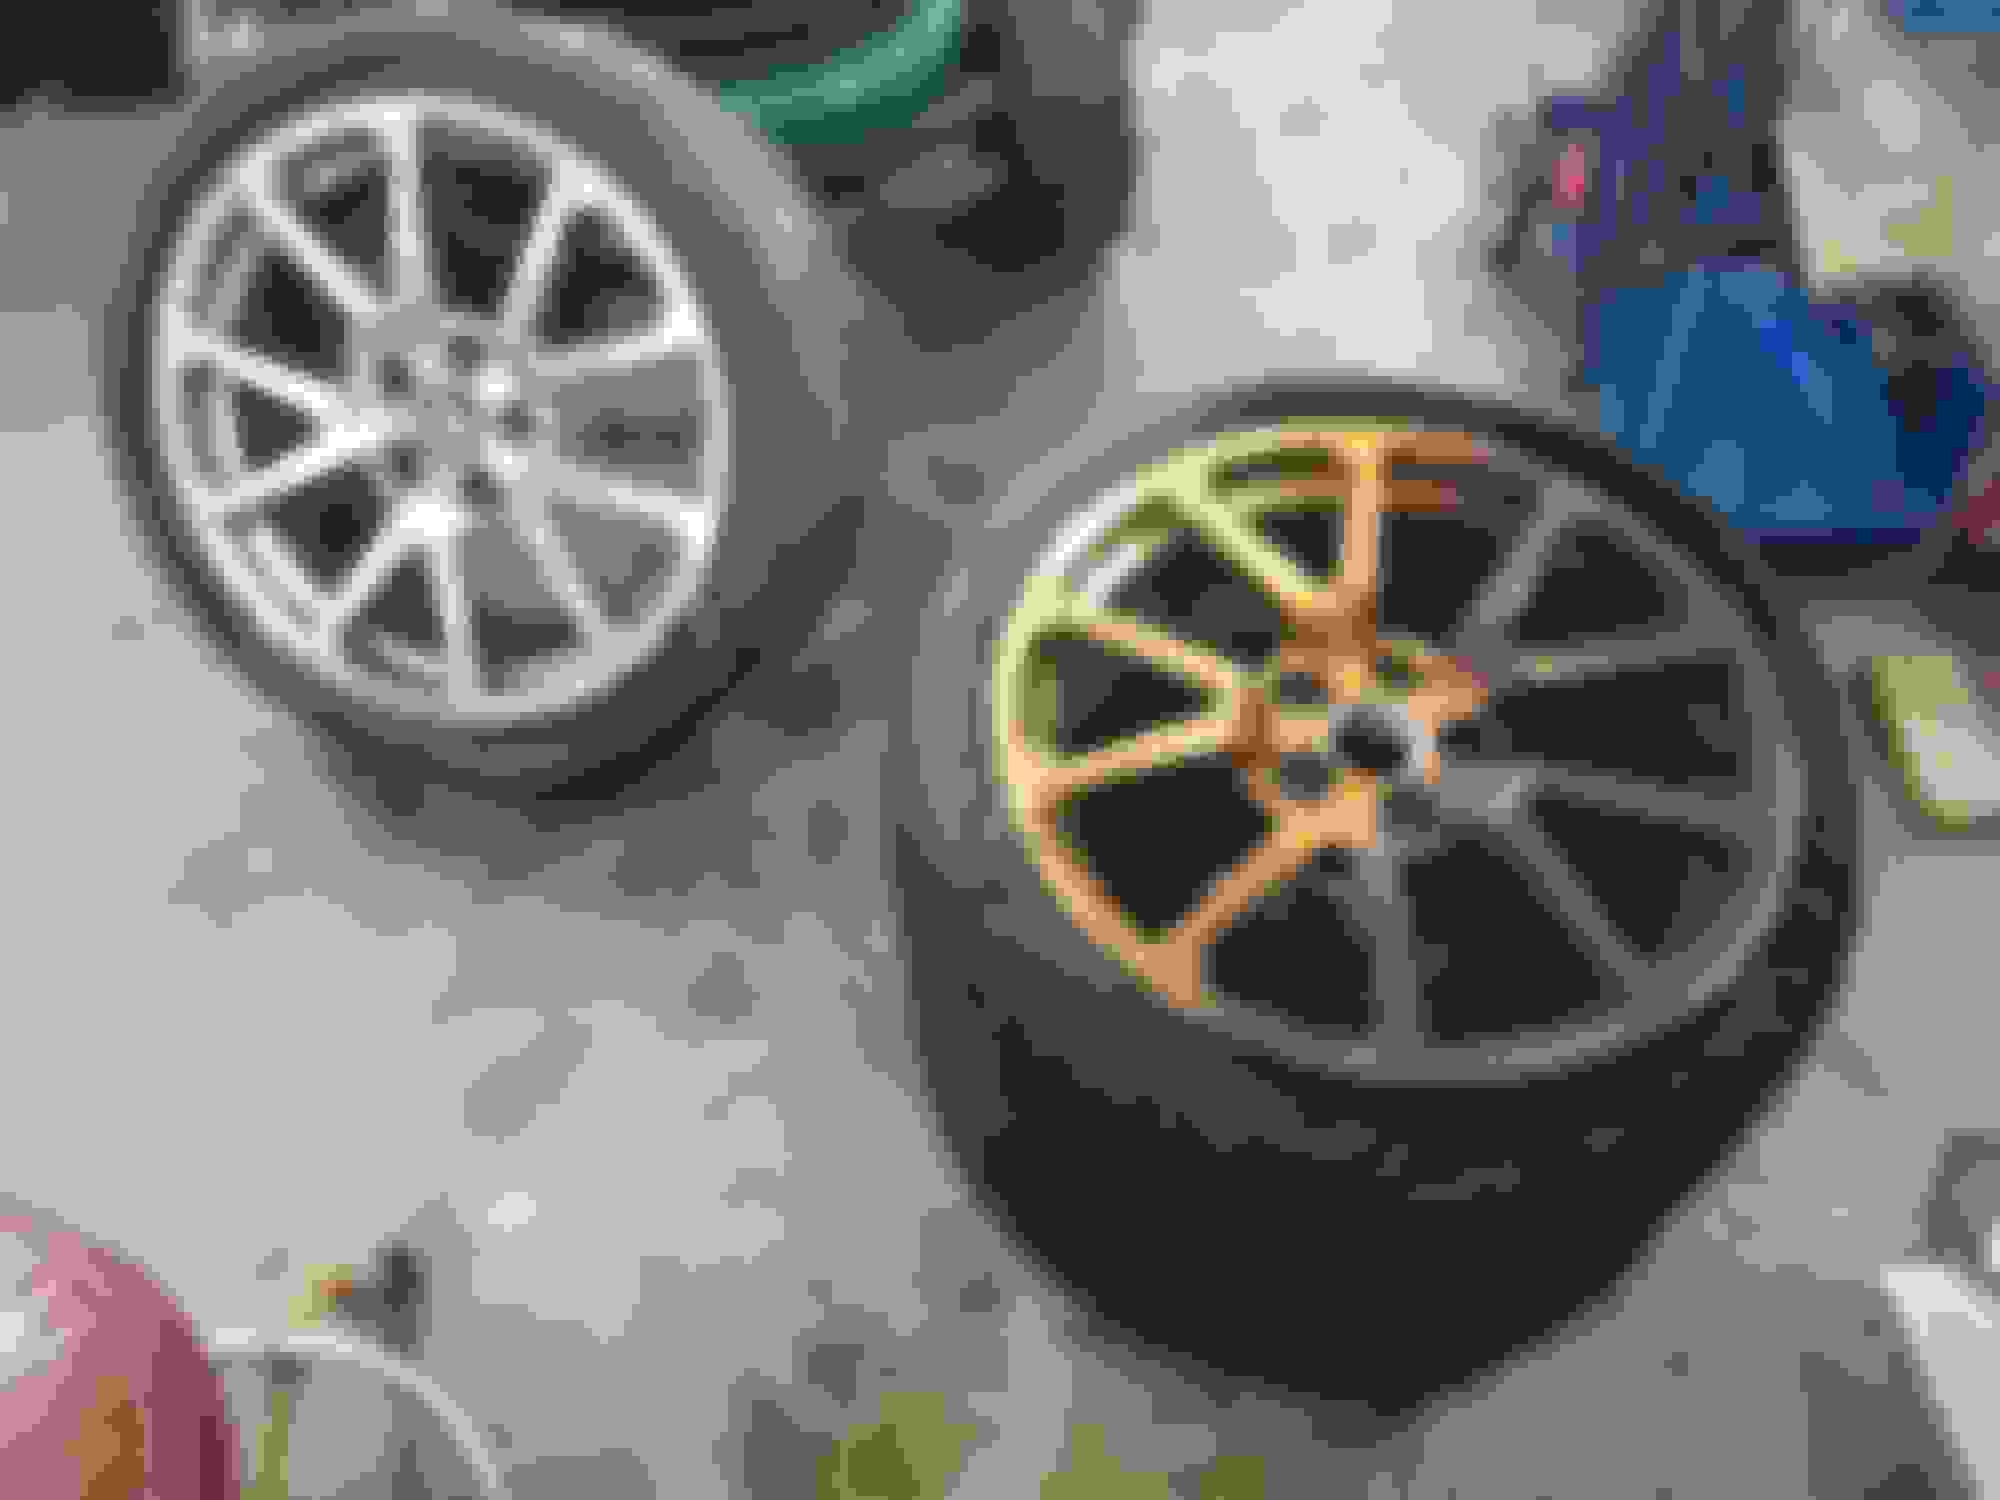
The condition of the wheels when I got them. The Cadillac they were on, had an engine fire. I got these for around $400 and took a chance that they were O.K.. After having them checked to be round and not damaged, I removed the fire stains, had the hub's bored, the fronts were narrowed from 9" to 8.5", so they would fit and had them Chrome PVD coated.
Some of my interior mods (though I'm not quite finished with those. I imported a center console from Aussie-land, because they have cup holders next to the radio. I cut the Australian piece down and spliced that together with an American console. Ater a bunch of cutting, I only used a small portion of the part I imported. I also fabbed up some gauge pods and mocked them up in the car.
More recently, I had the car mini-tubbed. I feel they did a really good job and I'm VERY happy with their work.
Welcome back!
Looks like the car is coming along great!
Originally Posted by blackbyrd
That ls9 looks good in there!
This place could use some more activity, though im considering parting ways with mine
Originally Posted by 02*C5
Looking great
Thanks! I have a TON of mods to do, but I should have the car running by this summer. I'm also planning on a lot of visuals, which will take me some time to get it all done and looking right.
One of the mod's I'm really looking forward to is modifying a G8 flat bottom steering wheel, to work in the GTO. I never liked the "bumper car" kind of look of the ones in the VZ's at ALL. I took a chance on buying a really rough one (for $30 off of eBay) and the steering wheel splines look the same from the VE to VZ platforms. This one had all the buttons / controls, but the plastic trim and leather was in REALLY bad shape. I'll have to look at the wiring for the airbag and radio / cruise controls, but I can't imagine those would be too hard to get to work from one to the other.
I'll be sure to post up more pictures of the car as I progress...
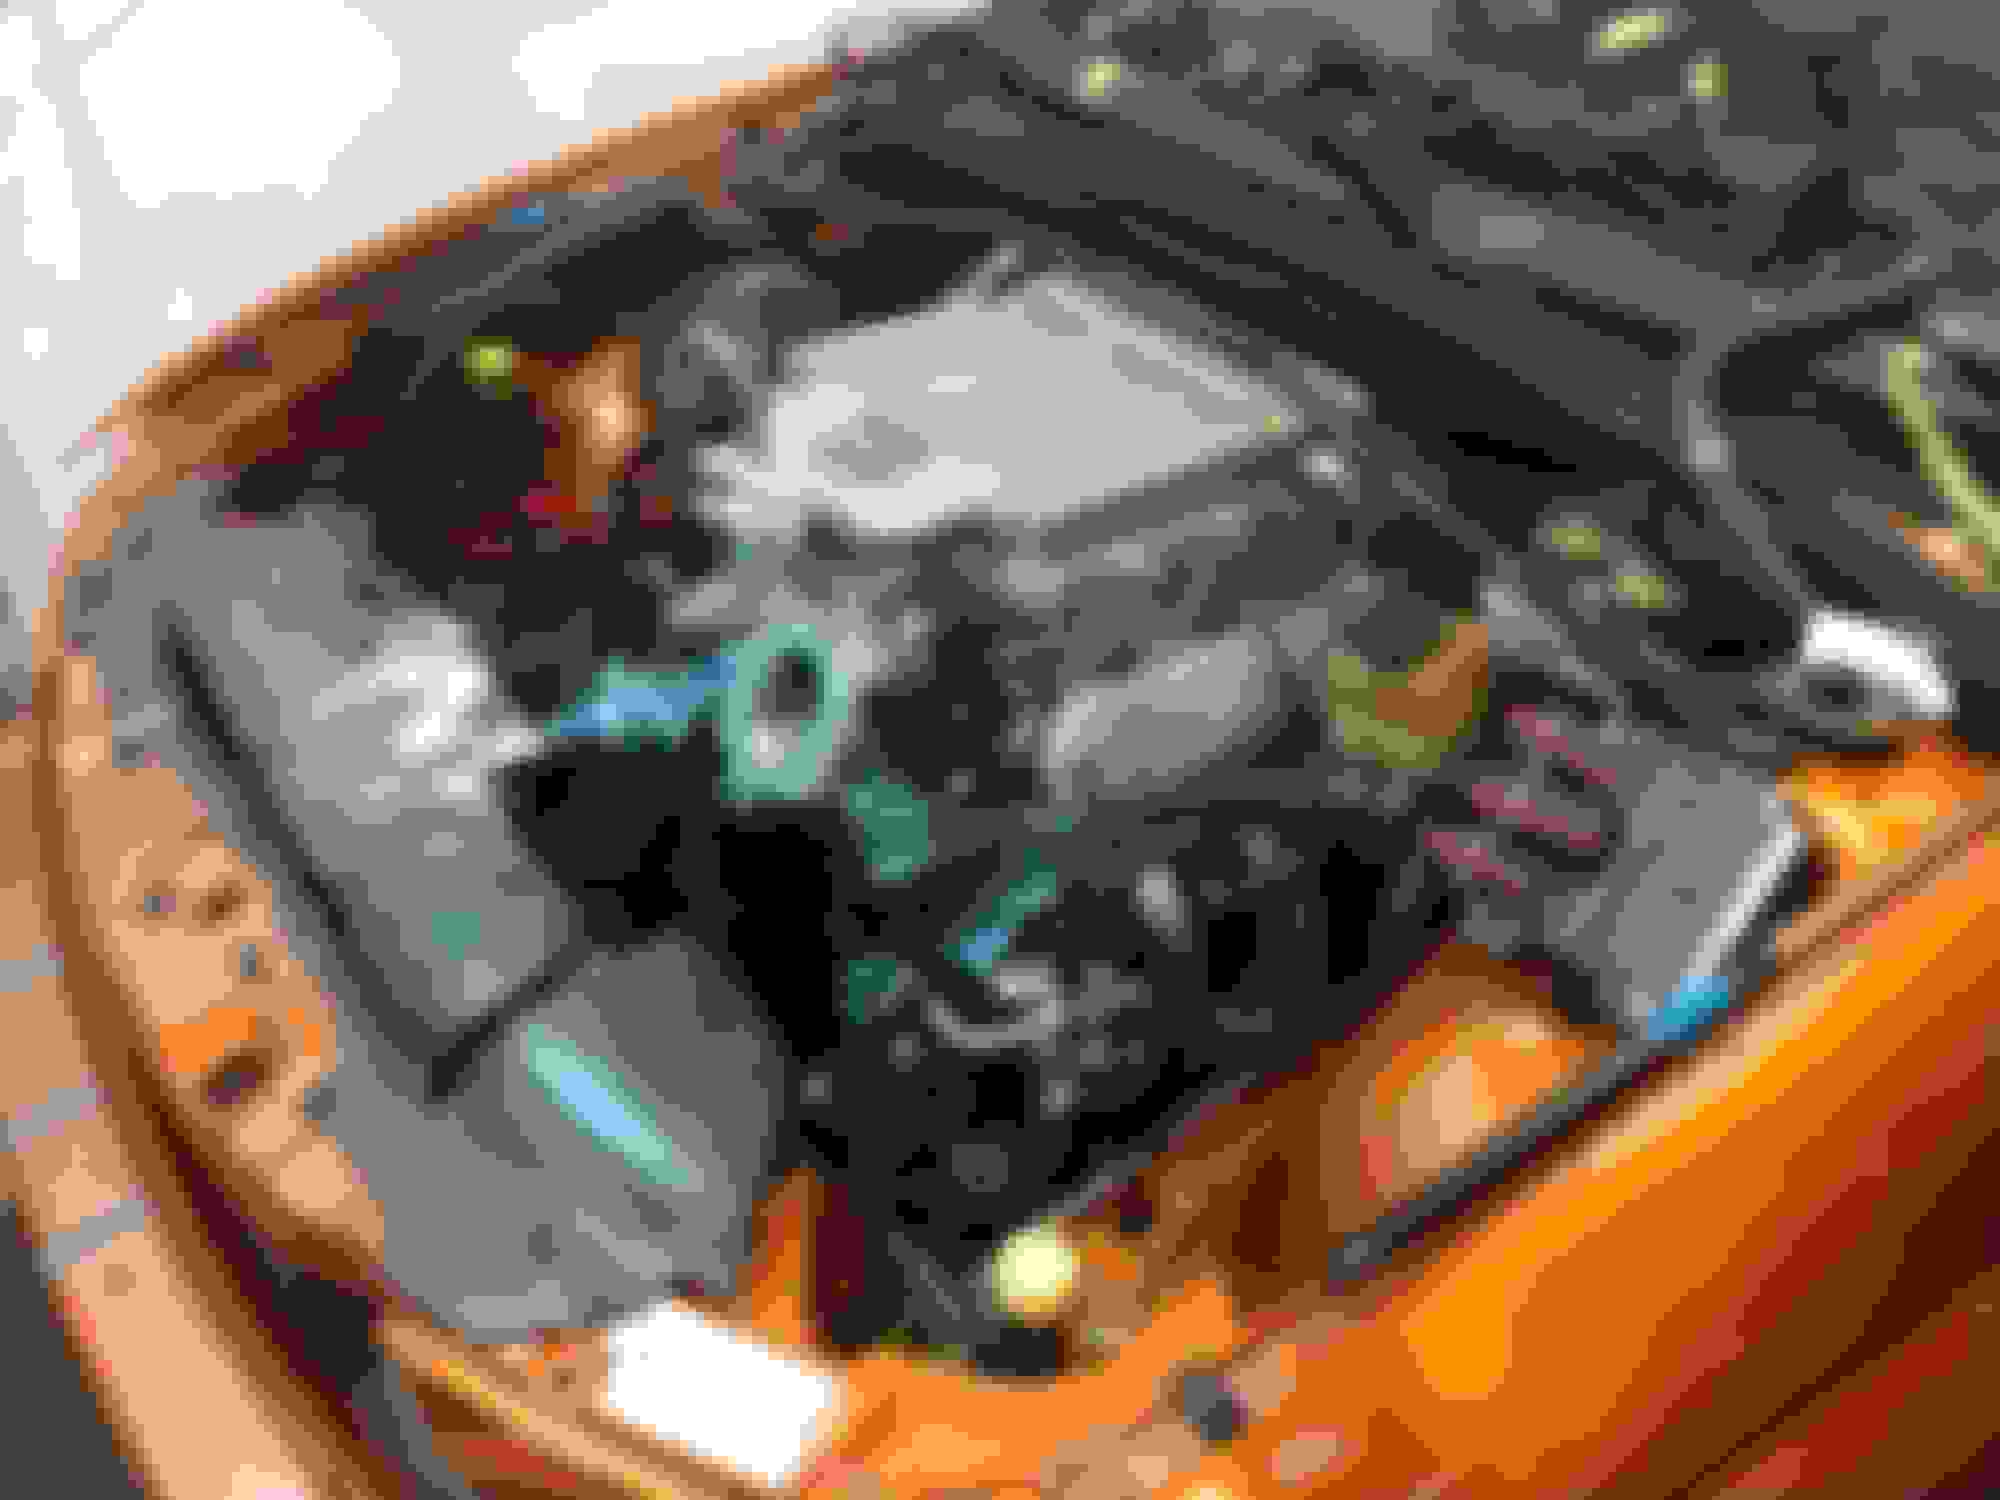
Here's some that I think are kinda cool...looking ringht down the D/S tunnel with everything out of the way. I imagine, not a lot of people have seen this.
My congratulations on the work that has been completed so far, and my condolences on the unfortunate family loss. That being said, I would be remiss if I did not tell you that the gauge pods you have are a hideous abomination in what will be sure to be an otherwise great build. I only looked at them once as I scrolled through this thread, and I still want to claw my eyes out.
Goddamnit, I doublechecked them to make sure I was not being too harsh. Now I want to claw my eyes out twice.
You're welcome! To each their own. There isn't a quad pod out there for our cars and (obviously) this is NOT a finished product. I never liked the gauge pods that just sit there, in the center, top console piece. I wanted something different and EVERYTHING I saw others do was just TERRIBLE. I mean, there was a Lingenfelter version where they plopped 5 gauges in a flat panel and called it a day. There was also another one, where they basically took a GaTOr pod and doubled it up on top of itself. I thought the staggered gauges along the drivers aspect looked better.
I still have to finish the mechanical bits, but I also have a bunch of visuals I want to get done on the car. I managed to find a really bad / fookered front and '04 rear bumper, as well as a new set of RK Sport side skirts I want to modify (soften the harsh edges and make a designated place for the "GTO" side emblem). The whole look of my car is going to be similar to Eddy Tassone's Holden VZ, which was totalled some time ago. I always loved the look and stance of his car, but hated the yellow / black color scheme. As far as the rear bumper, I want something SORTA like this, but with some SAP styling cues. It's something I have to work on, design and figure out.
There used to be a company that made a 3 gauge center pod that placed the same sized gauges evenly, and it still looked terrible. I went through 3 different center pods before finding a 2 gauge setup that blended properly with the look of the car. I never got one of the lower right hand side of the cluster gauge pods before they disappeared, but they blend nicely as well. Probably your only shot at replicating those would involve 3d printing. Anything more than those 3 gauges would probably require a pillar pod to be in your line of sight, but not look terrible. Technically, you can display any gauge reading you like on an aftermarket Android radio, but our radio location is too far below the natural line of sight while driving. When I put mine back together I am seriously considering printing a lower right hand side of the gauge cluster pod to augment the 2 gauges in the top center dash.
As per usual, it has been slow going. What I think should take a few hours, takes all day...but I will have ALL weekend to get more of this thing back together. The fuel PTFE fuel lines just came in from Summit, so I'll be running the new ones where the old ones were at. The suspension is Por-15 coated, sanded and painted w/ chassis black. I had 2 small rust issues in the trunk. That's been remedied, coated and painted as well. I was planning on sending out my diff for a rebuild, but I had another issue with my little G5 box..... That's all taken care of (fingers crossed) and I can concentrate on the GTO.
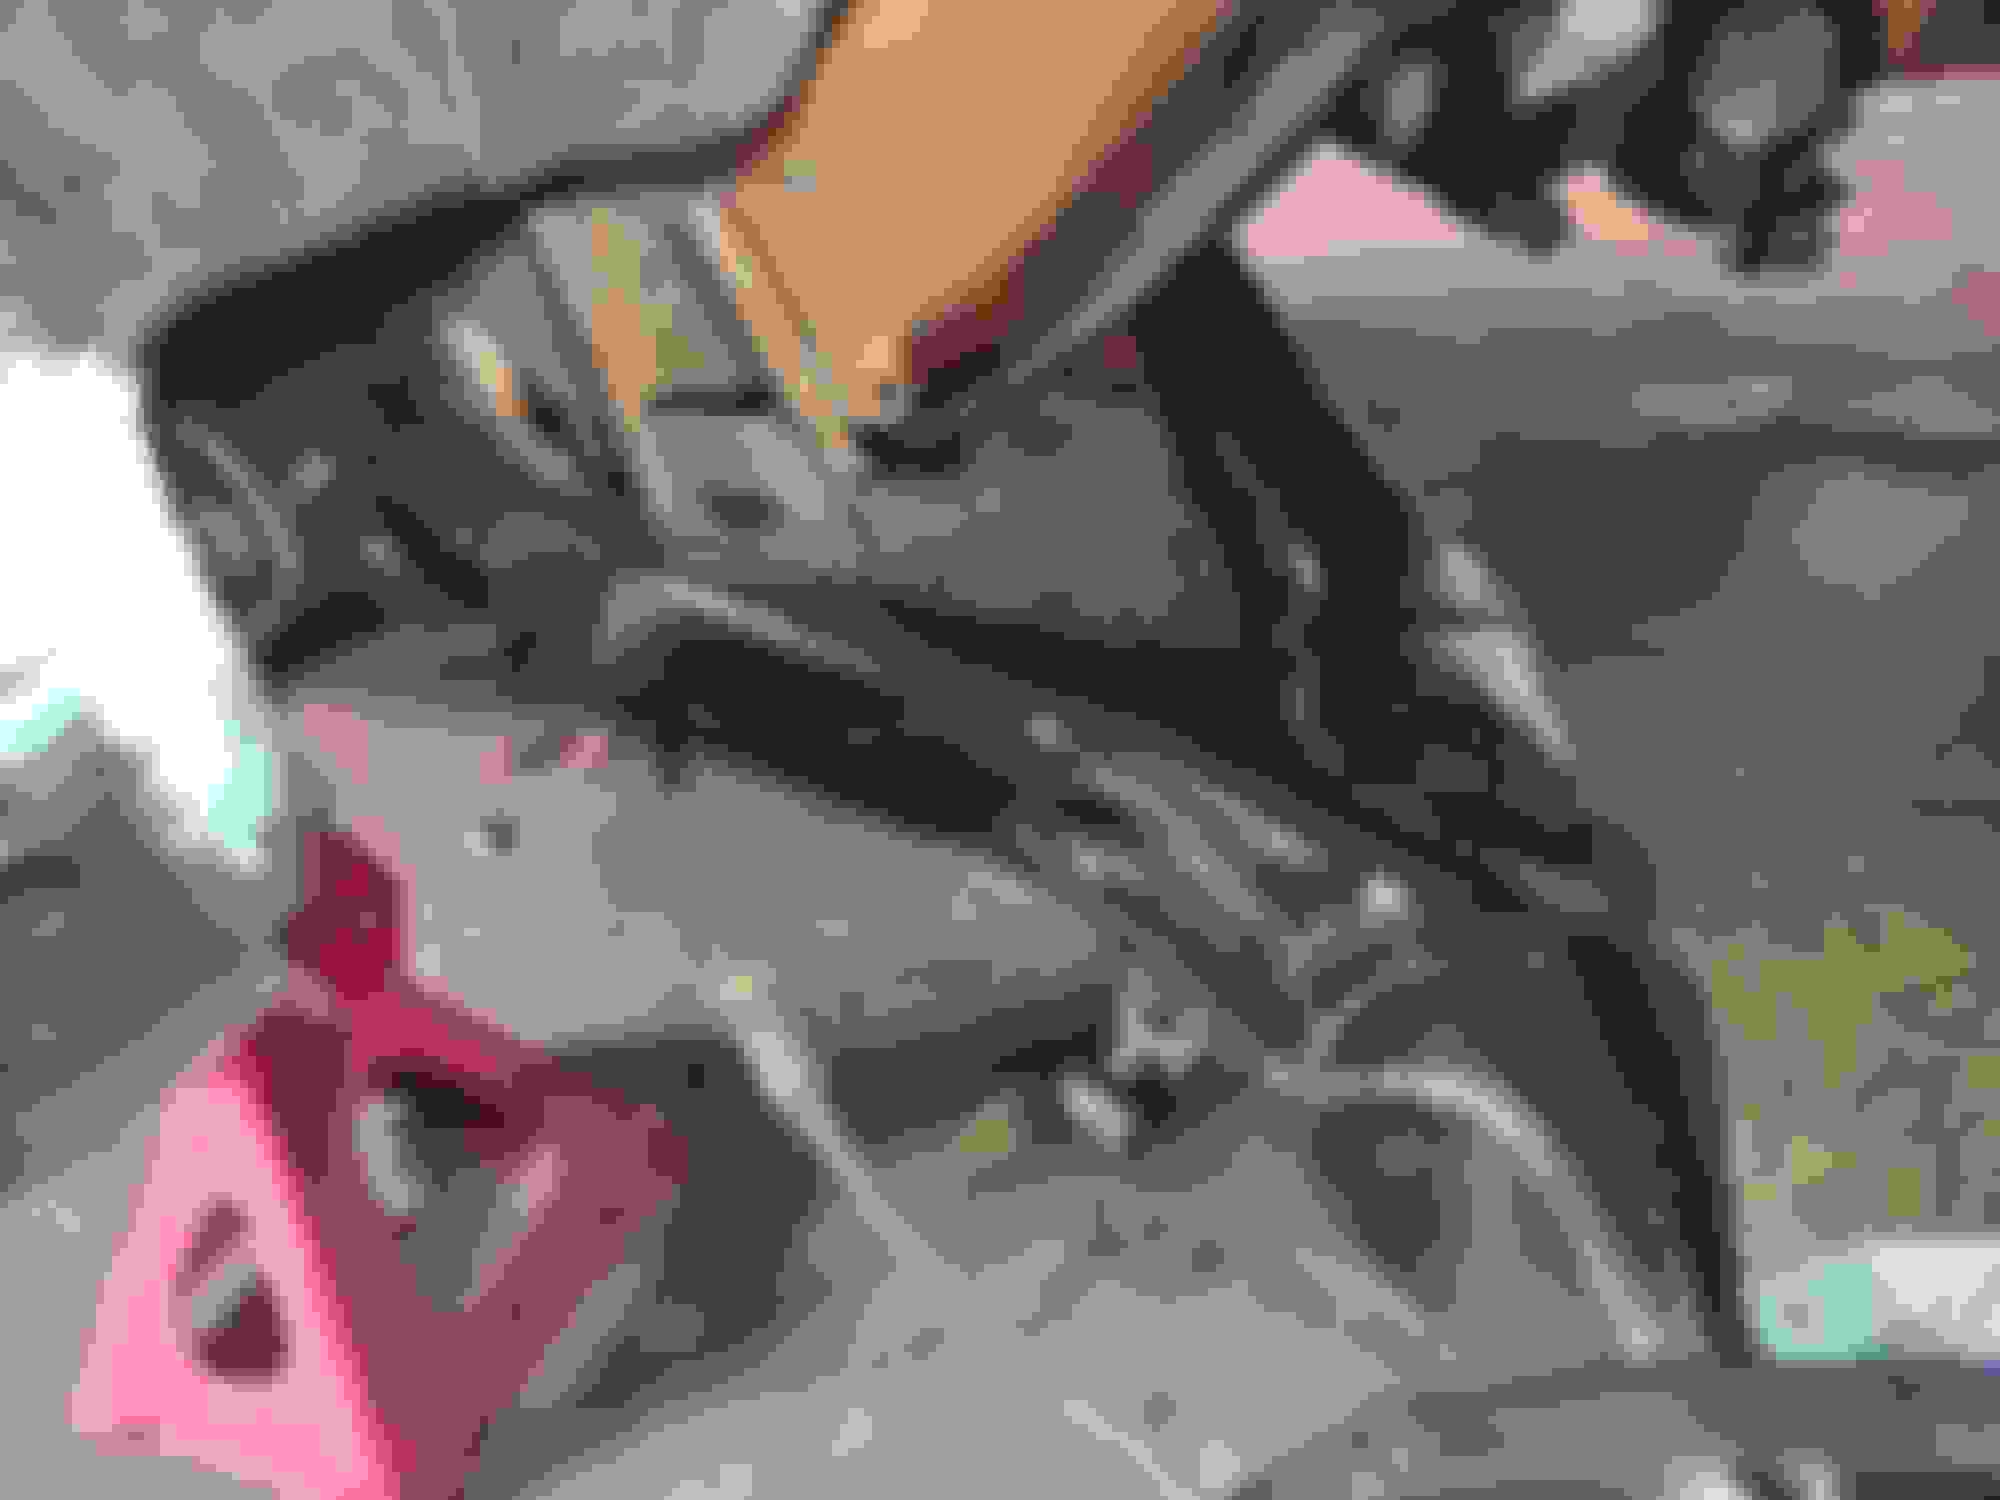
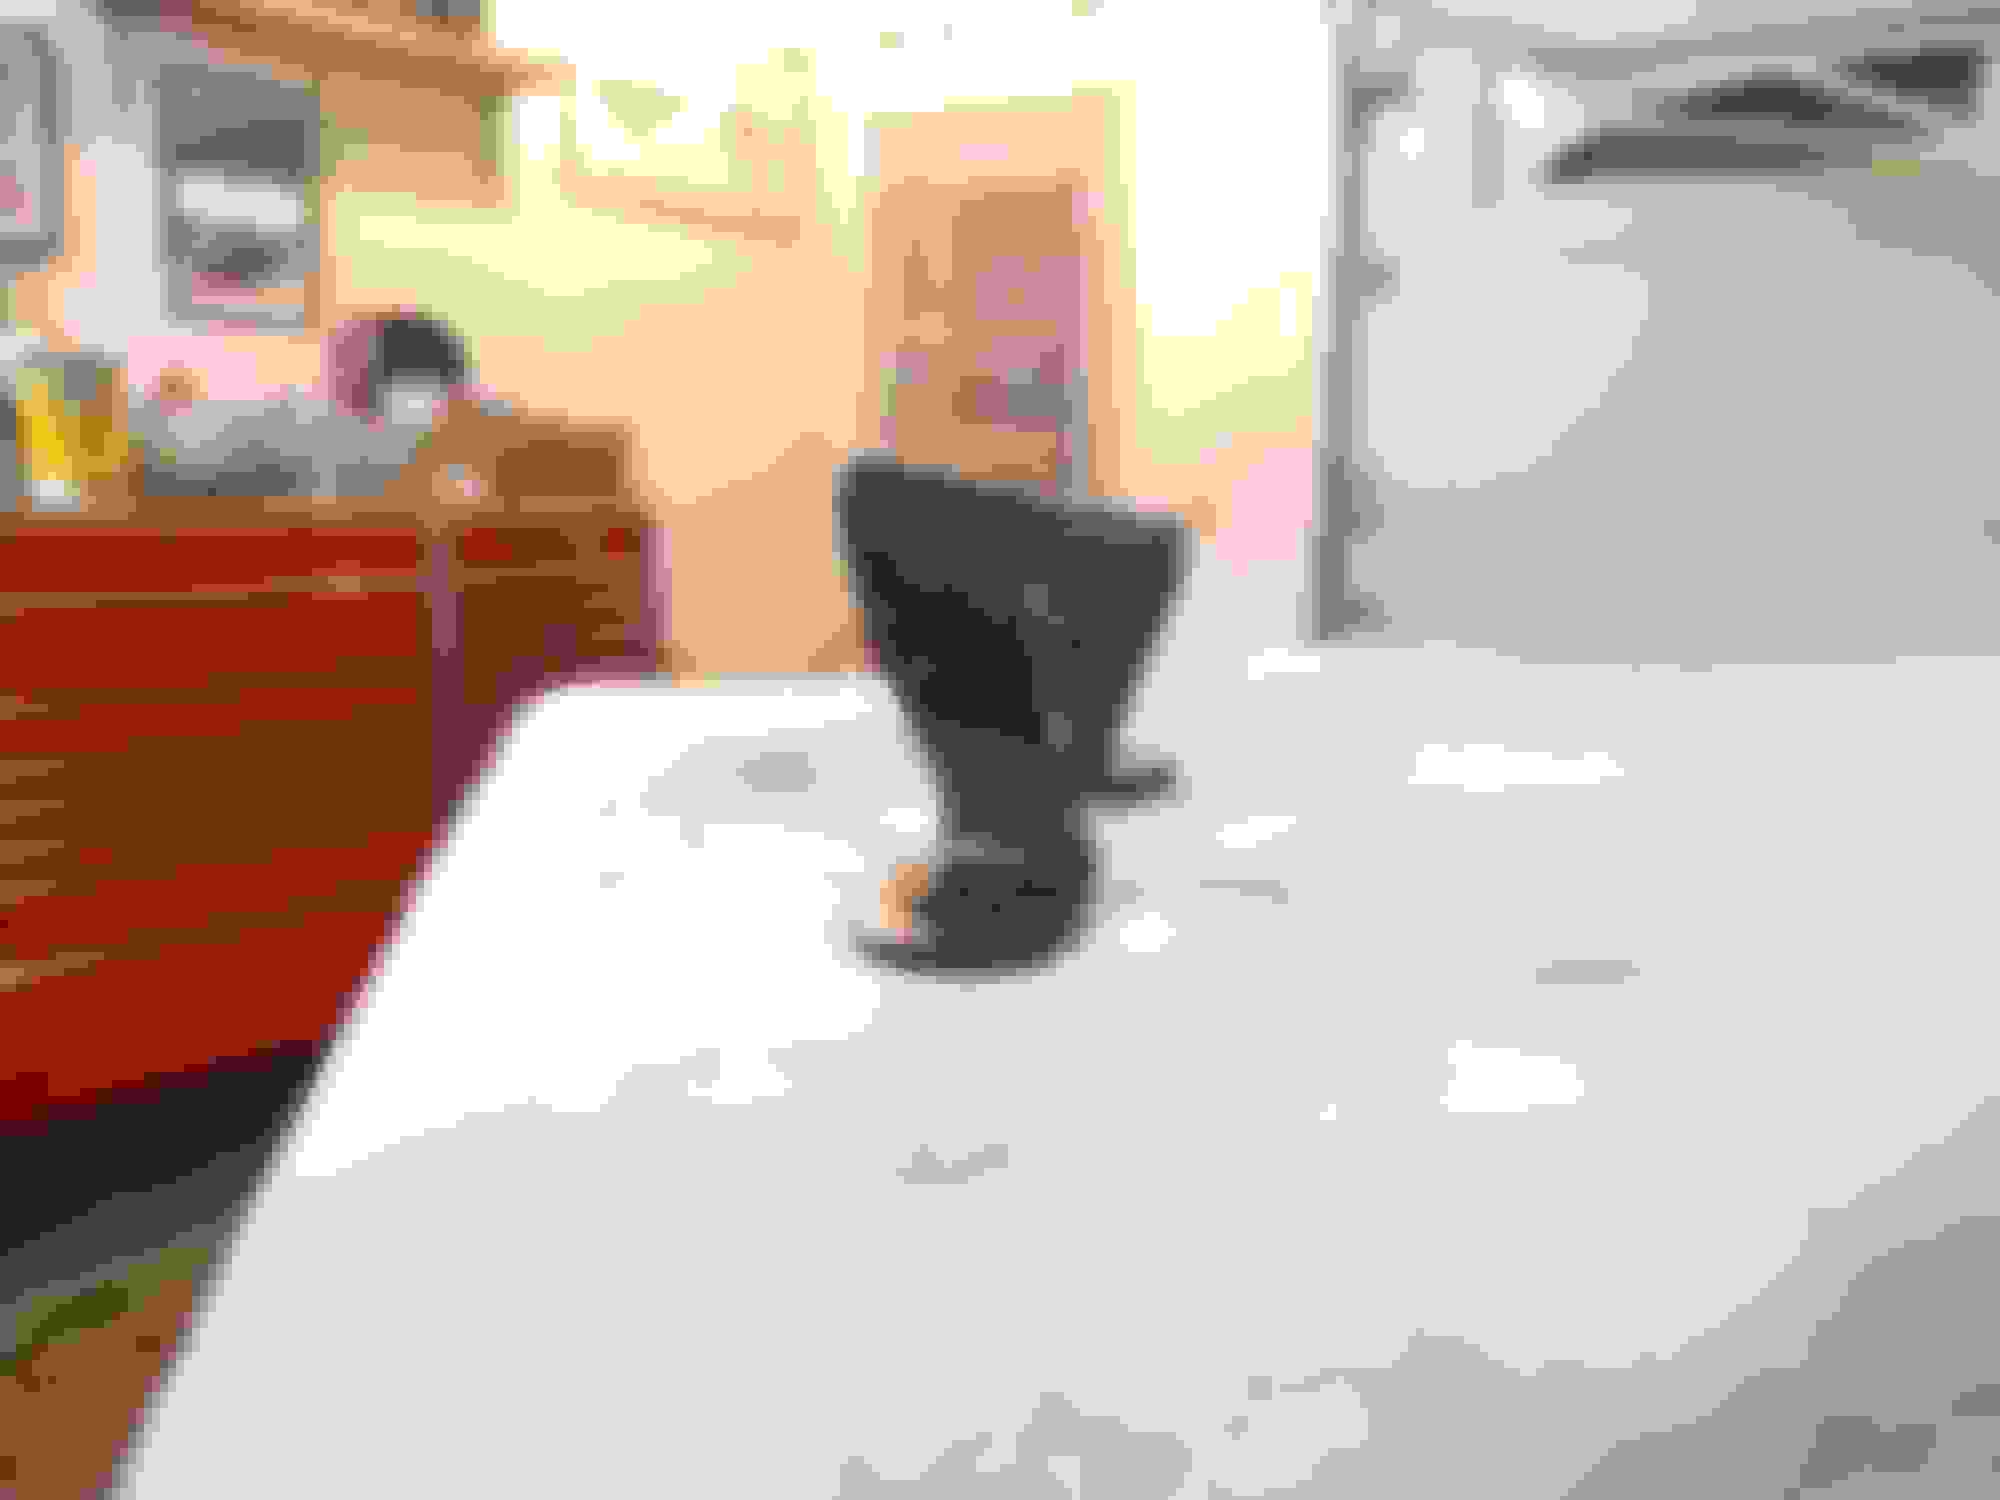
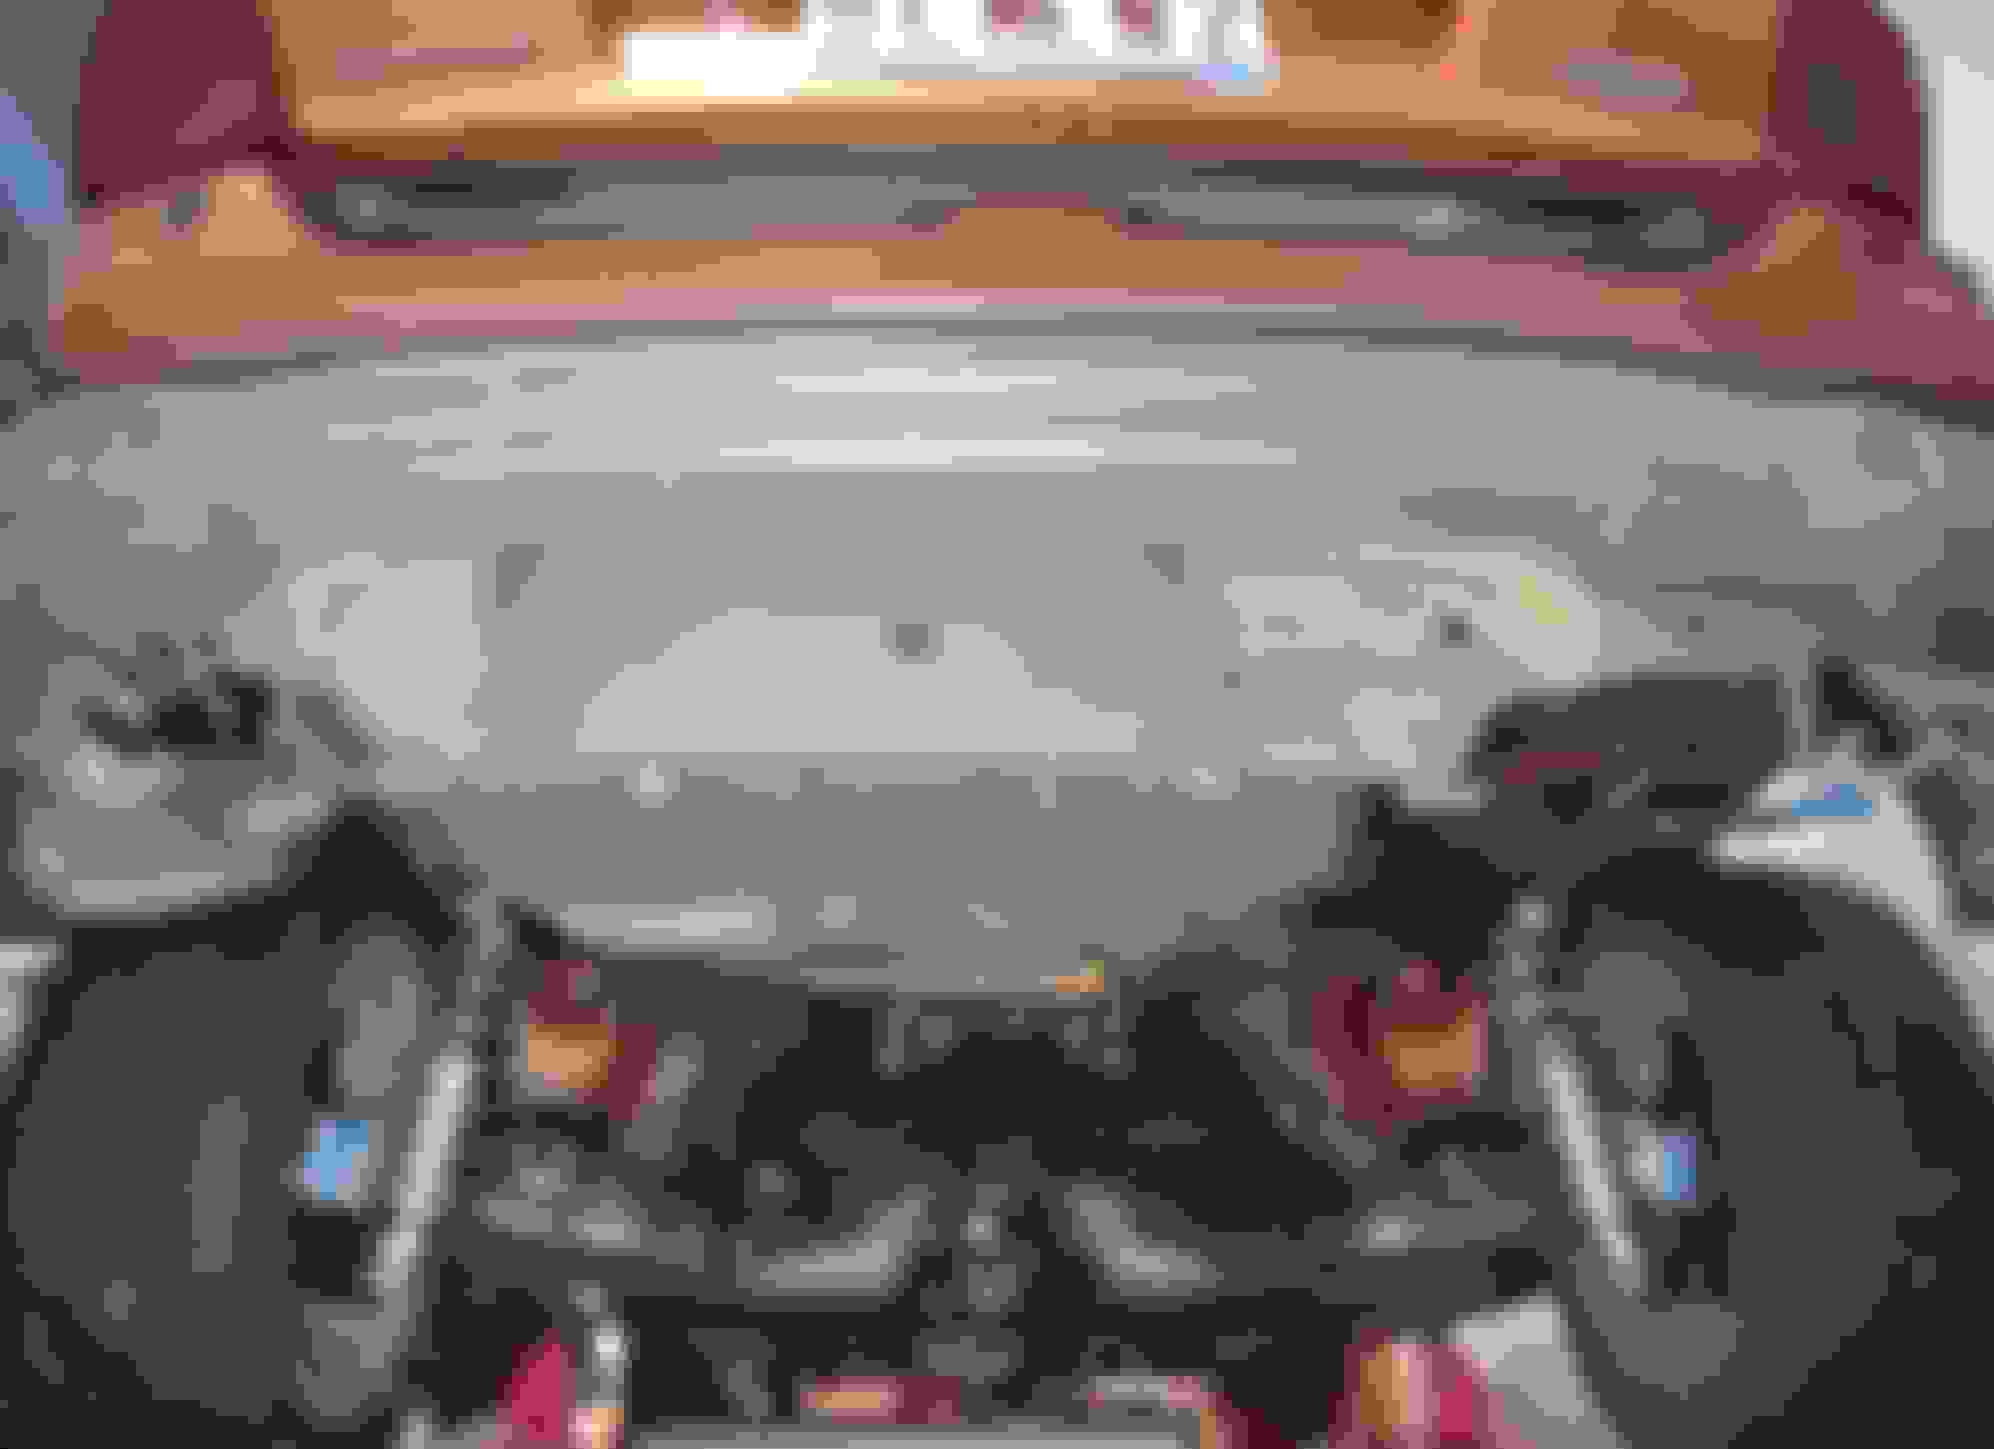
This is SUCH a weird picture to me. I mean, you're there, looking at what SHOULD be the back of the diff. Instead, you can see all the way down the tunnel, to the back of the trans. However, you can ALSO see all the rust on the rear K member
I used my Dremel w/ a grinder attachment and got off as much rust as I could from the K-Member and the suspension bits. I didn't want to coat over all kinds of rust, that's going to sit there and fester. I know Por-15 works well, but I feel, the more rust I get off, the better the product could penetrate into what was left.
I then hit itn with Rustoleum's "Rust Dissolver" That got a bunch of the rust out of the little pits. This stuff works GREAT!!!
There was just a TINY bit of surface rust left, so I coated it with Por-15 and let taht stuff do it's magic. After this, I sanded it all down and shot it with Eastwood's "Chassis Black". I didn't take a pic of that yet. Once I get the underside cleaned, spot de-rusted and painted Brazen Orange, I snap a few pictures for posterity.
Now that the wheel wells are coated, I'll be spraying in some bed-liner. Once that is dried, I'll put the rear suspension back together and re-install the brakes / brake lines.
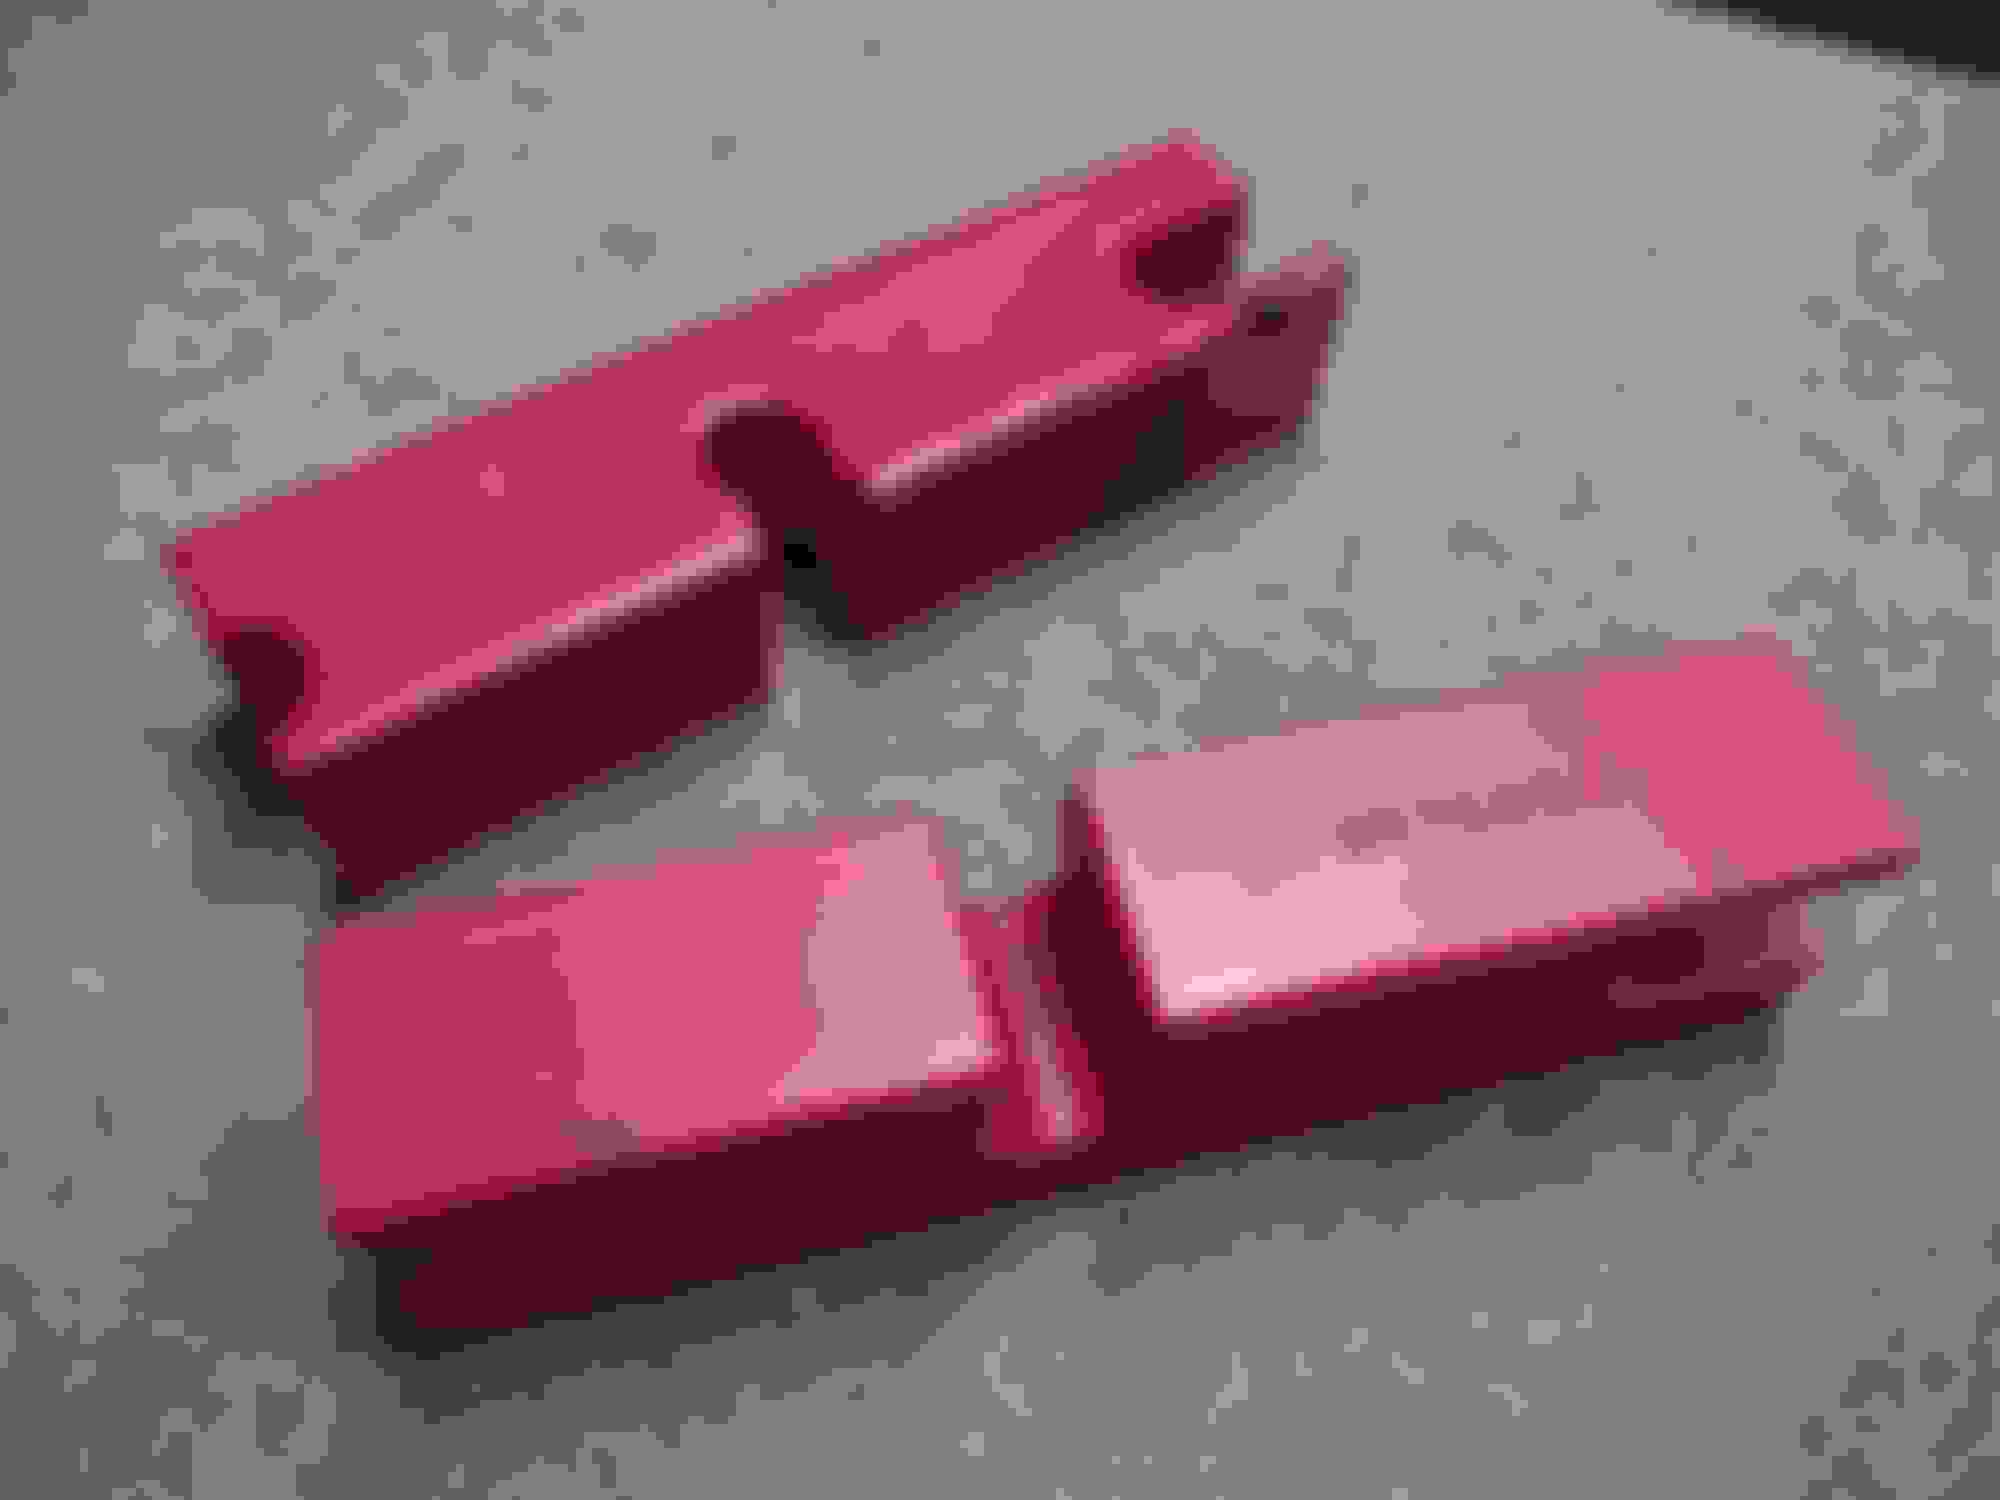
However, before I post up any of the recent progress, I need to say I recieved a gift from a guy named Nick in the U.K.! Not just ANY gift, but something I have been looking for since July of 2017. He sent me his Spring Blockers out of his silver CV8. The guy just sent them...didn't charge me or anything. I find it ironic that after almost 5 years of looking for a set (on FB, on eBay, Craigslist, etc.), someone in another country GAVE them to me!!!
I'm now looking for an old OEM spring, so I can use that and make a display for the garage.
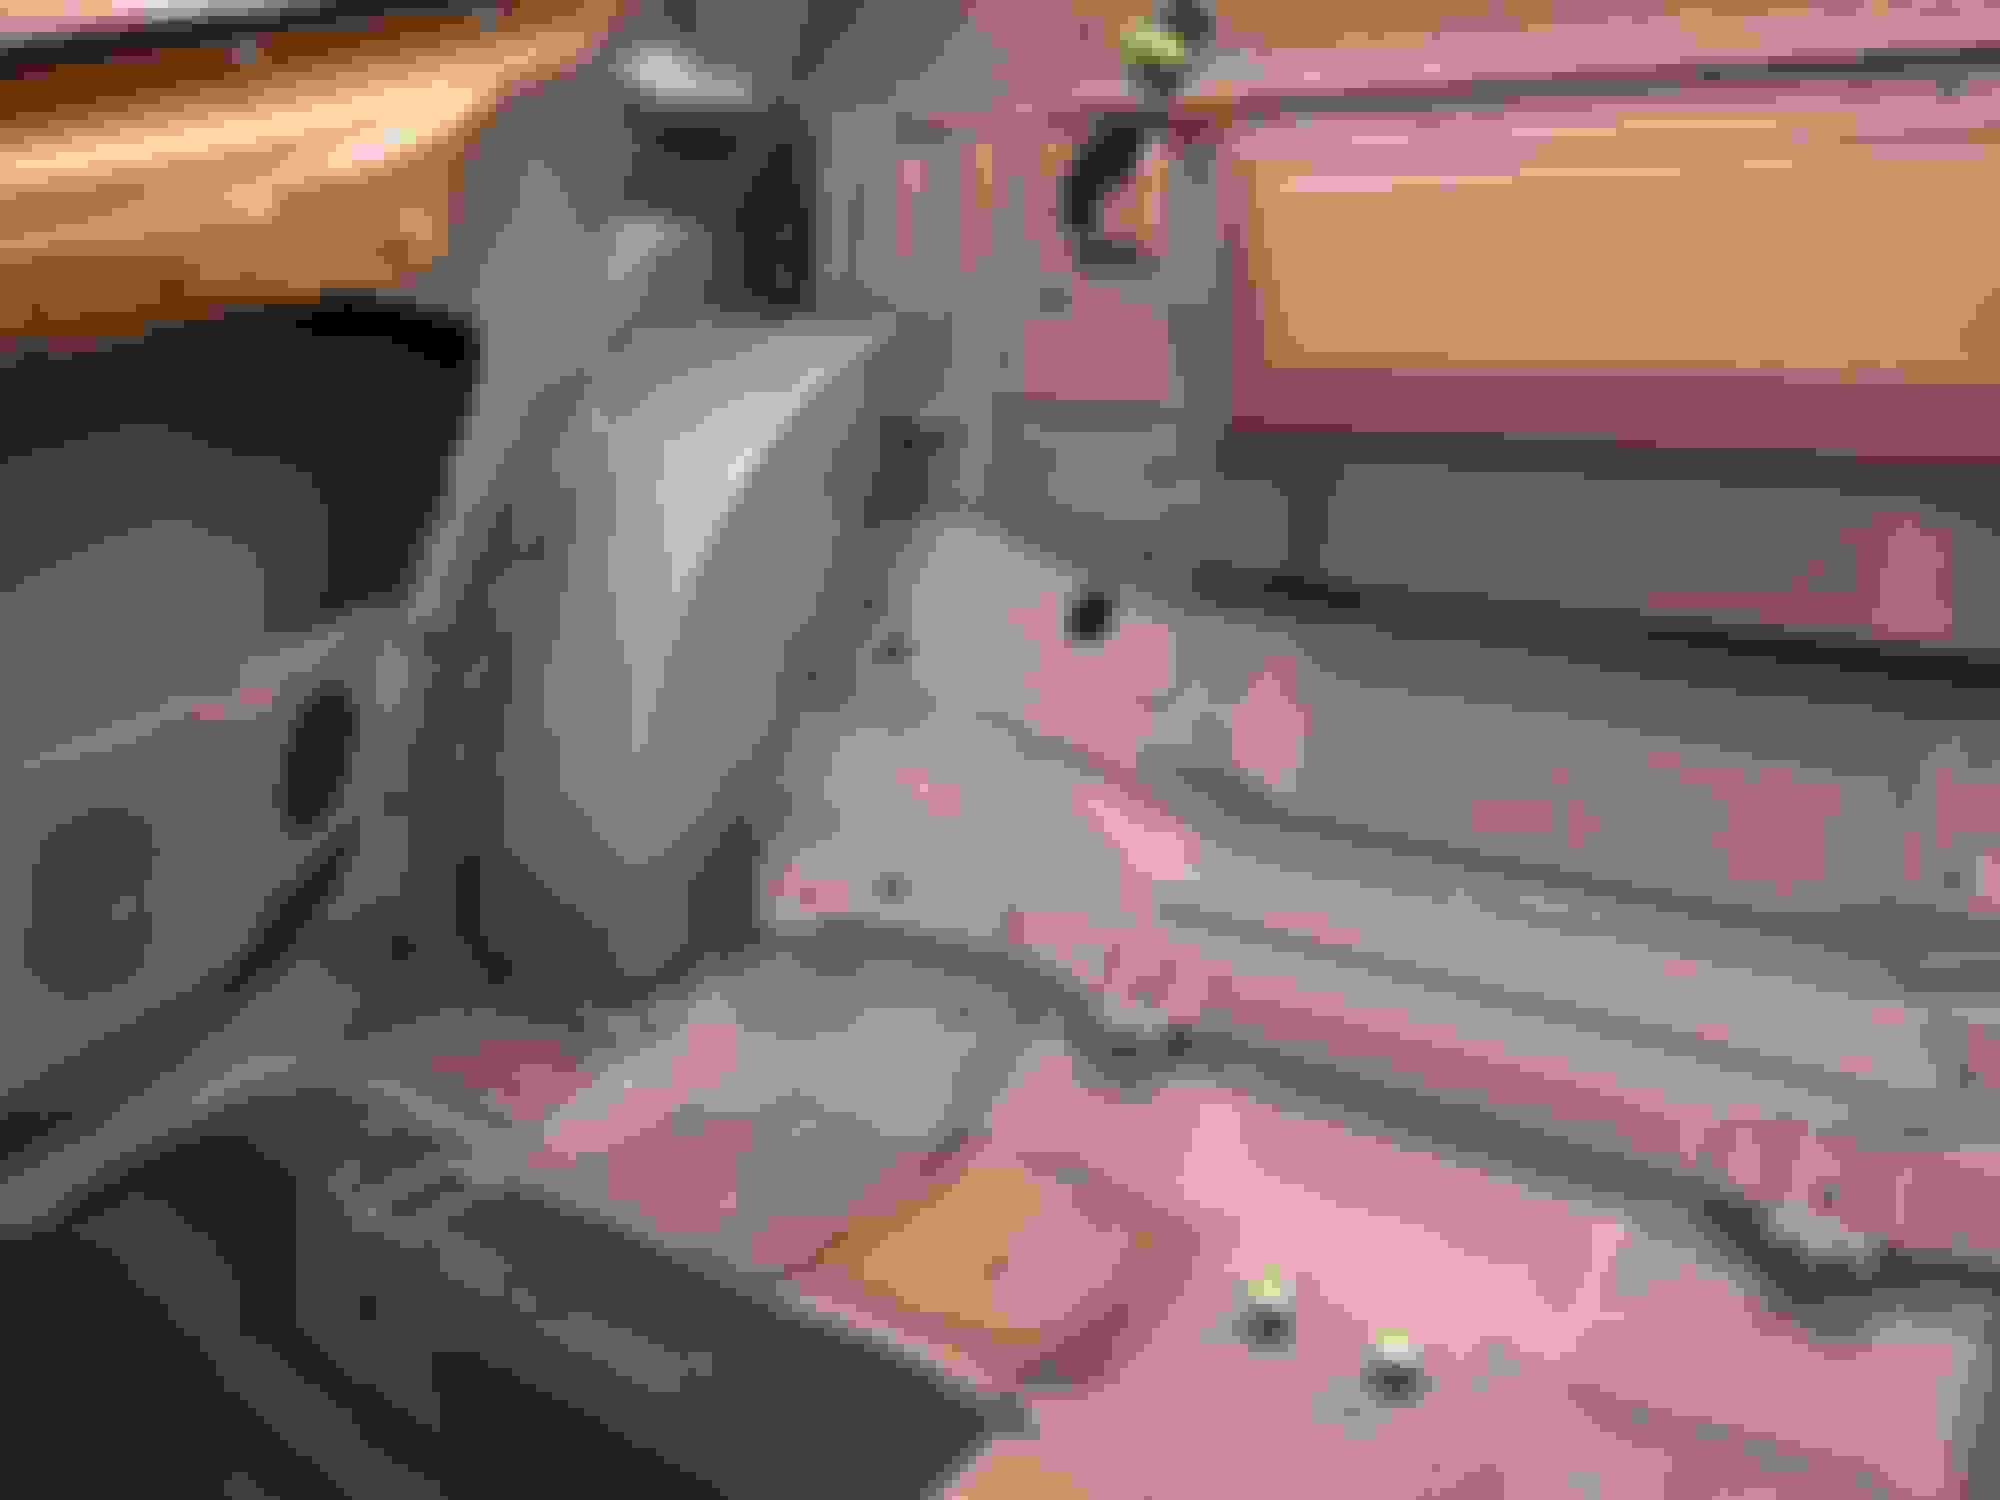
Last weekend, until last night, I did some cleaning / derusting on the bottom of the fuel tank. I finished the interior of the car-as far as making sure the mini-tubs wont rust. Those have been seam sealed, coated in Por-15, and sprayed with Eastwood's Rust Encapsulator. After that was finally dry (I waited 2 days), I put down the sound deadner foam. Tonight, I'm spraying the bedliner in the fender wells. Then later I'm going to start pulling out the tubs of interior stuff so I can put that back in this weekend.
Here's a shot with the sound deadner on the drivers side, while the passener side is only sitting there with ONLY the with the seam sealer, Por-15 and Rust Encapsulator on it.
Whoops....looks like I didn't shoot a few parts so good. No worries. It will be covered pretty good...
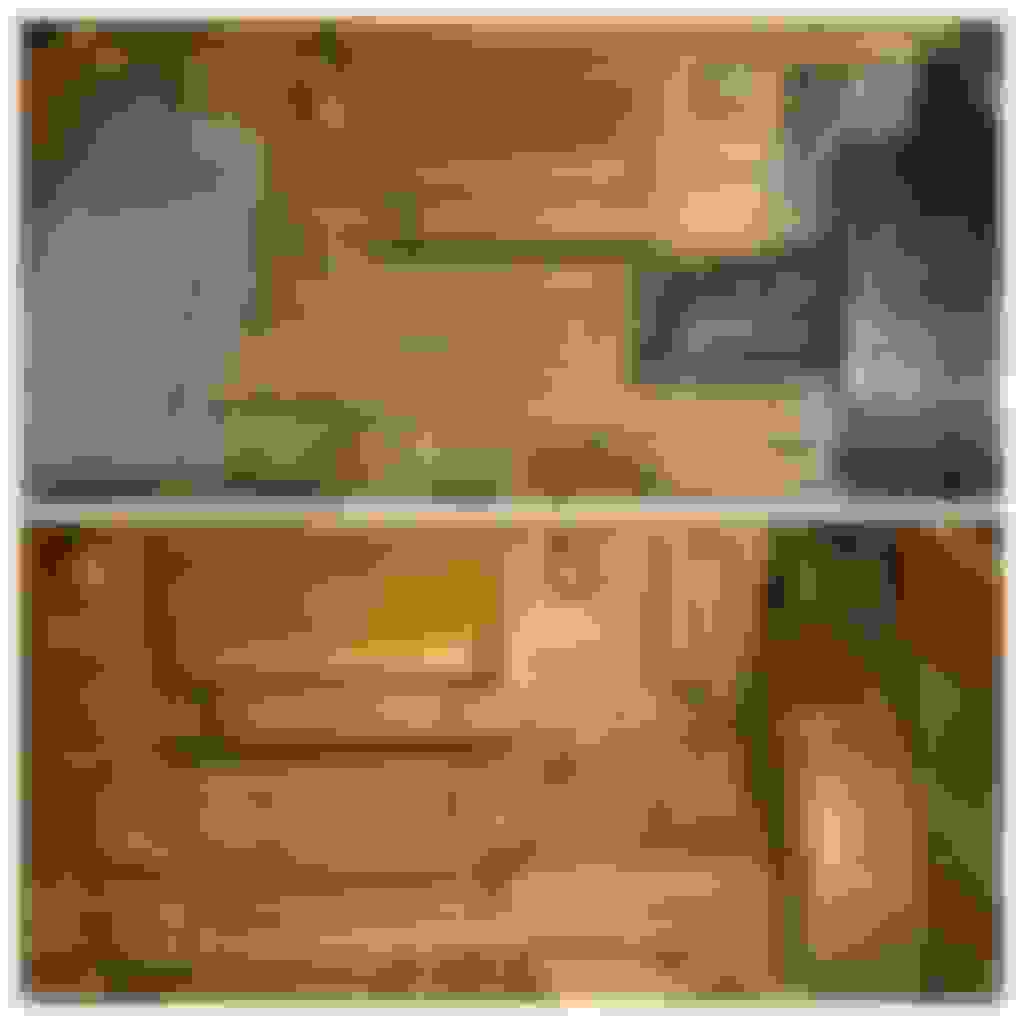
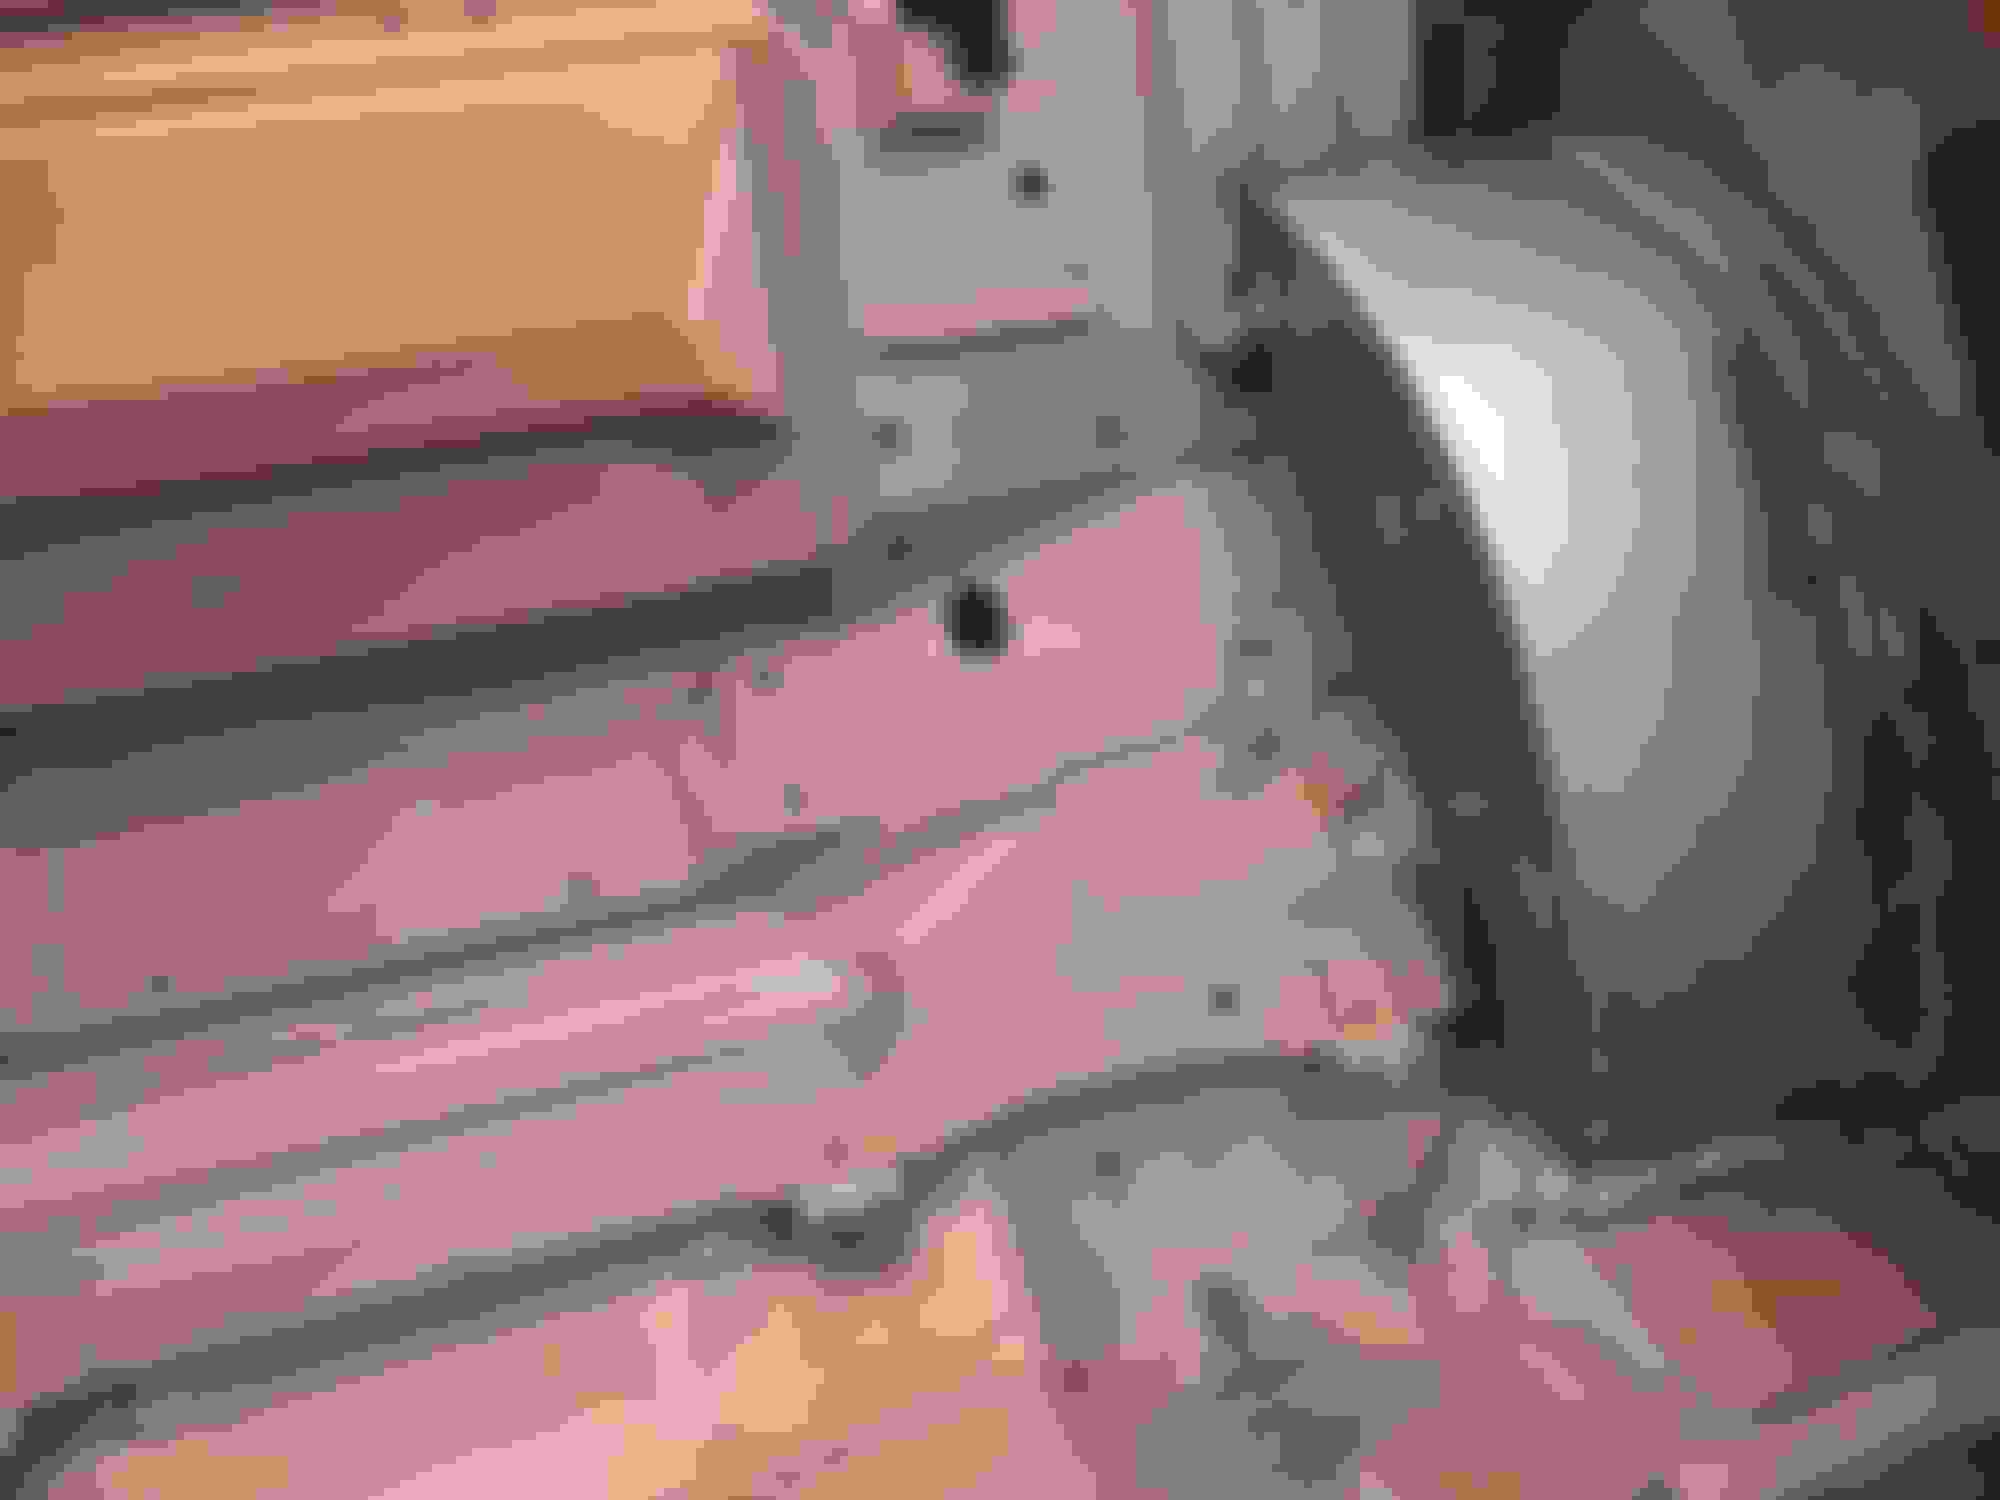
Here's a bottom / top comparo. of the before / after the mni-tub. That "U" shape, pressed into the steel has 2 holes in it, where the interior side panel screws into it. The tub extended into the car a good 6 inches and the lower screw hole is now gone.. I'm going to have to use a heat gun and "massage" / modify that side panel back into place. We'll see hs this all plays out, but I'm hoping the rear seat will help to hold the panel in place and wont look like there was much done to it....
One of my MANY projects is the DuSPEED CAI that I needed to modifty. I got it off of LS1GT...well...I bought it in May of '17. The guy before me cut off the snout because he was using a Corvette PCV system on it. This was the perfect candidate for me, as I needed to move the outlet over for my project. After deciding to go with the LS9 (and modified LS9 snout inlet), there is just NOTHING on the market like this for these cars. Either you make your own or you have it made.
Now, if this was one uniform color and not all sh_tted up in bare fiberglass, you could see the lines better. My apologies for the poor looks of this.
My plan is to use either Aluminized or Copper reflections Carbon Fiber (Composite Envisions) and skin what would be the 'air cleaner' part of it. The rest will be painted Brazen Orange, to help hide all the goings on, around nd by the radiator. The power steering reservoir is going to be mounted on the header panel (by the coolant bottle). The problem here is, I haven't finished that bracket yet. I'm not certain where the bottle or lid will end up. Rather than guess, I opted to wait until I get that bracket made. Trust me, this is going to look REALLY cool when I'm finished with it!!! Once I get the underside of the car closer to completed, will I have to figure this out a little better and get it done!
Here's what this DuSPEED looked like when I got it:
Here's a better look at my modded LS9 snout. Here you can see the weld marks better. I decided to leave it looking like this because I want people to know what sort of mods went into getting this to work together like it does.
Here are some of the pics I posted earlier, so you guys can compared them again...
Prior to cutting this off and having it welded back on, the LS9 snot had this weird upward and lateral angle to it. If I were to bolt the throttle body and intake tube, it would have hit the bottom of the hood. To remedy this, I had to come up a way to cut this off and flip it over. After a month of contemplating and doing this in my minds eye about 500 times, I came up with a line that would have worked best. I remeber this day, because I lost my black magic marker and had to use a red one. You have NO idea how many lines I drew on this part and cleaned off with brake cleaner....
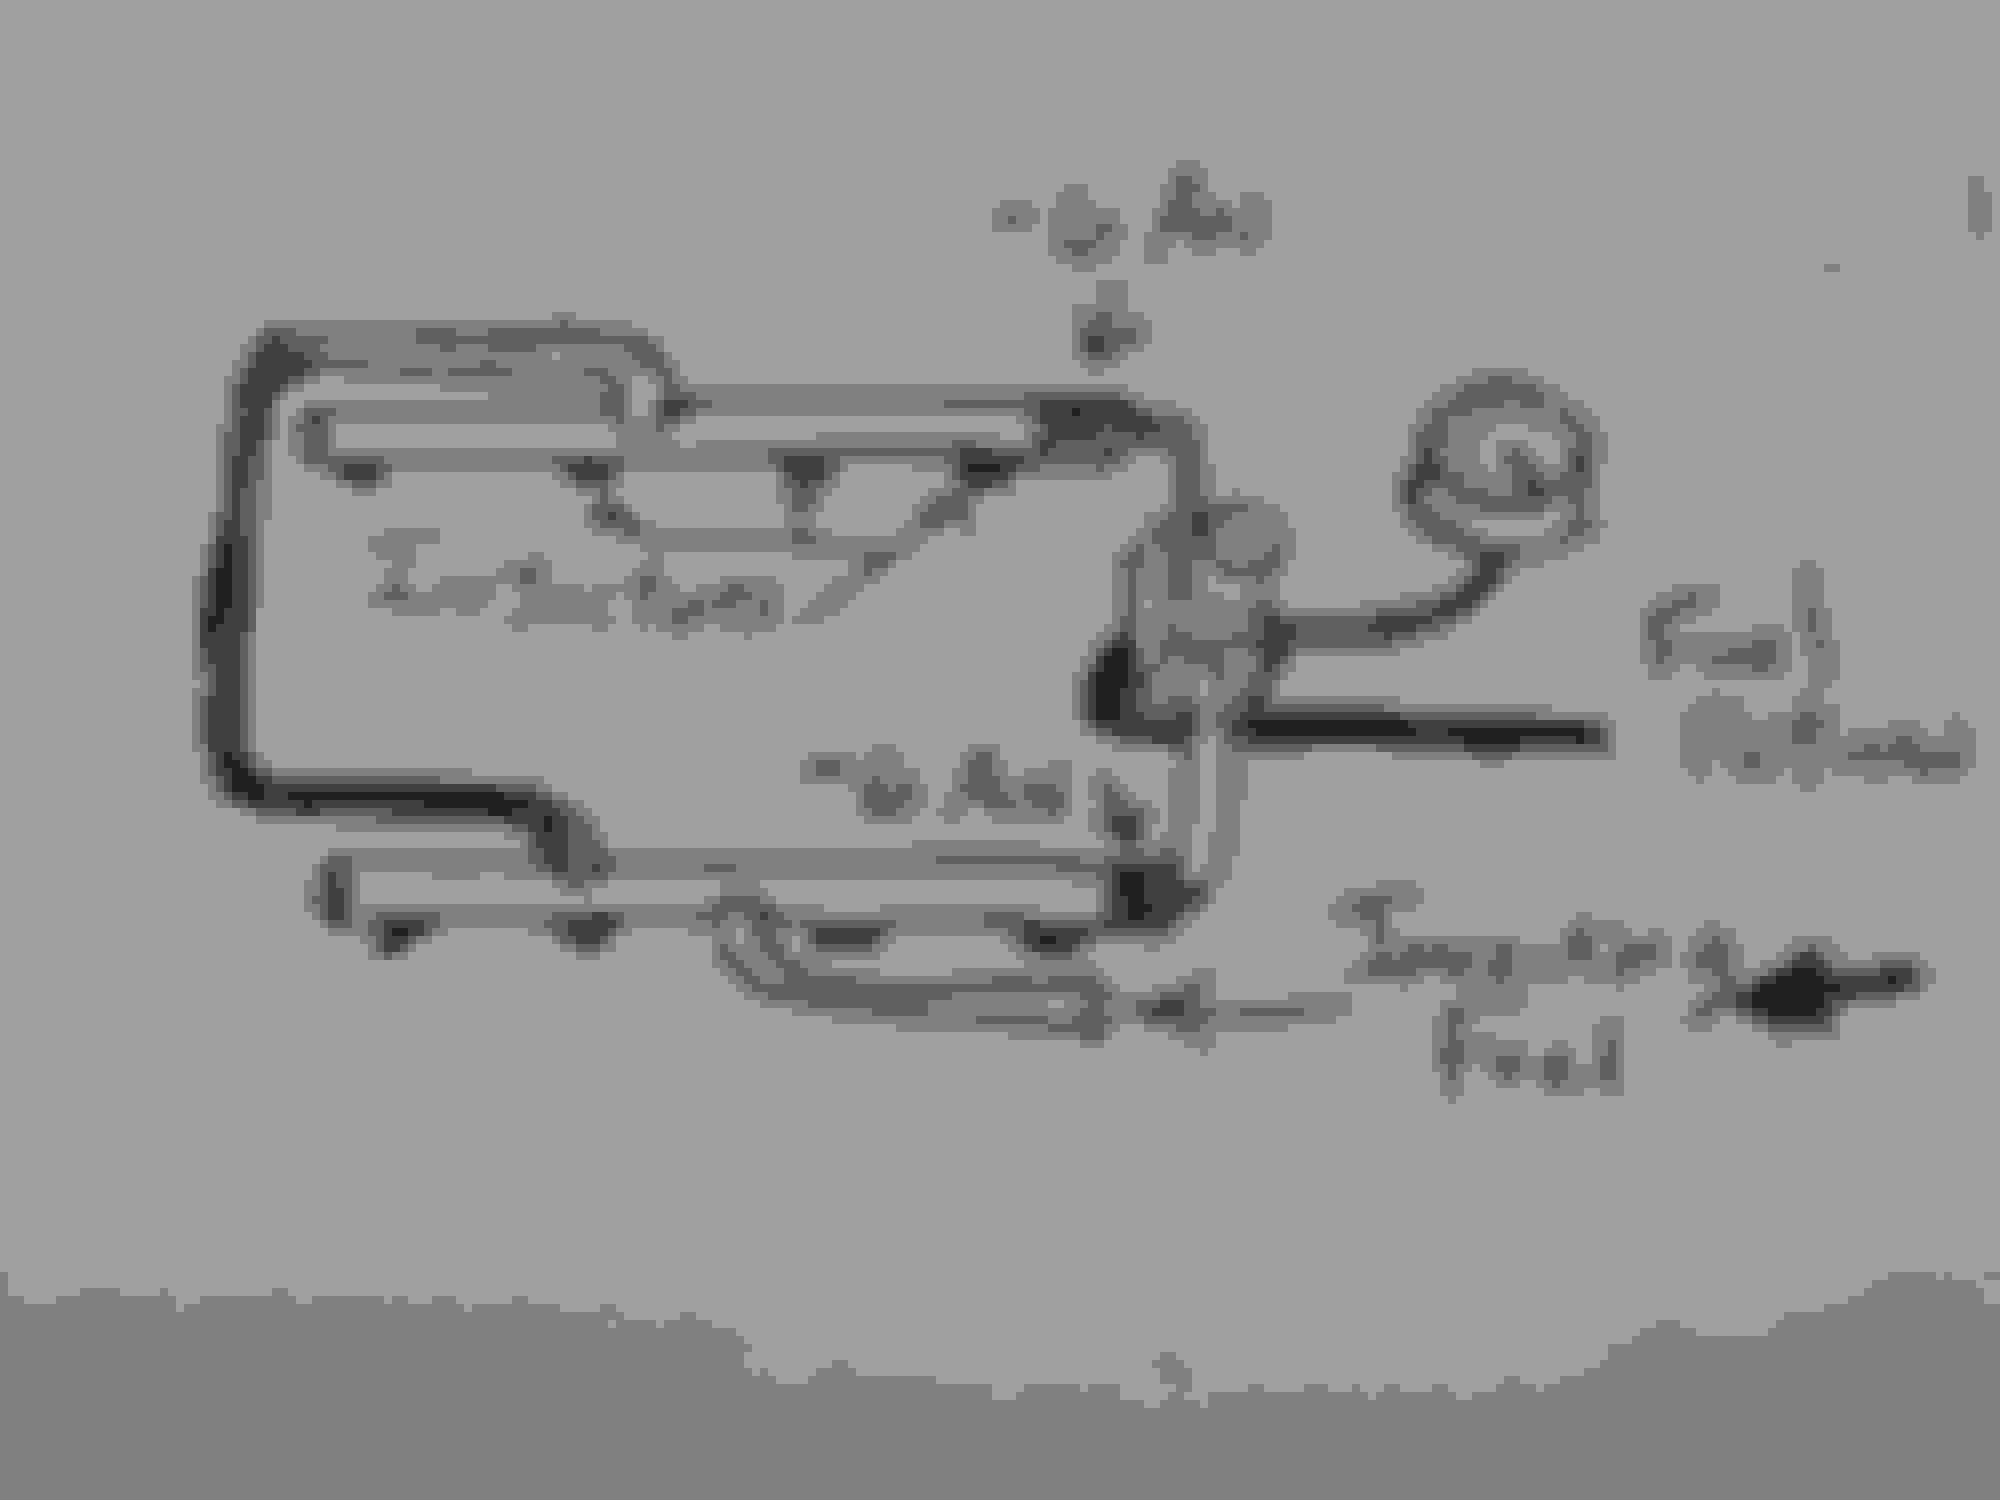
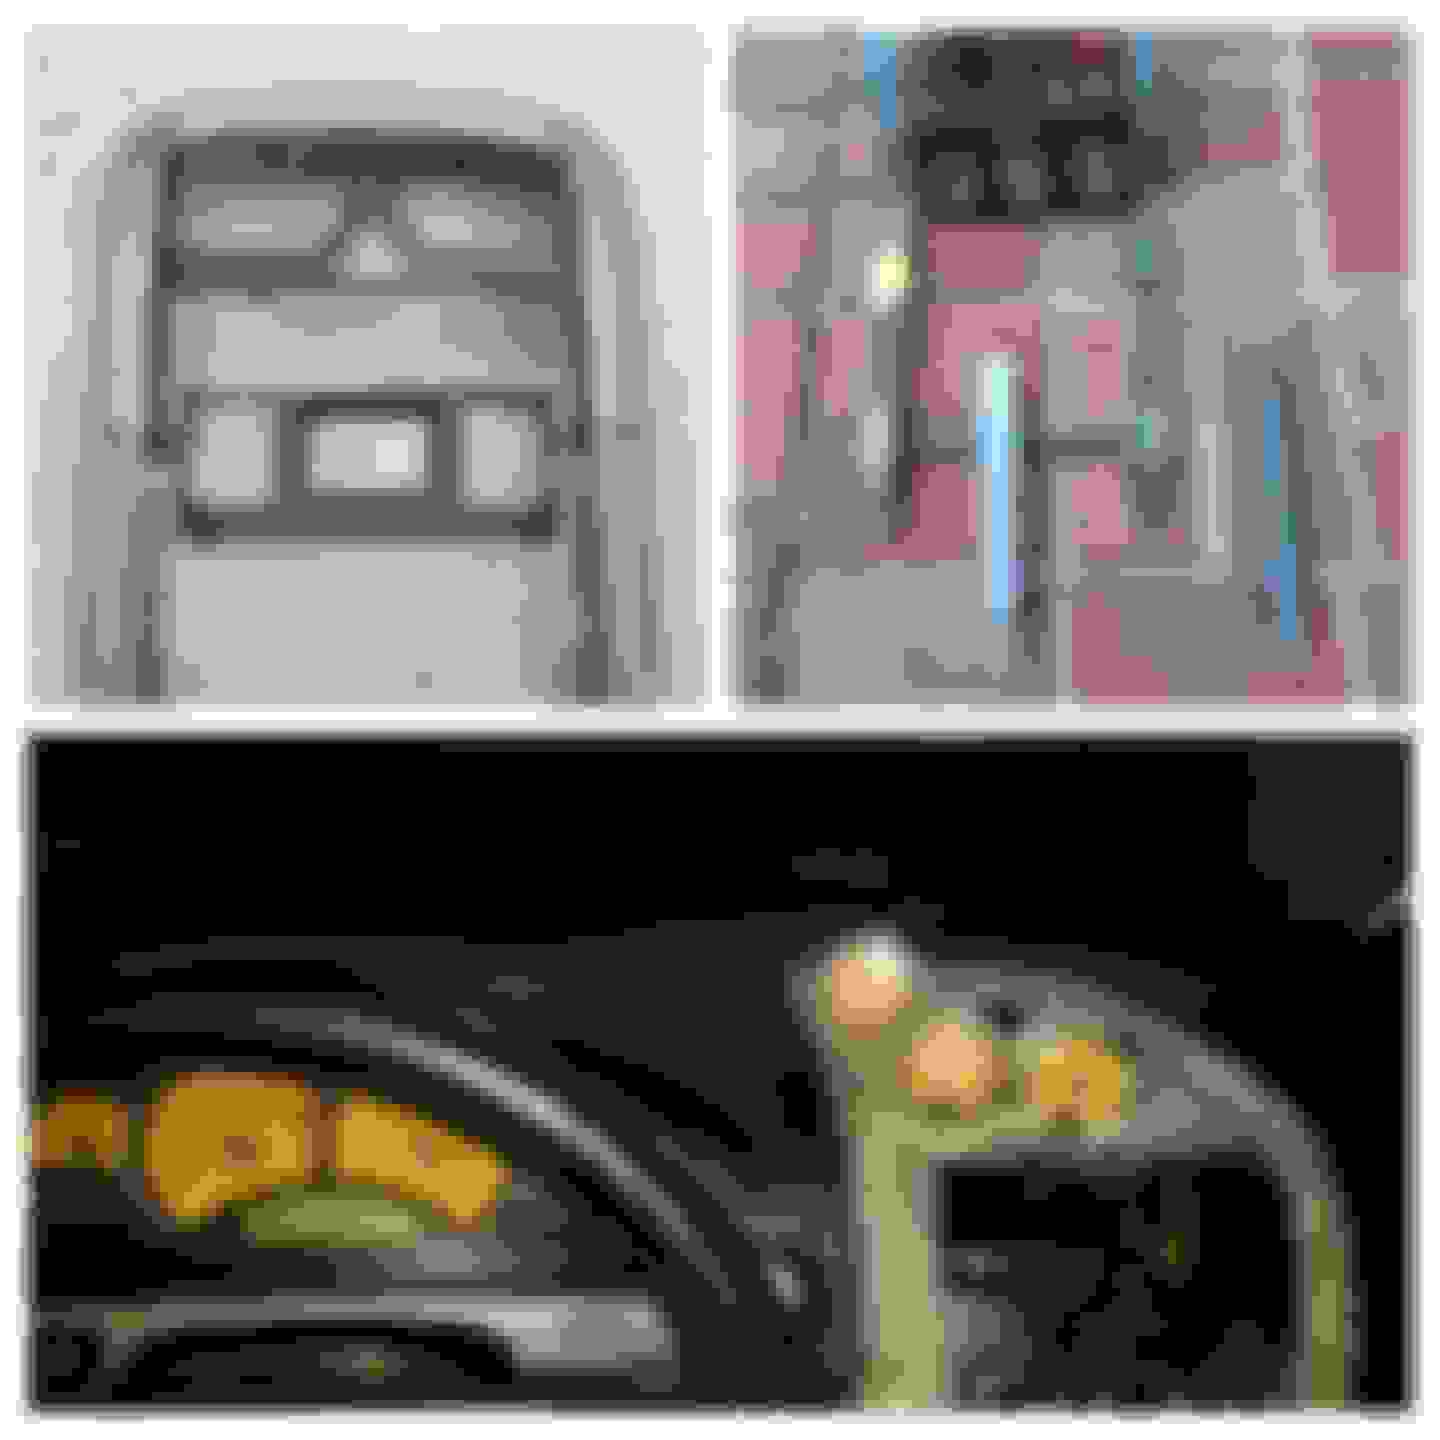
Something else you guys might think is cool. In order to tune the fuel pressure correctly, I had to install the fuel pressure regulator. However, this posed a bit of a problem, as to where to mount the fuel pressure regulator gauge...???
I thought the ideal spot was begind the supercharger, attached to the lid. Starting with scrap piece of flat iron bar, I fashioned this part using a hack saw, a torch, files and a vice. It took me around 6 hours to get this so it sat perfectly balanced in it's spot on the back side of the lid. When the gauge is set in place, it is about level with the top aspect of the lid, but does face outward. So if you're on the driver side adjusting it, it's facing directly at you. This is one of the brackets I'm REALLY proud of, and that NOBODY will ever really notice. It's a total, "one off" part.
If you were tuning the regulator, this is your view:
My schematic for the fuel pressure lines. I didn't want to lose fuel pressure at WOT and if you install the regulator before the rails, this can happen. So the regulator should go behind the rails, In order to do this on my blower, I had to (again) modify a few things.
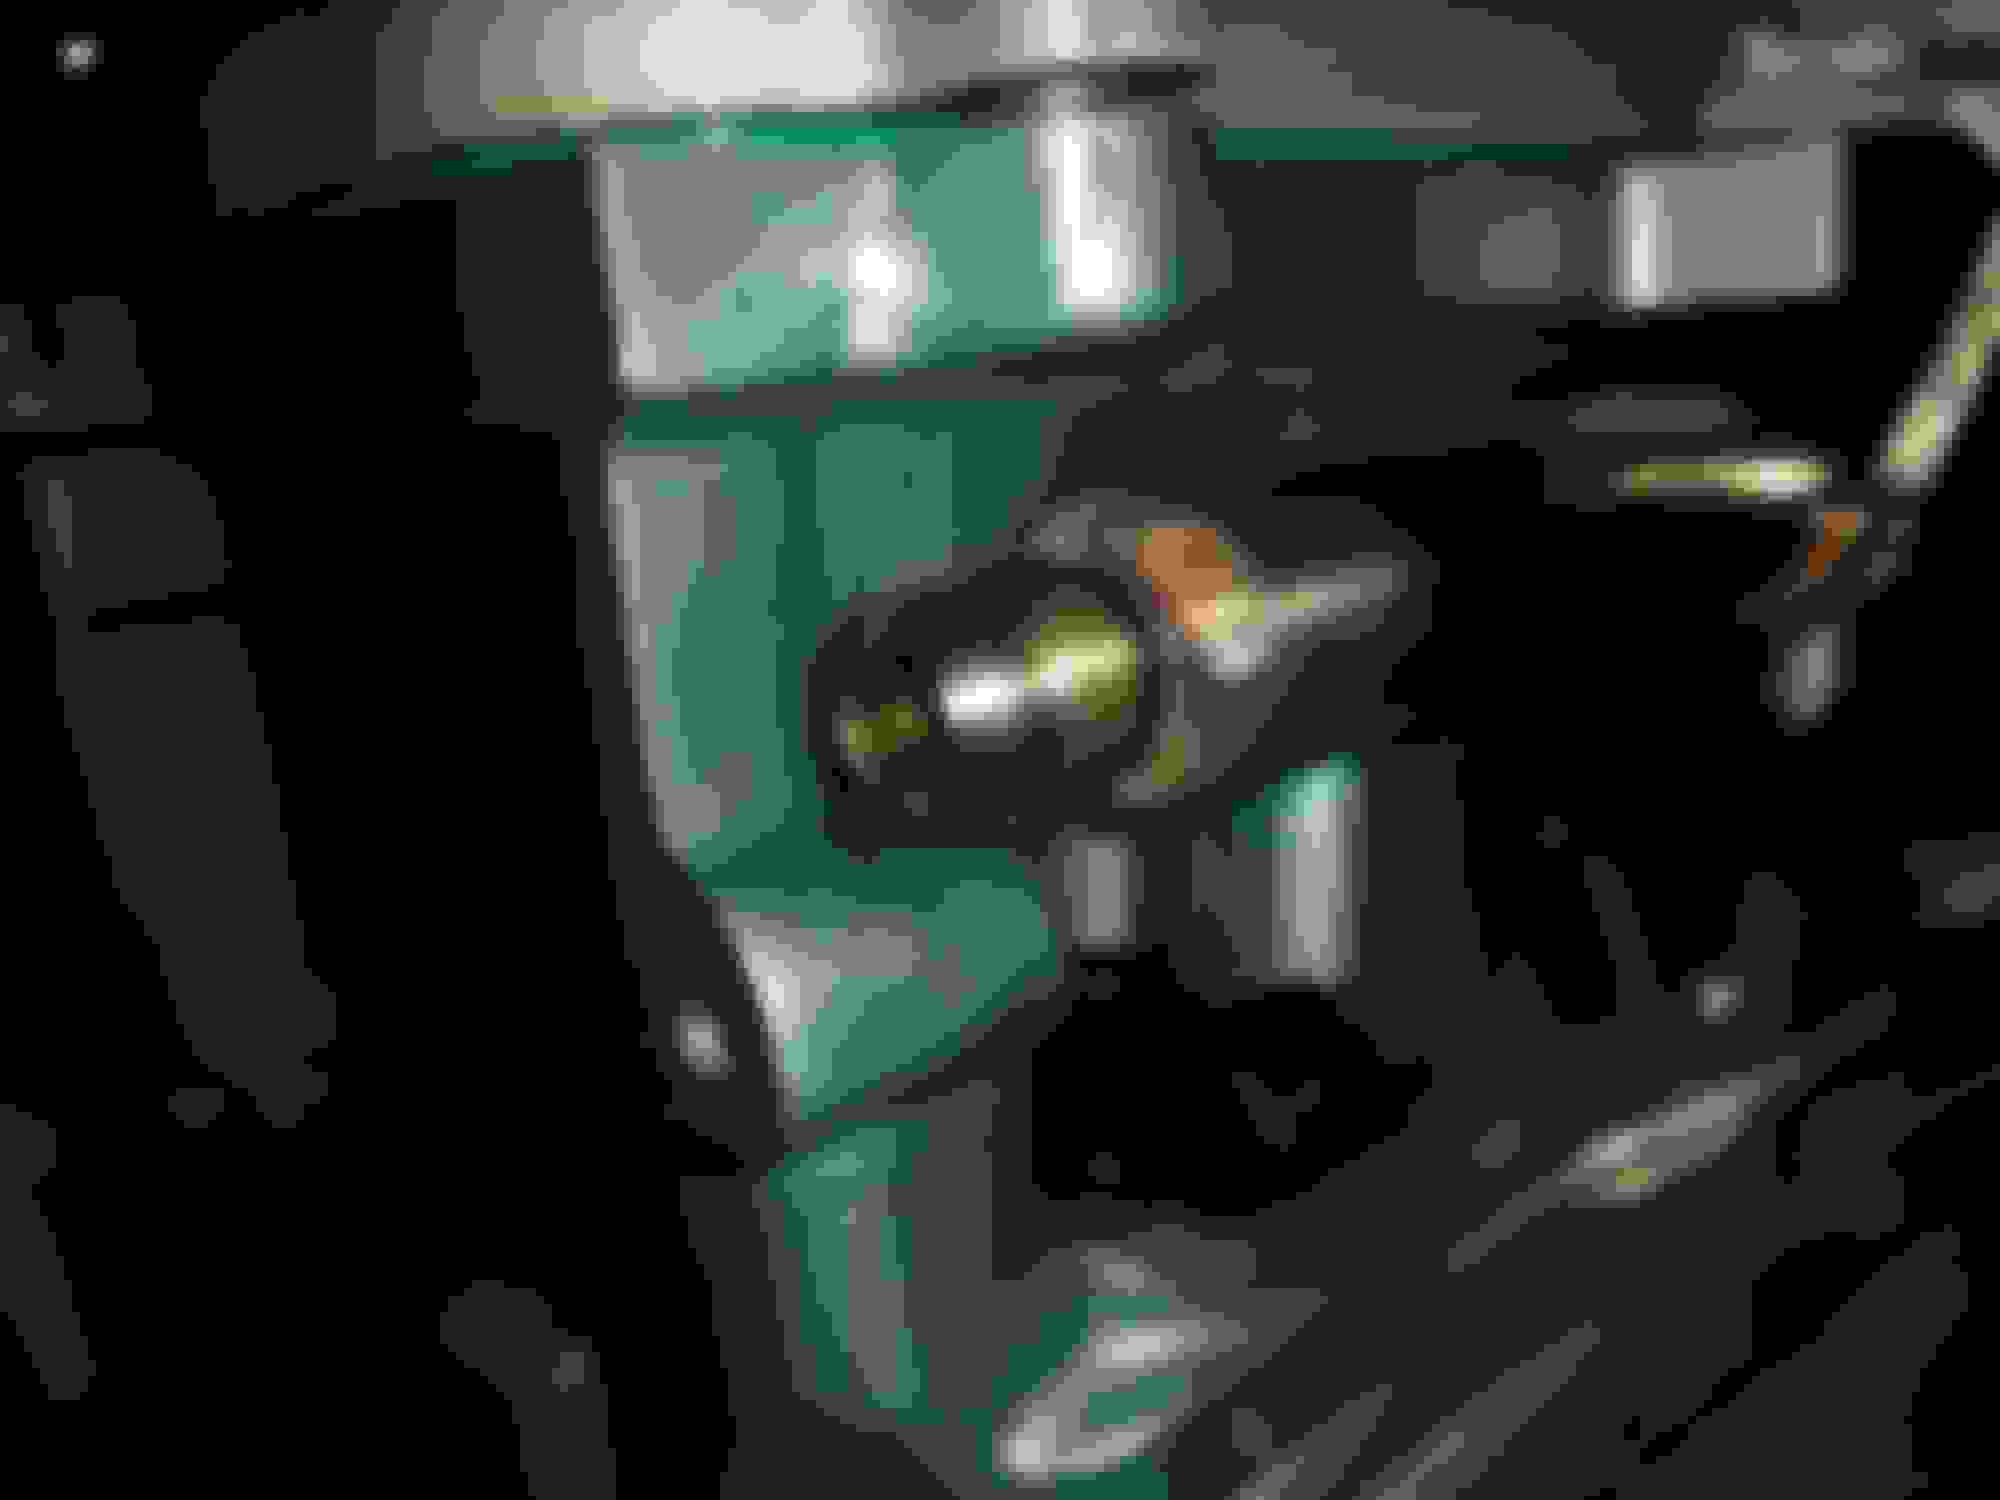
One of the obsticles in my way...this little piece of the supercharger housing is RIGHT BEHIND the fuel rail. You can see my hack saw (blurred) on top of the supercharger. That did most of the cutting. The rest was shaping using a dremel bit and sand paper.
My goal for this car is to make it look as factory as possible. I want people to see this next to another car and NOT notice the work that was done. This is a perfect example.
Over the Memorial Day weekend, I was working on the interior and interior panels. I had to cut, heat and bend the interior panels against their will...all while burning the $#!t out of my hands. I used some brake Kleen (on the backside of the plastic interior bits) to help cool them, so I could then test fit them. After about 30 tries, I finally got the side panels to fit...almost perfectly. The lower seat didn't need any modding at all, but the upper (backrest) portion required me to bend the frame a litlle. Fortunately, that only required a single try and it slid into place.
However, I had one project that I needed to wait on, because I needed some acoustic foam sponge for the rear speaker panel. There was a small dent and scracth in this speaker grille, which bothered me ALL of the time. I bought the car with this problem and since it was out, I fixed it. The de nt is hard to see, but the scratch stuck out like a sore thumb. You can also see some minor flakes in the paint. The other side had more flakes, but no scratches. This was one of those things that was like a Chinese Water Torture. Everytime I looked in the rear window, I saw this white spot on the speaker grille...and it drove me CRaZy!!
When I removed the grilles, there was some surface rust on the underside. Eventually, this would rear it's ugly head, so I took care of that with Rust-Oleum "Rust Dissolver". On surface rust, this stuff really works well. Below are the before and after the rust dissolver.
I used a small wooden roller to remove the ding and gave it a light dusting of primer...then some paint..
I am SO happy with the way the speaker panel turned out. I probably should have used a more, matte finish, but I just didn't want to see that scratch. I love the way it turned out.
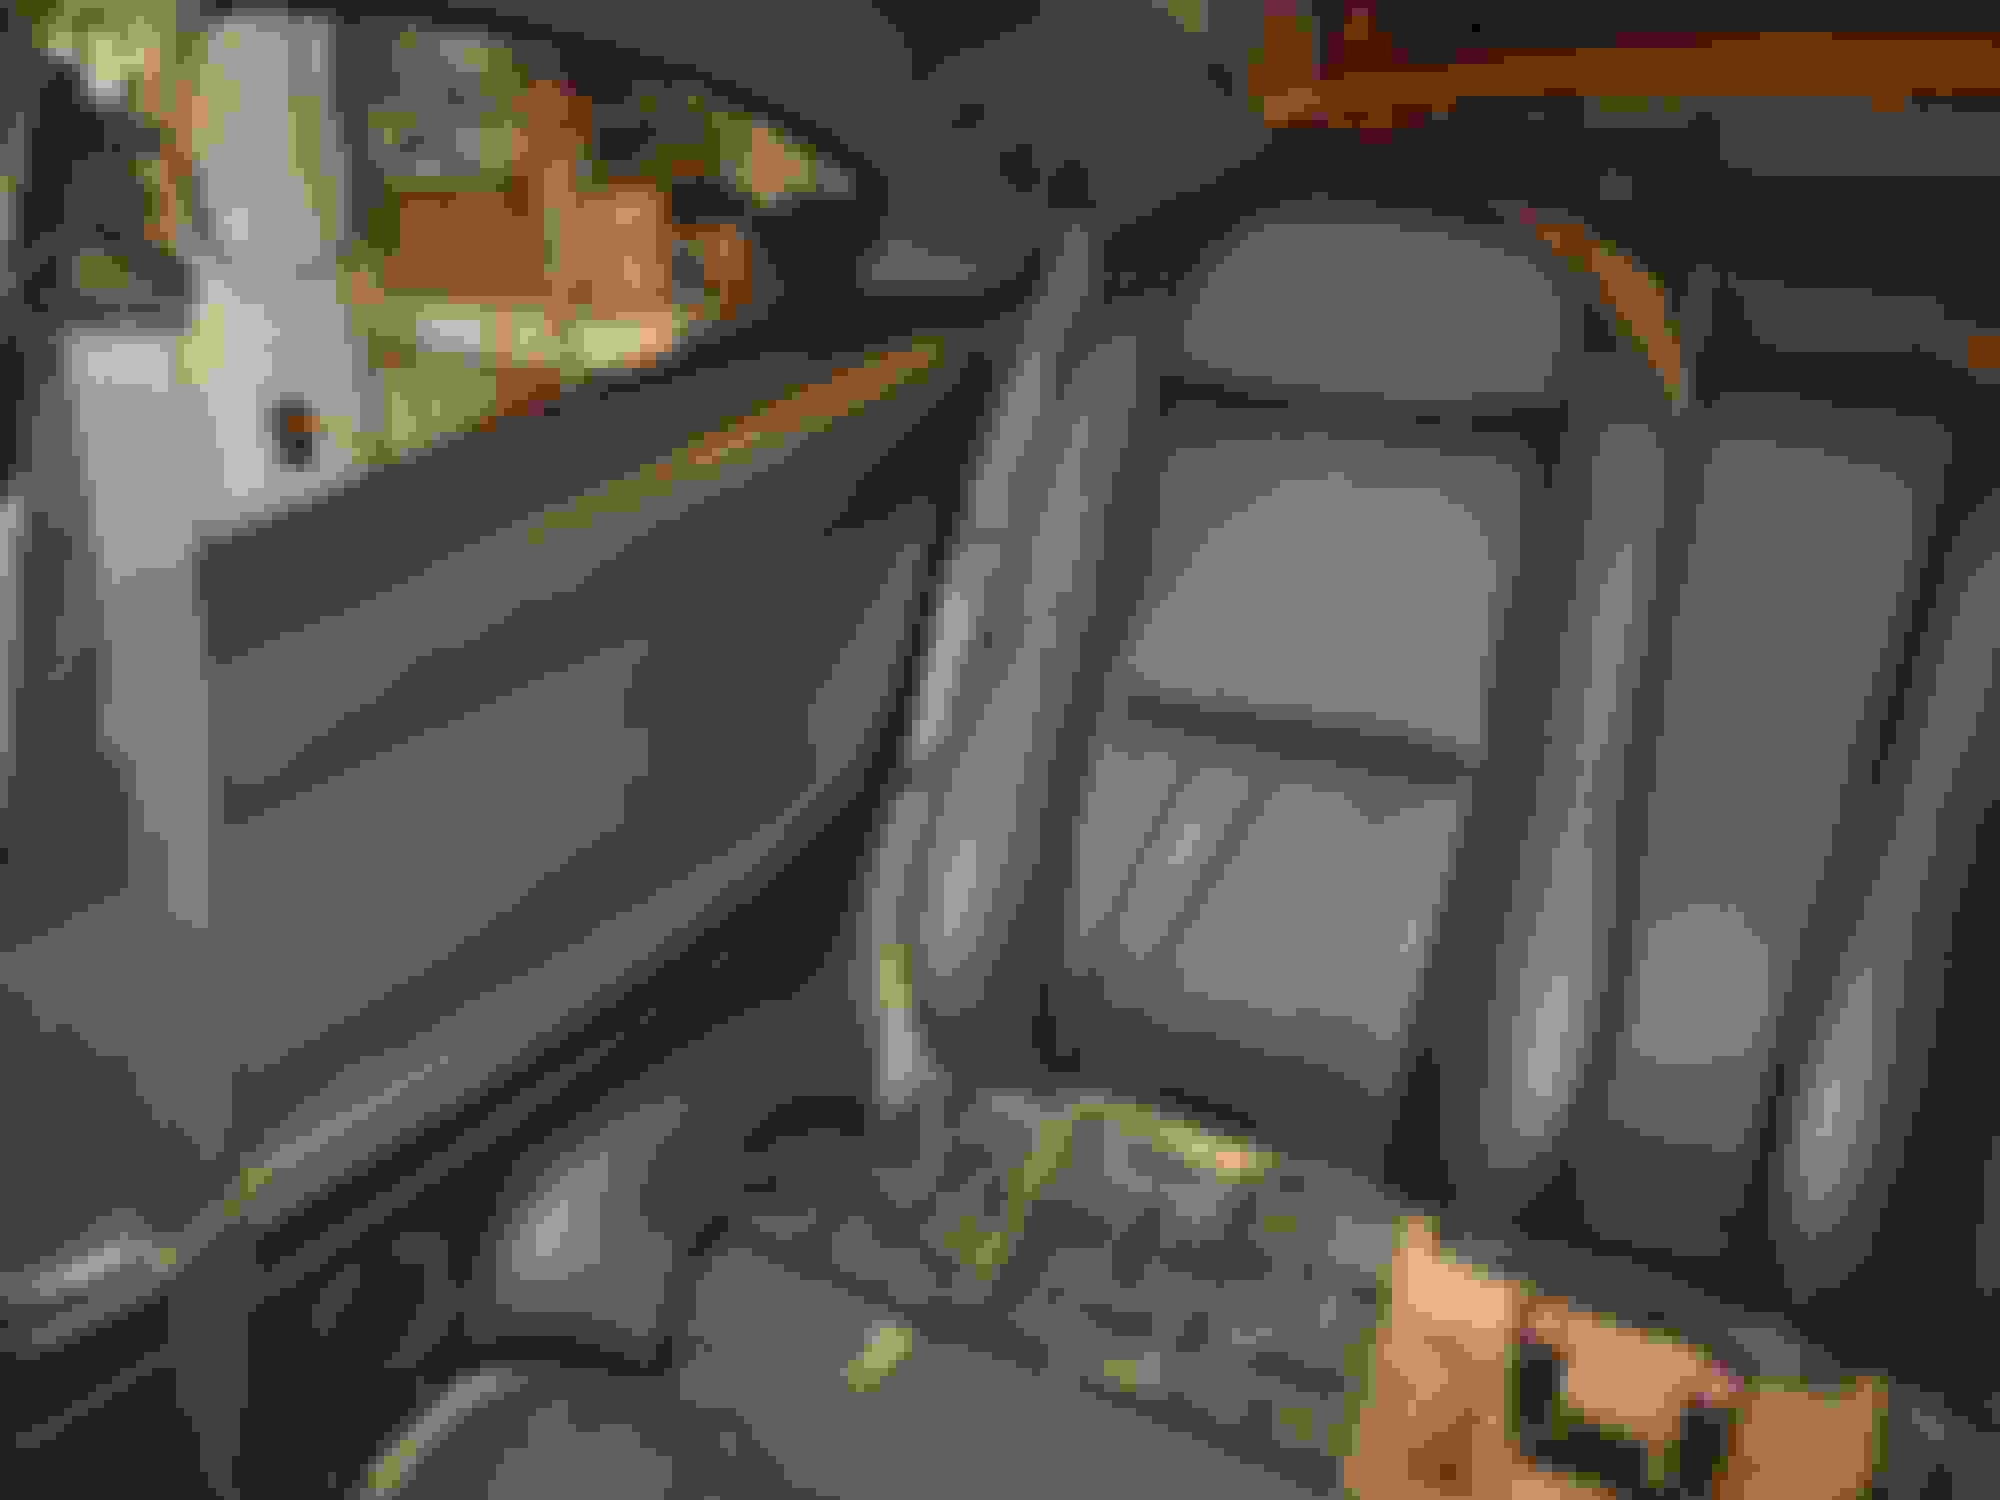
Then I reinstalled the back seat. This is the first (and only) test fit of the lower portion.
...and the upper portion after I bent the frame (side bolsters) inward about 2 inches. The only thing I'm not happy with are the wrinkles in the leather. I'm hoping that will contract on itself over time
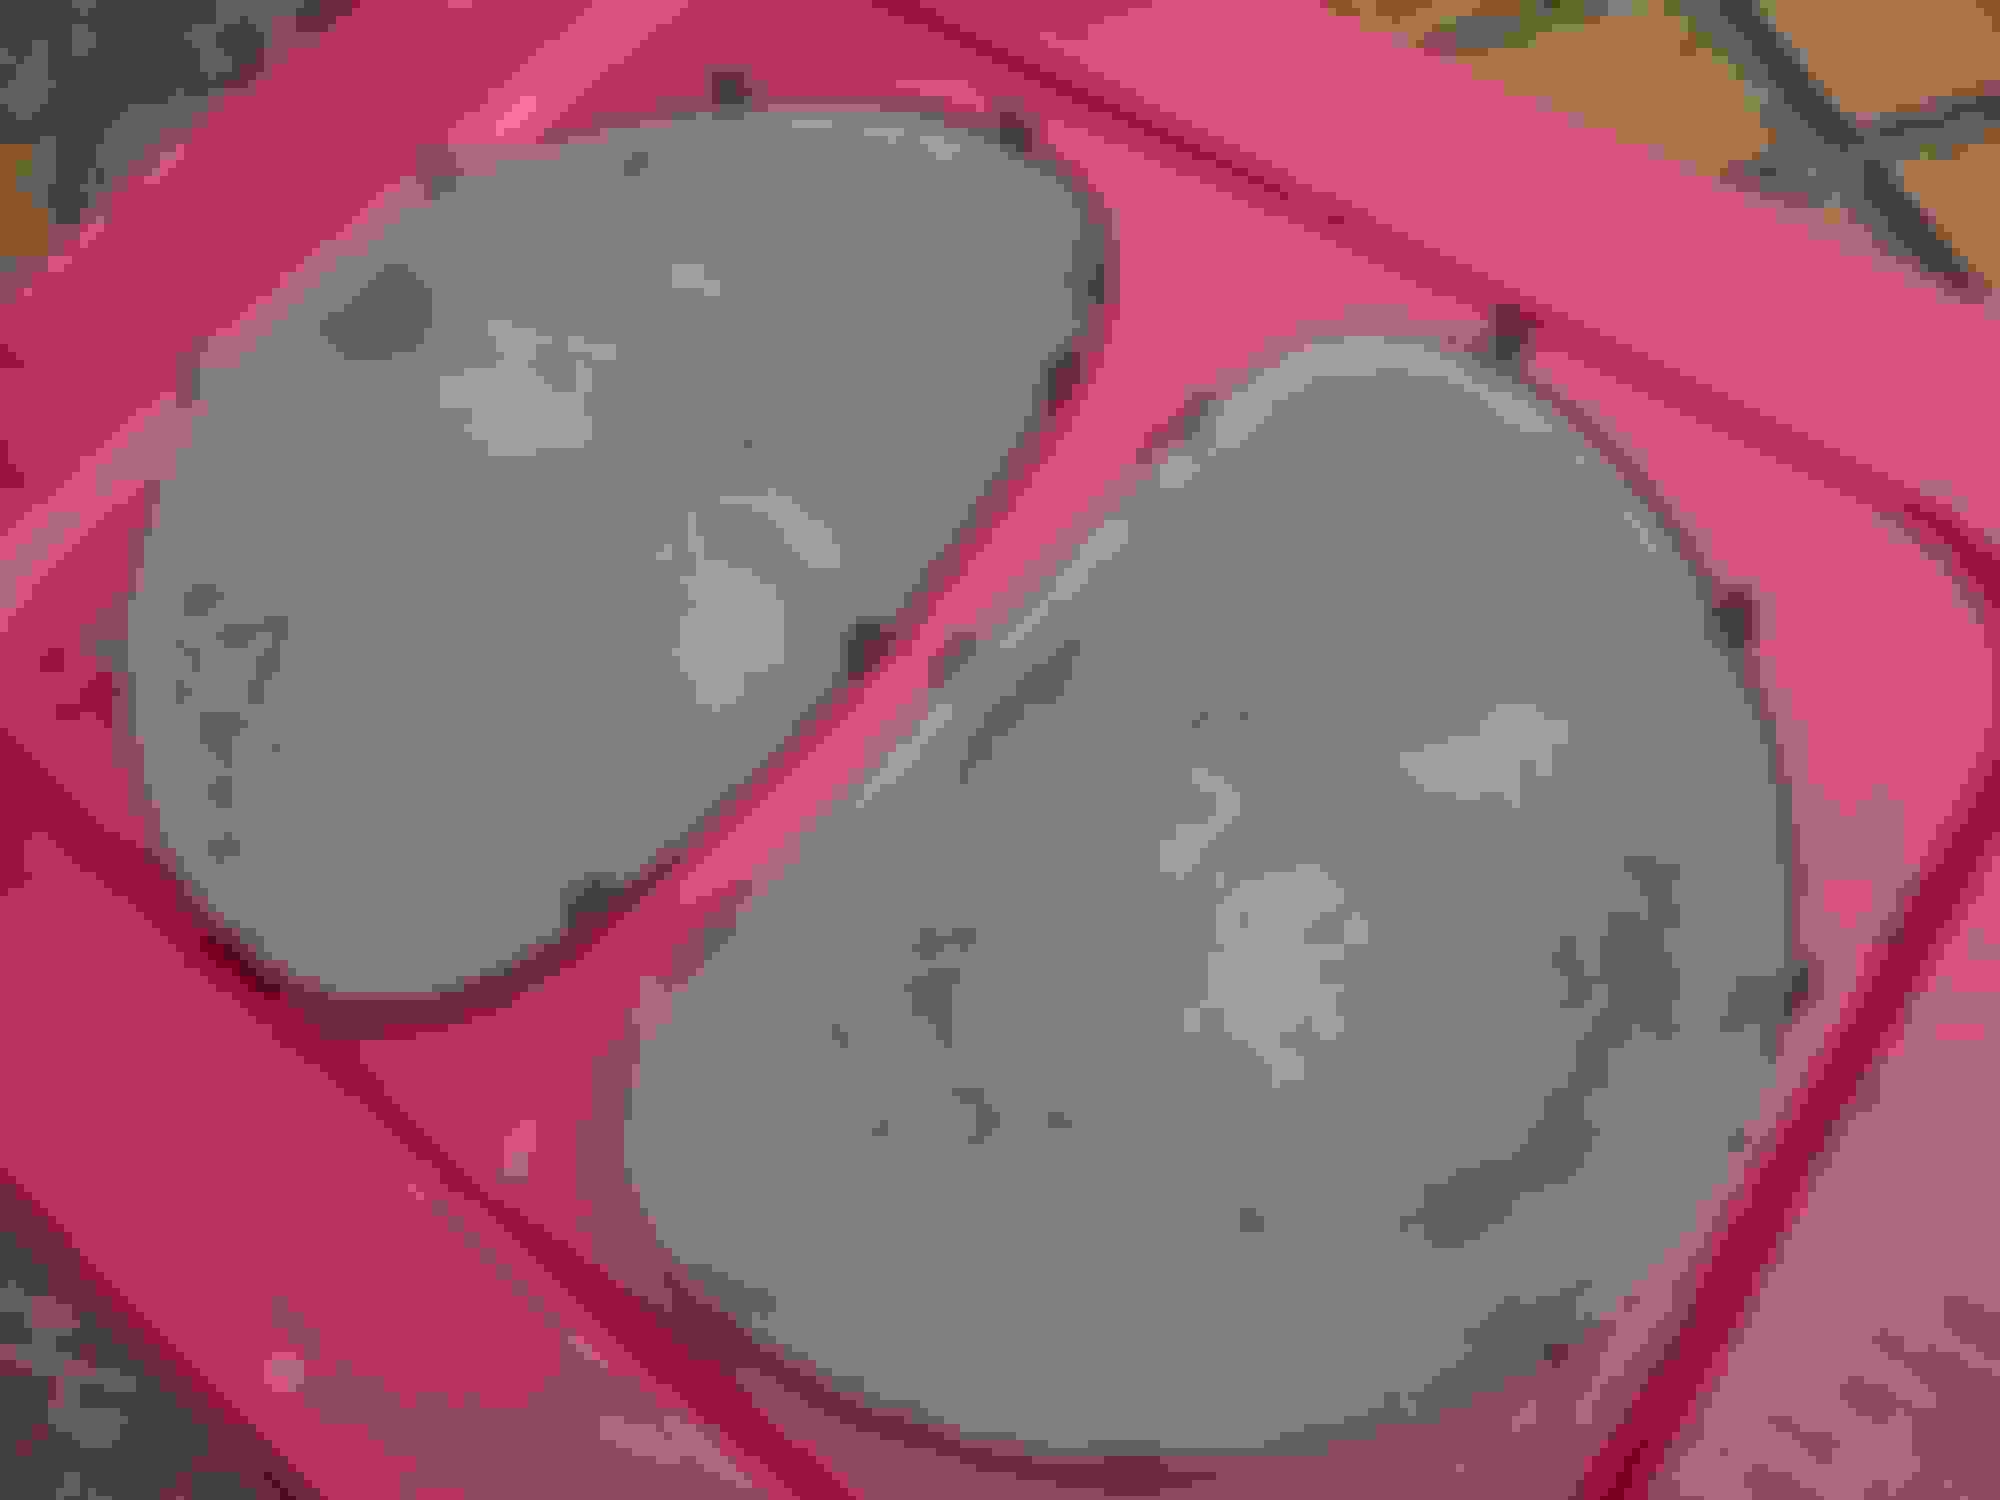
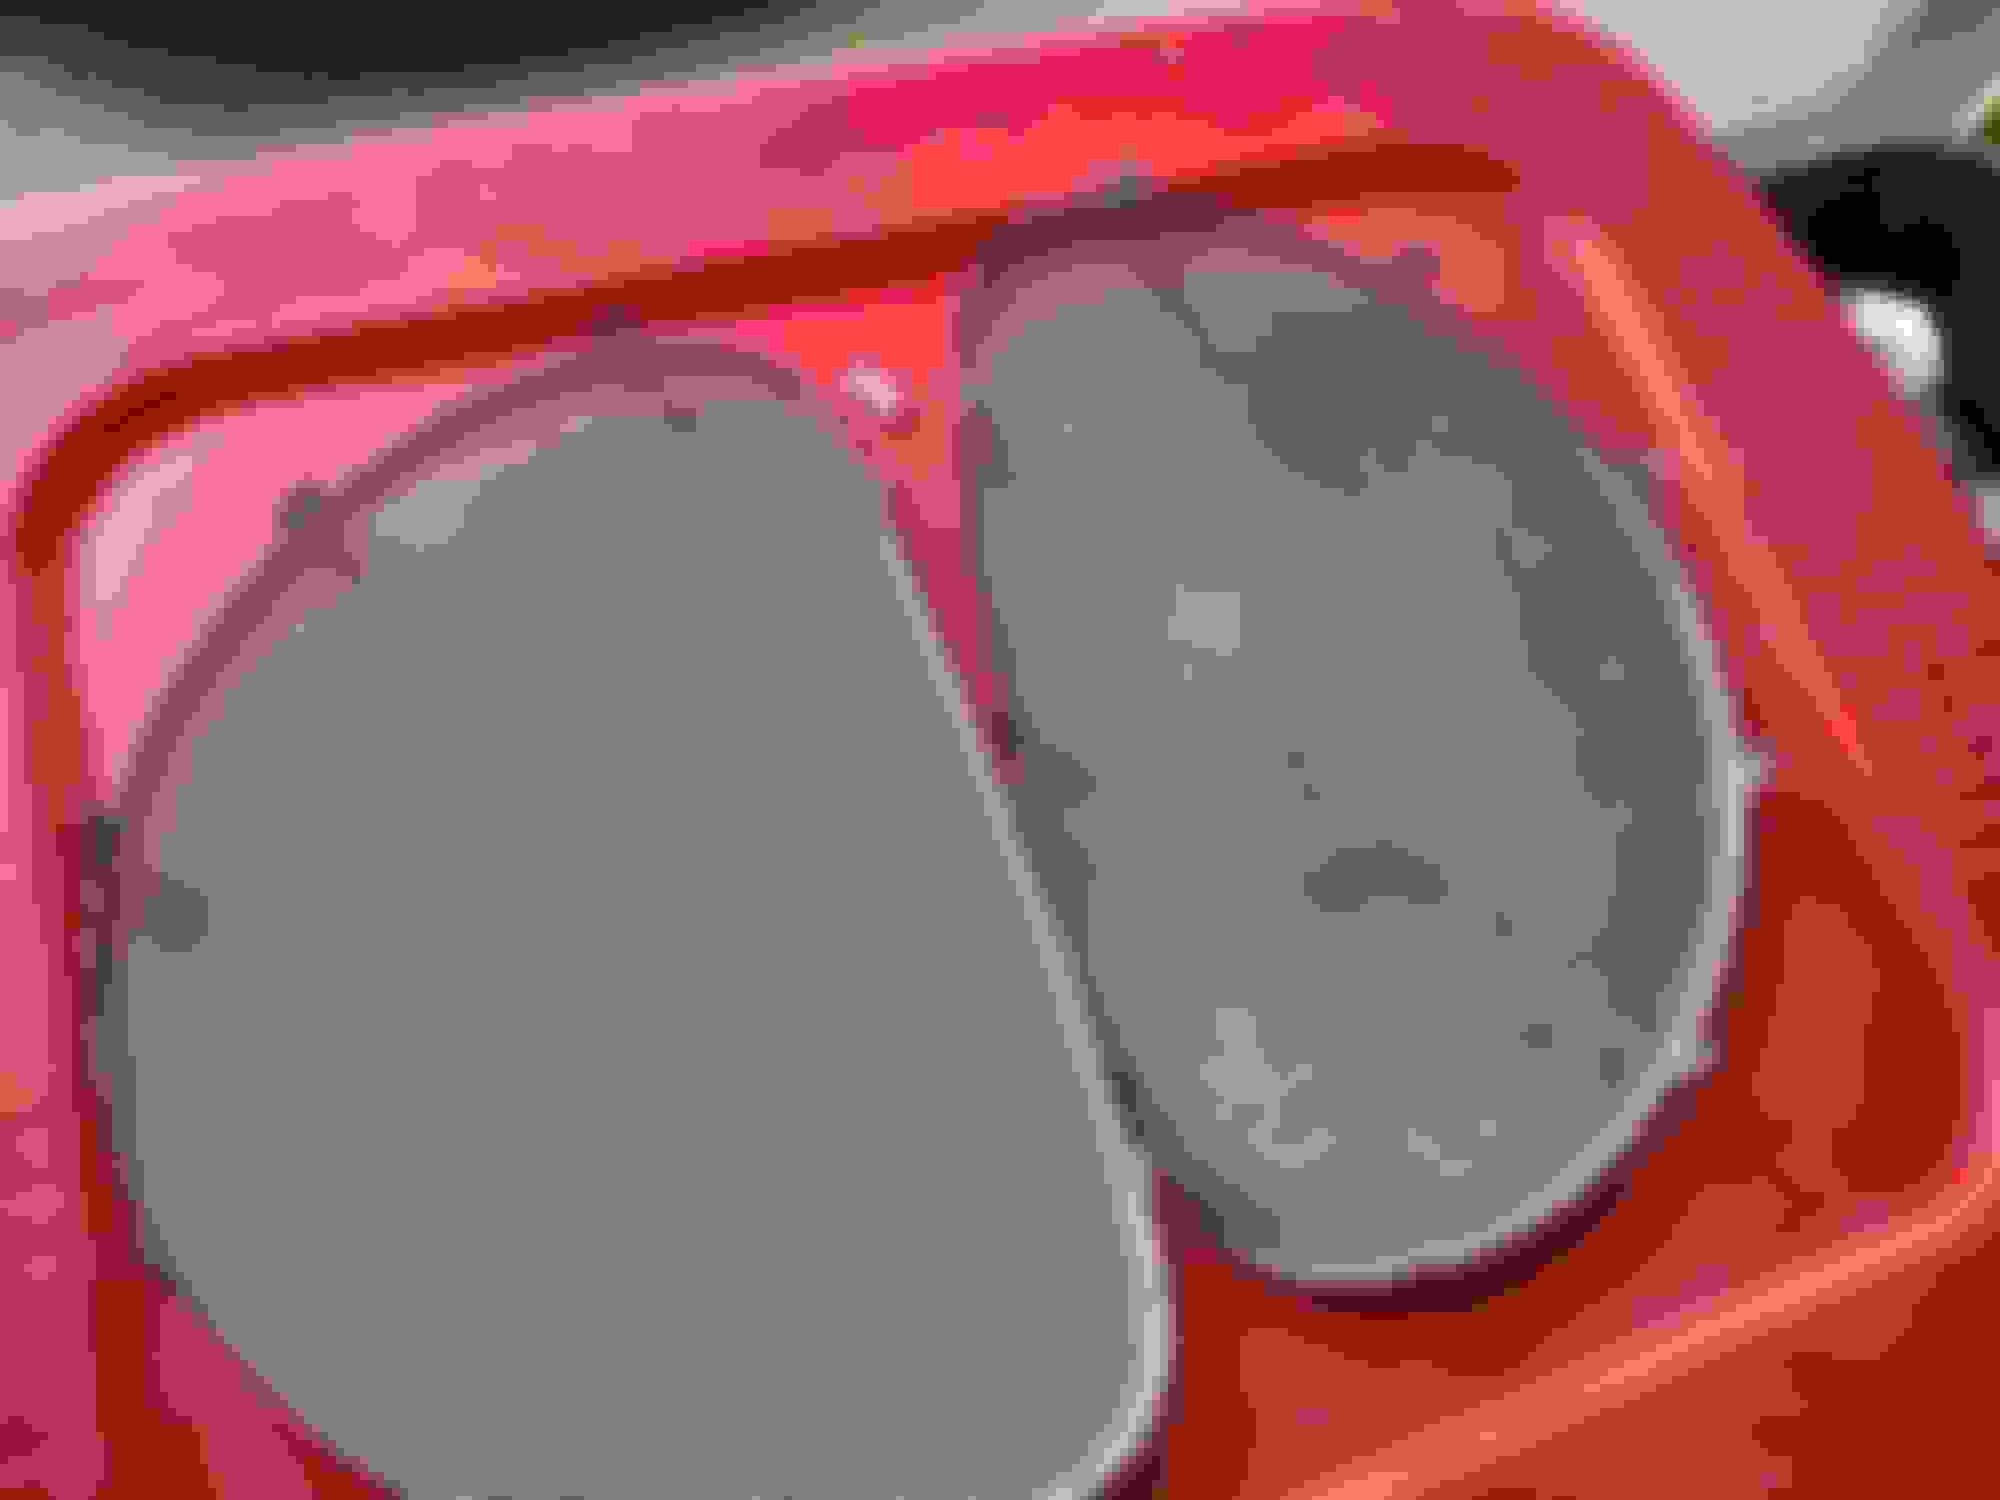
The side plastic panels were a different story all together. Since the wheel wells were brought in around 6", there was a portion of the rear interior panel that would not work. There are 2 small torx screws taht hold the centermost part of the rear panel to the car. The two screw holes are located in the "U" shaped stamp, next to the wheel wells. In the bottom picture (as a comparo), you can see how the one is now GONE. Obviously, this means the interior panel had to be modded to get it all to fit.
Below, is a TOP / BOTTOM comparo of the 2 screw holes in the "U" shaped stamp.....and WITH and WITHOUT the tubs installed.
The final test fit of the interior panels. At this point, the seatbelts were re-installed and the wire looms were replaced, speakers, tail lights and everything in the trunk was all reattached and plugged back into the wire harness.
In all, I have roughly 20 to 25 hours of work invested in the removal, repair, restoration and modifying everything for the rear seats. After all the mods, it all (literally) slipped / fell back into place...as if it was never mini-tubbed. I still have to replace the sagging headliner, but the rear seats are IN and that part of the car id DONE!
 03-30-2022, 04:02 PM


 box....
 . That's all taken care of (fingers crossed) and I can concentrate on the GTO.