When you click on links to various merchants on this site and make a purchase, this can result in this site earning a commission. Affiliate programs and affiliations include, but are not limited to, the eBay Partner Network.
Unless the Valve Body was modified, You cannot pull the Accumulator Bushing without dropping the Valve Body. This is the mod I'm talking about, You drill the roll pin hole trough the bottom of the Valve Body then use a Longer Pin. Trans-Go SK-4L60E kits come with the Pin & Drill Bit to do this.
I bought hundreds of them from a Auction that was selling out a Trans shop's inventory.
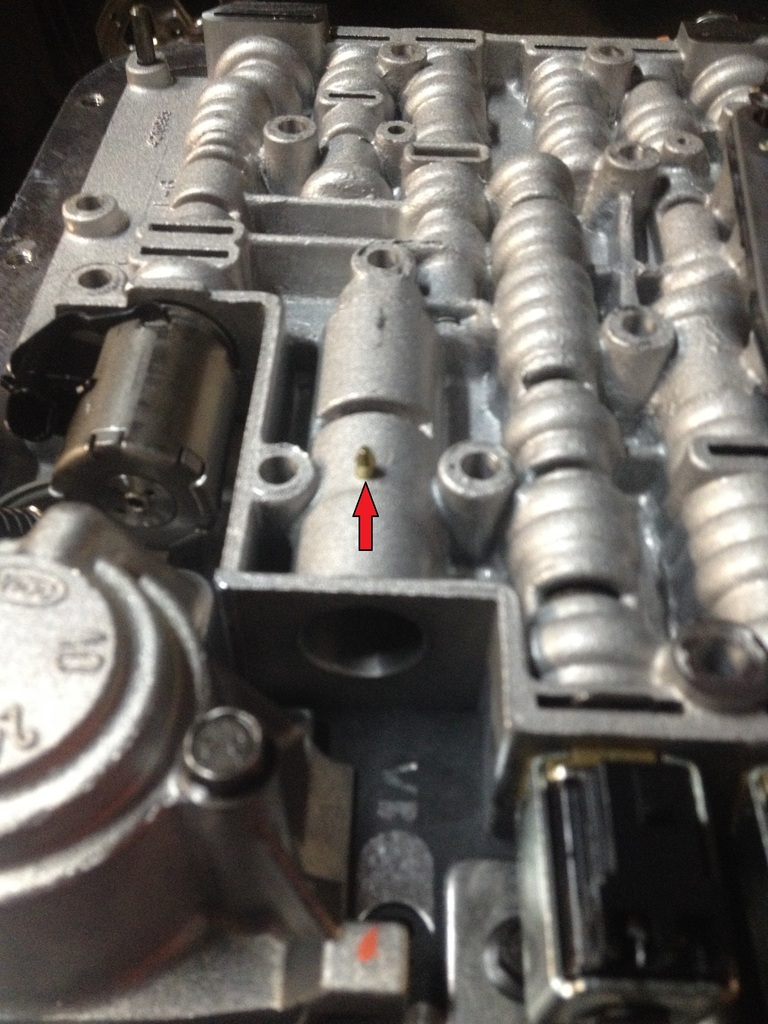
Look at the end of the Accumulator Valve Bushing, The "Horse-Shoe" should face UP with the Valve Body installed in the car.
Then look at the bottom of the Valve Body where indicated, You should see JUST the Spool, Not a LAND. If you see a Land half exposed in the window....The Accumulator Valve is in backwards.
Clinebarger, thanks for the advice. 12 Accumulator valve checks out ok. (pics below to confirm). Looking at the power flow diagram, I am still confused on how the 3rd gear circuit can be getting fluid when the computer is commanding 2nd since the 23 solenoid needs to be off for 3rd gear to be achieved. The only other thing that I can thing of is that I used the single character gaskets for the separator plate even though this is a 2000 transmission. I just looked it up and am pretty sure the only difference is that there is an additional marker hole in the gasket.
Took the 12 accumulator out, and as expected, no surprises. Piston was not stuck, or leaking, no springs broken, accumulator bore looks good. I think I'm going to drop the valve body and just go through all of it on the bench and hopefully find a shift valve installed wrong or something else thats an easy fix. Then I'll fight to put it back in the car another day.
Is this the same thing you are talking about above?
No, I was thinking the 12 accumulator sleeve (# 372)
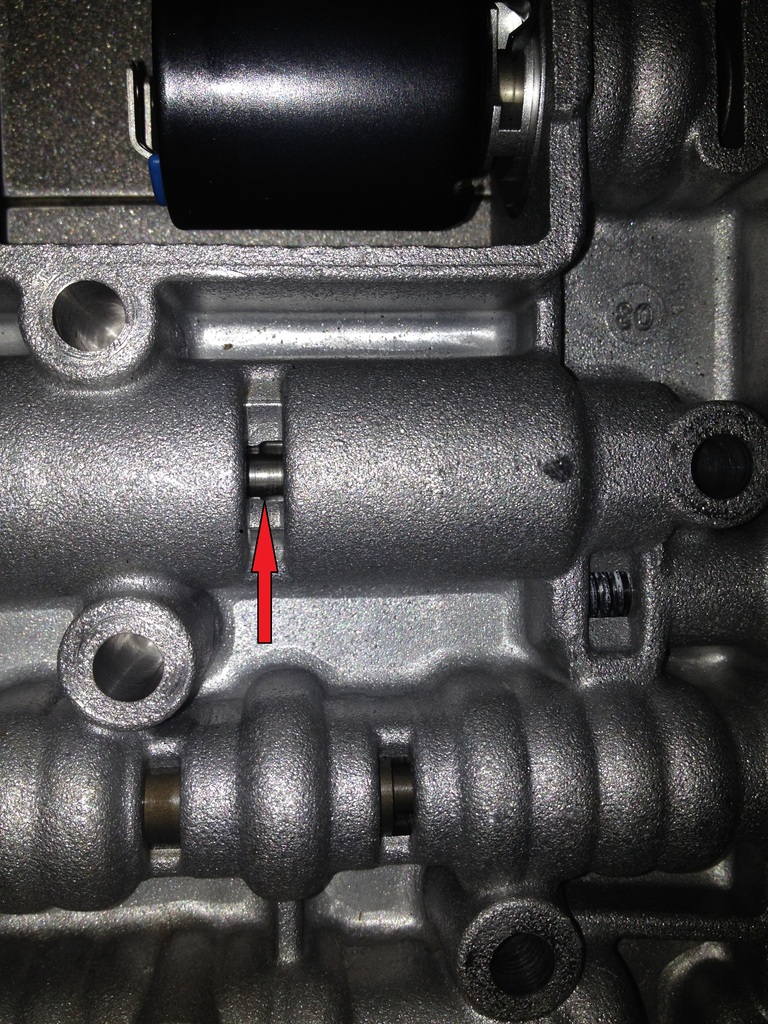
Pretty sure I found my problem. I took apart all of the valves and found that the 32 downshift valve and spring were installed backwards (#389 and 390). This would make sense that the issue was in both rebuilds since I didn't touch any of the shift valves in the 2nd rebuild.
Hard to see, but this is how it was assembled when I took it out:
The last bolt caught the edge of hole in the valve body side of the separator gasket so I need to pull the separator plate and replace the gaskets. The valve body is fully inspected and I plan on tackling the not so fun part of trying to work on my back and get everything installed correctly tomorrow.
Looks like you likely found your problem.
Sorry that I should have remembered another post where 1->2 upshift problems were caused by problems in the 3-2 downshift circuit.
Knowing that I'd be out of town the next few days I was eager to get the car finished up today. Got it all buttoned up with a new filter and fluids, and I've got 2nd gear. Can't wait to get back to the track and shave a couple of tenths off my ET now.
Glad you found the issue! Hope your 3/4 clutches are OK, I'd imagine that would cause a serious leak in the 3/4 clutch circuit.
I'm sure it out some unecessarry wear on those clutches but besides the track day, I had babied the car and based on the fluid in the pan, there was nowhere near the amount of friction material on the bottom of the pan that the other two times I blew out the 34.

 04-18-2016, 07:32 PM


 . Can't wait to get back to the track and shave a couple of tenths off my ET now.