When you click on links to various merchants on this site and make a purchase, this can result in this site earning a commission. Affiliate programs and affiliations include, but are not limited to, the eBay Partner Network.
looks like my buddy who has a mustang cobra obsession. all of the are blown up or in pieces. lol. looks like a fine place to do business. you are making very nice progress sir.
looks like my buddy who has a mustang cobra obsession. all of the are blown up or in pieces. lol. looks like a fine place to do business. you are making very nice progress sir.
Thanks! I was born into a Mustang family and had plenty of my own, including a 2004 Cobra about 5 years ago. So it's a little like being back at home.
Originally Posted by BudRacing
ugh, I would love to "borrow" a lift for a day. The rear control arms are a bitch to get to on their own when you're on the ground.
One would think this would be a service offered but I haven't seen/heard of it. I suppose insurance reasons and then the very real risk that you don't get the vehicle back together in time and get in the way of real business.
I've spent most of the week after work wiring up an alarm system as my contribution and now should be able to actually get to work!
Made progress on cradle bushings last night. Bottoms slid in by hand; tops were not going the same route(tight). Instructions recommend that a C-clamp is helpful to get the new stuff in but I already had their tool in front of me. I just pumped the lever with my thumb(without the handle/bar) to make sure I wasn't applying much pressure.
I got a little lazy and BFH'd the spare tire tub a little to get the passenger control arm bolt out without dropping the cradle all the way.. Meh.
Getting the control arm bushings out was starting to look like a bit of a chore and then I had an epiphany: hole saw in a drill press. It still took maybe 5 minutes per bushing but it turned the job into a "sit on my a$$, drink beer, and let the machine do the work" kind of affair. Then light touch with a hackzall(Milwaukee one-handed sawzall I *love*) and it was done. Hopefully front upper/lower control arm bushings tomorrow or Monday.
I'll be doing the same soon enough. Just need a weekend where I won't need my car for two days so I'm not so pressed to get the entire rear dropped out and reassembled on the floor in a day.
Man that makes it look difficult. Maybe I was lucky but the RUCA came out easy. I just hit them with a ball pein and they came out. The fronts are a different story.
Man that makes it look difficult. Maybe I was lucky but the RUCA came out easy. I just hit them with a ball pein and they came out. The fronts are a different story.
Everything on mine was in good shape. Almost felt silly changing it all out; especially since it made the bushings that much harder to remove. Like I should have sold the car and bought one that was already all ragged out. But really with the drill press I got to sit and let the weight of my arm do the work.
I'll be doing the same soon enough. Just need a weekend where I won't need my car for two days so I'm not so pressed to get the entire rear dropped out and reassembled on the floor in a day.
I never dropped the cradle fully; it was always hanging by either the front or rear mounts. I had considered pulling it completely but then the cradle flopping around while I went to town with the hole saws to cut the bushing flanges off told me to leave it in. Ok so actually the guys at CS told me that. But I get a little credit for listening!
Also having something for the tool/frame/jack to hang from is good, too. It is SURPRISINGLY HEAVY.
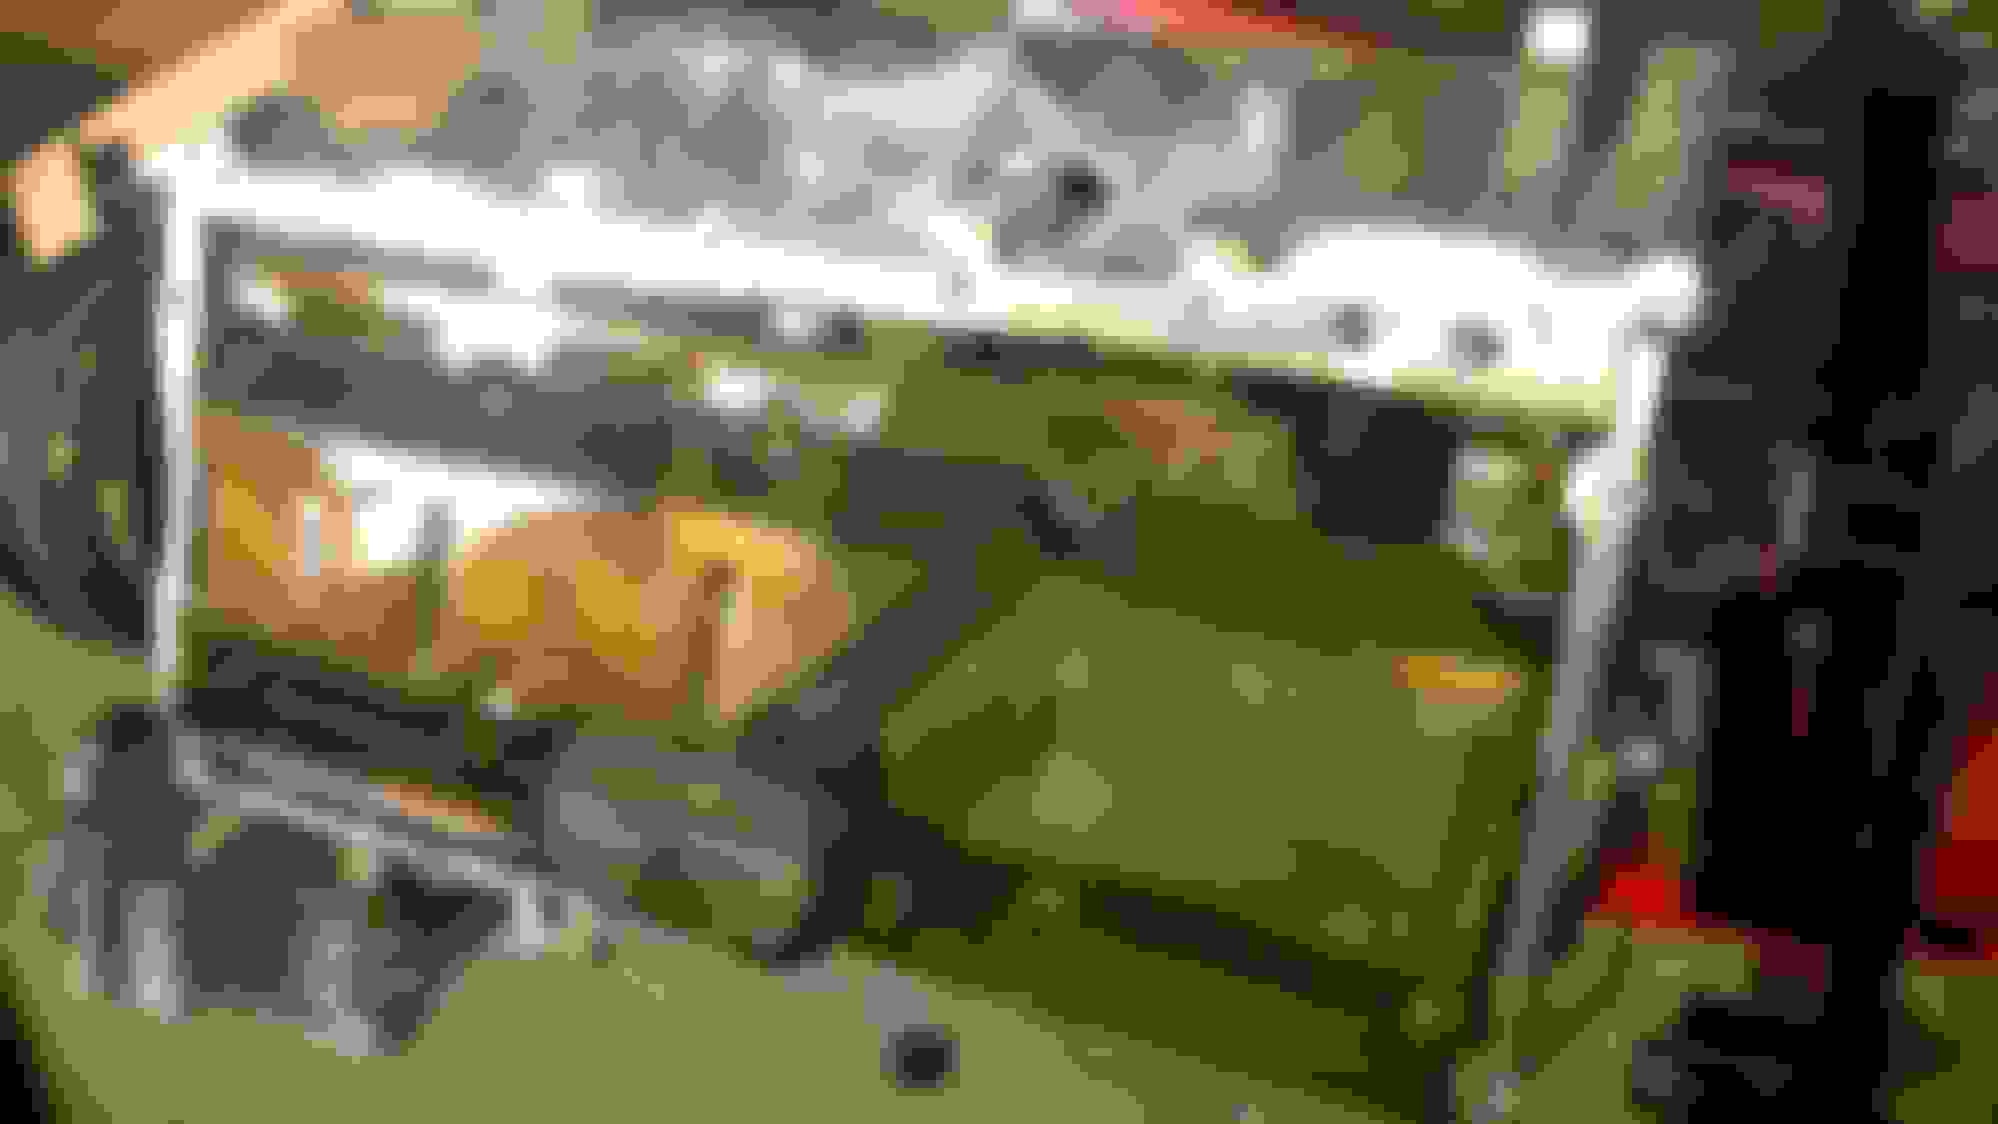
Coilovers, Swift springs and thrust sheets, rear pin mounts, CS cradle, RUCA bushings and toe rods installed...back on all fours so I can focus on building the rear and the engine. Lucky me I noticed that I'll get to disassemble the front again to flip the grease fittings around..so I decided to leave it all hand-tight, push it in the back of the shop, take some long relaxing breaths(and beers!) while putting the rest together, and revisit the entire setup with a fresh head when I have the patience to properly work a torque wrench.
Mercier, looking good. It's been a while since I've seen a brand-new set of KWs. Unless you've already put weight on the wheels and adjusted the coilovers to your liking, you might want to spin those front coilovers down a tad. IIRC, there should be 62-65mm of thread below the purple adjustment rings.
Mercier, looking good. It's been a while since I've seen a brand-new set of KWs. Unless you've already put weight on the wheels and adjusted the coilovers to your liking, you might want to spin those front coilovers down a tad. IIRC, there should be 62-65mm of thread below the purple adjustment rings.
Thanks, man. These will need all kinds of adjustment. The springs fit so tight that I wanted to put some weight on it to seat everything. Another factor was the stainless shims for the thrust sheets..had to Dremel the insides for quite a while to increase the ID slightly to fit. The polymer part stretched but the stainless was a tight fit as well and I think needed vehicle weight to ensure they really sit flat.
I'll be taking some measurements in the next week and figuring out exactly where to adjust them to.
Ok so after MANY dumbass, gotcha, and aha! moments, I am now a half-*** accomplished gear monkey. I thought I had a real nice gasket for the 8.8 but apparently all I had was what came in the FMS install kit. Pretty thick but still basically cardboard. I decided on RTV on both sides. Had studs I bought for it and cinched those down to get all the glue setting and will soon remove those and use longer bolts for the CS adapter bracket.
Not the best or worst pattern I've seen but at this point I want it together and can change gears, bearings, etc. in $200 and 2 hours so I'm just OVER it. If it whines I'll just tell them I have a blower.
Pinion preload @ 20 and backlash @ .009" so I'm going to call my first gear install a semi-success.
Thats one great looking rear end I really need to start putting together an 8.8. Love the Kooks, I wish that I wouldnt have wrapped my B&B's, i know...i know no need to flame me for wrapping them, hind sight is 20/20.
And the ladies at the gym haven't said a thing. Tsk.
I like the look of fresh wrap but my experience hasn't been good with miles. Hoping I can clear some of the cloudiness on the finish with some polish. But still pretty nice out of the box.
Got the transmission, bell, clutch, flywheel separated and the short block on a stand by itself. Time to clean up and freshen up. Stock clutch truly is an odd design. Is the flywheel/assembly supposed to have a lot of rotation in it?
Well, we're past the point of no return on the engine. And she's no virgin. Someone else has been under that skirt...even if just to try to fix a slow rear pan leak. Who knows. Underside of windage tray seems clean as does the pan...couple soft items in the screen. Blue o-ring.
And there is a shoe in one of the cylinders. Should pick up a few HP just correcting that. Have some cleaning to do on the pistons but pending mics and bore gauges tomorrow, I think this looks like a good candidate for quick refresh and go.
Lifters are a little more "streaky" than I've seen on the last LS2 I pulled apart but not rough at all. Left my puller at home so we'll get the cam out and see how it looks tomorrow or so.
 05-24-2016, 12:18 PM


 I really need to start putting together an 8.8. Love the Kooks, I wish that I wouldnt have wrapped my B&B's, i know...i know no need to flame me for wrapping them, hind sight is 20/20.