

1970 Bug Mid Engine - Assembly Time (Auto-x videos posted)
 05-02-2016, 03:34 PM
#121
TECH Resident

that is cool! Is it heavy - it looks pretty stout? I was thinking you'd have done the other style of bump steer spacer at the steering arm / tie rod end. Obviously, that is much lighter, but also adds leverage and then twisting force to the arm.
I ran that type of bump steer spacer with a heim joint tie rod end on an old 911 (1971 RSR style) I built. I had an off at the track that bent (twisted) an arm. Later I gusseted the steering arms and din't have any more issues.
Doug
I ran that type of bump steer spacer with a heim joint tie rod end on an old 911 (1971 RSR style) I built. I had an off at the track that bent (twisted) an arm. Later I gusseted the steering arms and din't have any more issues.
Doug
 05-02-2016, 04:08 PM
#122
Doug,
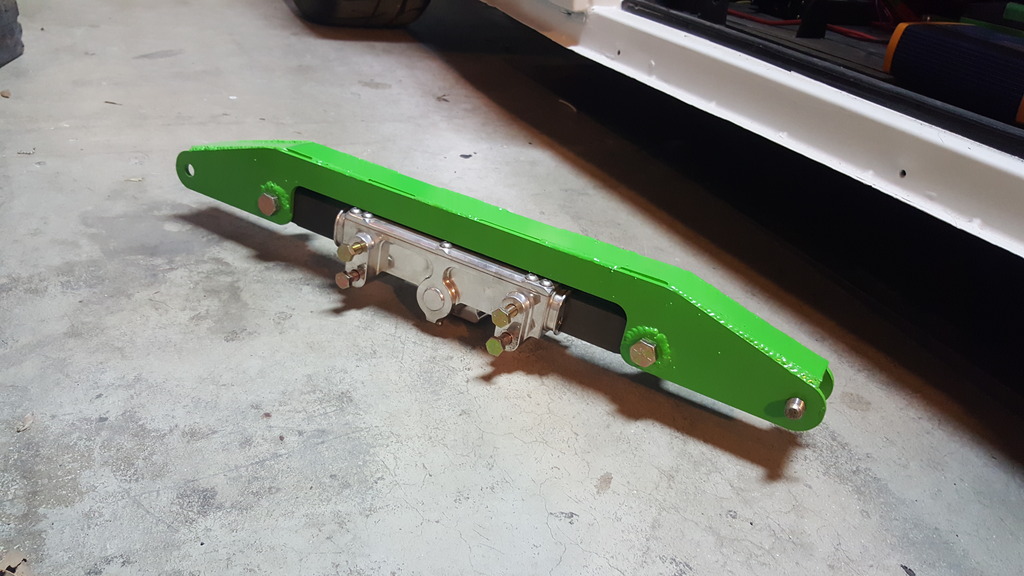
With how short my rack was, this was the only way to do it. I do have some adjustment that I can do on the spindle side, but I need to measure bump steer after I put the rack back in and go from there. I made it out of 3/16" steel so it is quite stout and a little bit on the heavy side. I would rather do over kill then worry about it breaking in half.
With how short my rack was, this was the only way to do it. I do have some adjustment that I can do on the spindle side, but I need to measure bump steer after I put the rack back in and go from there. I made it out of 3/16" steel so it is quite stout and a little bit on the heavy side. I would rather do over kill then worry about it breaking in half.
05-02-2016, 04:13 PM
#123
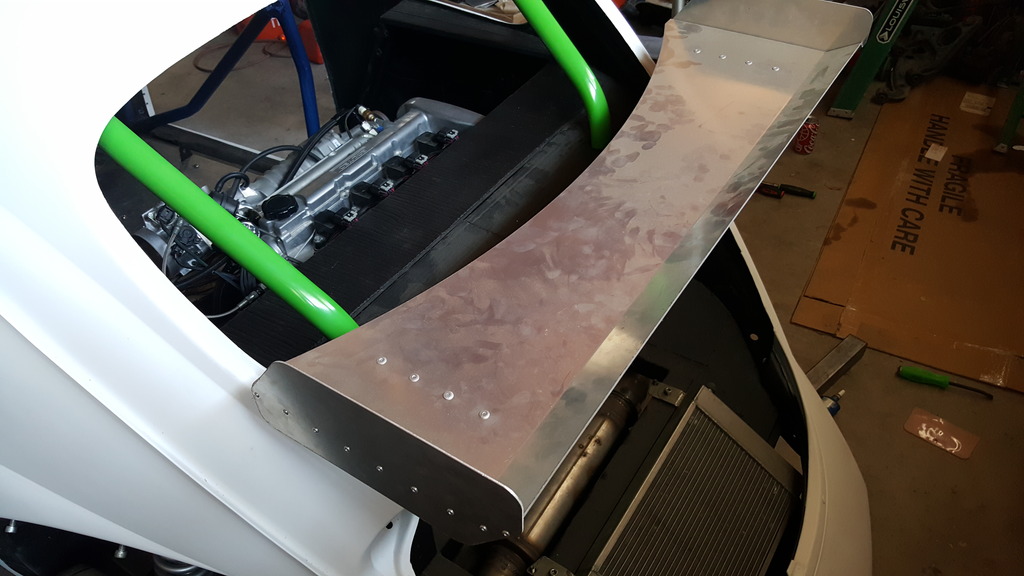
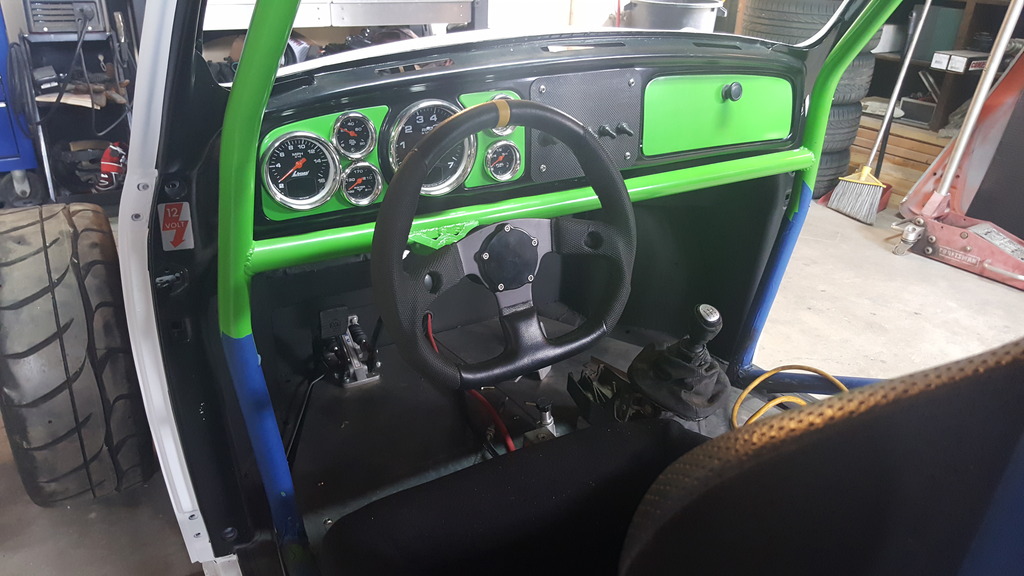
More pictures! I was a little bored. I did however fire it up and verify that the clutch and brakes do there job. I got to officially drive the Bug for 5ft! I also put the wing back on.
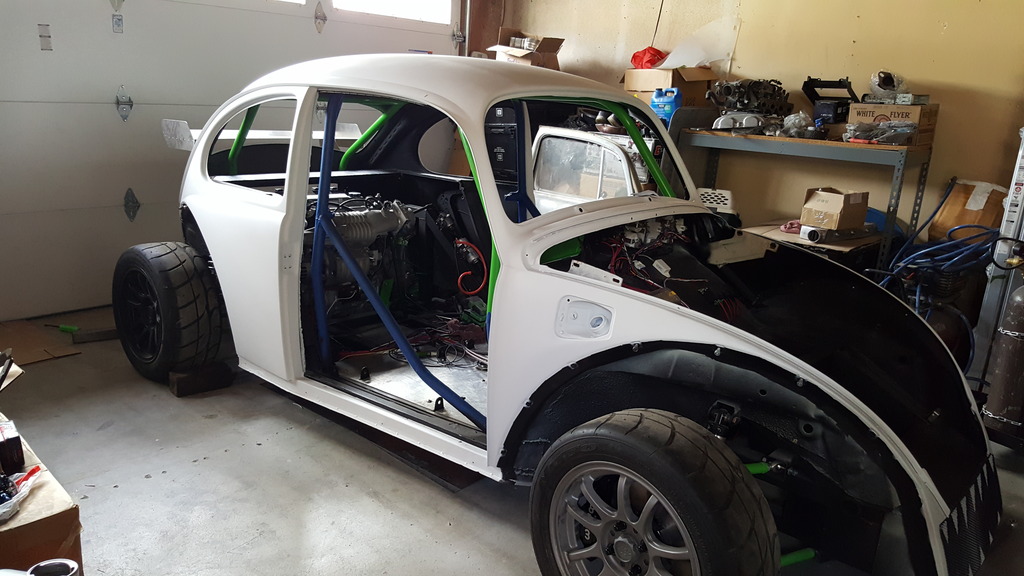
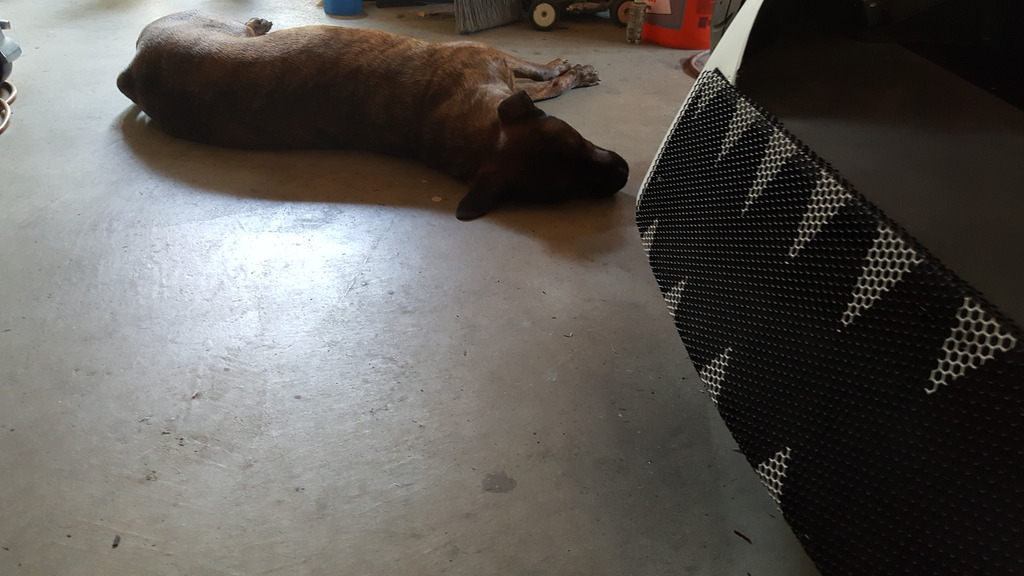
More help from the helpers. The Bug was looking hungry.
More help from the helpers. The Bug was looking hungry.
05-02-2016, 04:18 PM
#124
TECH Resident
a painted red tongue would look cool in that front grill.
Is the laser-cut steel piece the rack mount too (it seems so)? Or just to adjust bump steer?
You could always lighten it by drilling it, i guess.
Is the laser-cut steel piece the rack mount too (it seems so)? Or just to adjust bump steer?
You could always lighten it by drilling it, i guess.
05-02-2016, 04:21 PM
#125
The laser cut piece bolts on to the rack and extends its mounting points for the steering rods. No adjustments can be made to it or the rack. I could drill some holes in it, but honestly, it weights like 5-6 lbs so I am not worried about it.
05-02-2016, 04:31 PM
#126
TECH Resident
I get it. The whole project really looks great... Happy to hear the brakes work and the clutch, too.
I look forward to seeing it in person one of these months.
Doug
I look forward to seeing it in person one of these months.
Doug
05-03-2016, 08:10 PM
#127
TECH Addict
iTrader: (5)
Join Date: Oct 2004
Location: NE Texas
Posts: 2,119
Likes: 0
Received 0 Likes
on
0 Posts

I love the way it looks without the fenders.
I love going through all the builds on here. After looking at yours, it might be the most fun to drive. Makes me want to follow in your footsteps.
I love going through all the builds on here. After looking at yours, it might be the most fun to drive. Makes me want to follow in your footsteps.
05-03-2016, 10:20 PM
#128
Doug - you can see it anytime. Just make sure to drive your truck and take me for a ride in it!
Jerrad - thanks! That means a lot. I wanted a car that felt like a go kart. Who wouldn't want a go kart to drive to work everyday? Practical? No but the fun will out weigh it. I say you build one too, just go ls4 powered!
Jerrad - thanks! That means a lot. I wanted a car that felt like a go kart. Who wouldn't want a go kart to drive to work everyday? Practical? No but the fun will out weigh it. I say you build one too, just go ls4 powered!
05-04-2016, 11:48 AM
#129
TECH Resident
Definitely would drive the old truck to a meet up. I think you'll appreciate it.
Looking forward to initial on-road video and final installation details.
Doug
Looking forward to initial on-road video and final installation details.
Doug
05-09-2016, 03:52 PM
#130
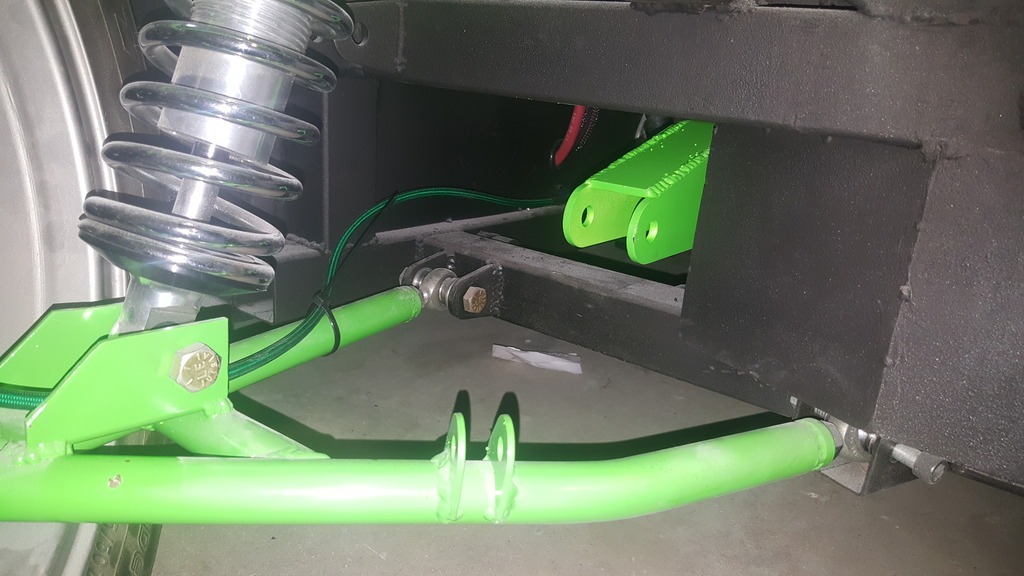
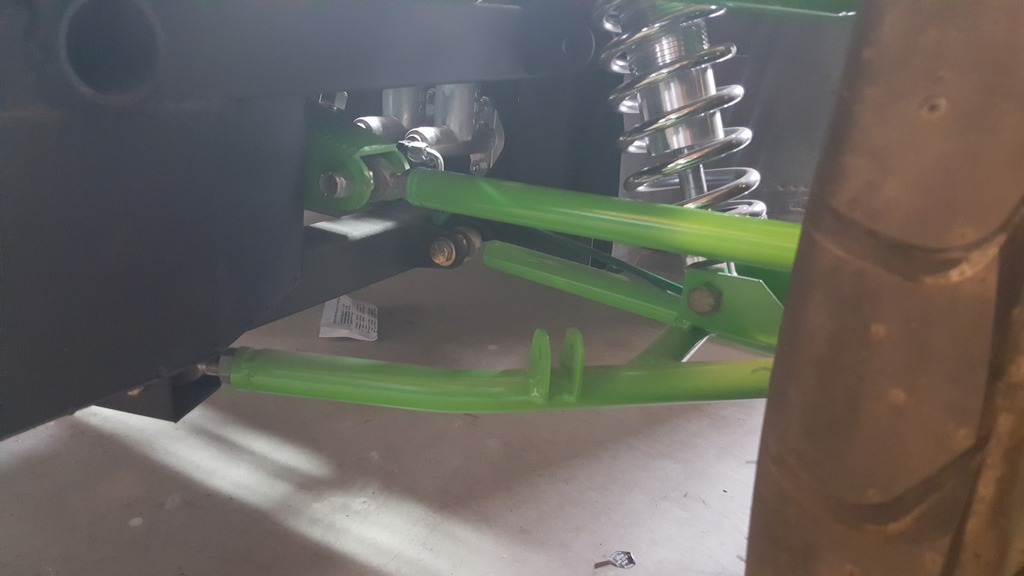
I got a little bit more done. Still waiting on my radiator to come back in! Its killing me! So I finished up the rack extender / bump steer eliminator. Got the tie rod ends shortened and welded back together. Painted them too. I also started welding all the steering shafts. Only had them tacked on. 2 more to go and all steering stuff is done. After slapping everything back on, I checked bump steer and it is nearly perfect now.
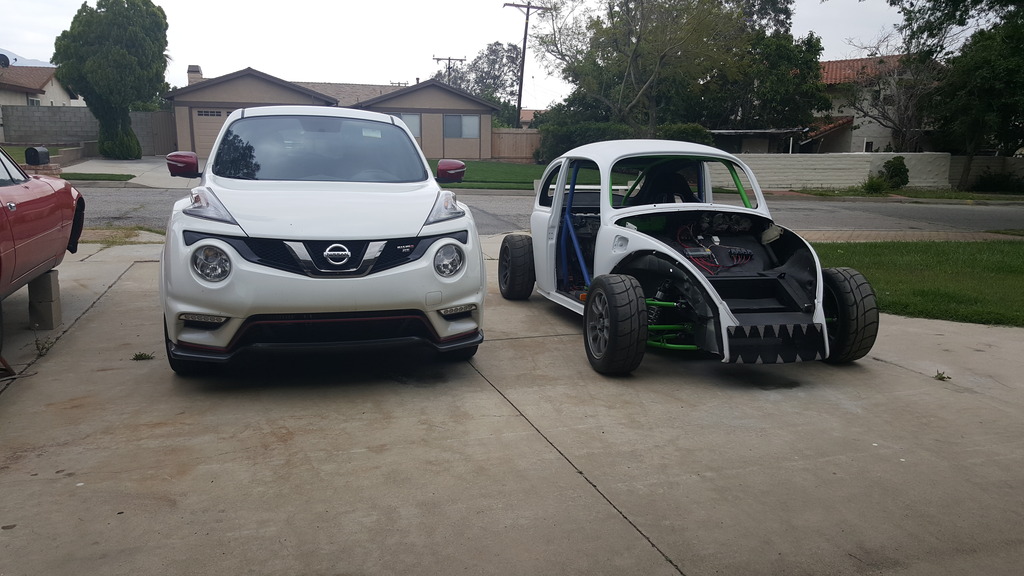
Drove it back out to sweep the garage. It is nice to not have to push it in and out anymore. Had to take a picture of the 2 frogs together. I didn't realize how small the Bug was compared to the Juke.
Drove it back out to sweep the garage. It is nice to not have to push it in and out anymore. Had to take a picture of the 2 frogs together. I didn't realize how small the Bug was compared to the Juke.
05-26-2016, 12:54 AM
#131
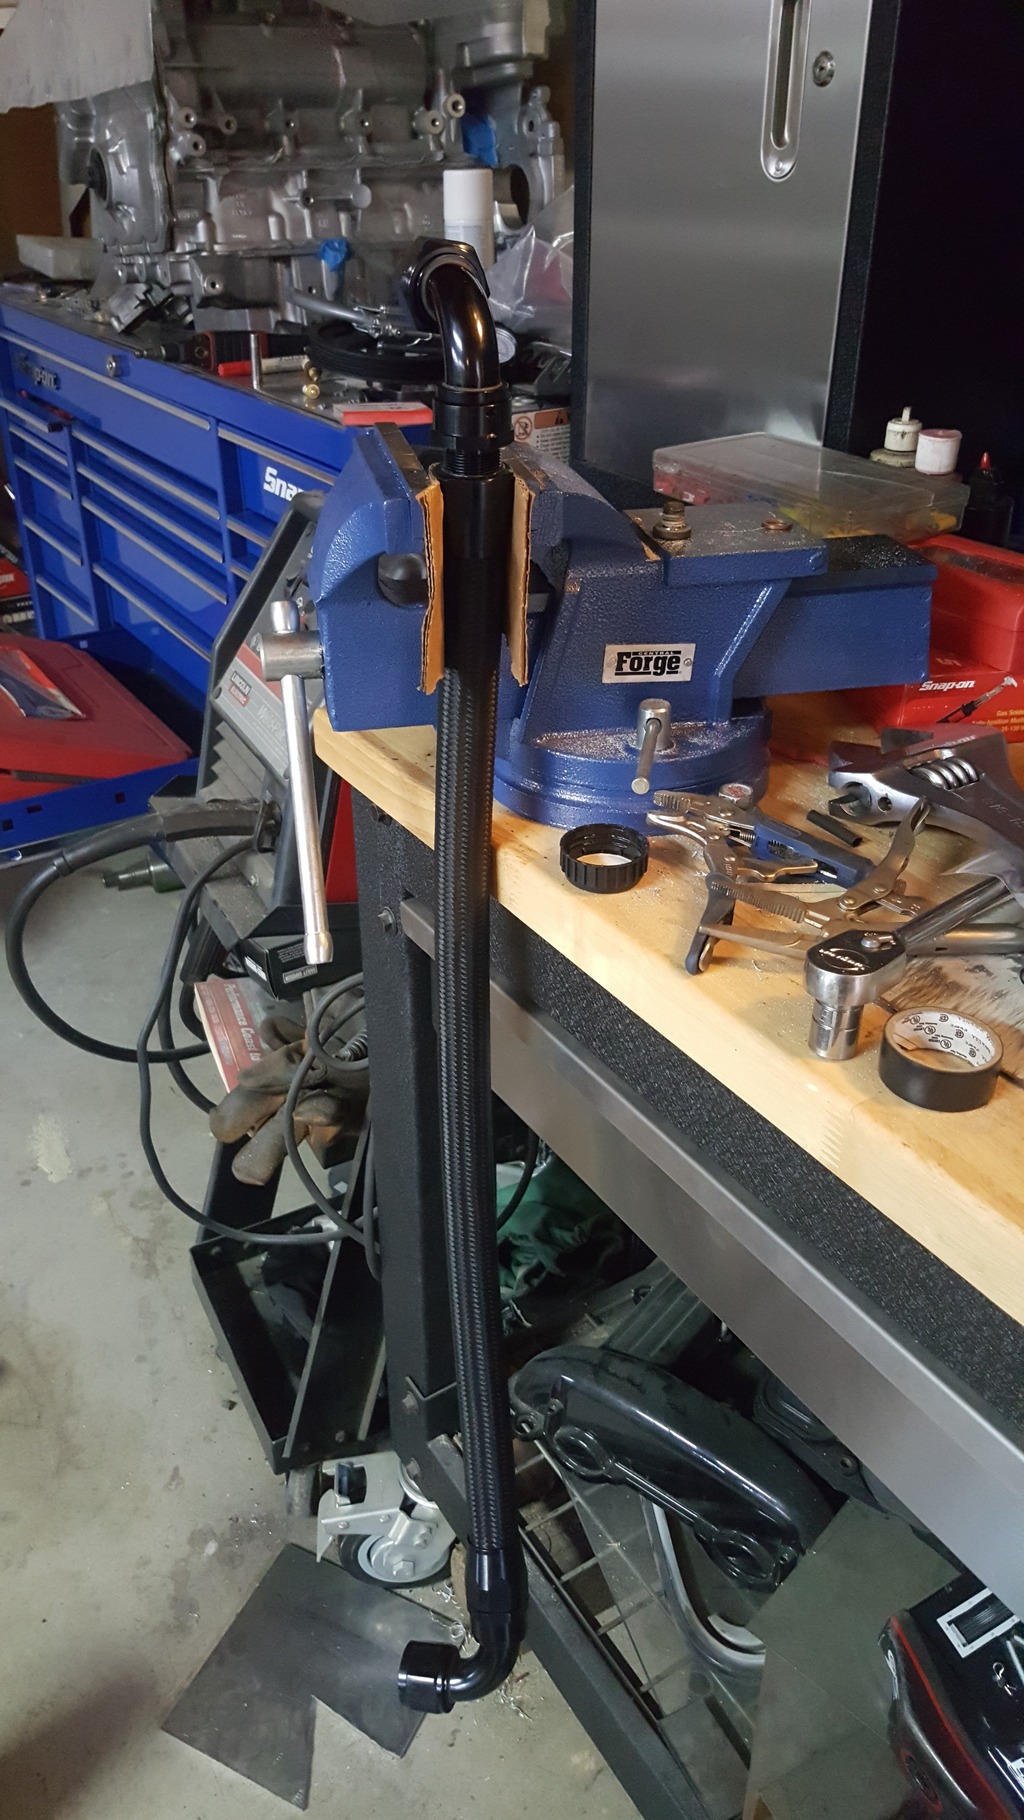
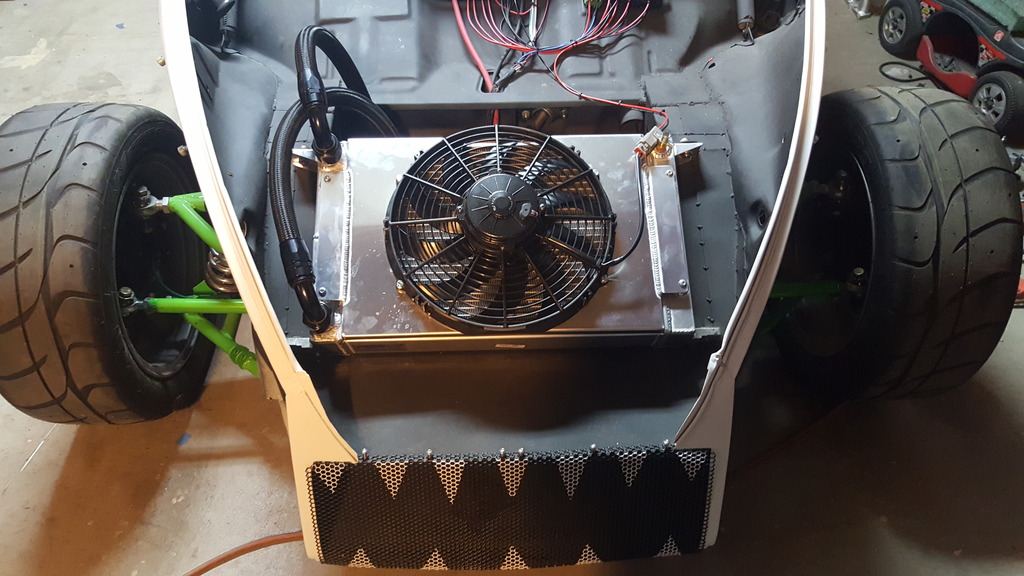
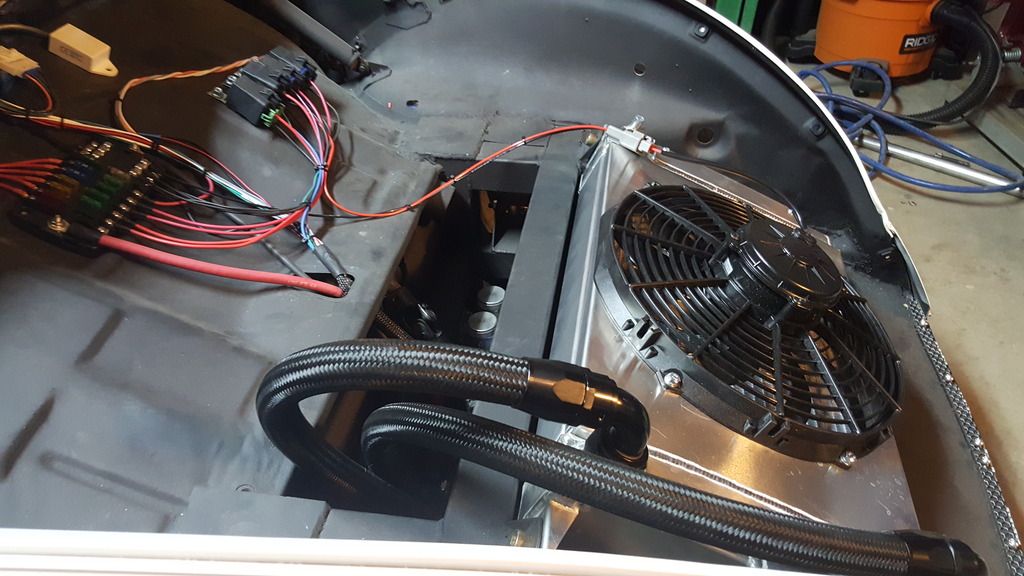
Alright! After about 5 weeks, I got my radiator back. In the mean time, I was buttoning up all the little stuff. Just need to finish my gas tank and the bug is good to drive. Since I got the radiator back, I finished up the coolant the lines. Now I can start to street tune it. My goal for this week is to drive it up and down the street. Hopefully it happens. Lots of little things to do before then. Btw....-16an hose ends are no fun to put on
 05-26-2016, 12:30 PM
#133
As odd as it sounds, I have seen LS engines run a -12an on the top with a -16an on the bottom with no issues. I have also seen many other Ecotecs run -16an top and bottom with no issues but they had the radiator mounted near the engine. We will find out for sure when I start tuning! Since I have no work on Monday, my plan is to start the street tuning. I won't get very far seeing that I have no doors or windows installed yet but should be able to get far enough to drive it around the block.

 05-26-2016, 02:34 PM
#136
I also just noticed the green braided brake lines. I noticed attached with zip ties. I just recently changed my quad lines to braided and bought some aluminum line brackets that would be a nice touch on your bug

 05-26-2016, 02:41 PM
#137
Don't mind the zip ties. 100% temporary. I have some billet clamps like the ones you pictured. I still have to go through the entire car and clean up all the wiring and lines. The back part of the car is a crazy mess right now. Waiting to do all that until I can take it up and down the street to verify that there are no big issues.
05-26-2016, 03:11 PM
#138
Don't mind the zip ties. 100% temporary. I have some billet clamps like the ones you pictured. I still have to go through the entire car and clean up all the wiring and lines. The back part of the car is a crazy mess right now. Waiting to do all that until I can take it up and down the street to verify that there are no big issues.
Almost tough to believe it was gonna be permanent as detailed as the rest of car is.
Carry on lol

 05-27-2016, 04:12 PM
#140
DW SD - Yes yours looks like mine for sure! Except yours is a whole lot bigger. I should have made it myself or at least designed it in Autocad and had it laser cut. Would have saved me a month of time! I swear that every part that I had to get custom made has taking a minimum of a month, when I got promised 2 week build times. This is why I prefer to just do it myself....