


How To Relocate Climate Controls 97-02
Thread Starter
Joined: Sep 2004
Posts: 6,814
Likes: 3
From: Hou. TX.
All right, there are a few folks out there who would like to relocate these controls to someplace other than the glove box, but the cable control has always been the roadblock. The fan **** is just electrical so it's straight forward to just cut the wires and splice in extensions to lengthen them. The vent selector is a simple 6 vacuum lines. They can be cut and rubber hose added with a dab of superglue to keep them tight. The middle **** is the real problem.
It's a cable operated device that is under tension and quite difficult to extend. That is the focus of this thread.
First thing I did was order a new cable to see how the whole thing worked. The part number is #10418042 and it is about 20 bucks from GM Parts Direct.
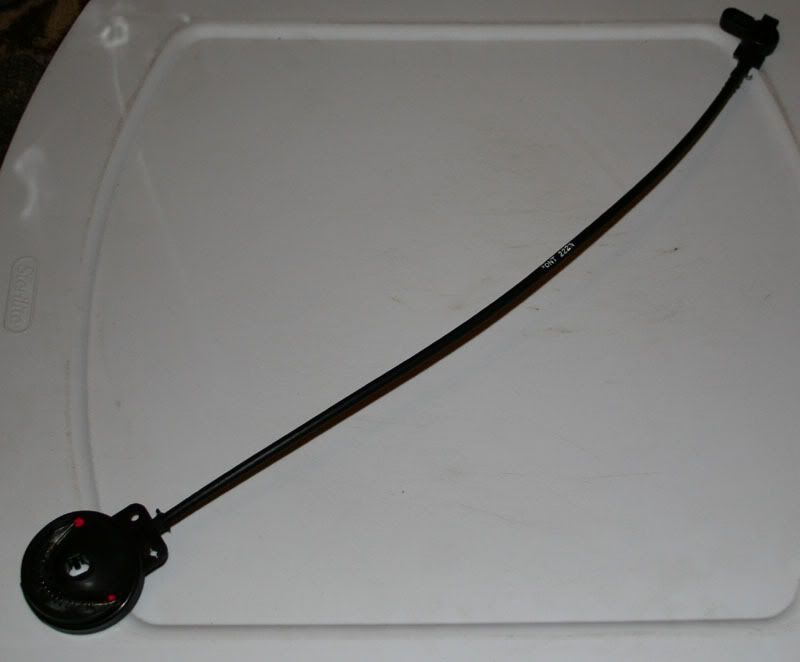
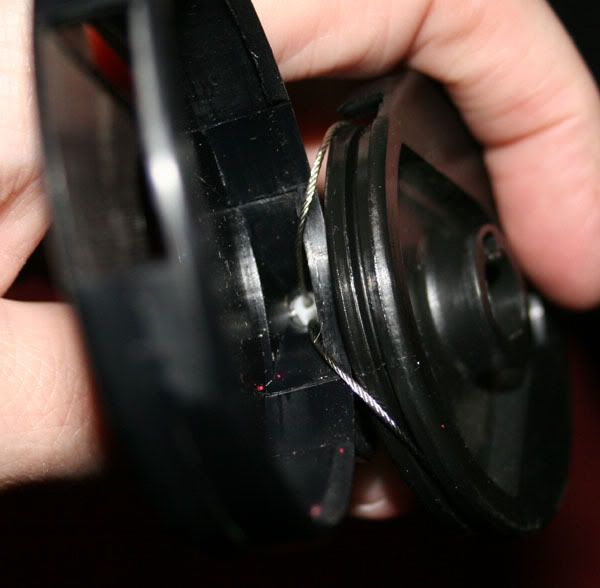
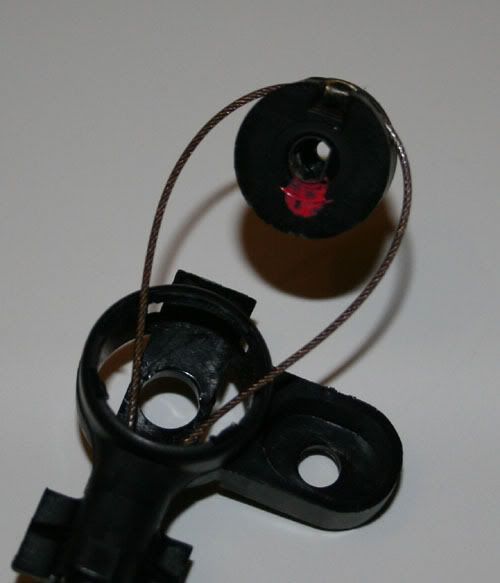
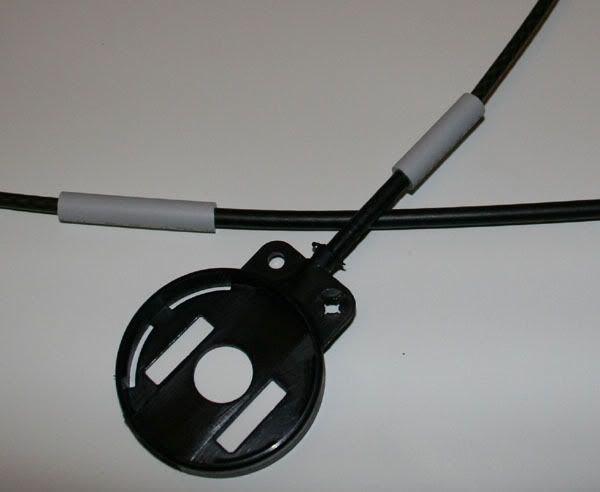
There is a small end that attaches to the **** and a big end that goes under the dash on the passenger side. Just drop the plastic foot panel under the dash and follow the cable. It is held on with one screw.
The sheath holds one long cable that has the ends crimped with lugs on the big end and a crimp in the center so the **** can grab it. The whole cable is under tension from the spring on the big end. The sheath is also divided in two to keep the 2 cables from rubbing against one another. I doubt that makes any difference and a single large hole should work just as well. How much rubbing do they actually see anyway?
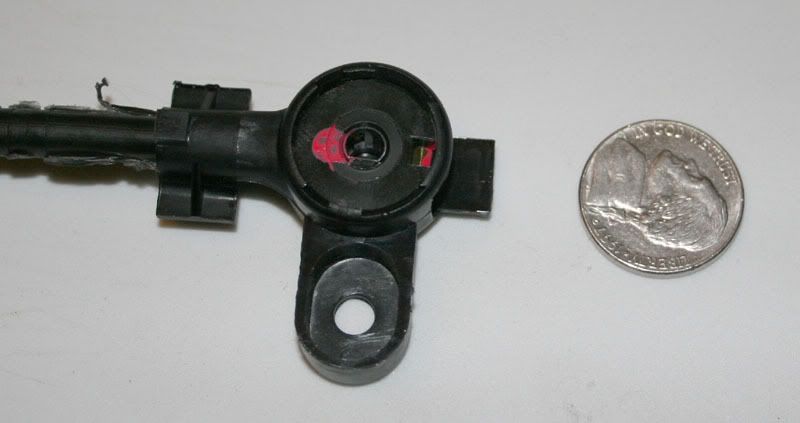
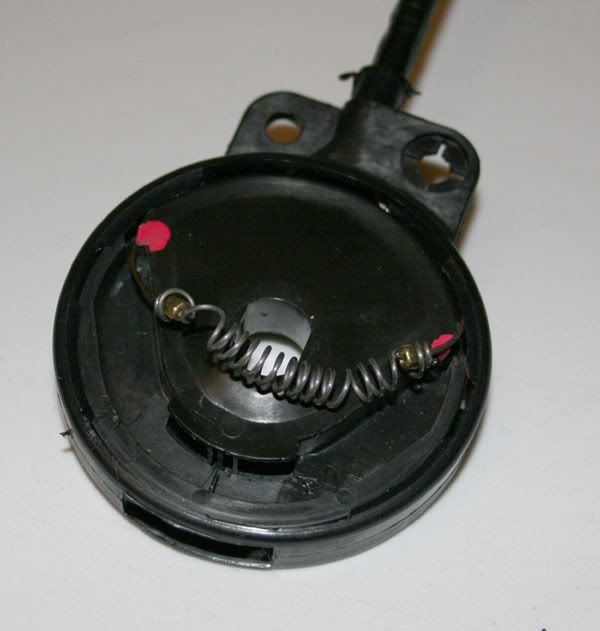
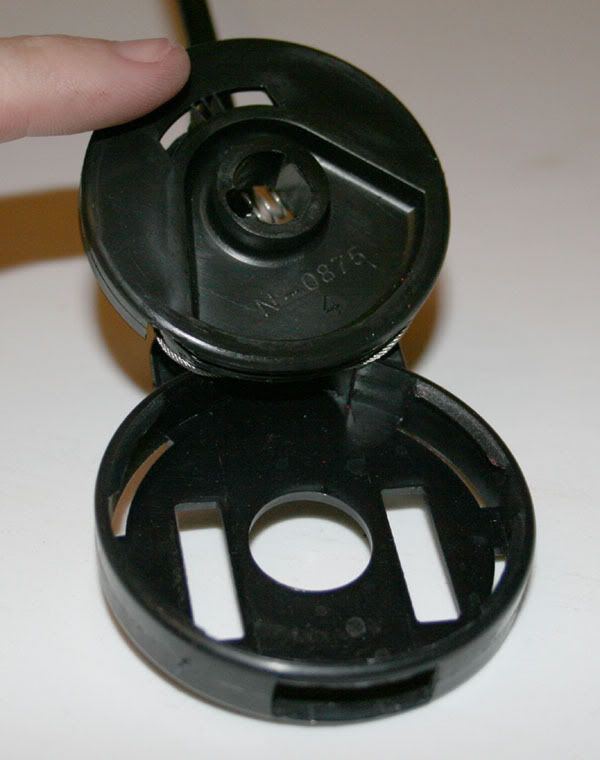
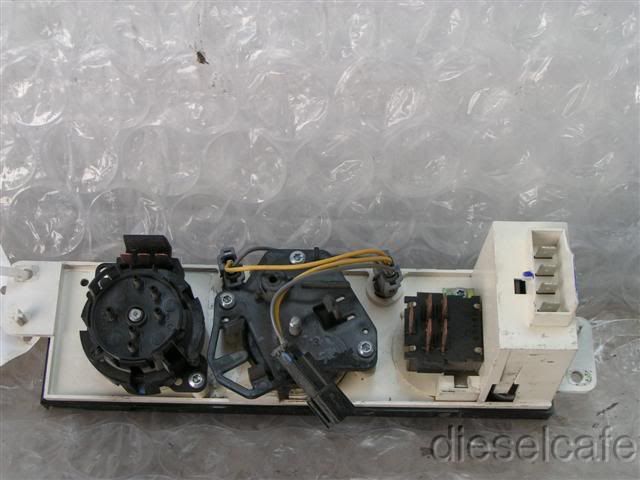
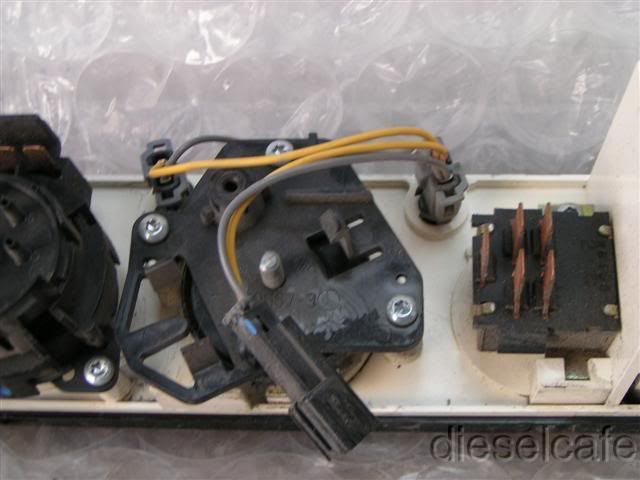
Here is the back of the controls.
It's a cable operated device that is under tension and quite difficult to extend. That is the focus of this thread.
First thing I did was order a new cable to see how the whole thing worked. The part number is #10418042 and it is about 20 bucks from GM Parts Direct.
There is a small end that attaches to the **** and a big end that goes under the dash on the passenger side. Just drop the plastic foot panel under the dash and follow the cable. It is held on with one screw.
The sheath holds one long cable that has the ends crimped with lugs on the big end and a crimp in the center so the **** can grab it. The whole cable is under tension from the spring on the big end. The sheath is also divided in two to keep the 2 cables from rubbing against one another. I doubt that makes any difference and a single large hole should work just as well. How much rubbing do they actually see anyway?
Here is the back of the controls.
Last edited by JasonWW; Oct 25, 2006 at 01:15 AM.
Thread Starter
Joined: Sep 2004
Posts: 6,814
Likes: 3
From: Hou. TX.
The key to this design is that the cables are under a lot of tension from the spring plus you don't really need a dual hole sheath to keep them seperated. I think I can cut the sheath (already done) and add a length of bicycle cable sheath in the middle. Get both outer diameters roughly the same size and slip a 3" or so length of plastic tubing over the joints and then tape them into place. The sheaths will be pulled together anyway from the cable tension and the tubing will help keep everything lined up and prevent kinks at the joints.
Here is the cable I found.
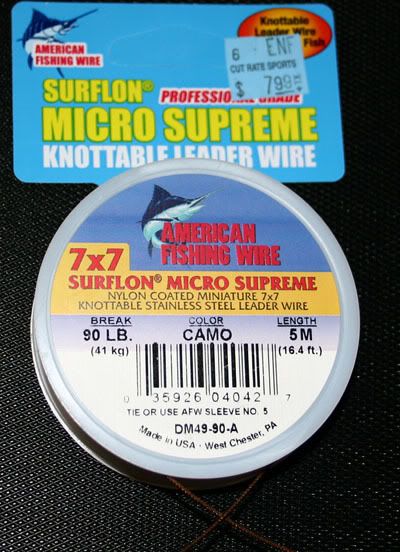
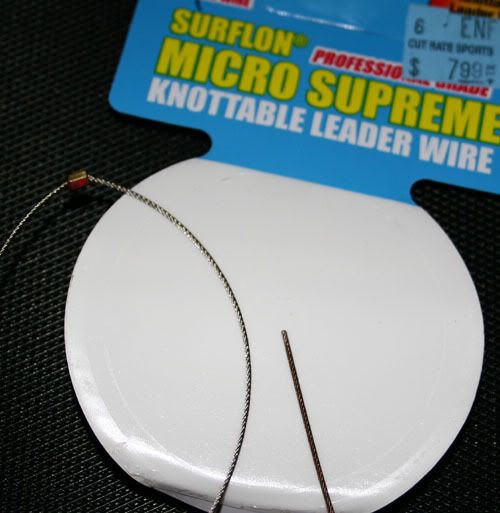
It has 49 strands of stainless steel and is 0.030 diameter. 1/32" diameter is 0.03125" so that's about right. The nylon coating can be a problem, though. I ended up burning it off. Maybe a different brand of cable can be found without the coating. Either way, it should be no big deal.

This cable is refered to as 7x7 which means it hase 7 big strands and each one of those has 7 individual strands. That's where you get the 49 strands from and what makes it so strong and flexible.
I counted the stock cable strands and found about 49 so I'm sure that's what the factory used.
Here is the cable I found.
It has 49 strands of stainless steel and is 0.030 diameter. 1/32" diameter is 0.03125" so that's about right. The nylon coating can be a problem, though. I ended up burning it off. Maybe a different brand of cable can be found without the coating. Either way, it should be no big deal.
This cable is refered to as 7x7 which means it hase 7 big strands and each one of those has 7 individual strands. That's where you get the 49 strands from and what makes it so strong and flexible.
I counted the stock cable strands and found about 49 so I'm sure that's what the factory used.
Last edited by JasonWW; Oct 25, 2006 at 01:00 AM.
Thread Starter
Joined: Sep 2004
Posts: 6,814
Likes: 3
From: Hou. TX.
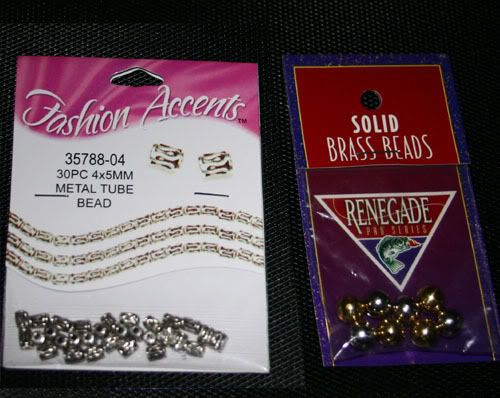
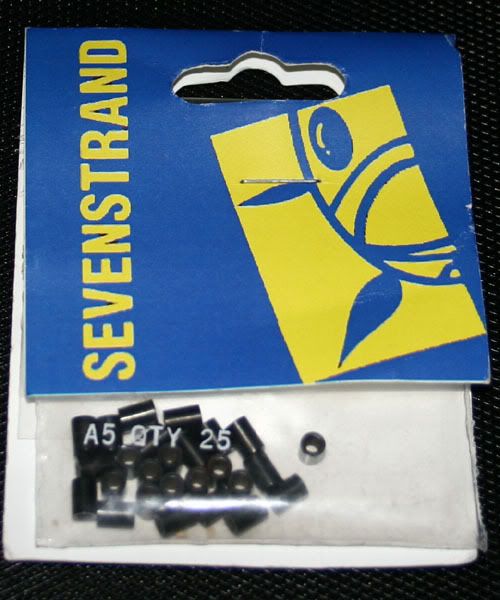
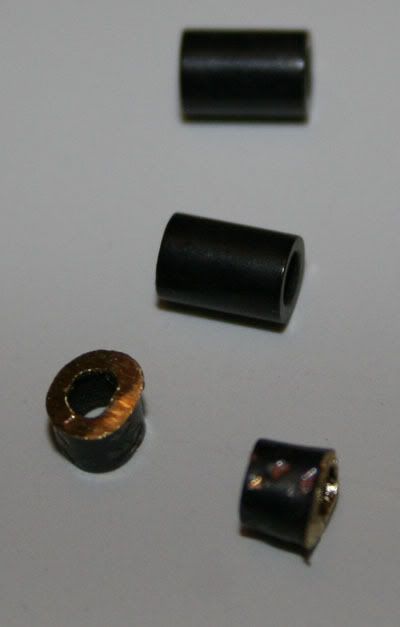
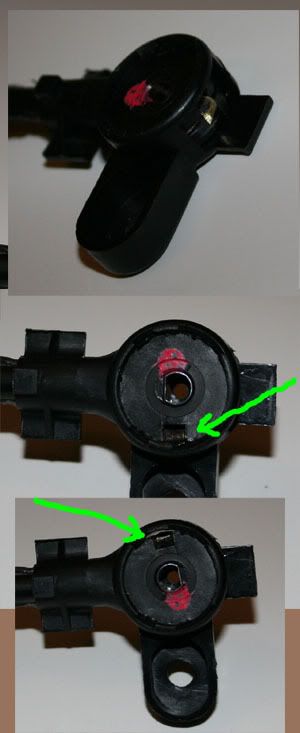
The crimps turned out to be the hardest thing to find. The crimp near the **** end is a special size that fits inside a notch in the small round disc.
I went through a few different things to get a strong crimp small enough. First I will say DON'T use any of these:

None of them worked well at all.
Here is what you need to get and it's also from the fishing supply store. Crimps in a size called A5. They are solid metal and fairly thick. I think they are brass, I don't know for sure but they are strong and flexible enough to get the job done and the cable broke before the crimps slipped. You can't ask for more than that.
I went through a few different things to get a strong crimp small enough. First I will say DON'T use any of these:
None of them worked well at all.
Here is what you need to get and it's also from the fishing supply store. Crimps in a size called A5. They are solid metal and fairly thick. I think they are brass, I don't know for sure but they are strong and flexible enough to get the job done and the cable broke before the crimps slipped. You can't ask for more than that.
Last edited by JasonWW; Oct 25, 2006 at 01:03 AM.
Thread Starter
Joined: Sep 2004
Posts: 6,814
Likes: 3
From: Hou. TX.
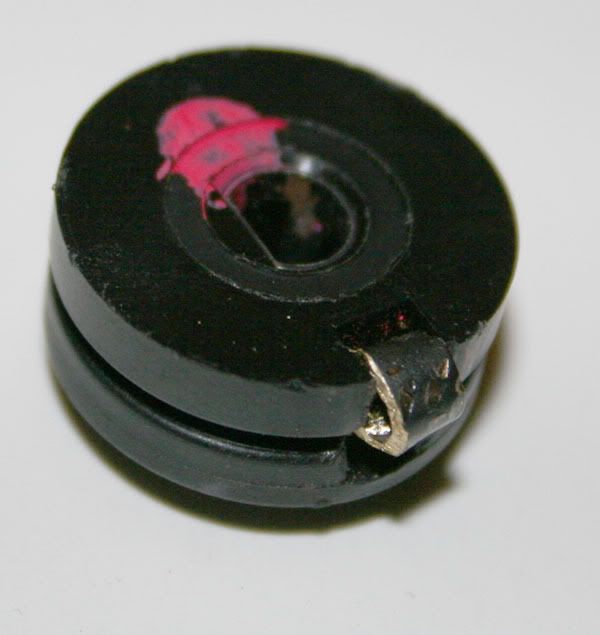
In order to fit it into the notch on the small disc I had to grind one of the A5 crimps to about half it's length and then had to use a special crimping technique.
Follow this GIF, although we will only be crimping a single cable.

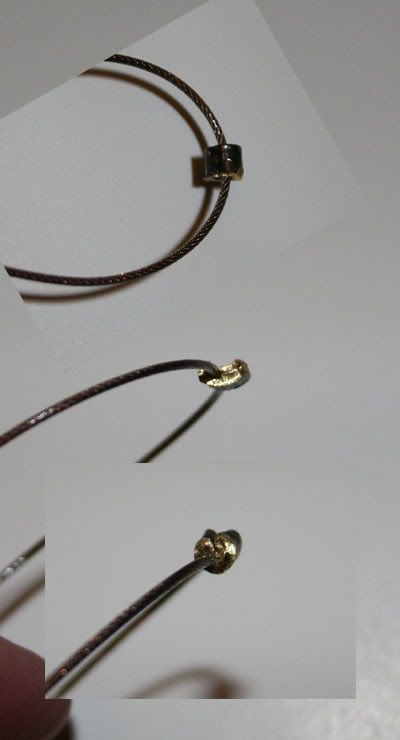
Follow this GIF, although we will only be crimping a single cable.
Last edited by JasonWW; Oct 25, 2006 at 01:04 AM.
Trending Topics
Thread Starter
Joined: Sep 2004
Posts: 6,814
Likes: 3
From: Hou. TX.
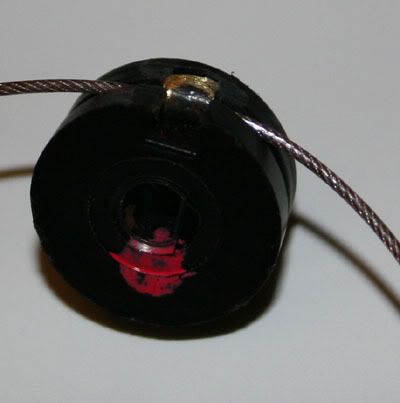
Once crimped I ran the wires through the cable end and through the 2 holes and then tapped the crimp into that notch. I also used a Dremel to grind the sharp edges from the crimp just in case, but it wasn't needed.

LS1 Tech Stories
The Best V8 Stories One Small Block at Time

Topdon ONE vs. Artidiag 800 BT2: Which is the Diagnostic Tablet For You?
Pouria Savadkouei
Gas Monkey Built a 6-Wheel Ferrari Testarossa With a Corvette LT4 Engine
Verdad Gallardo
7 Most Reliable High-Performance Engines GM Has Ever Built
Verdad Gallardo
Amazing '71 Camaro Restomod Is Modern Muscle Car Under the Skin
Verdad Gallardo
6 Common C5 Corvette Failures and What's Involved In Repairing Them
Pouria Savadkouei
Retro Modern Bandit Pontiac Trans AM Comes With Burt Reynolds' Autograph
Verdad Gallardo
Top 10 Greatest Cadillac V Series Performance Models Ever, Ranked
Pouria Savadkouei
Top 10 Most Powerful Chevy Trucks Ever Made!

Hennessey's New Supercharged Silverado ZR2 Has 700 HP
Verdad Gallardo Thread Starter
Joined: Sep 2004
Posts: 6,814
Likes: 3
From: Hou. TX.
I was able to find a bicycle brake cable sheath large enough to hold the 2 wires. It is important that the teflon be removed so that they won't bind when rubbing together. This is the one part of my idea that I don't like so much. I would love to use a dual channel cable to keep the wires seperate, but I can't find any so I have to use a single hole cable. Seeing how little this control is used (at least by me) I still think the cables will last a long time before they cause any problems. The stainless cables are real smooth and slick so hopefully it will last.
The brake cable sheath I found is slighty smaller in outer diameter so I wrapped it with tape to build it up to the size of the factory cable sheath.
I also found some plastic tubing with a 1/4 inch inner diameter that works real well for like 2 bucks.
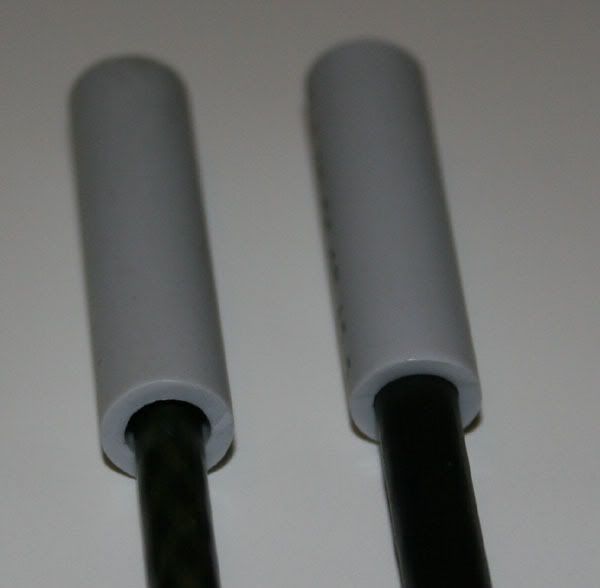

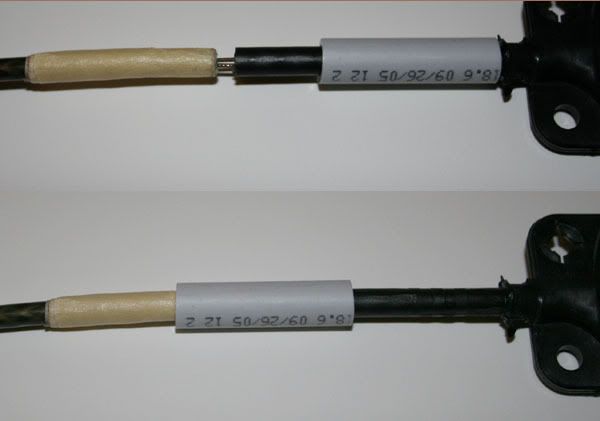
I also made sure the edges where the cables go into the sheath are not sharp so it won't get cut in any way.
The brake cable sheath I found is slighty smaller in outer diameter so I wrapped it with tape to build it up to the size of the factory cable sheath.
I also found some plastic tubing with a 1/4 inch inner diameter that works real well for like 2 bucks.
I also made sure the edges where the cables go into the sheath are not sharp so it won't get cut in any way.
Last edited by JasonWW; Oct 25, 2006 at 01:07 AM.
Thread Starter
Joined: Sep 2004
Posts: 6,814
Likes: 3
From: Hou. TX.
This is it for Part 1.
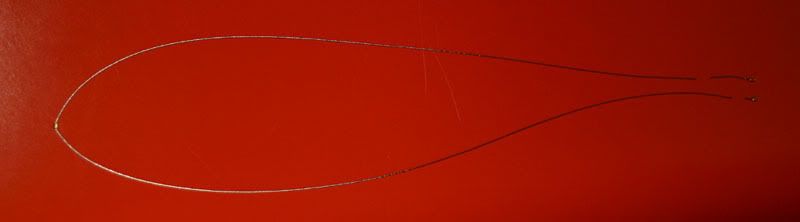
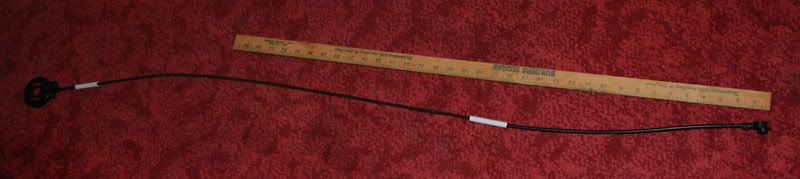
I plan to move the climate controls to the center console so I'm shooting for a total length of 55-56 inches. Unfortunately I cut my brake cable sheath a tad shorter and I have a 54" length. Hopefully this won't be a problem.
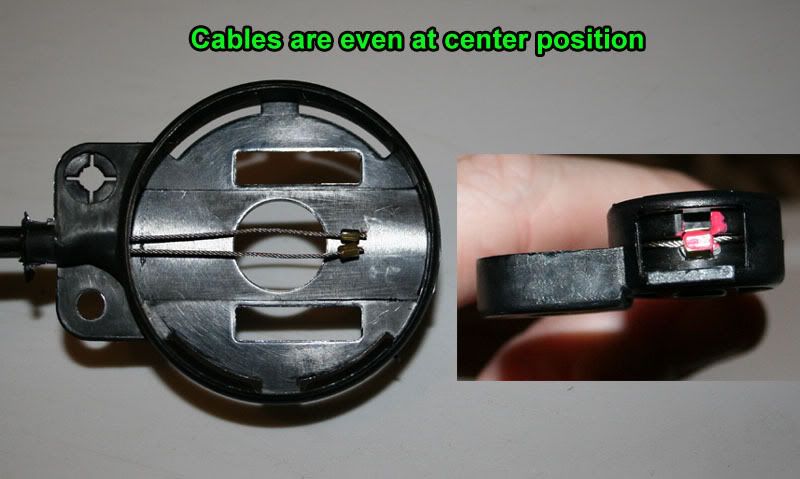
I need to run the cable ends into the large disc which goes under the dash. It's important that the cables are not twisted so that the **** turns the air valve the right way. Otherwise the cold will be the hot and vice versa. I'm not going to grind the A5 crimps on the very ends where the spring attaches as they don't have to be shorter. Their full size should work fine and be plenty strong when using that special crimping technique. After all, the end crimps are what holds the actual tension on the cable.
I will try and finish the bottom end when I can and show all the details.
I plan to move the climate controls to the center console so I'm shooting for a total length of 55-56 inches. Unfortunately I cut my brake cable sheath a tad shorter and I have a 54" length. Hopefully this won't be a problem.
I need to run the cable ends into the large disc which goes under the dash. It's important that the cables are not twisted so that the **** turns the air valve the right way. Otherwise the cold will be the hot and vice versa. I'm not going to grind the A5 crimps on the very ends where the spring attaches as they don't have to be shorter. Their full size should work fine and be plenty strong when using that special crimping technique. After all, the end crimps are what holds the actual tension on the cable.
I will try and finish the bottom end when I can and show all the details.
Last edited by JasonWW; Oct 25, 2006 at 01:24 AM.

Joined: Nov 2003
Posts: 11,331
Likes: 346
From: Jacksonville, FL (originally from Toronto Canada)
Great write up! Couldn't you use the sheath from the extra factory cable you bought to double the length and still retain the divided inner liner?
Thread Starter
Joined: Sep 2004
Posts: 6,814
Likes: 3
From: Hou. TX.
Originally Posted by WhiteBird00
Great write up! Couldn't you use the sheath from the extra factory cable you bought to double the length and still retain the divided inner liner?
Copy & Paste Moderator


Joined: Apr 2002
Posts: 9,764
Likes: 208
From: Eastern MA
Great write-up!
A few questions:
Why not use two thinner parrallel bike brake cable sheeths instead of one thick one? You could use some large heatshrink tubing or electrical tape to hold them together. Would that make it too rigid for a particular bend? What about putting some grease on the cable before applying the sheeth so that it glides more smoothly?
Thread Starter
Joined: Sep 2004
Posts: 6,814
Likes: 3
From: Hou. TX.
Originally Posted by VIP1
Great write-up!
A few questions:
Why not use two thinner parrallel bike brake cable sheeths instead of one thick one? You could use some large heatshrink tubing or electrical tape to hold them together. Would that make it too rigid for a particular bend? What about putting some grease on the cable before applying the sheeth so that it glides more smoothly?
A few questions:
Why not use two thinner parrallel bike brake cable sheeths instead of one thick one? You could use some large heatshrink tubing or electrical tape to hold them together. Would that make it too rigid for a particular bend? What about putting some grease on the cable before applying the sheeth so that it glides more smoothly?
As far as adding grease, that is fine. I'll probably do that as it can only help.


Thread Starter
Joined: Sep 2004
Posts: 6,814
Likes: 3
From: Hou. TX.
I know a guy who sent his cable off to a company that does this kind of work and they supposedly where able to figure out how to lengthen it for him. It's been a few months and he still hasn't gotten it back, but he said he would have it shortly. The good part is that they are saving all this info so they can repeat it for other customers, but the bad part is, it may cost quite a bit. I don't know what they are charging him.
I'll update this thread when I get more info.
I could finish mine right now. It's not hard or anything. I just need to go out to the car and pull the stock cable out from under the dash and work the **** so I know damn sure which way the cables move so I don't reverse them by accident.
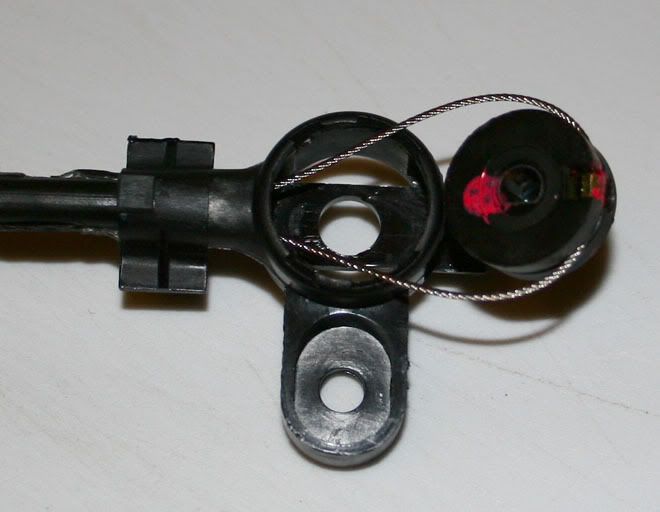
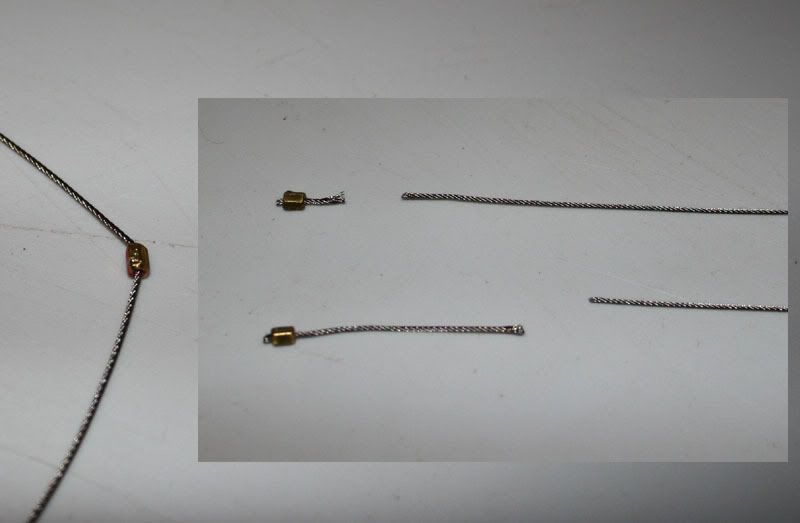
It will end up looking like this:
And the big end will look just like this, but with my larger crimps on the cable ends.

I'm just waiting to finish it as I'm not 100% sure I want to put it in the center console.
I'll update this thread when I get more info.
I could finish mine right now. It's not hard or anything. I just need to go out to the car and pull the stock cable out from under the dash and work the **** so I know damn sure which way the cables move so I don't reverse them by accident.
It will end up looking like this:
And the big end will look just like this, but with my larger crimps on the cable ends.
I'm just waiting to finish it as I'm not 100% sure I want to put it in the center console.
Thread Starter
Joined: Sep 2004
Posts: 6,814
Likes: 3
From: Hou. TX.
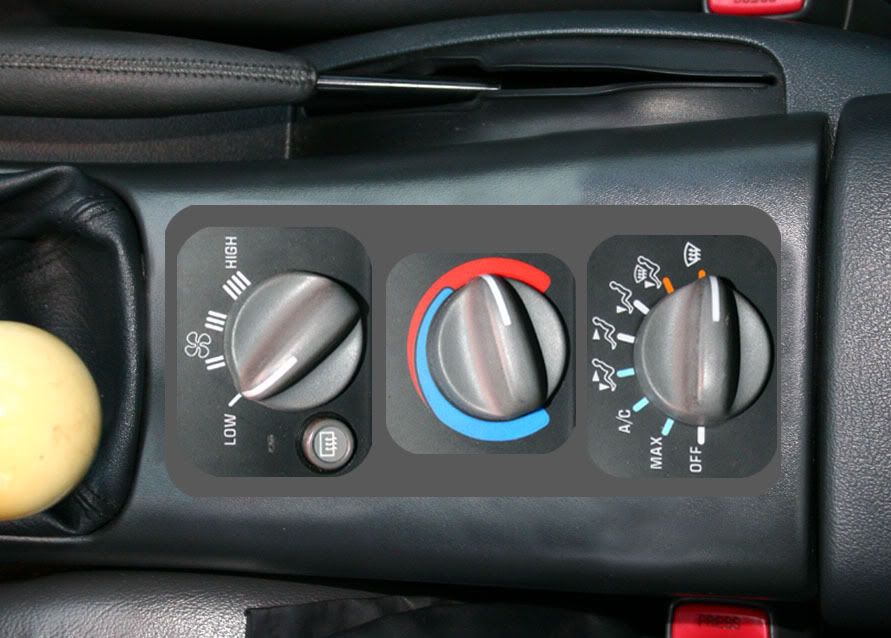
Here is my idea for relocating the controls to the center console. There is an ashtray and a cup holder here, neither of which I use. I was going to put them under the armrest, but then you have to open it plus it's a long reach. This new idea is much better in my opinion. The passenger can still reach them as well.
Last edited by JasonWW; Mar 6, 2007 at 09:25 AM.