My Custom Air Suspension Install - 99 Trans Am
 05-25-2009, 10:34 AM
#21

And then if you hit a bump with one side of the car just before entering a corner, the bags on either side of the car will be pre-loaded differently and cornering will be unpredictable...I don't think that'd be worth the complexity. Seperate valves for each bag is the way to go.
You can have an on/off switch for the extra front and/or rear valves for when your autocrossing or whatever.
I at least have to try it out. It's in my nature.

Last edited by JasonWW; 05-25-2009 at 10:42 AM.


 05-26-2009, 08:05 PM
#24
TECH Fanatic

Join Date: Jul 2007
Posts: 1,516
Likes: 0
Received 0 Likes
on
0 Posts
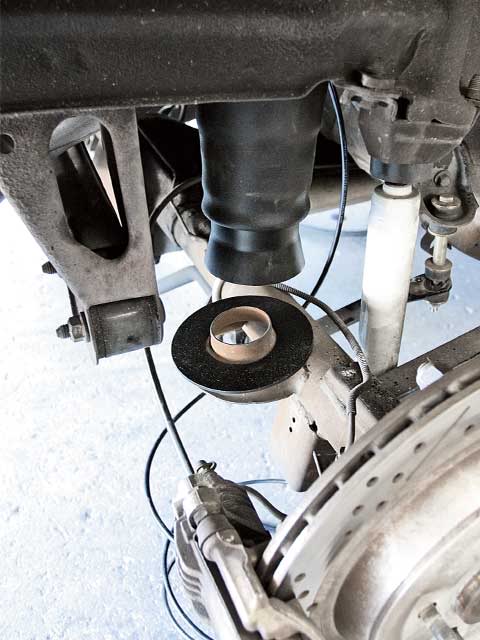
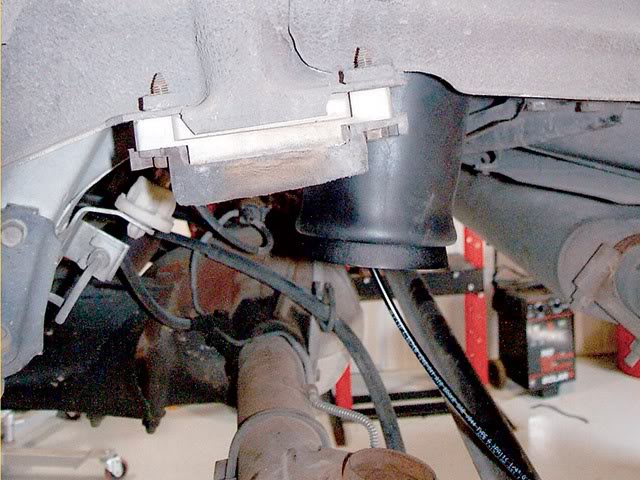
looking good jason, and the way you are doing it will go much lower than the shockwaves.
Just like its in your nature to modify and try new and different things, its in mine to pick at peoples fabrication. LOL. You need to really take your time and make things a little nicer bro. Ive cut many many things with a torch and it is hard to cut clean, but thats what grinders are for. One question, why didn't you fully weld your upper bag mounts in the rear?
Just like its in your nature to modify and try new and different things, its in mine to pick at peoples fabrication. LOL. You need to really take your time and make things a little nicer bro. Ive cut many many things with a torch and it is hard to cut clean, but thats what grinders are for. One question, why didn't you fully weld your upper bag mounts in the rear?
05-26-2009, 08:24 PM
#25
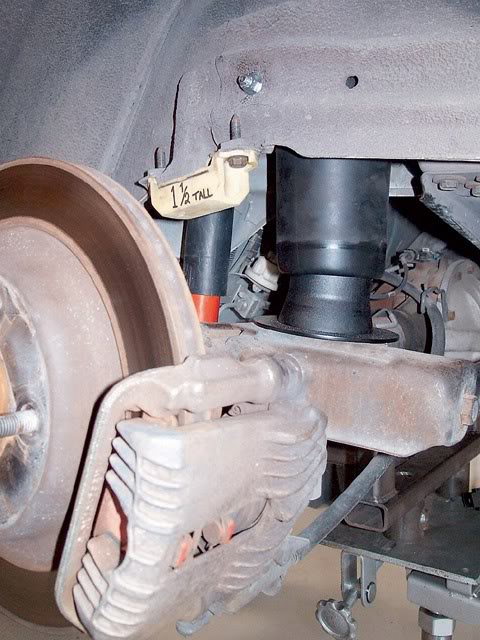
Normally it will drop only as far as the shock allows it. It doesn't matter if your using coilovers, stock springs or air springs.
Now in my case, I modded the upper shock mount to give me 1 1/2" more drop. My limit right now is the tire touching the curved metal on the edge of the shock tower.
I posted a fully dropped pic on page one. I'll post some new ones showing the full range of motion later.
Now in my case, I modded the upper shock mount to give me 1 1/2" more drop. My limit right now is the tire touching the curved metal on the edge of the shock tower.
I posted a fully dropped pic on page one. I'll post some new ones showing the full range of motion later.
Last edited by JasonWW; 05-26-2009 at 08:39 PM.
05-26-2009, 08:35 PM
#26
looking good jason, and the way you are doing it will go much lower than the shockwaves.
Just like its in your nature to modify and try new and different things, its in mine to pick at peoples fabrication. LOL. You need to really take your time and make things a little nicer bro. Ive cut many many things with a torch and it is hard to cut clean, but thats what grinders are for. One question, why didn't you fully weld your upper bag mounts in the rear?
Just like its in your nature to modify and try new and different things, its in mine to pick at peoples fabrication. LOL. You need to really take your time and make things a little nicer bro. Ive cut many many things with a torch and it is hard to cut clean, but thats what grinders are for. One question, why didn't you fully weld your upper bag mounts in the rear?
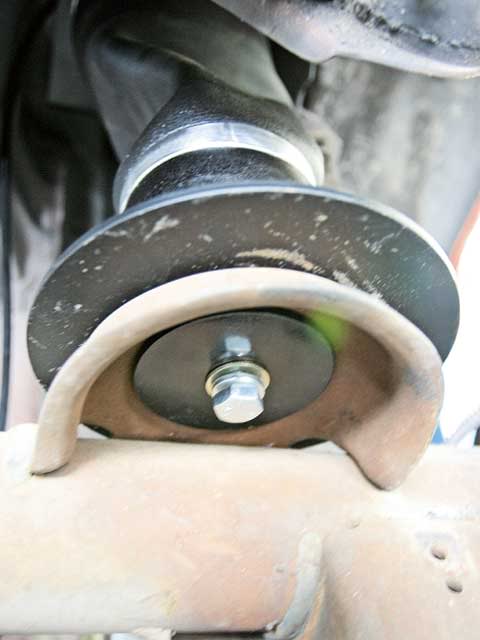
I didn't fully weld the rear plates because it didn't need it. The weight of the car pushes it straight up. The welds I added are to just keep the plate from sliding around.
05-27-2009, 02:07 PM
#27
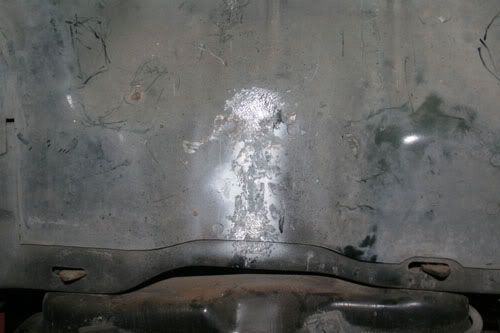
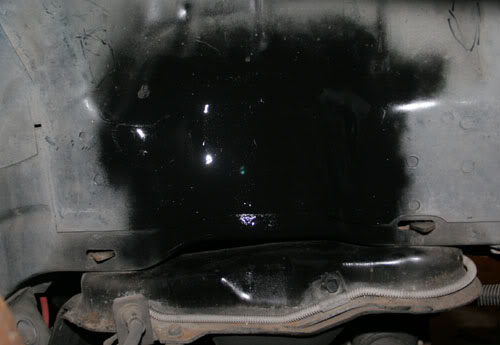
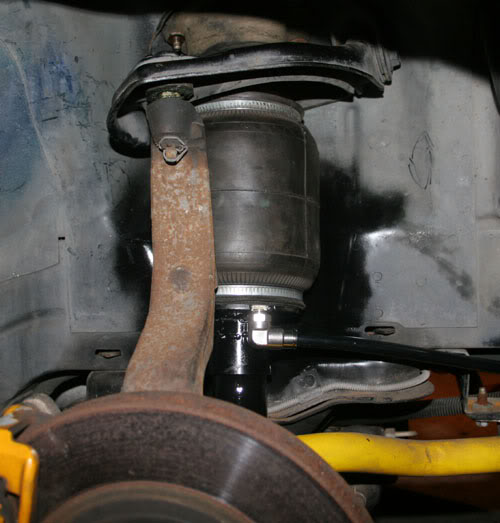
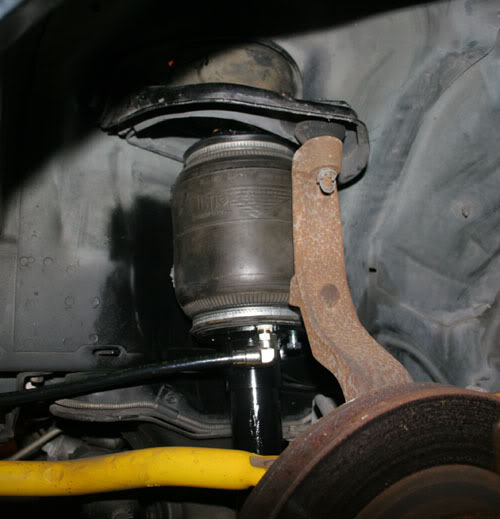
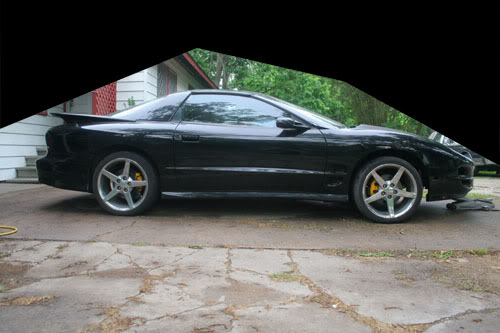
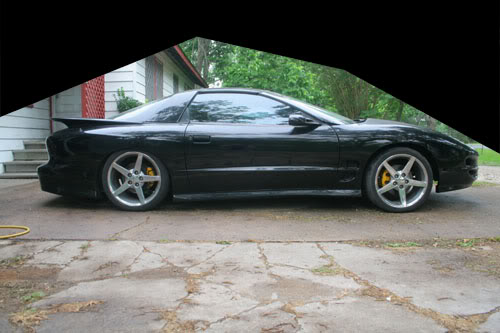
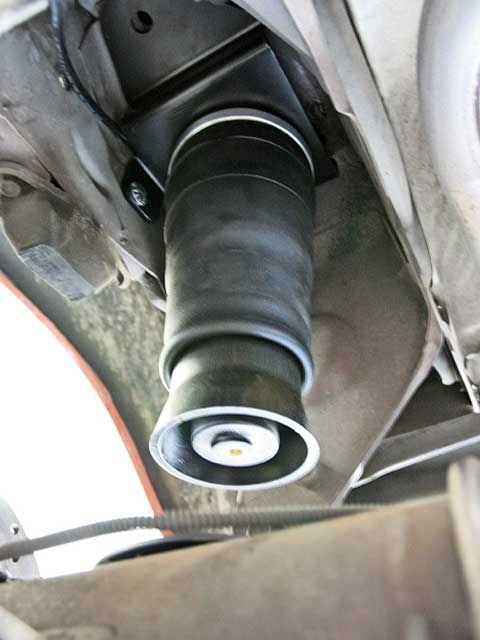
Here are some new pics.
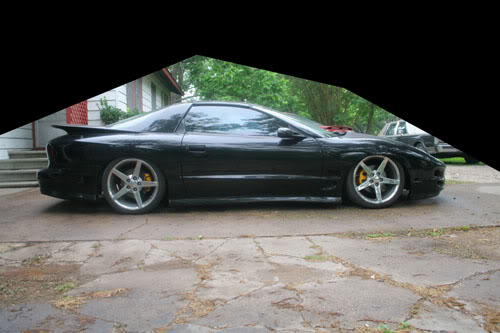
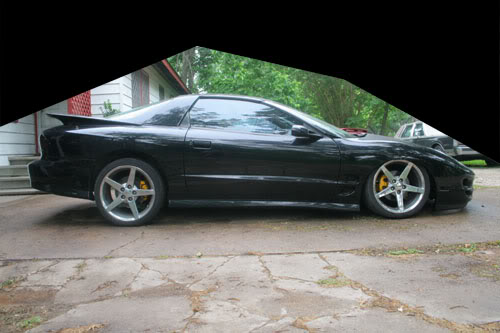
With 180psi in front bags.
(It turns out I was at a much lower pressure than I thought. Probably only 110psi or so.)

Here is how high the front should go with more pressure.
I have the range I need to slam it and to have a normal ride height, but I don't like the actual numbers. I measured at the fender lips.
Front 23"-26.5 = 3.5" ride height range
Back 24"-28.5" = 4.5" ride height range
I can lift the back end up another 1.5" if I add a spacer to the bottom mount. So that would be a 6" range.
I don't know about the front. I expected it to go higher at that pressure.
(The reduced lift up front was due to only 110psi or so pressure.)
With 180psi in front bags.
(It turns out I was at a much lower pressure than I thought. Probably only 110psi or so.)
Here is how high the front should go with more pressure.
I have the range I need to slam it and to have a normal ride height, but I don't like the actual numbers. I measured at the fender lips.
Front 23"-26.5 = 3.5" ride height range
Back 24"-28.5" = 4.5" ride height range
I can lift the back end up another 1.5" if I add a spacer to the bottom mount. So that would be a 6" range.
I don't know about the front. I expected it to go higher at that pressure.
(The reduced lift up front was due to only 110psi or so pressure.)
Last edited by JasonWW; 05-29-2009 at 07:07 PM.
05-27-2009, 06:27 PM
#28
TECH Fanatic
Join Date: Jul 2007
Posts: 1,516
Likes: 0
Received 0 Likes
on
0 Posts
That is quite a bit of airpressure to get it up that high. The air systems we use only need about 130 psi to get the front suspension to full extention. I would check to see if you are binding or if the bag is already fully extended before using more air pressure. Those bags might not be able to fully extend the suspension.
05-27-2009, 07:01 PM
#29
That is quite a bit of airpressure to get it up that high. The air systems we use only need about 130 psi to get the front suspension to full extention. I would check to see if you are binding or if the bag is already fully extended before using more air pressure. Those bags might not be able to fully extend the suspension.
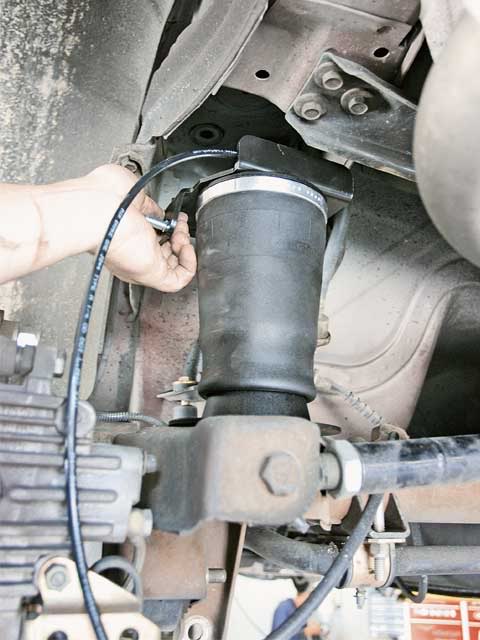
If we say the front wheels have 2000lbs on them and the motion ratio of the suspension is 1.7 to 1, then the bags are seeing 1700lbs each.
The bags extension range is from 4" to 9" with the last inch not really usable so 4" is a more practical expectation. That should be more than I need to get full extension from the shock, but I'm only seeing 2" at a high 180psi. That's not as good as I hoped.
I'm going to have to contact Universal Air and see what they say. It's possible these bags are near their load limit. Well, they do seem to work great on the Magnums. I'm guessing those cars are just as heavy if not more so.
To qoute Zack Ratcliff of Universal Air:
105 should start to move and at about 200 psi you should be around 8" (vehicle lift) with 1700 lbs at each corner.
It's a 300psi pump, so I may get it up to 180 and then let it cool down real good and then go for 200. Last edited by JasonWW; 05-29-2009 at 07:09 PM.
05-27-2009, 09:17 PM
#31
I'm pretty pleased at how low I got the front. So next I'll focus on getting the back on the ground and then I'll see if I want to do more work to the front. I need to rest for a while. 

Last edited by JasonWW; 05-27-2009 at 09:36 PM.
05-27-2009, 11:13 PM
#32
Here's the cost layout for the front.
$160 pair of used bags with lower mounts
$20 fittings and line
$10 laser cut upper plates
$7 2" pipe
$15 machine work
So $212 out of my pocket for the front.
Front and rear cost together was about $335.
$160 pair of used bags with lower mounts
$20 fittings and line
$10 laser cut upper plates
$7 2" pipe
$15 machine work
So $212 out of my pocket for the front.
Front and rear cost together was about $335.
05-27-2009, 11:28 PM
#33
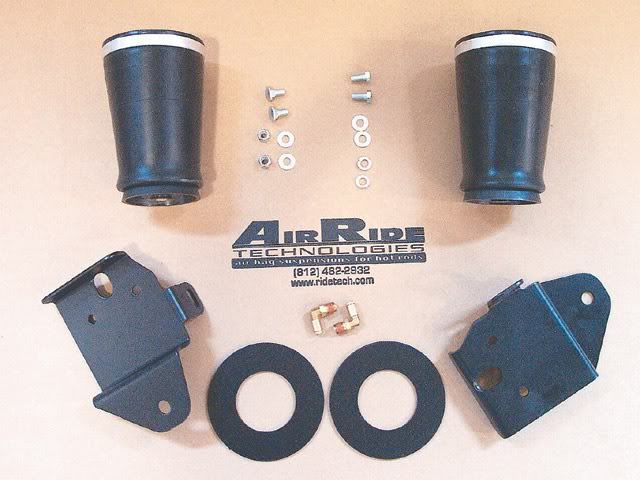
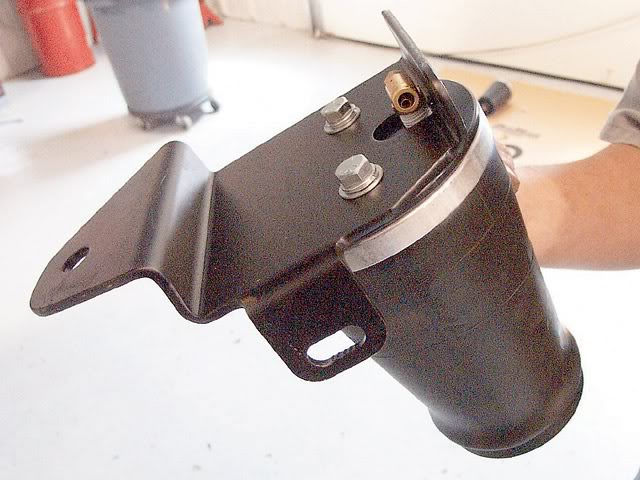
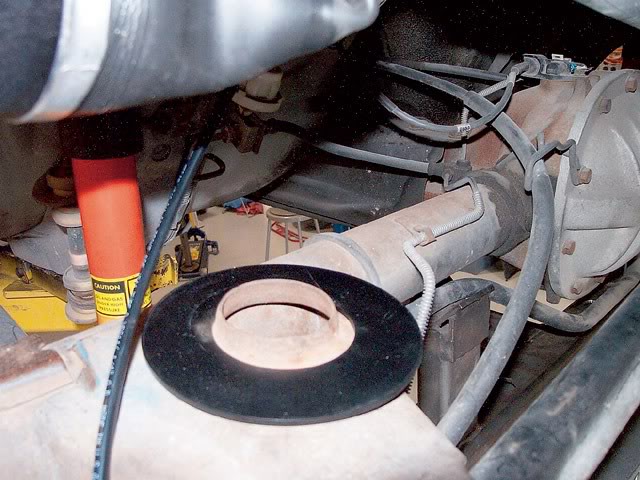
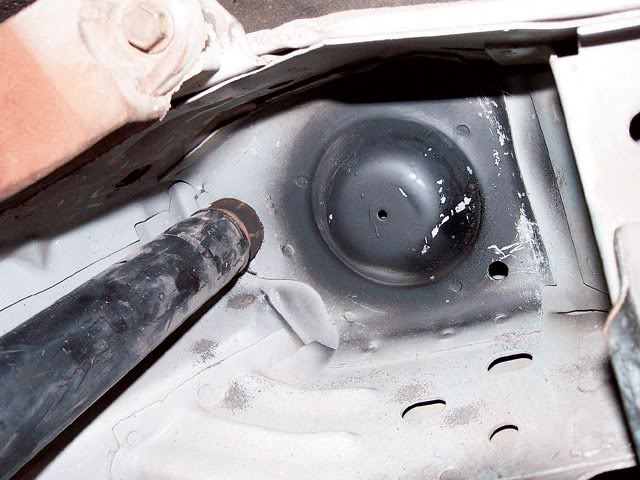
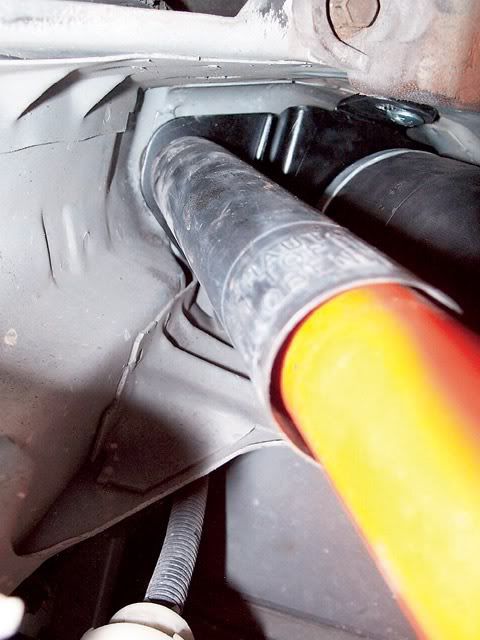
Here are some magazine pics from Air Ride Tech showing their rear install. This is the type of setup I recommend for most folks.
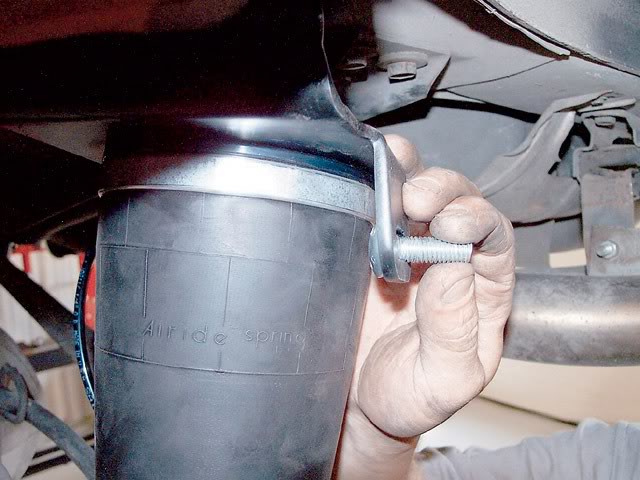
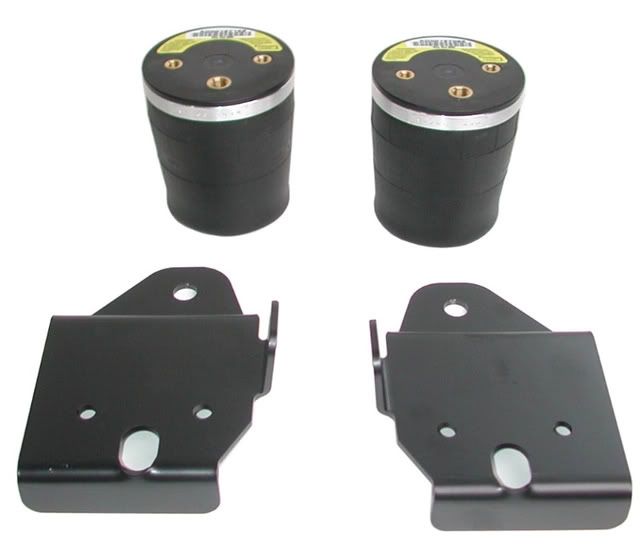
If anyone is interested I think I can make a pattern for that upper plate so you can cut and bend it yourself.
If anyone is interested I think I can make a pattern for that upper plate so you can cut and bend it yourself.
Last edited by JasonWW; 05-27-2009 at 11:52 PM.
 05-28-2009, 04:39 PM
#35
It was made a sticky, but it was so hard to find, difficult for me to update and difficult for people to ask questions about it, that I had the mods change it back to a regular thread.
It's still here, but I'm guessing that all the subscriptions got erased. Try a search and then re-subscribe.
It's still here, but I'm guessing that all the subscriptions got erased. Try a search and then re-subscribe.
05-28-2009, 07:40 PM
#36
I was looking at used air parts on ebay and found a pair of rear bags for sale. They are at $50 right now if anyone is interested.
Firestone F9000 bags
Firestone F9000 bags
05-28-2009, 08:25 PM
#38
Drew, what tools do you have to cut it out of steel plate with? A torch or an angle grinder. Depending on the metal thickness, you might need a torch to heat it for the bends.
Another option would be to send the full size template to Exstensive Metalworks here in Houston and have them cut it out for you on their computerized laser setup. They cut me some circle plates out for $5 each so it might not cost too much. Plus they sell lots of common brackets and truck install kits. So I know they CAN do it.
http://www.ekstensive.com/
If all that fails, I guess I can run over there and have them cut it out and then I can can bend it and test fit it for you. That way you can just bolt it in.
05-29-2009, 06:59 AM
#39
05-29-2009, 06:58 PM
#40
Well, I figured out why I wasn't getting full extension in the front. The 12v pump/gauge I was using is a piece a crap and reads way too high. My home compressor will lift the front of the car from 23" to 26", but I knew it didn't get very high pressure. Sure enough, it only does 100 psi. So something is way off. 100 psi in the bags, verified with a digital gauge, was reading 145 psi on my 12v compressor. So no way was I at 180 the other day.
Now then, I bet I can get full extension with less than 140psi. I just don't have a pump that can go that high. Any sugestions on a cheap way to get it that high at least once to verify?
Now then, I bet I can get full extension with less than 140psi. I just don't have a pump that can go that high. Any sugestions on a cheap way to get it that high at least once to verify?
Last edited by JasonWW; 05-29-2009 at 07:15 PM.